Veeam 12 Upgrade Guidance
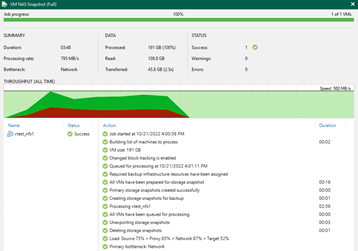
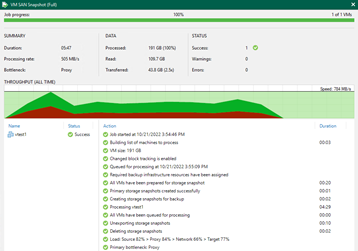
1. Veeam11 Backup Job Status
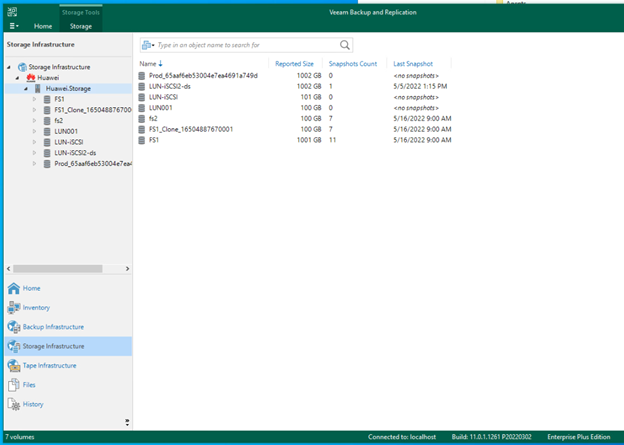
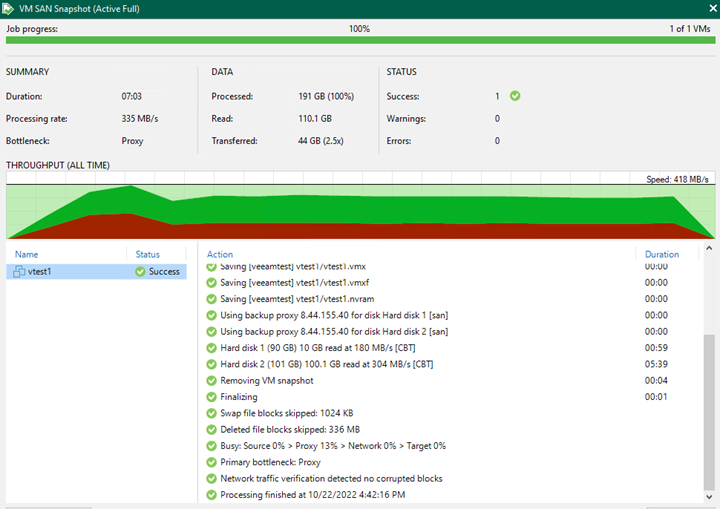
Create different kinds of backup jobs (including VMware SAN Snapshot and NAS snapshot)
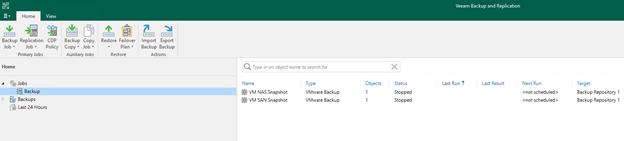
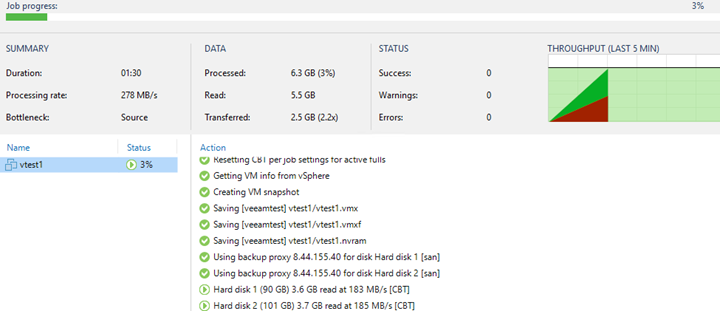
Run Backup Jobs and Check Status
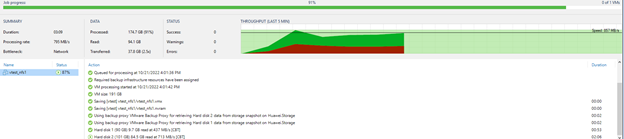
Backup Jobs Finished Successfully
2. Upgrade Checklist
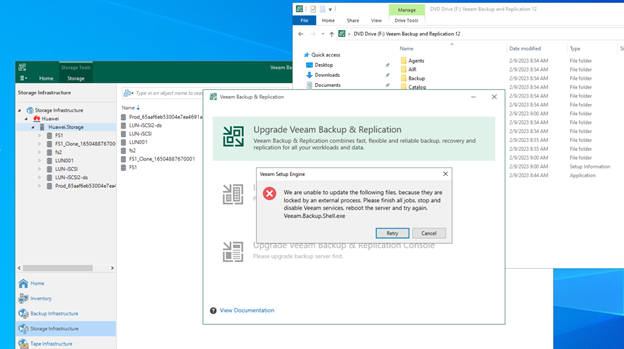
Stop jobs and Veeam service otherwise will not all to upgrade
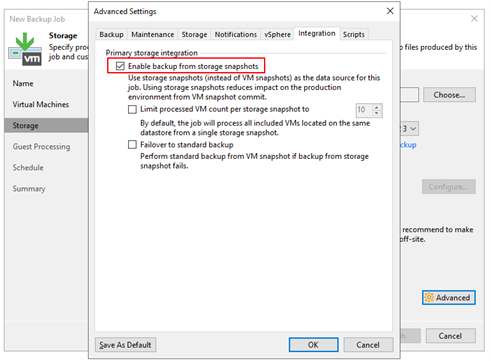
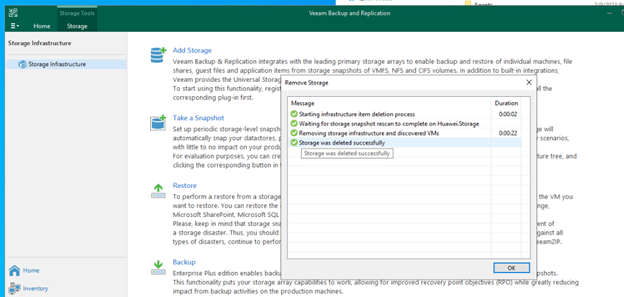
Remove Huawei storage array from Veeam console

3. Old Version before Upgrade

4. Upgrade Steps
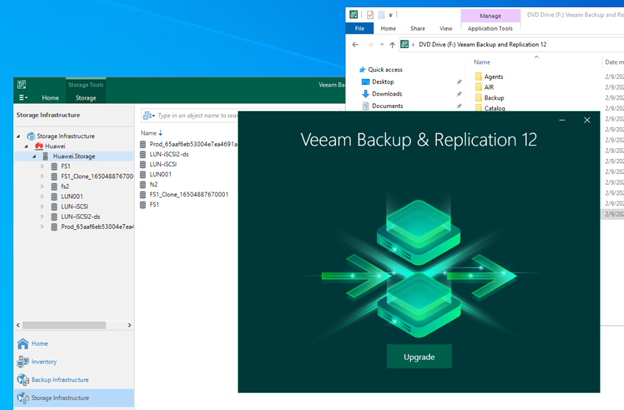
Step 1. Start Upgrade Wizard
Download the latest version of the Veeam Backup & Replication installation image from Veeam
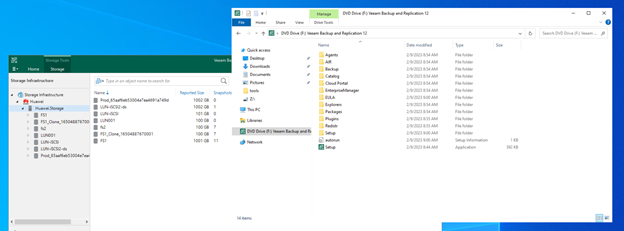
Mount the installation image to the machine where Veeam Backup & Replication is installed
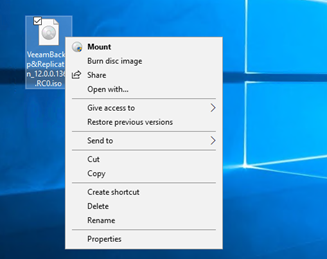
After you mount the image or insert the disk, Autorun opens a splash screen. If Autorun is not available or disabled, run the Setup.exe file from the image or disk.
Click Upgrade
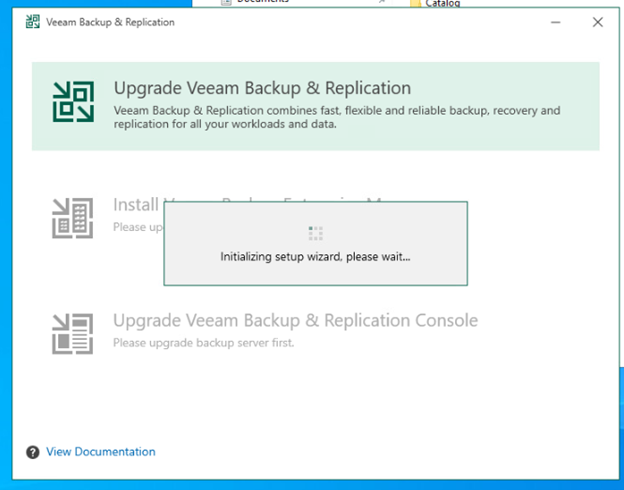
Step 2. Select Component
At this step of the wizard, select Upgrade Veeam Backup & Replication
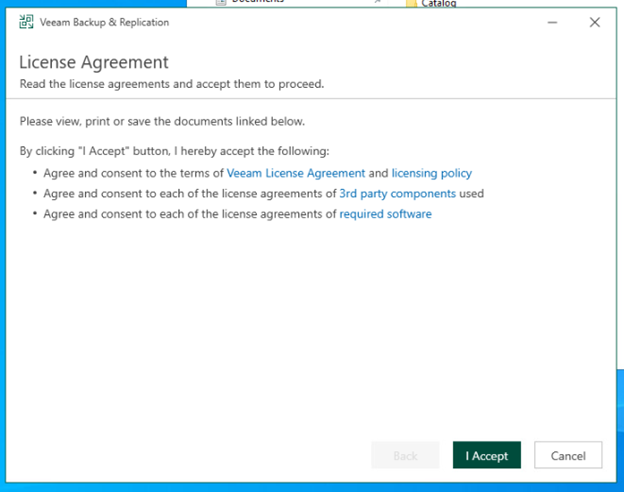
Step 3. Read and Accept License Agreement
At the License Agreement step of the wizard, read Veeam License Agreement and licensing policy as well as license agreements of 3rd party components that Veeam incorporates and license agreements of required software. To accept the license agreements and continue installing Veeam Backup & Replication, click I Accept
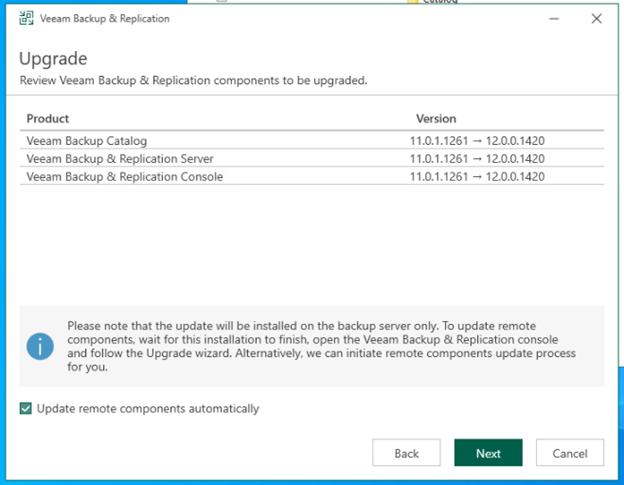
Step 4. Review Components
At the Upgrade step of the wizard, you can review the components that will be upgraded.
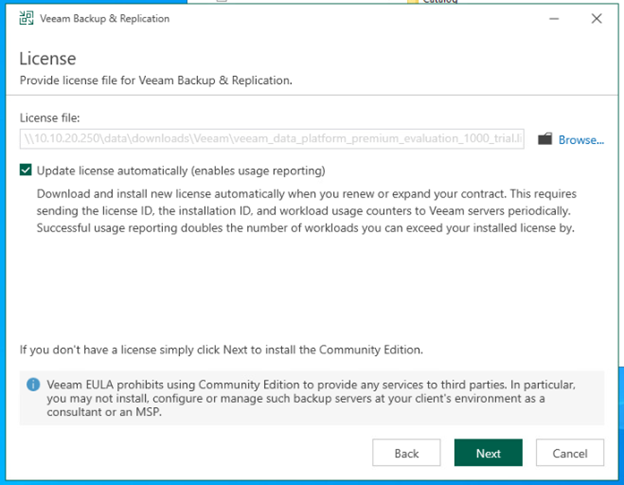
Step 5. Provide License File
- Next to the License file field, click Browse
- Select a valid license file for Veeam Backup & Replication
- To install new licenses automatically when you renew or expand your contract, select the Update license automatically check box. If you enable the automatic license update, and therefore enable usage reporting, you will double the number of workloads by which you can exceed your installed license. For more information
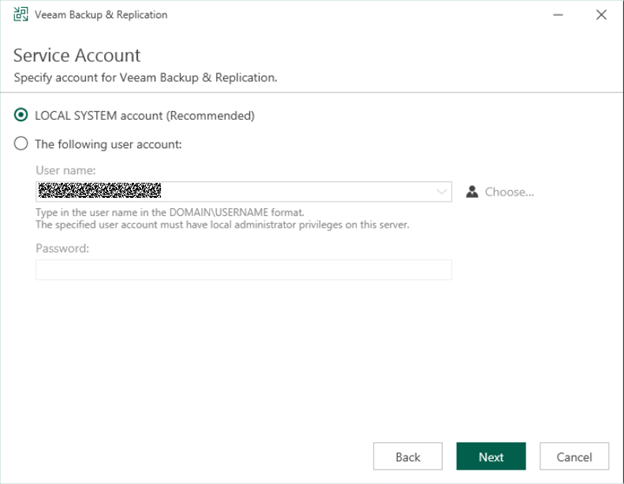
Step 6. Specify Service Account Settings
The Service Account step of the wizard is available if you have selected to configure installation settings manually.
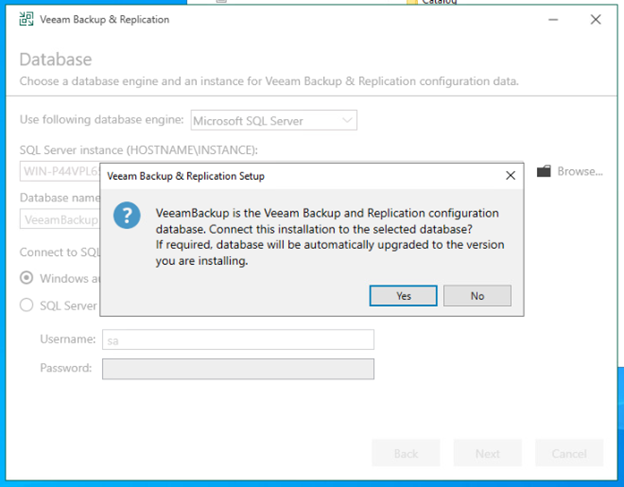
Step 7. Specify Database Engine and Instance
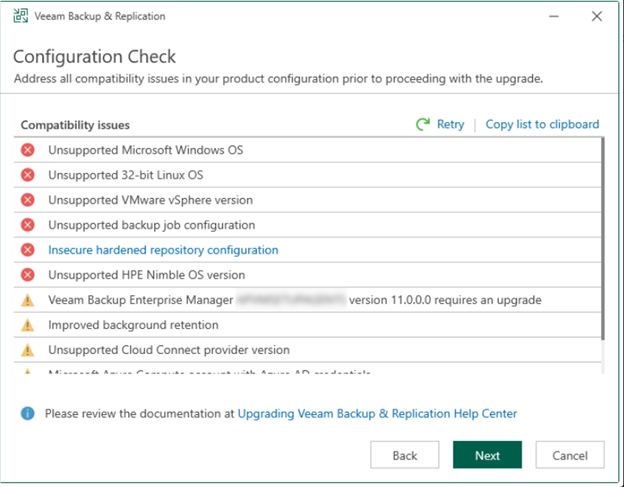
Step 8. Perform Configuration Check
At the Configuration Check step of the wizard, the setup checks the Veeam Backup & Replication configuration.
If the check returns errors, solve their causes before continuing the upgrade. After you solve them, click Retry to check if there are any issues left
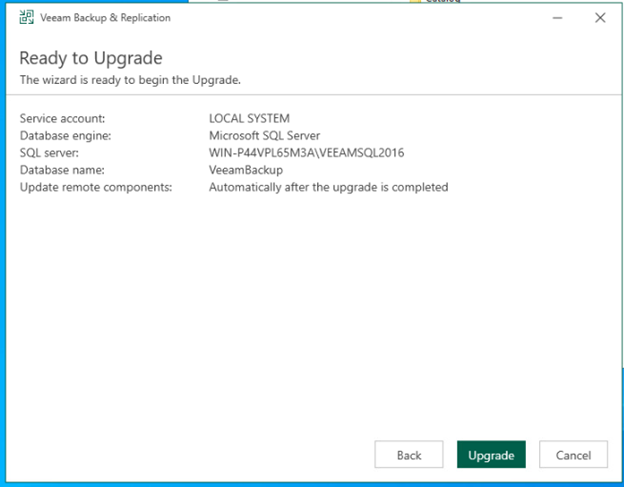
Step 9. Begin Upgrade
At the Ready to Upgrade step of the wizard, review the upgrade settings and start the upgrade process.
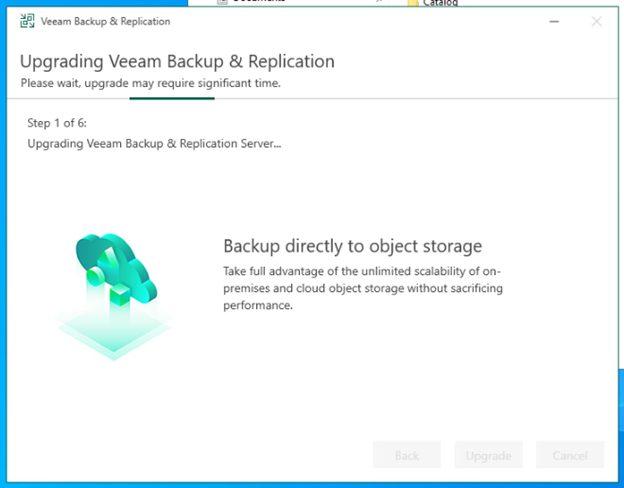
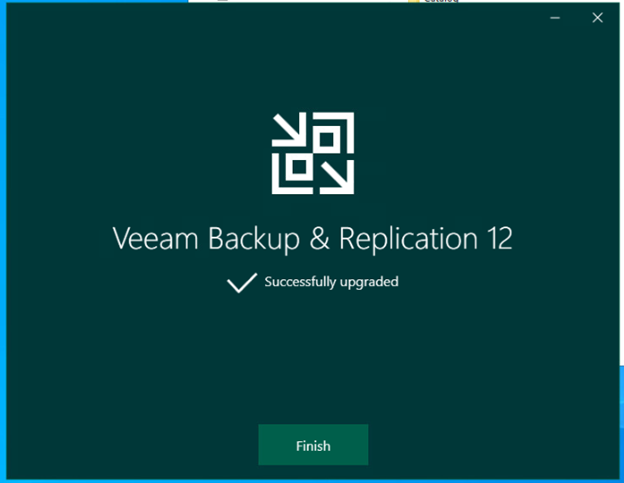
Wait for the installation process to complete and click Finish to exit the wizard
5. New Version after Upgrade
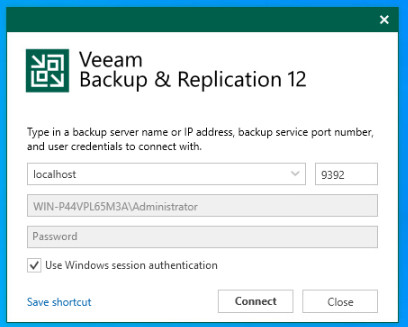
Log in to the new version
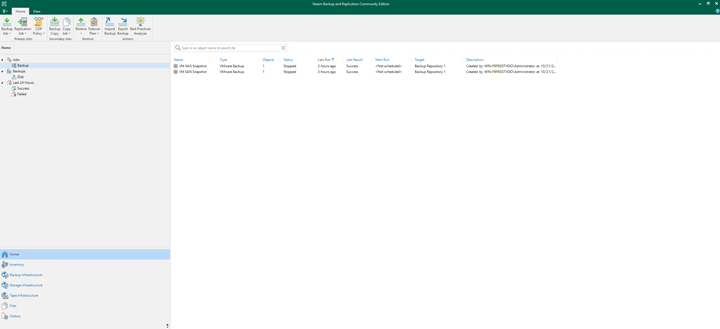
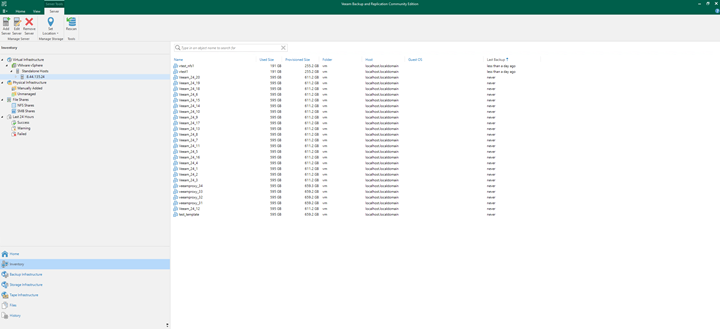
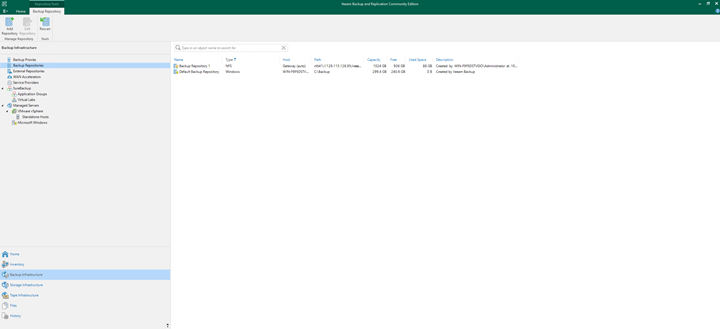
Inventory of normal backup repo is unaffected, and VM inventory is also in good state
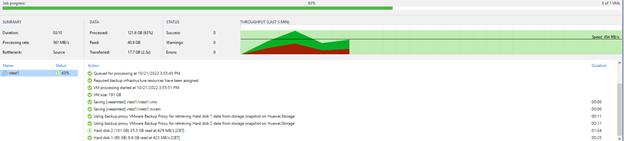
Backup Using Direct SAN Access Mode instead of SAN snapshot
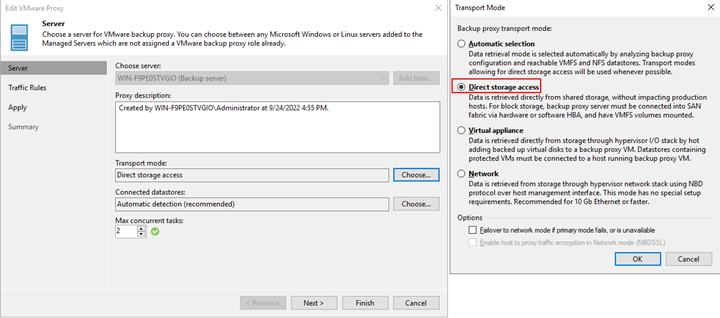
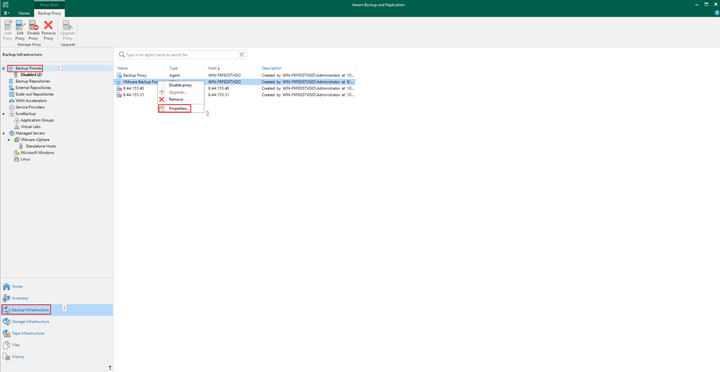
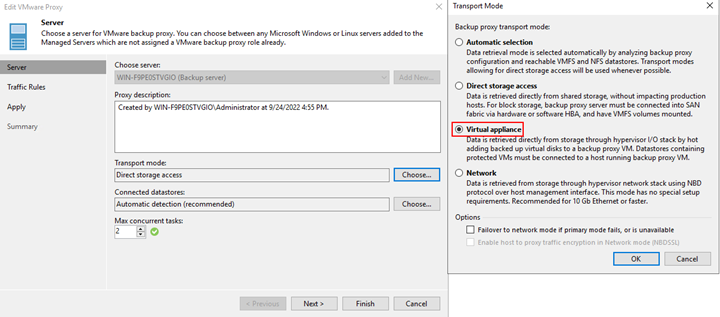
- Under Backup Infrastructure tab, open Backup Proxies and right click on VMware Backup Proxy to enter properties setting

- Change proxy transport mode into ‘Direct storage access’ on VMware Proxy and finish setting
- Ensure storage lun is mapped to both ESXi platform and Veeam proxy via iSCSI/FC protocol.
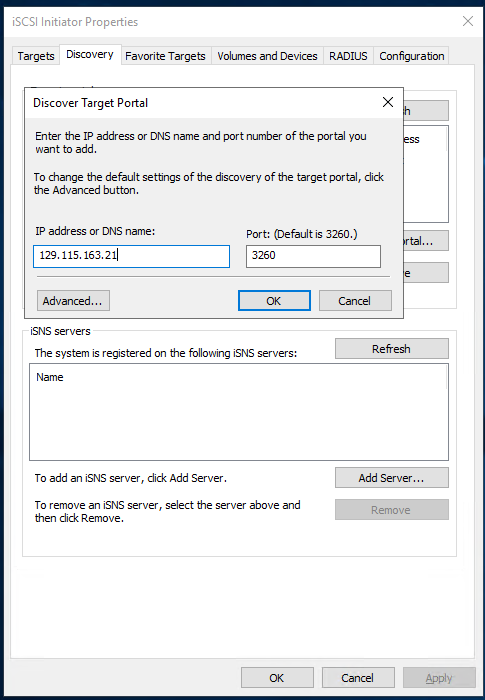
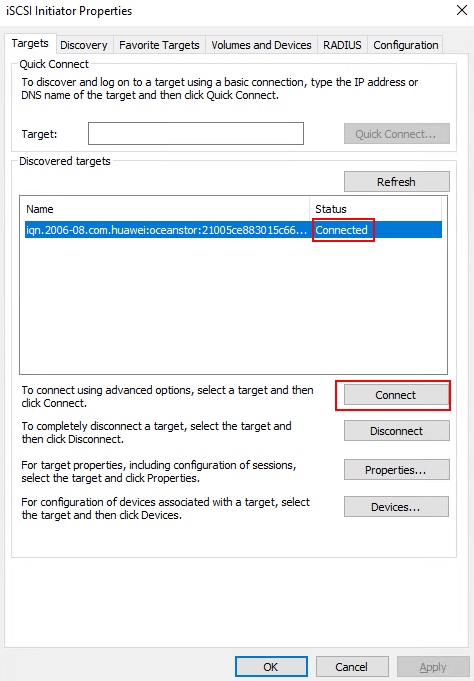
- If storage lun is mapped to Veeam proxy via iSCSI protocol, then you need to open iSCSI Initiator on Veeam proxy. Under Discovery tab, click on Discover Portal and input iSCSI port address of storage. If FC protocol is used, you can directly skip to step 6.
- Under Targets tab, click on Connect button to ensure Veeam proxy is connected to the iSCSI target.
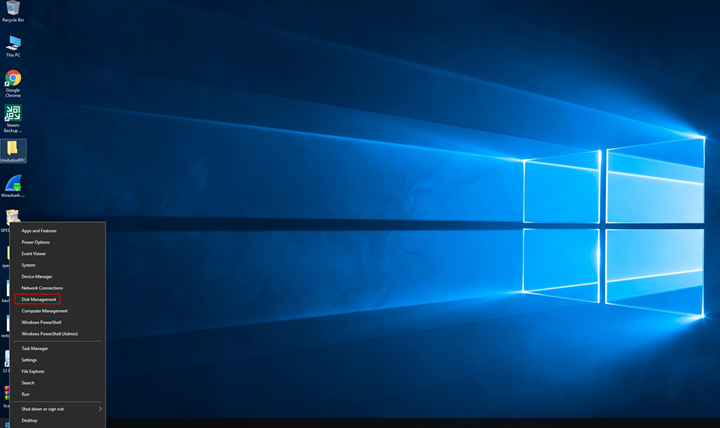
- Right click on start menu and open disk management to scan the mapped lun.
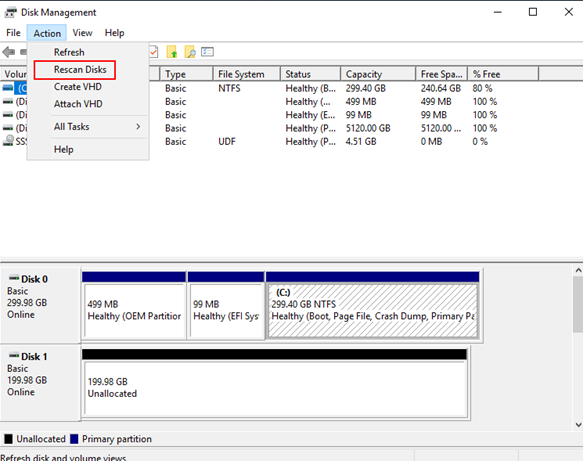
- Under Action tab, click Rescan Disks
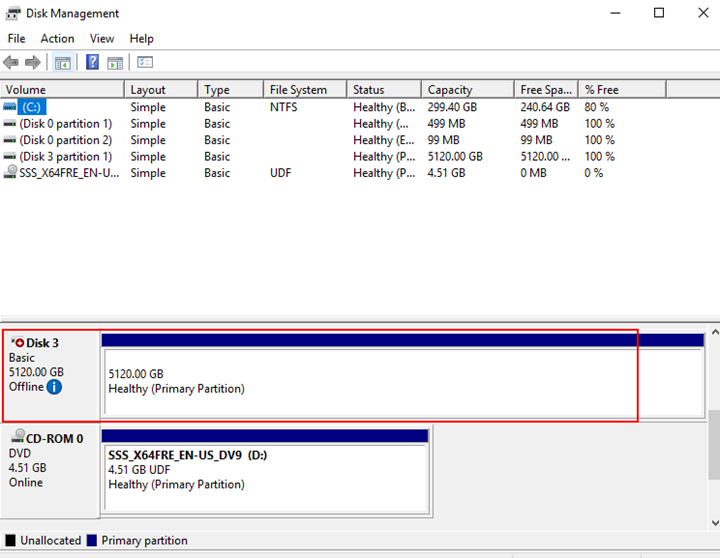
- When the specific lun can be scanned in Veeam proxy, keep it in offline state during backup.
- Run backup job and check status
- Backup job finished successfully using direct san access mode
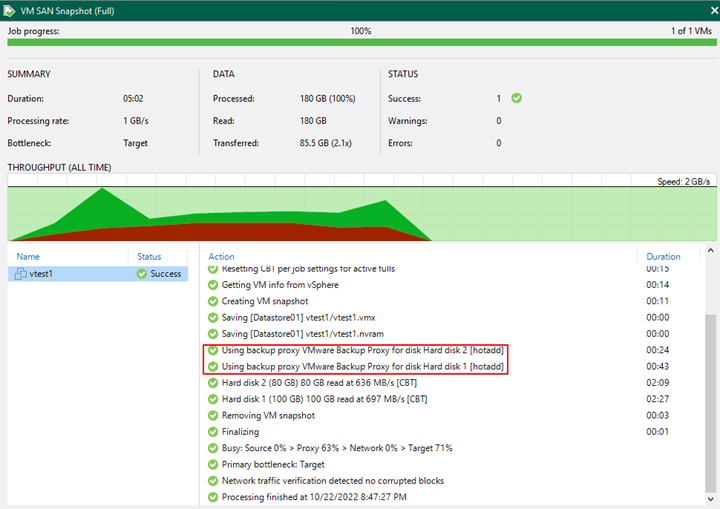
Backup Using Virtual Appliance Mode (HotAdd) instead of SAN snapshot
- Under Backup Infrastructure tab, open Backup Proxies and right click on VMware Backup Proxy to enter properties setting
- Change proxy transport mode into ‘Virtual Appliance’ on VMware Proxy and finish setting
- Run backup job and check status

- Backup job finished successfully using virtual appliance mode