Huawei OceanStor Pacific Scale-Out Storage and OpenText Archive Server
Interoperability Test Report
1 Environment Configuration
1.1 Networking Diagram
Figure 1.1 Storage and Archive Server Test Networking
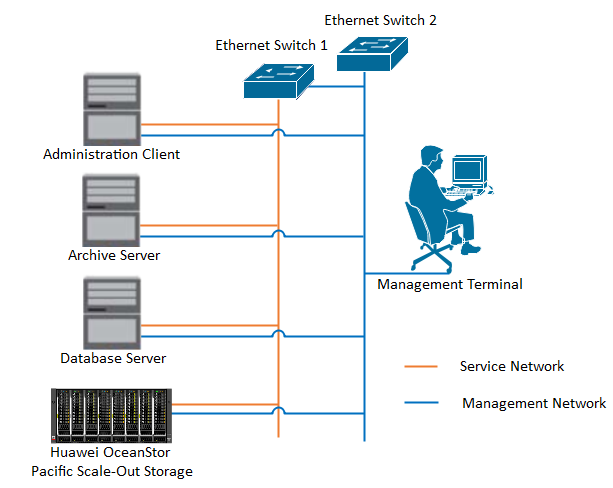
Networking Description:
The management network and service network are connected to the Administration client, Archive server, Database Server, and Huawei OceanStor Pacific Scale-Out Storage through switches.
1.2 Hardware and Software Configuration
1.2.1 Storage Configuration
Table 1-1 Huawei storage configuration table
| Name | Model | Version | Quantity |
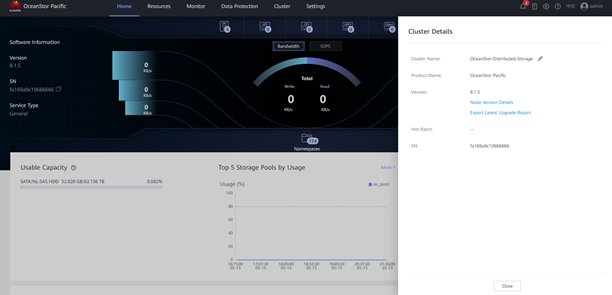
| Storage | Huawei OceanStor Pacific Scale-Out Storage (Hereinafter referred to as “the storage” as well) | 8.1.5 | 1 |
1.2.2 Matching Hardware Configuration
Table 1-2 Hardware Configuration
| Name | description | Quantity |
| Administration Client | Install the OpenText Administration Client software for management. | 1 |
| Archive Server | Install the OpenText Archive Server software. | 1 |
| Database Server | Install the SQL server and hold the configuration information for OpenText Archive Server. | 1 |
| Ethernet switch | Ethernet switches for management networking and service networking. | 2 |
1.2.3 Test Software and Tools
Table 1-3 Test Software and Tool List
| Software Name | Version | Quantity |
| Administration Client | 20.2 | 1 |
| Archive Server | 20.2 | 1 |
| SQL Server | SQL Server 2016 | 1 |
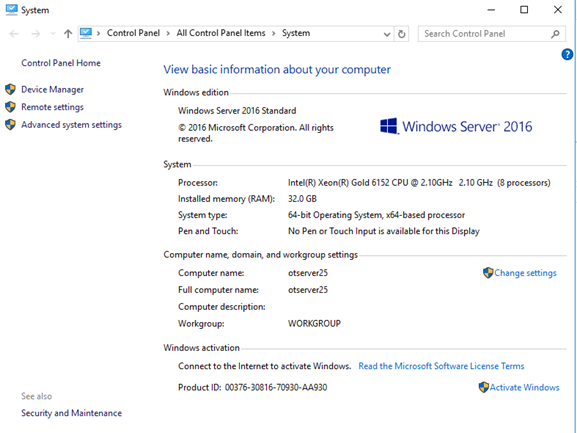
| Operation System | Windows 2016 | 1 |
Software Version:
SQL Server:

Windows:
Archive Server and Administrator Client:

Huawei OceanStor Pacific Scale-Out Storage:
2 Verification
2.1 Add the storage to the archive server as S3 target storage
| Test Purpose | To verify that the storage can be added to the archive server as S3 target storage. |
| Test Networking | Storage and Archive Server Test Networking |
| Prerequisites | 1.The administration client, archive server, and SQL database have been deployed and configured successfully. 2.The S3 services of the storage have been configured successfully, including accounts, namespace, access certificates, security certificates, and service networks. |
| Test Procedure | 1. On the administration client, add the archive server. 2. Add the storage to the archive server through the S3 protocol. 3. Test the connection between the storage and the archive server. |
| Expected Result | 1. In step 2, succeed to add the storage to the archive server successfully. 2. In step 3, the connection test succeeded. |
| Test Results | 1. On the administration client, add the archive server. 1.1 Input the IP address of the archive server in the Server name filed. And input the Port and Display name. Then click OK. 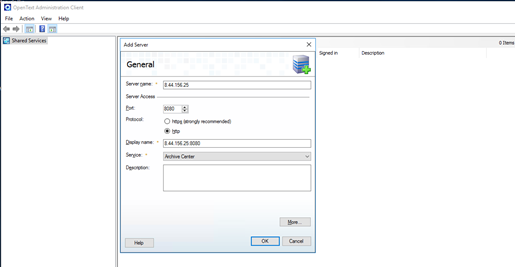 1.2 Sign in to the archive server created in the previous step.  2. Add the storage to the archive server through the S3 protocol. 2.1 Right-click Storage Devices and choose Add Storage Device. 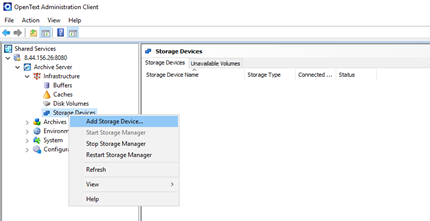 2.2 Input the Storage Device name, and select Simple Storage Service(S3) as the Storage type. 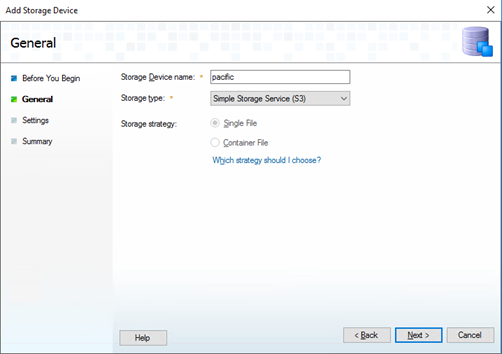 2.3 Input the domain name of the storage in the Service Address field, and choose the RootCA certificate exported from the storage as the SSL certificates. 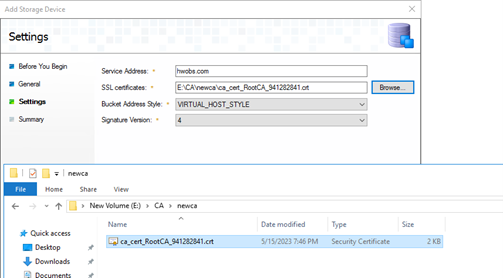 2.4 Click Finish to complete Add Storage Device. 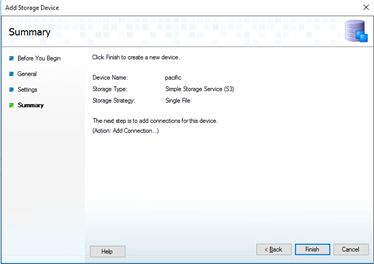 3. Test the connection between the storage and the archive server. 3.1 Right-click the storage device created in the previous step, and choose Add connection. 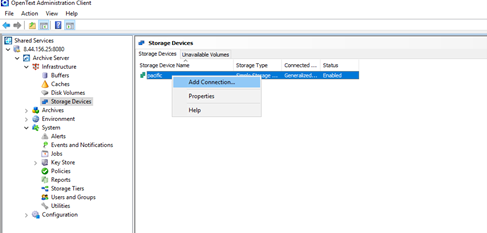 3.2 Input a name in the Bucket field. Select defaultRegion in the Region field. Input the Access key and Secret key of the storage. 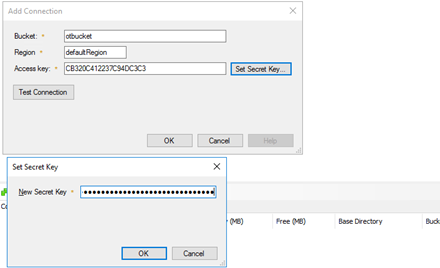 3.3 Click Test Connection and the result is OK. 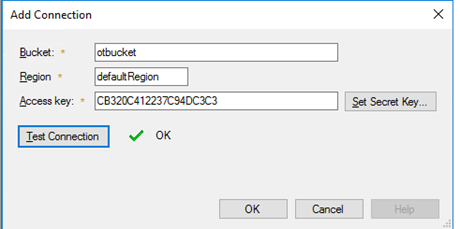 |
| Test Conclusion | Passed |
2.2 Archive files to the storage through the archive server
| Test Purpose | To verify that the archive server can archive files to the storage. |
| Test Networking | Storage and Archive Server Test Networking |
| Prerequisites | 1. The administration client, archive server, and SQL database have been deployed and configured successfully. 2. The S3 services of the storage have been configured successfully, including accounts, namespace, access certificates, security certificates, and service networks. 3. The storage has been added to the archive server successfully. |
| Test Procedure | 1. Prepare some files and write the files to the archive server’s local buffer. And check the files in the archive server’s local buffer. 2. Run related PoolWrite job to write the files in the archive server’s local buffer to the volumes of the storage. And check the files in the storage. |
| Expected Result | 1. In step 1, the files are written to the archive server’s local buffer successfully. 2. In step 2, the files are written to the storage successfully. |
| Test Results | Prerequisites Pre1 Configuration of the storage Set the trim-slash-switch to true so that the storage allows object name can contain more than two consecutive directory separators. 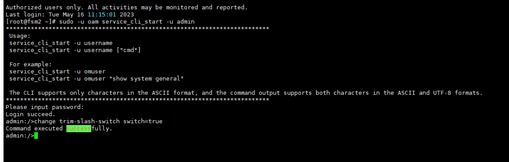 Pre2 Configuration of the archive server Pre2.1 Initialize a new volume. 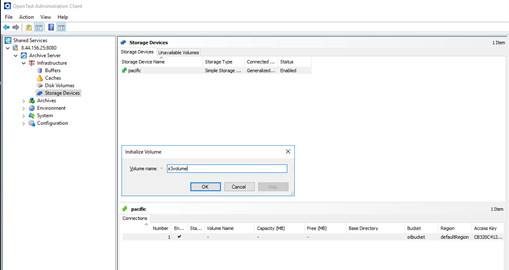  Pre2.2 Create a new disk volume in the local disk E:\. 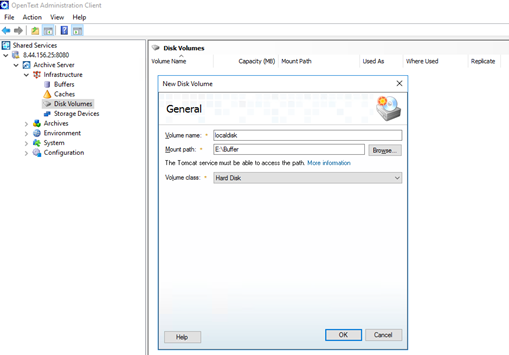 Pre2.3 Create a new disk buffer and attach the local disk volume created in the previous step. 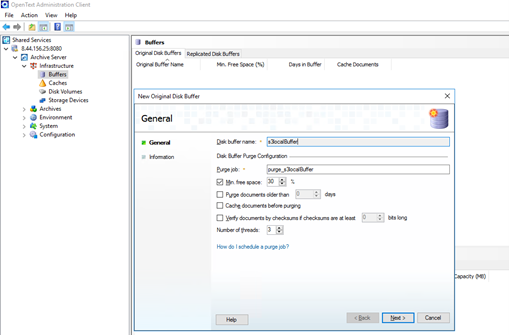 Pre2.4 Create a new archive. 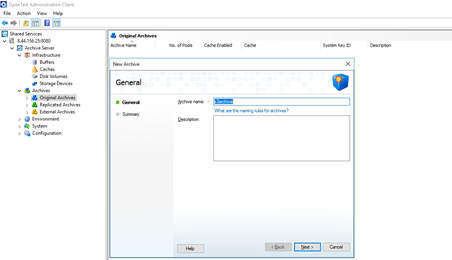 Pre2.5 Create a new pool in Single file (VI) type and select the disk buffer created earlier. 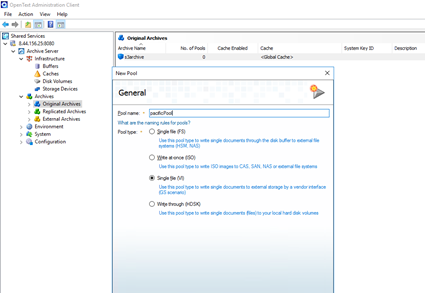 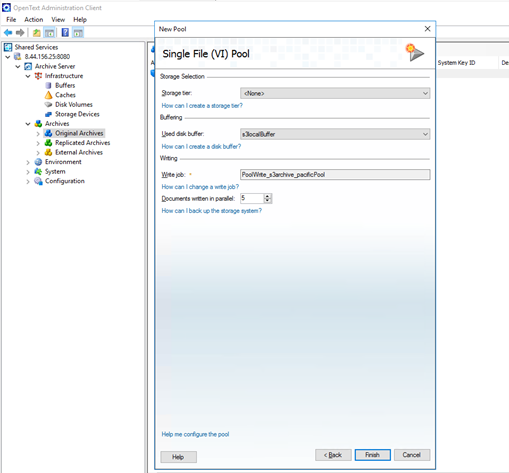 Pre2.6 Attach the volume created earlier. 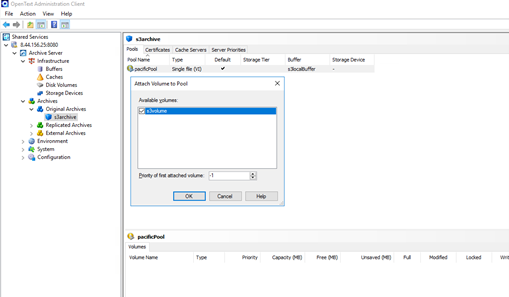 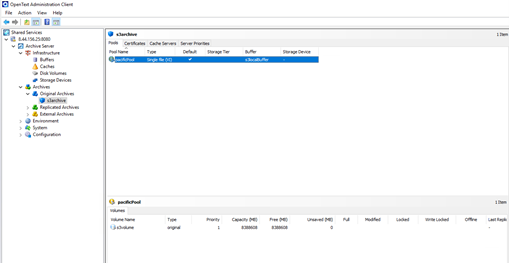 Test Result 1. Prepare some files and write the files to the archive server’s local buffer. And check the files in the archive server’s local buffer. 1.1 Test files are created. 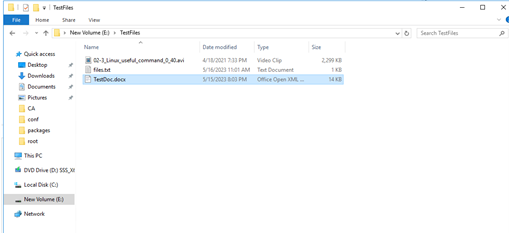 1.2 Write the test files to the archive server’s local buffer. 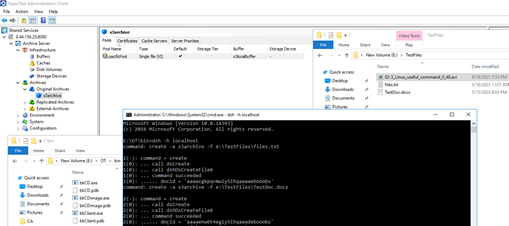 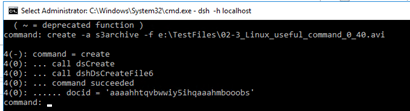 1.3 Data of the test files has been written into the local buffer. 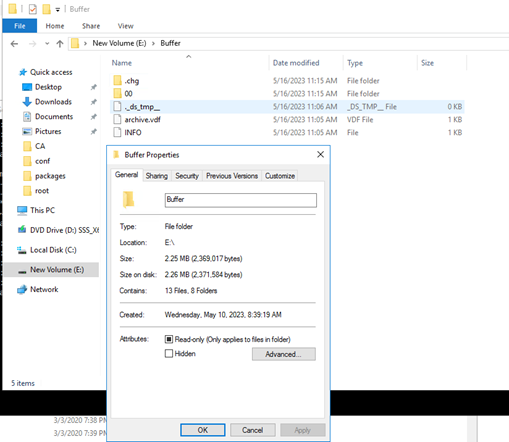 2. Run related PoolWrite job to write the files in the archive server’s local buffer to the volumes of the storage. And check the files in the storage 2.1 Before running the job, there is no data in the S3 bucket of the storage. 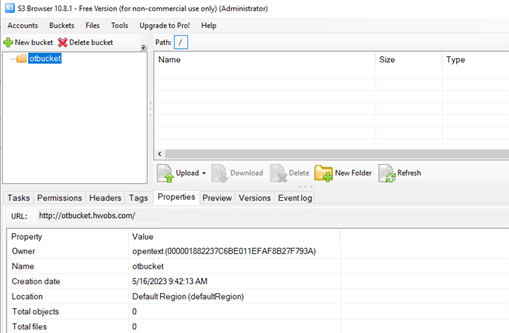 2.2 Start the related PoolWrite job. 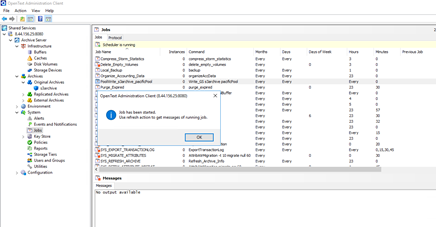 2.3 Job has been completed successfully and 3 files have been archived. 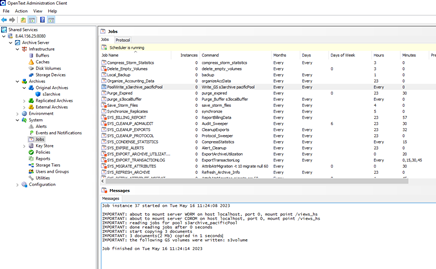 2.4 The folder structure in the storage is the same as that in the local buffer. 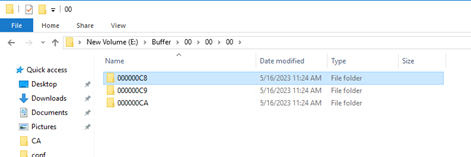 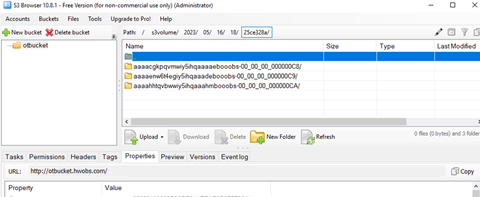 2.5 The files have been written into the storage successfully. 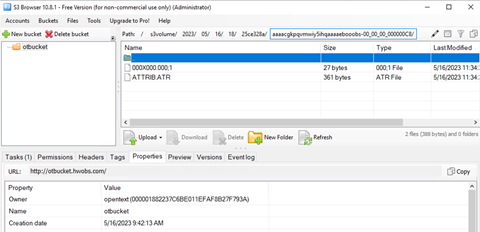 |
| Test Conclusion | Passed |
2.3 Retrieve archived files from the storage through the archive server
| Test Purpose | To verify that archived files can be retrieved from the storage through the archive server. |
| Test Networking | Storage and Archive Server Test Networking |
| Prerequisites | 1.The administration client, archive server, and SQL database have been deployed and configured successfully. 2.The S3 services of the storage have been configured successfully, including accounts, namespace, access certificates, security certificates, and service networks. 3.The storage has been added to the archive server successfully. 4.Some files (original files) have been archived to the storage successfully and the docids have been recorded. |
| Test Procedure | 1.Run related Purge job to clean the archive server’s local buffer. And check the files in the archive server’s local buffer. 2.Prepare a destination directory for retrieving files. 3.In the archive server, retrieve the archived files from the storage to the destination directory. 4.Check the consistency of the retrieved files and original files. |
| Expected Result | 1.In step 1, the files in the archive server’s local buffer are cleared successfully. 2.In step 2, the files are retrieved to the destination directory successfully. 3.In step 3, the retrieved files and original files are consistent. |
| Test Results | Prerequisites The docids have been recorded while archiving the files. e:\TestFiles\files.txt docid = ‘aaaacgkpqvmwiy5ihqaaaaebooobs’ e:\TestFiles\TestDoc.docx docid = ‘aaaaenw6t4egiy5ihqaaadebooobs’ e:\TestFiles\02-3_Linux_useful_command_0_40.avi docid = ‘aaaahhtqvbwwiy5ihqaaahmbooobs’ Test Result 1. Run related Purge job to clean the archive server’s local buffer. And check the files in the archive server’s local buffer. 1.1 Before running the job, folder ‘00’ is in the local buffer. 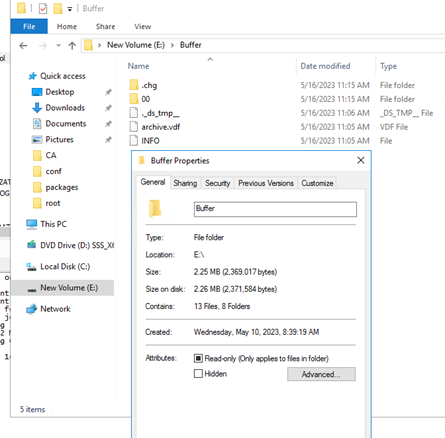 1.2 Change Min. free space to ‘100%’ in related buffer properties, so that the data can be purged immediately for testing purposes. 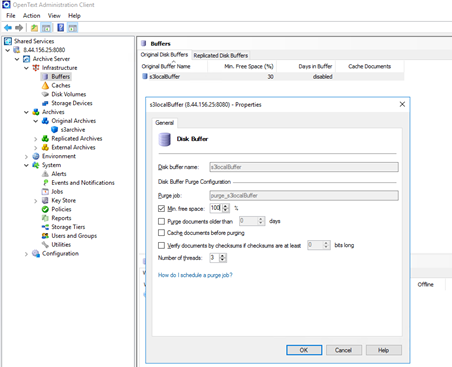 1.3 Start the purge job. 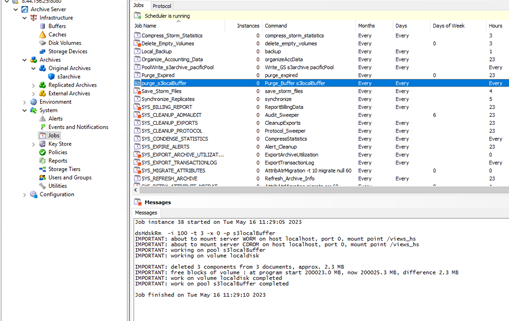 1.4 The folder ‘00’ in the Archive Server local buffer has been removed. 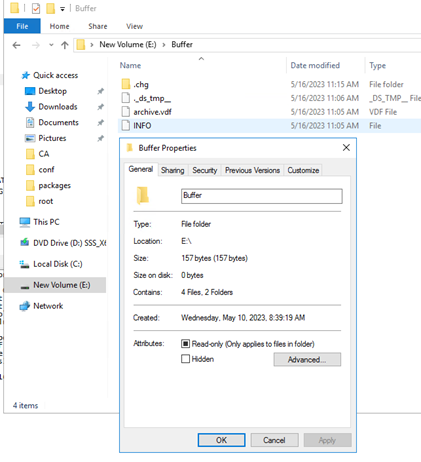 2. Create a new folder in the local disk as the destination directory for retrieving files. 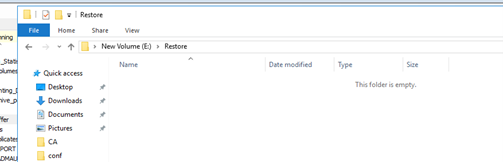 3. In the archive server, retrieve the archived files with the docids recorded earlier from the storage to the destination directory. 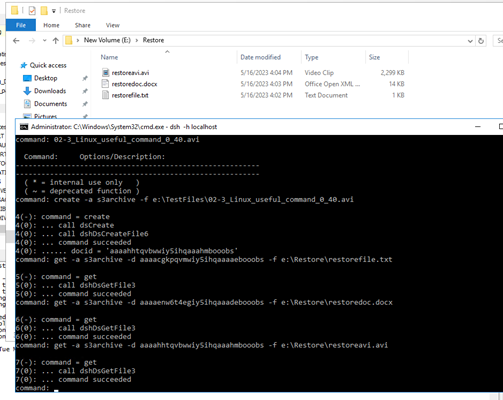 4. The MD5 value of the retrieved files and original files are the same. That indicates the retrieved files and original files are consistent. 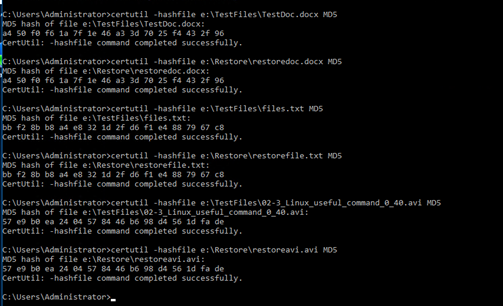 |
| Test Conclusion | Passed |
2.4 Retention Period Testing
| Test Purpose | To verify that the retention period is supported when the storage is used as S3 target storage of the archive server. |
| Test Networking | Storage and Archive Server Test Networking |
| Prerequisites | 1.The administration client, archive server, and SQL database have been deployed and configured successfully. 2.The S3 services of the storage have been configured successfully, including accounts, namespace, access certificates, security certificates, and service networks. 3.The storage has been added to the archive server successfully. |
| Test Procedure | 1.On the administration client, set a retention period for the archive. 2.Archive files to the storage. 3.Check the headers of the archived files on the storage. 4.Delete the archived files within the retention period on the storage. 5.Delete the archived files after the retention period expires on the storage. |
| Expected Result | 1.In step 1, succeeded to set the retention period for the archive. 2.In step 3, the headers of the archived files show that the files are Read-only. 3.In step 4, fail to delete the archived files within the retention period. 4.In step 5, succeed to delete the archived files after the retention period expires. |
| Test Results | Prerequisites Pre1 Configuration of the storage Pre1.1 Create a new bucket with WORM enabled and set the worm policy mode to None, so that the storage will use the retention period set by the archive server through the S3 interface. 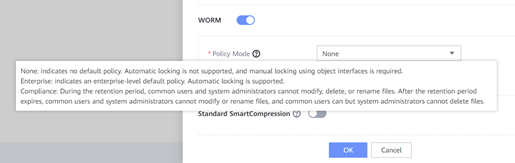 Pre1.2 In the S3 browser check the S3 worm bucket created in the previous step. 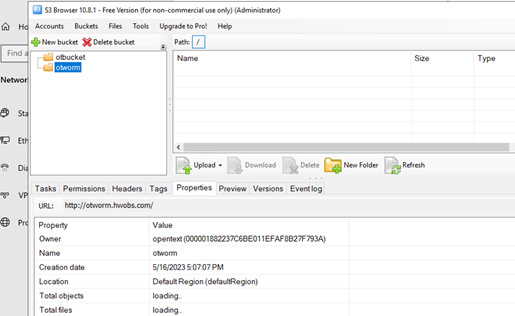 Pre2 Configuration of the archive server Pre2.1 Add a new connection with the S3 worm bucket created earlier. 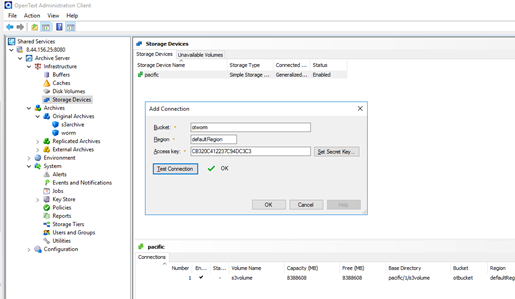 Pre2.2 Initialize a new volume. 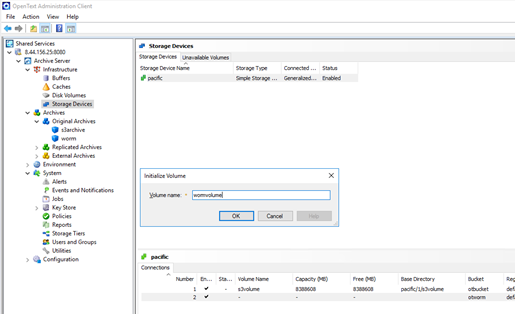  Pre2.3 Create a new disk volume in the local disk E:\. 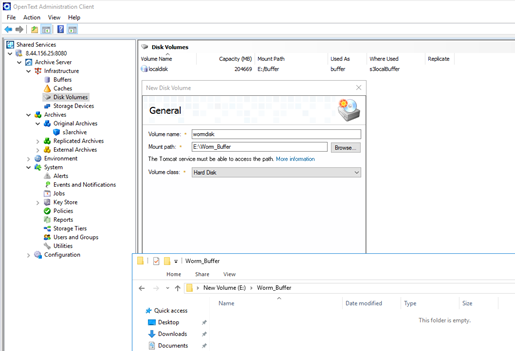 Pre2.4 Create a new disk buffer and attach the local disk volume created in the previous step. 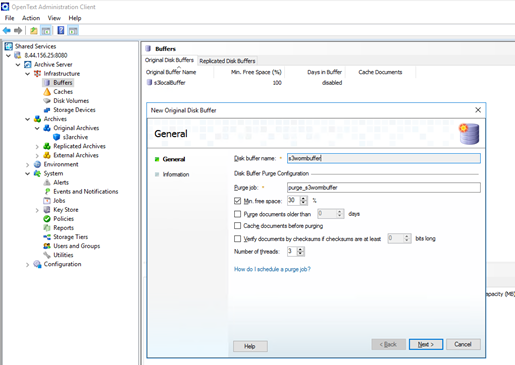 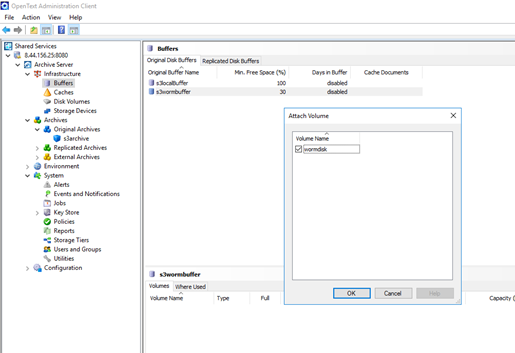 Pre2.5 Create a new archive. 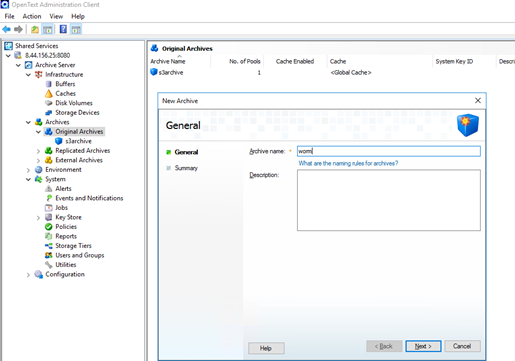 Pre2.6 Create a new pool in Single file (VI) type and select the disk buffer created earlier. 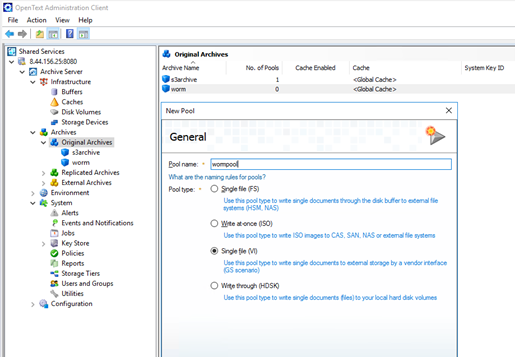 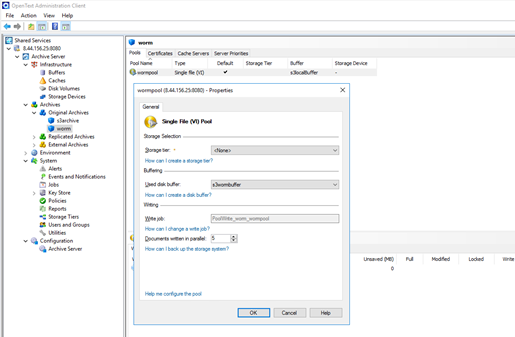 Pre2.7 Attach the volume created earlier. 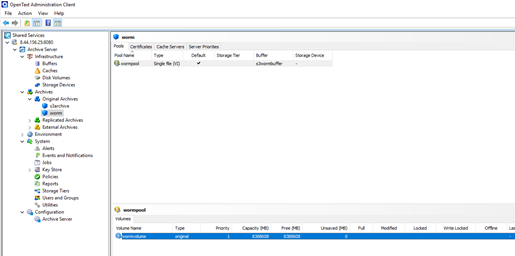 Test Result 1. On the administration client, set the retention period to 1 day in archive properties. 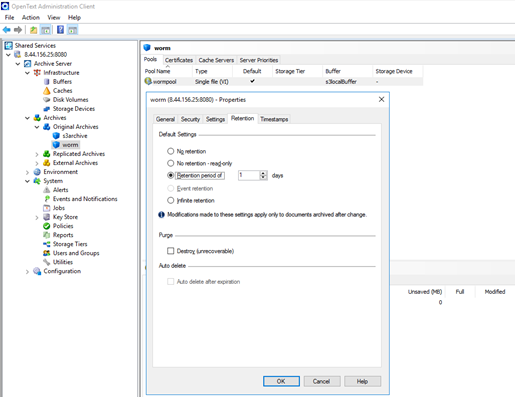 2. Archive files to the storage. 2.1 Write the test files to the archive server’s local buffer. 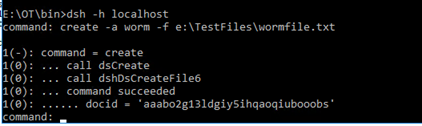 2.2 Start the related PoolWrite job to archive the file to the storage. 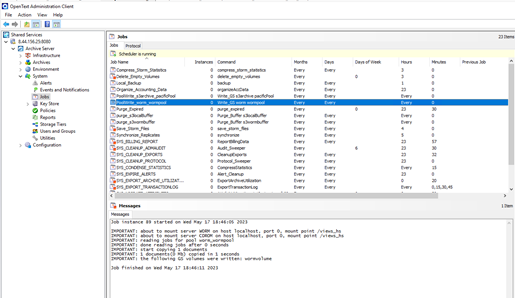 2.3 The files have been written into the storage successfully. 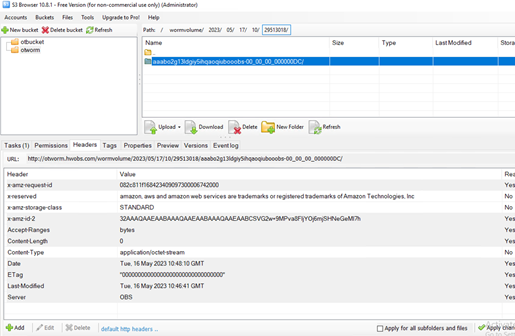 3. On the S3 browser the headers of the archived files in the storage contain the ‘x-amz-object-lock-retain-until-date’ and the value is 2023-05-18T10:45:50. 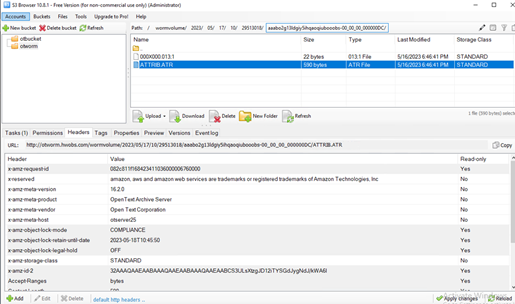 4. The archived files could not be deleted within the retention period (2023-05-18 10:45:50 UTC+0/ 2023-05-18 18:45:50 UTC+8). 4.1 The WORM clock in the storage is within the retention period. 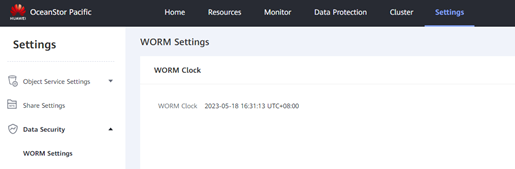 4.2 Files could not be deleted. 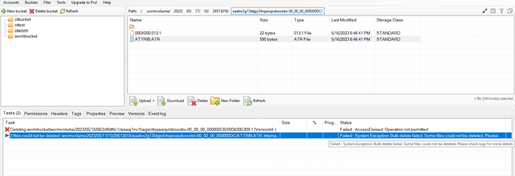 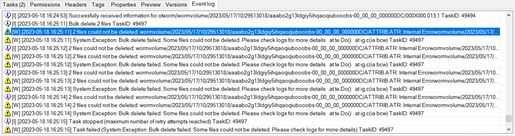 5. Succeed to delete the archived files after the retention period (2023-05-18 10:45:50 UTC+0/ 2023-05-18 18:45:50 UTC+8) expires. 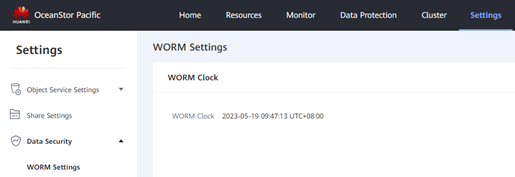 5.1 Check the WORM clock in the storage to make sure the retention period has expired. 5.2 Files could be deleted. 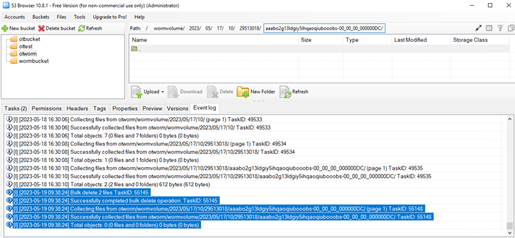 |
| Test Conclusion | Passed |
3 Summary and Conclusion
3.1 Result Summary
| Number | Test Cases | Results |
| 1 | Add the storage to the archive server as S3 target storage | Passed |
| 2 | Archive files to the storage through the archive server | Passed |
| 3 | Retrieve archived files from the storage through the archive server | Passed |
| 4 | Retention Period Testing | Passed |
3.2 Conclusion
All the interoperability test cases were completed. The Huawei OceanStor Pacific Scale-Out Storage supports connecting to the OpenText Archive Server through the S3 protocol as target storage. The system works as expected for file archiving, retrieving, and retention period. With regards to the test results, the Huawei OceanStor Pacific Scale-Out Storage and the OpenText Archive Server are well interoperable.
3.3 Signature
| Company Name: |
| Signature: |
| Date: |