Huawei OceanProtect X8000 Data Protection Appliance Compatibility Test Report

1 Executive Summary
This report assesses the compatibility of Huawei OceanProtect X8000 data protection appliance with Oracle Database, SAP HANA Database, SAP ECC Application, SQL Server Database, VMware Virtual Machine, Windows Server, Linux Server, Exchange Server and NDMP Storage. The goal of the assessment is to validate that the data of these database, applications, virtual environments and servers can be effectively protected by Huawei OceanProtect X8000 data protection appliance.
All the compatibility test cases were completed and passed. With regards to the test results, Huawei OceanProtect X8000 data protection appliance can effectively protect the data of Oracle Database, SAP HANA Database, SAP ECC Application, SQL Server Database, VMware Virtual Machine, Windows Server, Linux Server, Exchange Server and NDMP Storage.
| Test Case | Test Result |
| Oracle Database test for data protection | PASS |
| SAP HANA test for data protection | PASS |
| SAP ECC test for data protection | PASS |
| SQL Server Database test for data protection | PASS |
| VMware test for data protection | PASS |
| Windows Server test for data protection | PASS |
| Linux Server test for data protection | PASS |
| Exchange Server test for data protection | PASS |
| NDMP backup test for data protection | PASS |
2 Test Environment
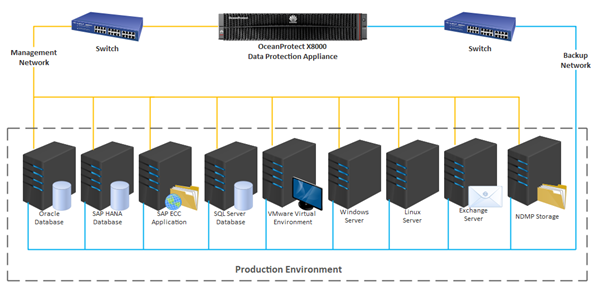
2.1 Networking Diagram
Figure 1.1 Huawei OceanProtect X8000 data protection appliance test networking
2.2 Hardware and Software Configurations
The detail information of hardware and software used during the test is as follows.
Table 1.1 Hardware and Software Configuration
| Hardware and Software | Version | Description | Quantity |
| Huawei OceanProtect X8000 data protection appliance | OceanProtect X8000 1.5.0 | Data protection appliance for testing | 1 |
| Oracle Database | Oracle 19c(19.3.0) | Oracle database for backup and restore test | 1 |
| SAP HANA Database | SAP HANA 2.00.040.00 | SAP HANA database for backup and restore test | 1 |
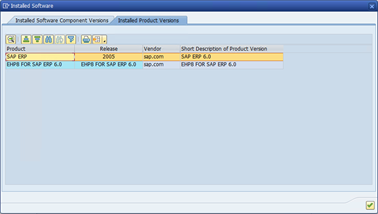
| SAP ECC Application | EHP8 FOR SAP ERP 6.0 | SAP ECC Application for backup and restore test | 1 |
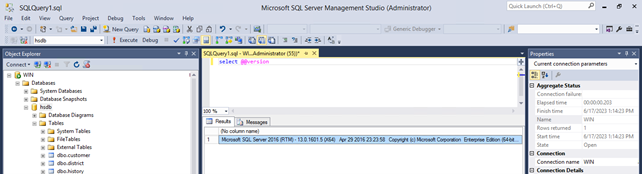
| SQL Server Database | SQL Server 2016(13.0) | SQL Server database for backup and restore test | 1 |
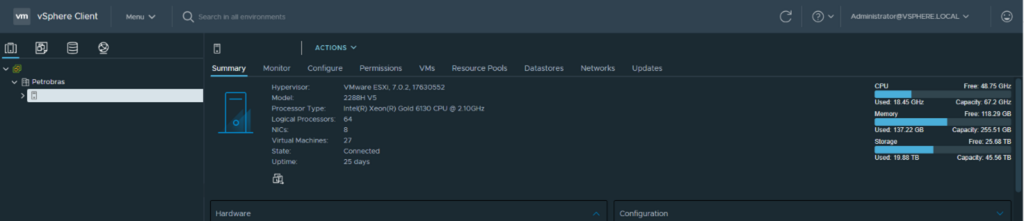
| VMware Host | VMware ESXi, 7.0.2 | VMware Host for backup and restore test | 1 |
| Windows Server | Windows Server 2019 | Windows Server for backup and restore test | 1 |
| Linux Server | CentOS 7.8 x86_64 | Linux Server for backup and restore test | 1 |
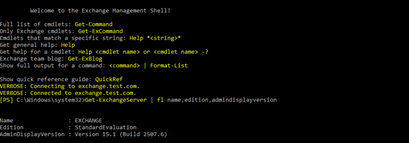
| Exchange Server | Exchange 2016 | Exchange Server for backup and restore test | 1 |
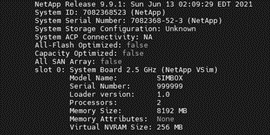
| NDMP Server | NetApp 9.9.1 | NDMP Server for backup and restore test | 1 |
| GE/10GE Ethernet Switch | NA | Used for networking | 2 |
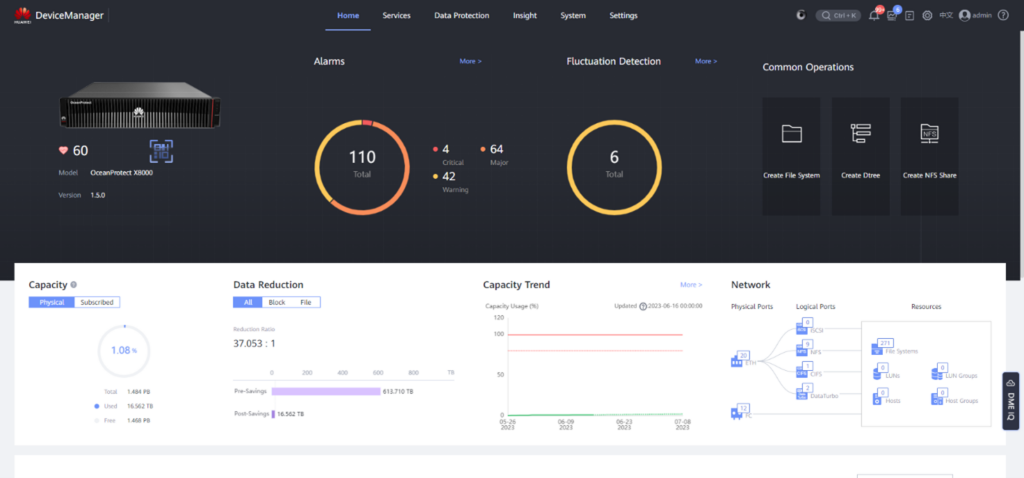
Huawei OceanProtect X8000 data protection appliance – Homepage

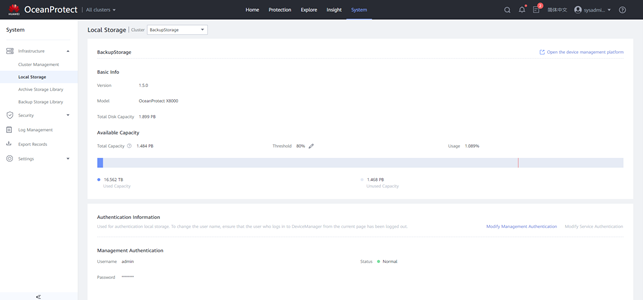
Huawei OceanProtect X8000 data protection appliance – System Page
Huawei OceanProtect X8000 data protection appliance – Device Manager Page
Databases, Applications and Servers information:
- Oracle Server 19c (19.3.0)

2. SAP HANA 2.00.040.00.1553674765

3. SAP EHP8 FOR SAP ERP 6.0
4. SQL Server 2016
5. VMware ESXi 7.0.2
6. Windows Server 2019 x86_64

7. (Linux) CentOS 7.8 x86_64

8. Exchange Server 2016 (Build number 15.1)
9. NetApp 9.9.1 storage
3 Test Cases and Records
3.1 Oracle Database test for data protection
| Test Purpose | Verify that the OceanProtect X8000 data protection appliance can backup and restore Oracle Database. |
| Prerequisites | The OceanProtect X8000 data protection appliance system is running properly. An Oracle Database is set up and a user database is created for protection. |
| Procedure | Expected Result |
| 1.Install Protect Agent software on Oracle server. 2.Create protection policy for Oracle Database. 3.Register Oracle Server to OceanProtect. 4.Add protection to Oracle Database. 5.Run a full backup job on OceanProtect, check backup job result. 6.Delete some tables and tablespace in Oracle Database, restore the full backup copy on OceanProtect, and check restore job result. 7.Check if deleted tables and tablespace are restored in Oracle Database. 8.Run a full backup job, check backup job result. 9.Add some tables and tablespace in Oracle Database, then run an incremental backup job on OceanProtect, check restore job result. 10.Delete tables and tablespace just added, restore the incremental backup copy on OceanProtect, and check backup job result. 11.Check if deleted tables and tablespace are restored in Oracle Database. | In step 1, Protect Agent is successfully installed. In step 2, protection policy for Oracle Database is created successfully. In step 3, Oracle Server is successfully registered to OceanProtect. In step 4, protection for Oracle Database is added. In step 5, the full backup job is successfully completed. In step 6, the restore job is successfully completed. In step 7, deleted tables and tablespace are restored in database. In step 8, the full backup job is successfully completed. In step 9, the incremental backup job is successfully completed. In step 10, the restore job is successfully completed. In step 11, deleted tables and tablespace are restored in database. |
| Test Result | [Steps and Screenshots] 1. Install Protect Agent https://intranet.bcstechno.com/controllers/ticket_details.php?&action=TicketDetails&id=157311 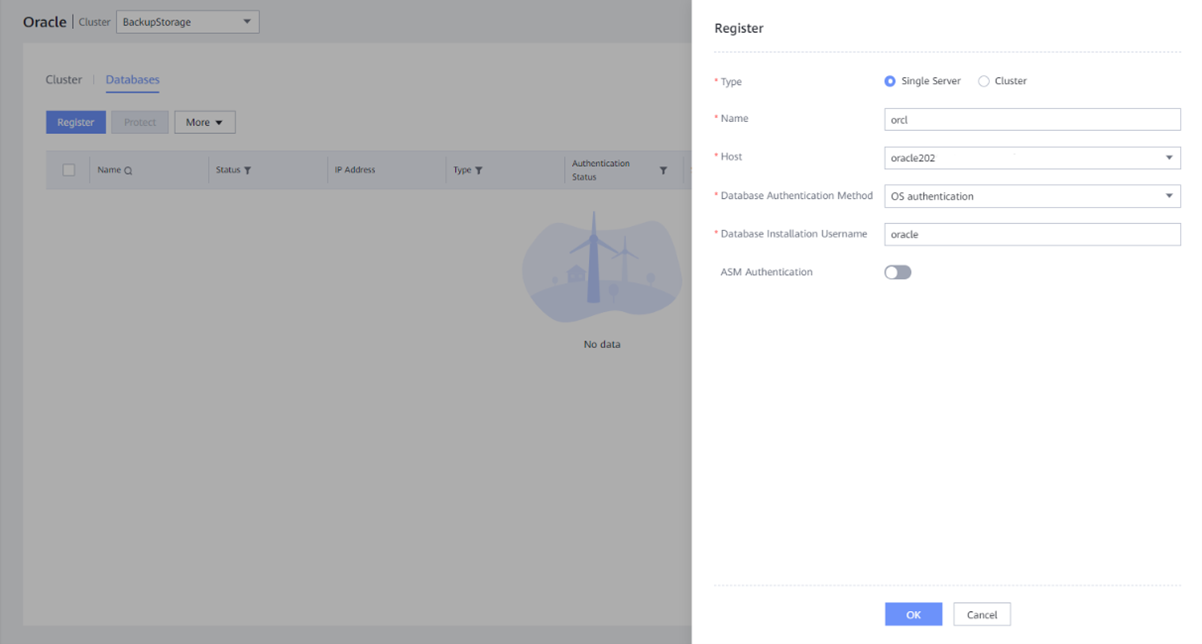 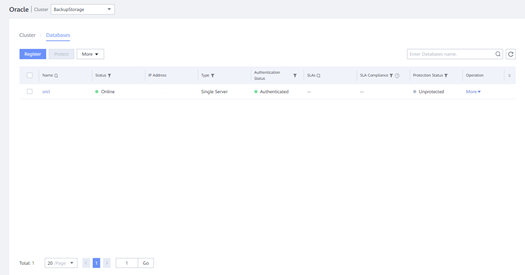 2. Add Protection 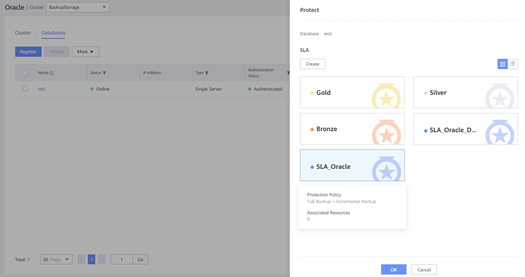 3. Run a full backup 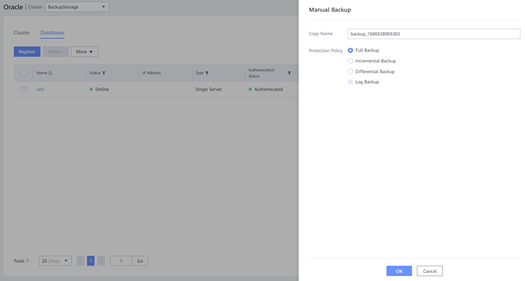 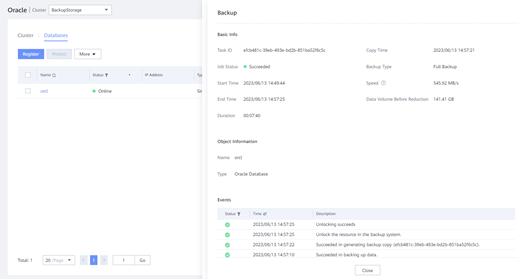 4. Delete some tables and tablespace, then restore full backup copy Select 11 tables to drop. 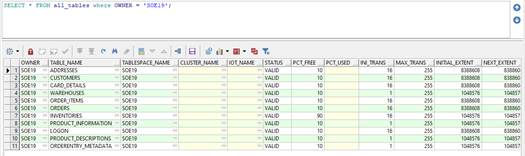 Drop 11 tables. 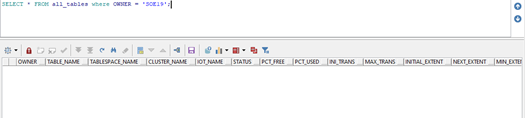 Drop a tablespace. 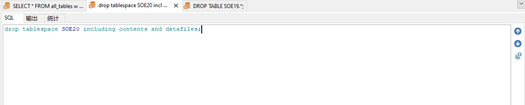 Initiate a restore job. 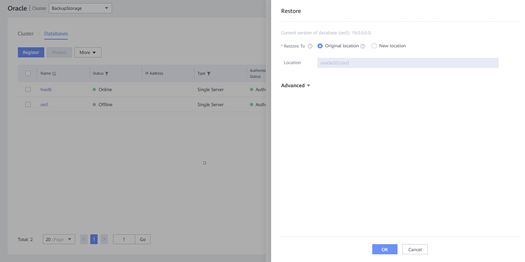 Restore in progress. 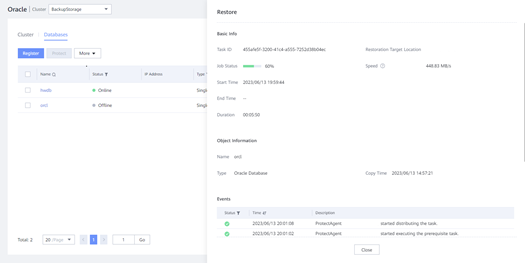 Restore job is completed. 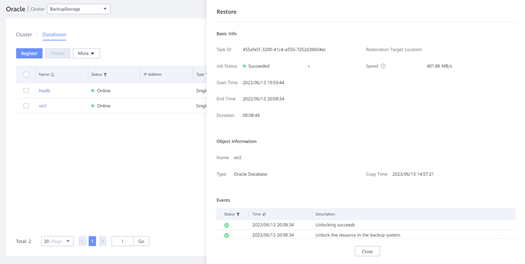 5. Data restored successfully All deleted tables are restored. 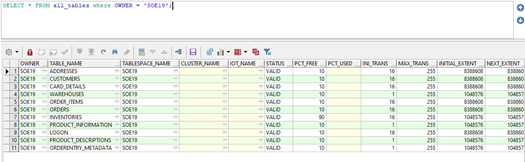 Deleted tablespace is restored. 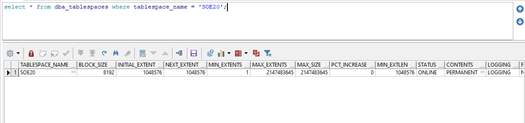 6. Full backup is completed. 7. Add some tables and tablespace, then run an increamental backup Tablespace and tables are added. 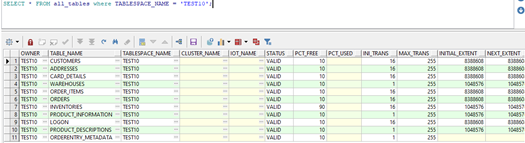 Initiate a incremental backup job. 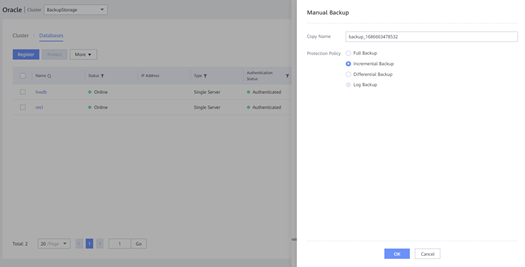 Incremental backup job is completed. 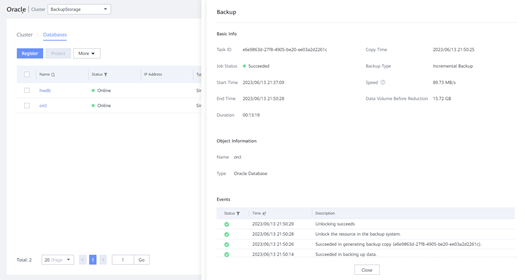 8. Delete some tables and tablespace, then restore increamental backup copy. Select tables and tablespace to drop.  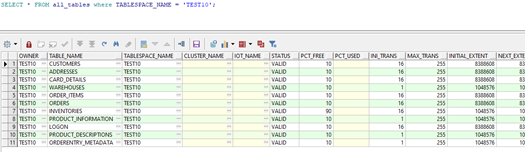 Drop tables and tablespace.  Tablespace dropped. 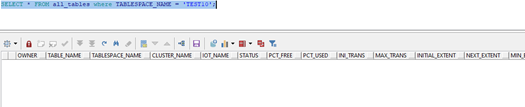 Initial an restore job of increamental backup copy. 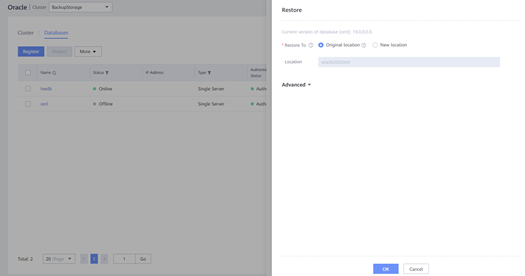 Restore job is completed. 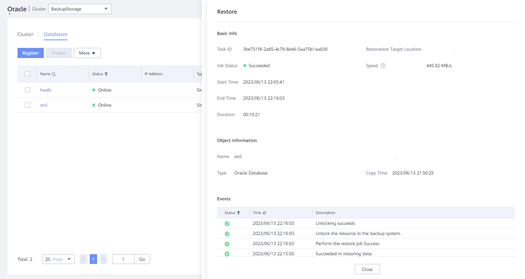 9. Data restored successfully. 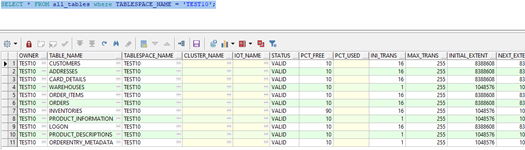  |
| Test Conclusion | PASS |
3.2 SAP HANA test for data protection
| Test Purpose | Verify that the OceanProtect X8000 data protection appliance can backup and restore SAP HANA Database. |
| Prerequisites | The OceanProtect X8000 data protection appliance system is running properly. A SAP HANA Database system is set up and a tenant database with user tables have been created for testing. |
| Procedure | Expected Result |
| 1.Install Protect Agent software on HANA server. 2.Create protection policy for HANA Database. 3.Register HANA Instance and tenant database to OceanProtect 4.Add protection to HANA Database. 5.Run a full backup job on OceanProtect, check backup job result. 6.Add table in tenant Database, then run an incremental backup job on OceanProtect, check backup jobs result. 7.Delete table just added, restore the incremental backup copy on OceanProtect, and check restore job result. 8.Check if the deleted table is restored in tenant database. | In step 1, Protect Agent is successfully installed. In step 2, protection policy for HANA Database is created successfully. In step 3, HANA instance and tenant database are successfully registered to OceanProtect. In step 4, protection for tenant database is added. In step 5, the full backup job is successfully completed. In step 6, the incremental backup job are successfully completed. In step 7, the restore job is successfully completed. In step 8, deleted table is restored in tenant database. |
| Test Result | [Steps and Screenshots] 1. Protect Agent installed.  2. Protection policy (SLA) created. 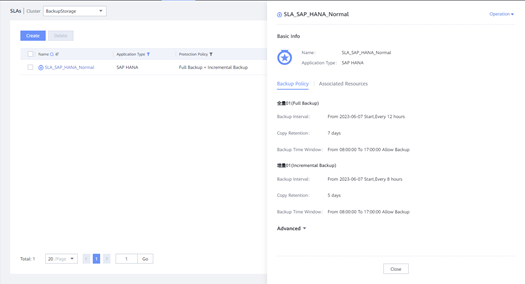 3. Instance and tenant database are registered. 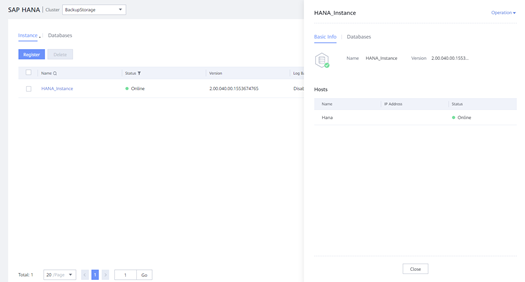 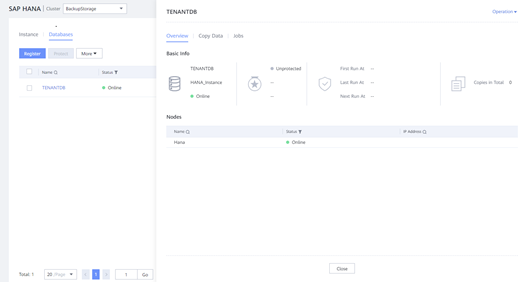 4. Protection for tenant database is added. 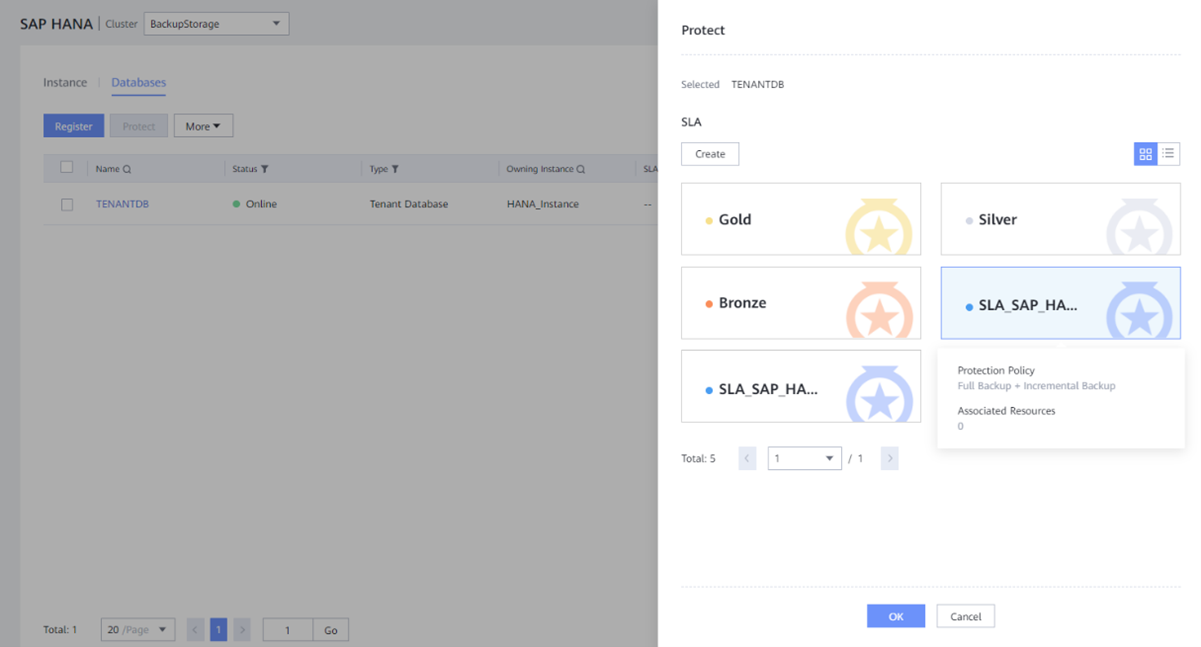 5. Full Backup job is completed.  6. Table added. 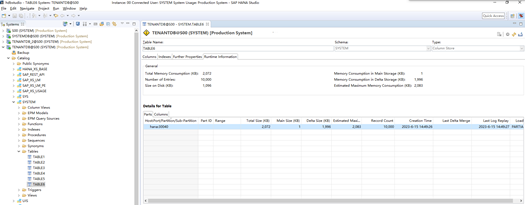 Incremental backup is completed. 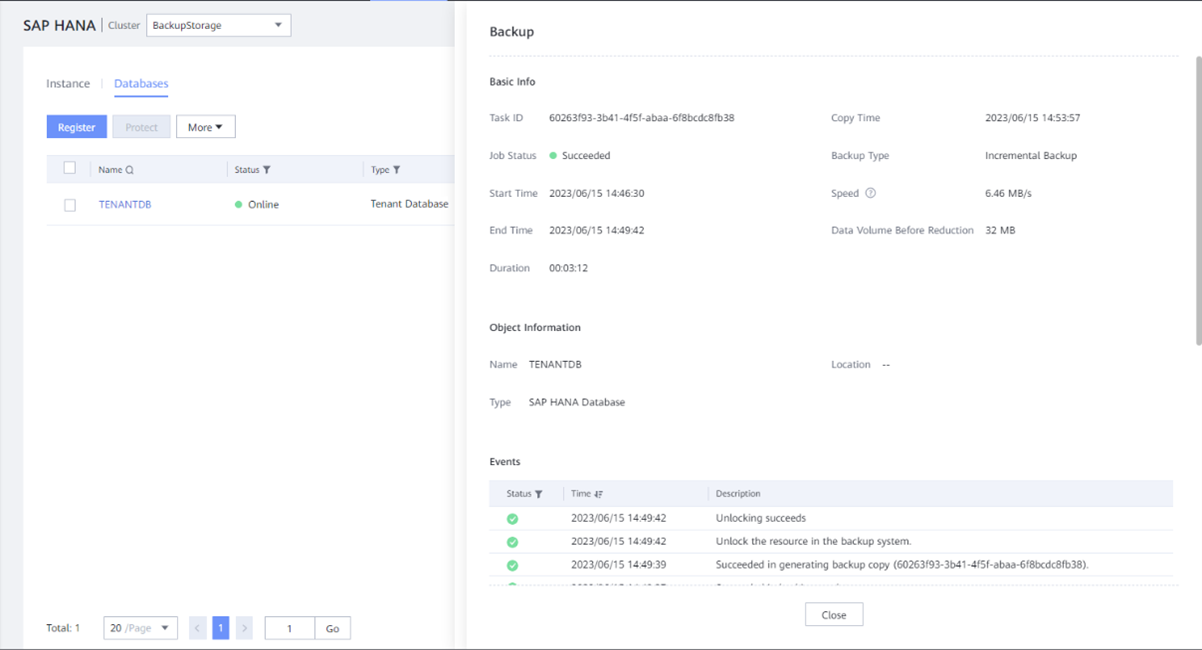 7. Table deleted. 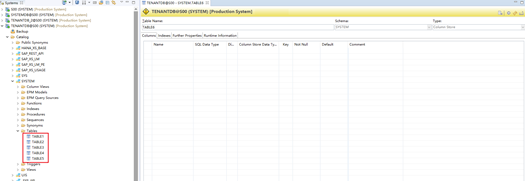 Restore job is completed. 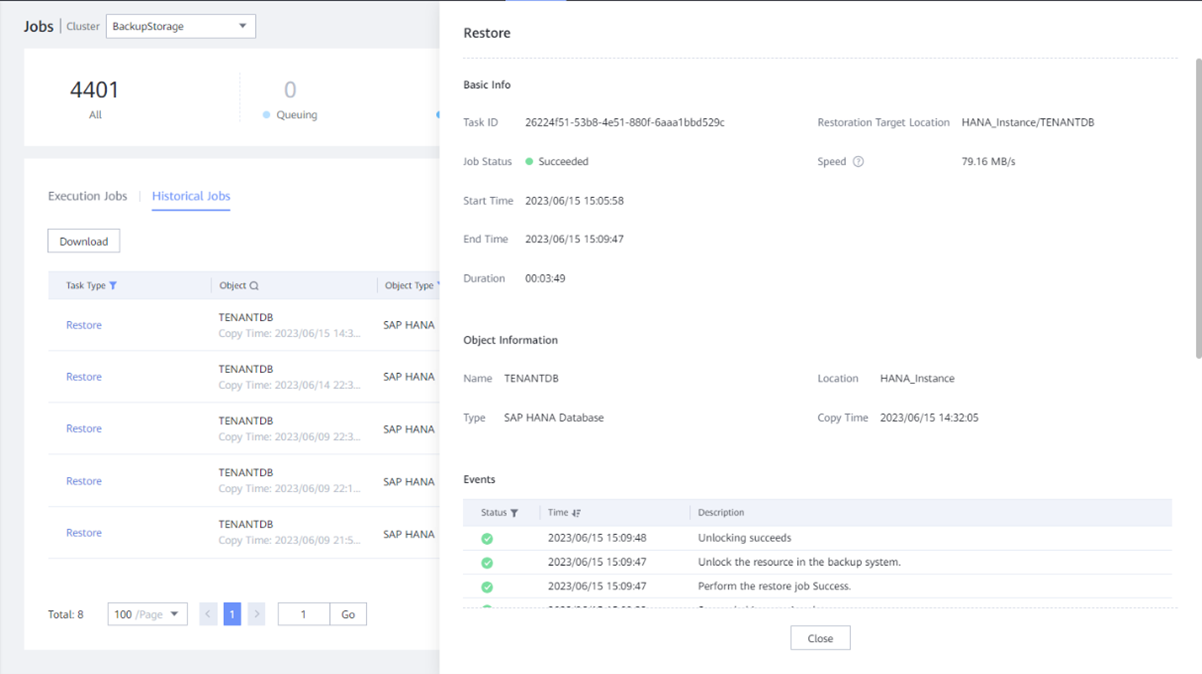 8. Deleted table is restored. 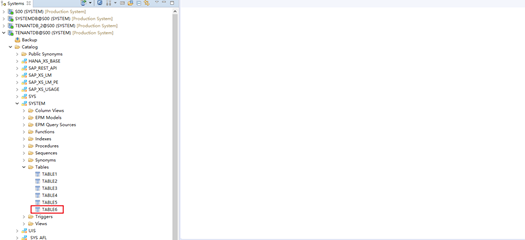 |
| Test Conclusion | PASS |
3.3 SAP ECC test for data protection
| Test Purpose | Verify that the OceanProtect X8000 data protection appliance can backup and restore SAP ECC Application. |
| Prerequisites | The OceanProtect X8000 data protection appliance system is running properly. A SAP ECC application system with SAP HANA database is set up and users/user groups have been created for testing. |
| Procedure | Expected Result |
| 1.Install Protect Agent software on SAP ECC server. 2.Create protection policy for database which is used by SAP ECC server. 3.Register database Instance and database to OceanProtect. 4.Add protection to database. 5.Add users and user groups on SAP GUI, then run a full backup job on OceanProtect, check backup jobs result. 6.Delete users and user groups just added, restore the backup copy on OceanProtect, and check restore job result. 7.Check if the deleted users and user groups are restored in SAP ECC application. | In step 1, Protect Agent is successfully installed. In step 2, protection policy for HANA database is created successfully. In step 3, HANA instance and database are successfully registered to OceanProtect. In step 4, protection for database is added. In step 5, the backup job are successfully completed. In step 6, the restore job is successfully completed. In step 7, deleted users and user groups are restored in SAP ECC application. |
| Test Result | [Steps and Screenshots] 1. Protect Agent installed. 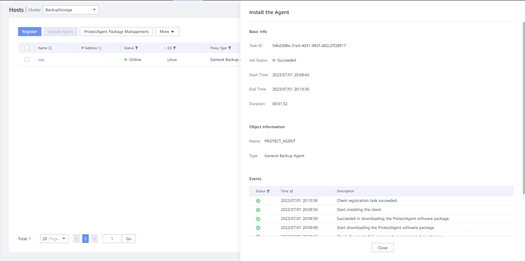 2. Protection policy (SLA) created. 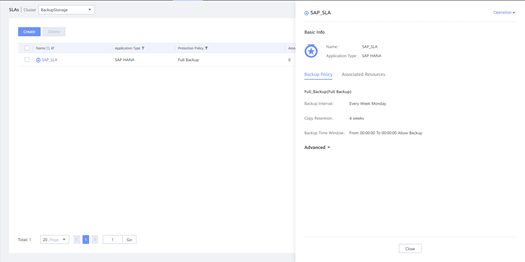 3. Instance and database are registered. Instance registered. 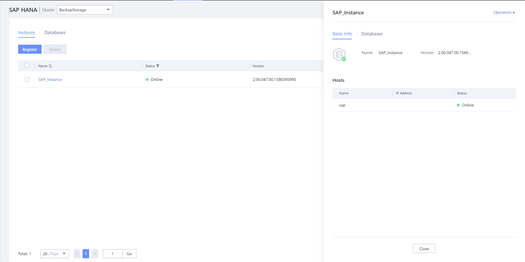 Database registered. 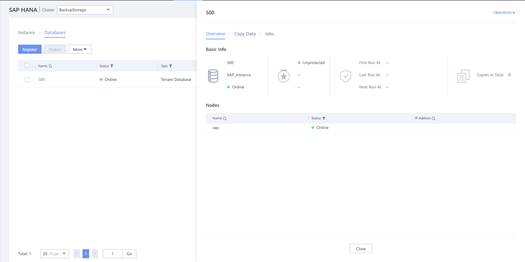 4. Protection for database is added. 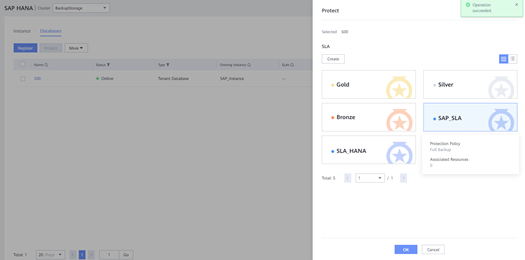 6. Users and user groups added. User added. 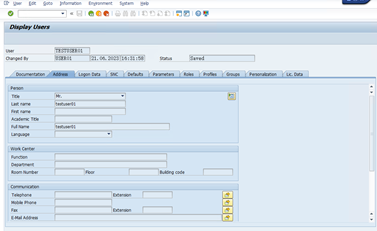 User group added. 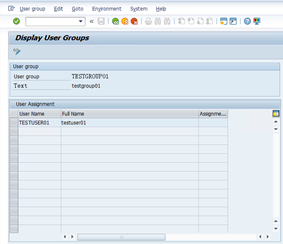 Backup job is completed 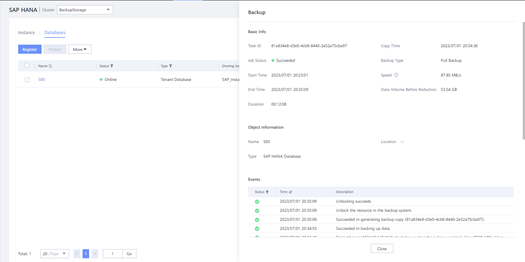 6. Users and user groups are deleted. User deleted. 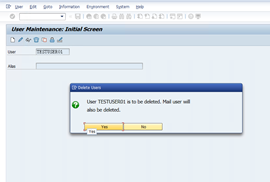 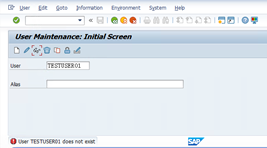 User groups deleted. 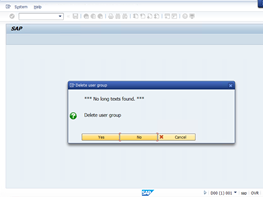 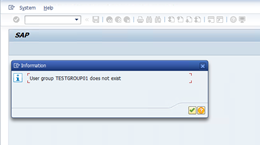 Restore job is completed. 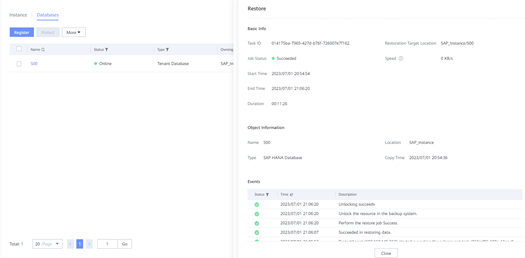 7. Deleted users and user groups are restored. User restored. 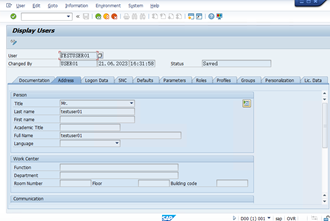 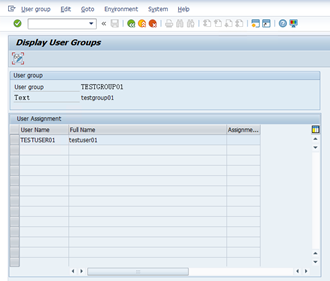 |
| Test Conclusion | PASS |
3.4 SQL Server Database test for data protection
| Test Purpose | Verify that the OceanProtect X8000 data protection appliance can backup and restore SQL Server Database. |
| Prerequisites | The OceanProtect X8000 data protection appliance system is running properly. A SQL Server Database system is set up and a user database has been created for testing. |
| Procedure | Expected Result |
| 1.Install Protect Agent software on SQL Server host. 2.Create protection policy for SQL Server Database. 3.Register SQL Server Instance and user database to OceanProtect. 4Add protection to SQL Server user database. 5.Run a full backup job on OceanProtect, check backup job result. 6.Delete some tables in user database, then restore the full backup copy on OceanProtect, check restore job result. 7.Check if deleted tables are restored in user database. 8.Run a full backup job on OceanProtect, check backup job result. 9.Add some tables in user database, then run a differential backup job on OceanProtect, check restore job result. 10.Delete tables just added, restore the differential backup copy on OceanProtect, and check backup job result. 11.Check if deleted tables are restored in user database. | In step 1, Protect Agent is successfully installed. In step 2, protection policy for SQL Server Database is created successfully. In step 3, SQL Server instance and user database are successfully registered to OceanProtect. In step 4, protection for user database is added. In step 5, the full backup job is successfully completed. In step 6, the restore job is successfully completed. In step 7, deleted tables are restored in database. In step 8, the full backup job is successfully completed. In step 9, the differential backup job is successfully completed. In step 10, the restore job is successfully completed. In step 11, deleted tables are restored in database. |
| Test Result | [Steps and Screenshots] 1.Protect Agent is successfully installed. 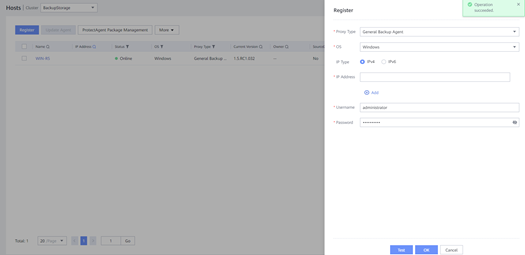 2. Protection policy (SLA) is created. 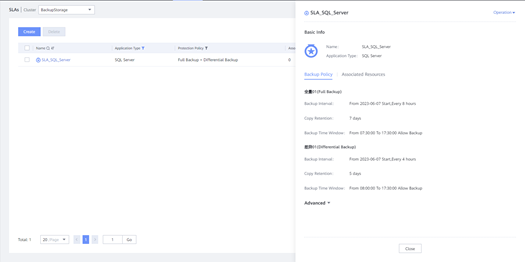 3. SQL Server instance and user database are registered. 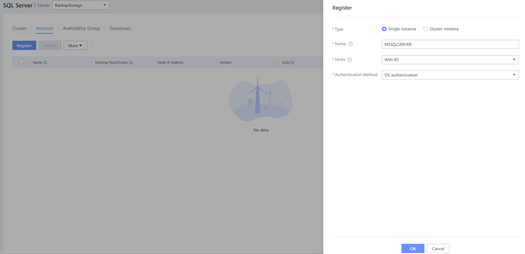 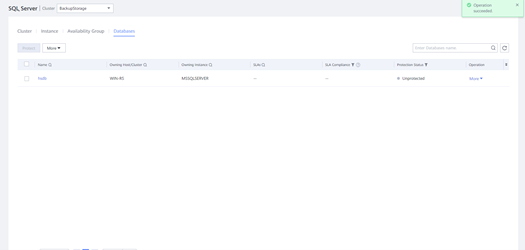 4. Protection for user database is added 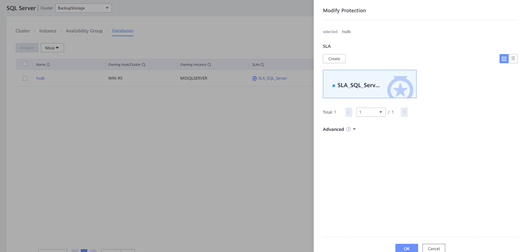 5. The full backup job is successfully completed. 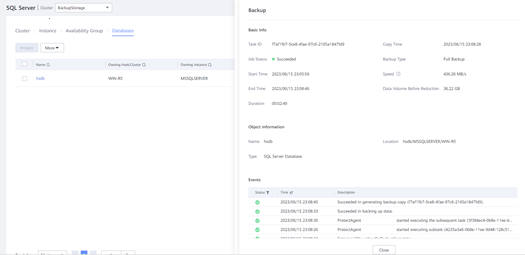 6. The restore job is completed. Delete some tables. 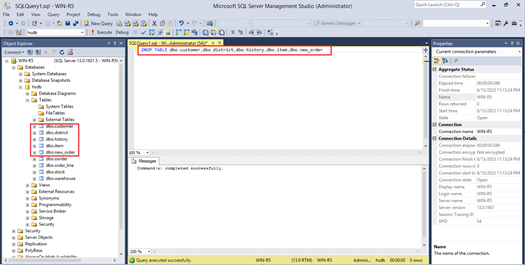 Restore job is completed. 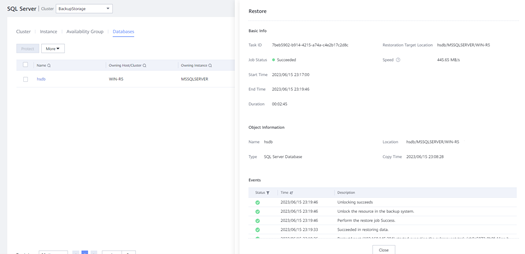 7. Deleted tables are restored. 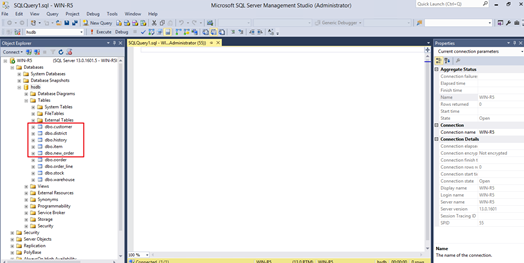 8. The full backup job is completed. 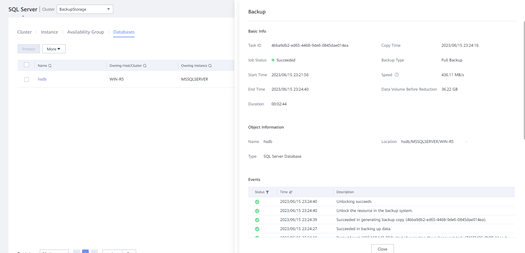 9. The differential backup job is completed. Tables are added. 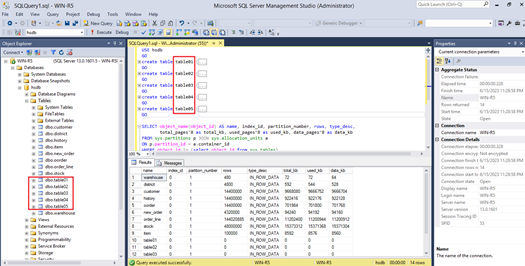 The differential backup job is completed. 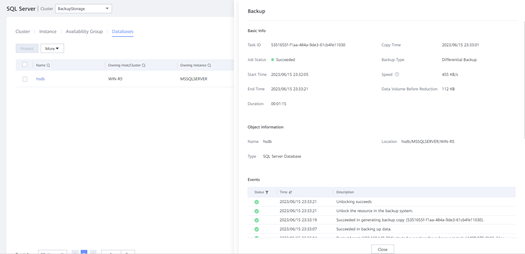 10. The restore job is completed. Tables are deleted. 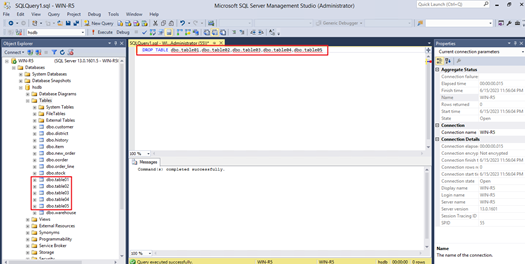 Restore of differential backup copy is completed. 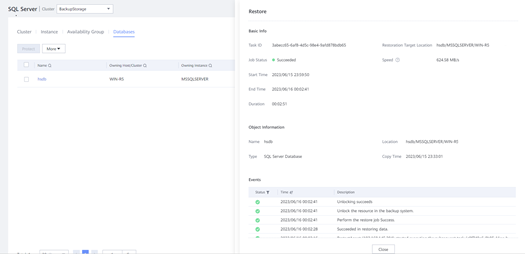 11. Deleted tables are restored. 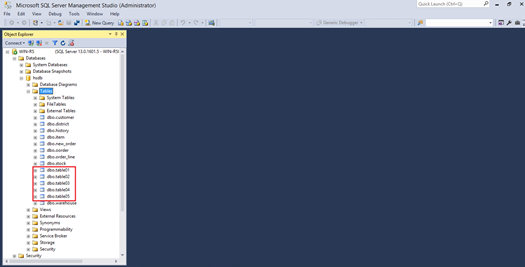 |
| Test Conclusion | PASS |
3.5 VMware test for data protection
| Test Purpose | Verify that the OceanProtect X8000 data protection appliance can backup and restore VMware virtual machines. |
| Prerequisites | The OceanProtect X8000 data protection appliance system is running properly. VMware ESXi and is set up and virtual machines are created for protection. |
| Procedure | Expected Result |
| 1.Install Protect Agent software on proxy VM host. 2.Create protection policy (SLA) for VMware.Register VMware vCenter/ESXi to OceanProtect. 3.Add protection to virtual machines. 4.Run a full backup job on OceanProtect, check backup job result. 5.Delete some files and folders on virtual machine, restore the full backup copy on OceanProtect, and check restore job result. 6.Check if deleted files and folders are restored in virtual machine. 7.Run a full backup job on OceanProtect, check backup job result. 8.Add some files and folders on virtual machine, then run an incremental backup job on OceanProtect, check restore job result. 9.Delete files and folder just added, restore the incremental backup copy on OceanProtect, and check backup job result. 10.Check if deleted files and folders are restored in virtual machine. 11.Delete original virtual machine, then restore the full backup copy on OceanProtect, and check restore job result. 12.Check if deleted virtual machine is restored. | In step 1, Protect Agent is successfully installed. In step 2, protection policy (SLA) for VMware is created successfully. In step 3, VMware vCenter/ESXi is successfully registered to OceanProtect. In step 4, protection for virtual machine is added. In step 5, the full backup job is successfully completed. In step 6, the restore job is successfully completed. In step 7, deleted files and folders are restored in virtual machine. In step 8, the full backup job is successfully completed. In step 9, the incremental backup job is successfully completed. In step 10, the restore job is successfully completed. In step 11, deleted files and folders are restored in virtual machine. In step 12, restored job is successfully completed. In step 13, deleted virtual machine is restored. |
| Test Result | [Steps and Screenshots] 1. Protect Agent is installed. 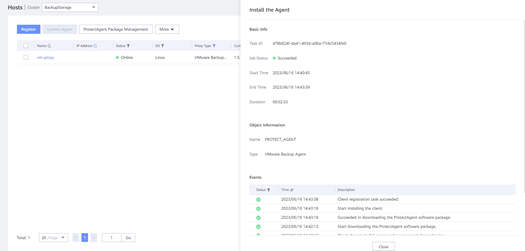 2. Protection policy (SLA) is created.  3. VMware ESXi is successfully registered to OceanProtect. 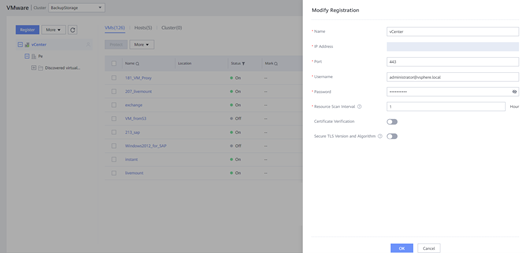 4. Protection for virtual machine is added. 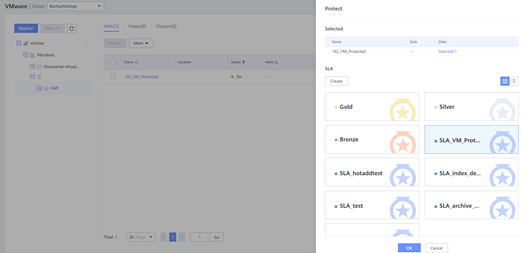 5. The full backup job is completed. 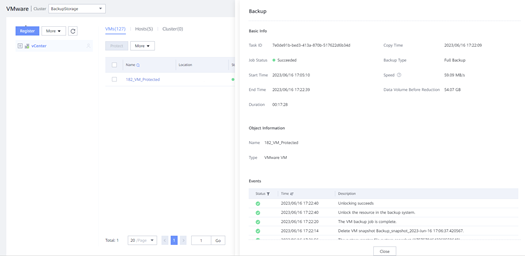 6. The restore job is completed. Delete files and folder. 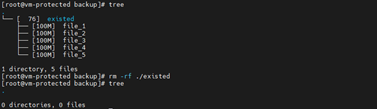 Restore job is completed. 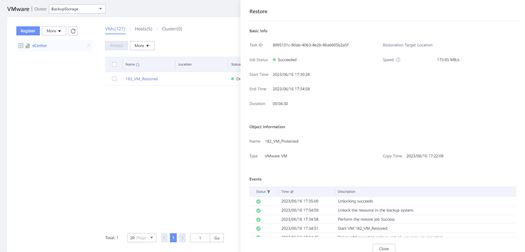 7. Deleted files and folders are restored.  8. The full backup job is completed. 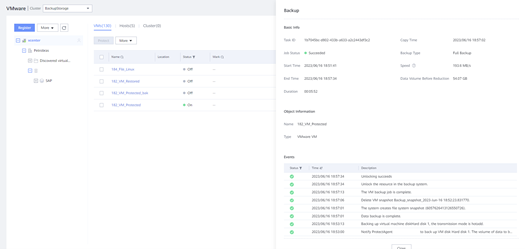 9. The incremental backup job is completed. Files and folder added. 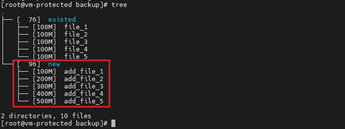 Incremental backup is completed.  10. The restore job is completed. Files and folder are deleted. 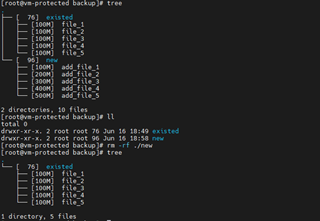 Restore job is completed. 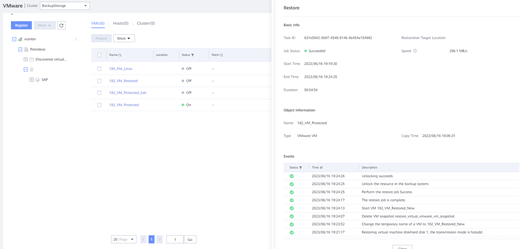 11. Deleted files and folders are restored. 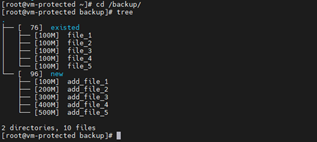 12. Virtual machine deleted.  Restore job is completed. 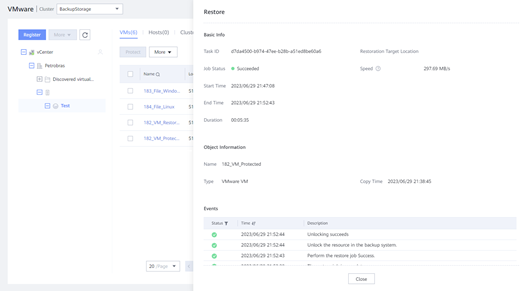 13. Deleted virtual machine is restored. 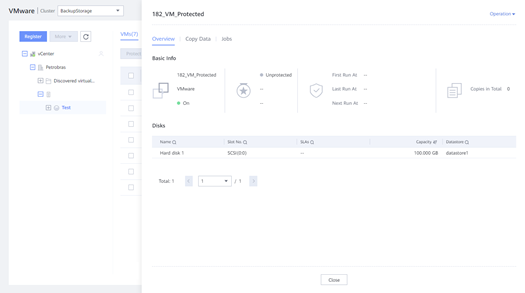 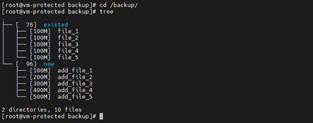 |
| Test Conclusion | PASS |
3.6 Windows Server test for data protection
| Test Purpose | Verify that the OceanProtect X8000 data protection appliance can backup and restore Windows Server data. |
| Prerequisites | The OceanProtect X8000 data protection appliance system is running properly. A Windows Server is set up for testing. |
| Procedure | Expected Result |
| 1.Install Protect Agent software on Windows Server. 2.Create protection policy (SLA) for Filesets. 3.Create a Fileset to protect. 4.Add protection to the fileset. 5.Run a full backup job on OceanProtect, check backup job result. 6.Delete some files and folders in fileset path, then restore the full backup copy on OceanProtect, check restore job result. 7.Check if deleted files and folders are restored on Windows Server. 8.Add some files and folders in fileset path, then run an incremental backup job on OceanProtect, check backup job result. 9.Delete files and folder just added, restore the incremental backup copy on OceanProtect, and check restore job result. 10;Check if deleted files and folders are restored on Windows Server. | In step 1, Protect Agent is successfully installed. In step 2, protection policy for Filesets is created successfully. In step 3, a fileset is successfully created on OceanProtect. In step 4, protection for fileset is added. In step 5, the full backup job is successfully completed. In step 6, the restore job is successfully completed. In step 7, deleted files and folders are restored on Windows Server. In step 8, the incremental backup job is successfully completed. In step 9, the restore job is successfully completed. In step 10, deleted files and folders are restored on Windows Server. |
| Test Result | [Steps and Screenshots] 1. Protect Agent is installed. 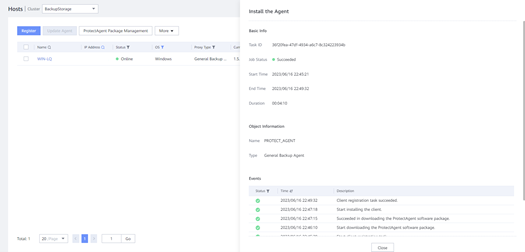 2. Protection policy (SLA) is created. 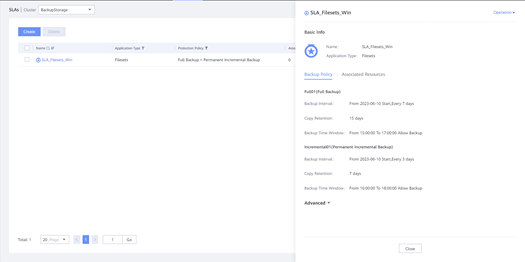 3. Fileset is created. 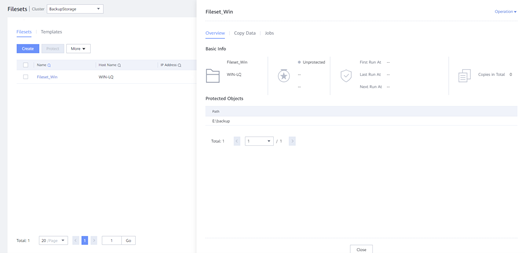 4. Protection is added. 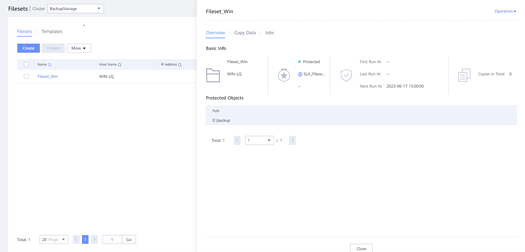 5. Full backup job is completed. 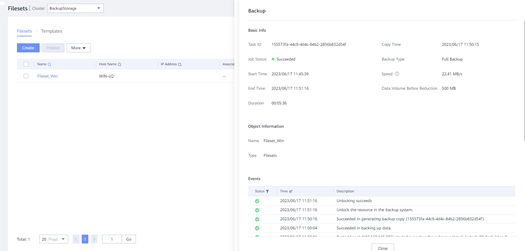 6. Data is deleted and restore job is completed. Files and folder are Deleted. 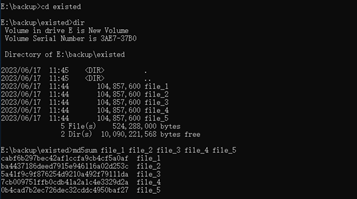 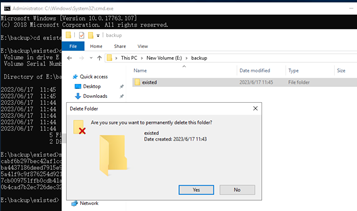 Restore job is completed. 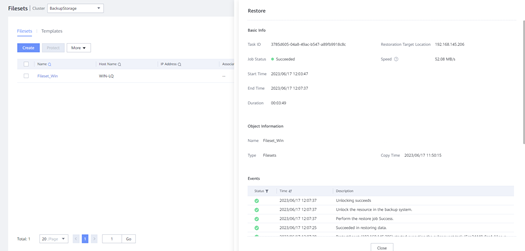 7. Deleted data is restored. Deleted files and folder are restored. 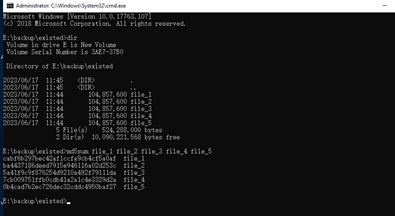 8. Incremental backup is completed. New files and folder added.  Incremental backup is completed. 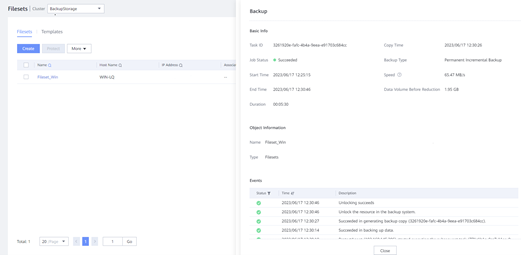 9. Data is deleted and restore job is completed. 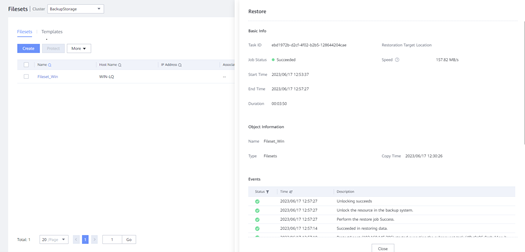 10. Deleted data is restored. 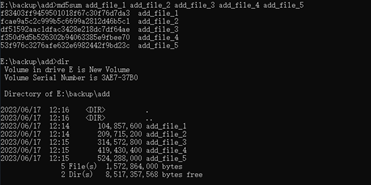 |
| Test Conclusion | PASS |
3.7 Linux Server test for data protection
| Test Purpose | Verify that the OceanProtect X8000 data protection appliance can backup and restore Linux Server data. |
| Prerequisites | The OceanProtect X8000 data protection appliance system is running properly. A Linux Server is set up for testing. |
| Procedure | Expected Result |
| 1.Install Protect Agent software on Linux Server. 2.Create protection policy for Filesets. 3..Create a Fileset to protect. 4.Add protection to the fileset. 5.Run a full backup job on OceanProtect, check backup job result. 6.Delete some files and folders in fileset path, then restore the full backup copy on OceanProtect, check restore job result. 7.Check if deleted files and folders are restored on Linux Server. 8.Add some files and folders in fileset path, then run an incremental backup job on OceanProtect, check backup job result. 9.Delete files and folder just added, restore the incremental backup copy on OceanProtect, and check restore job result. 10.Check if deleted files and folders are restored on Linux Server. | In step 1, Protect Agent is successfully installed. In step 2, protection policy for Filesets is created successfully. In step 3, a fileset is successfully created on OceanProtect. In step 4, protection for fileset is added. In step 5, the full backup job is successfully completed. In step 6, the restore job is successfully completed. In step 7, deleted files and folders are restored on Linux Server. In step 8, the incremental backup job is successfully completed. In step 9, the restore job is successfully completed. In step 10, deleted files and folders are restored on Linux Server. |
| Test Result | [Steps and Screenshots] 1. Protect Agent is installed. 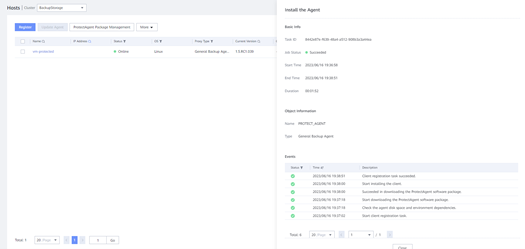 2. Protection policy (SLA) is created. 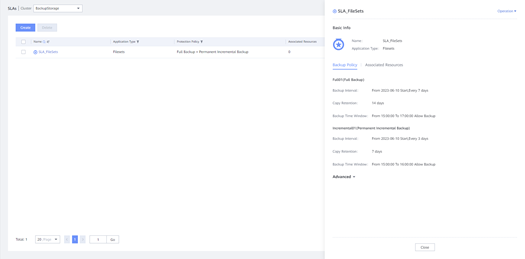 3. Fileset is created. 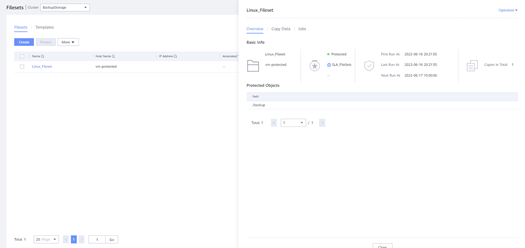 4. Protection is added. 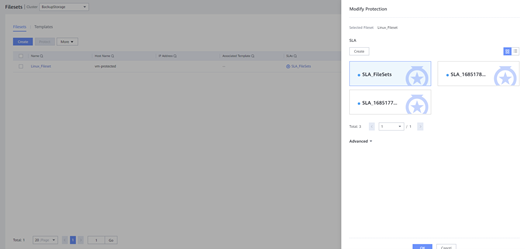 5. Full backup job is completed. 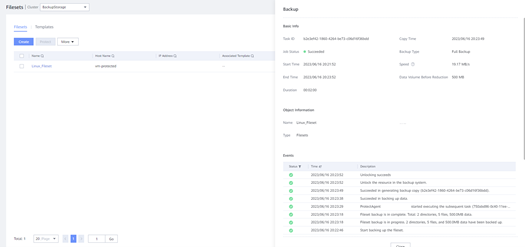 6. Data is deleted and restore job is completed. Folder and files are deleted 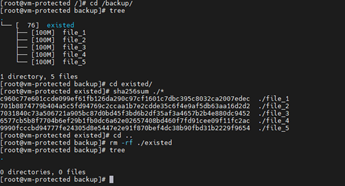 Restore job is completed. 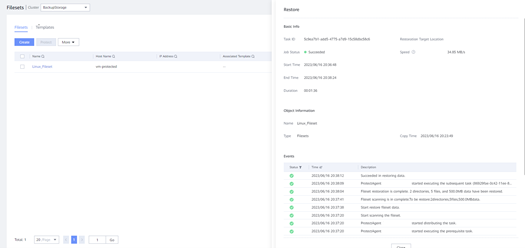 7. Deleted data is restored. 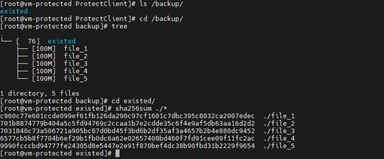 8. Incremental backup is completed. Files and folder are added. 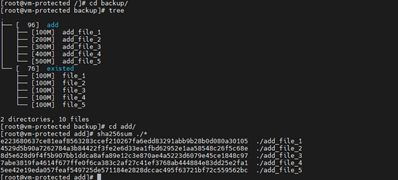 Incremental backup is completed. 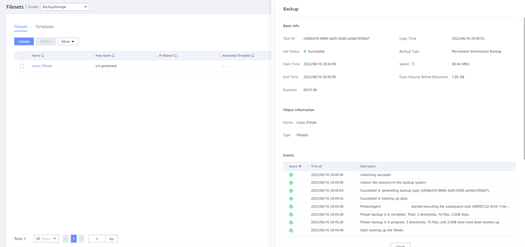 9. Data is deleted and restore job is completed. Files and folder are deleted. 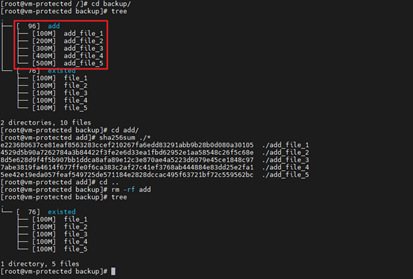 Restore job is completed. 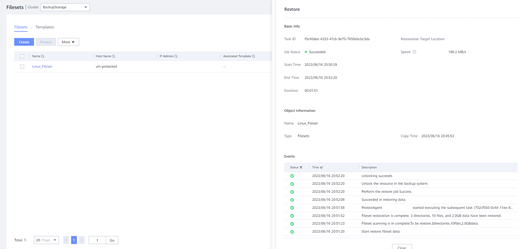 10. Deleted data is restored. 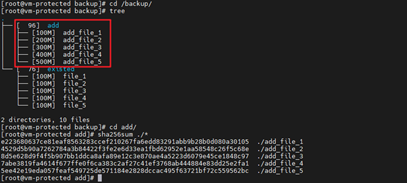 |
| Test Conclusion | PASS |
3.8 Exchange Server test for data protection
| Test Purpose | Verify that the OceanProtect X8000 data protection appliance can backup and restore Exchange Server. |
| Prerequisites | The OceanProtect X8000 data protection appliance system is running properly. An Exchange Server is set up and a mailbox database with mails has been created for testing. |
| Procedure | Expected Result |
| 1.Install Protect Agent software on Exchange Server. 2.Create protection policy (SLA) for Exchange Server. 3.Register Exchange Server to OceanProtect. 4.Add protection to Exchange mailbox database. 5.Run a full backup job on OceanProtect, check backup job result. 6.Delete some mails in mailbox from client, then restore the full backup copy on OceanProtect, check restore job result. 7.Check if deleted mails are restored in mailbox database. 8.Run a full backup job on OceanProtect, check backup job result. 9.Create new mails from client, then run an incremental backup job on OceanProtect, check restore job result. 10.Delete mails just added, restore the incremental backup copy on OceanProtect, and check restore job result. 11.Check if deleted data are restored in mailbox database. | In step 1, Protect Agent is successfully installed. In step 2, protection policy for Exchange Server is created successfully. In step 3, Exchange Server is successfully registered on OceanProtect. In step 4, protection for Exchange Server is added. In step 5, the full backup job is successfully completed. In step 6, the restore job is successfully completed. In step 7, deleted data are restored in mailbox database. In step 8, the full backup job is successfully completed. In step 9, the incremental backup job is successfully completed. In step 10, the restore job is successfully completed. In step 11, deleted data are restored in mailbox database. |
| Test Result | [Steps and Screenshots] 1. Protect Agent is installed. 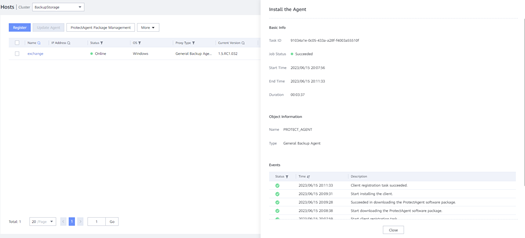 2. Protection policy is created. 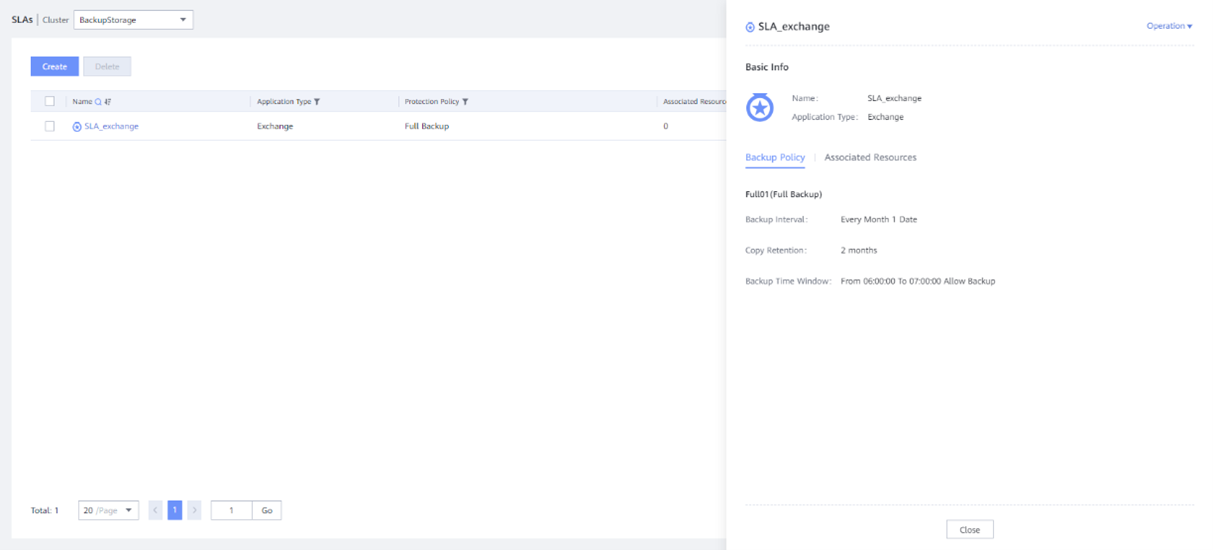 3. Exchange Server is registered. 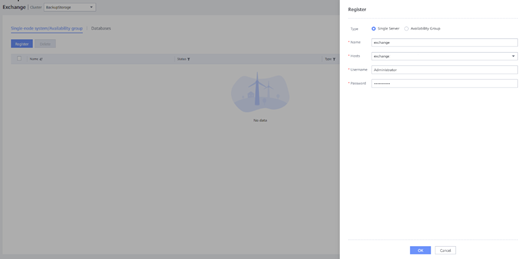 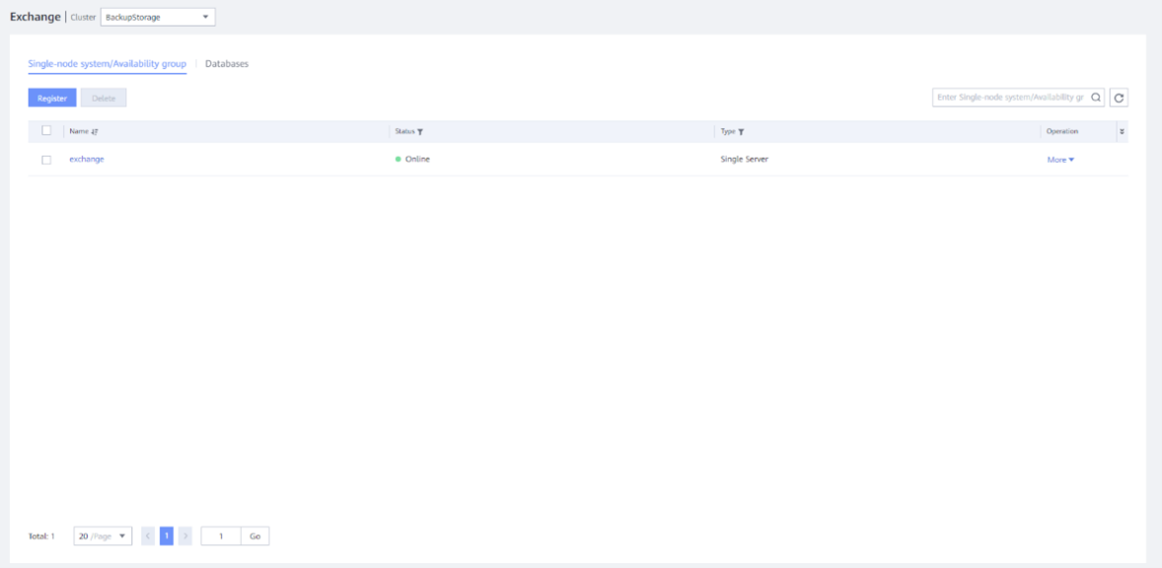 4. Protection is added. 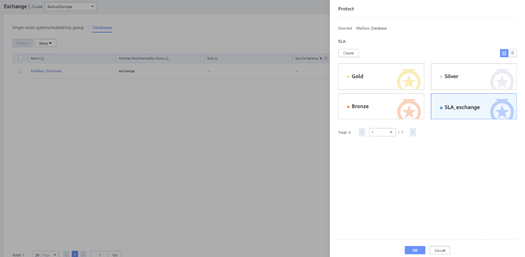 5. The full backup job is completed.  6. The restore job is completed. 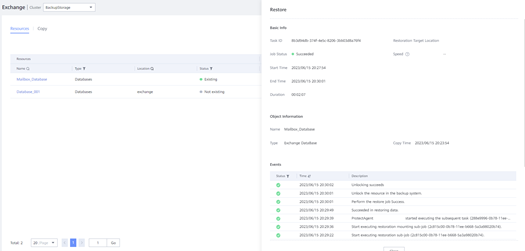 7. Deleted mails are restored in mailbox database. 7. Deleted mails are restored in mailbox database.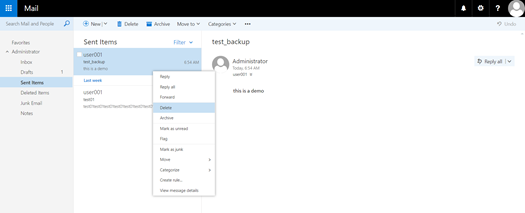 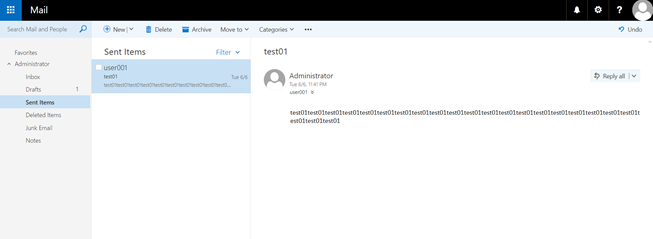 8. The full backup job is completed.  9. The incremental backup job is completed. 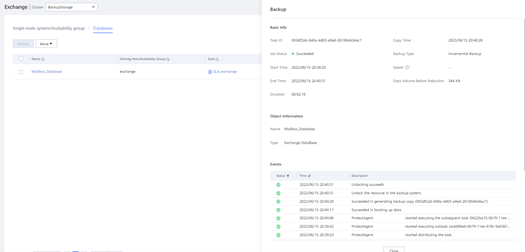 10. The restore job is completed. 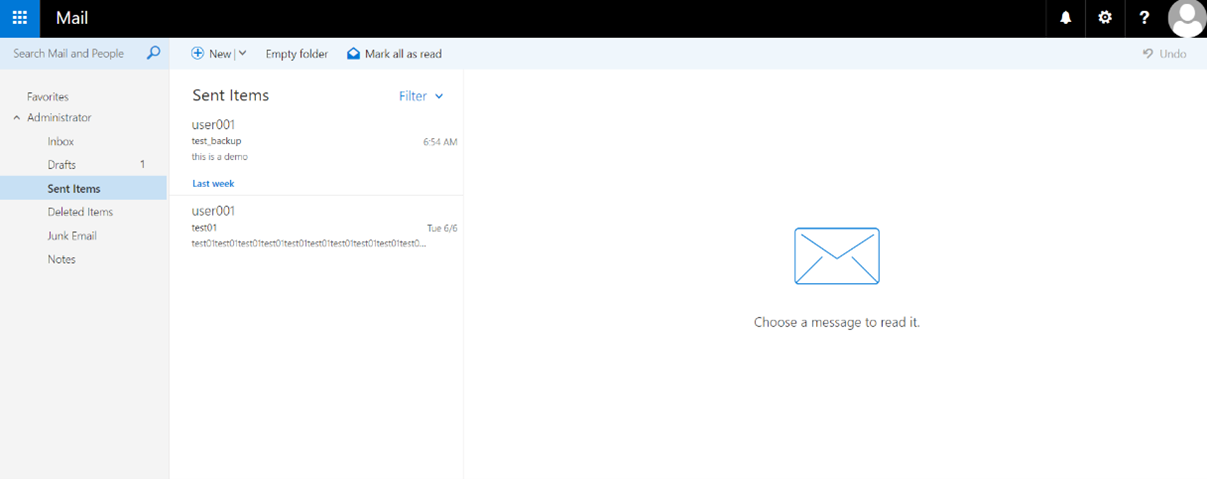 |
| Test Conclusion | PASS |
3.9 NDMP backup test for data protection
| Test Purpose | Verify that the OceanProtect X8000 data protection appliance can backup and restore NetApp NAS storage device through NDMP protocol. |
| Prerequisites | The OceanProtect X8000 data protection appliance system is running properly. A NetApp NAS storage device is set up and file system has been created for testing. |
| Procedure | Expected Result |
| 1.Create protection policy (SLA) for NDMP. 2.Register NetApp Storage and create BackupSet for NetApp file system on OceanProtect. 3.Add protection to the NDMP BackupSet, run a full backup job on OceanProtect, check backup job result. 4.Delete some data in NetApp file system, then restore the full backup copy on OceanProtect, check restore job result. 5.Check if deleted data are restored in NetApp storage. 6.Run a full backup job on OceanProtect, check backup job result. 7.Add some data in NetApp file system, then run an incremental backup on OceanProtect, check backup job result. 8.Delete the data just added, then restore the incremental backup copy on OceanProtect, check restore job result. 9.Check if deleted data are restored in NetApp storage. | In step 1, protection policy for Exchange Server is created successfully. In step 2, NetApp storage is successfully registered on OceanProtect. In step 3, protection for NDMP BackupSet is added, and the full backup job is successfully completed. In step 4, the restore job is successfully completed. In step 5, deleted data are restored in NetApp storage. In step 6, the restore job is successfully completed. In step 7, the backup job is successfully completed. In step 8, the restore job is successfully completed. In step 9, deleted data are restored in NetApp storage. |
| Test Result | [Steps and Screenshots] 1. Protection policy for NDMP is created. 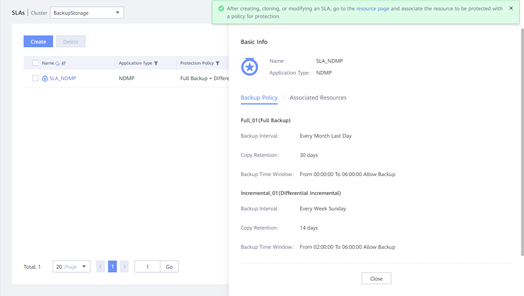 2. NetApp Storage is registered. 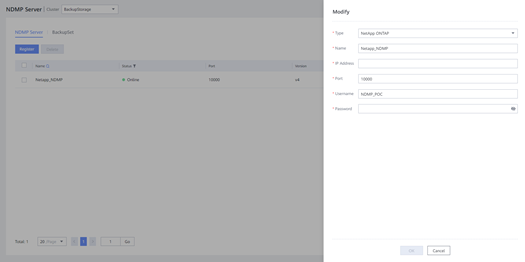 BackupSet is registered. 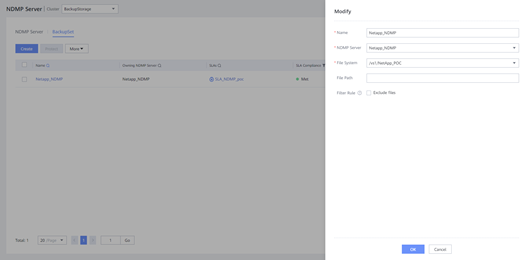 3. Full backup job is completed. 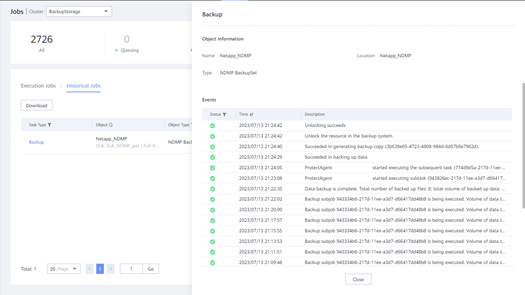 4. Data in NetApp file system deleted. 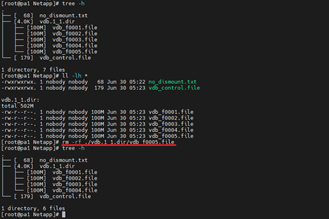 Restore job is completed. 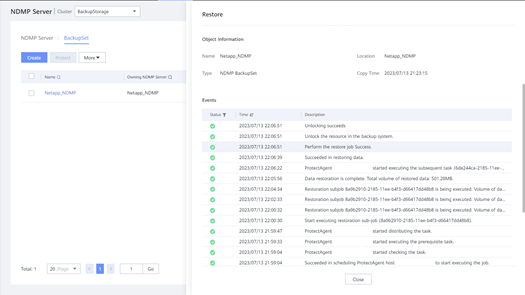 5. Deleted data are restored in NetApp. 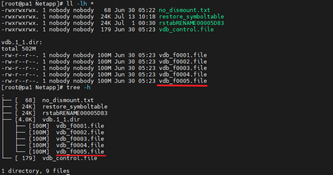 6. Full backup job is completed. 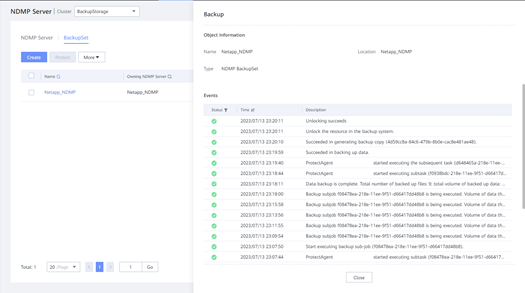 7. New data added. 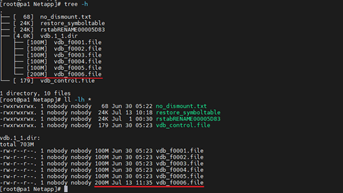 Incremental backup job is completed. 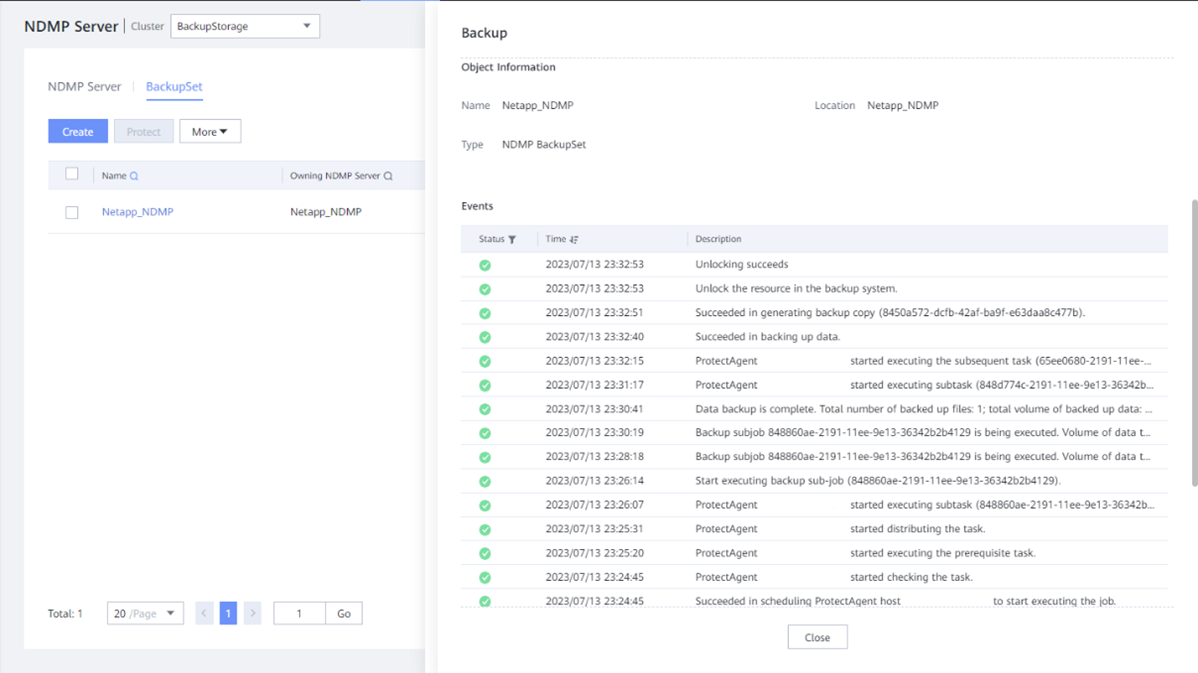 8. Data deleted. 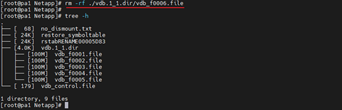 Restore job is completed. 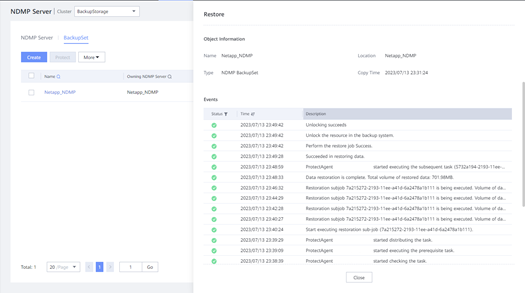 9. Deleted data is restored.  |
| Test Conclusion | PASS |