Huawei OceanStor Storage and IBM FileNet P8 Platform
Interoperability Test Report

Axians Global All Rights Reserved
Executive Summary
Axians Global (“Axians”) assessed the interoperability of IBM FileNet P8 Platform with Huawei Storage solutions including OceanStor Dorado and OceanStor Pacific. The goal of the assessment is to validate that IBM FileNet P8 Platform is interoperable with Huawei Storage.
In the assessment, Axians has determined that IBM FileNet P8 Platform content management will function with Huawei Storage for the following scenarios:
Test Scenario | Storage Involved | Protocol(s) Tested | Result |
File storage area | OceanStor Dorado All-Flash Storage | NAS | Passed |
Advanced storage area (File System Storage Device) | OceanStor Dorado All-Flash Storage | NAS | Passed |
Fixed storage area (Amazon Simple Storage Service(s3)) | OceanStor Pacific Series | S3 | Passed |
Advanced storage area | OceanStor Pacific Series | S3 | Passed |
In this document, you will find details on the above test cases and the captured output. The procedures conducted in the tests are referenced from standard online documentation from IBM FileNet P8 Platform and Huawei.
1. Environment Configuration
1.1 Networking diagram
Figure 1.1 Storage as the IBM FileNet P8 Content Platform Engine Storage Area Test Networking
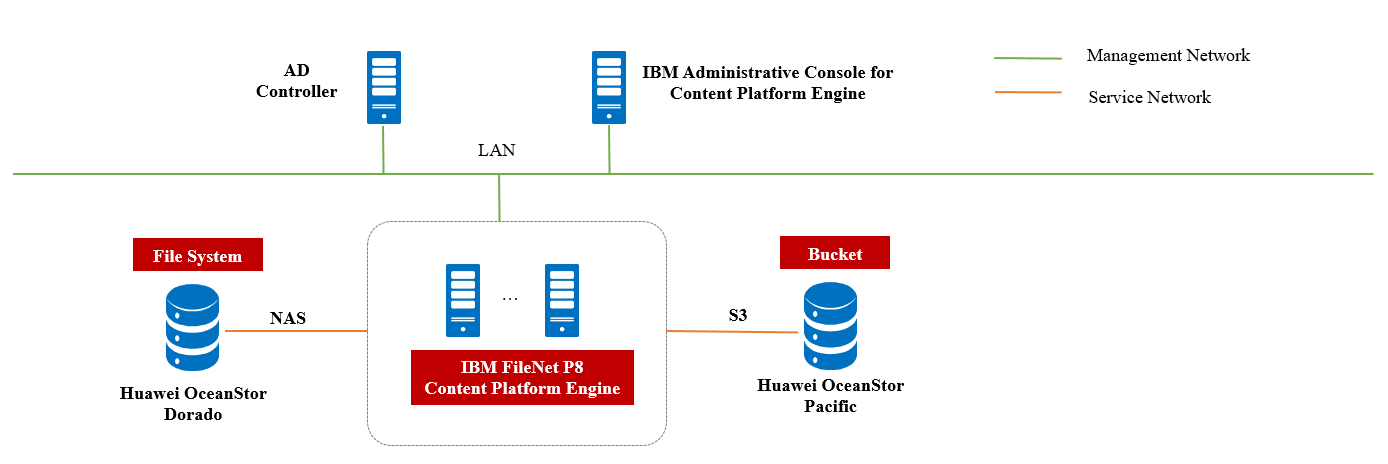
Networking description:
- Deploy one ESXi physical host, install the VMware VM software, create a VM for deploy the IBM FileNet P8 Platform and AD controller.
- Deploy the IBM FileNet P8 Platform: Use the Windows VM servers as the IBM FileNet P8 Content Platform Engine Sever and Administrator Console.
- Deploy the AD Controller: Use one Windows server VM as the AD controller.
- The management network and service network are connected to the IBM FileNet P8 Content Platform Engine Sever and Huawei storage through switches.
- All storage devices connect to the Content Platform Engine Server through 10g Ethernet.
1.2 Hardware and Software Configuration
1.2.1 Storage Configuration
Table 1-1 Huawei storage configuration table
Name | Model | Version | Quantity |
Storage | Huawei OceanStor Pacific Scale-Out Storage (Hereinafter referred to as “Pacific” as well) | 8.2 | 1 |
Storage | Huawei OceanStor Dorado Storage (Hereinafter referred to as “Dorado” as well) | V6/V700 | 1 |
1.2.2 Matching Hardware Configuration
Table 1-2 Hardware Configuration
Name | description | Usage | Quantity |
VMWare ESXi |
| Deploy the VM for IBM FileNet P8 Content Platform Engine and AD controller | 1 |
Ethernet switch |
| Ethernet switches for management networking and service networking. | 2 |
1.2.3 Test Software and Tools
Table 1-3 Test Software and Tool List
Software Name | description | Version | Quantity |
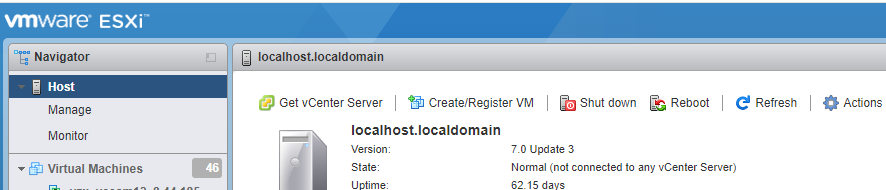
VMWare ESXi | VMware virtualization platform | 7 | 1 |
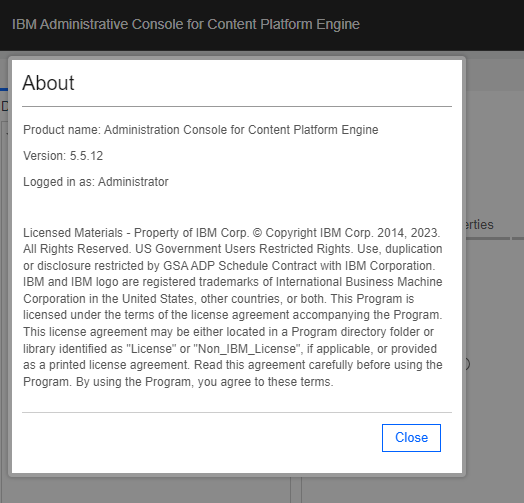
IBM FileNet P8 Platform |
(Hereinafter referred to as “CPE” as well) | 5.5.12 | 1 |
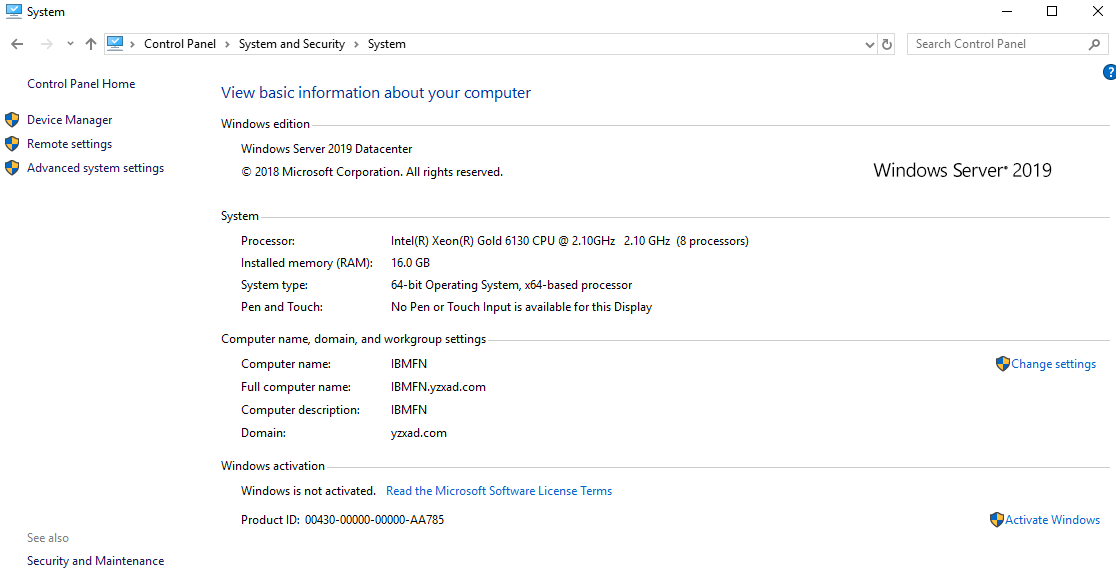
Operation System |
| Windows Server 2019 | 1 |
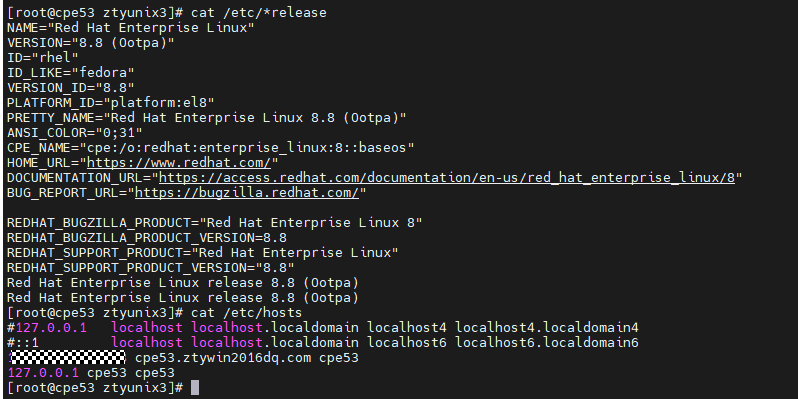
Operation System | Install the Linux Hosts | RHEL 8.8 | 1 |
S3 Browser | Connect to the Pacific storage and browse the bucket data | 9 | 1 |
VMWare ESXi 7.0
IBM FileNet P8 CPE 5.5.12
Windows Server 2019
S3 Browser
2. Test Preparation
2.1 Installing IBM FileNet P8 Content Platform Engine 5.5.12 for Windows
2.1.1 Join the AD domain

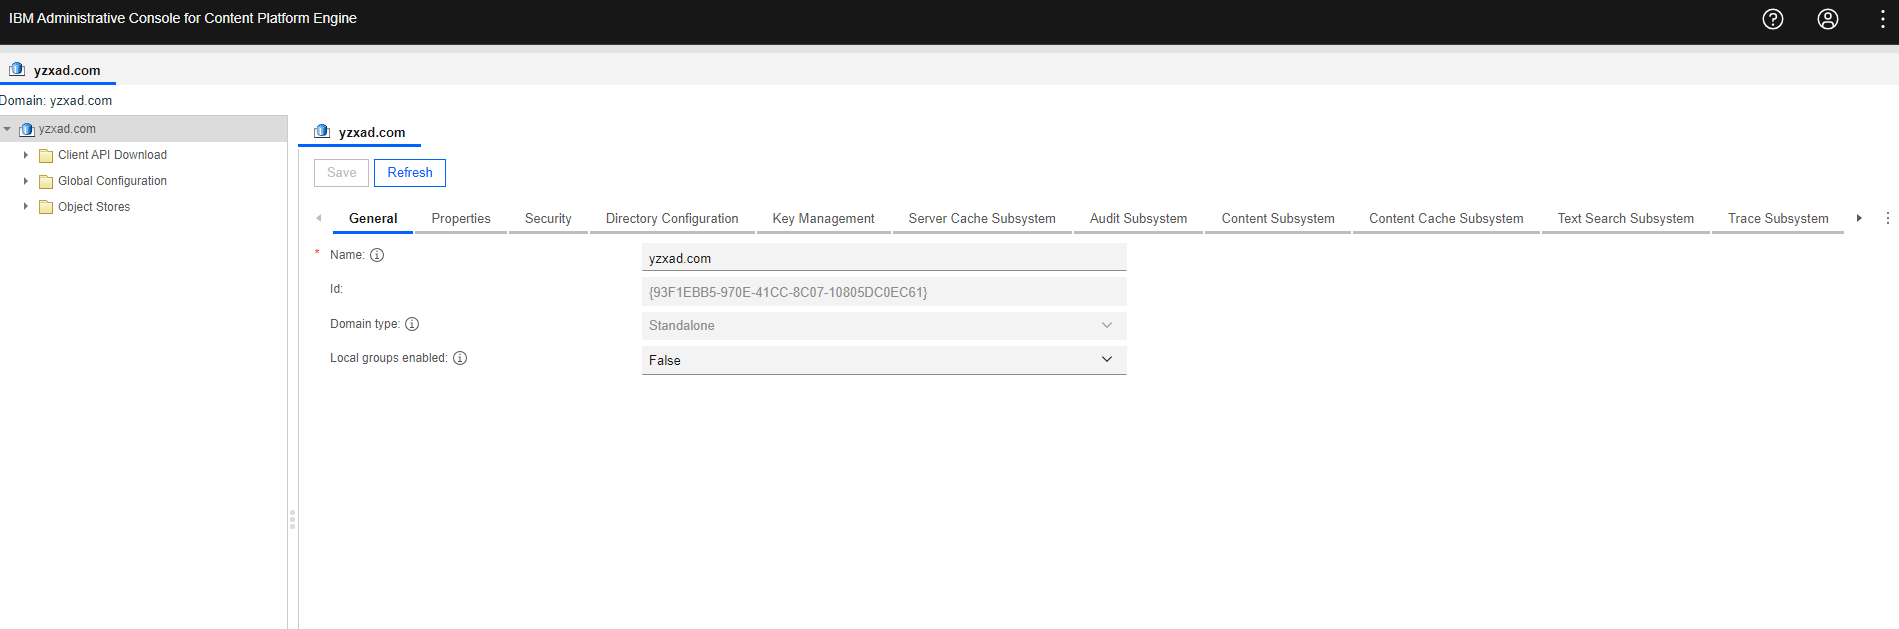
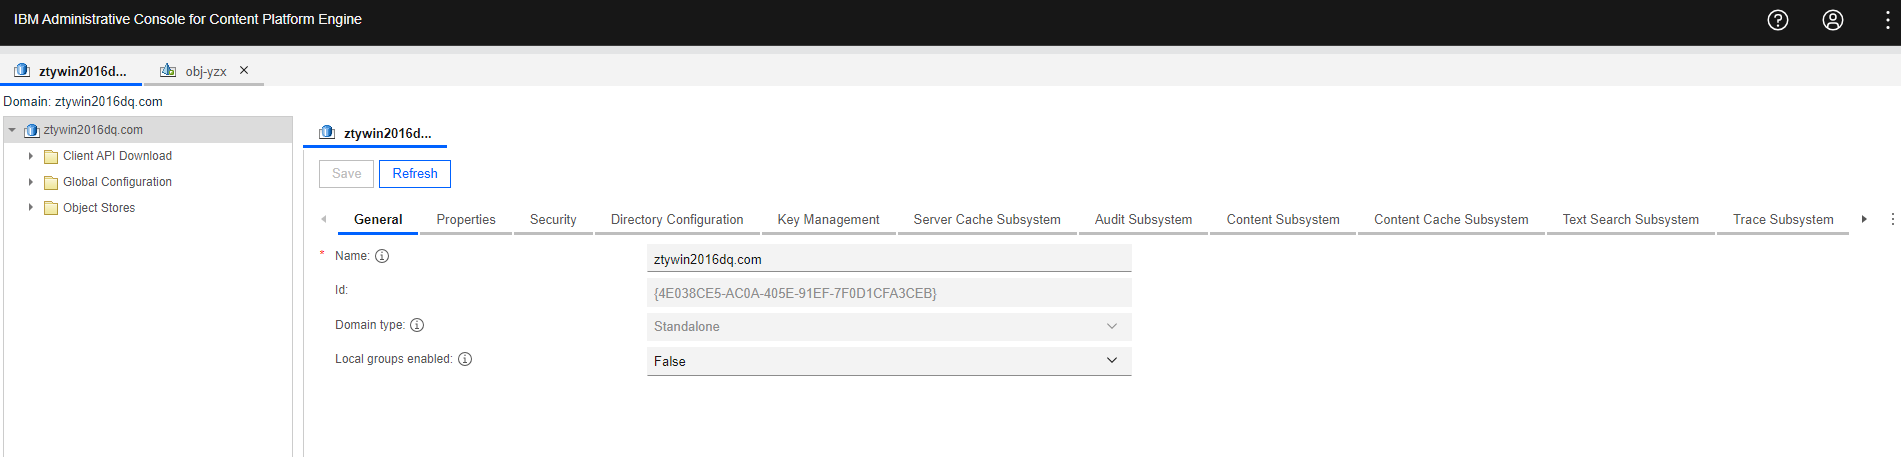
2.1.2 Start the CPE console
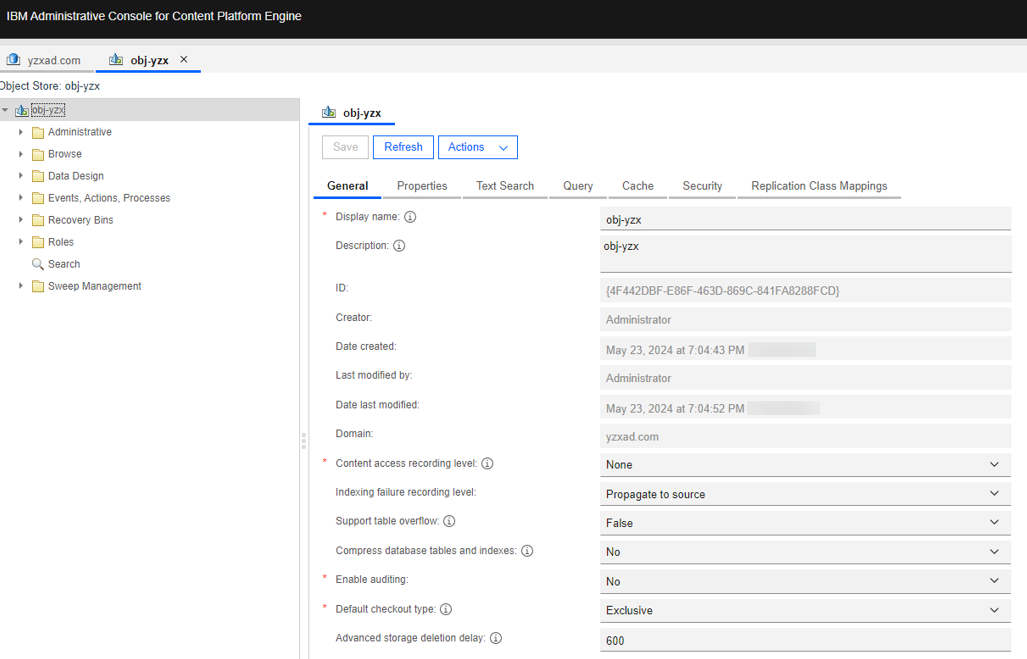
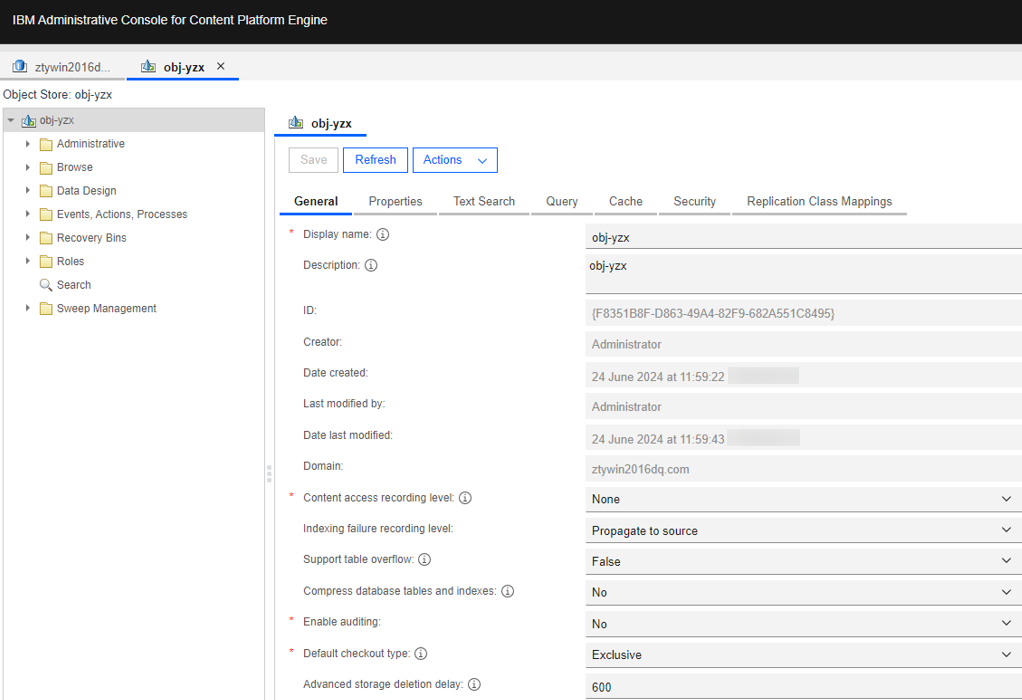
2.1.3 Create the Object Stores
2.2 Installing IBM FileNet P8 Content Platform Engine 5.5.12 for Linux
2.2.1 Join the AD domain
2.2.2 Start the CPE console
2.3.3 Create the Object Stores
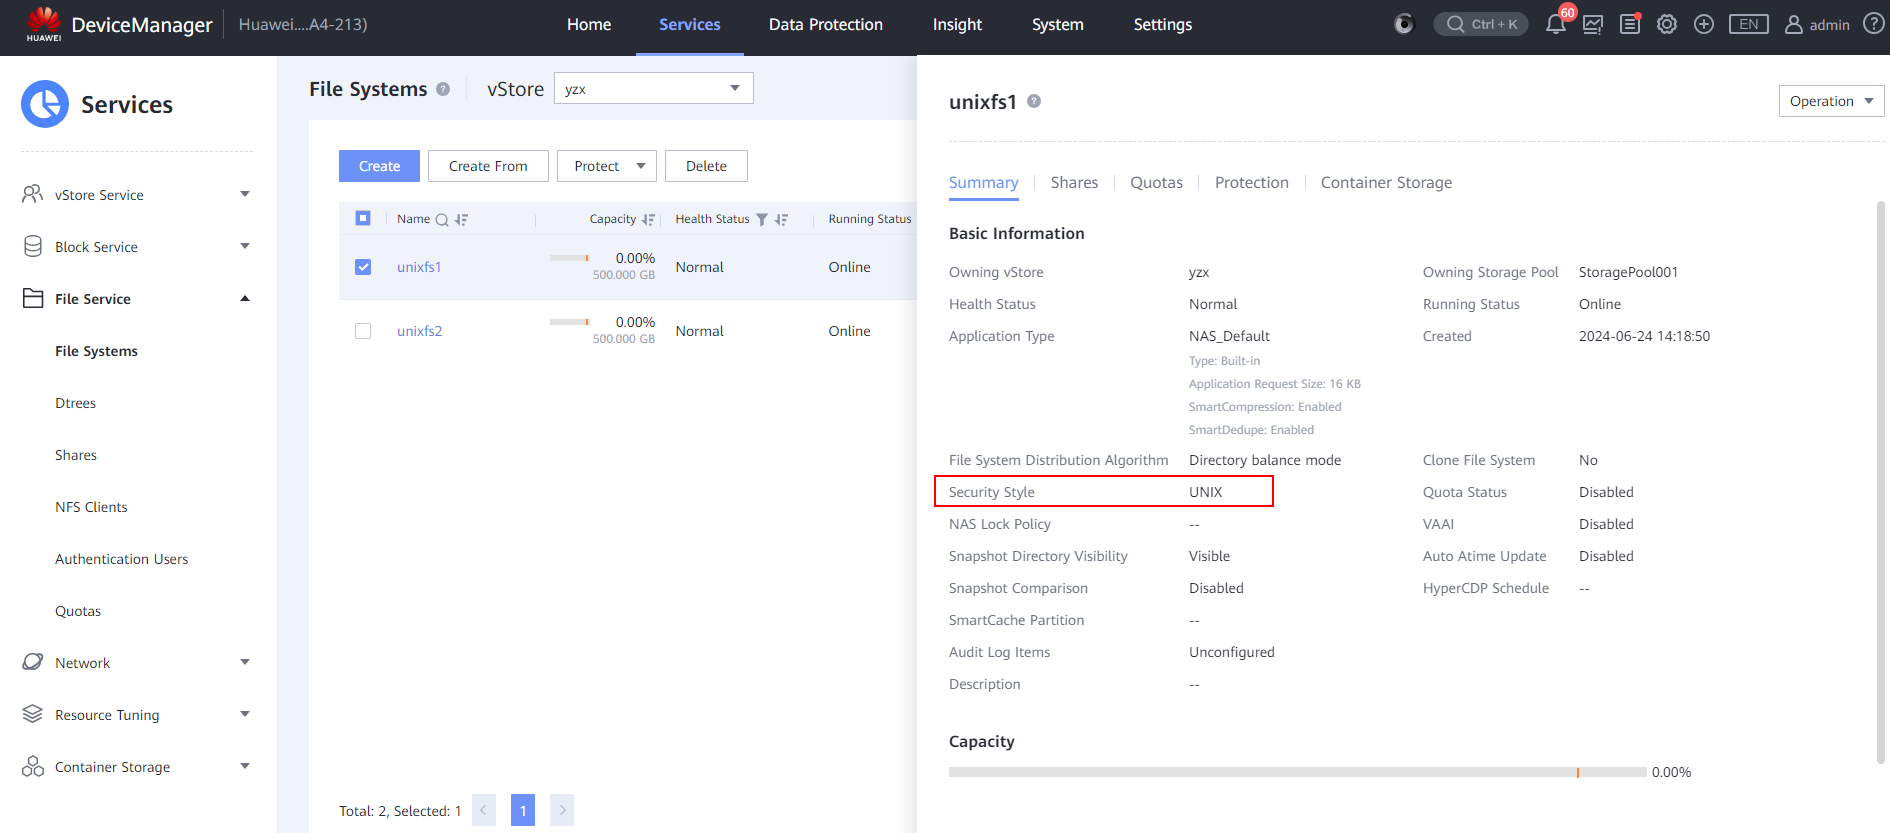
2.3 OceanStor Dorado Storage Device Preparation
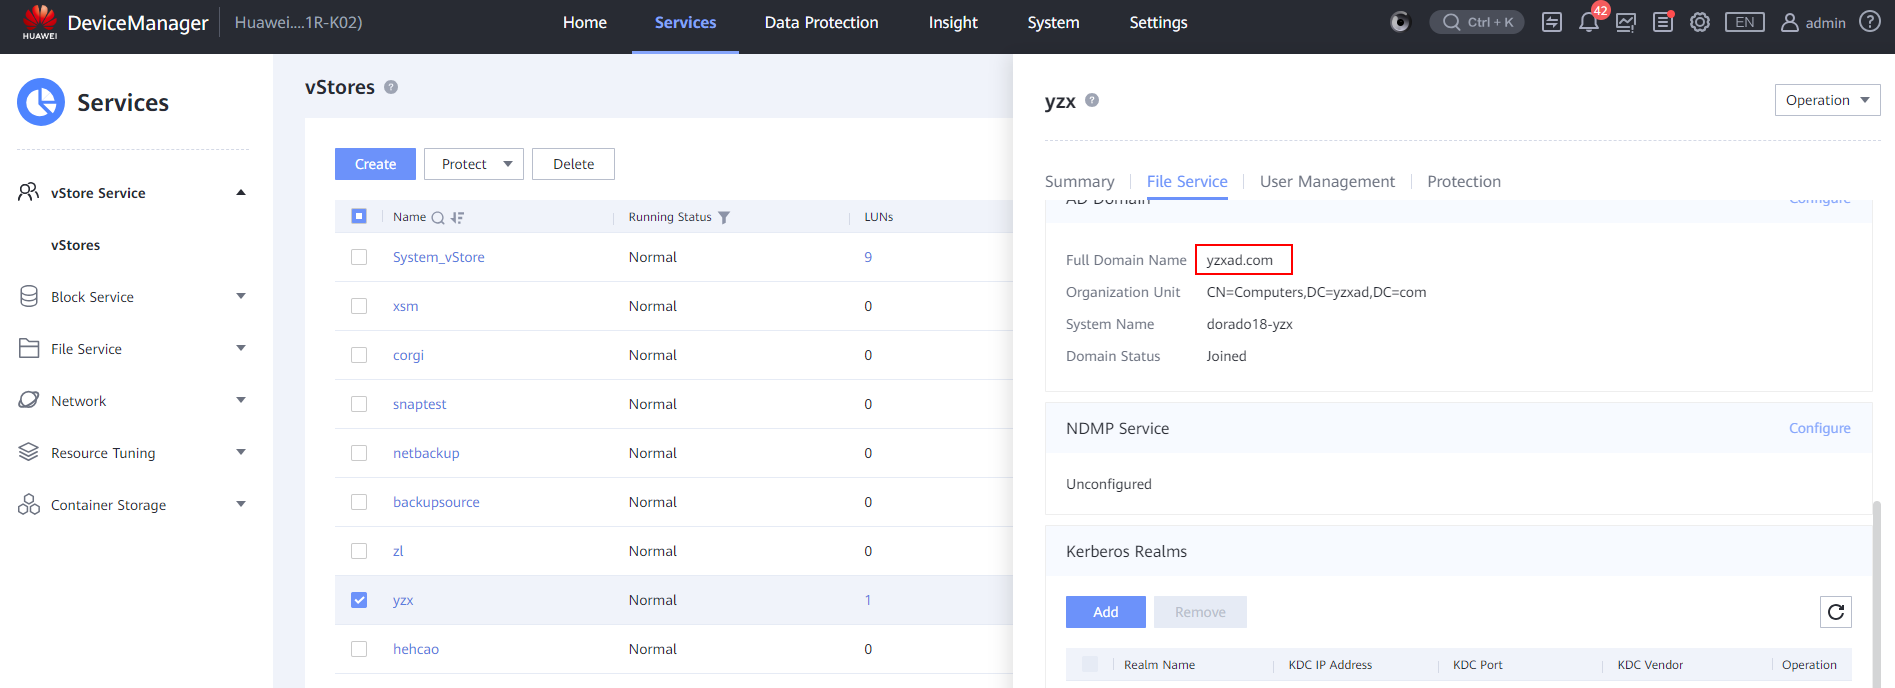
2.3.1 Join the AD domain
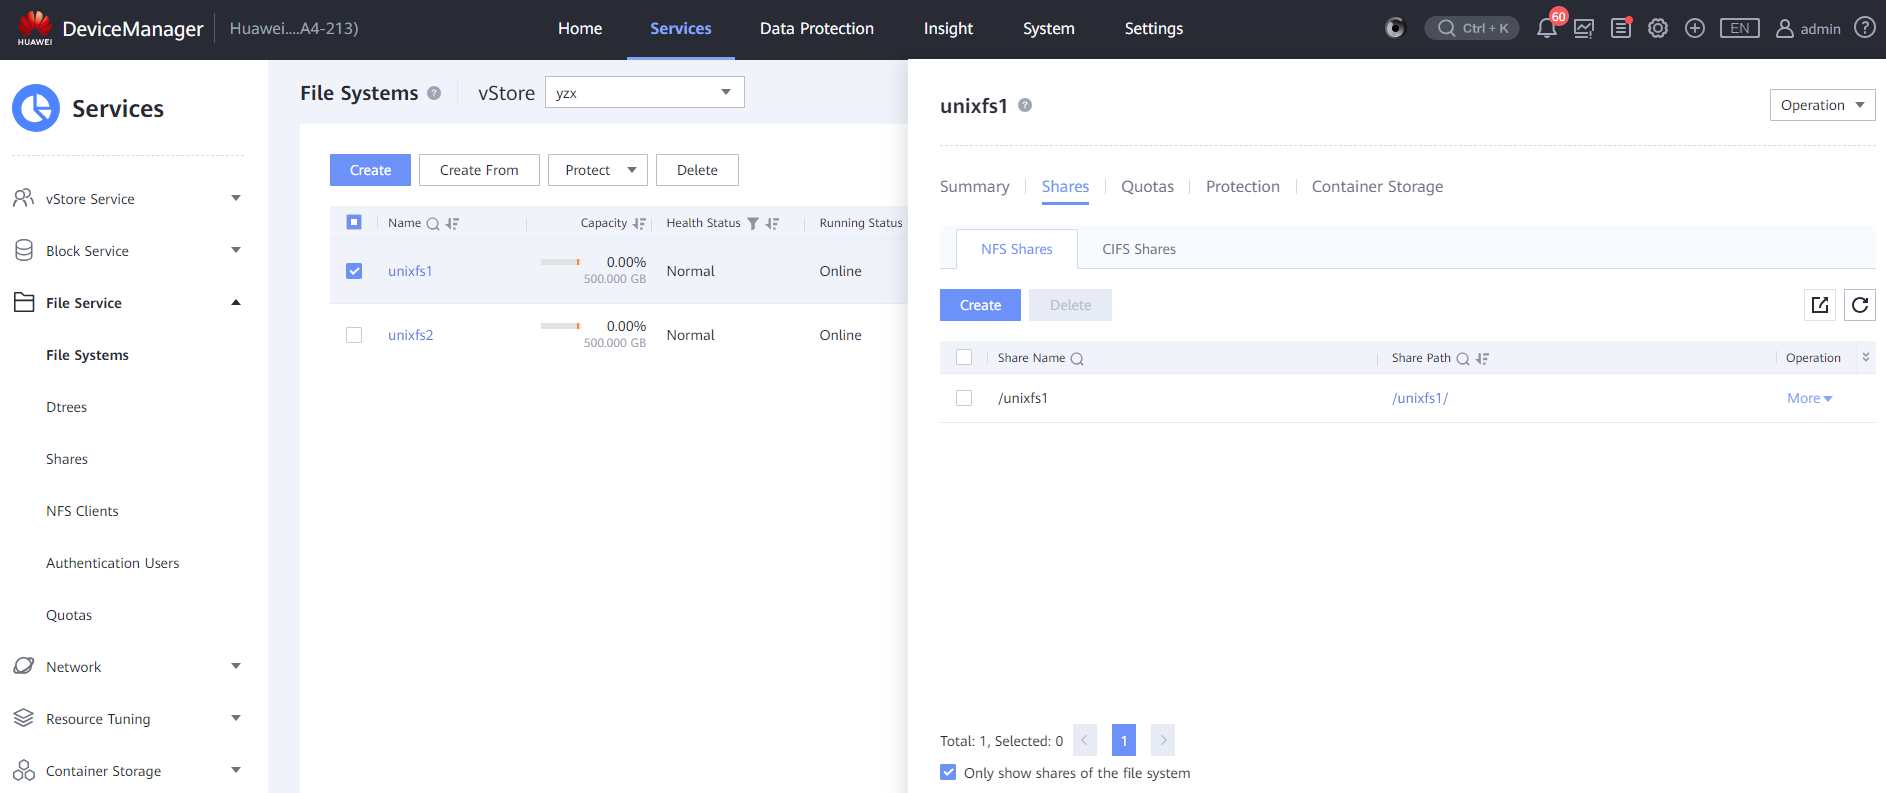
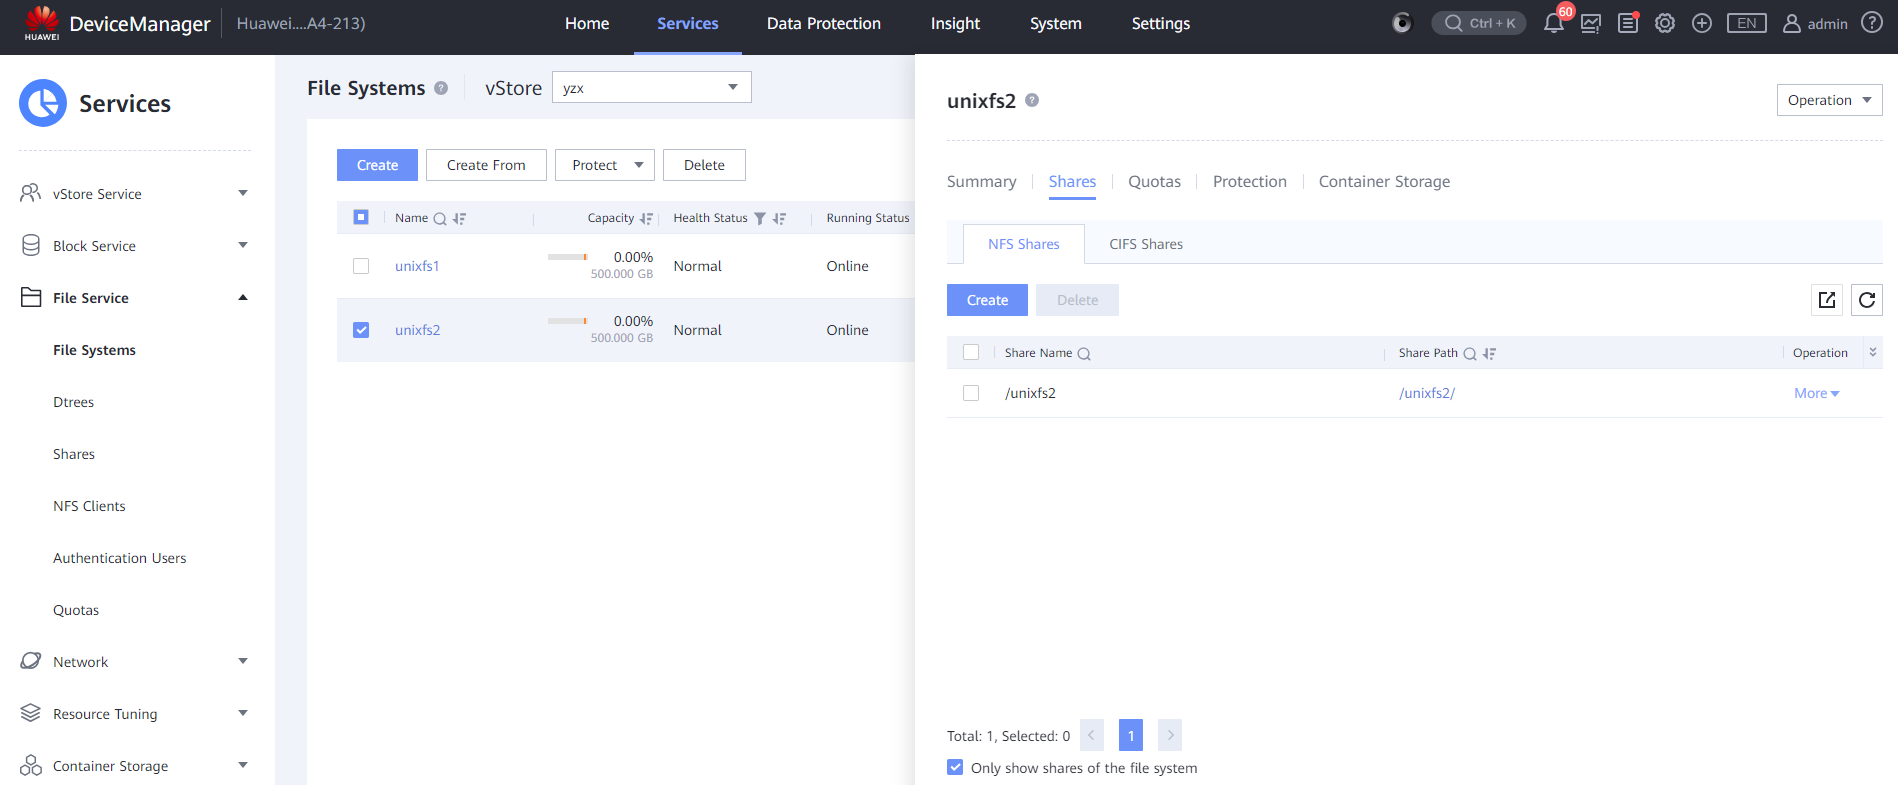
2.3.2 Create the file systems and CIFS shares
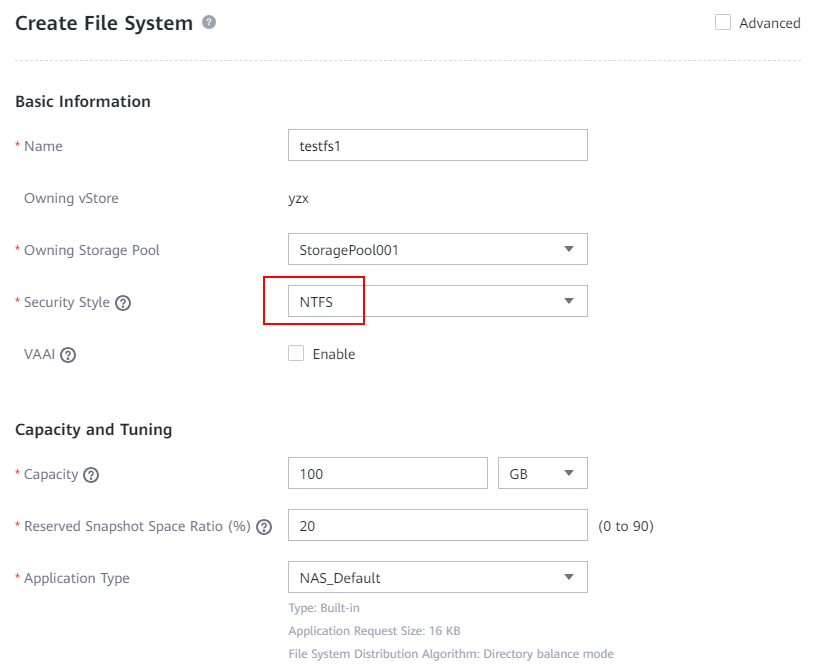

2.3.3 Create the file systems and NFS shares
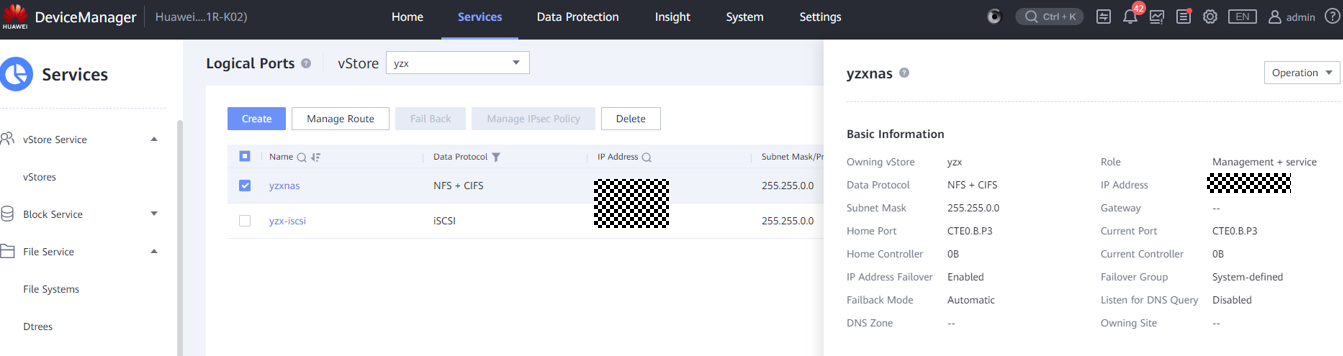
2.3.4 Create the logical port
2.4 OceanStor Pacific Storage Device Preparation
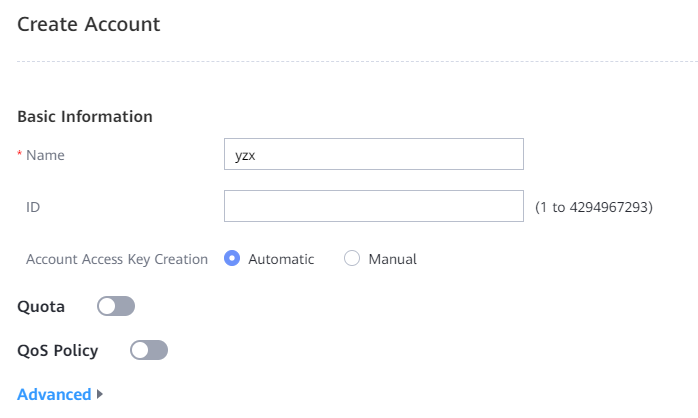
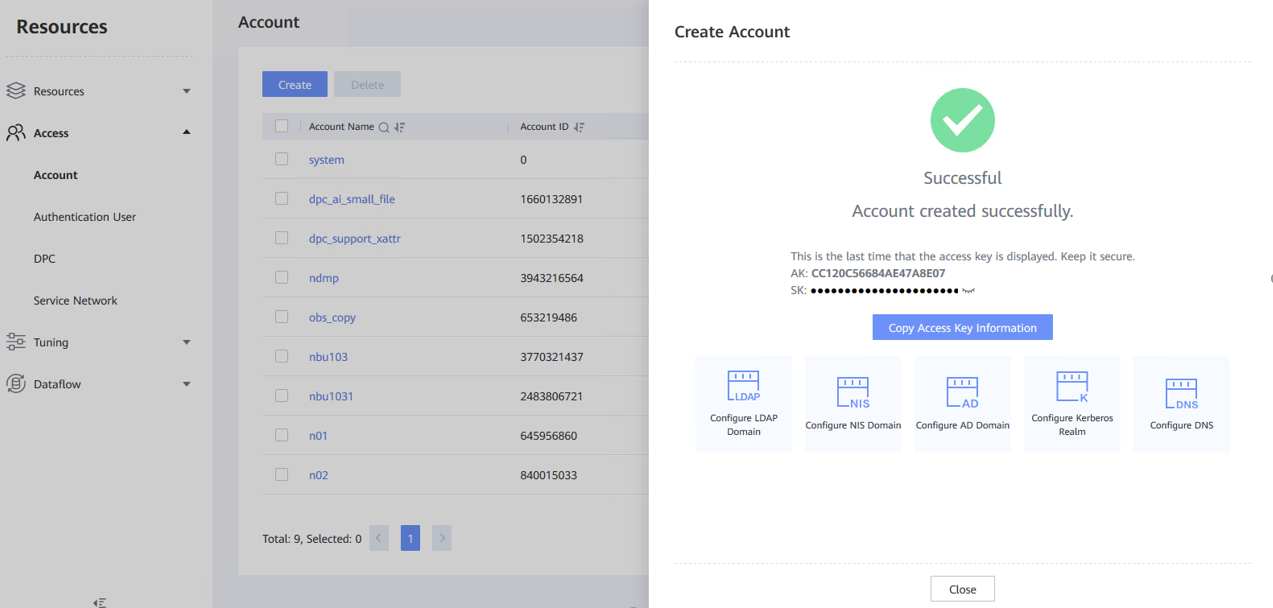
2.4.1 Create the Account and save the AK&SK on the Pacific storage
2.4.2 Create the Service Network on the Pacific storage
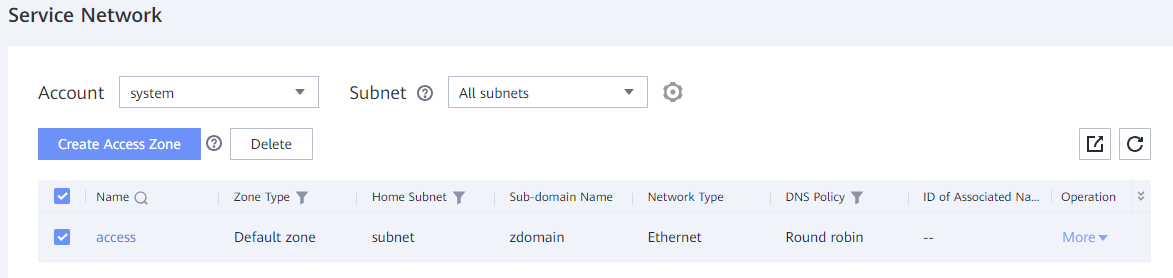
2.4.3 Create the Namespace on the Pacific storage
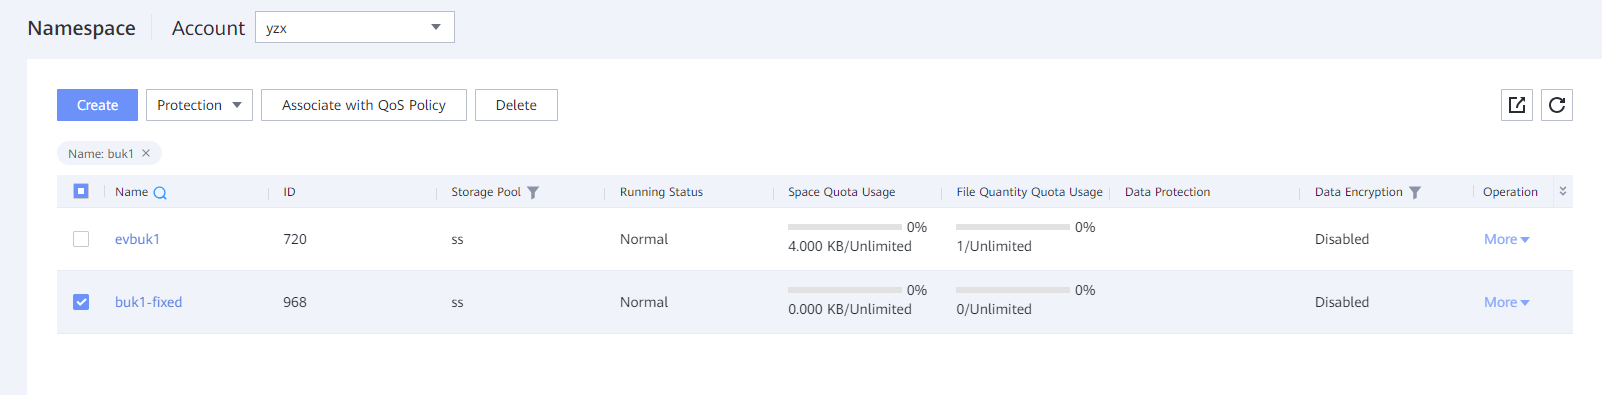
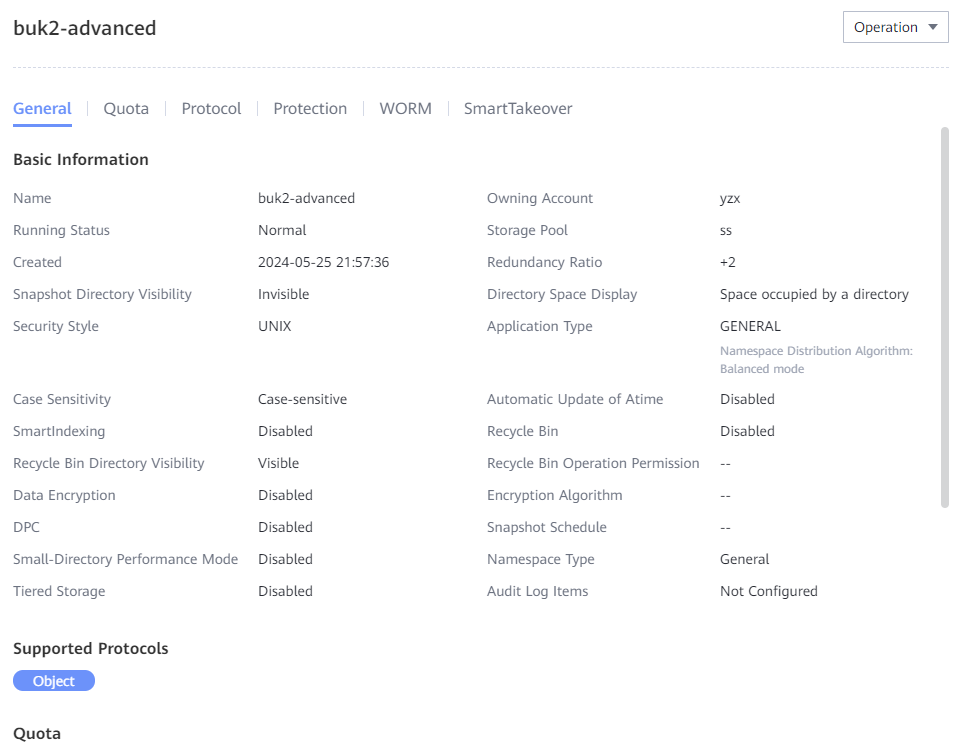
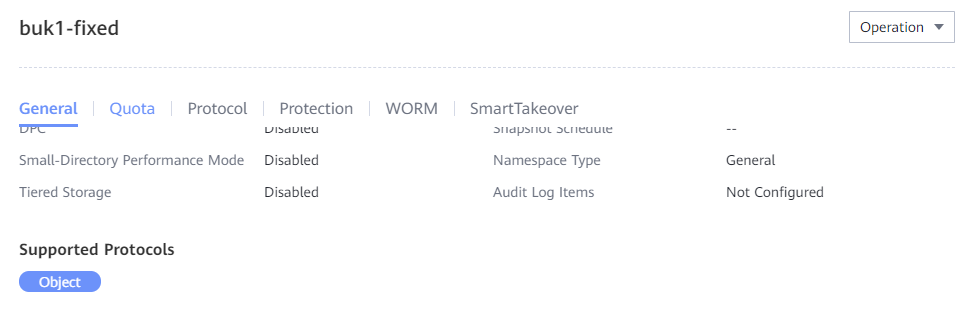
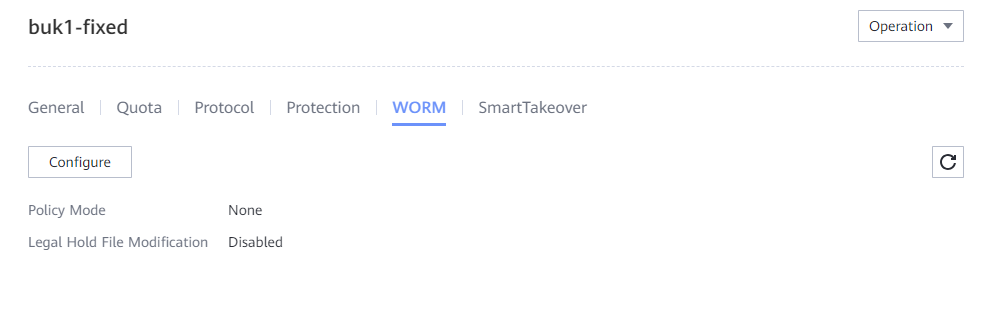
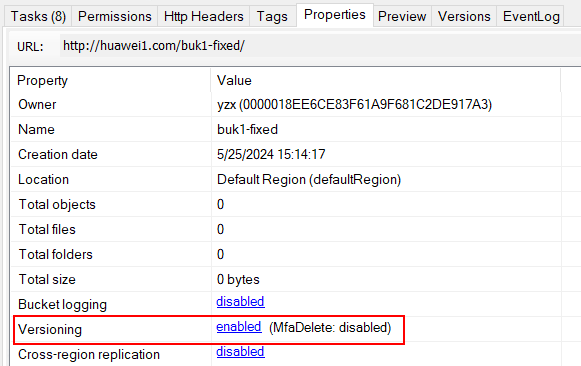
2.4.4 Create the Bucket on the Pacific storage
Enable the worm policy mode to None, and enable the Versioning.
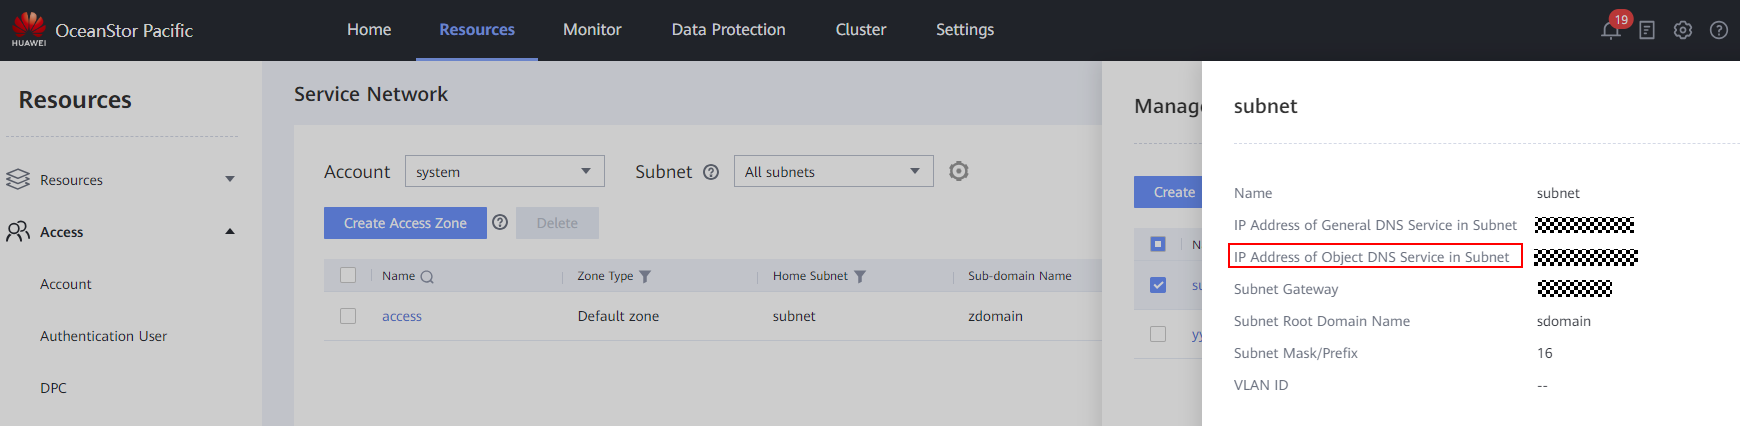
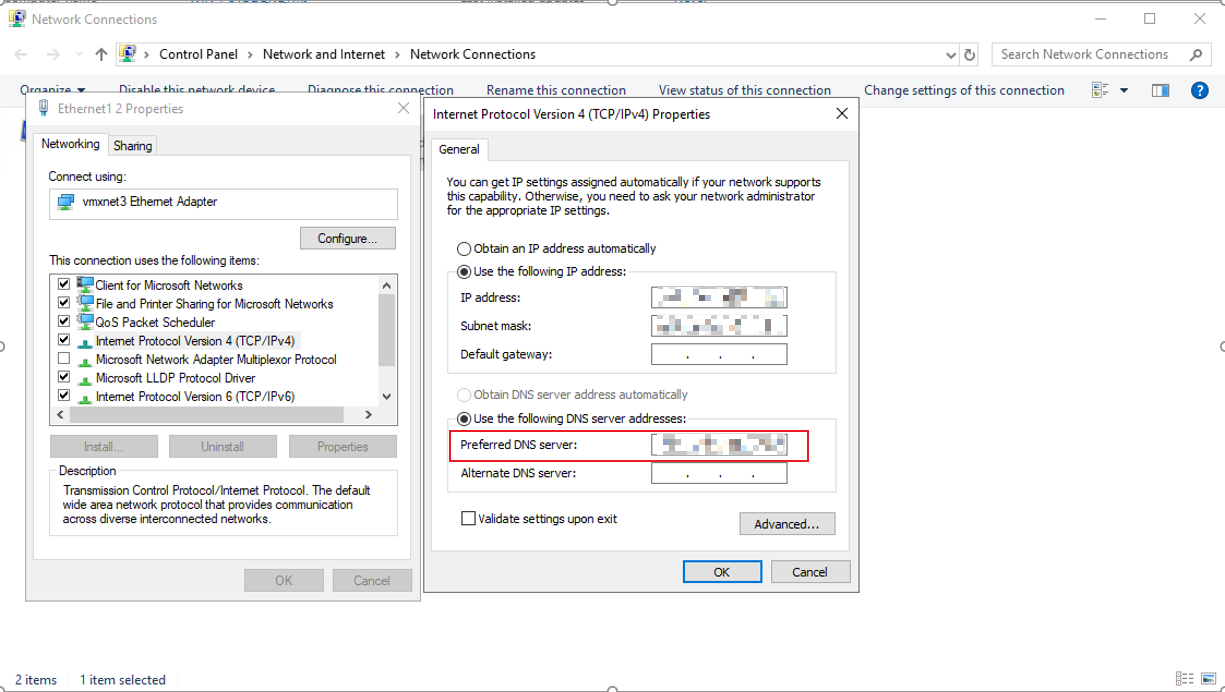
2.4.5 Configure the DNS on the CPE server
Query the IP Address of Object DNS Service in Subnet on the storage device.
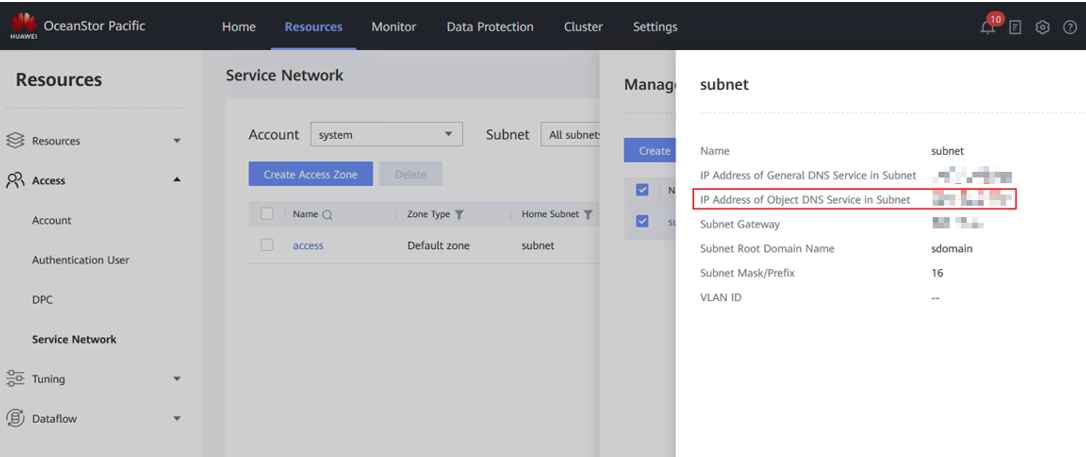
Configure DNS on the CPE server.
2.4.6 Configure the Certificate for the Pacific object service in the WebSphere
Import and activate the object service CA.
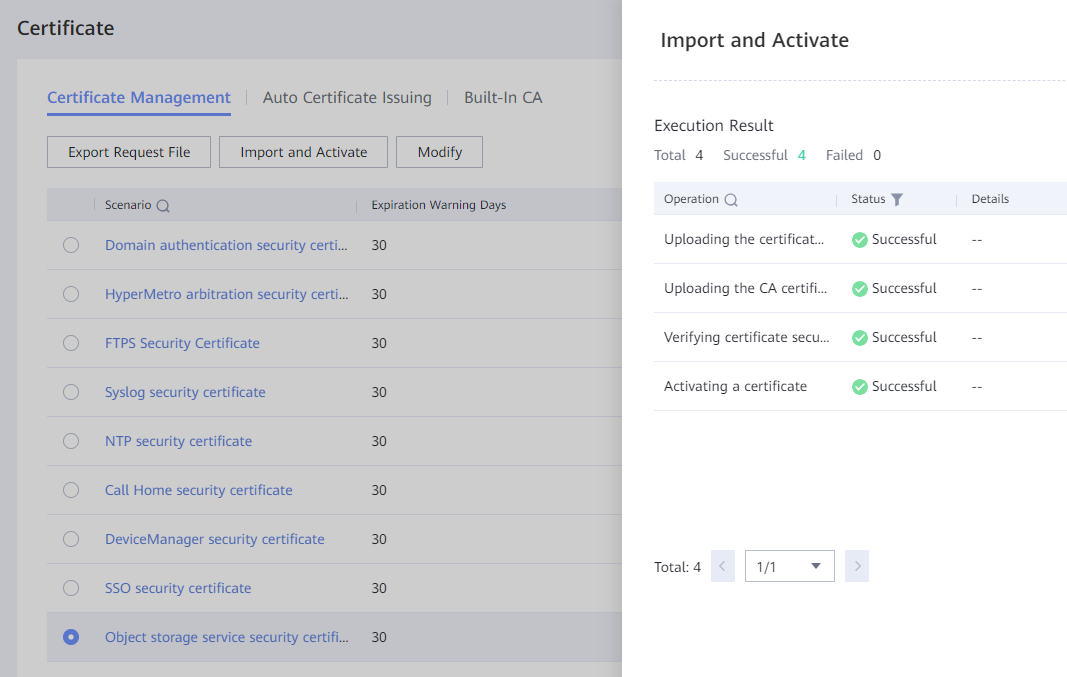
Configure the WebSphere to apply the certificate.

2.4.7 Turn on the switch of worm_retention_format on the Pacific storage

3. Verification the Dorado Storage as the File storage area
3.1 Add the NFS share to the CPE as the File storage area
Test Purpose | To verify that the Dorado storage can be added to the to the CPE as the File storage area |
Test Networking | Storage as the IBM FileNet P8 Content Platform Engine Storage Area Test Networking |
Prerequisites |
2. The storage device is running properly. 3. File System and NFS share have been created on storage device. 4. The Object Store of “obj-yzx” have been created on CPE. |
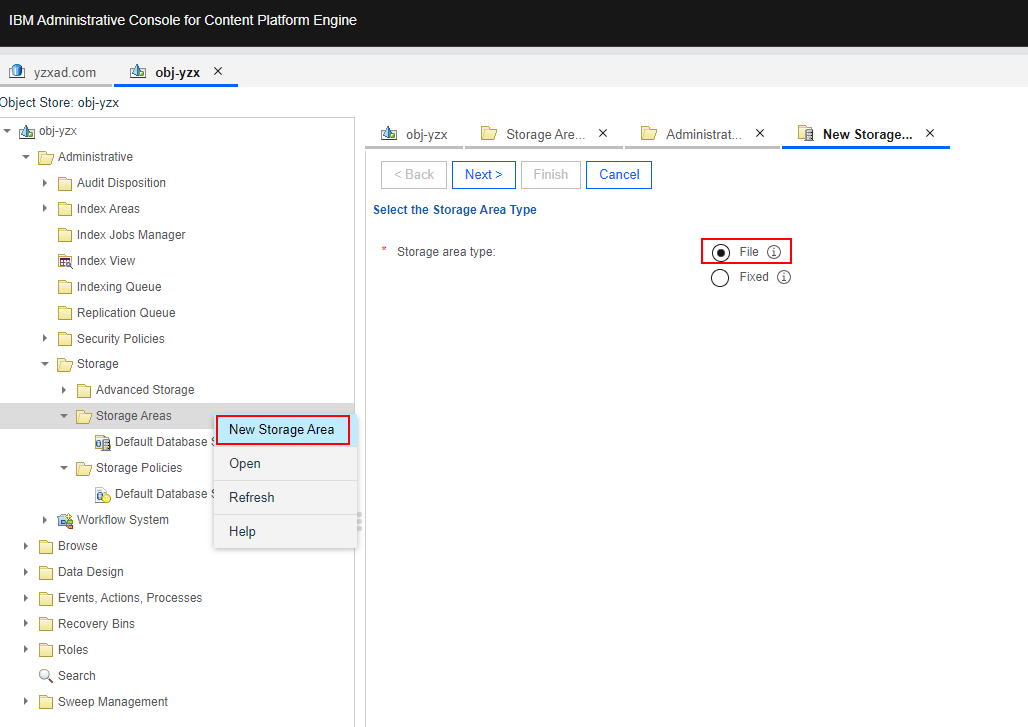
Test Procedure | 1. Mount the NFS share on CPE Linux Server. 2. Select the Object Store > Administrative > Storage > Storage Areas, and right-click to New Storage Area. Select the Storage area type of File and next. |
Expected Result |
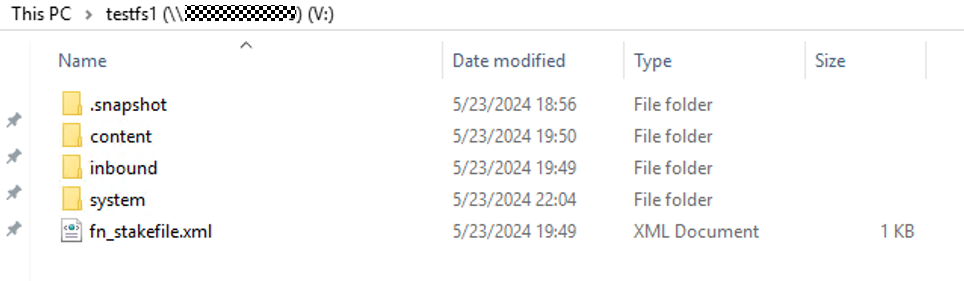
2. In step 11, succeed to create the Storage Policy. 3. In step 12, succeed to create three directories (content, inbound, system) and one file (fn_stakefile.xml) in the NFS share. |
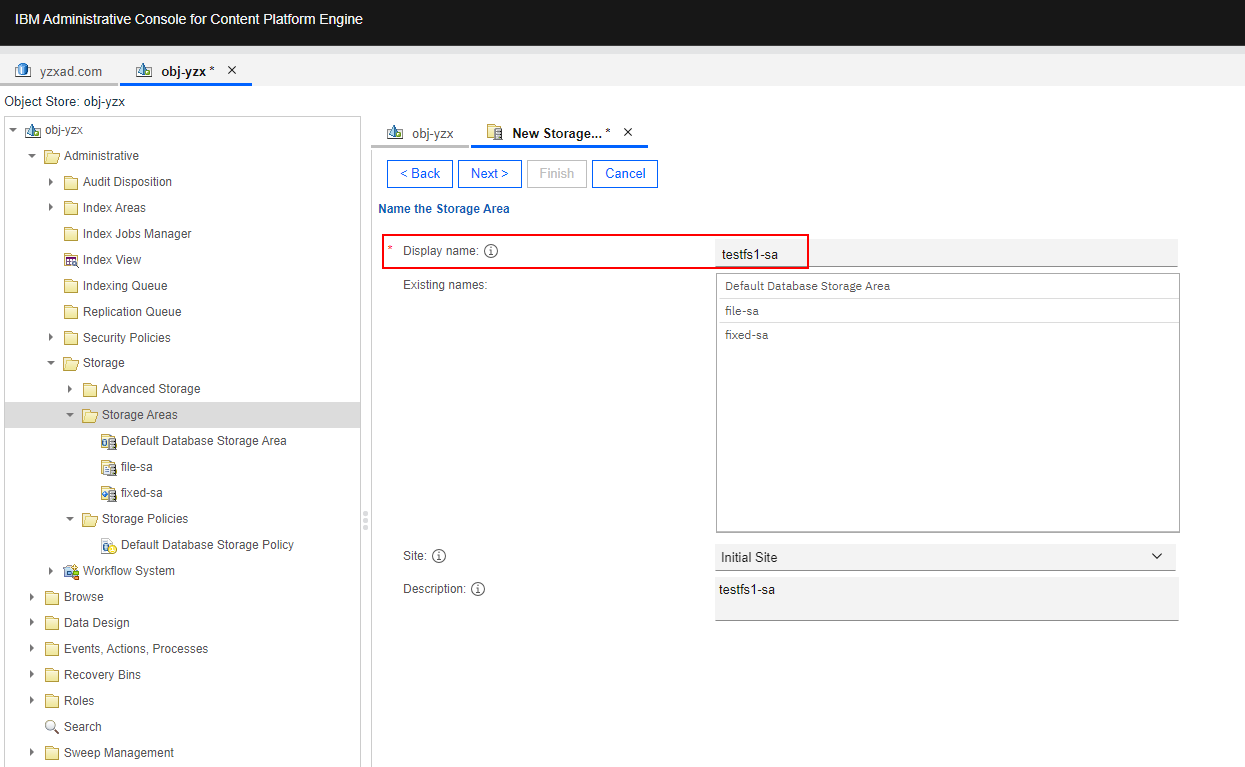
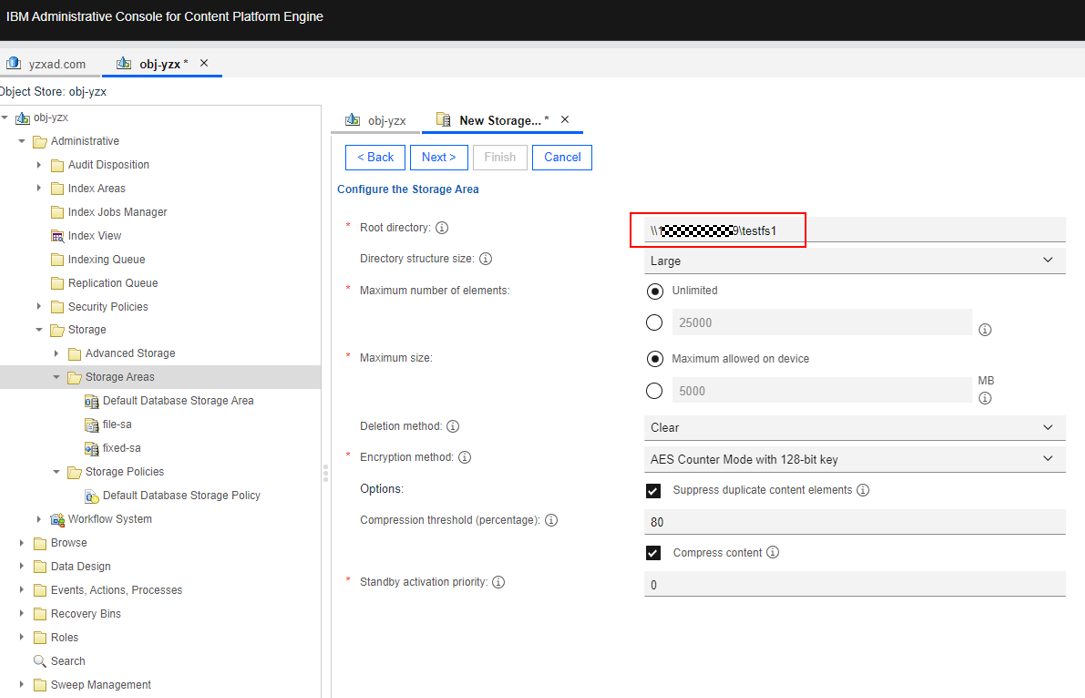
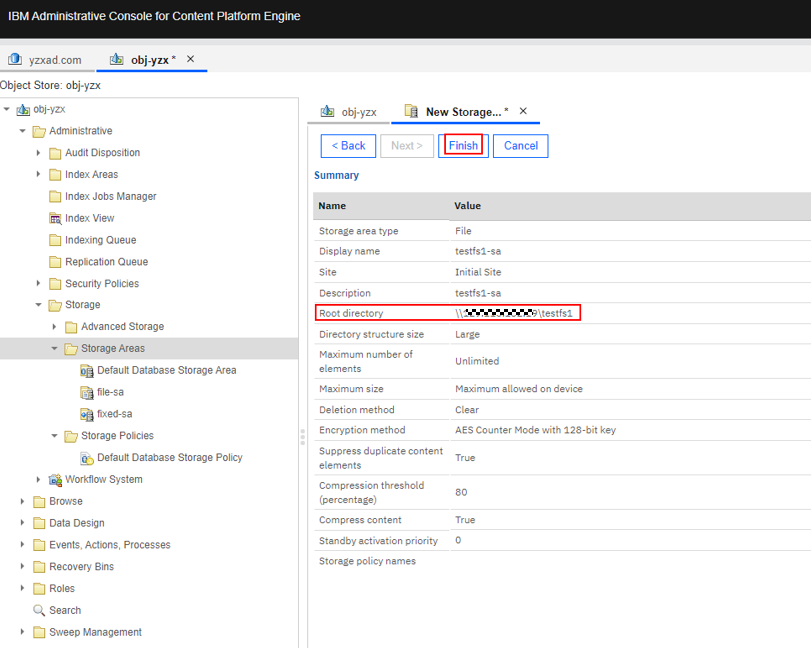
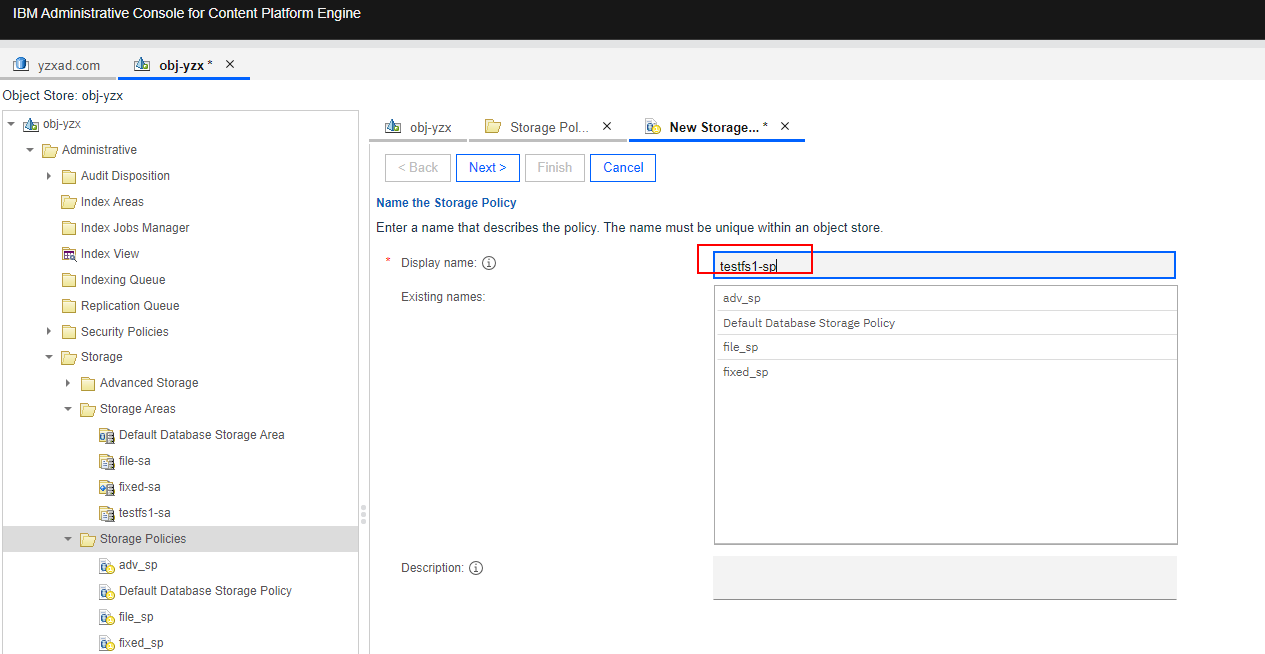
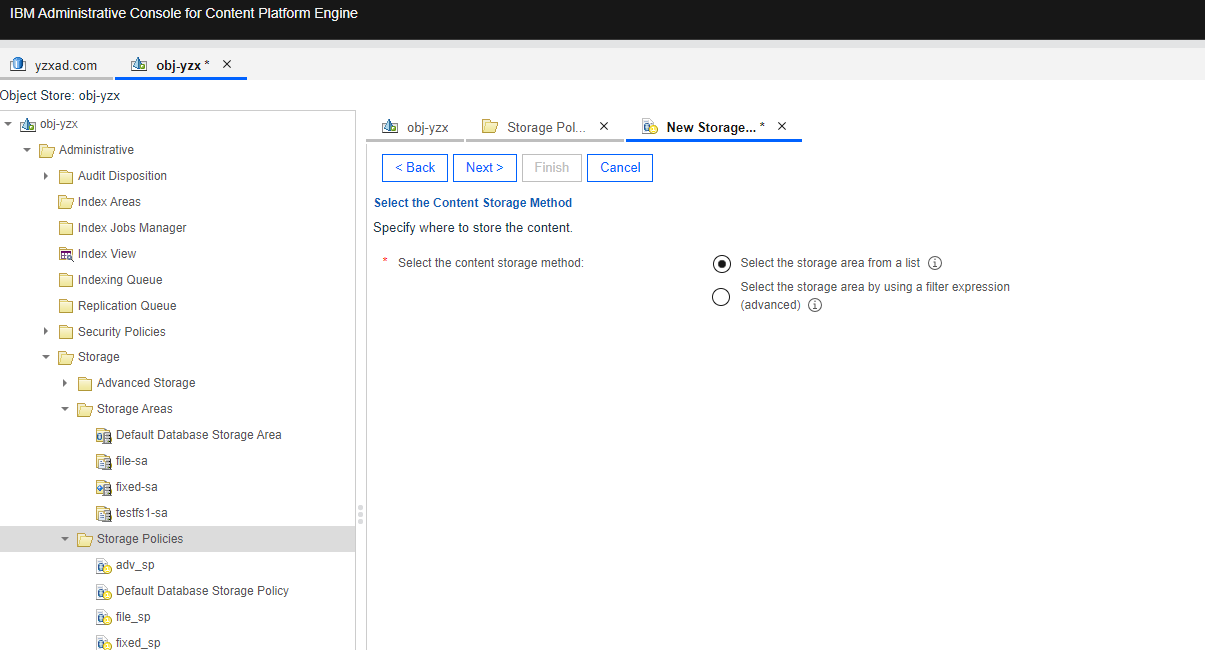
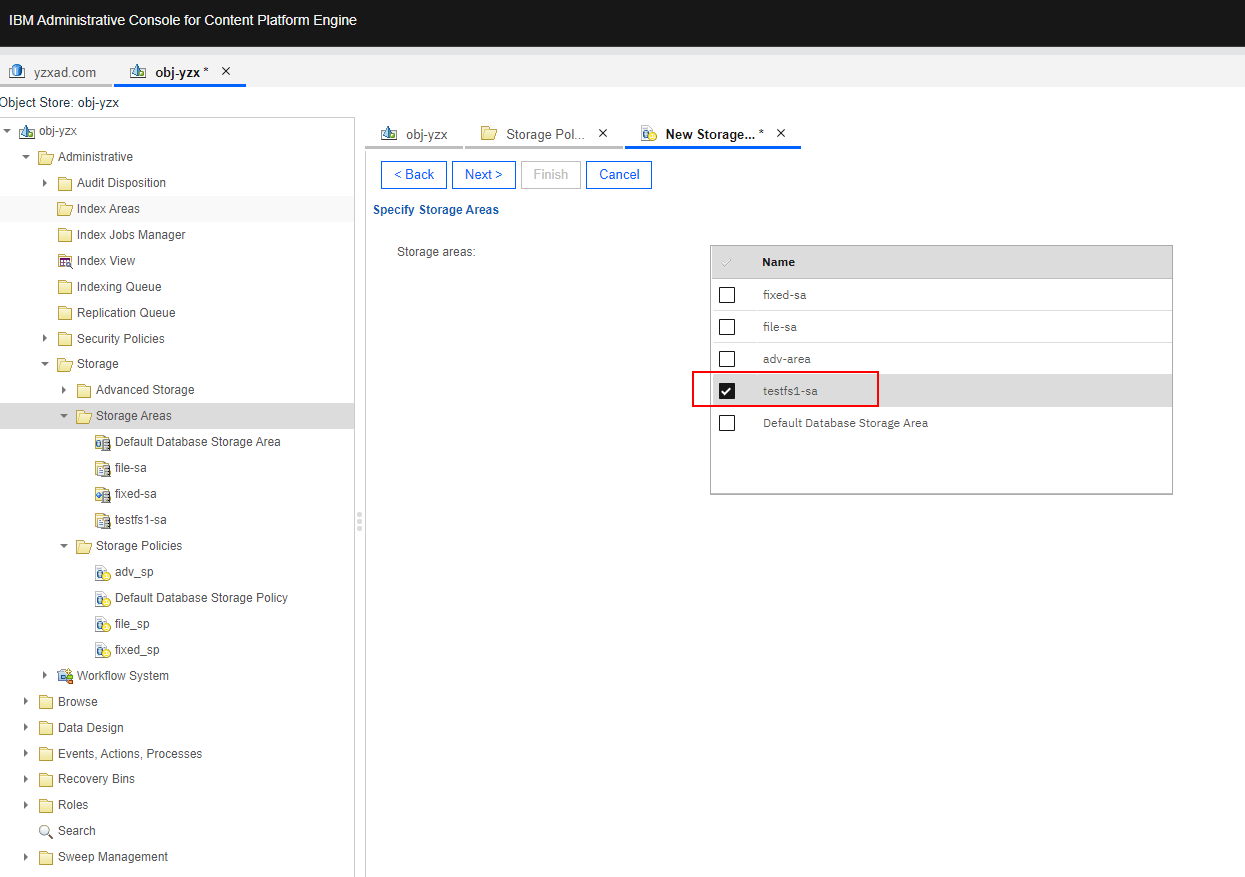
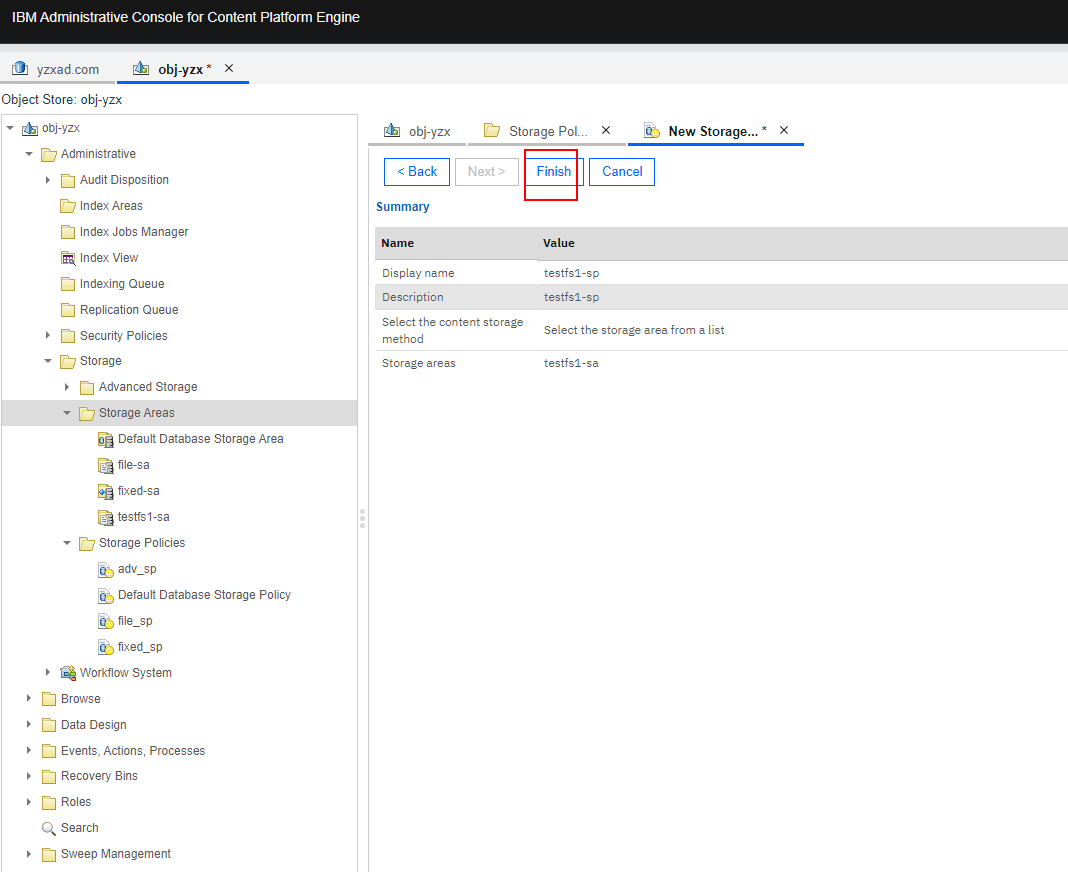
Test Results | 1. Mount the NFS share on CPE Linux Server. 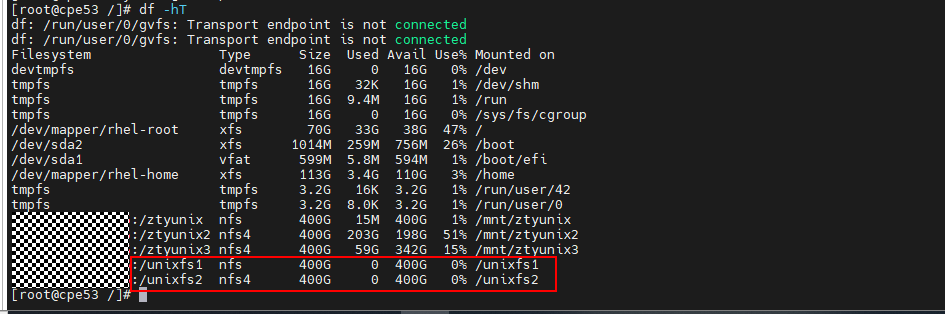  2. Select the Object Store > Administrative > Storage > Storage Areas, and right-click to New Storage Area. Select the Storage area type of File and next. 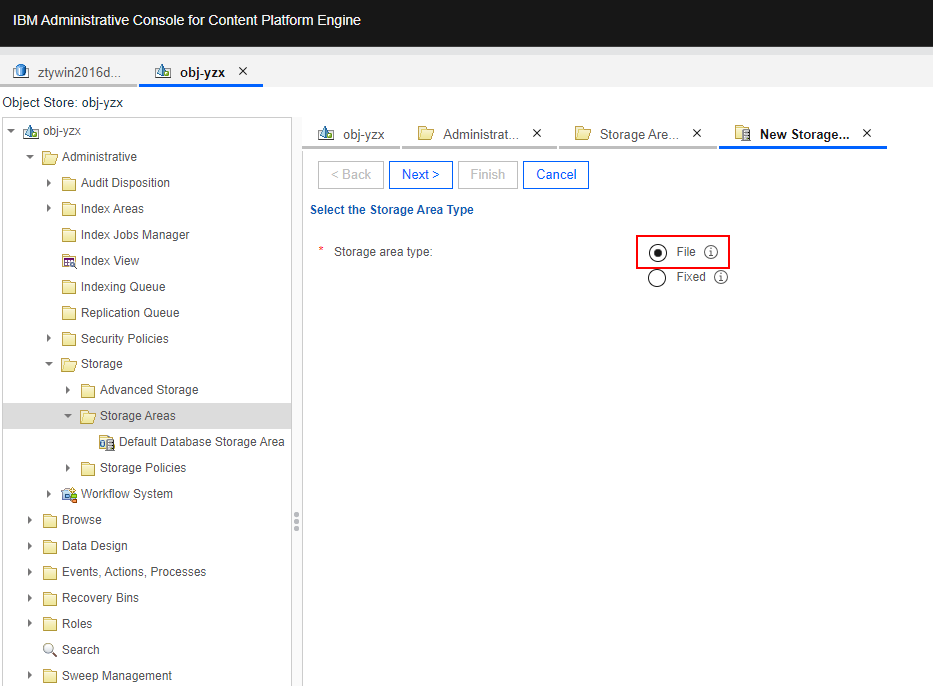 3. Enter a display name and next. 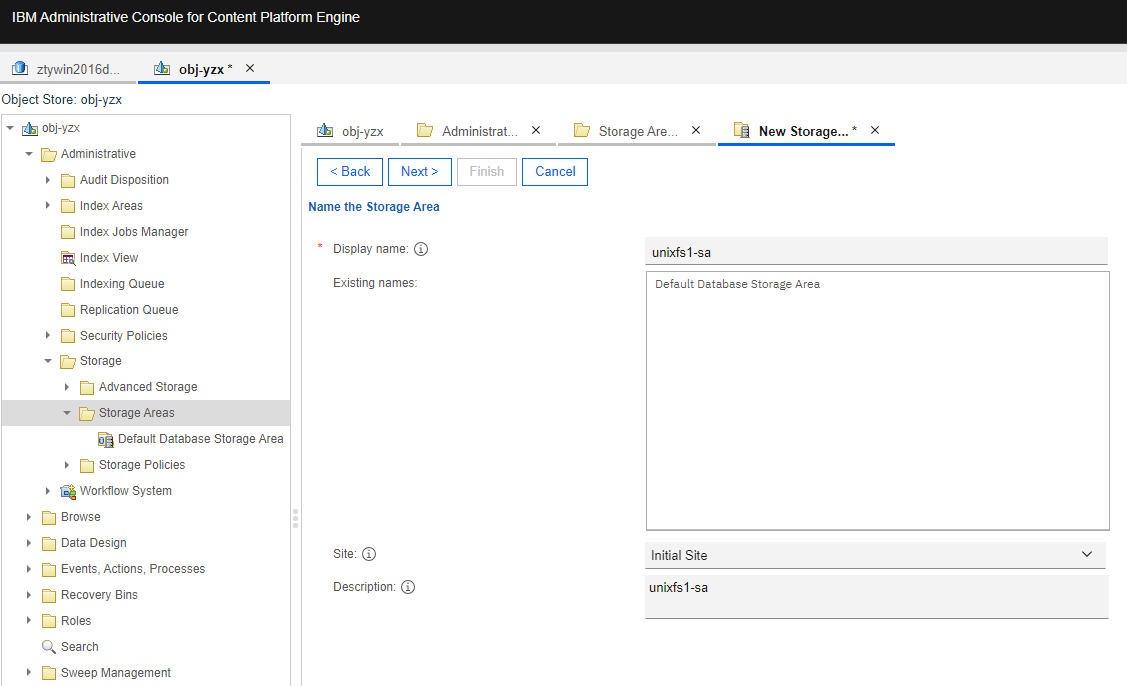 4. Enter the Mounted Path of the NFS share and next. 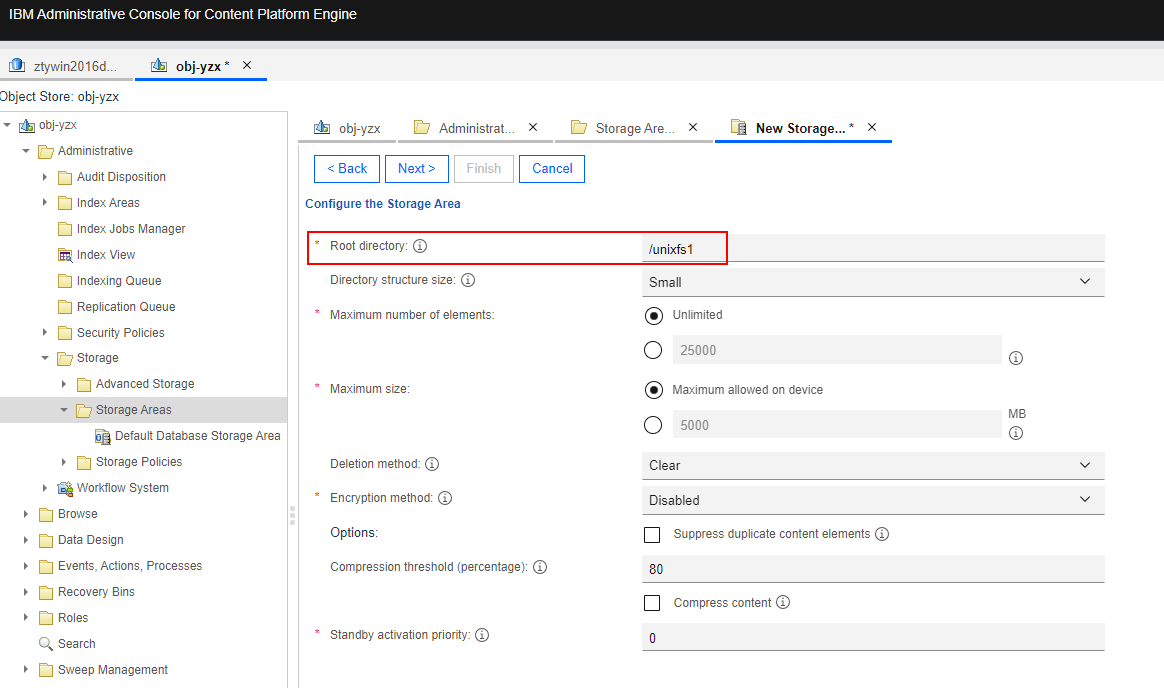 5. The policy is configured later and next. 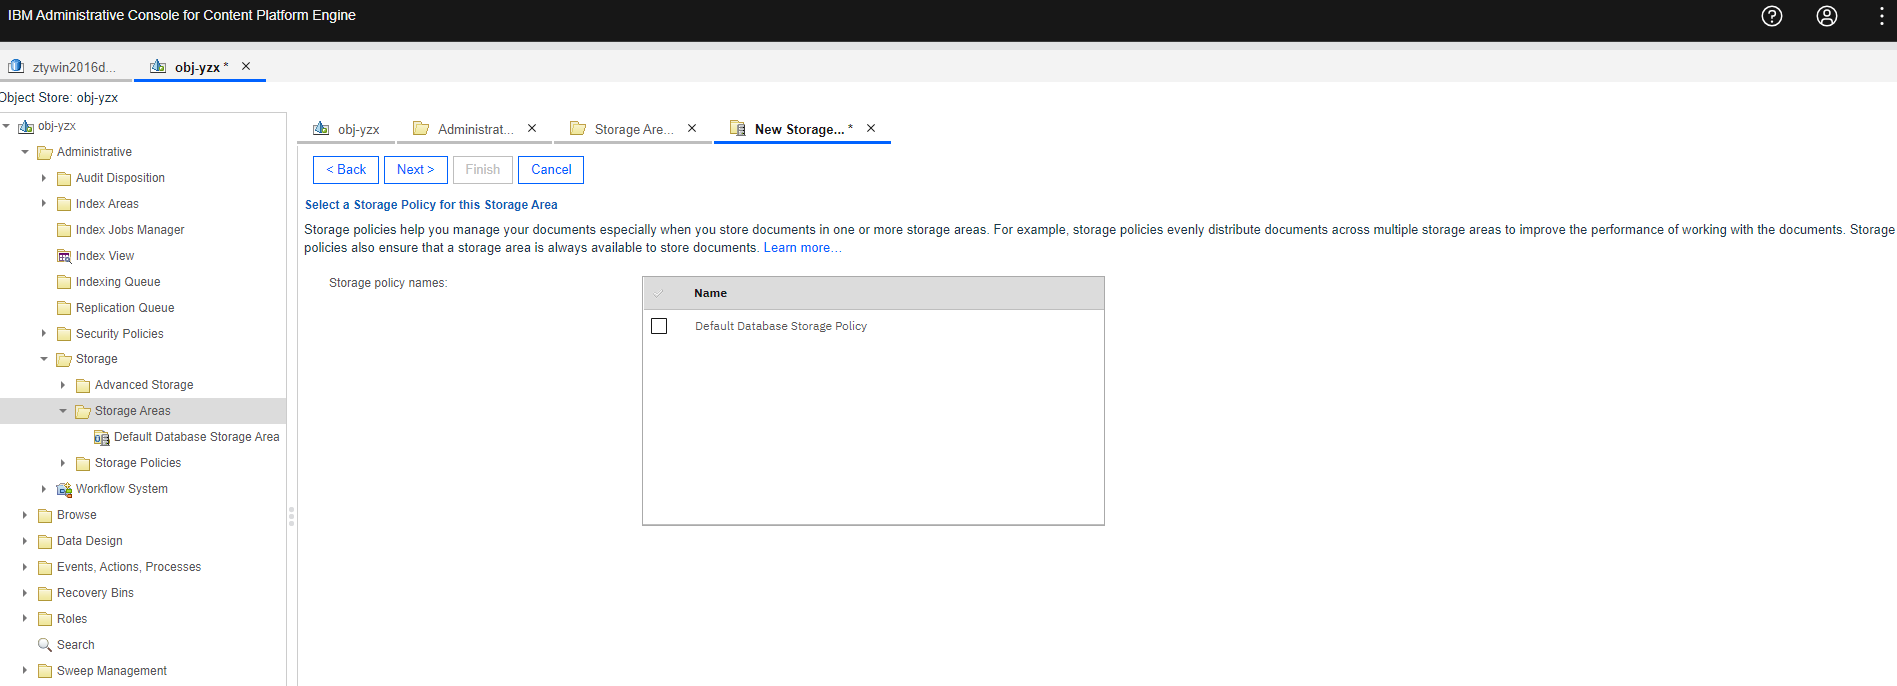 6. Check the configuration and finish. 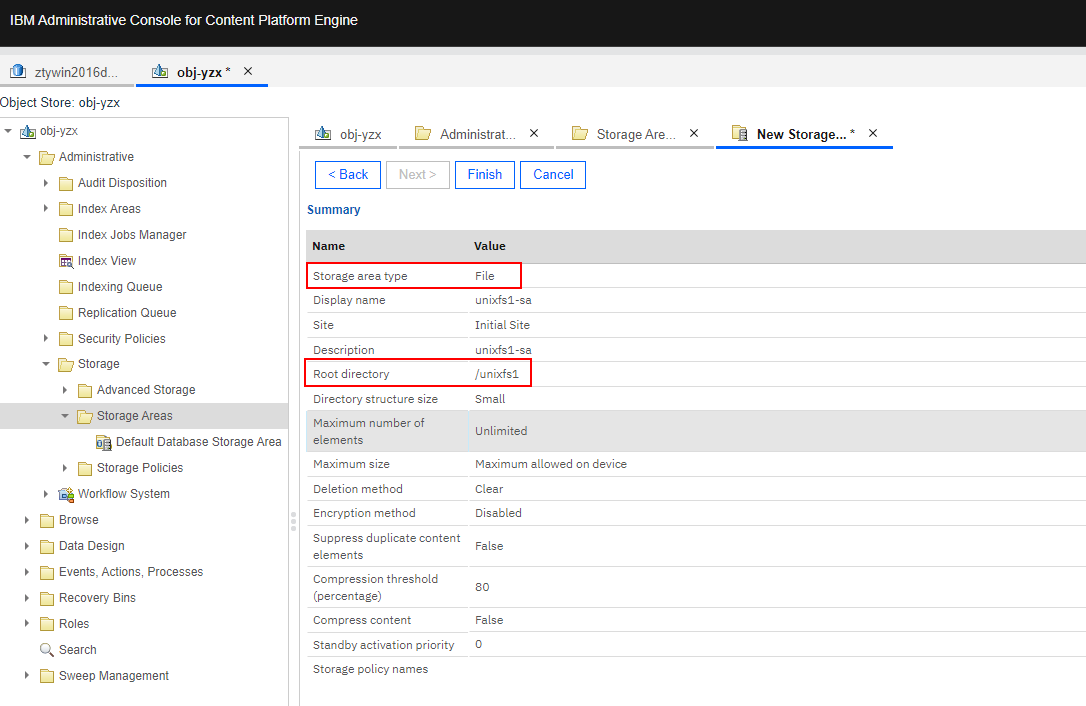 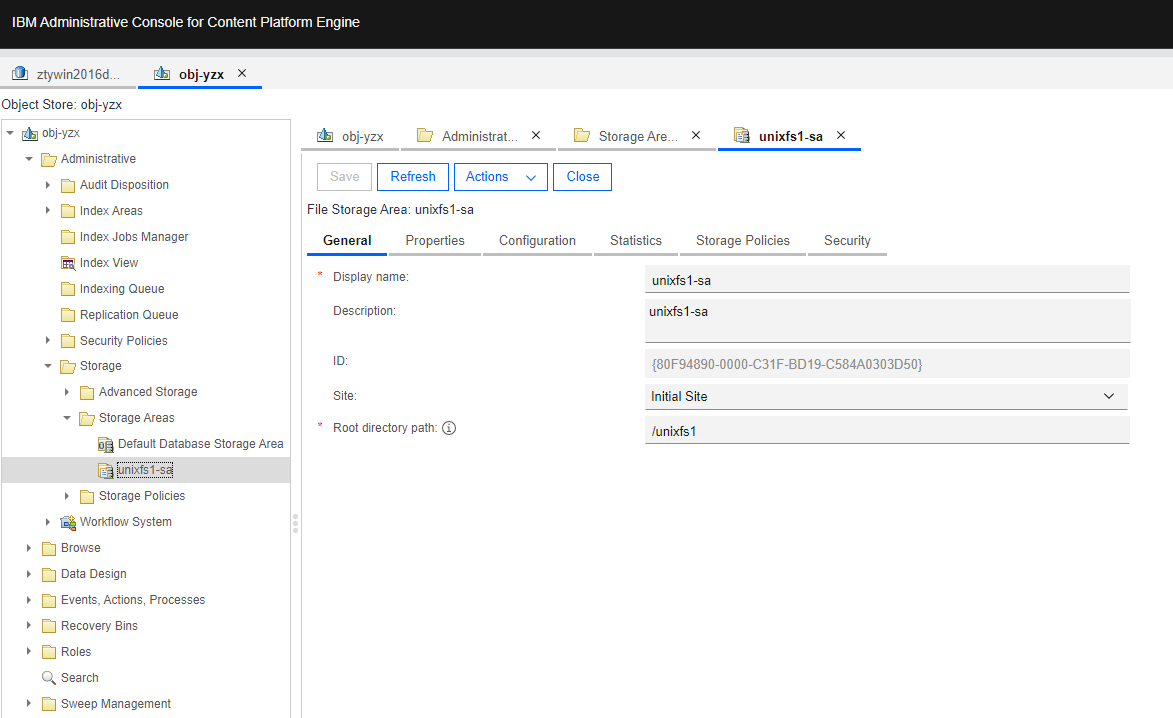 7. Select the Object Store > Administrative > Storage > Storage Policies, and right-click to New Storage Policy. Enter a display name and next. 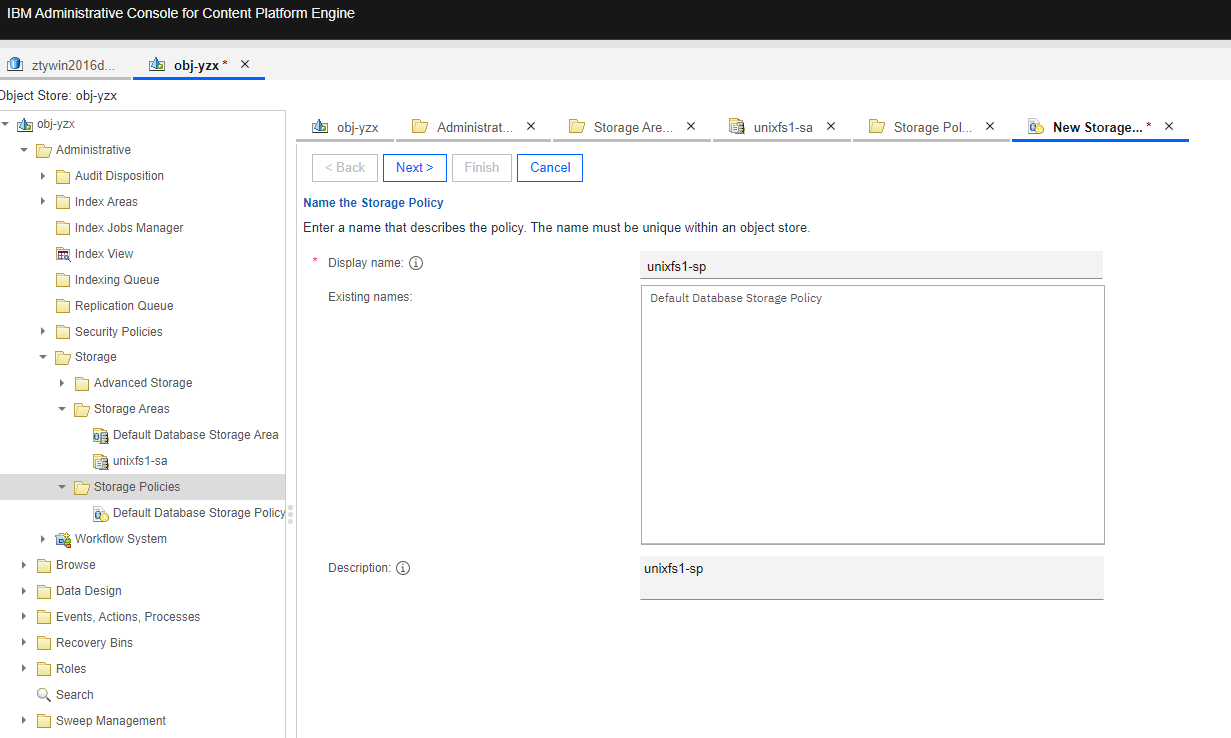 8. Retain the default settings and next. 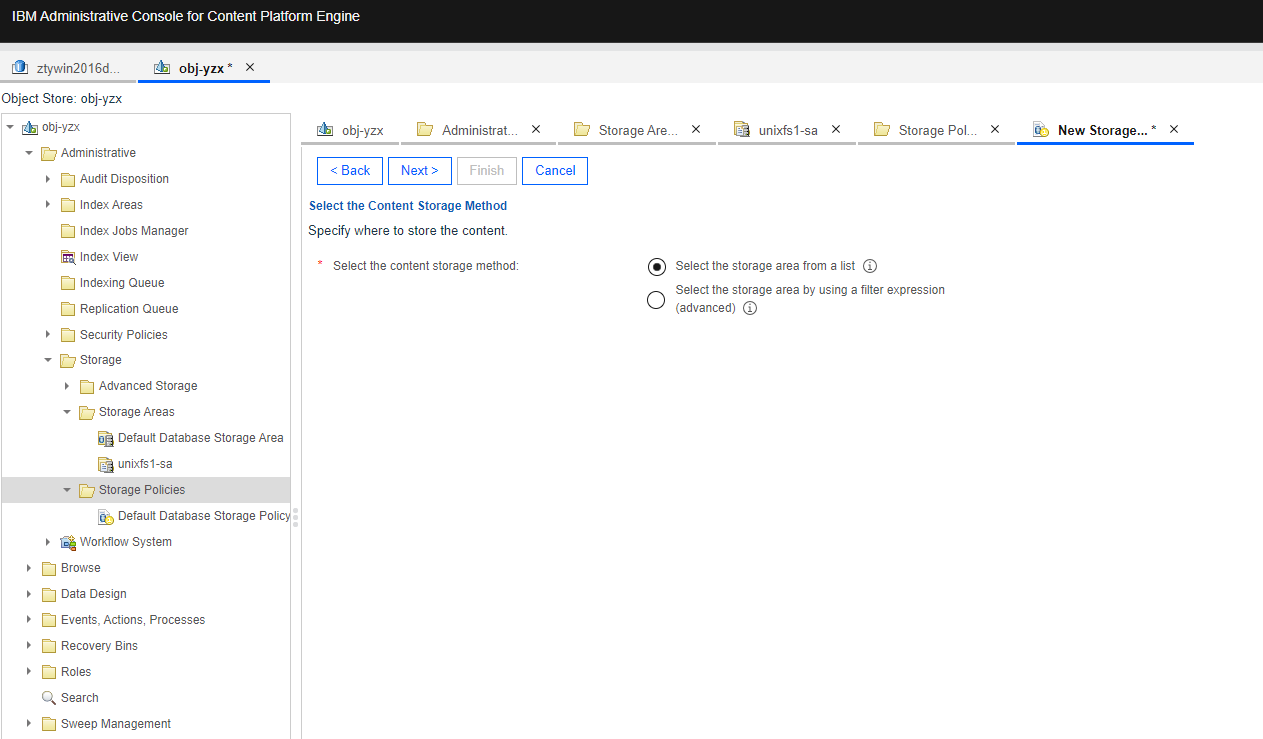 9. Select the created Storage Area in step 6 and next. 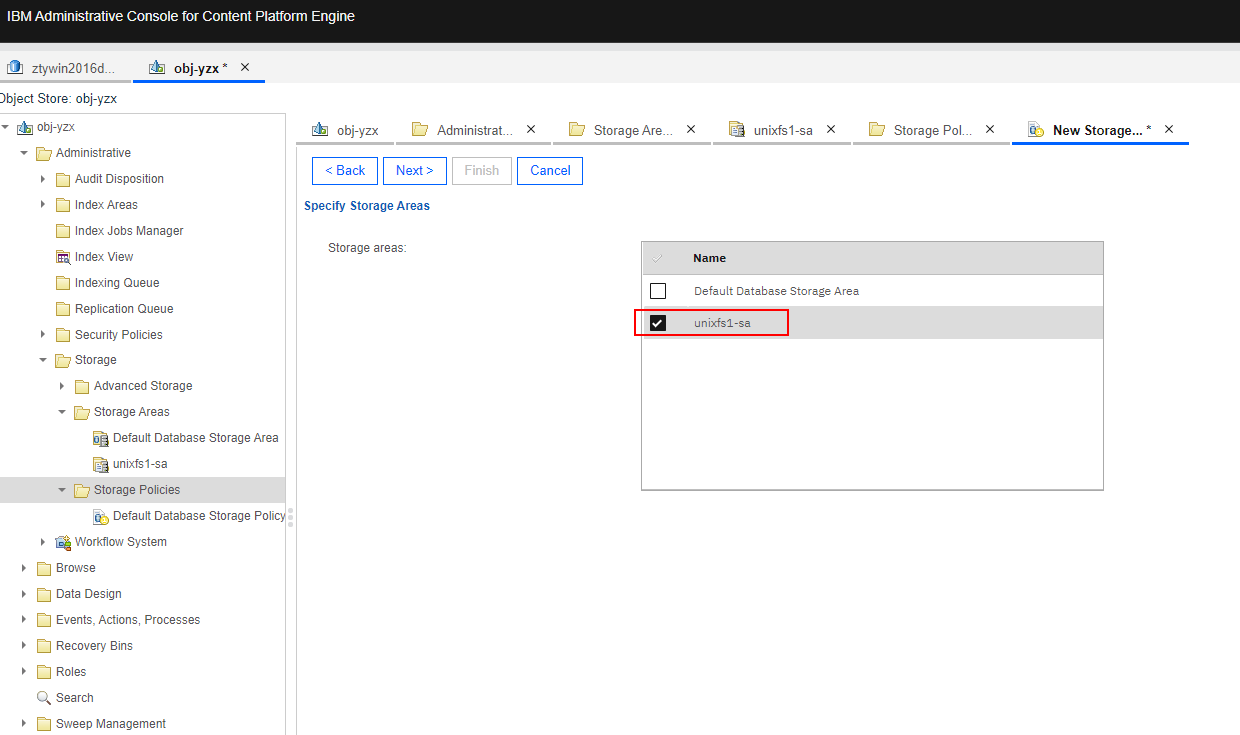 10. Check the configuration and finish. 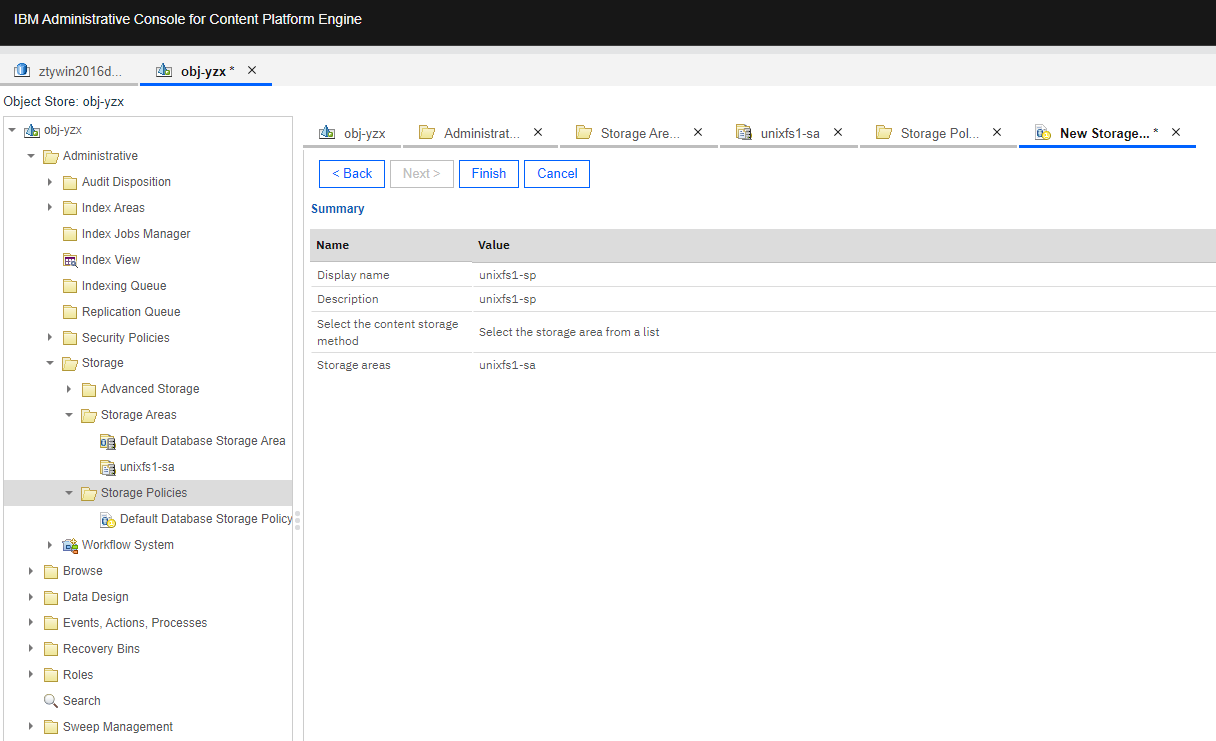 11. Check the directory structure of the NFS share. 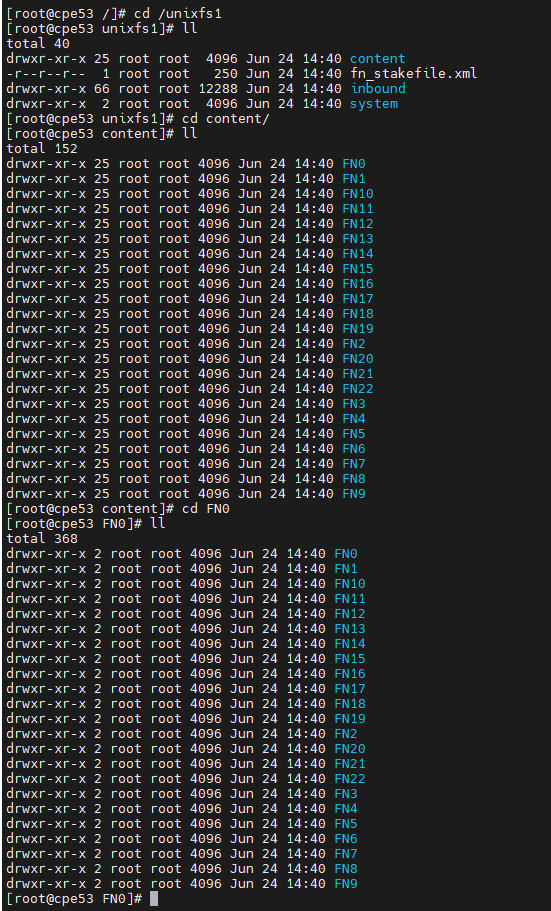 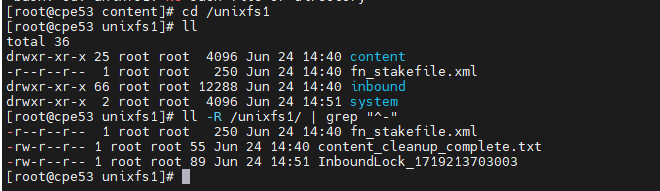 |
Test Conclusion | Passed |
3.2 Add the documents to the File storage area
Test Purpose | To verify that File storage area can work properly. |
Test Networking | Storage as the IBM FileNet P8 Content Platform Engine Storage Area Test Networking |
Prerequisites | 1. Deployment of storage device, CPE Linux Server and networking have been completed. 2. The storage device is running properly. 3. File System and NFS share have been created on storage device. 4. The Object Store of “obj-yzx” has been created on CPE. 5. The file storage area has been created in section 3.1. |
Test Procedure |
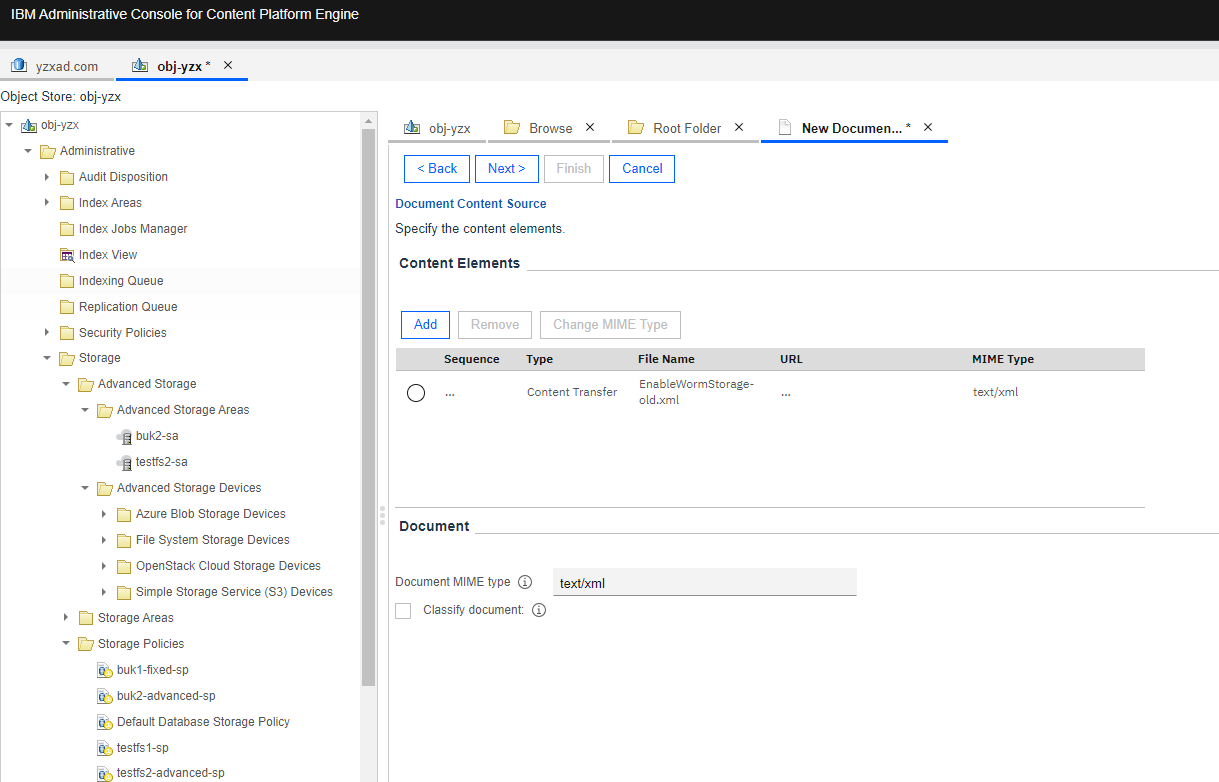
2. Enter the document title and next. 3. Add the content element and next. 4. Retain the default settings and next. 5. Select the created storage area and storage policy in section 3.1 and next. 6. Check the configuration and finish. 7. Check the directory size of the NFS share. |
Expected Result | In step 6, succeed to add the documents to the file storage area. In step 7, succeed to add the documents to the NFS share. |
Test Results | 1. Select the Object Store > Browse > Root Folder > Actions > New Document. 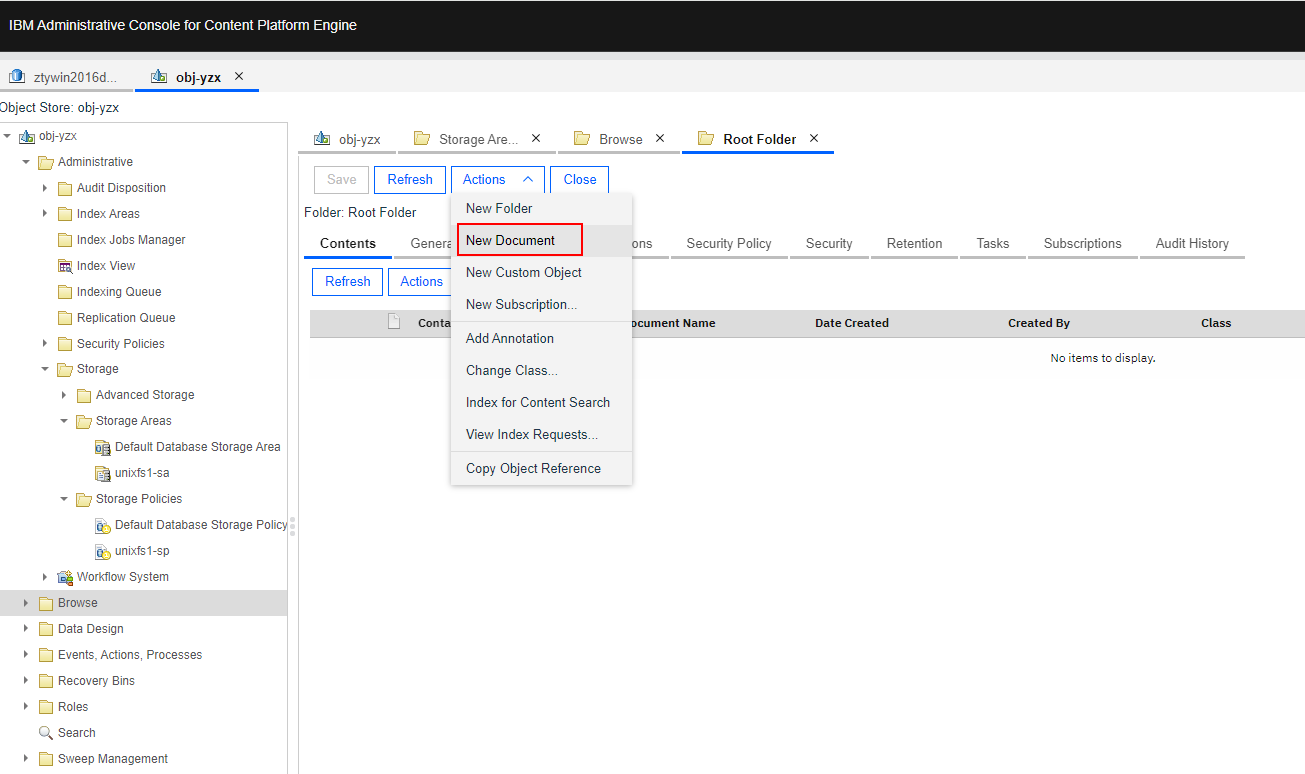 2. Enter the document title and next. 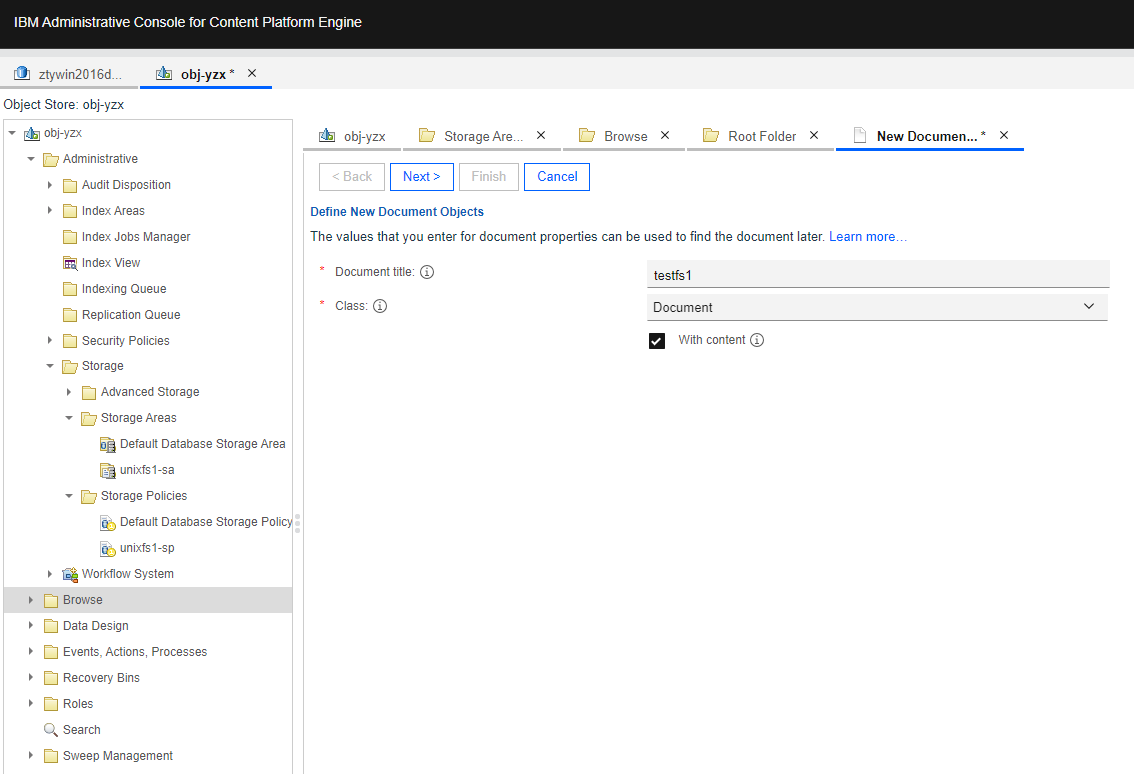 3. Add the content element and next. 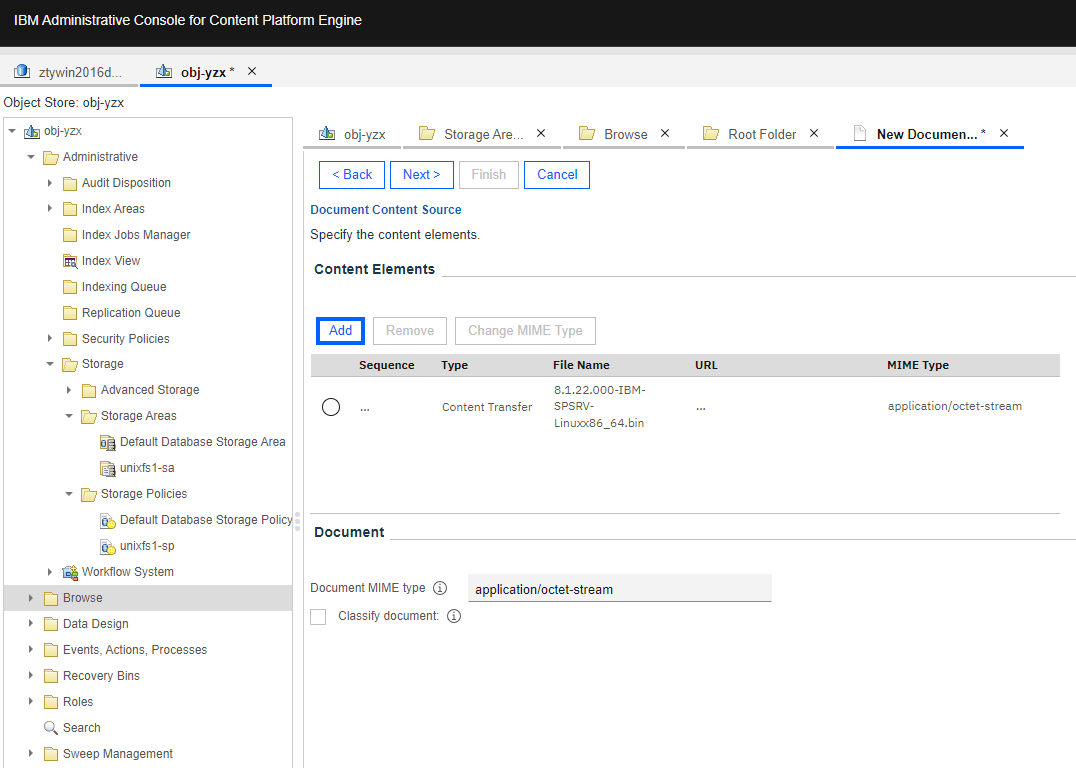 4. Retain the default settings and next. 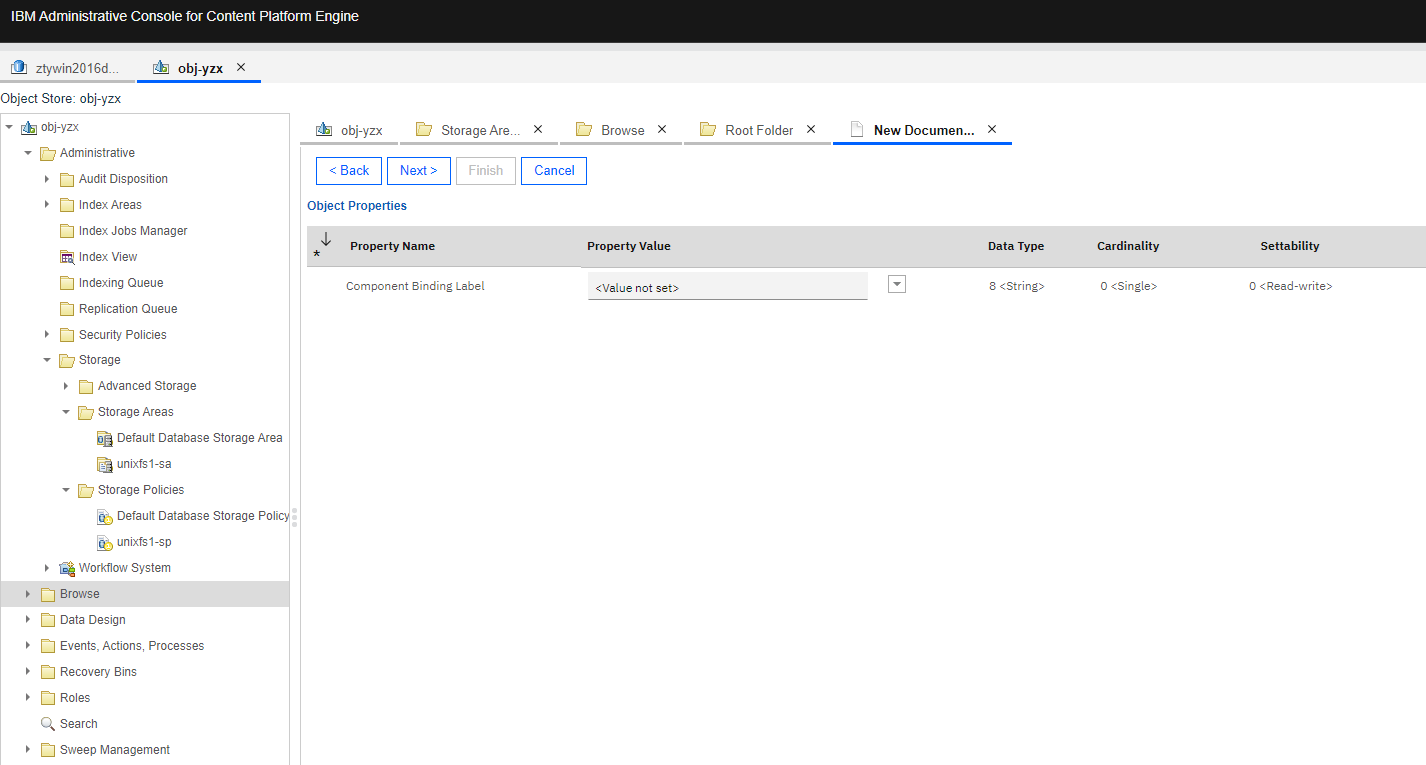  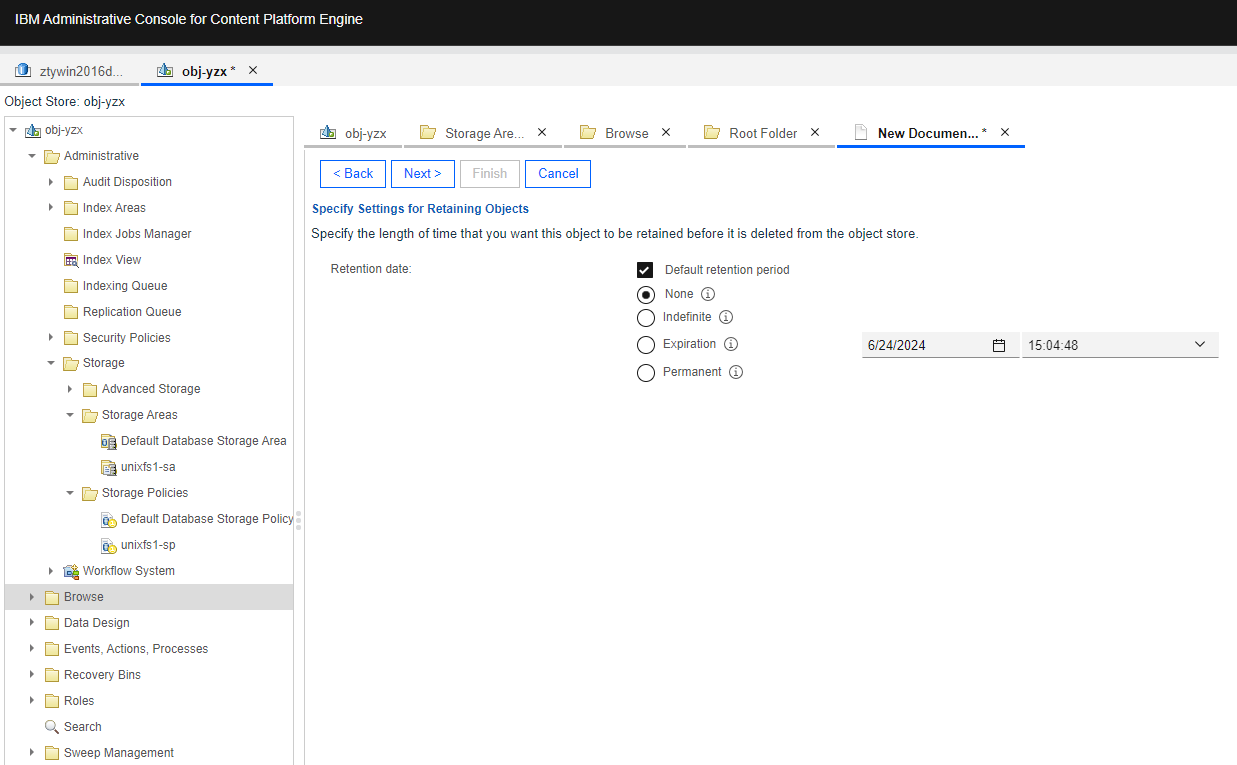 5. Select the created storage area and storage policy in section 3.1 and next. 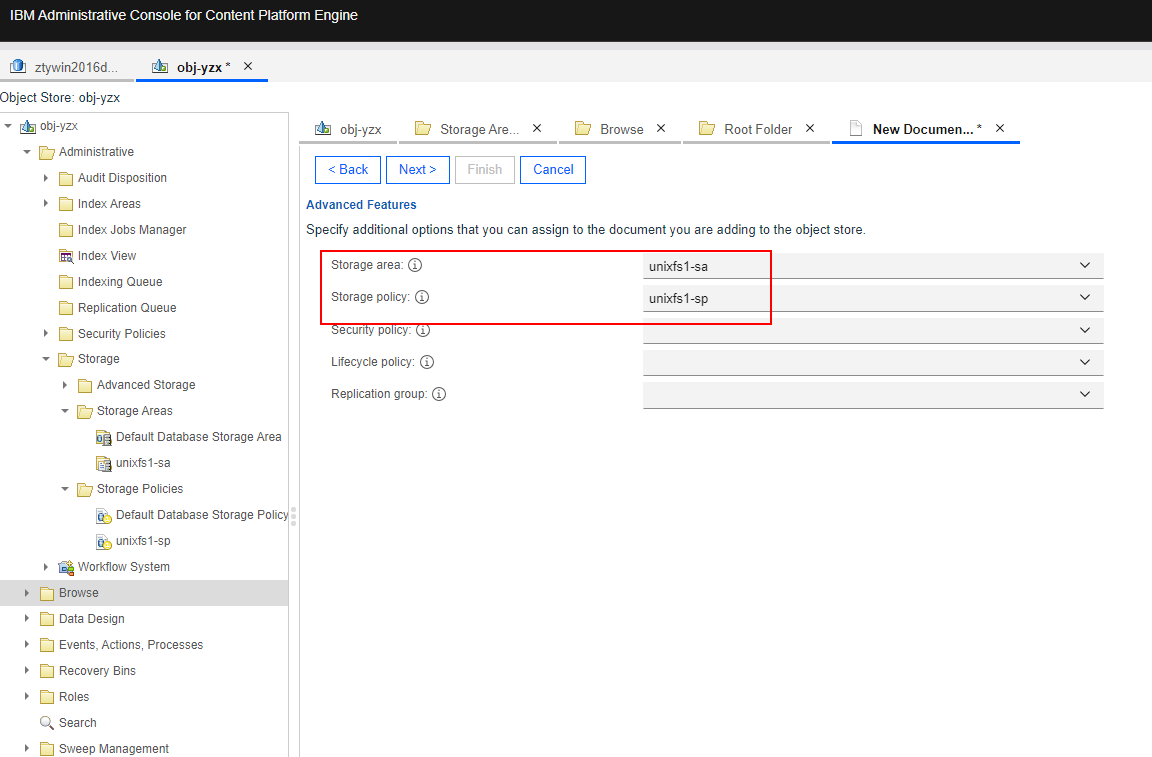 6. Check the configuration and finish. 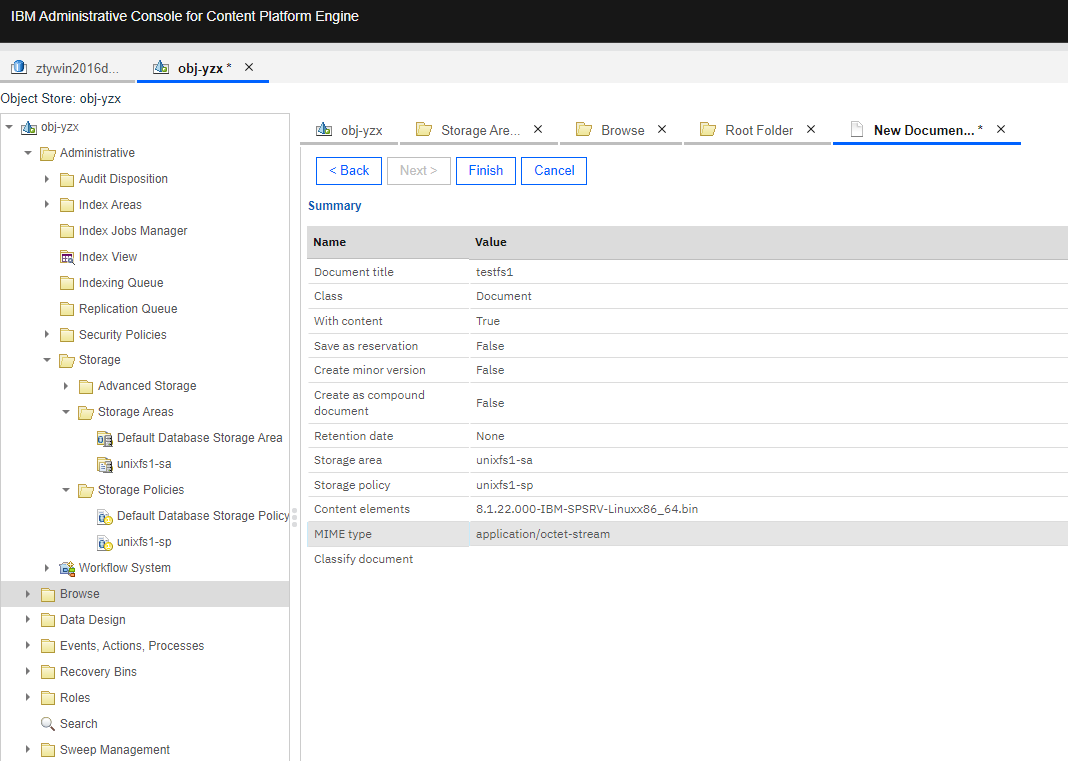 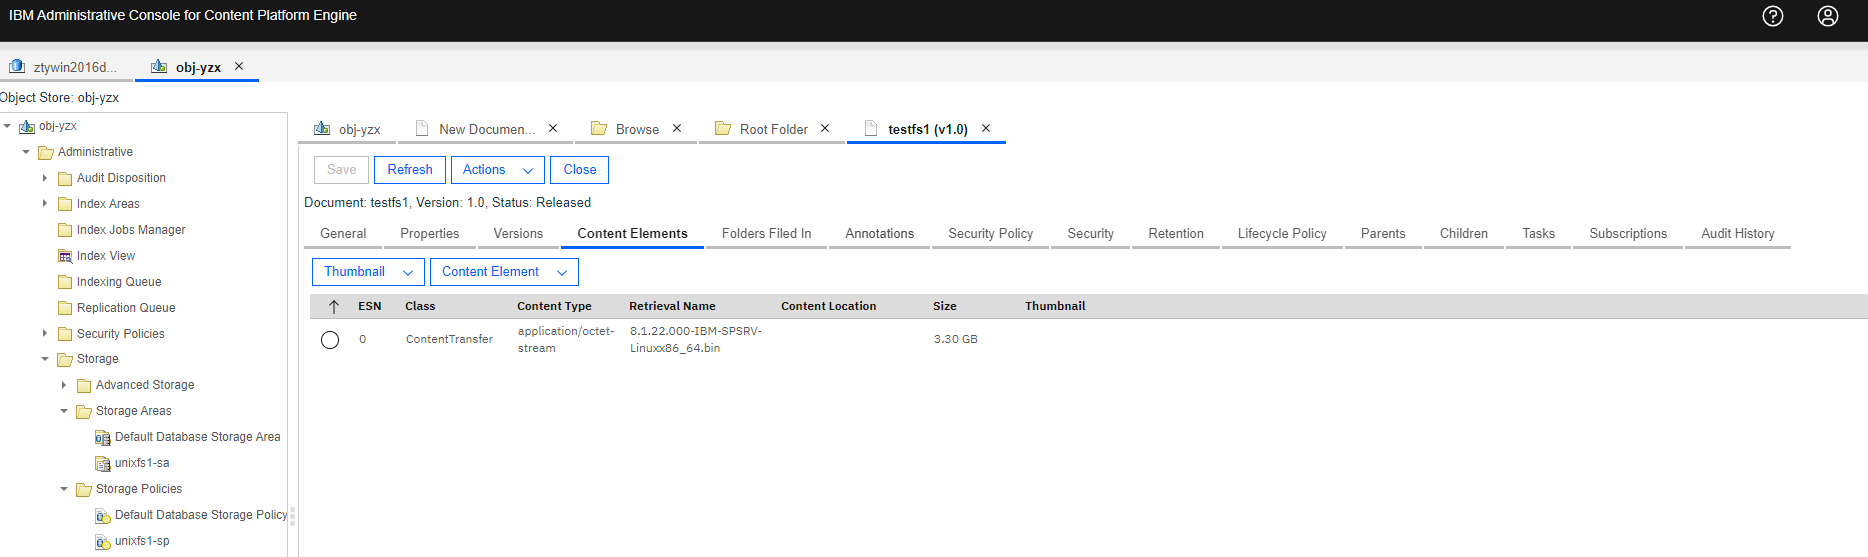 7. Check the directory size of the NFS share. 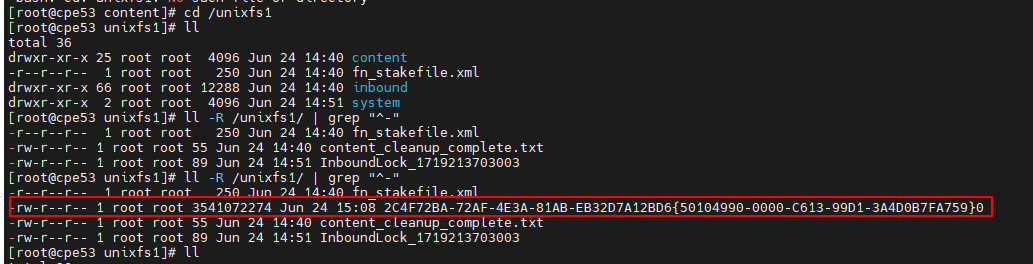 |
Test Conclusion | Passed |
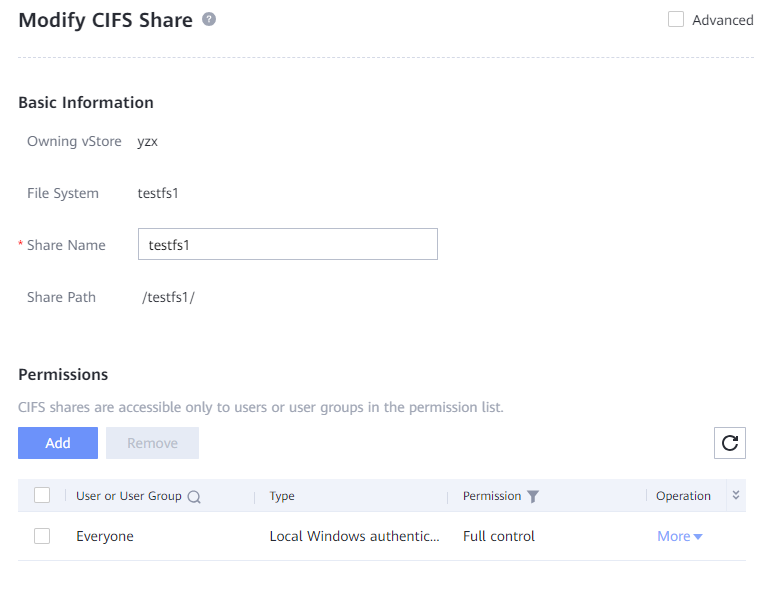
3.3 Add the CIFS share to the CPE as the File storage area
Test Purpose | To verify that the Dorado storage can be added to the to the CPE as the File storage area |
Test Networking | Storage as the IBM FileNet P8 Content Platform Engine Storage Area Test Networking |
Prerequisites |
2. The storage device is running properly. 3. File System and CIFS share have been created on storage device. 4. The Object Store of “obj-yzx” have been created on CPE. |
Test Procedure | 1. Select the Object Store > Administrative > Storage > Storage Areas, and right-click to New Storage Area. Select the Storage area type of File and next. 2. Enter a display name and next. 3. Enter the UNC Path of the CIFS share and next. 4. The policy is configured later and next. 5. Check the configuration and finish. 6. Select the Object Store > Administrative > Storage > Storage Policies, and right-click to New Storage Policy. 7. Enter a display name and next. 8. Retain the default settings and next. 9. Select the created Storage Area in step 5 and next. 10. Check the configuration and finish. 11. Check the directory structure of the CIFS share. |
Expected Result | 1. In step 5, succeed to connect to the Dorado storage, and create the file storage area. 2. In step 10, succeed to create the Storage Policy. 3. In step 11, succeed to create three directories (content, inbound, system) and one file (fn_stakefile.xml) in the CIFS share. |
Test Results | 1. Select the Object Store > Administrative > Storage > Storage Areas, and right-click to New Storage Area. Select the Storage area type of File and next. 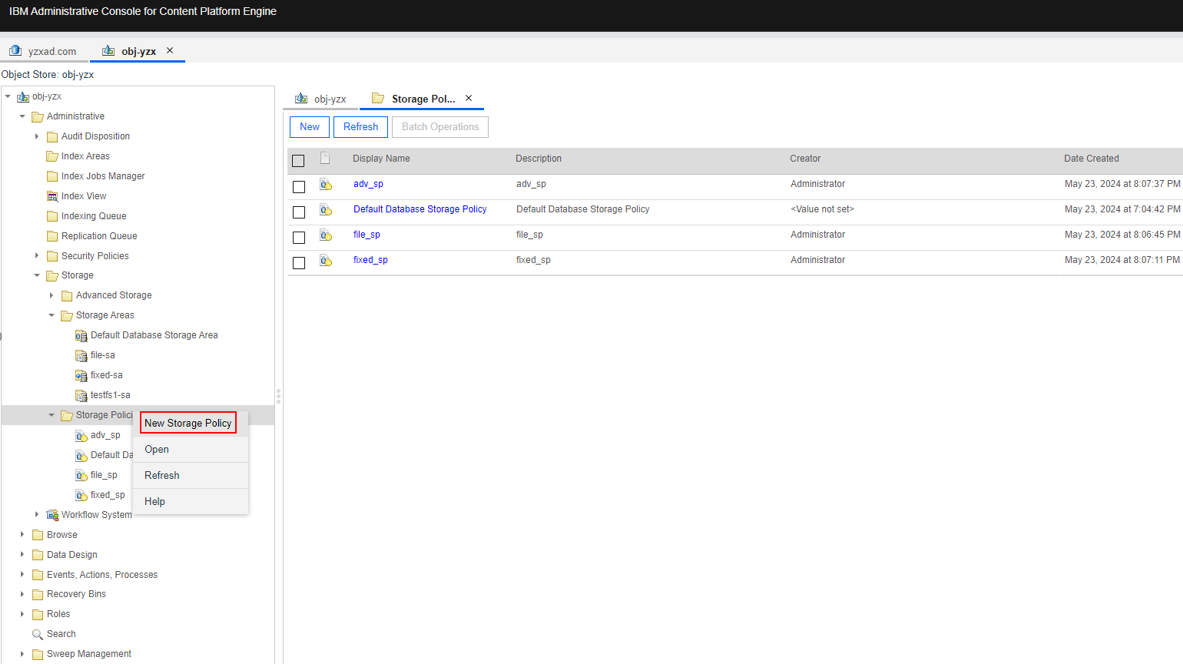 7. Enter a display name and next. |
Test Conclusion | Passed |
 2.
2.  3.
3.
 5.
5. 
3.4 Add the documents to the File storage area
Test Purpose | To verify that File storage area can work properly. |
Test Networking | Storage as the IBM FileNet P8 Content Platform Engine Storage Area Test Networking |
Prerequisites | 1. Deployment of storage device, CPE Windows Server and networking have been completed. 2. The storage device is running properly. 3. File System and CIFS share have been created on storage device. 4. The Object Store of “obj-yzx” has been created on CPE. 5. The file storage area has been created in section 3.3. |
Test Procedure | 1. Select the Object Store > Browse > Root Folder > Actions > New Document. 2. Enter the document title and next. 3. Add the content element and next. 4. Retain the default settings and next. 5. Select the created storage area and storage policy in section 3.3 and next. 6. Check the configuration and finish. 7. Check the directory size of the CIFS share. |
Expected Result | In step 6, succeed to add the documents to the file storage area. In step 7, succeed to add the documents to the CIFS share. |
Test Results | 1. Select the Object Store > Browse > Root Folder > Actions > New Document. 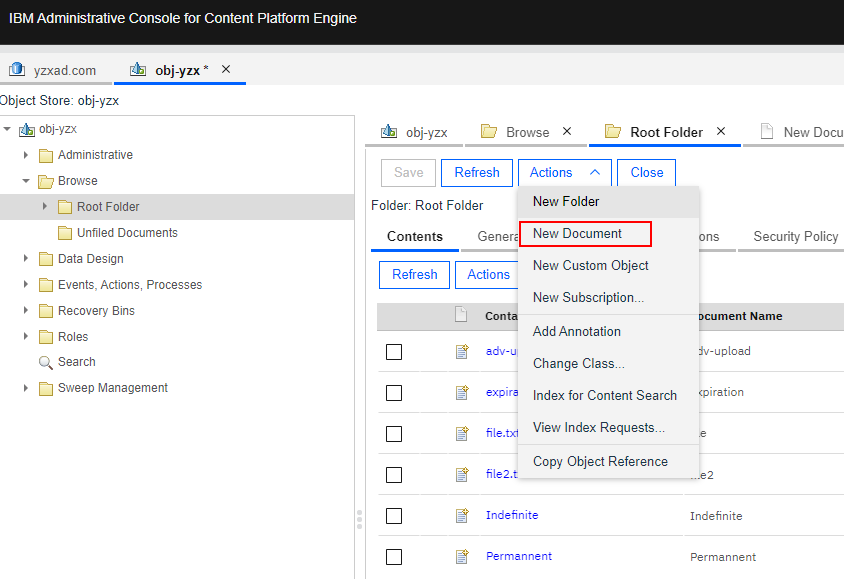 2. Enter the document title and next. 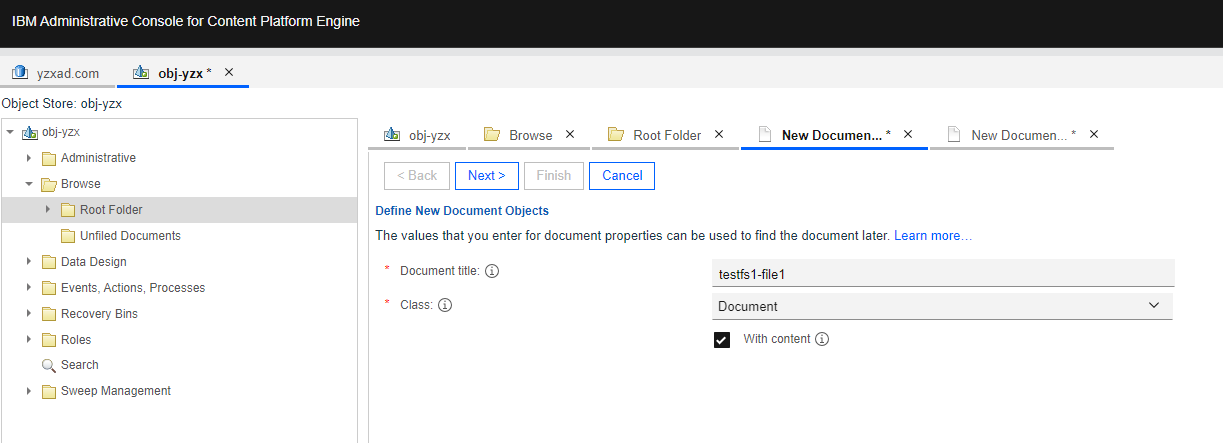 3. Add the content element and next. 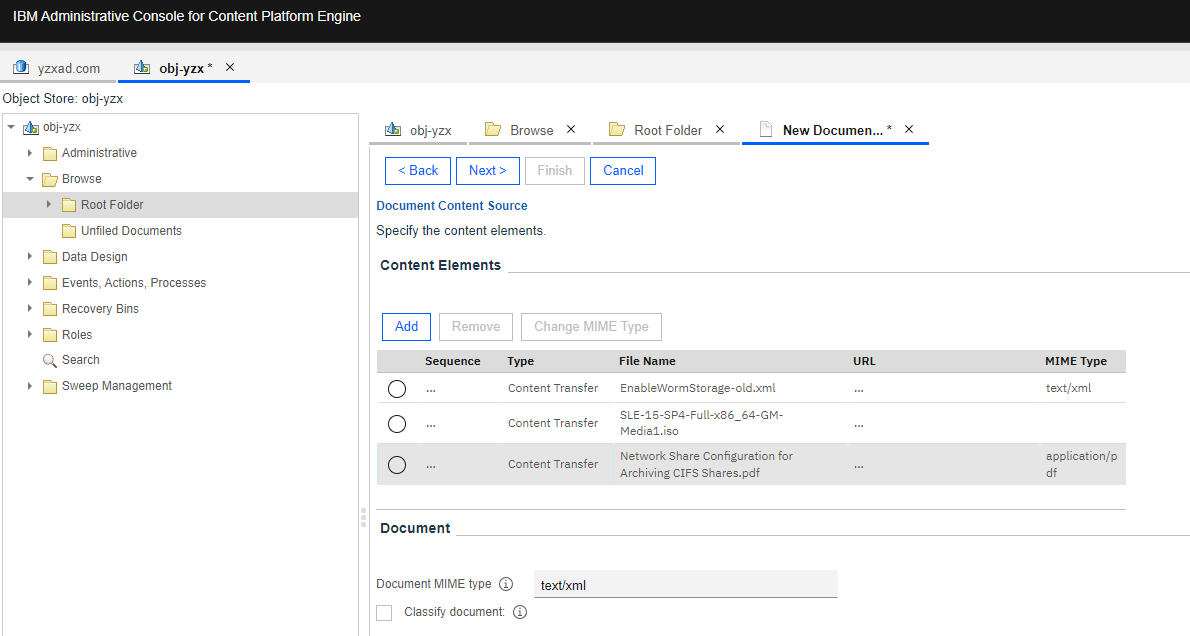 4. Retain the default settings and next. 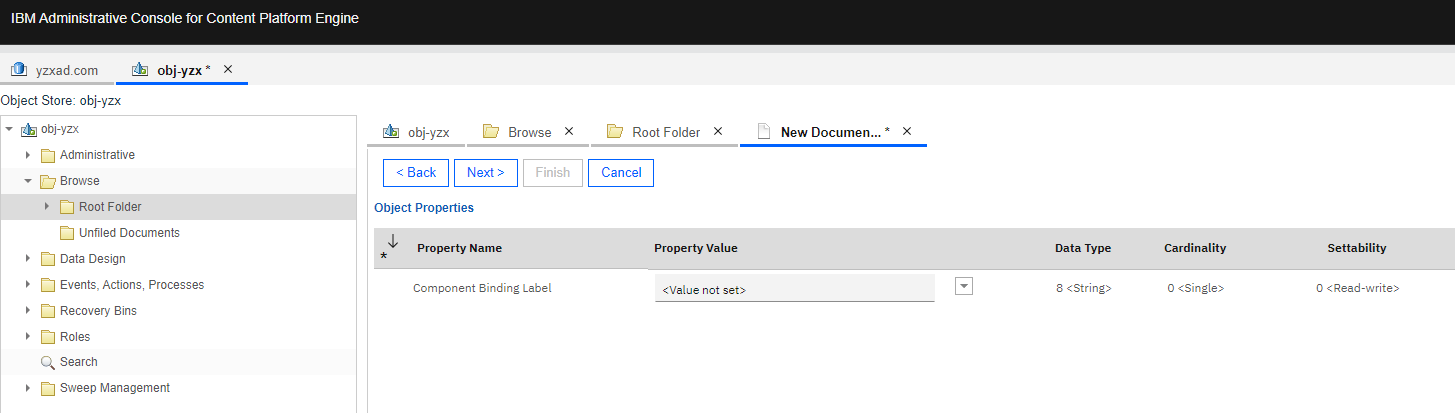 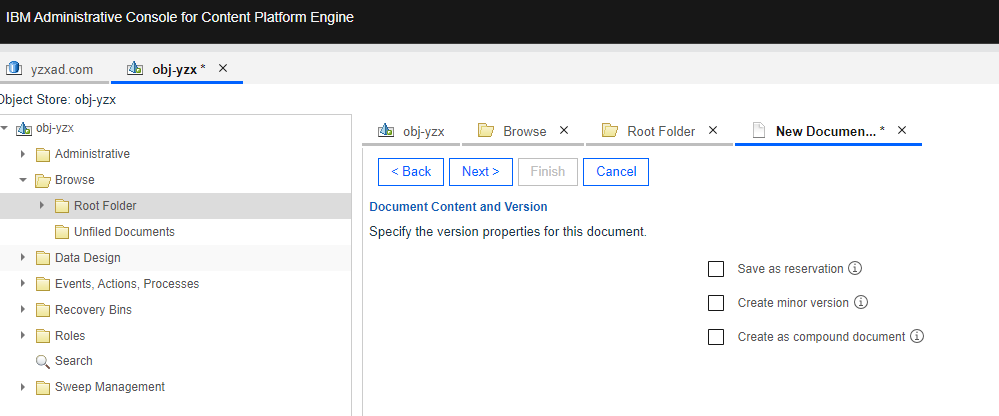 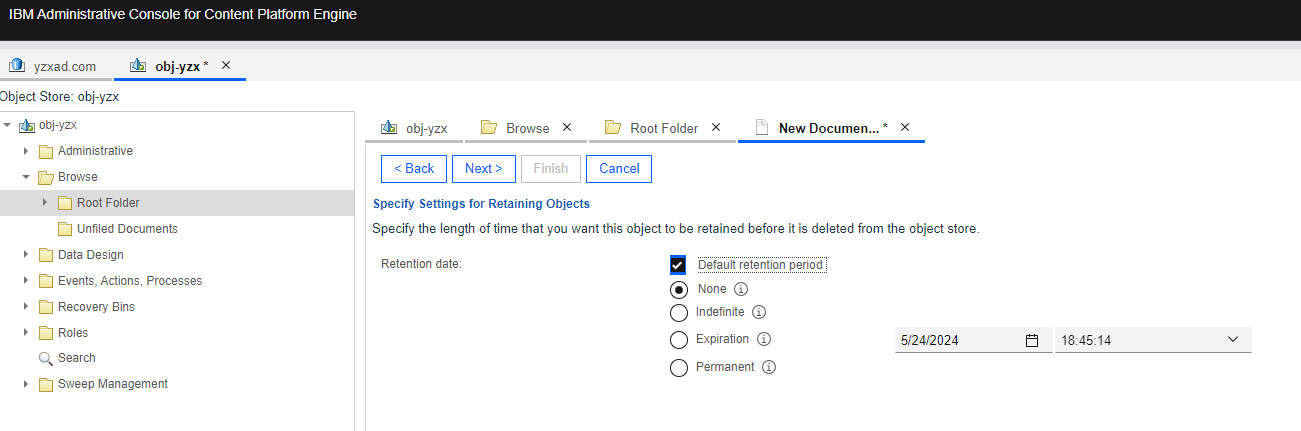 5. Select the created storage area and storage policy in section 3.3 and next.  6. Check the configuration and finish. 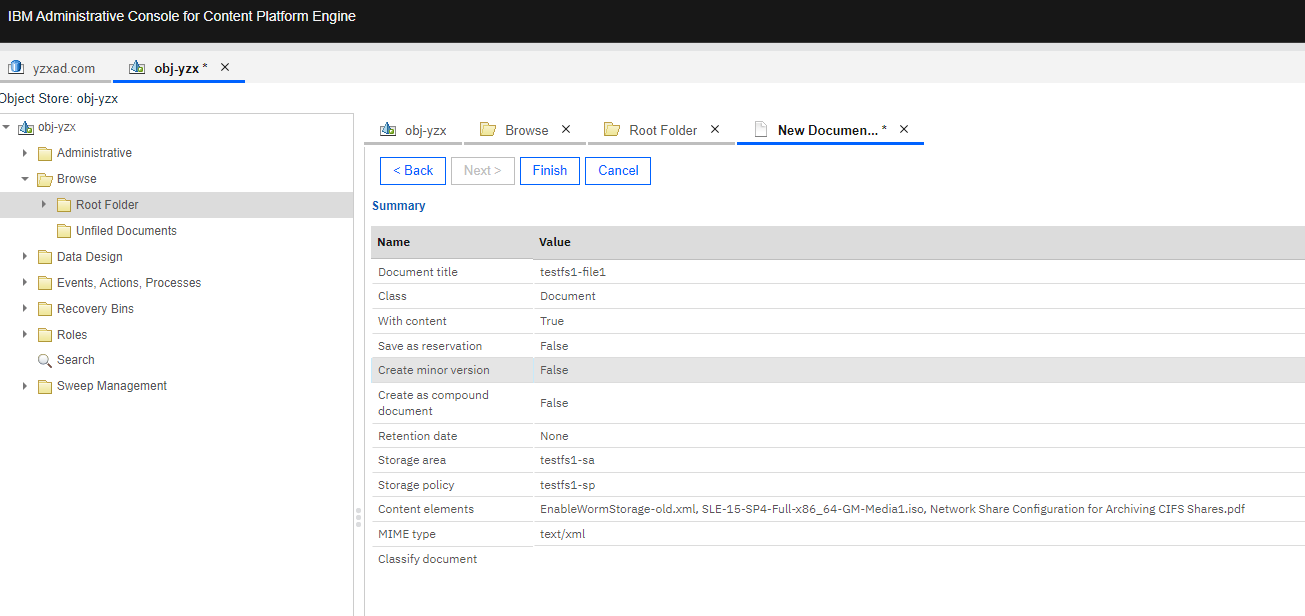  7. Check the directory size of the CIFS share. 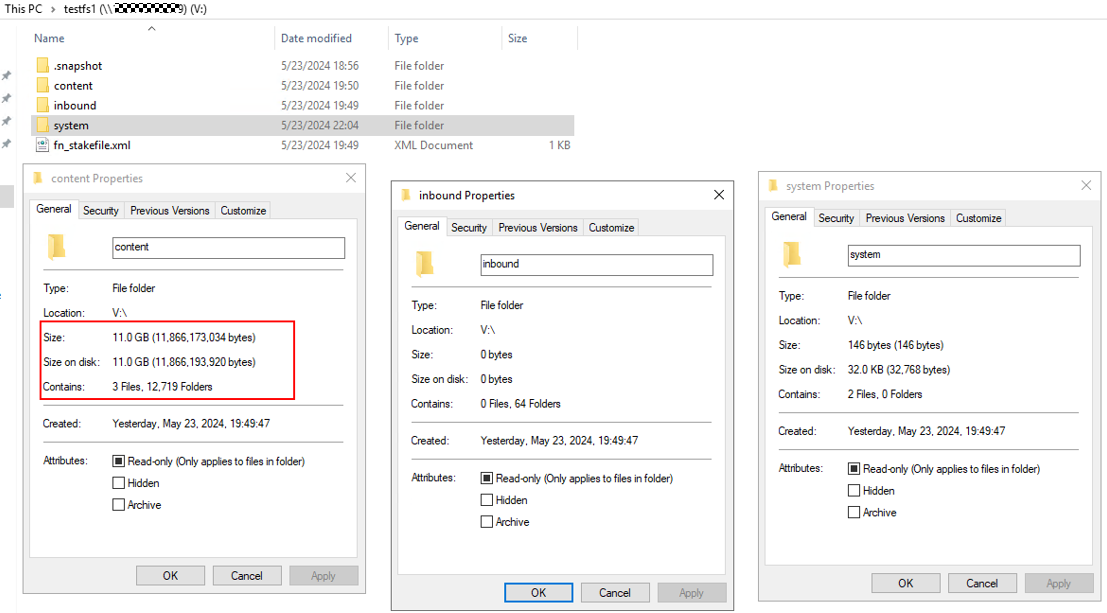 |
Test Conclusion | Passed |
3.5 Download the documents form the File storage area
Test Purpose |
|
Test Networking | Storage as the IBM FileNet P8 Content Platform Engine Storage Area Test Networking |
Prerequisites | 1. Deployment of storage device, CPE Windows Server and networking have been completed. 2. The storage device is running properly. 3. File System and CIFS share have been created on storage device. 4. The Object Store of “obj-yzx” has been created on CPE. 5. The documents have been added to the File storage area in section 3.4 |
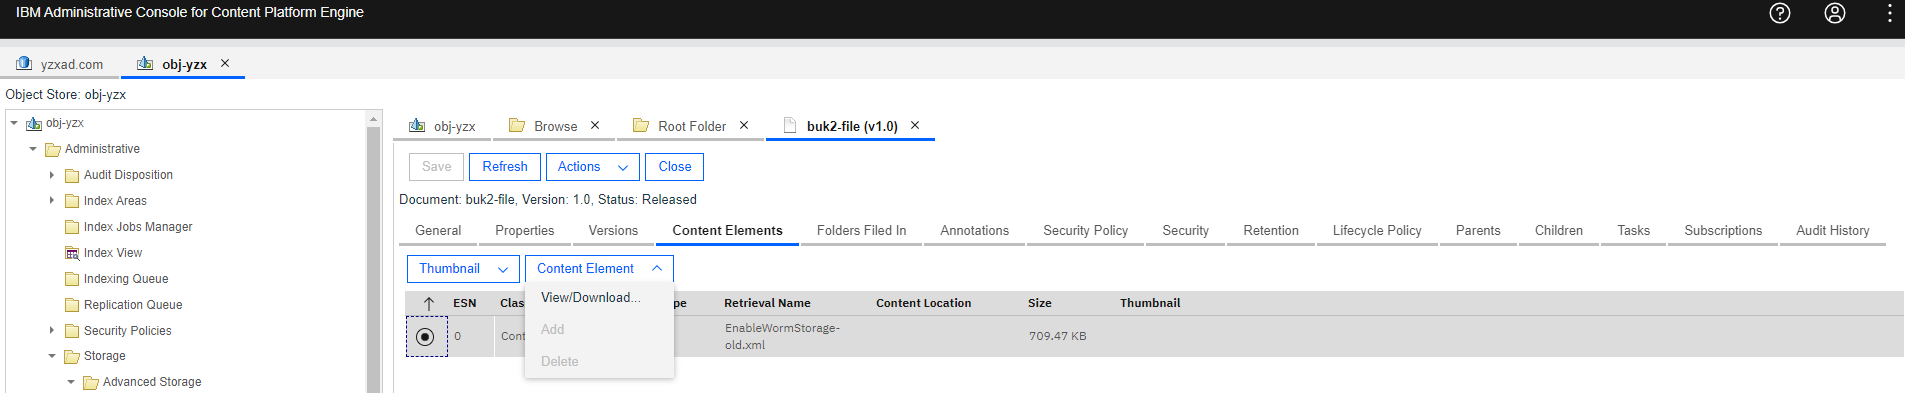
Test Procedure | 1. Select the Object Store > Browse > Root Folder > Actions > Contents. 2. Select the document and browse the content elements. 3.Download the content element of a document. 4. Check the downloaded document consistency. |
Expected Result | 1. In step 3, succeed to download the document. 2. In step 4, the downloaded file is complete and correct. |
Test Results | 1. Select the Object Store > Browse > Root Folder > Actions > Contents. 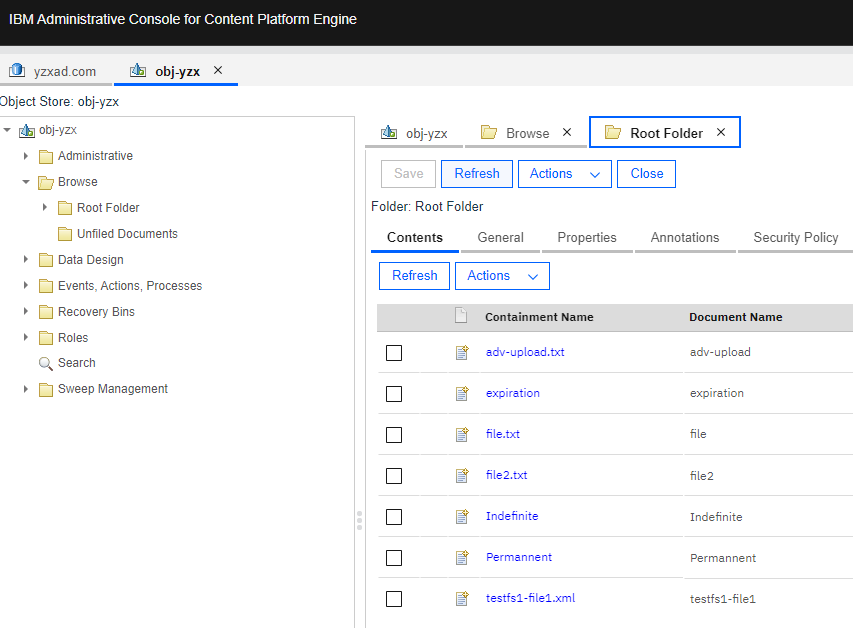 2. Select the document and browse the content elements. 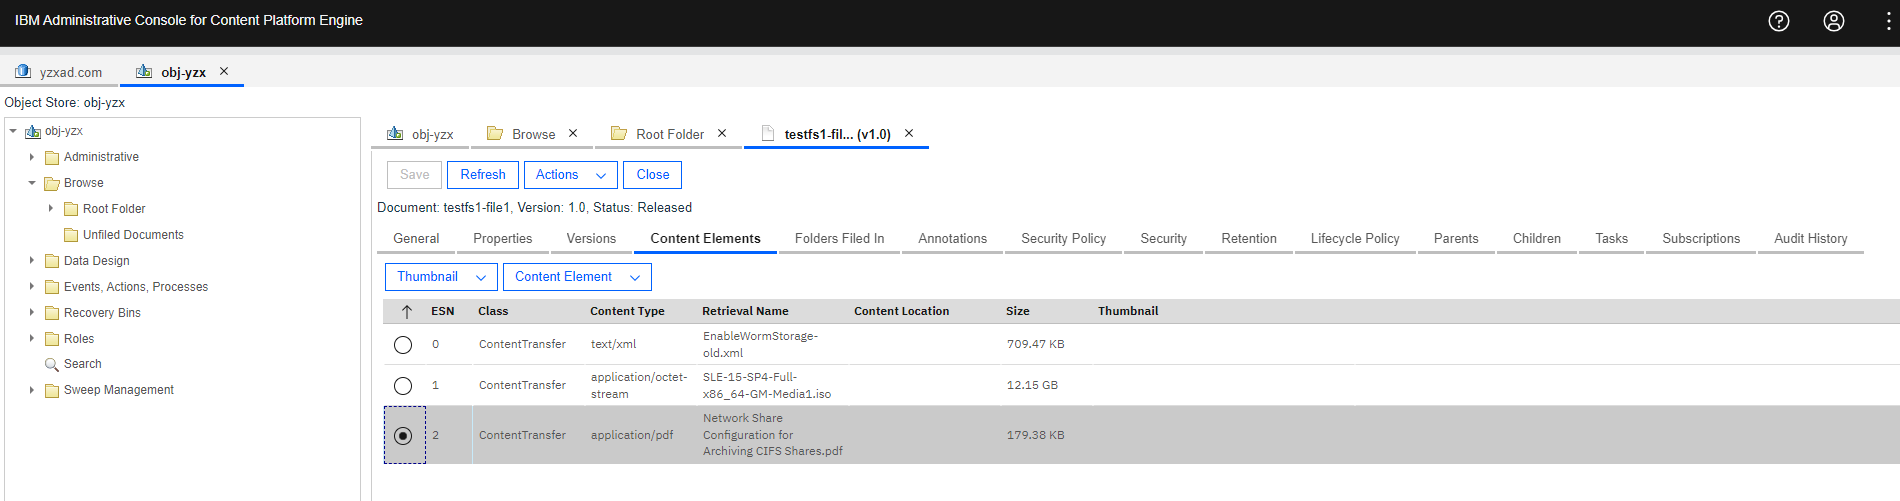 3. Download the content element of a document. 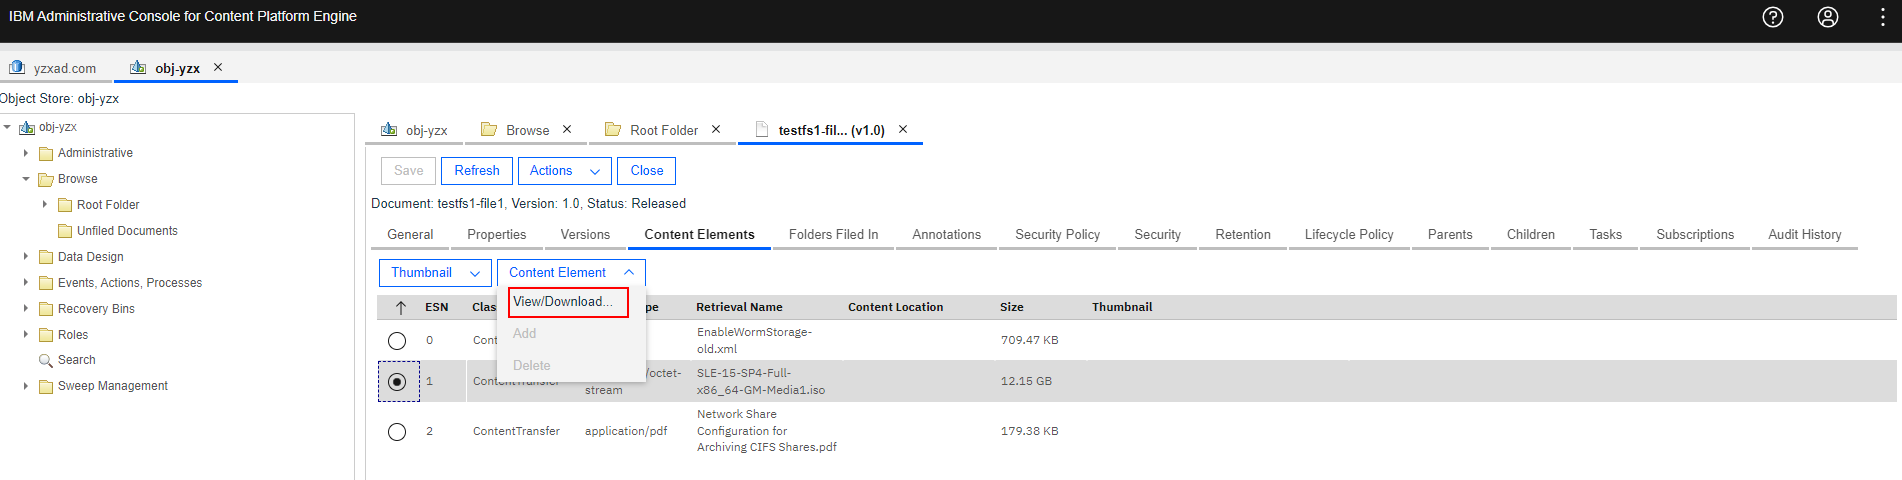 4. Check the downloaded document consistency.  |
Test Conclusion | Passed |
3.6 Delete the documents form the File storage area
Test Purpose | To verify that File storage area can work properly |
Test Networking | Storage as the IBM FileNet P8 Content Platform Engine Storage Area Test Networking |
Prerequisites | 1. Deployment of storage device, CPE Windows Server and networking have been completed. 2. The storage device is running properly. 3. File System and CIFS share have been created on storage device. 4. The Object Store of “obj-yzx” has been created on CPE. 5. The documents have been added to the File storage area in section 3.4. |
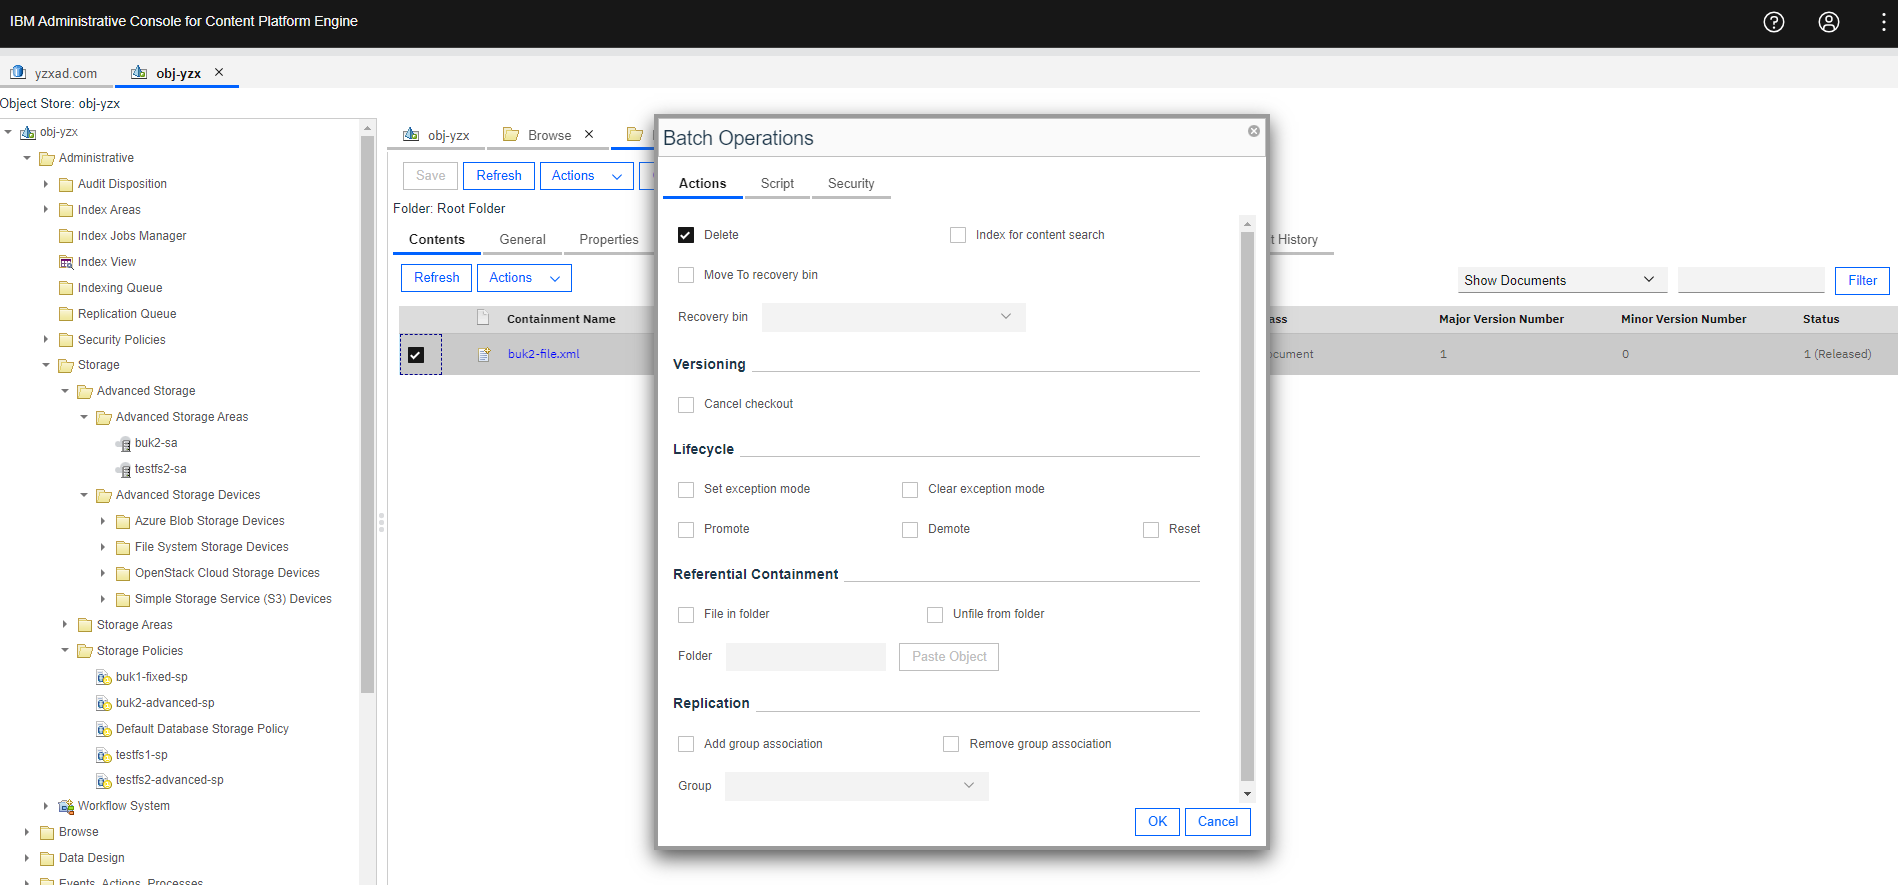
Test Procedure | 1. Select the Object Store > Browse > Root Folder > Actions > Contents. 2. Select the document and delete the document. 3. Check the directory size of the CIFS share. |
Expected Result | 1. In step 2, succeed to delete the document on CPE. 2. In step 3, succeed to delete the document from CIFS share. |
Test Results | 1. Select the Object Store > Browse > Root Folder > Actions > Contents.  2. Select the document and delete the document. 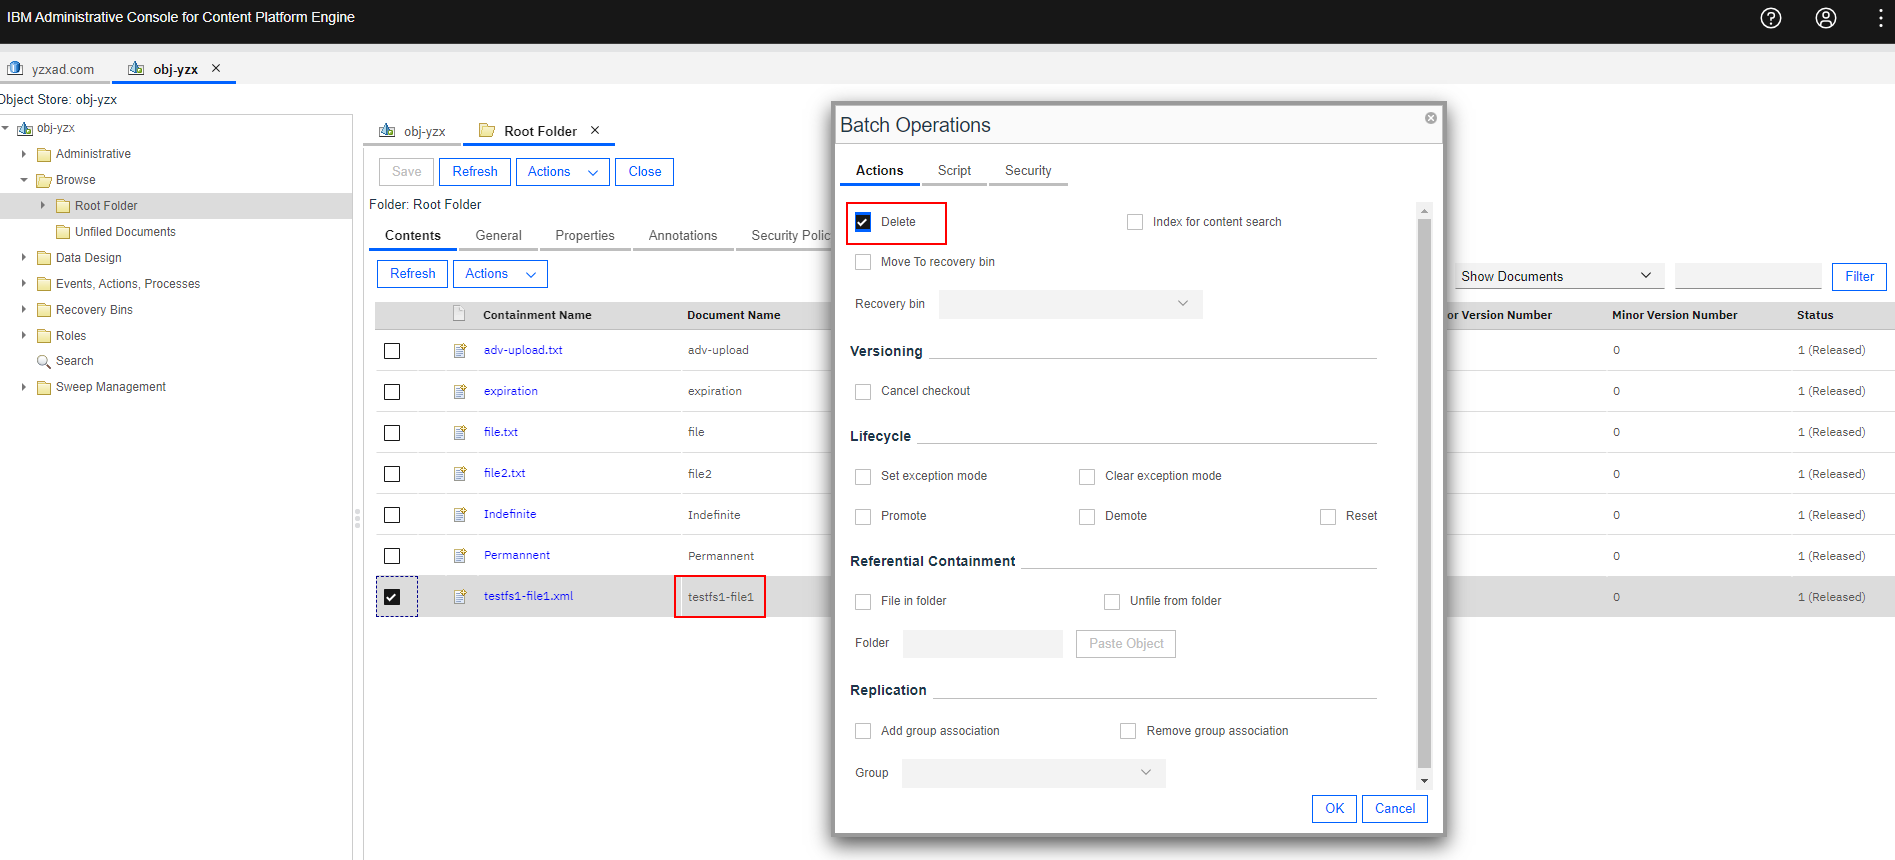 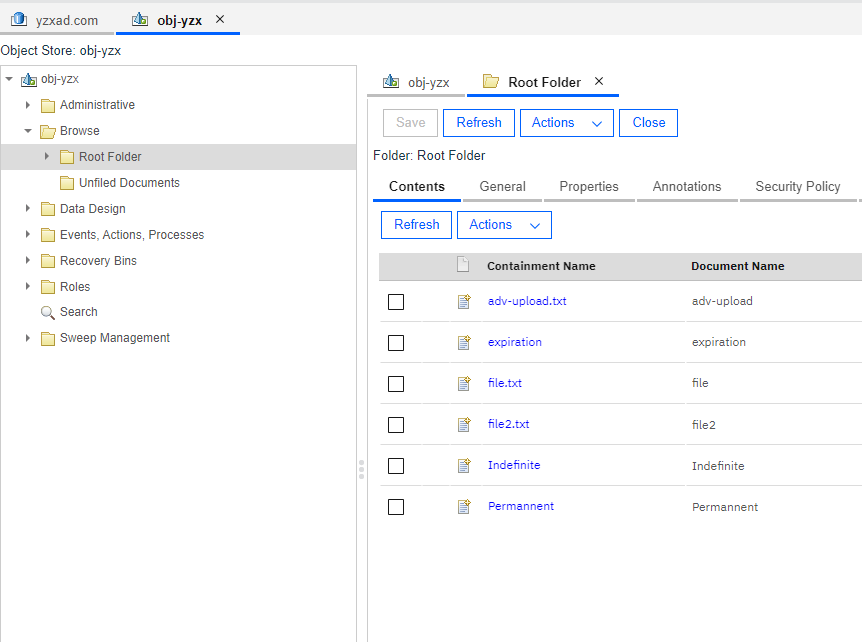 3. Check the directory size of the CIFS share.  |
Test Conclusion | Passed |
4. Verification the Dorado Storage as the Advanced storage area
4.1 Add the NFS share to the CPE as the Advanced Storage Device
Test Purpose | To verify that the Dorado storage can be added to the to the CPE as the Advanced storage device |
Test Networking | Storage as the IBM FileNet P8 Content Platform Engine Storage Area Test Networking |
Prerequisites | 1. Deployment of storage device, CPE Linux Server and networking have been completed. 2. The storage device is running properly. 3. File System and CIFS share have been created on storage device. 4. The Object Store of “obj-yzx” have been created on CPE. |
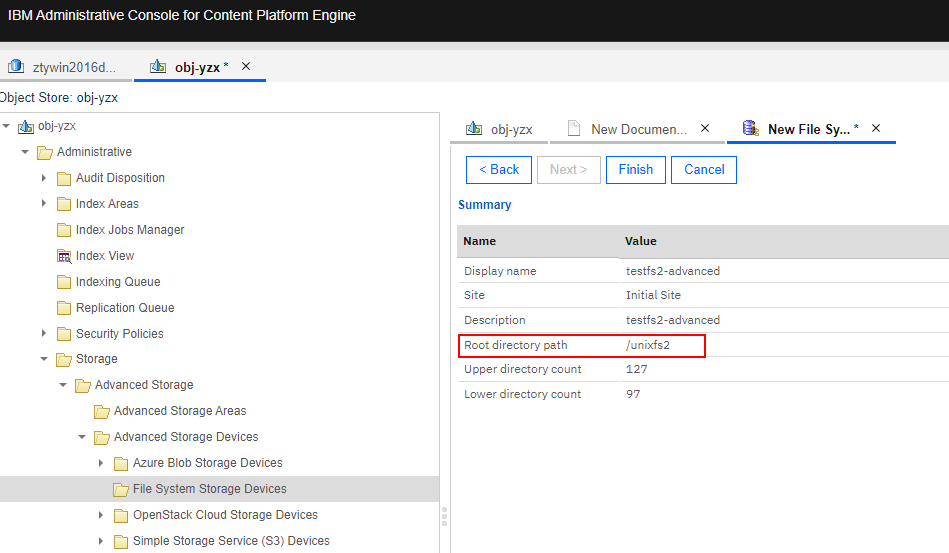
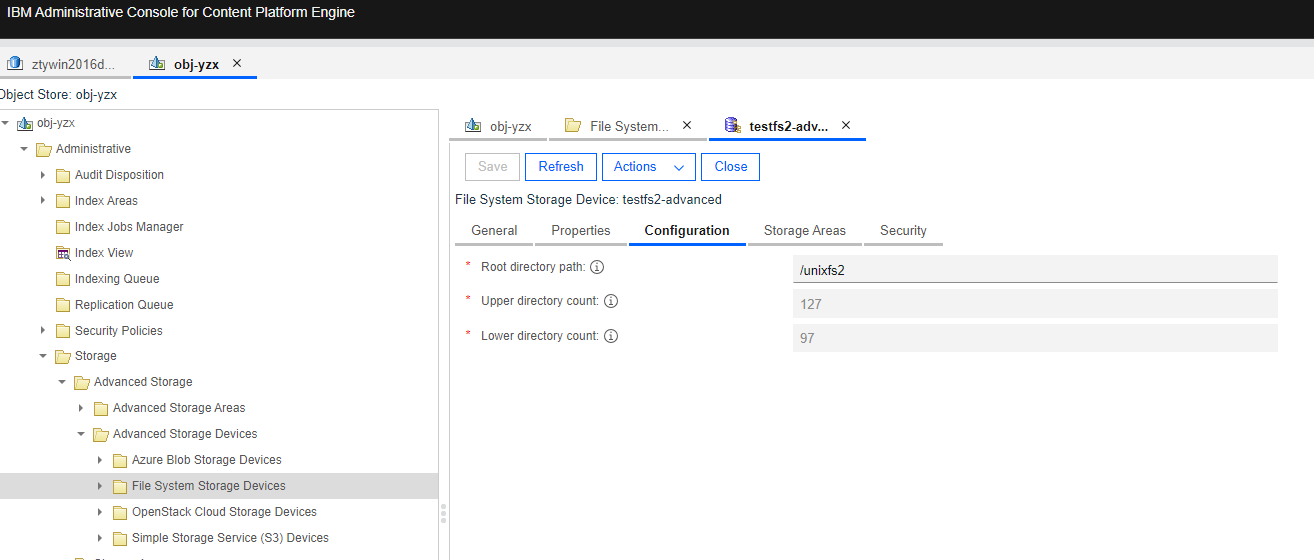
Test Procedure | 1. Mount the NFS share on CPE Linux Server. 2. Select the Object Store > Administrative > Storage > Advanced Storage > Advanced Storage Devices > File System Storage Devices, and right-click to New File System Storage Device. 3. Enter a display name and next. 4. Enter the Mounted Path of the NFS share and next. 5. Check the configuration and finish. 6. Check the directory structure of the NFS share. |
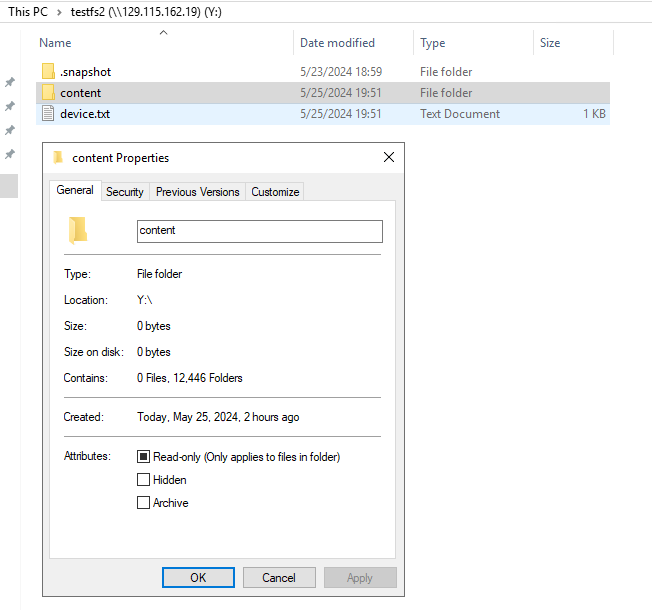
Expected Result | 1. In step 5, succeed to connect to the Dorado storage, and create the Advanced storage device. 2. In step 6, succeed to create one directories (content) and one file (device.txt) in the NFS share. |
Test Results | 1. Mount the NFS share on CPE Linux Server.   2. Select the Object Store > Administrative > Storage > Advanced Storage > Advanced Storage Devices > File System Storage Devices, and right-click to New File System Storage Device. 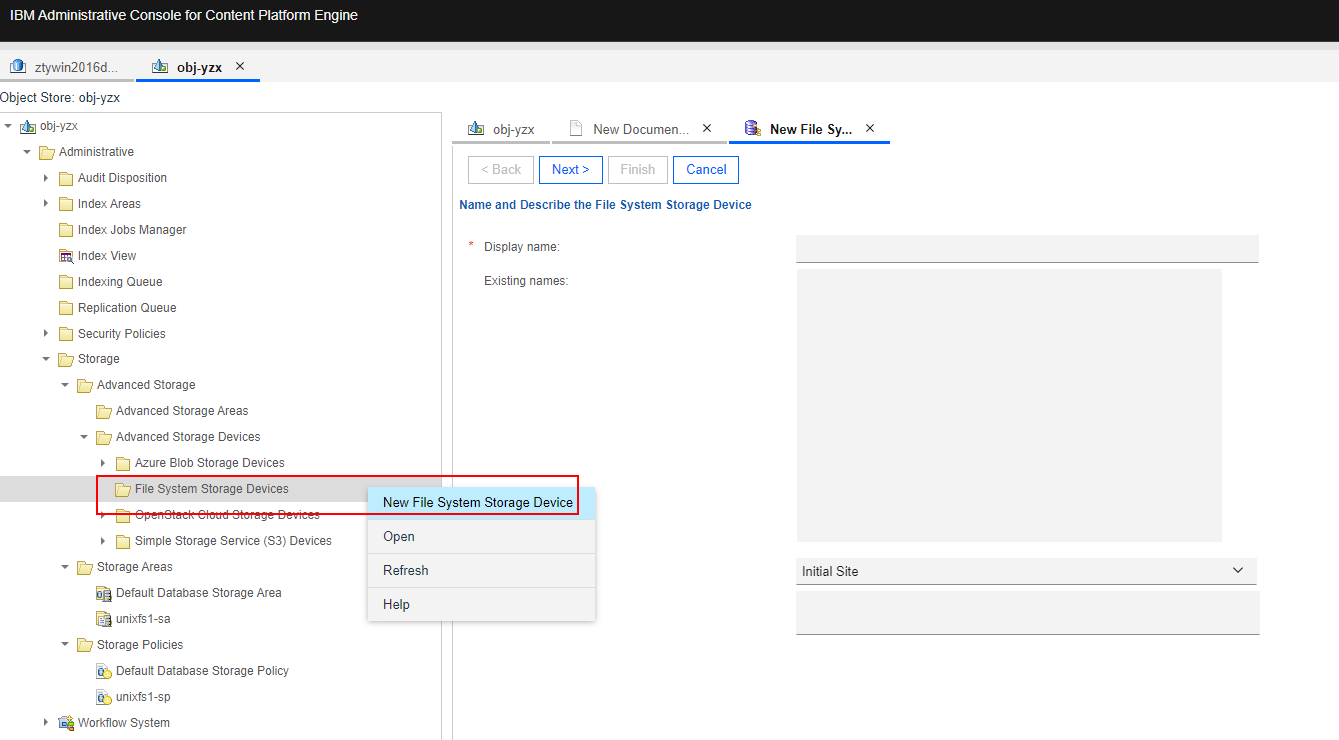 3. Enter a display name and next. 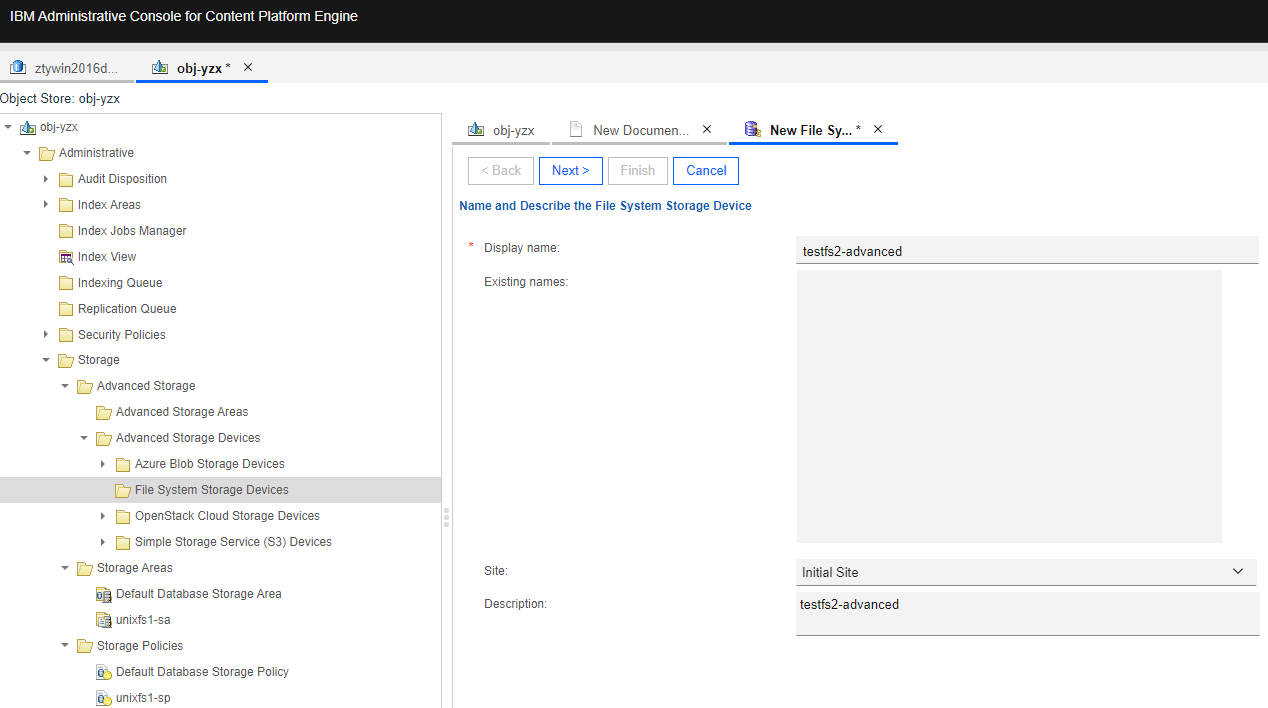 4. Enter the Mounted Path of the NFS share and next. 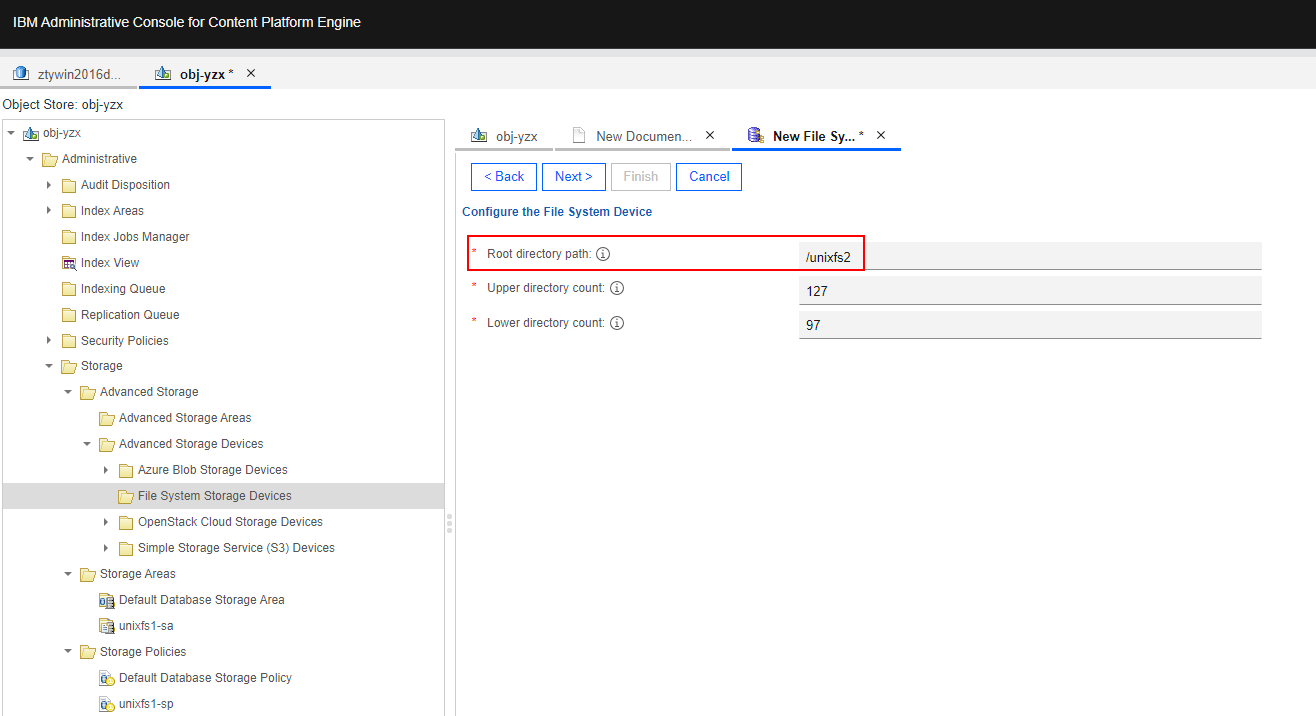
  6. Check the directory structure of the NFS share. 6. Check the directory structure of the NFS share.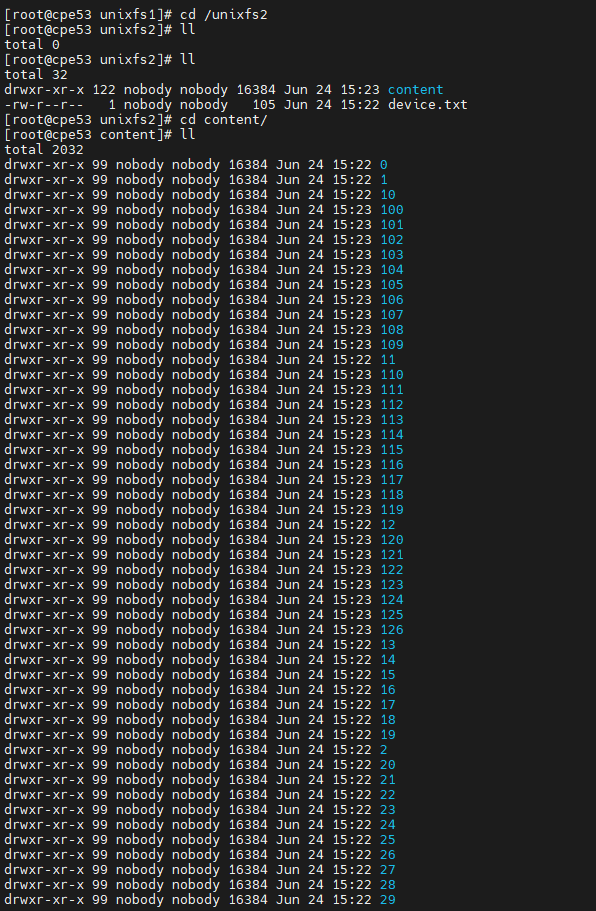  |
Test Conclusion | Passed |
4.2 Create the Advanced storage area
Test Purpose | To verify that the Dorado storage can be added to the CPE as the Advanced storage area. |
Test Networking | Storage as the IBM FileNet P8 Content Platform Engine Storage Area Test Networking |
Prerequisites | 1. Deployment of storage device, CPE Linux Server and networking have been completed. 2. The storage device is running properly. 3. File System and NFS share have been created on storage device. 4. The Object Store of “obj-yzx” have been created on CPE. 5. The Advanced storage device has been created on CPE in section 4.1. |
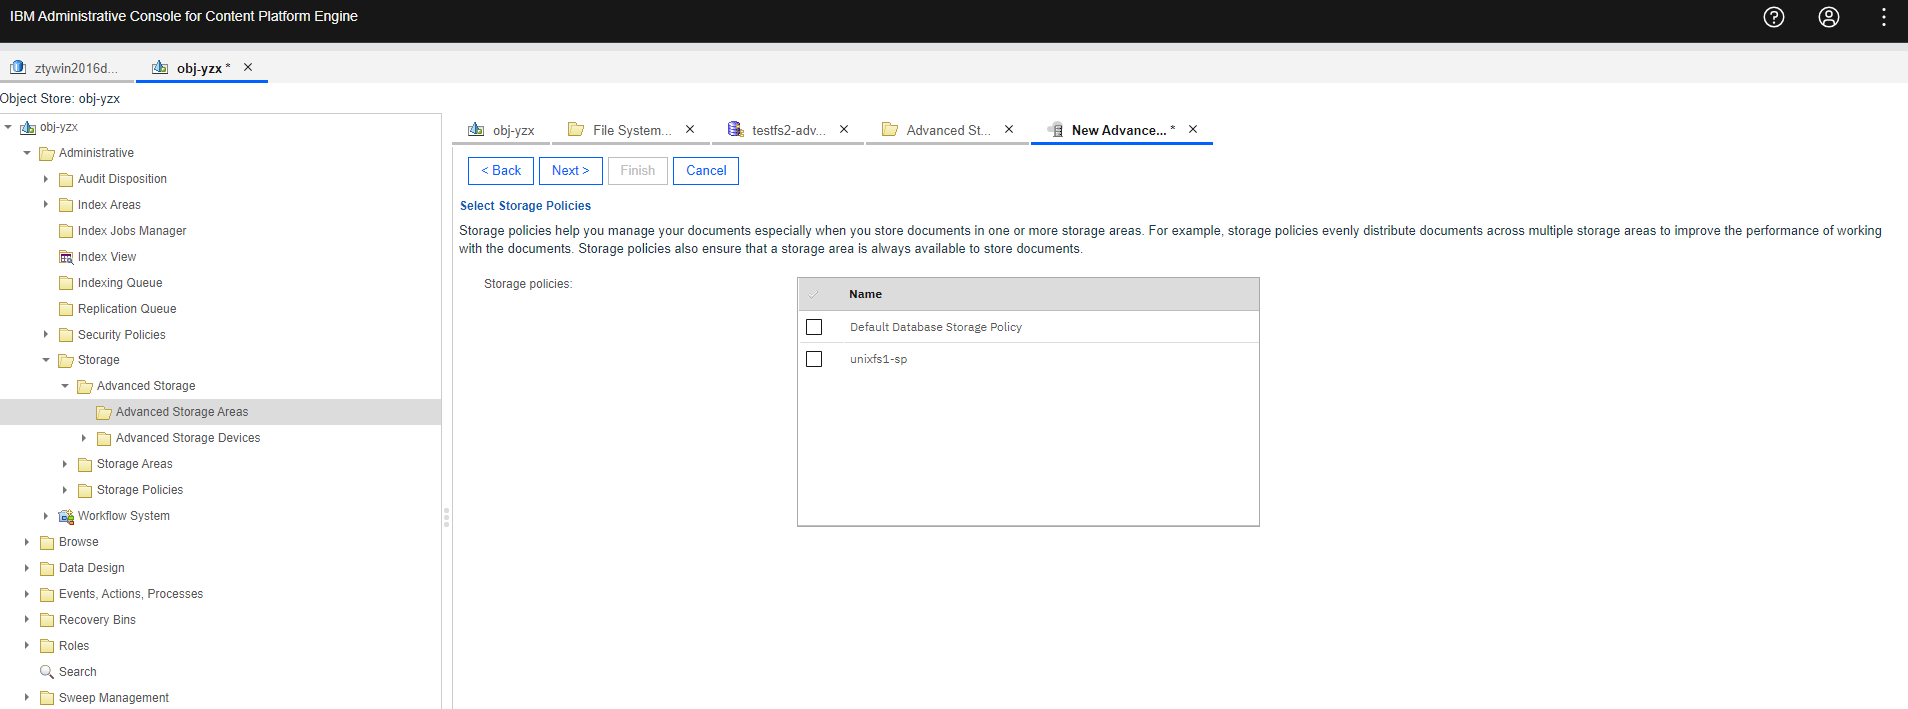
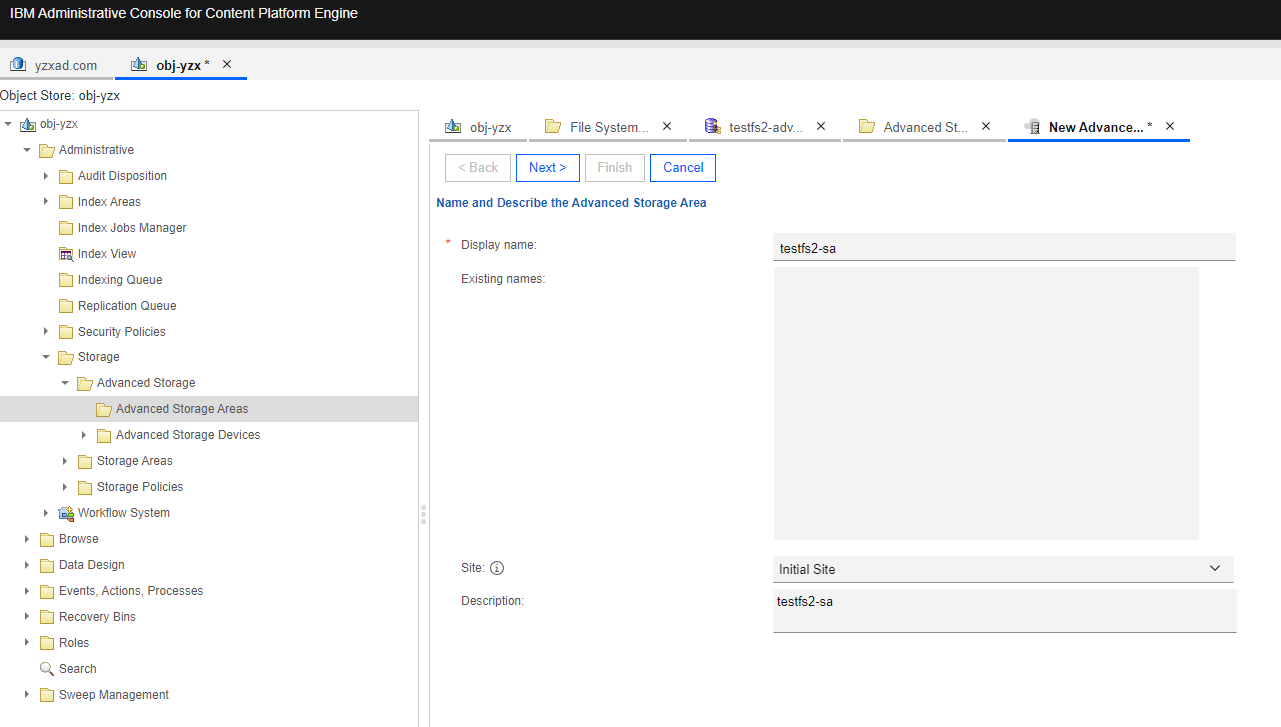
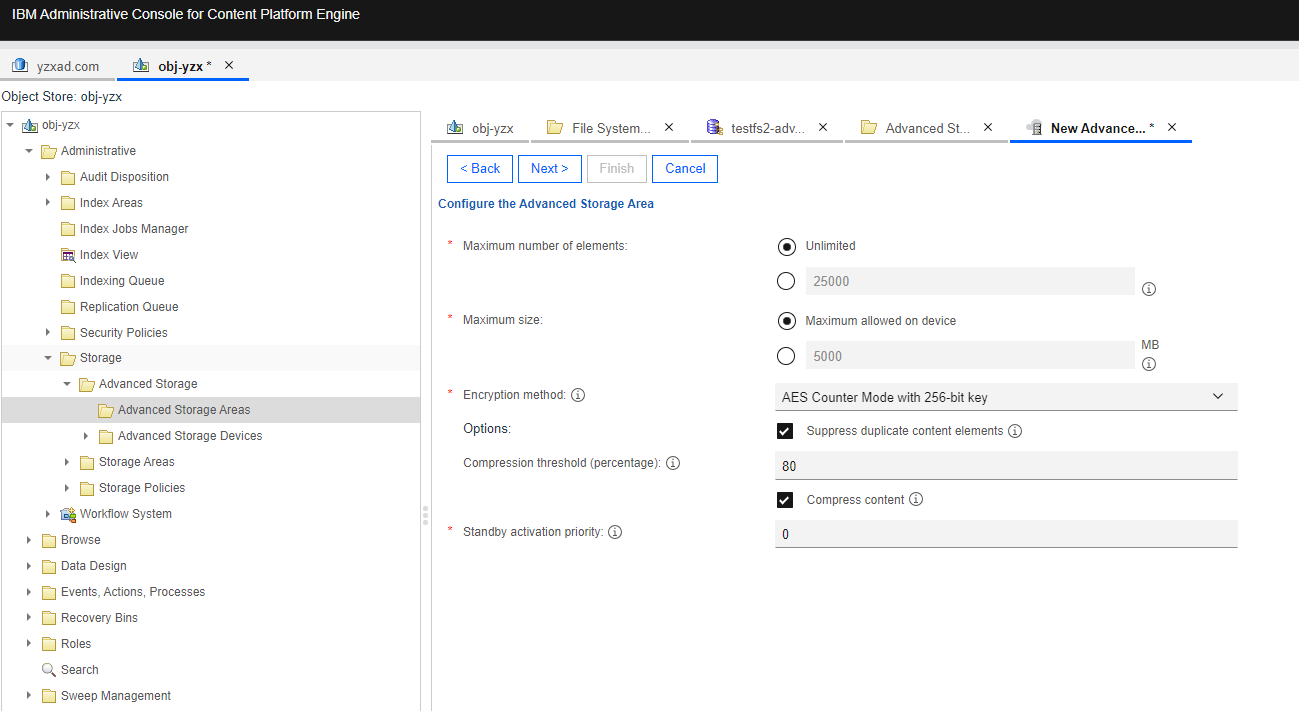
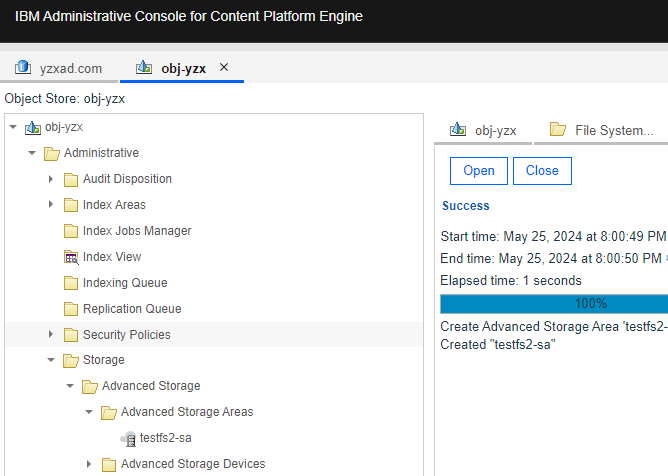
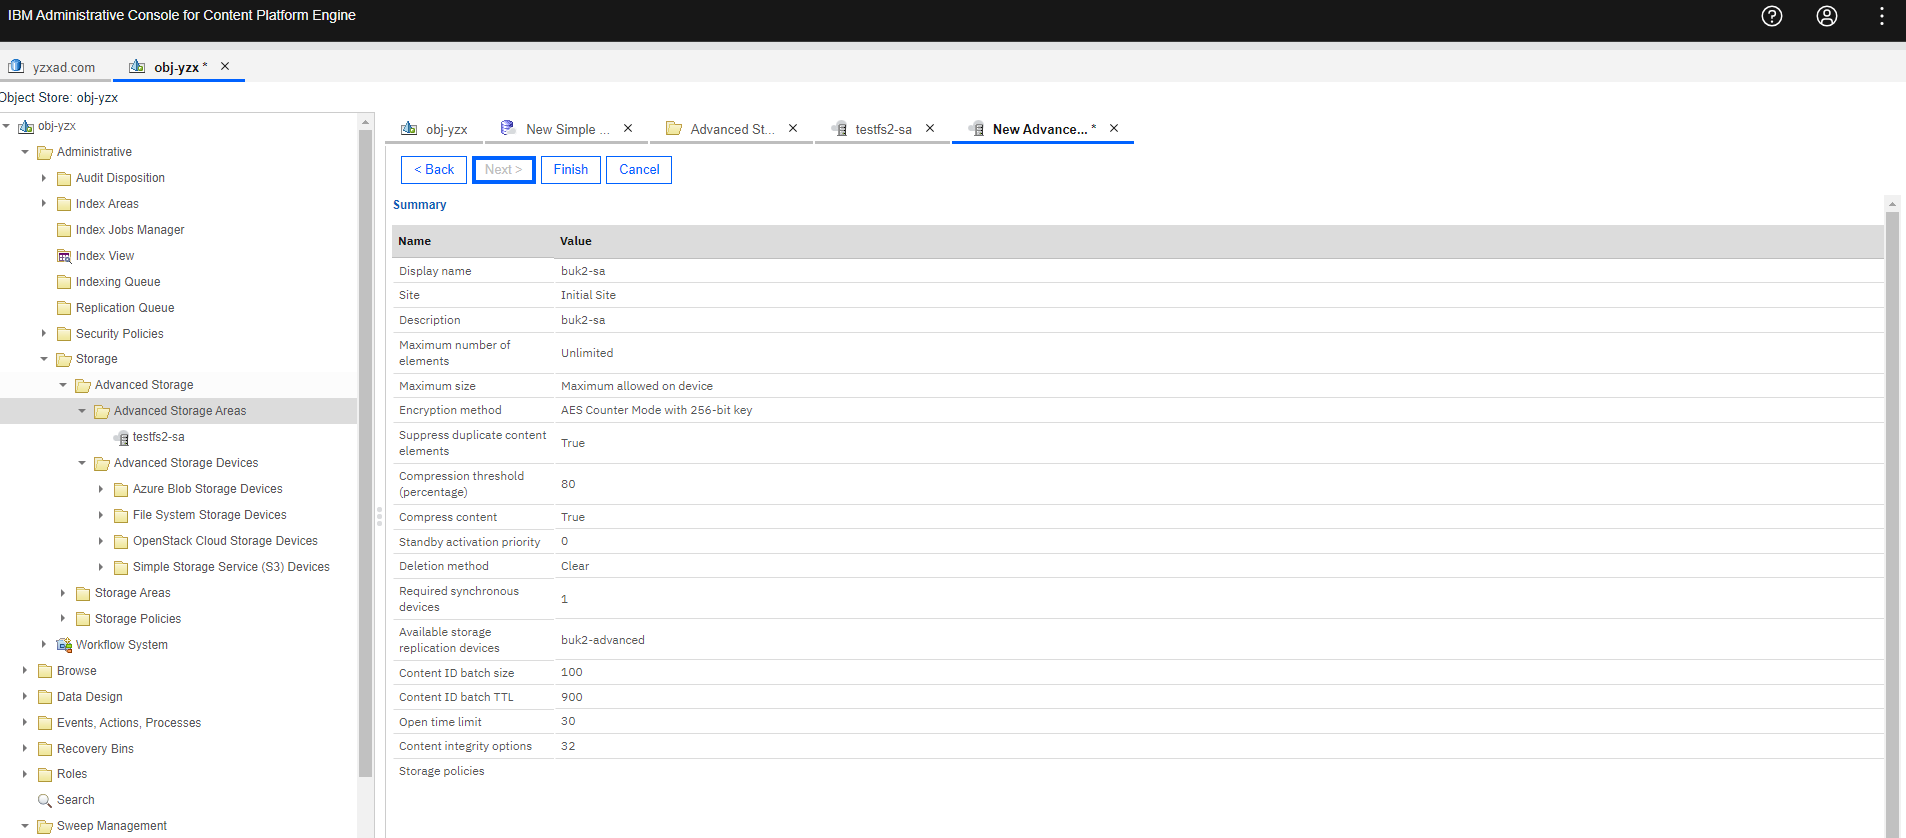
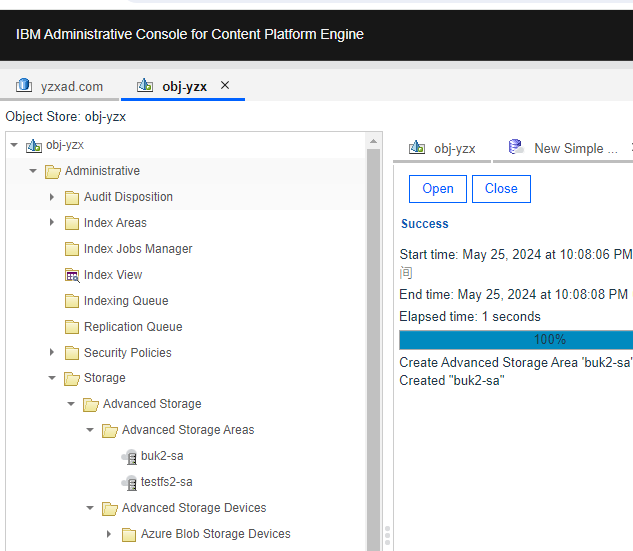
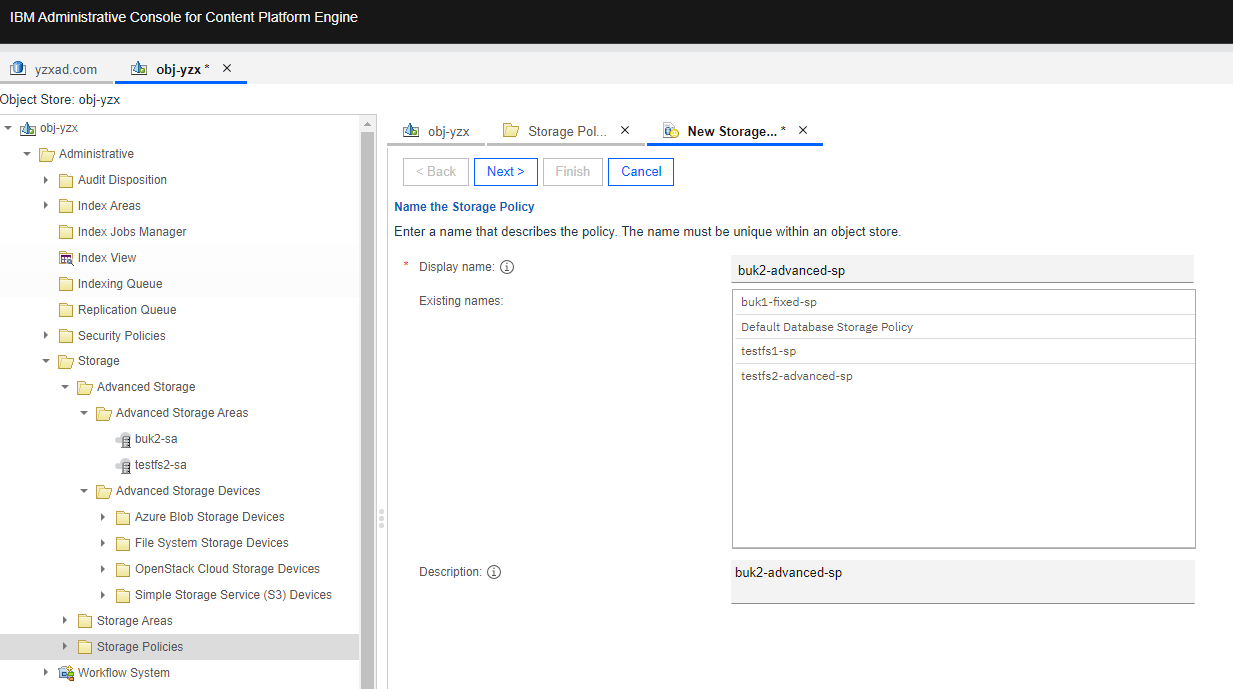
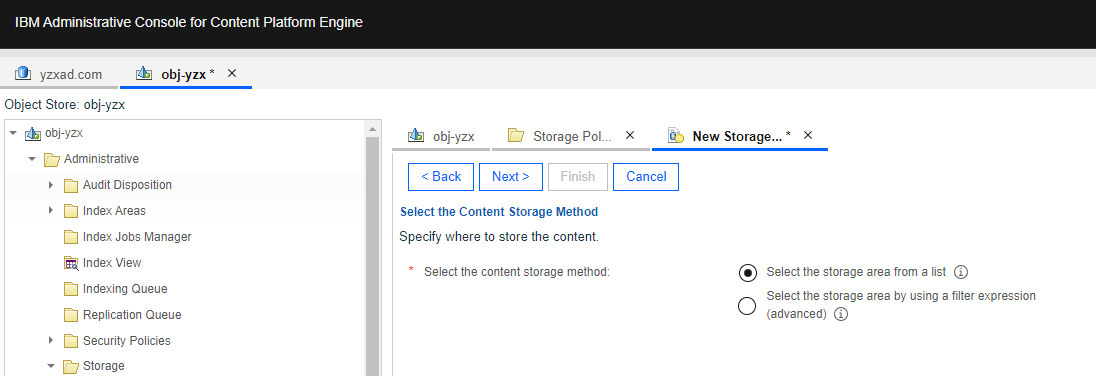
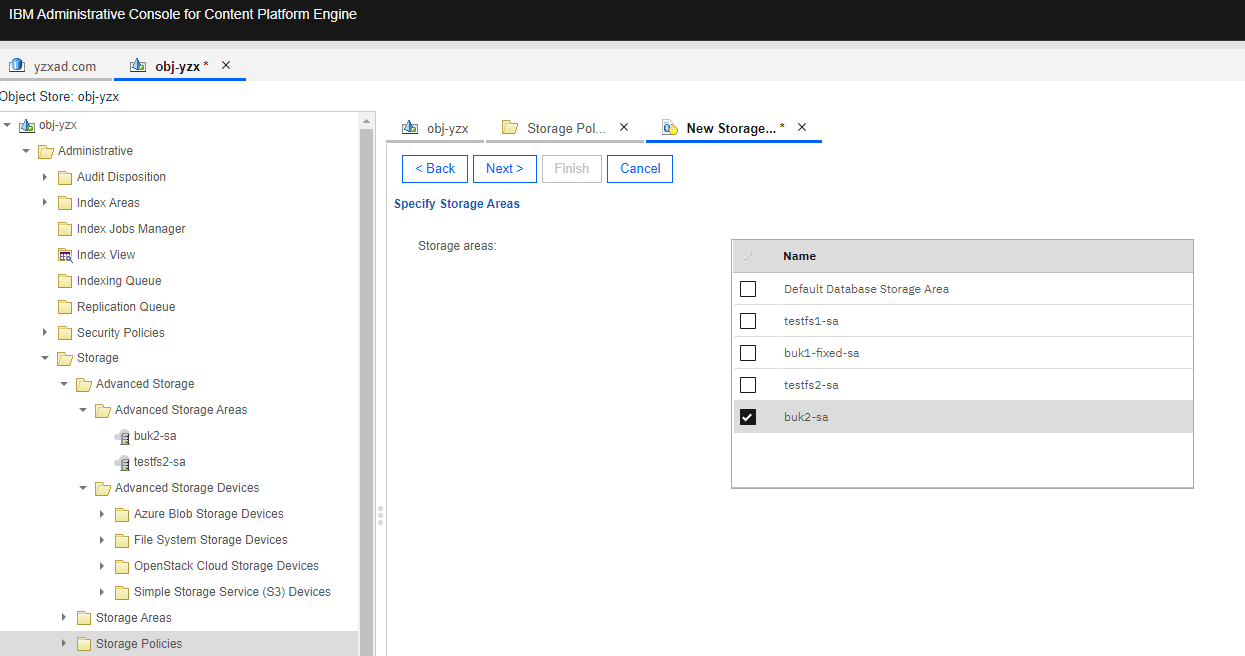
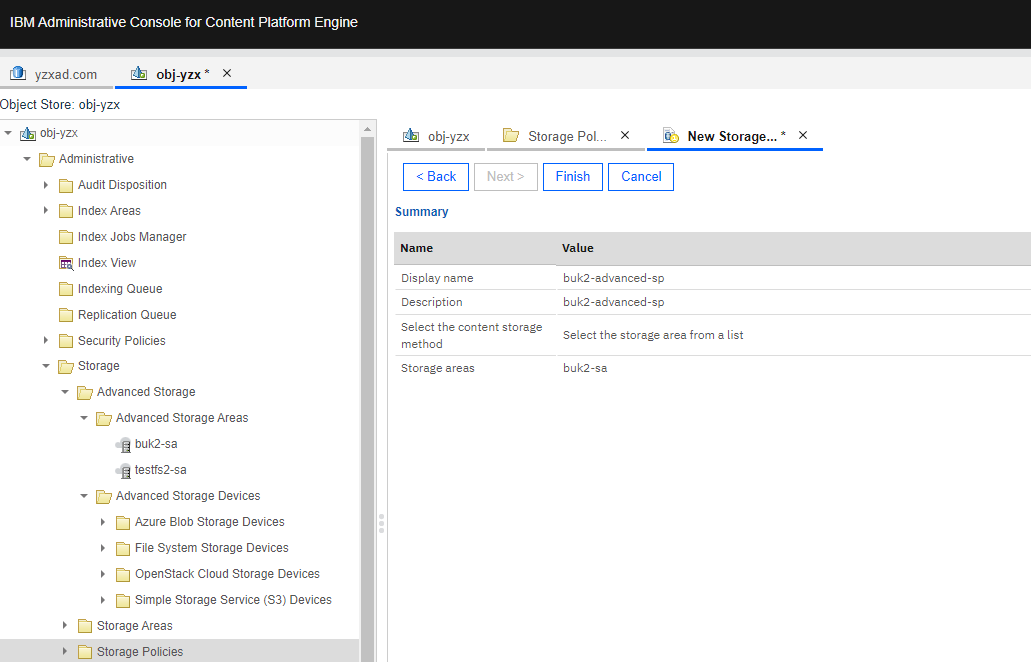
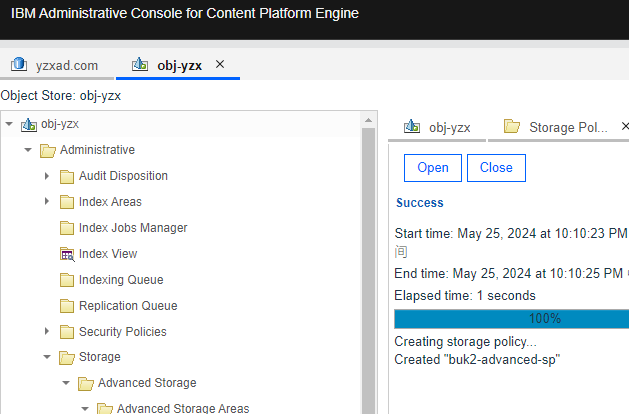
Test Procedure | 1. Select the Object Store > Administrative > Storage > Advanced Storage > Advanced Storage Areas, and right-click to New Advanced Storage Area. 2. Select the created File System Storage Device in section 4.1 and next. 3. Retain the default settings and next. 4. Check the configuration and finish. 5. Select the Object Store > Administrative > Storage > Storage Policies, and right-click to New Storage Policy. 6. Enter a display name and next. 7. Retain the default settings and next. 8. Select the created Storage Area in step 4 and next. 9. Check the configuration and finish. |
Expected Result | 1. In step 4, succeed to create the Advanced storage area. 2. In step 9, succeed to create the Storage Policy. |
Test Results |
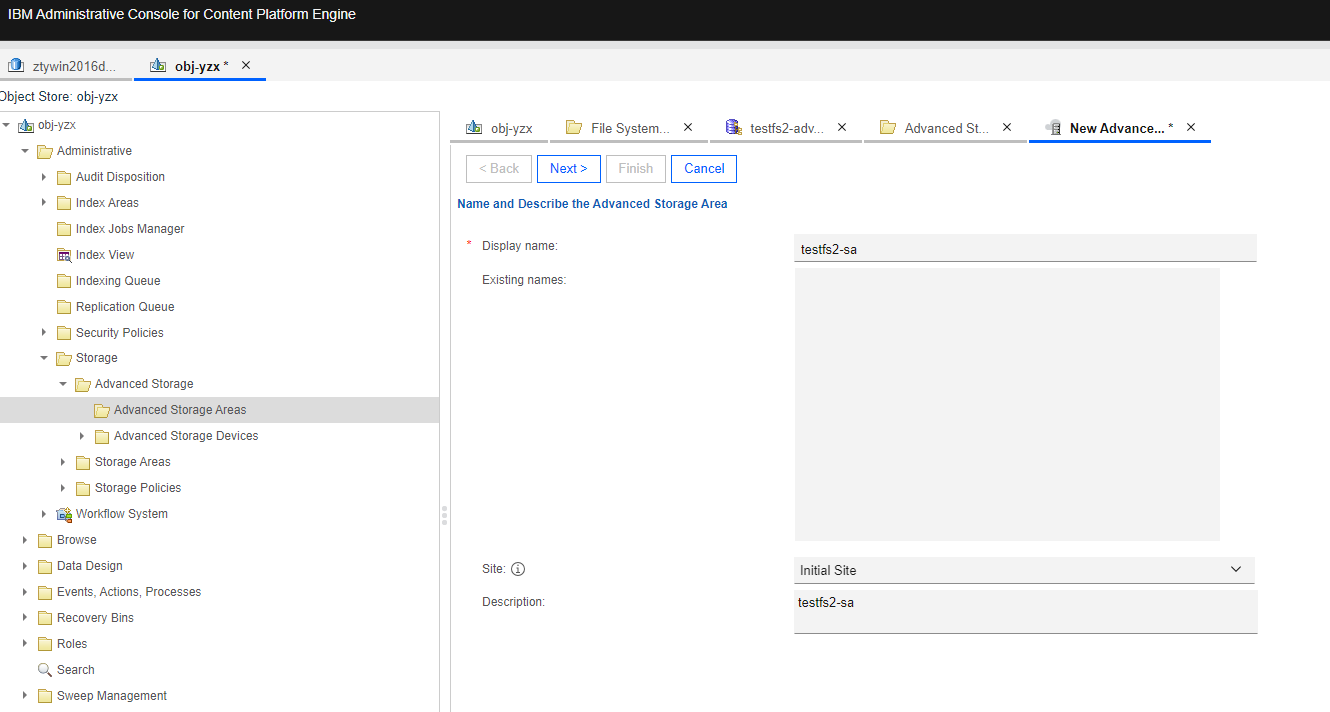 2. Select the created File System Storage Device in section 4.1 and next. 2. Select the created File System Storage Device in section 4.1 and next.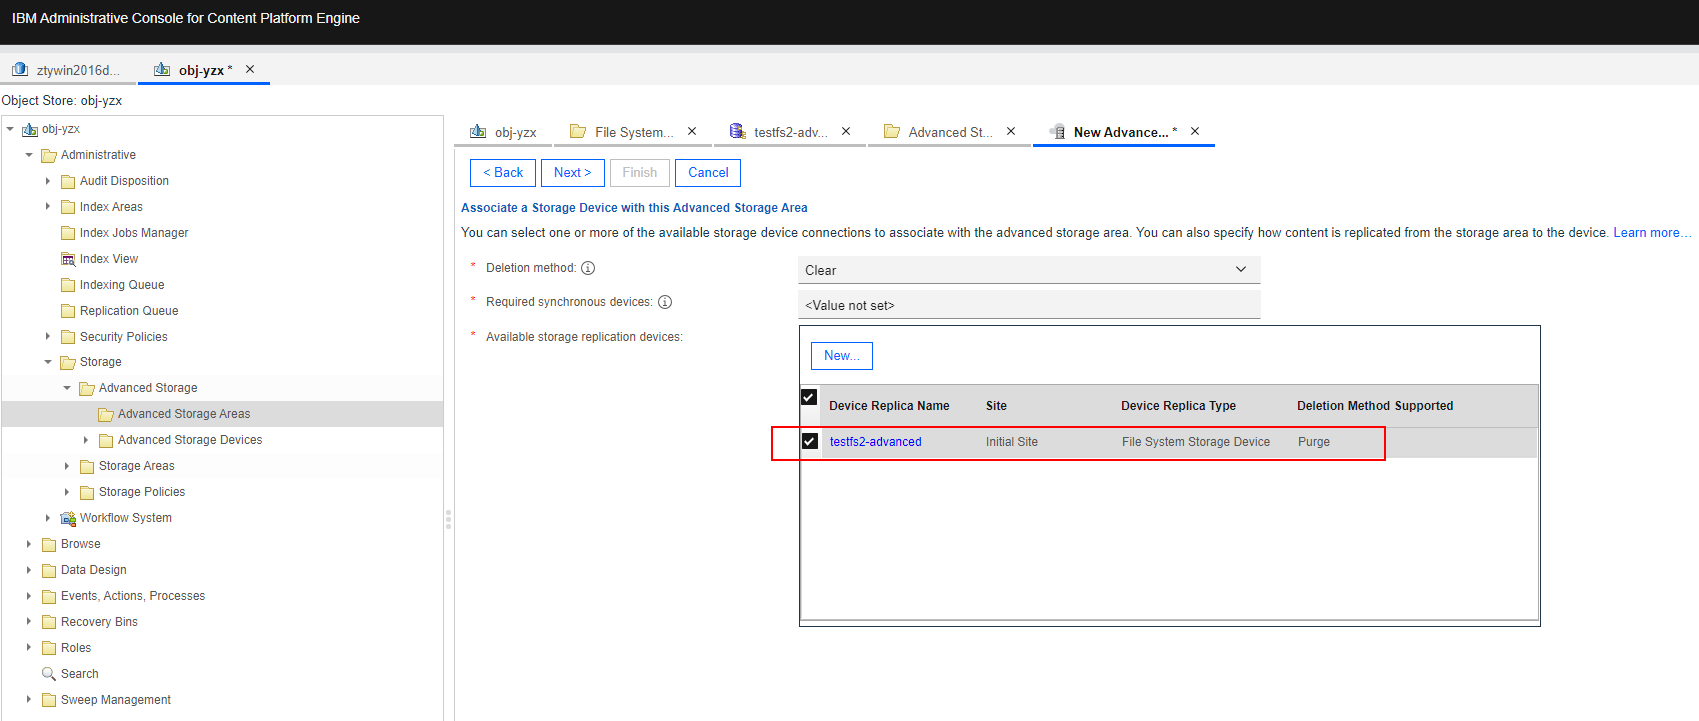 3. Retain the default settings and next. 3. Retain the default settings and next.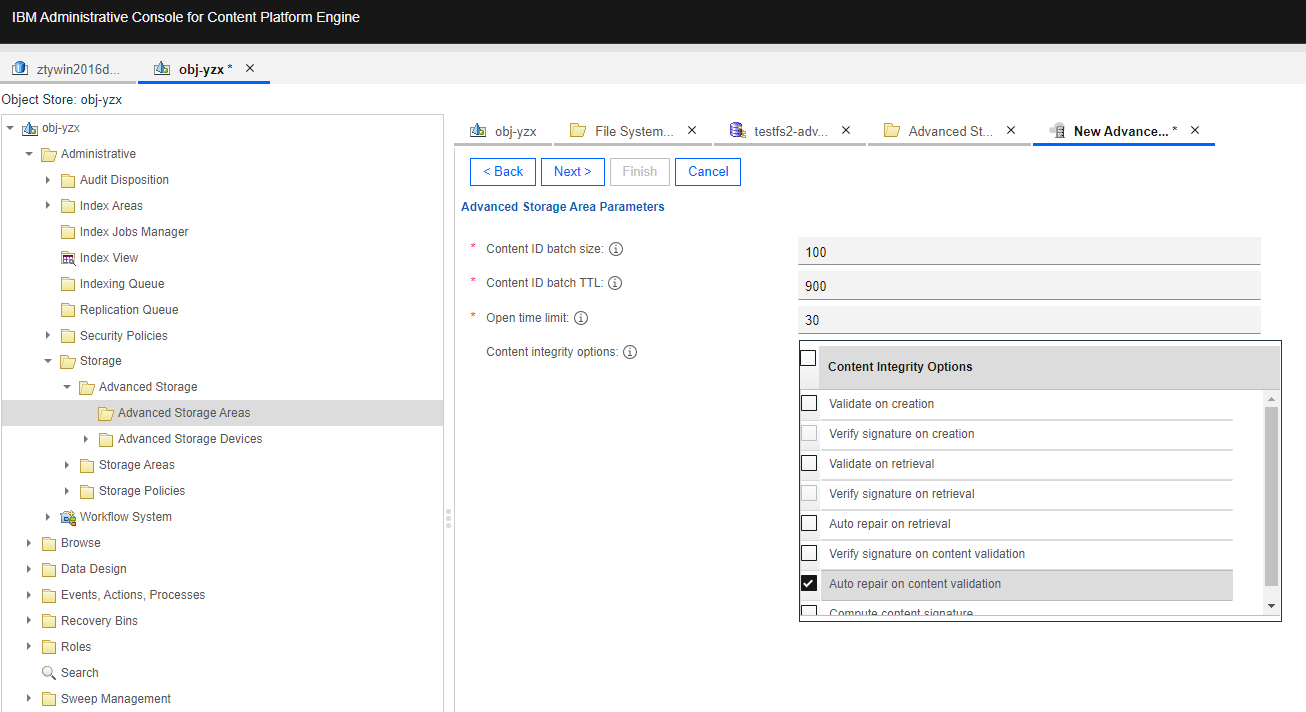
4. Check the configuration and finish. 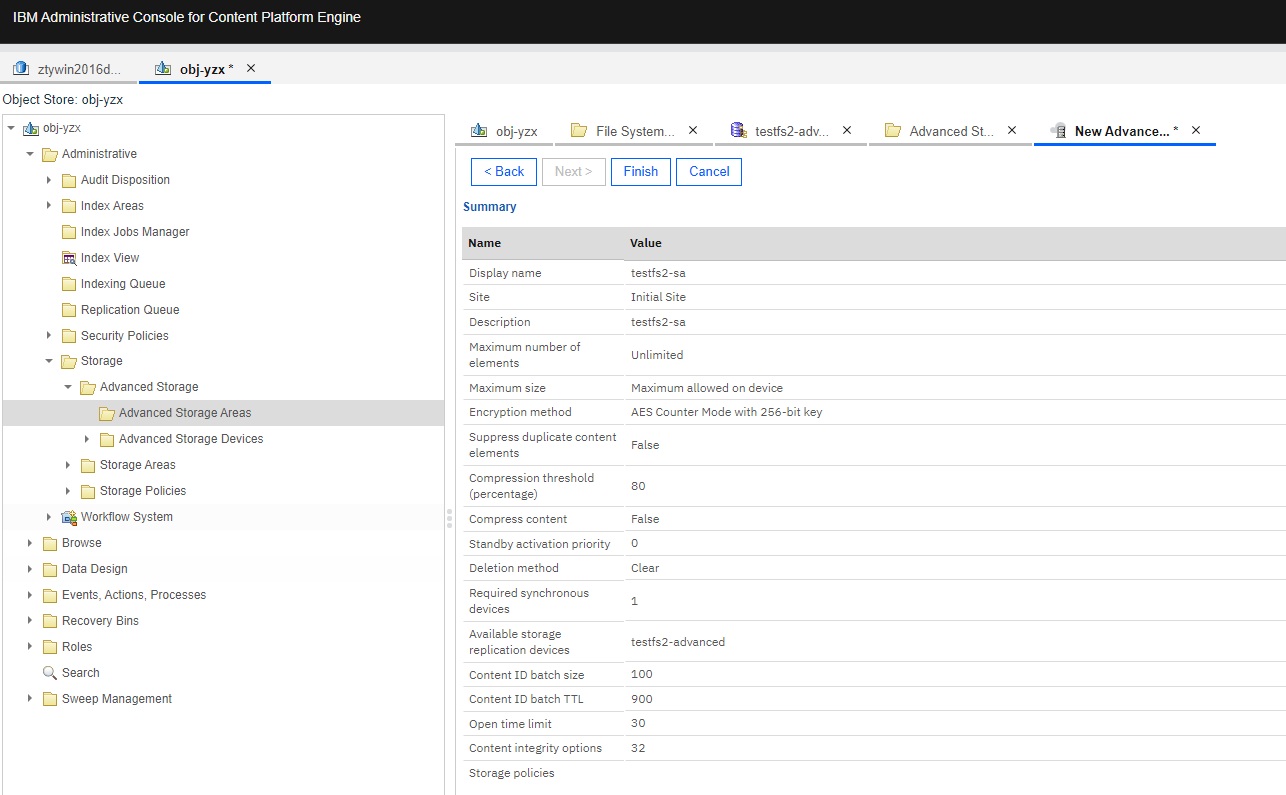 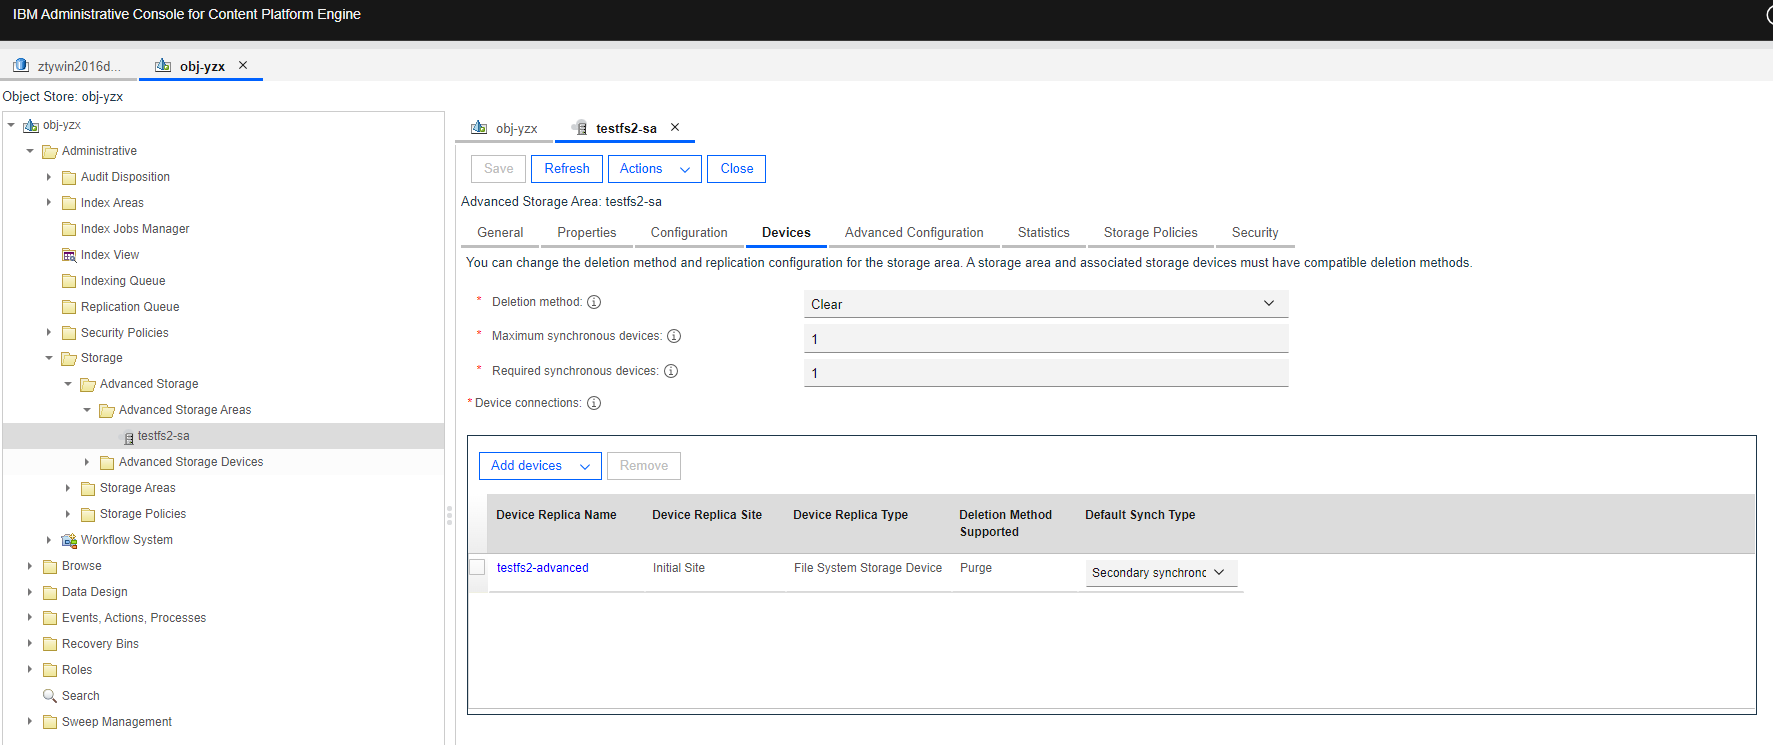 5. Select the Object Store > Administrative > Storage > Storage Policies, and right-click to New Storage Policy. 5. Select the Object Store > Administrative > Storage > Storage Policies, and right-click to New Storage Policy.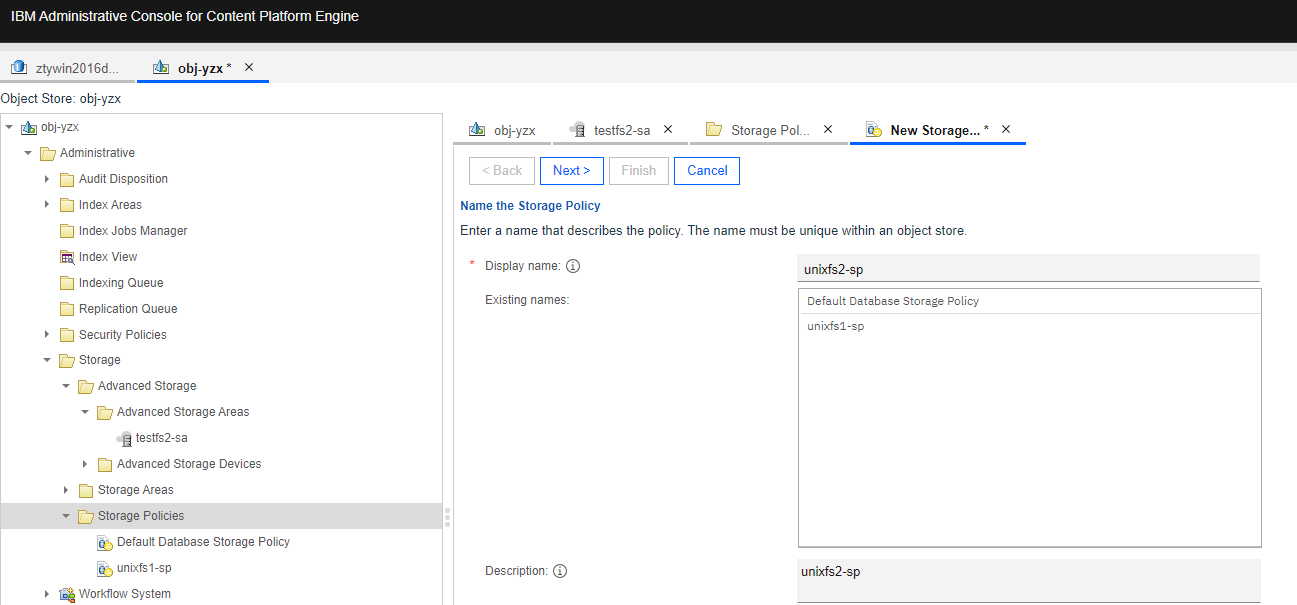 6. Enter a display name and next.  7. Retain the default settings and next. 7. Retain the default settings and next.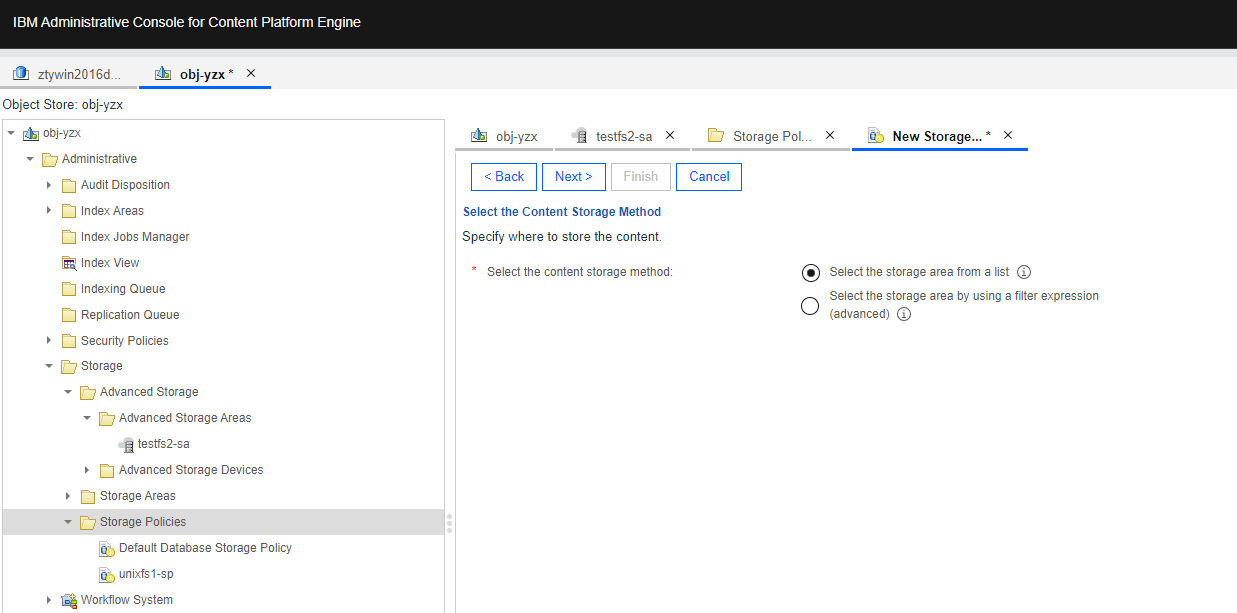 8. Select the created Storage Area in step 4 and next. 8. Select the created Storage Area in step 4 and next.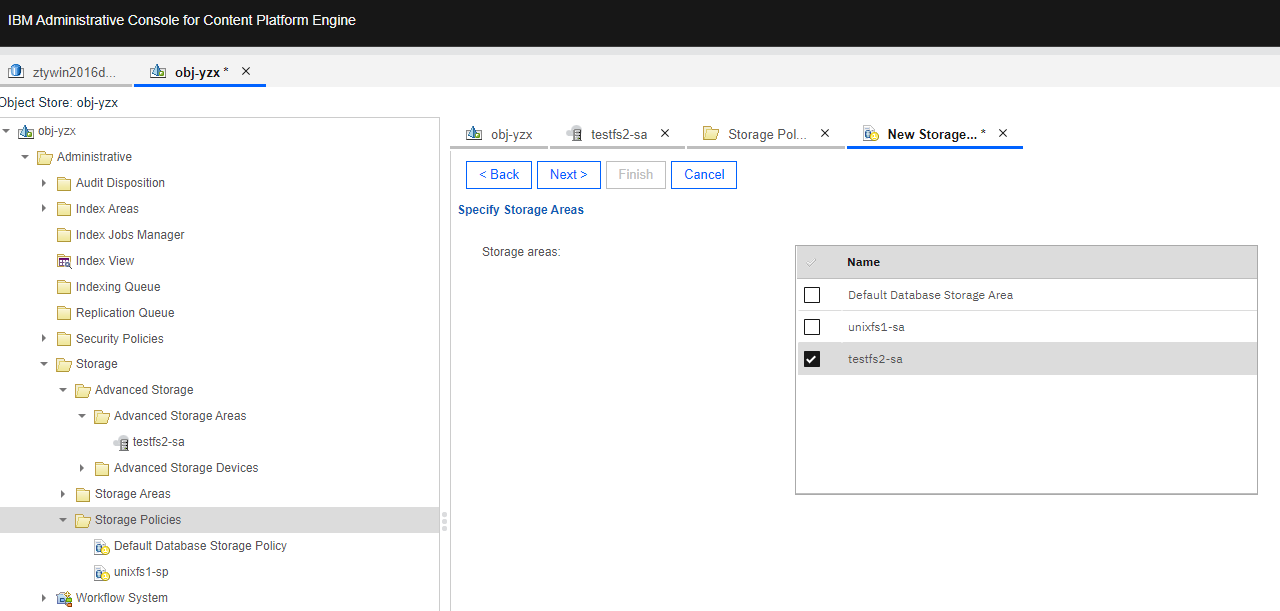 9. Check the configuration and finish. 9. Check the configuration and finish.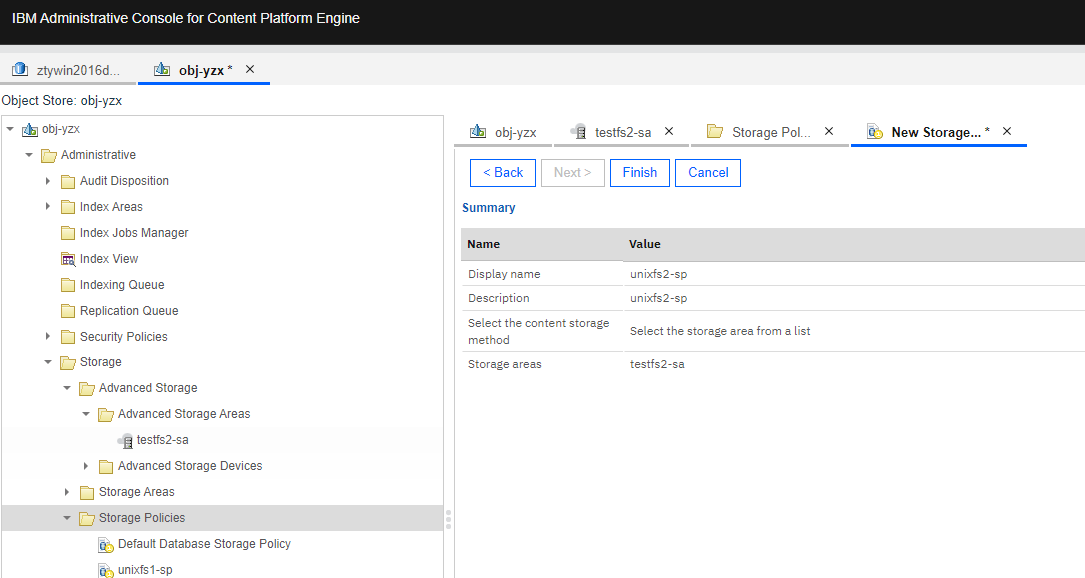 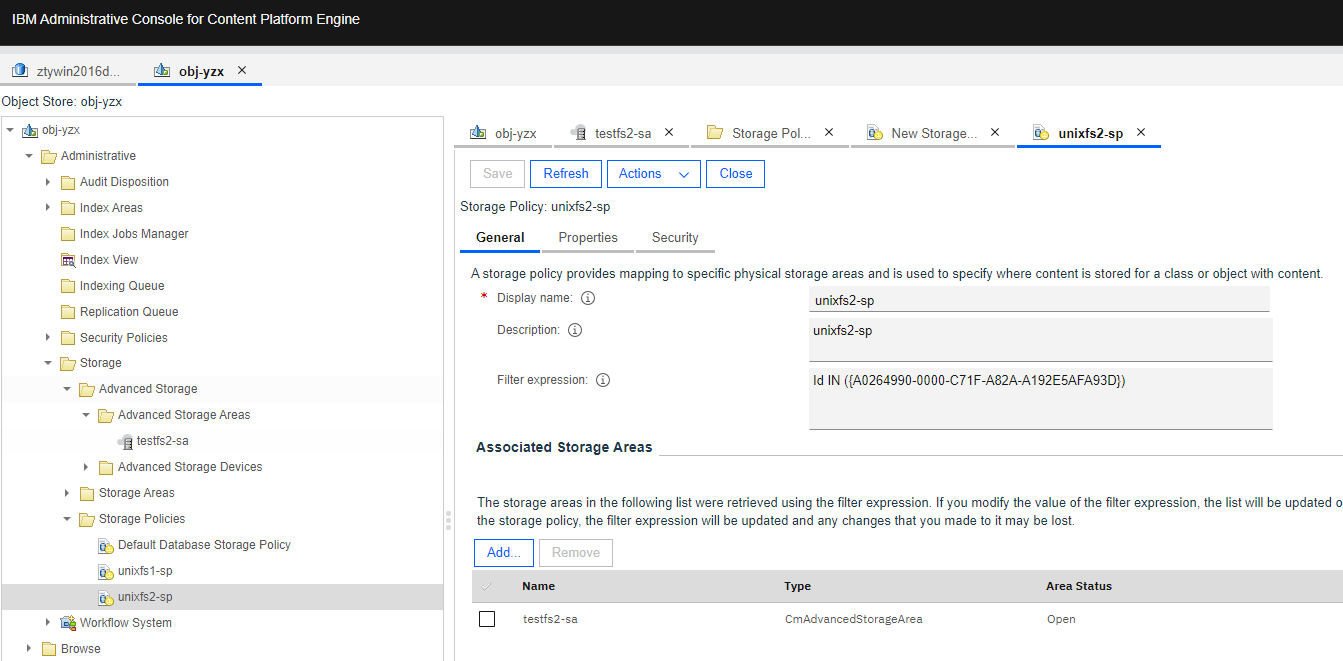 |
Test Conclusion | Passed |
4.3 Add the documents to the Advanced storage area
Test Purpose | To verify that Advanced storage area can work properly. |
Test Networking | Storage as the IBM FileNet P8 Content Platform Engine Storage Area Test Networking |
Prerequisites | 1. Deployment of storage device, CPE Linux Server and networking have been completed. 2. The storage device is running properly. 3. File System and NFS share have been created on storage device. 4. The Object Store of “obj-yzx” has been created on CPE. 5. The Advanced storage area has been created in section 4.2. |
Test Procedure | 1. Select the Object Store > Browse > Root Folder > Actions > New Document. 2. Enter the document title and next. 3. Add the content element and next. 4. Retain the default settings and next. 5. Select the created storage area and storage policy in section 4.2 and next. 6. Check the configuration and finish. 7. Check the directory size of the NFS share. |
Expected Result | 1. In step 6, succeed to add the documents to the file storage area. 2. In step 7, succeed to add the documents to the NFS share. |
Test Results | 1. Select the Object Store > Browse > Root Folder > Actions > New Document. 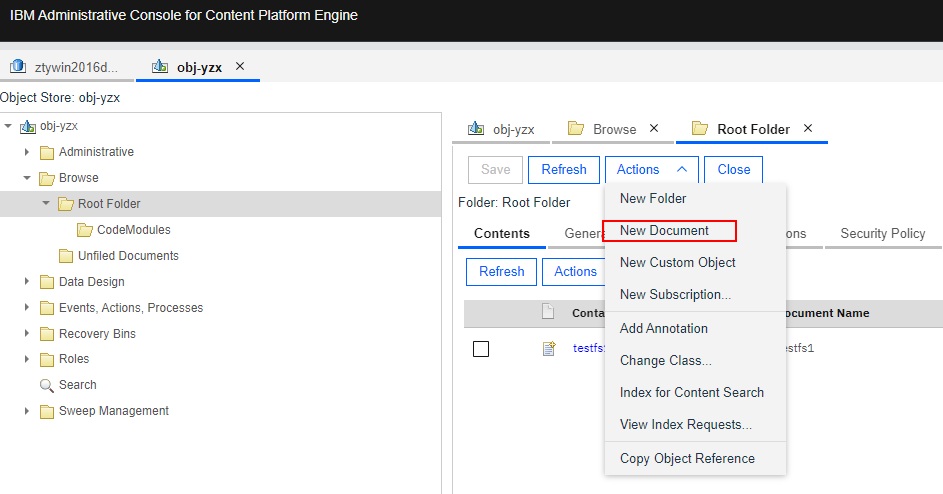 2. Enter the document title and next. 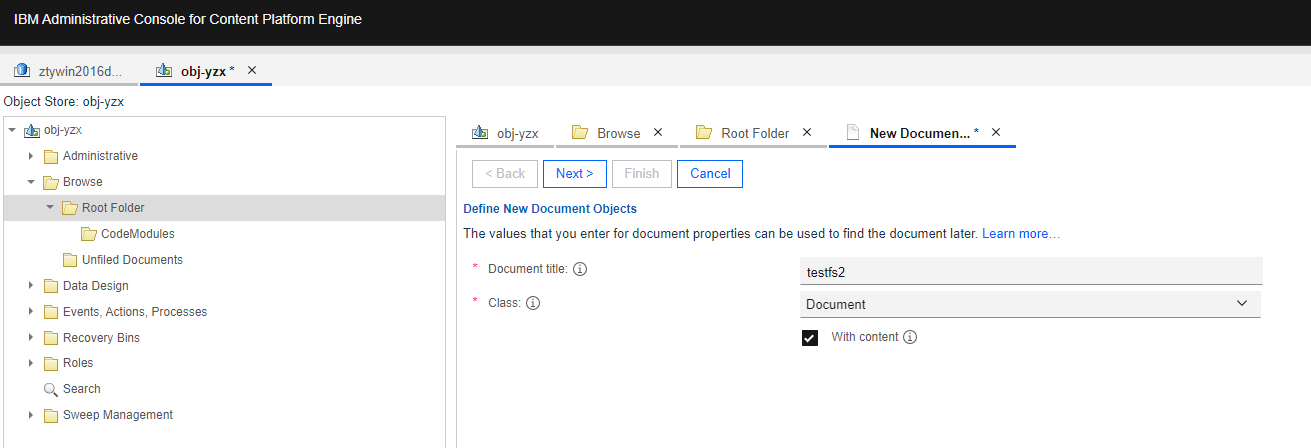 3. Add the content element and next. 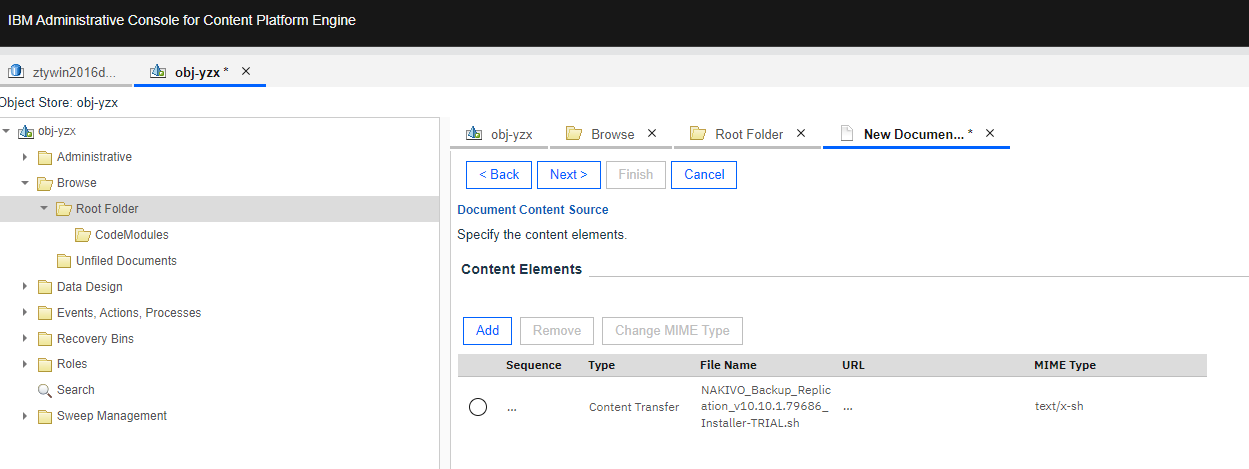 4. Retain the default settings and next. 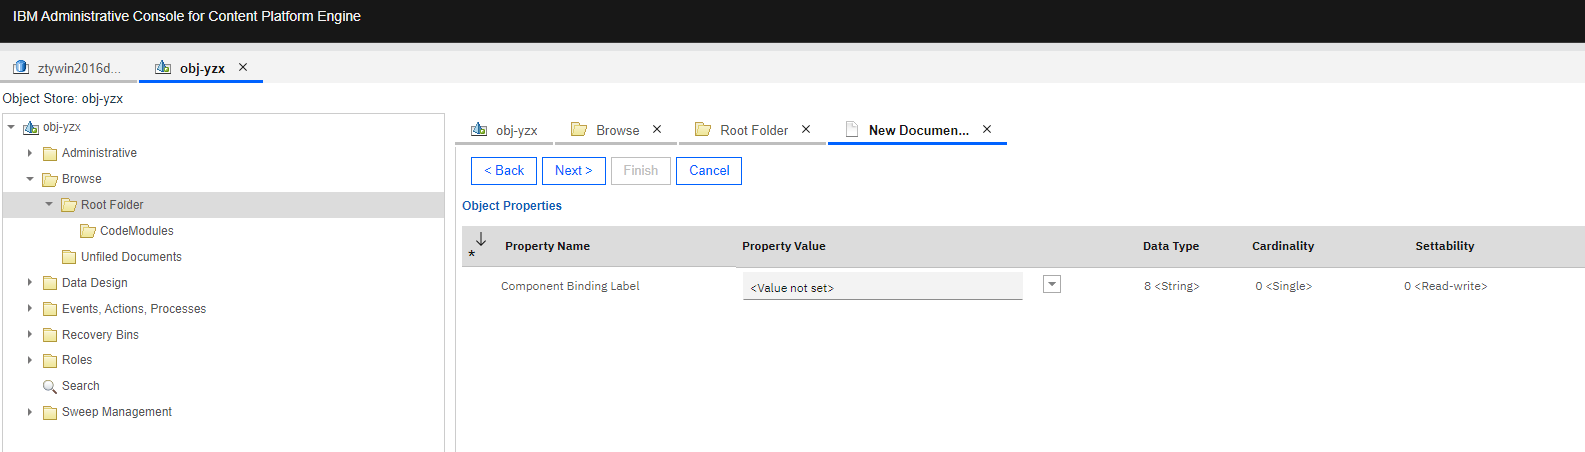 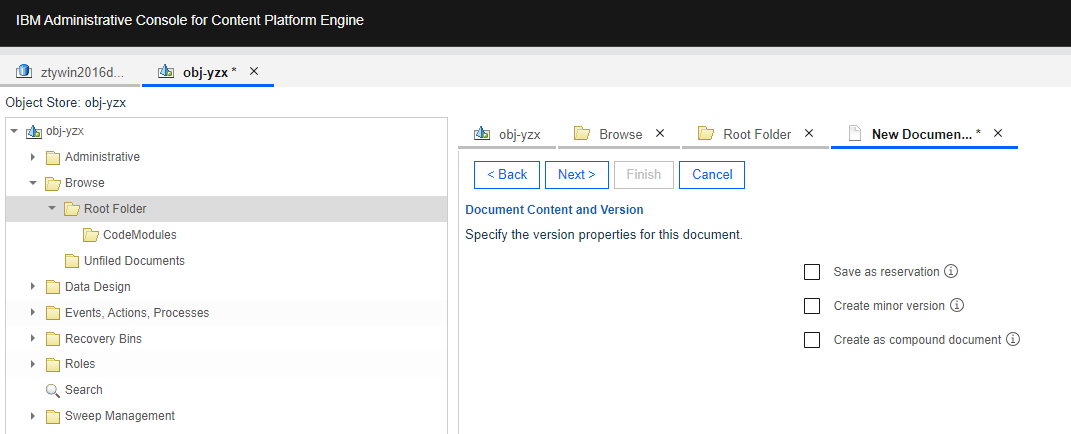 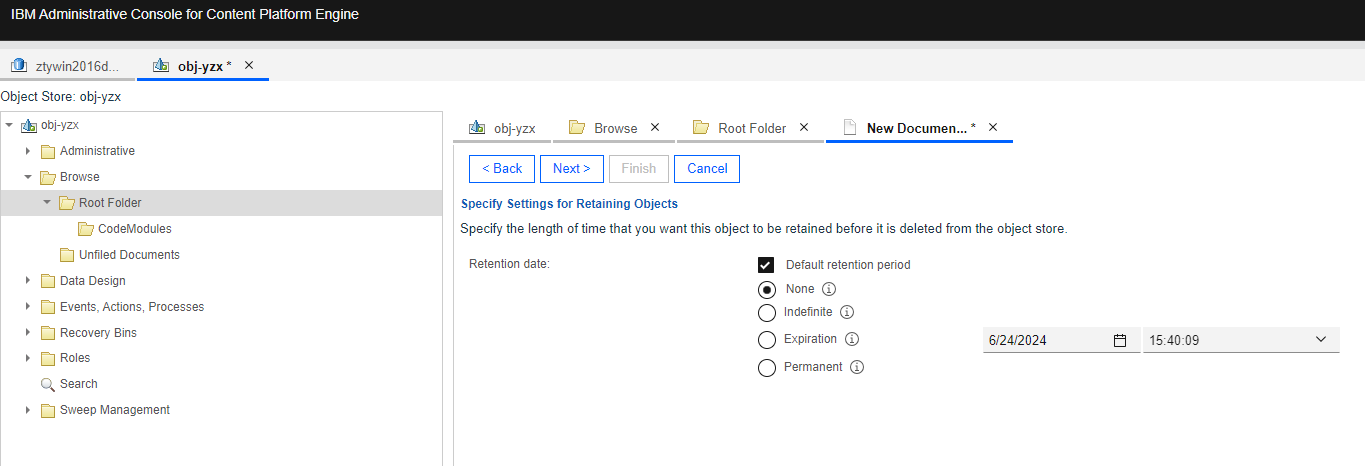 5. Select the created storage area and storage policy in section 4.2 and next. 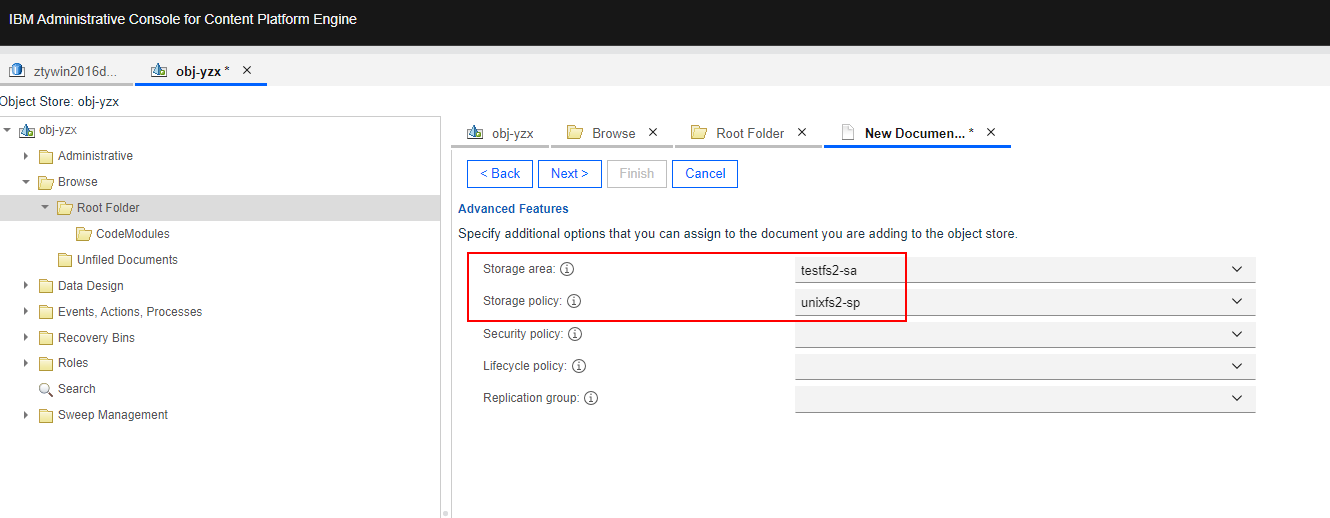 6. Check the configuration and finish. 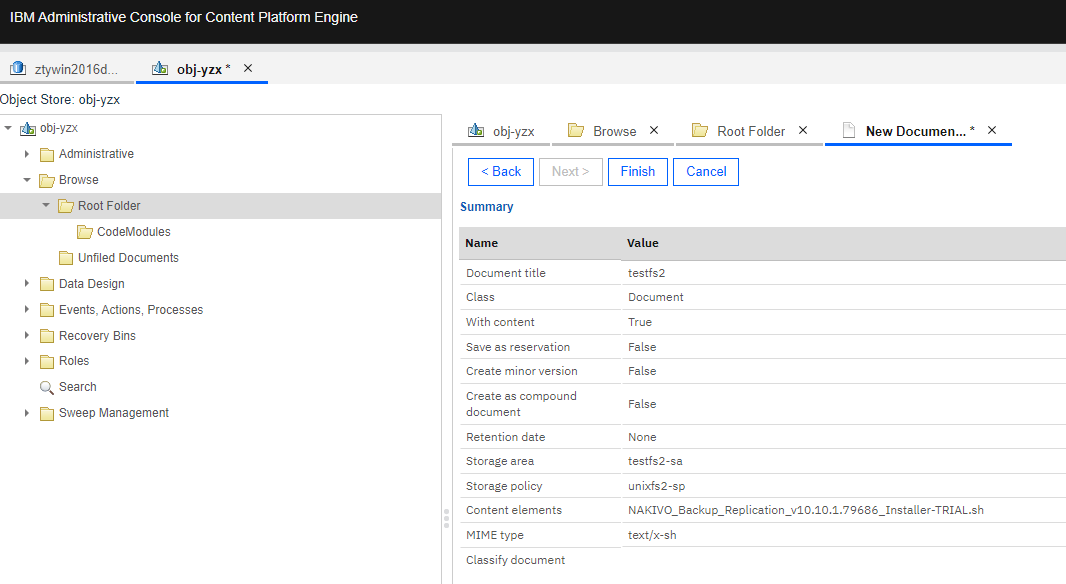 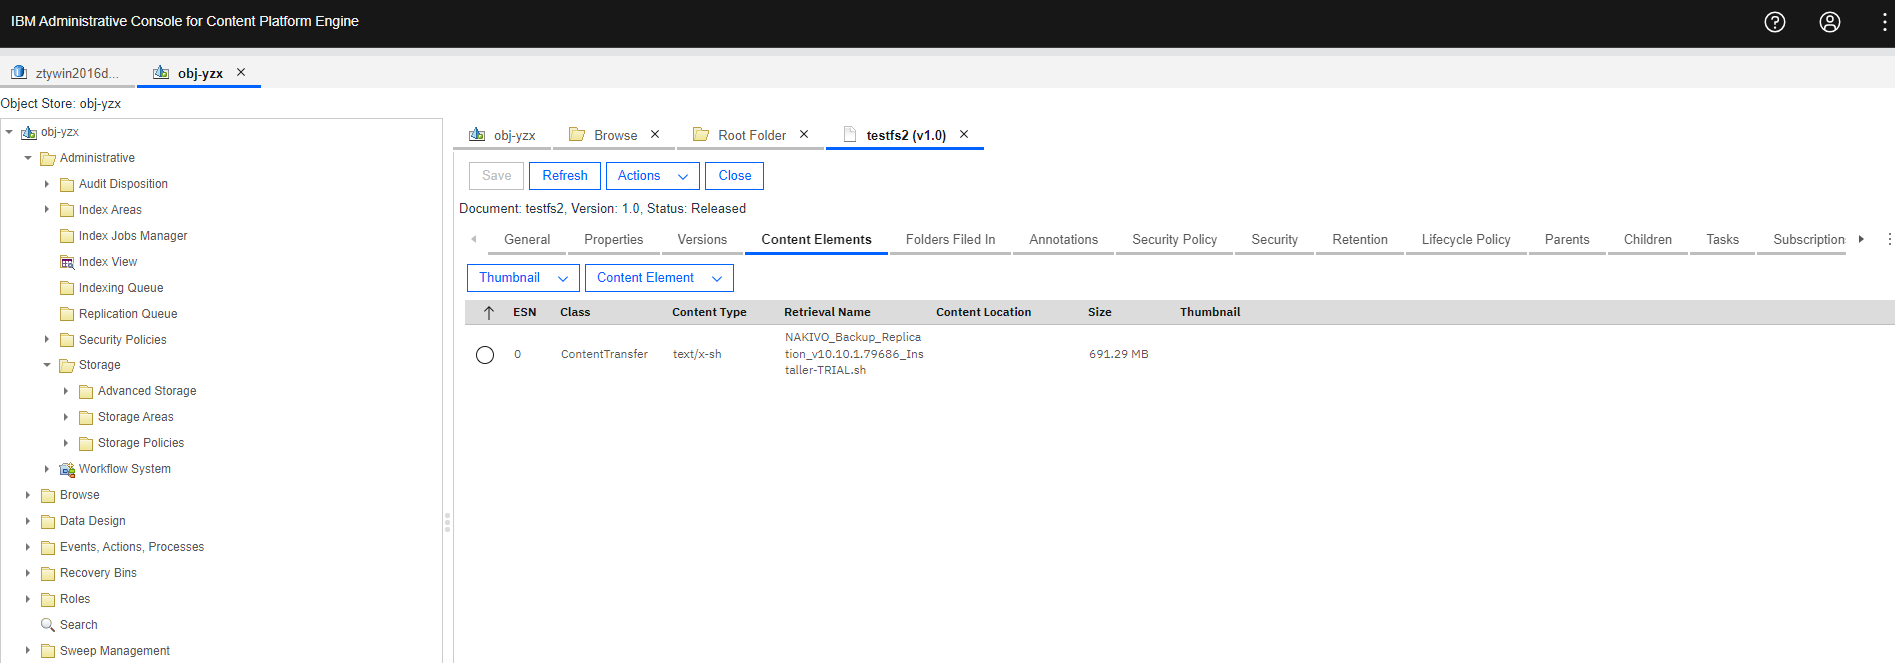 7. Check the directory size of the NFS share.  |
Test Conclusion | Passed |
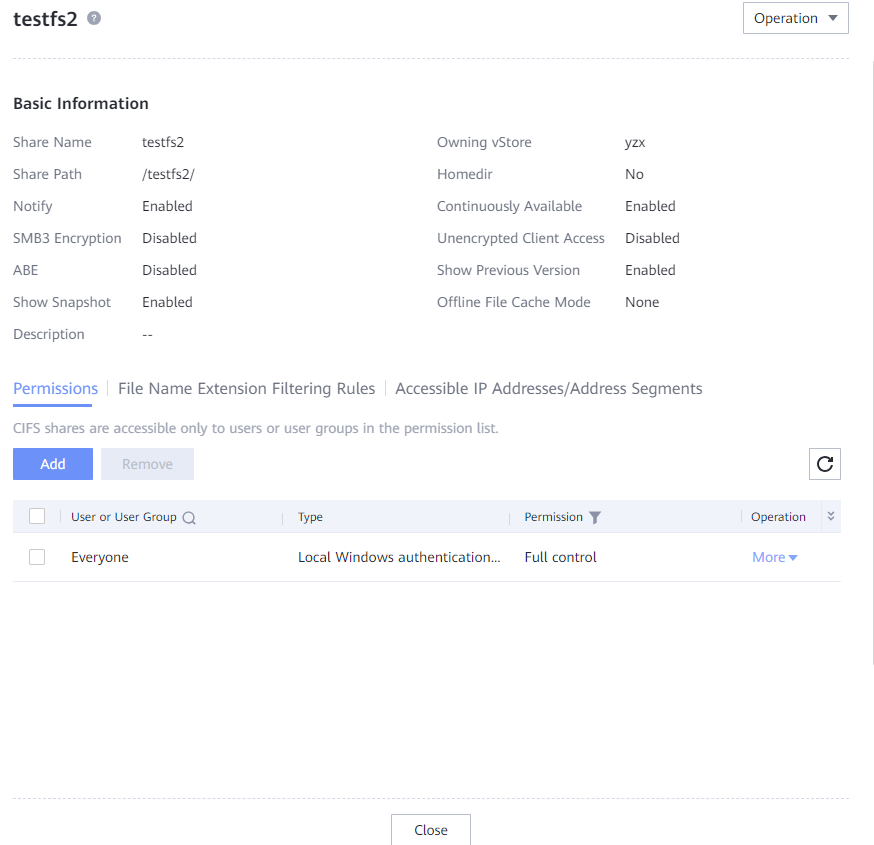
4.4 Add the CIFS share to the CPE as the Advanced Storage Device
Test Purpose | To verify that the Dorado storage can be added to the to the CPE as the Advanced storage device |
Test Networking | Storage as the IBM FileNet P8 Content Platform Engine Storage Area Test Networking |
Prerequisites | 1. Deployment of storage device, CPE Windows Server and networking have been completed. 2. The storage device is running properly. 3. File System and CIFS share have been created on storage device. 4. The Object Store of “obj-yzx” have been created on CPE. |
Test Procedure | 1. Select the Object Store > Administrative > Storage > Advanced Storage > Advanced Storage Devices > File System Storage Devices, and right-click to New File System Storage Device. 2. Enter a display name and next. 3. Enter the UNC Path of the CIFS share and next. 4. Check the configuration and finish. 5. Check the directory structure of the CIFS share. |
Expected Result | 1. In step 4, succeed to connect to the Dorado storage, and create the Advanced storage device. 2. In step 5, succeed to create one directories (content) and one file (device.txt) in the CIFS share. |
Test Results | 1. Select the Object Store > Administrative > Storage > Advanced Storage > Advanced Storage Devices > File System Storage Devices, and right-click to New File System Storage Device. 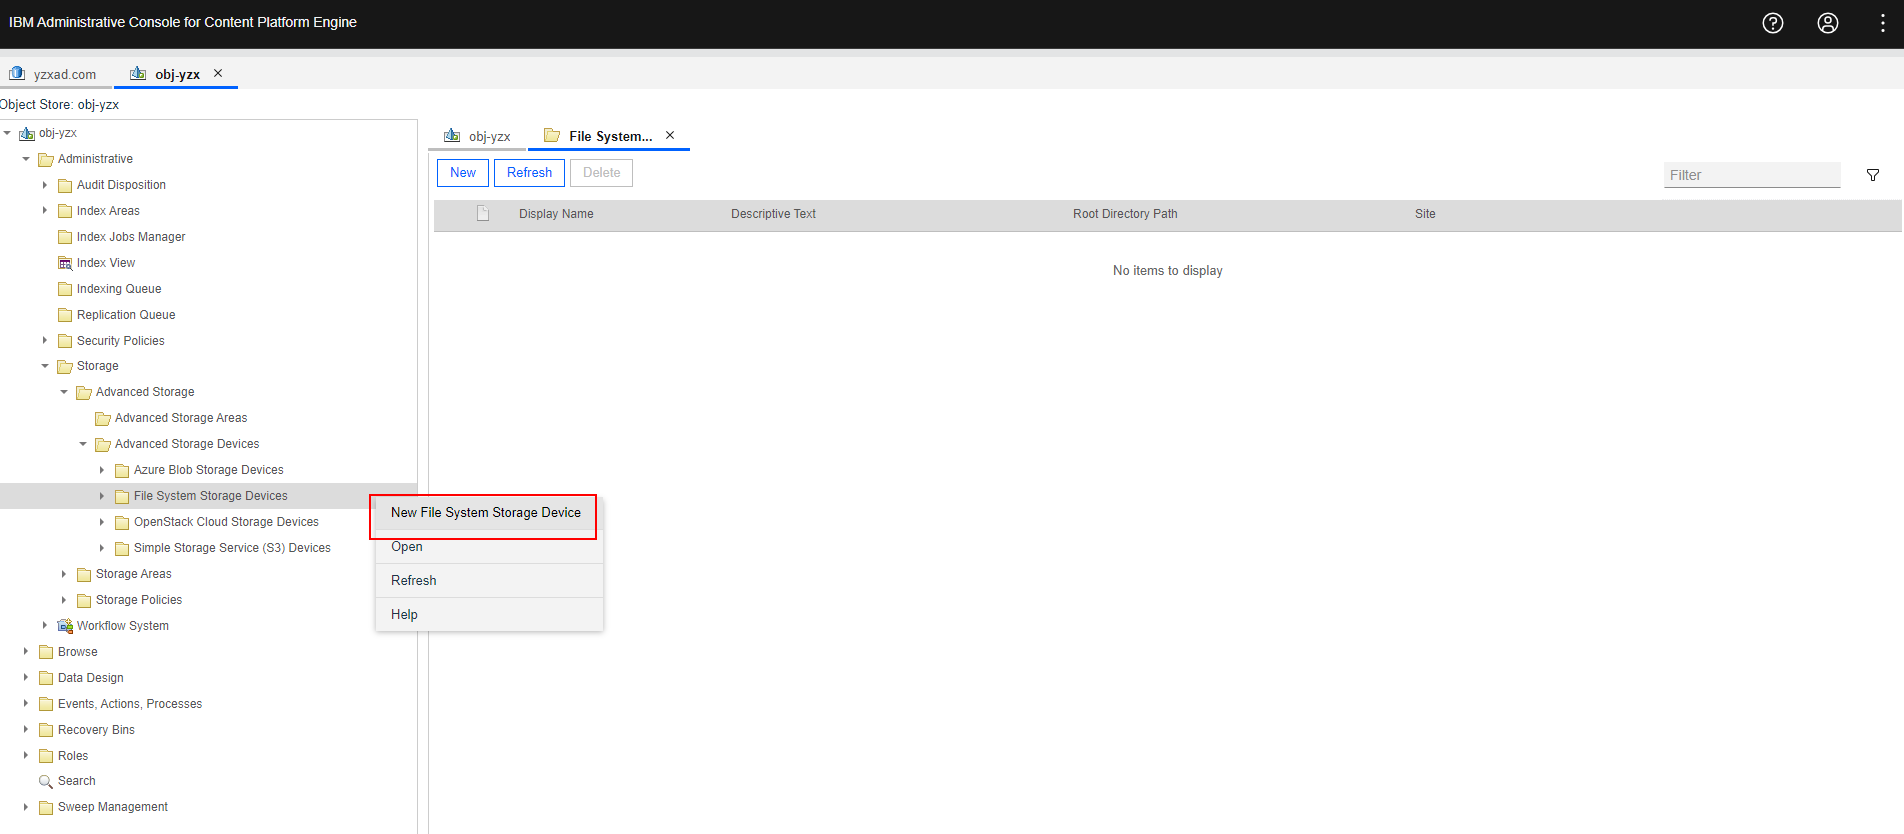 2. Enter a display name and next.  3. Enter the UNC Path of the CIFS share and next.  4. Check the configuration and finish. 4. Check the configuration and finish.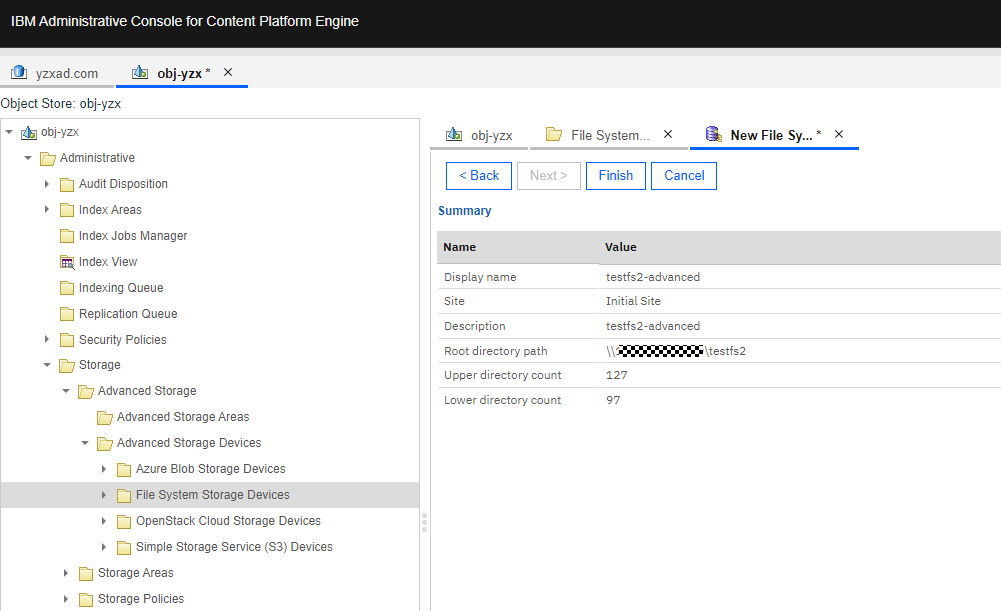  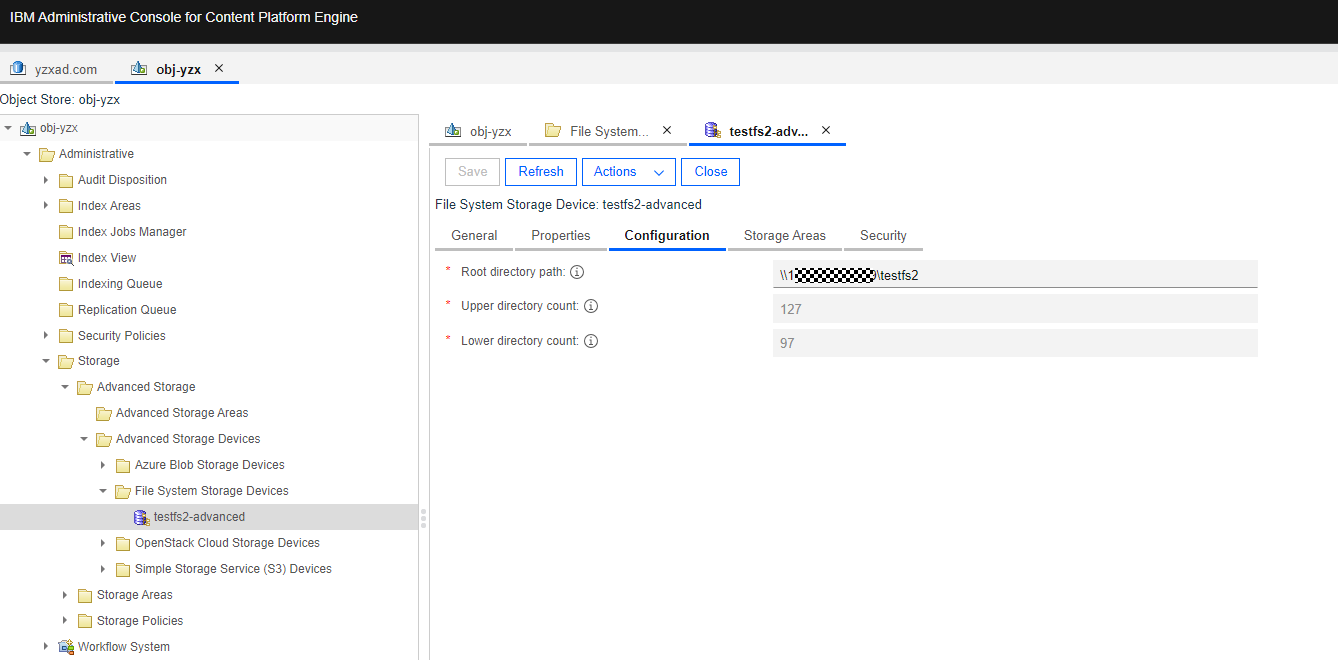 5. Check the directory structure of the CIFS share. 5. Check the directory structure of the CIFS share.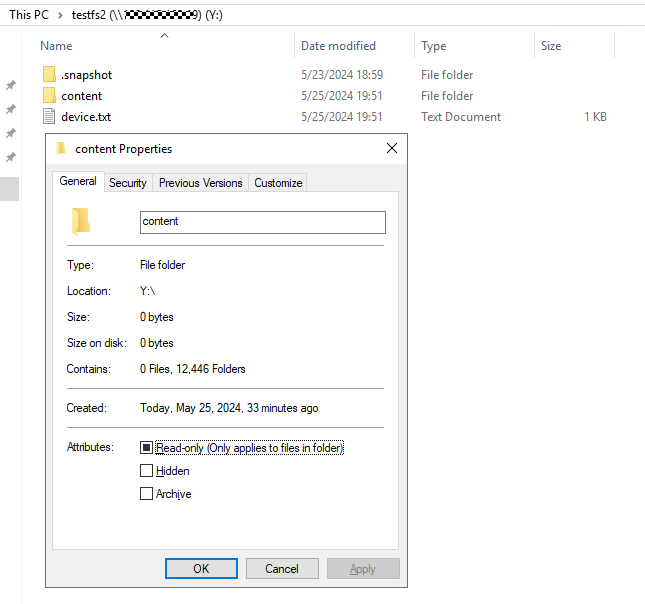 |
Test Conclusion | Passed |
4.5 Create the Advanced storage area
Test Purpose | To verify that the Dorado storage can be added to the CPE as the Advanced storage area. |
Test Networking | Storage as the IBM FileNet P8 Content Platform Engine Storage Area Test Networking |
Prerequisites | 1. Deployment of storage device, CPE Windows Server and networking have been completed. 2. The storage device is running properly. 3. File System and CIFS share have been created on storage device. 4. The Object Store of “obj-yzx” have been created on CPE. 5. The Advanced storage device has been created on CPE in section 4.4. |
Test Procedure | 1. Select the Object Store > Administrative > Storage > Advanced Storage > Advanced Storage Areas, and right-click to New Advanced Storage Area. 2. Select the created File System Storage Device in section 4.4 and next. 3. Retain the default settings and next. 4. Check the configuration and finish. 5. Select the Object Store > Administrative > Storage > Storage Policies, and right-click to New Storage Policy. 6. Enter a display name and next. 7. Retain the default settings and next. 8. Select the created Storage Area in step 4 and next. 9. Check the configuration and finish. |
Expected Result | 1. In step 4, succeed to create the Advanced storage area. 2. In step 9, succeed to create the Storage Policy. |
Test Results |
 2. Select the created File System Storage Device in section 4.4 and next. 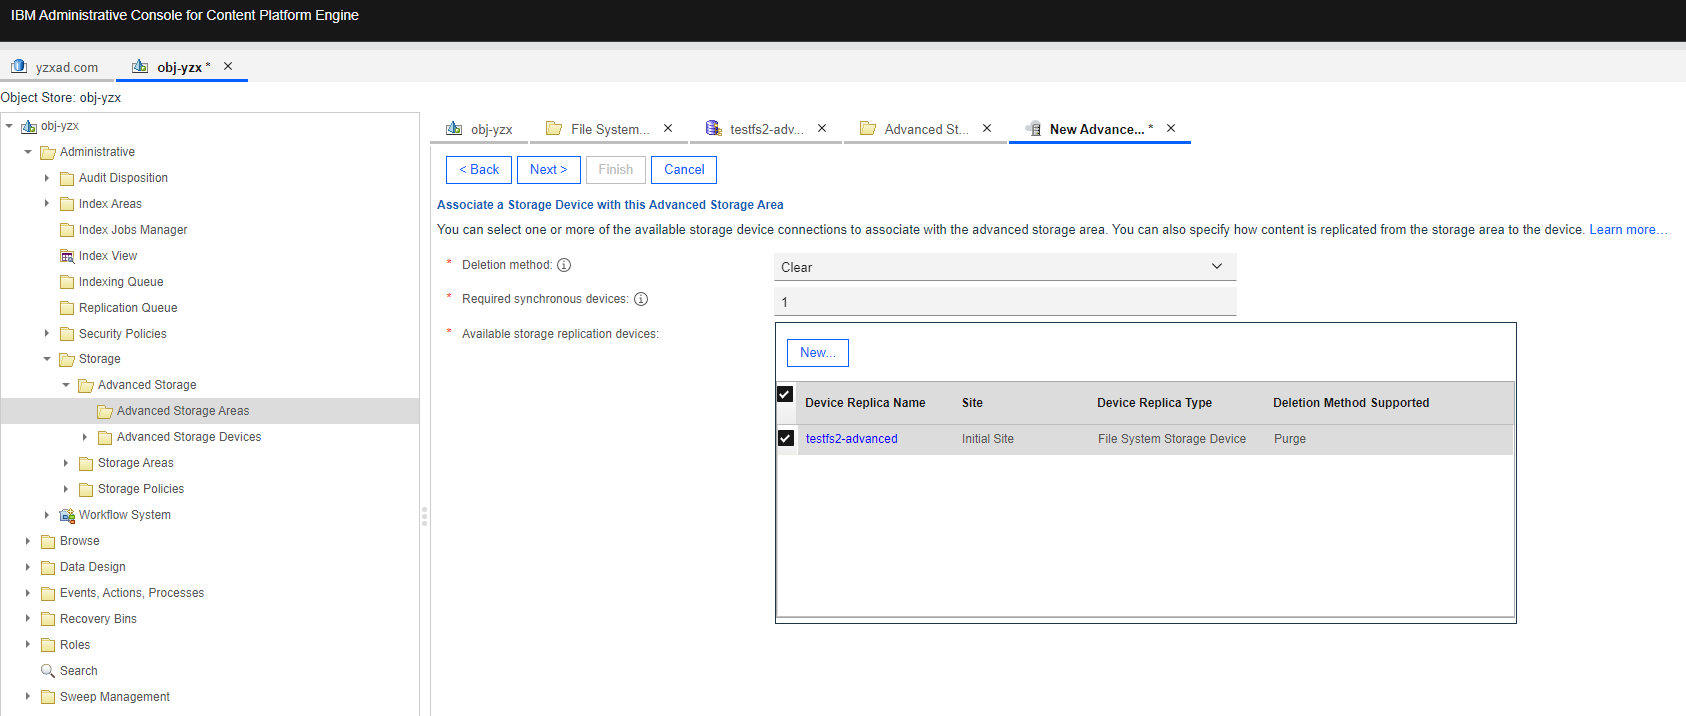 3. Retain the default settings and next. 3. Retain the default settings and next.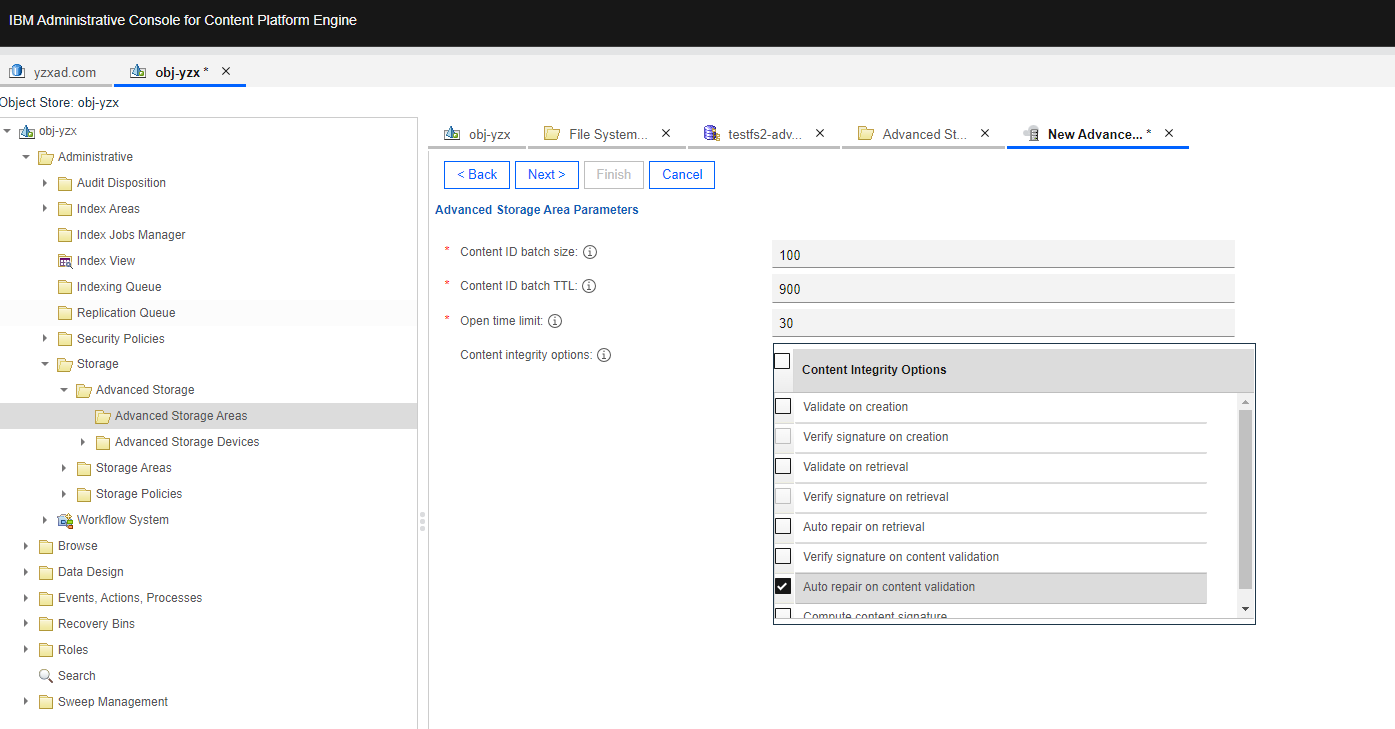 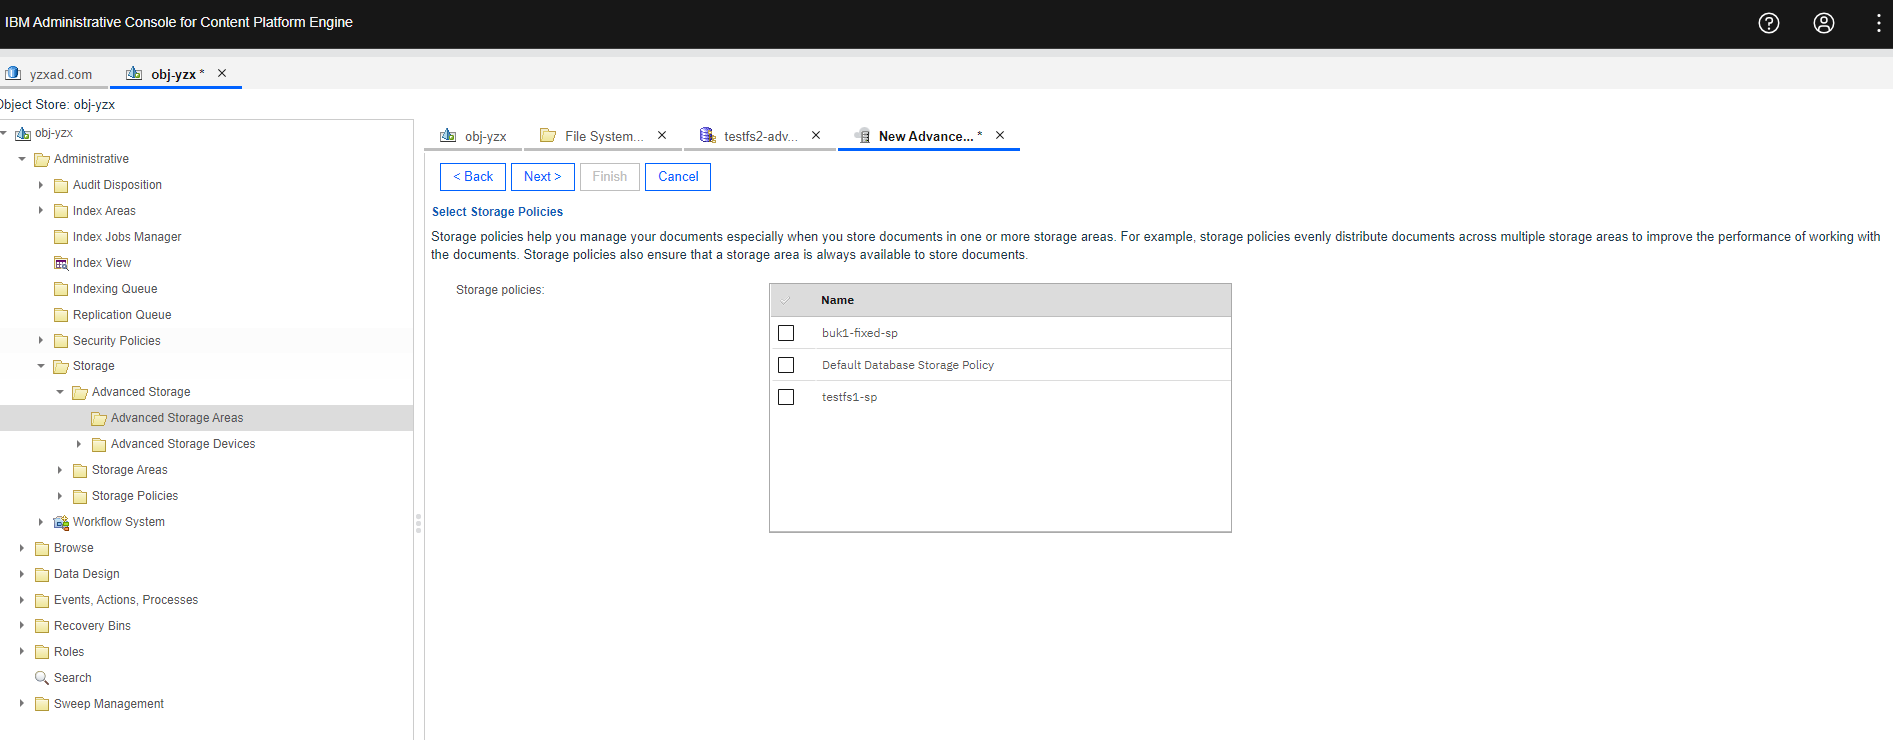 4. Check the configuration and finish. 4. Check the configuration and finish.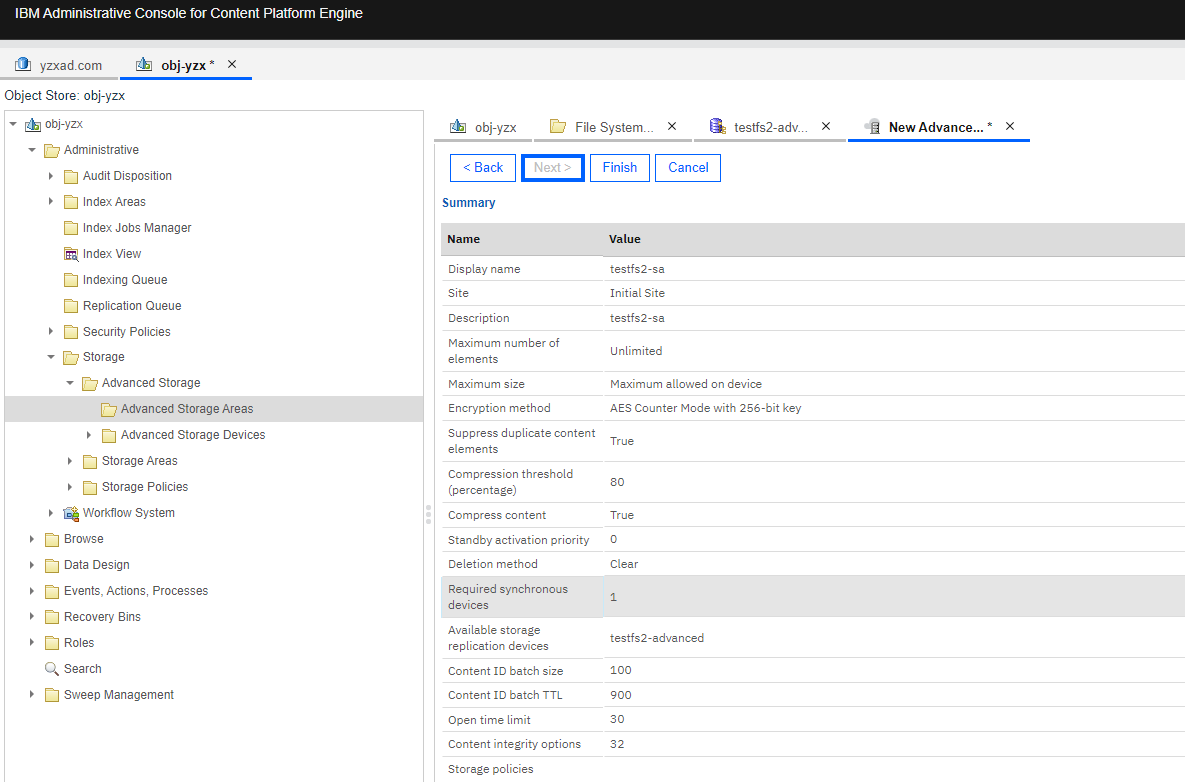 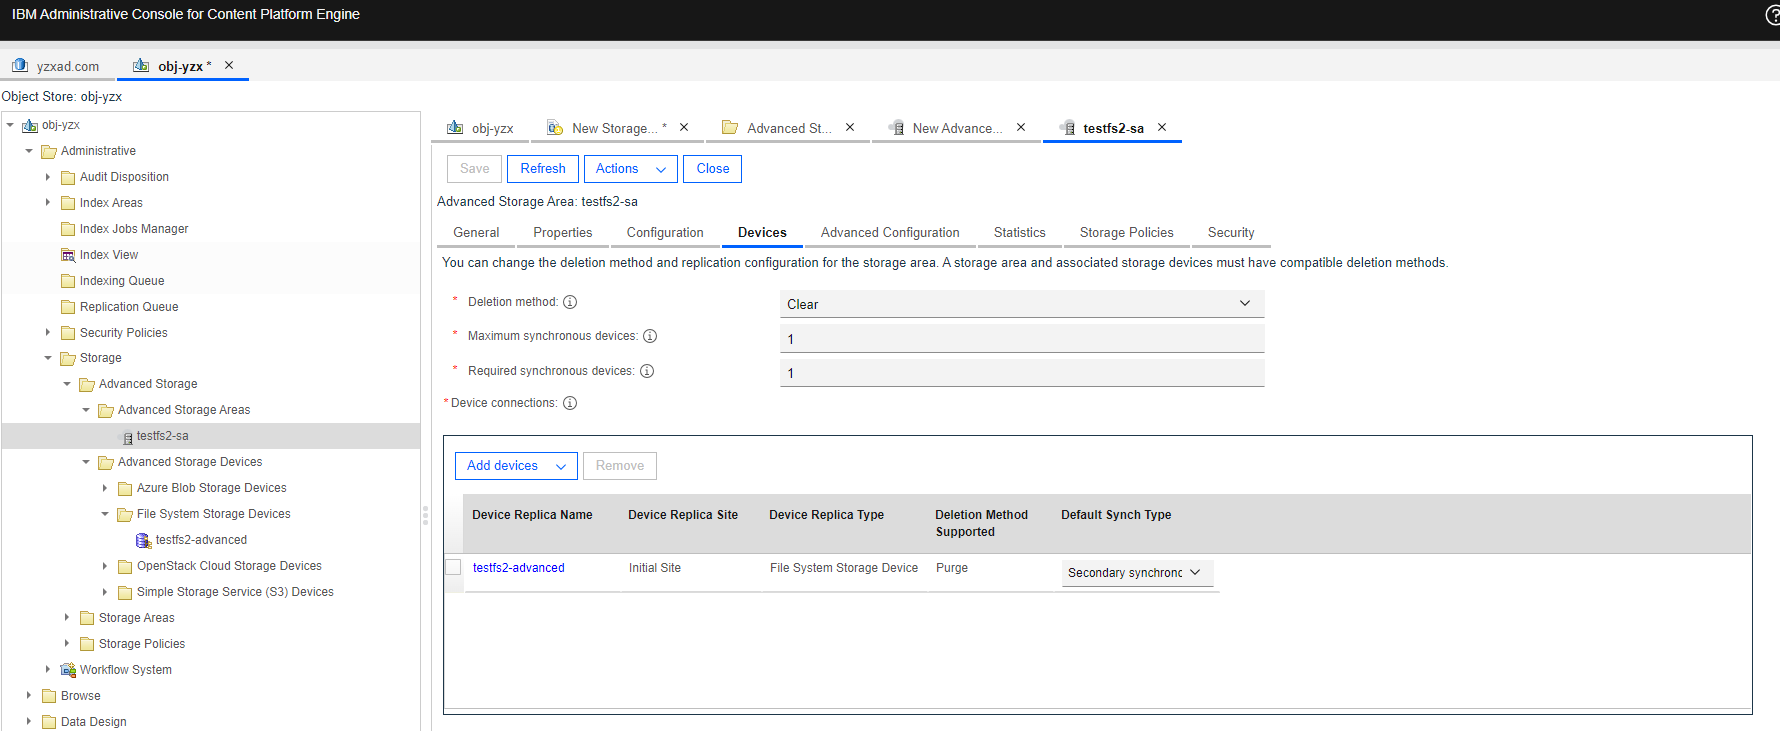 5. Select the Object Store > Administrative > Storage > Storage Policies, and right-click to New Storage Policy. 5. Select the Object Store > Administrative > Storage > Storage Policies, and right-click to New Storage Policy.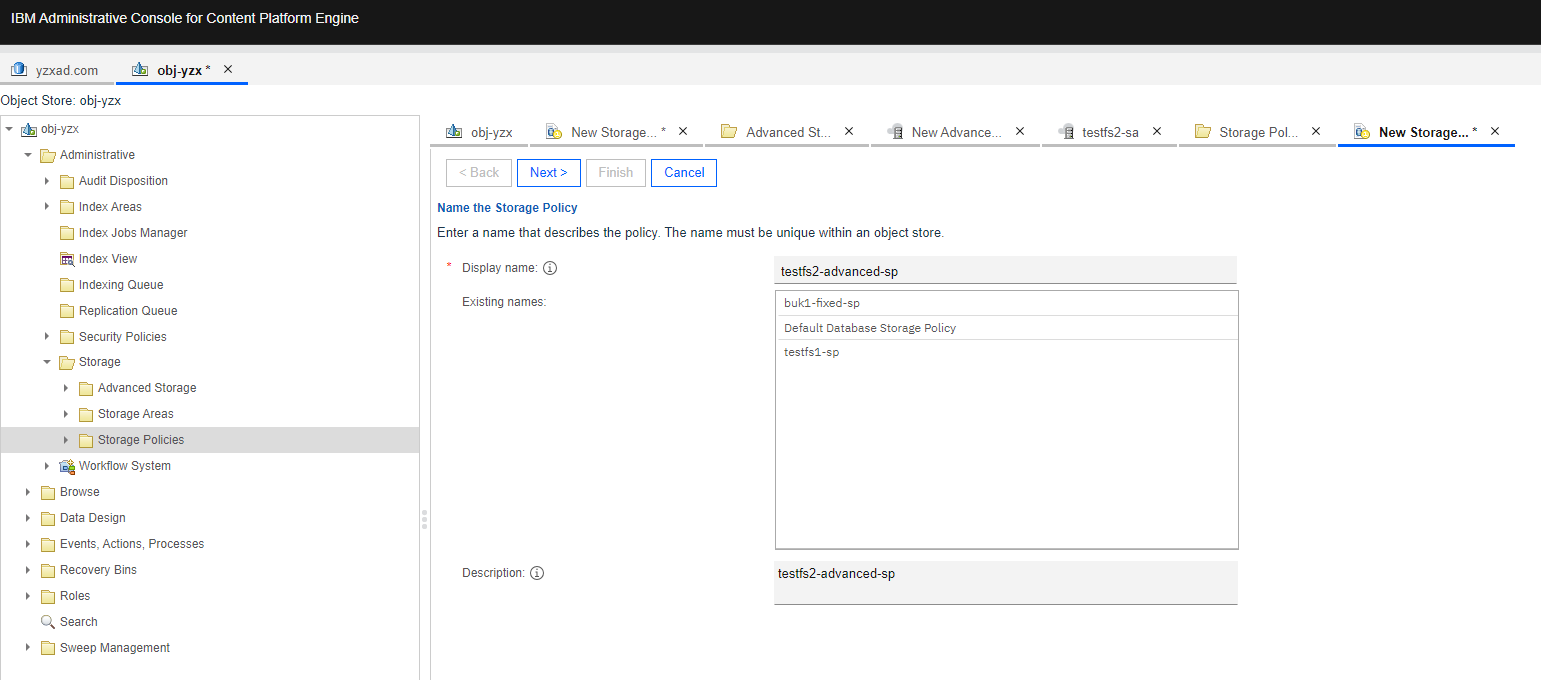 6. Enter a display name and next.  7. Retain the default settings and next. 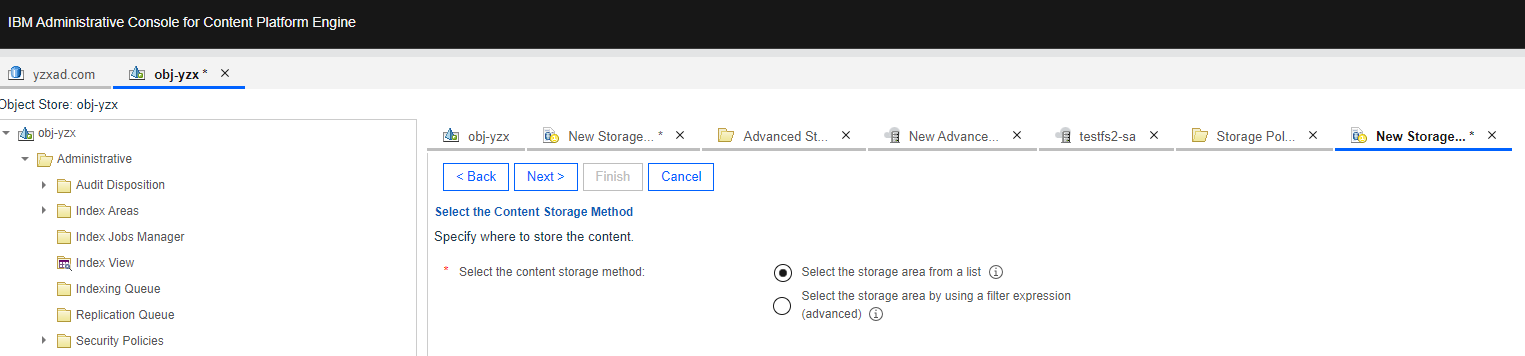 8. Select the created Storage Area in step 4 and next. 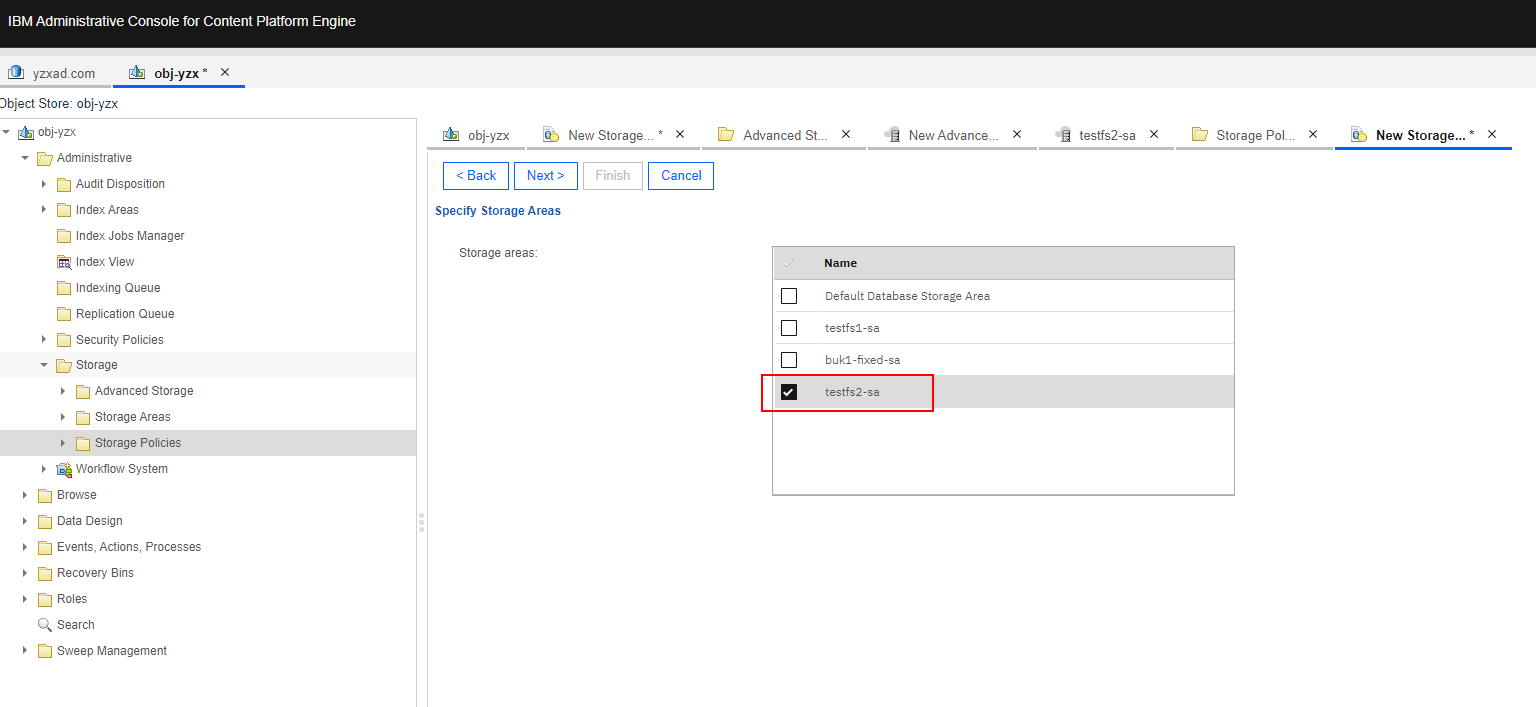 9. Check the configuration and finish. 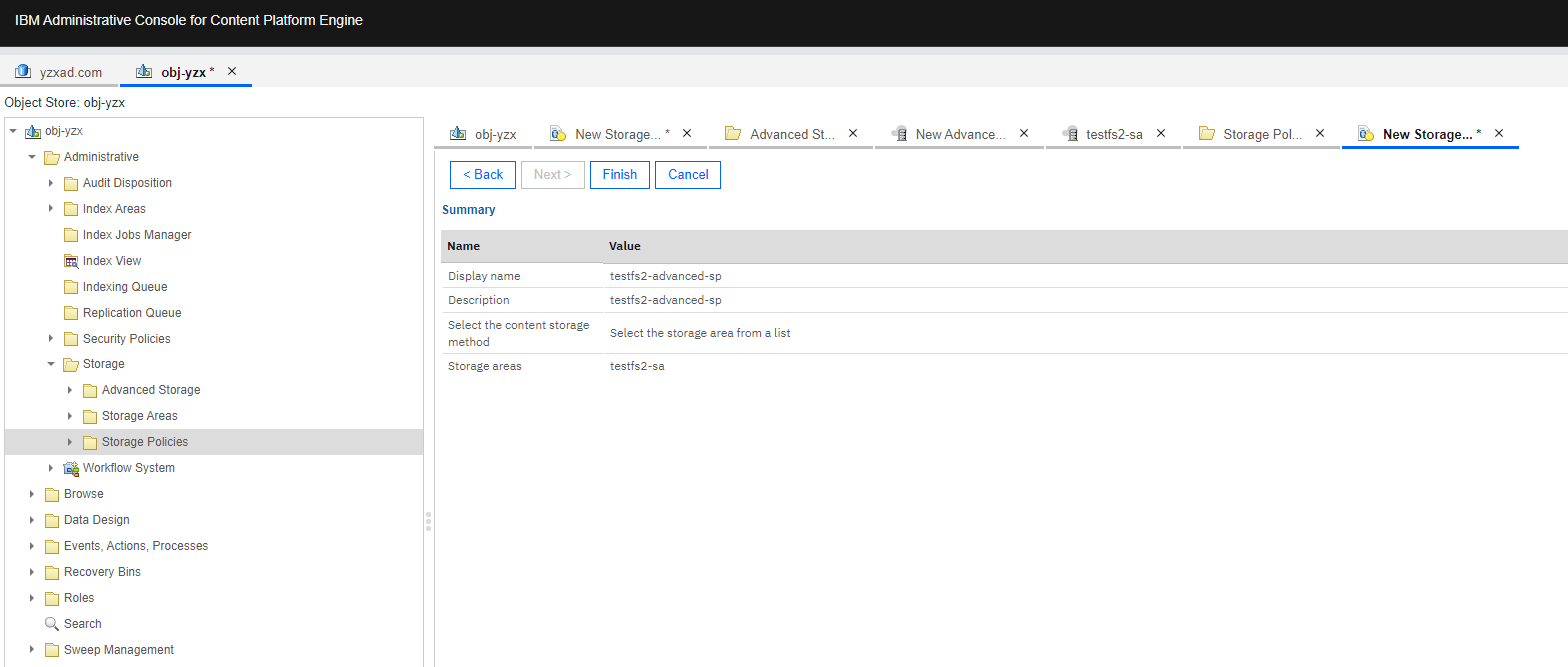 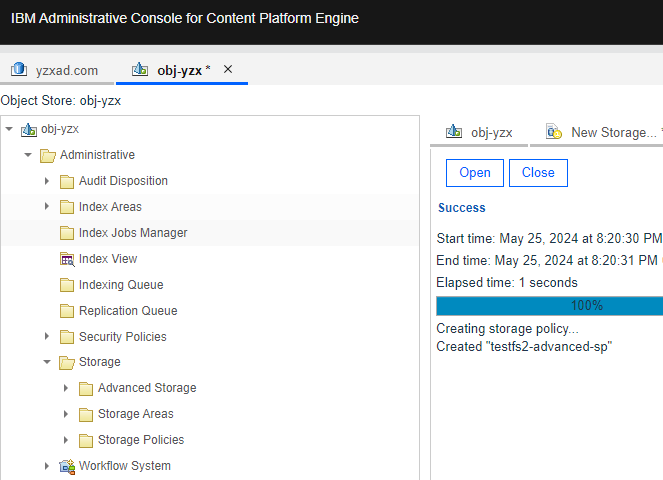 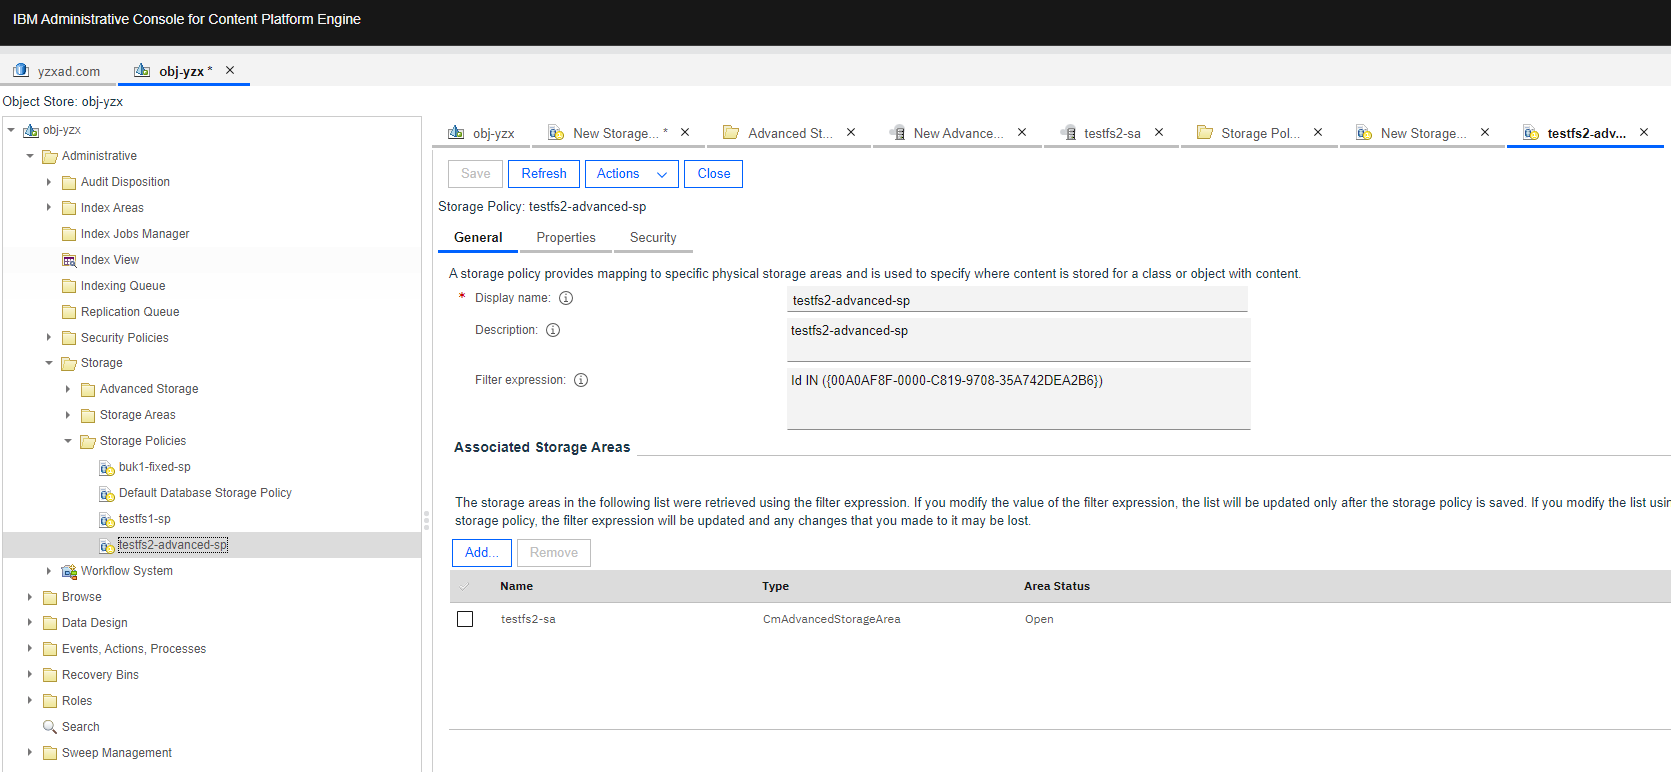 |
Test Conclusion | Passed |
4.6 Add the documents to the Advanced storage area
Test Purpose | To verify that Advanced storage area can work properly. |
Test Networking | Storage as the IBM FileNet P8 Content Platform Engine Storage Area Test Networking |
Prerequisites | 1. Deployment of storage device, CPE Windows Server and networking have been completed. 2. The storage device is running properly. 3. File System and CIFS share have been created on storage device. 4. The Object Store of “obj-yzx” has been created on CPE. 5. The Advanced storage area has been created in section 4.5. |
Test Procedure | 1. Select the Object Store > Browse > Root Folder > Actions > New Document. 2. Enter the document title and next. 3. Add the content element and next. 4. Retain the default settings and next. 5. Select the created storage area and storage policy in section 4.5 and next. 6. Check the configuration and finish. 7. Check the directory size of the CIFS share. |
Expected Result | 1. In step 6, succeed to add the documents to the file storage area. 2. In step 7, succeed to add the documents to the CIFS share. |
Test Results | 1. Select the Object Store > Browse > Root Folder > Actions > New Document.  2. Enter the document title and next. 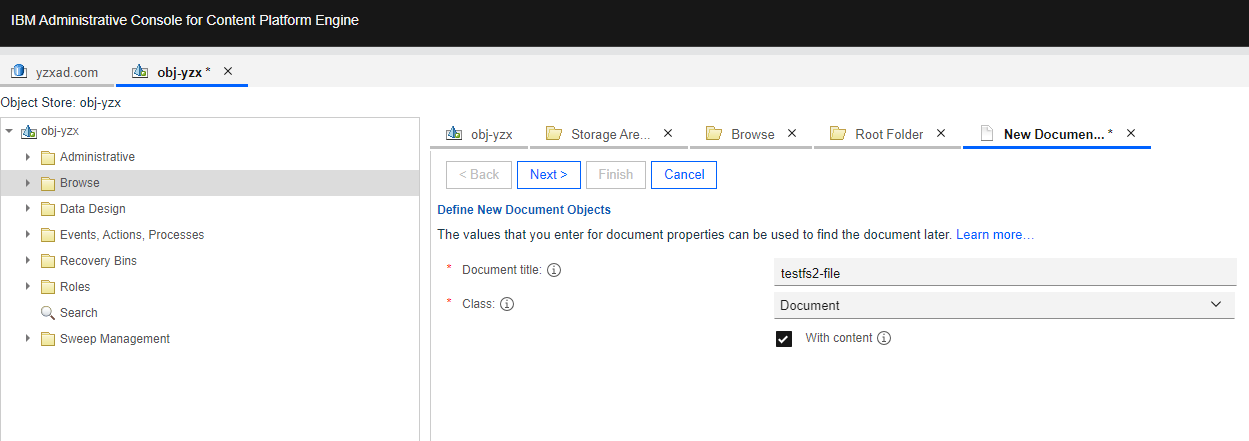 3. Add the content element and next. 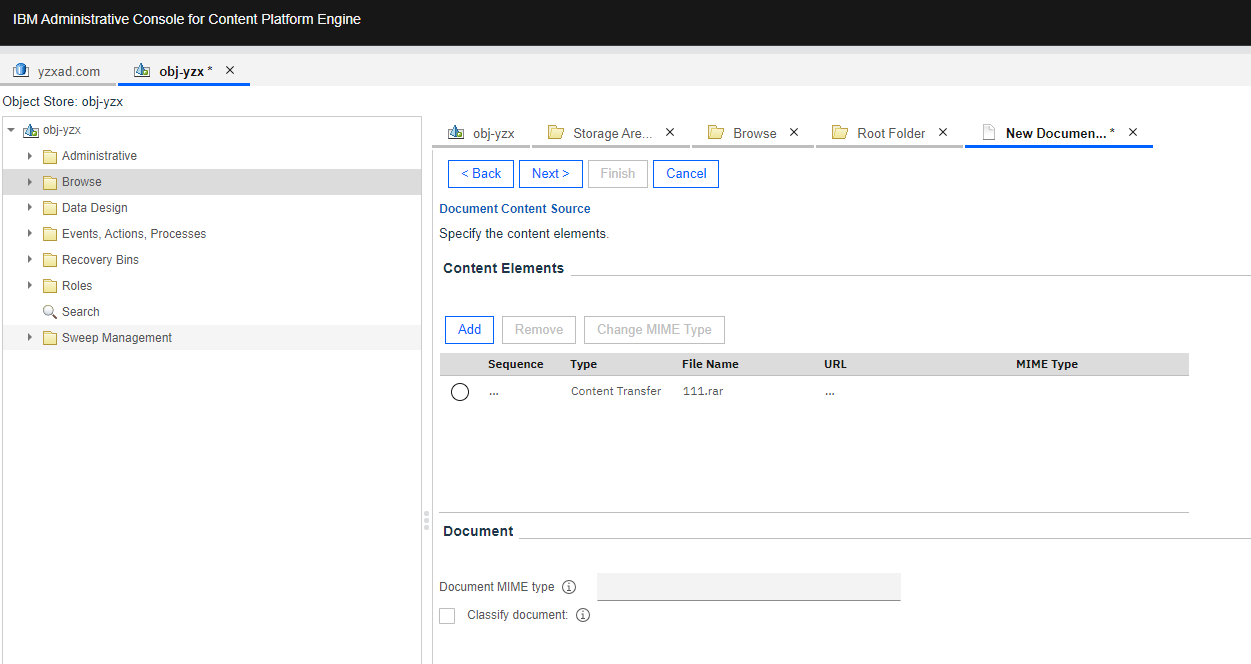 4. Retain the default settings and next.   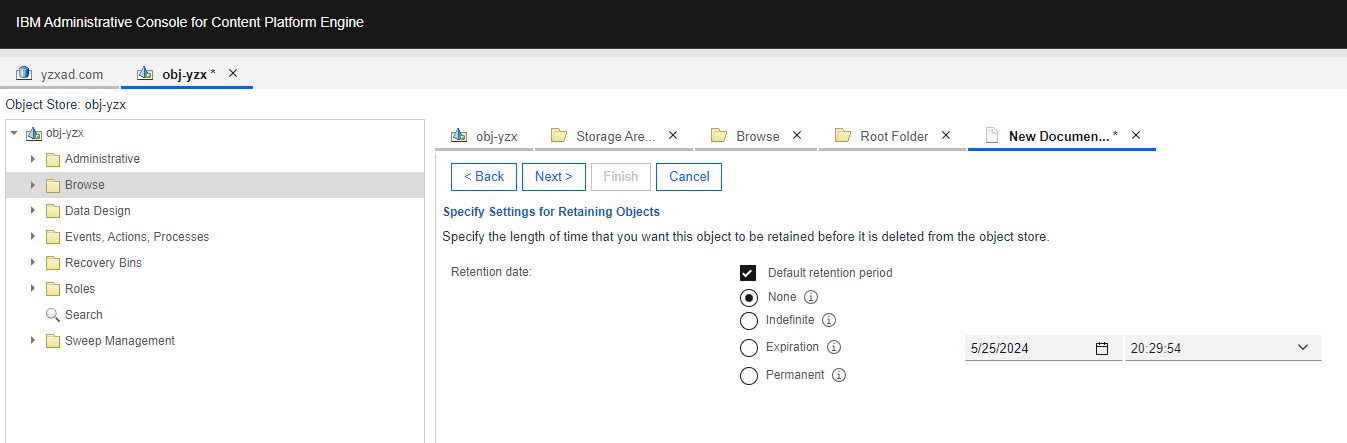 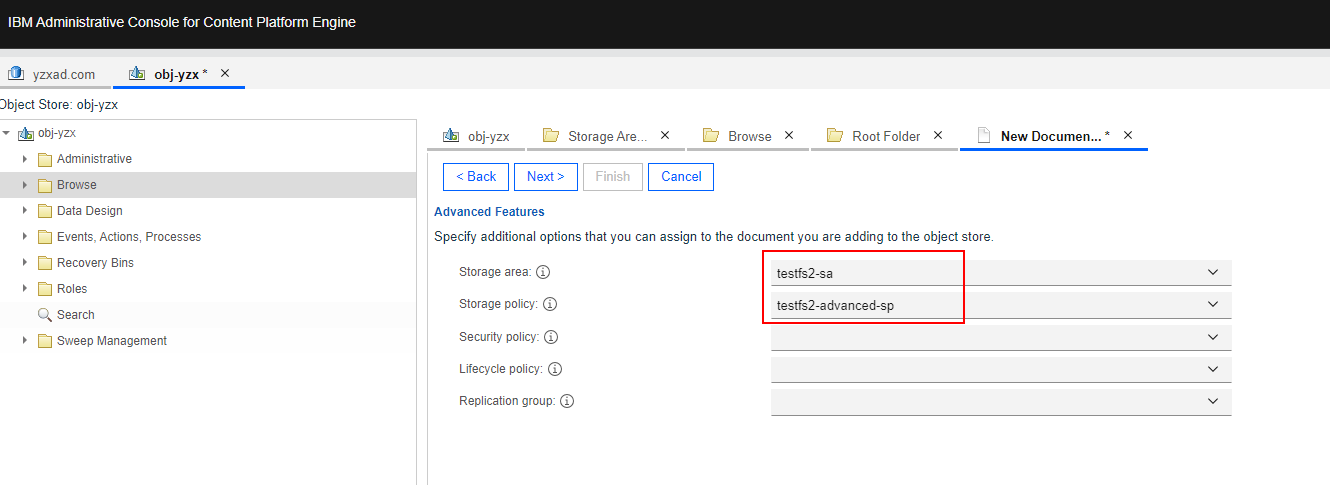 6. Check the configuration and finish. 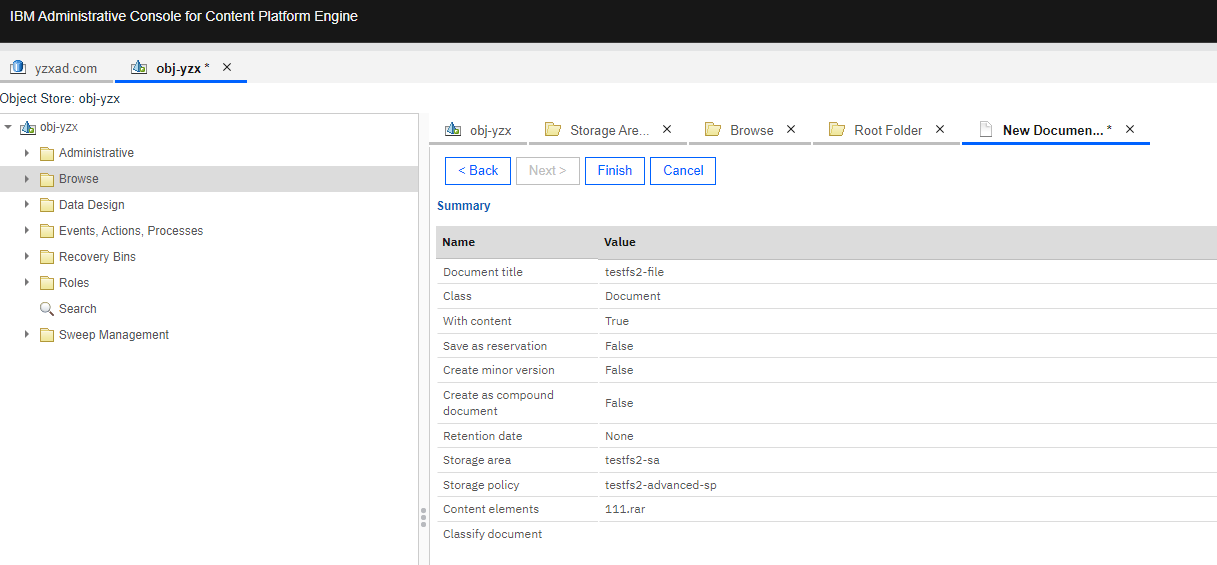 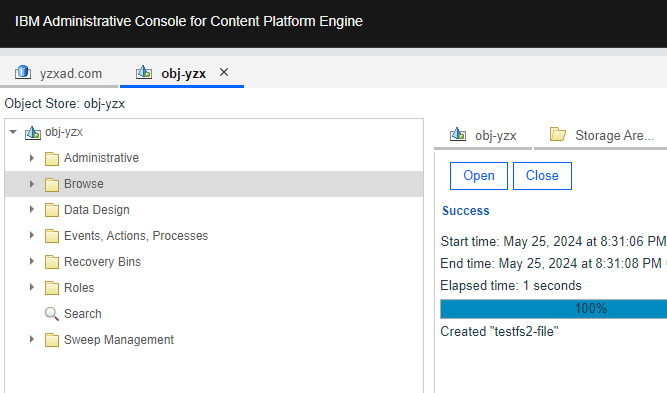 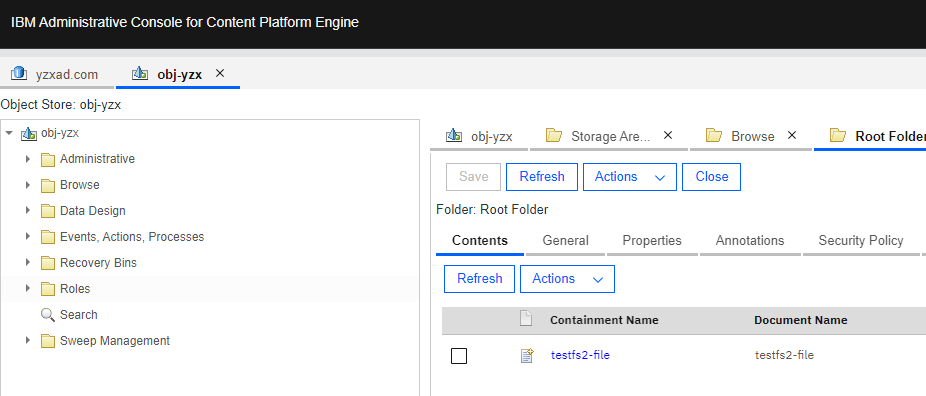 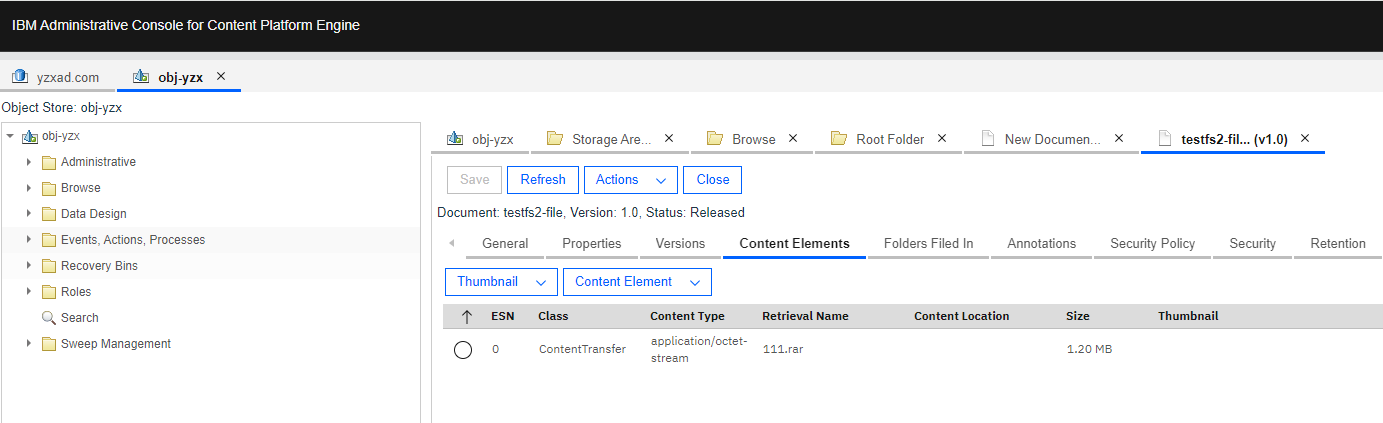 7. Check the directory size of the CIFS share. 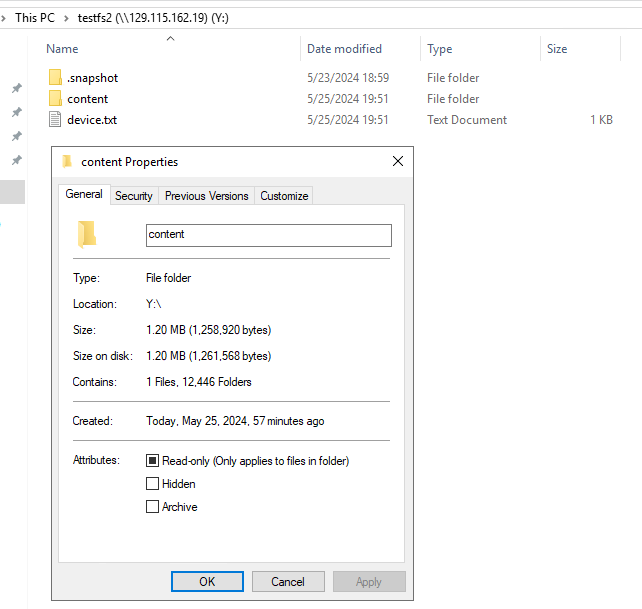 |
Test Conclusion | Passed |
4.7 Download the documents form the Advanced storage area
Test Purpose | To verify that Advanced storage area can work properly. |
Test Networking | Storage as the IBM FileNet P8 Content Platform Engine Storage Area Test Networking |
Prerequisites | 1. Deployment of storage device, CPE Windows Server and networking have been completed. 2. The storage device is running properly. 3. File System and CIFS share have been created on storage device. 4. The Object Store of “obj-yzx” has been created on CPE. 5. The documents have been added to the Advanced storage area in section 4.6. |
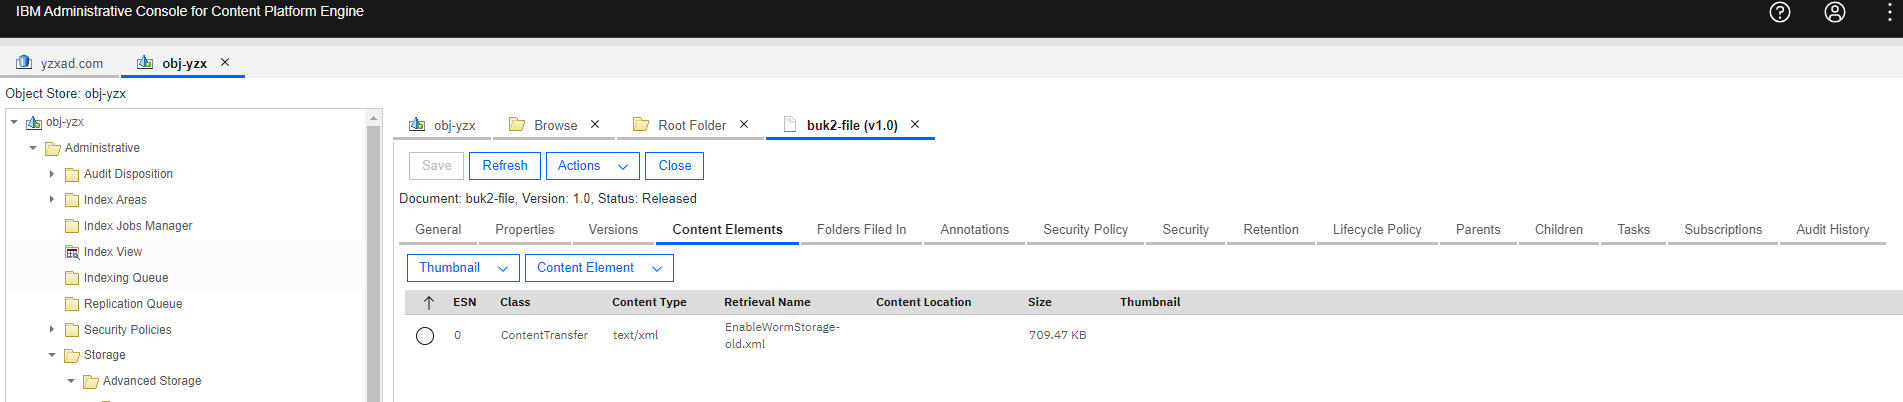
Test Procedure | 1. Select the Object Store > Browse > Root Folder > Actions > Contents. 2. Select the document and browse the content elements. 3. Download the content element of a document. 4. Check the downloaded document consistency. |
Expected Result | 1. In step 3, succeed to download the document. 2. In step 4, the downloaded file is complete and correct. |
Test Results | 1. Select the Object Store > Browse > Root Folder > Actions > Contents. 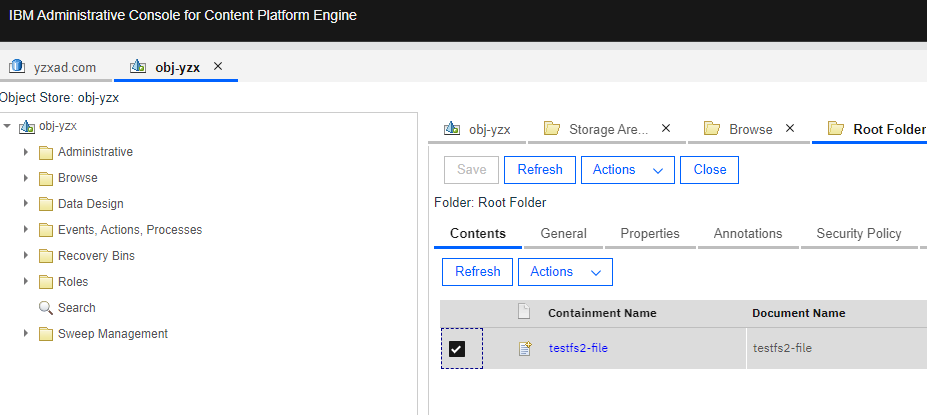 2. Select the document and browse the content elements.  3. Download the content element of a document. 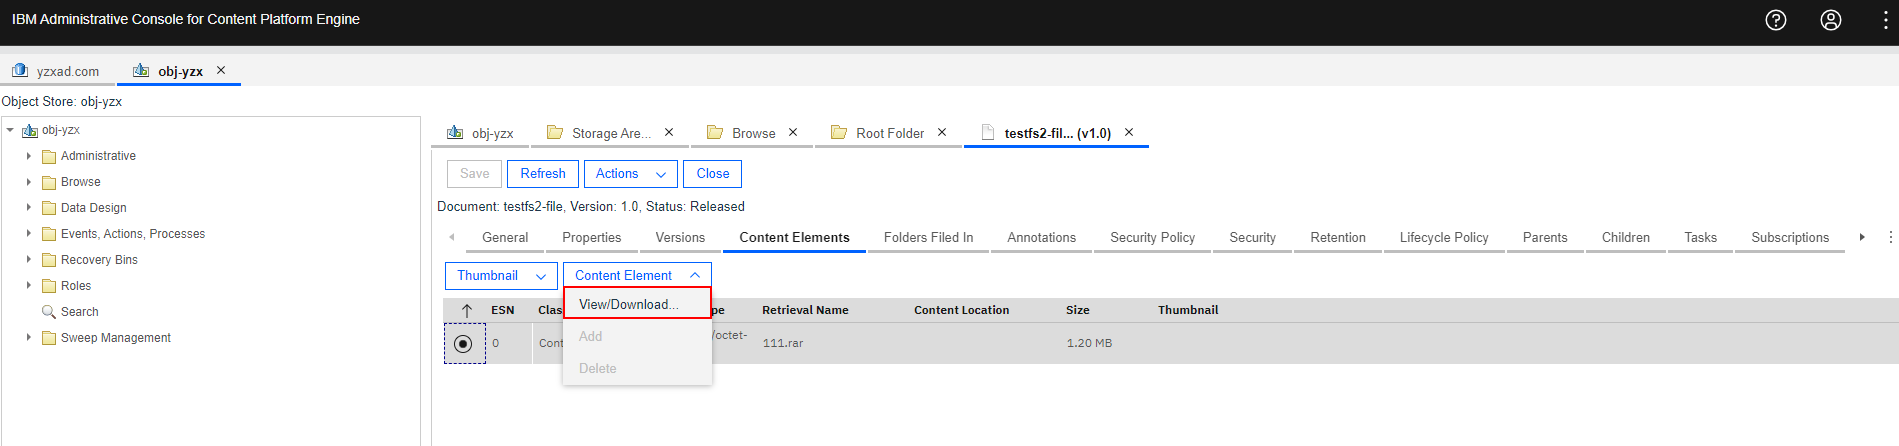
 |
Test Conclusion | Passed |
4.8 Delete the documents form the Advanced storage area
Test Purpose | To verify that Advanced storage area can work properly. |
Test Networking | Storage as the IBM FileNet P8 Content Platform Engine Storage Area Test Networking |
Prerequisites | 1. Deployment of storage device, CPE Windows Server and networking have been completed. 2. The storage device is running properly. 3. File System and CIFS share have been created on storage device. 4. The Object Store of “obj-yzx” has been created on CPE. 5. The documents have been added to the File storage area in section 4.6. |
Test Procedure | 1. Select the Object Store > Browse > Root Folder > Actions > Contents. 2. Select the document and delete the document. 3. Check the directory size of the CIFS share. |
Expected Result | 1. In step 2, succeed to delete the document on CPE. 2. In step 3, succeed to delete the document from CIFS share. |
Test Results | 1. Select the Object Store > Browse > Root Folder > Actions > Contents.  2. Select the document and delete the document. 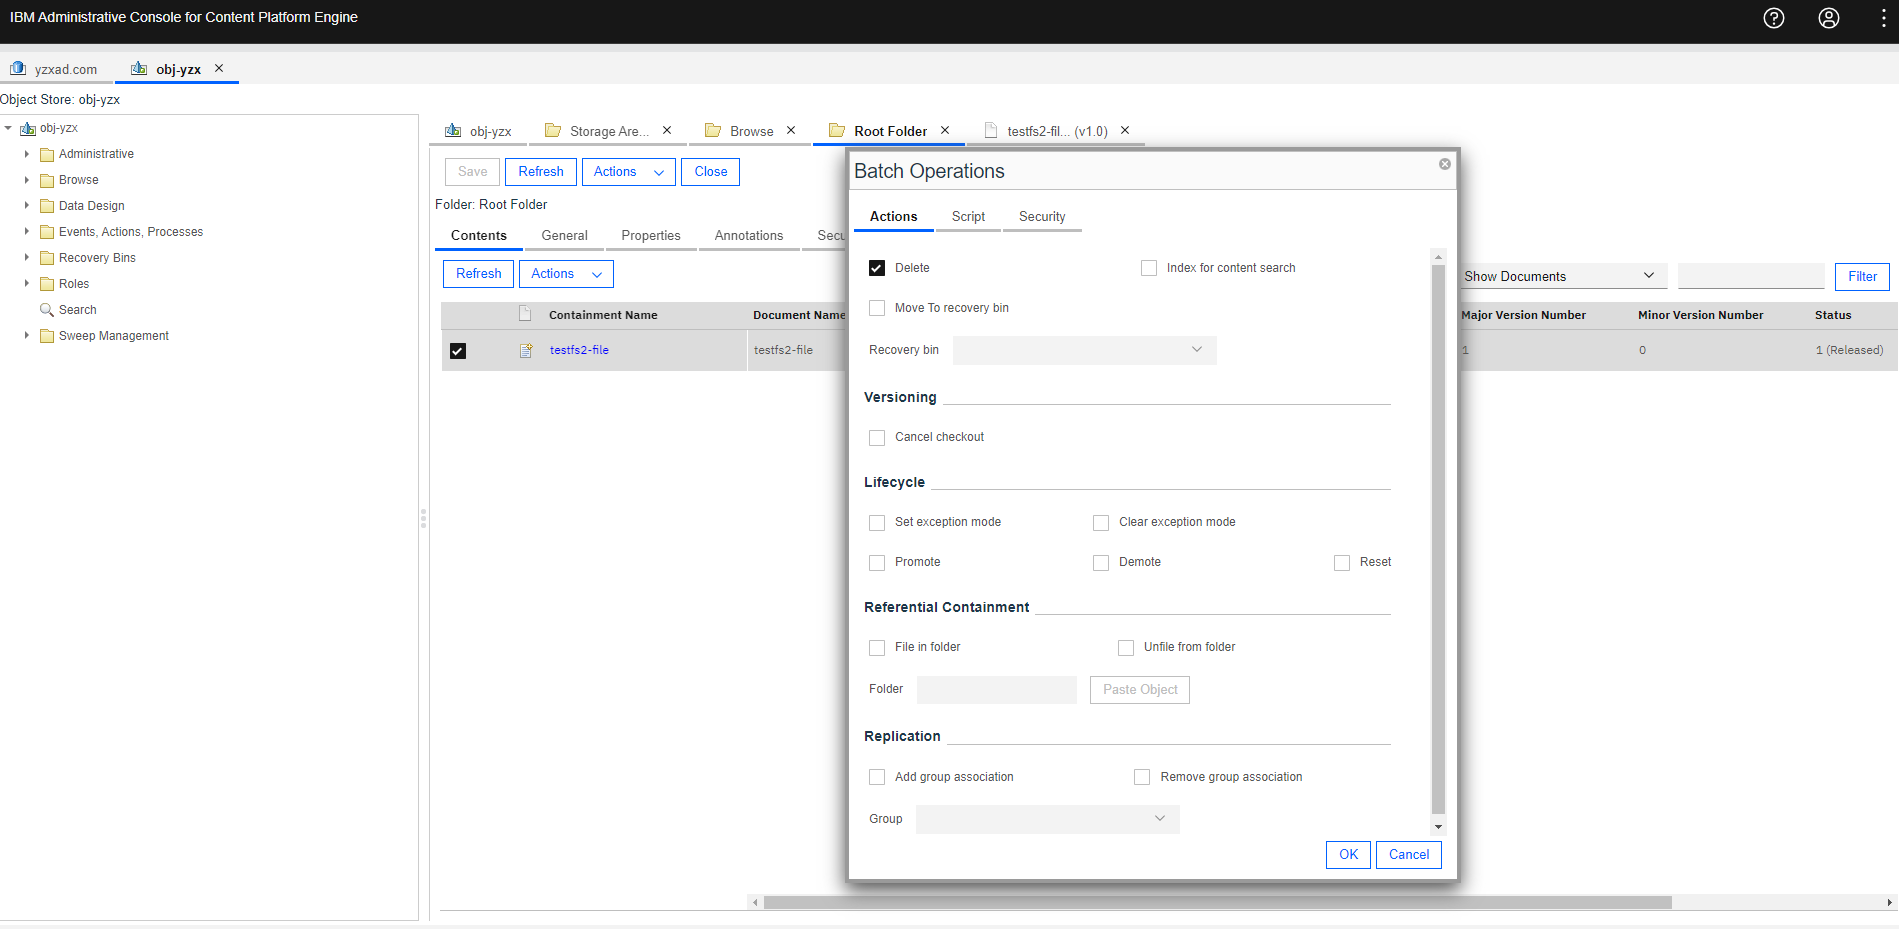 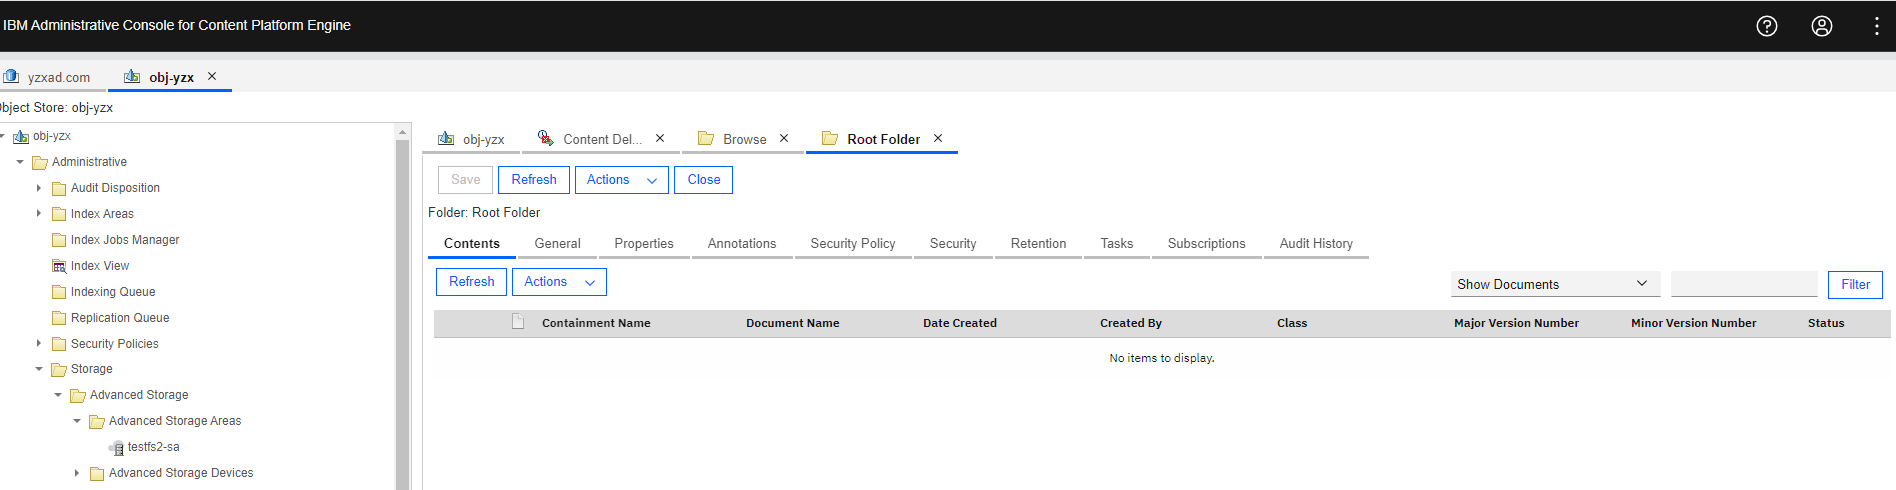
 |
Test Conclusion | Passed |
5. Verification the Pacific Storage as the Fixed Storage Area
5.1 Add the bucket to the CPE as the Fixed Content Device.
Test Purpose | To verify that the Pacific storage can be added to the CPE as the Fixed Content Device. |
Test Networking | Storage as the IBM FileNet P8 Content Platform Engine Storage Area Test Networking |
Prerequisites | 1. The Pacific storage, CPE server, VMware ESXi deployment and networking have been completed. 2. The S3 services of the Pacific storage have been configured successfully, including accounts, namespace, access certificates, security certificates, and service network. 3. NTP clock synchronization has been configured for the WORM clock of the storage device and the CPE server. 4. The Object Store of “obj-yzx” has been created on CPE. 5. The bucket has been enabled the worm policy mode to None, and enabled the Versioning. |
Test Procedure | 1. Select the Global Configuration > Administration > Fixed Content Devices, and right-click to New Fixed Content Device. 2. Enter a display name and next. 3. Select the type of Amazon Simple Storage Service (S3) and next. 4. Enter the Device connection URL, AWS S3 Bucket Name, AWS S3 Region Name. Select the Authentication Method of Secret Key. 5. Enter the AK&SK and next. 6. Check the configuration and finish. |
Expected Result | 1. In step 6, succeed to add the bucket as Fixed Content Device. |
Test Results | 1. Select the Global Configuration > Administration > Fixed Content Devices, and right-click to New Fixed Content Device. 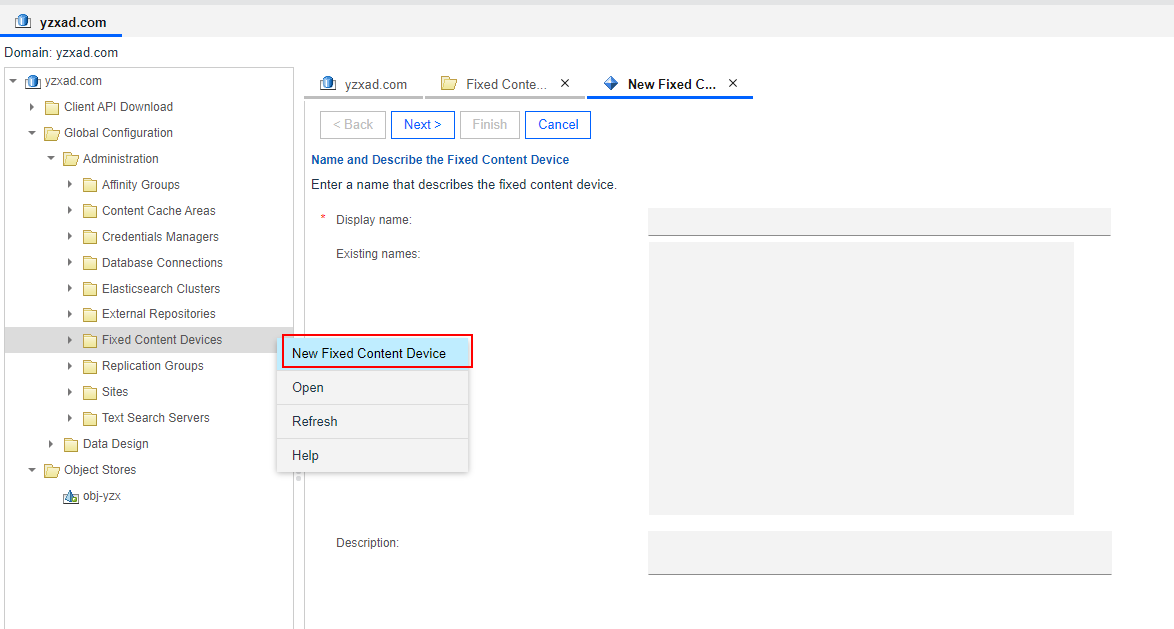
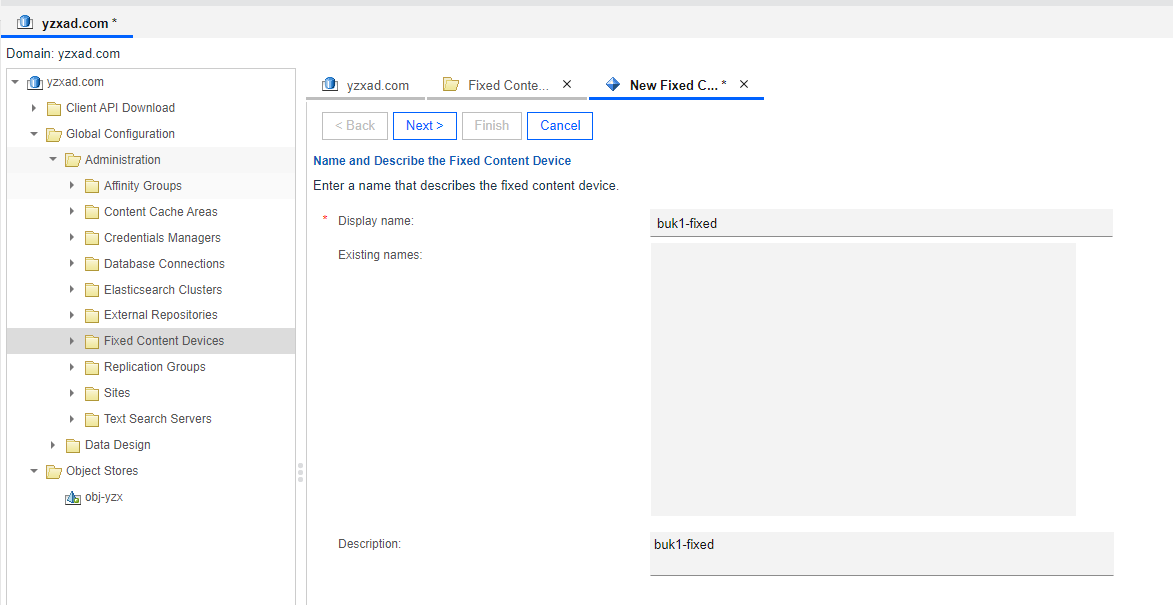 3. Select the type of Amazon Simple Storage Service (S3) and next.  4. Enter the Device connection URL, AWS S3 Bucket Name, AWS S3 Region Name. Select the Authentication Method of Secret Key. 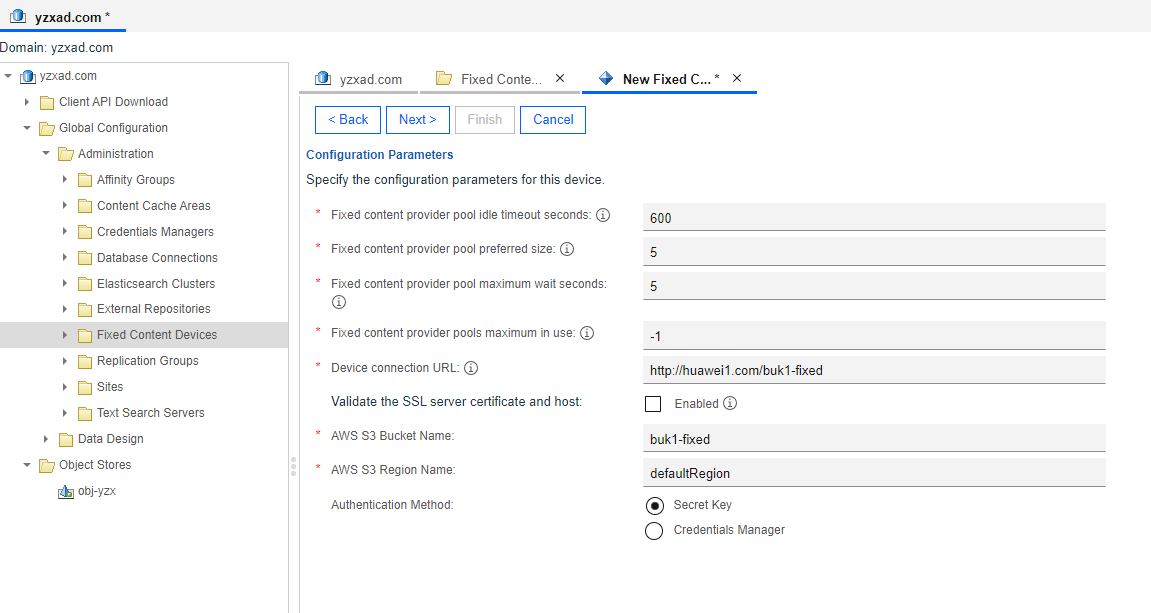 5. Enter the AK&SK and next. 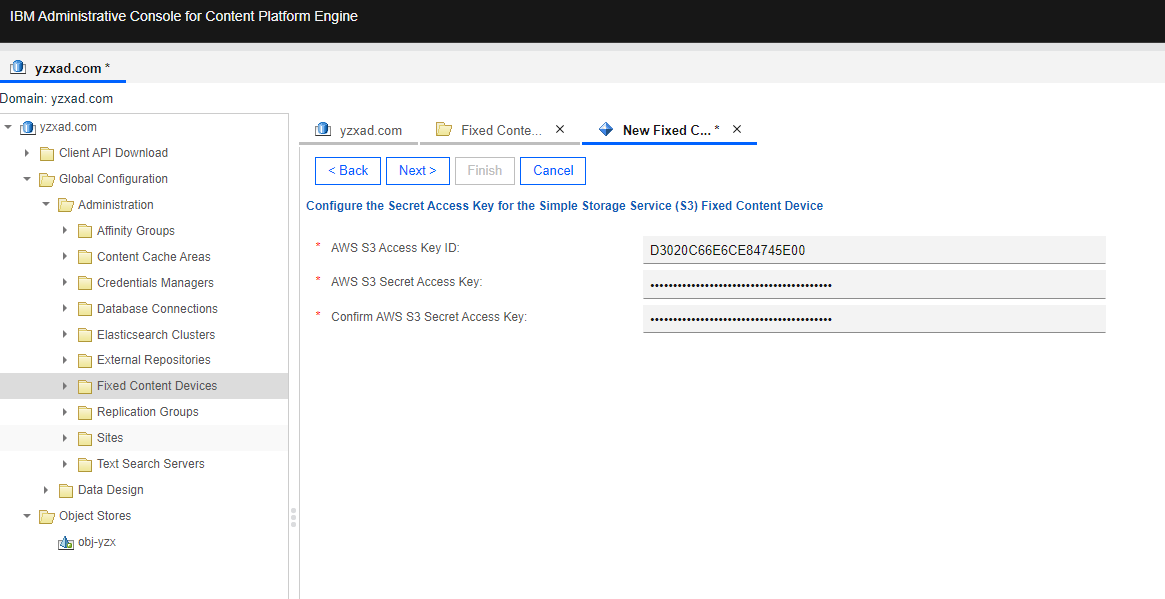 6. Check the configuration and finish. 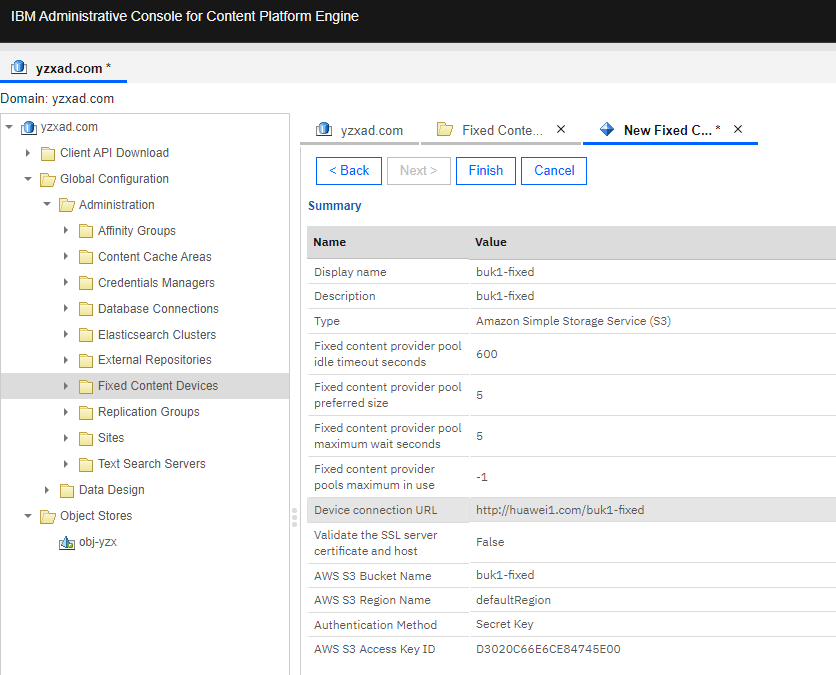 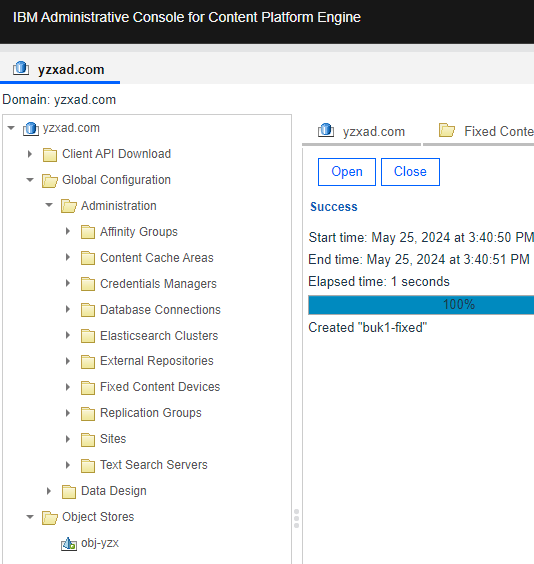 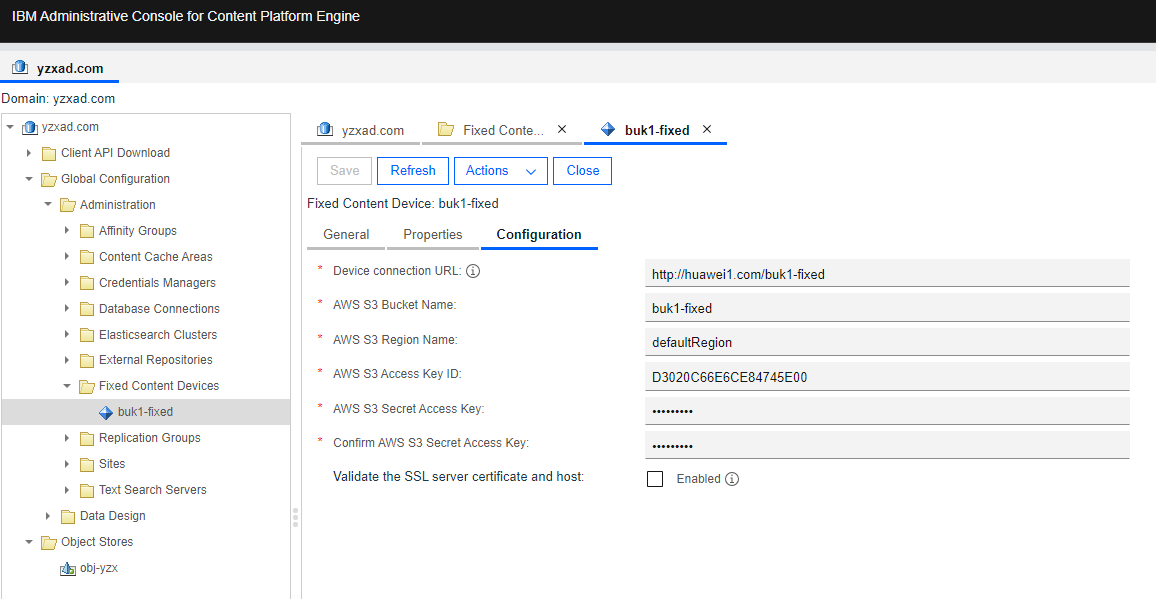 |
Test Conclusion | Passed |
5.2 Create the Fixed storage area.
Test Purpose | To verify that the Pacific storage can be added to the CPE as the Fixed storage area. |
Test Networking | Storage as the IBM FileNet P8 Content Platform Engine Storage Area Test Networking |
Prerequisites | 1. The Pacific storage, CPE server, VMware ESXi deployment and networking have been completed. 2. The S3 services of the Pacific storage have been configured successfully, including accounts, namespace, access certificates, security certificates, and service network. 3. NTP clock synchronization has been configured for the WORM clock of the storage device and the CPE server. 4. The Object Store of “obj-yzx” has been created on CPE. 5. The Fixed Content Device has been created on CPE in section 5.1. |
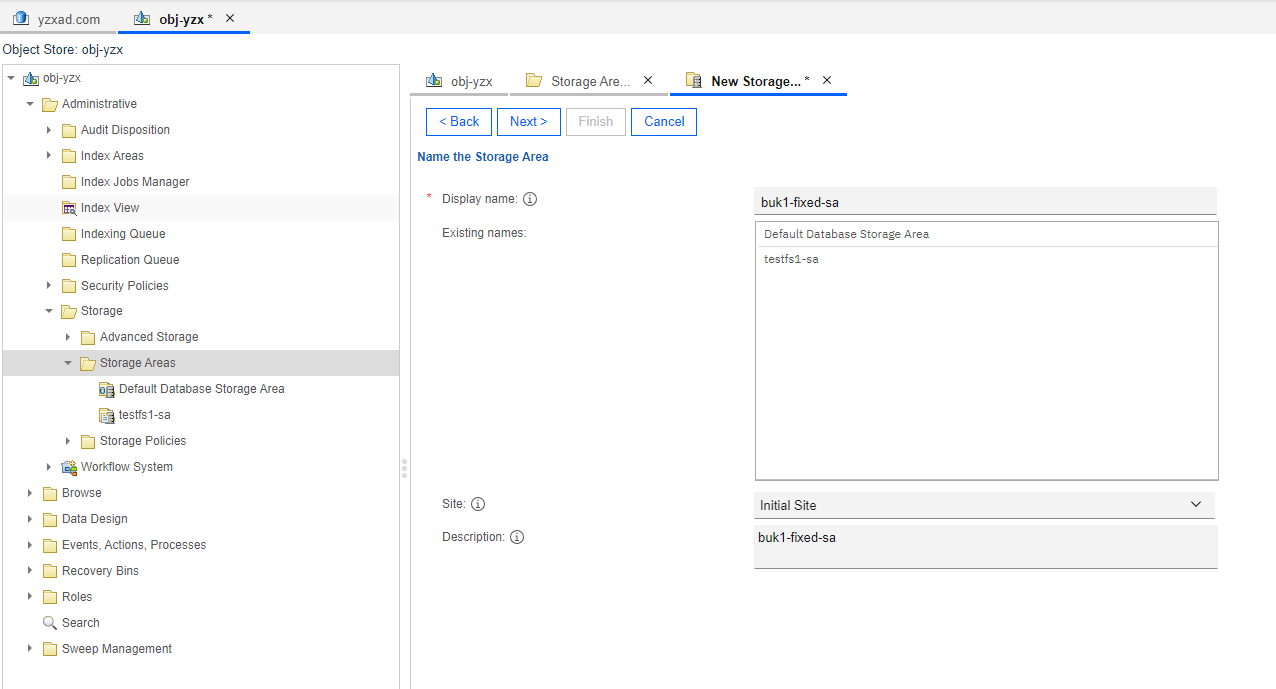
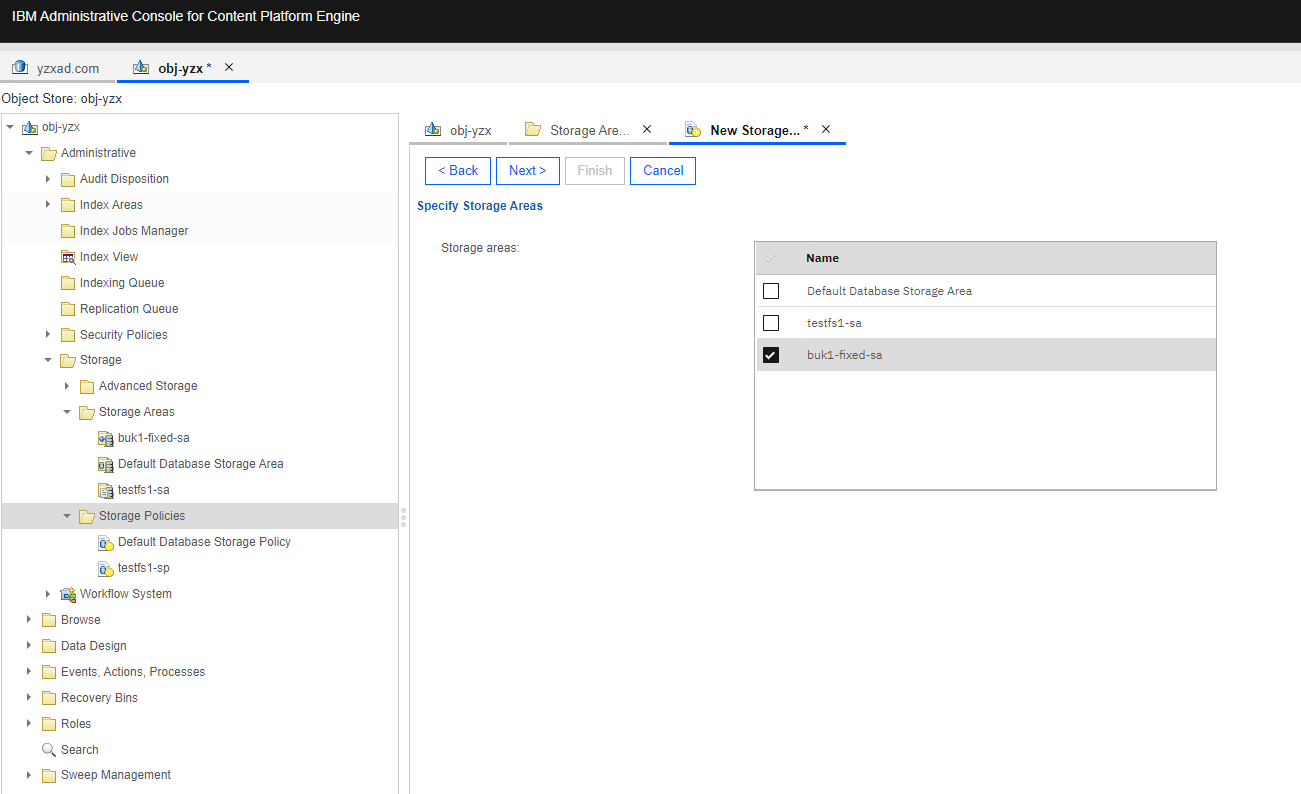
Test Procedure | 1. Select the Object Store > Administrative > Storage > Storage Areas, and right-click to New Storage Area. Select the Storage area type of Fixed and next. 2. Enter a display name and next. 3. Select the created Fixed Content Device in section 5.1 and next. 4. Enter the Staging area root directory of the local path and next. 5.The policy is configured later and next. 6. Check the configuration and finish. 7. Select the Object Store > Administrative > Storage > Storage Policies, and right-click to New Storage Policy. 8. Enter a display name and next. 9. Retain the default settings and next. 10. Select the created Storage Area in step 6 and next. 11. Check the configuration and finish. |
Expected Result | 1. In step 6, succeed to create the Fixed storage area. 2. In step 11, succeed to create the Storage Policy. |
Test Procedure | 1. Select the Object Store > Administrative > Storage > Storage Areas, and right-click to New Storage Area. Select the Storage area type of Fixed and next. 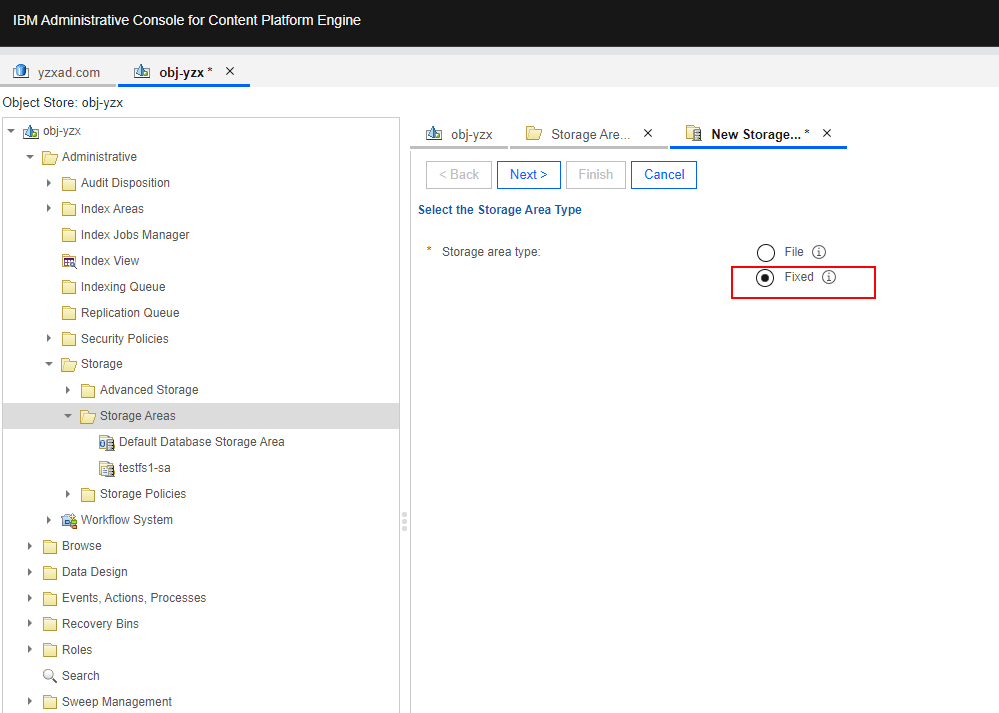
 3. Select the created Fixed content device in section 5.1 and next. 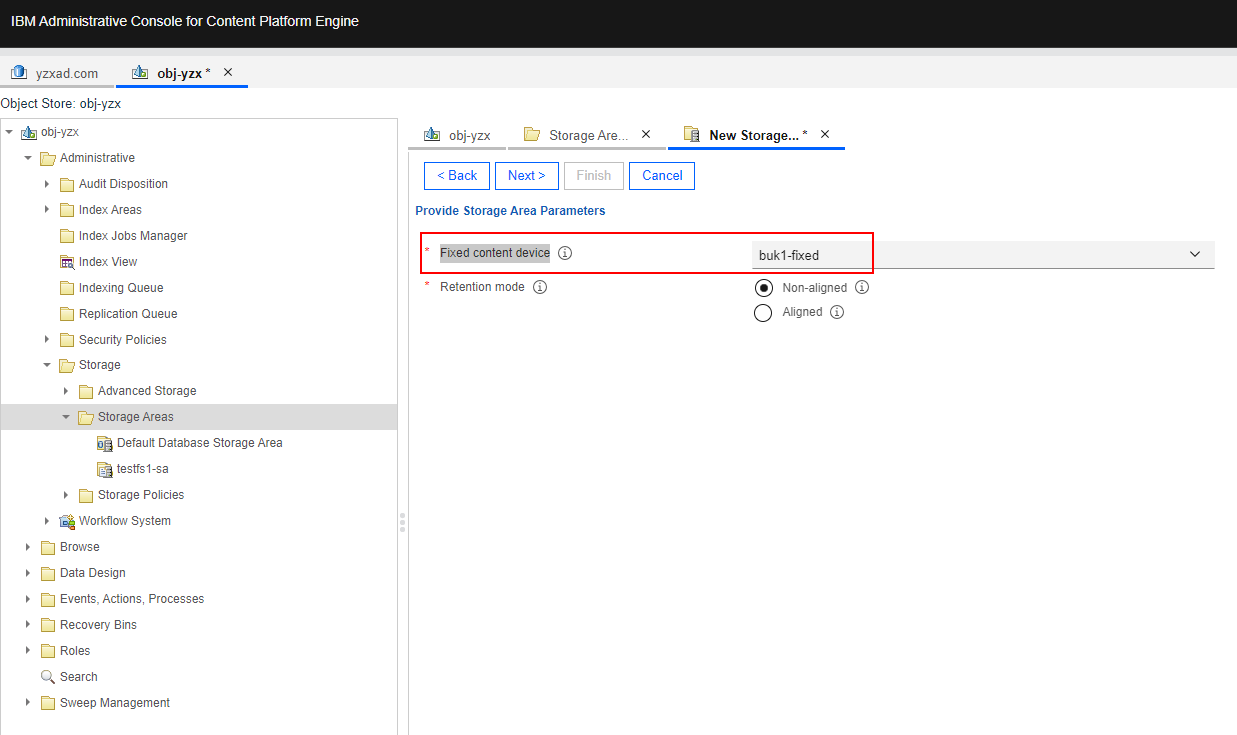
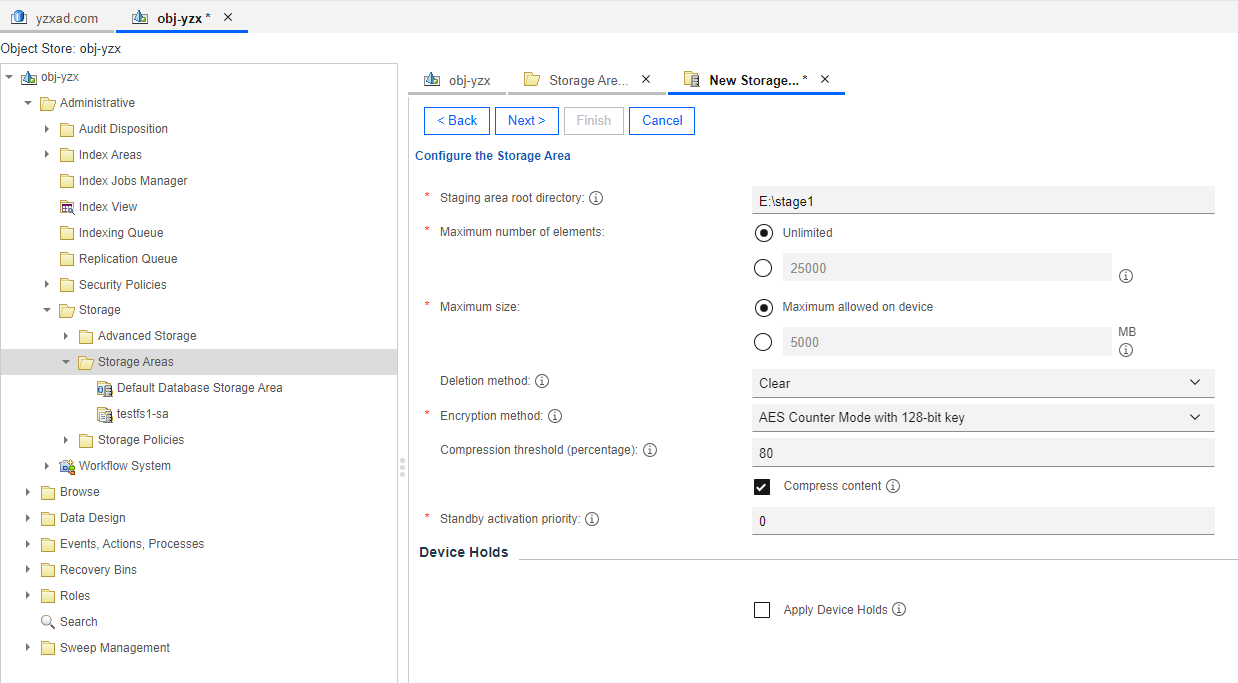 5. The policy is configured later and next. 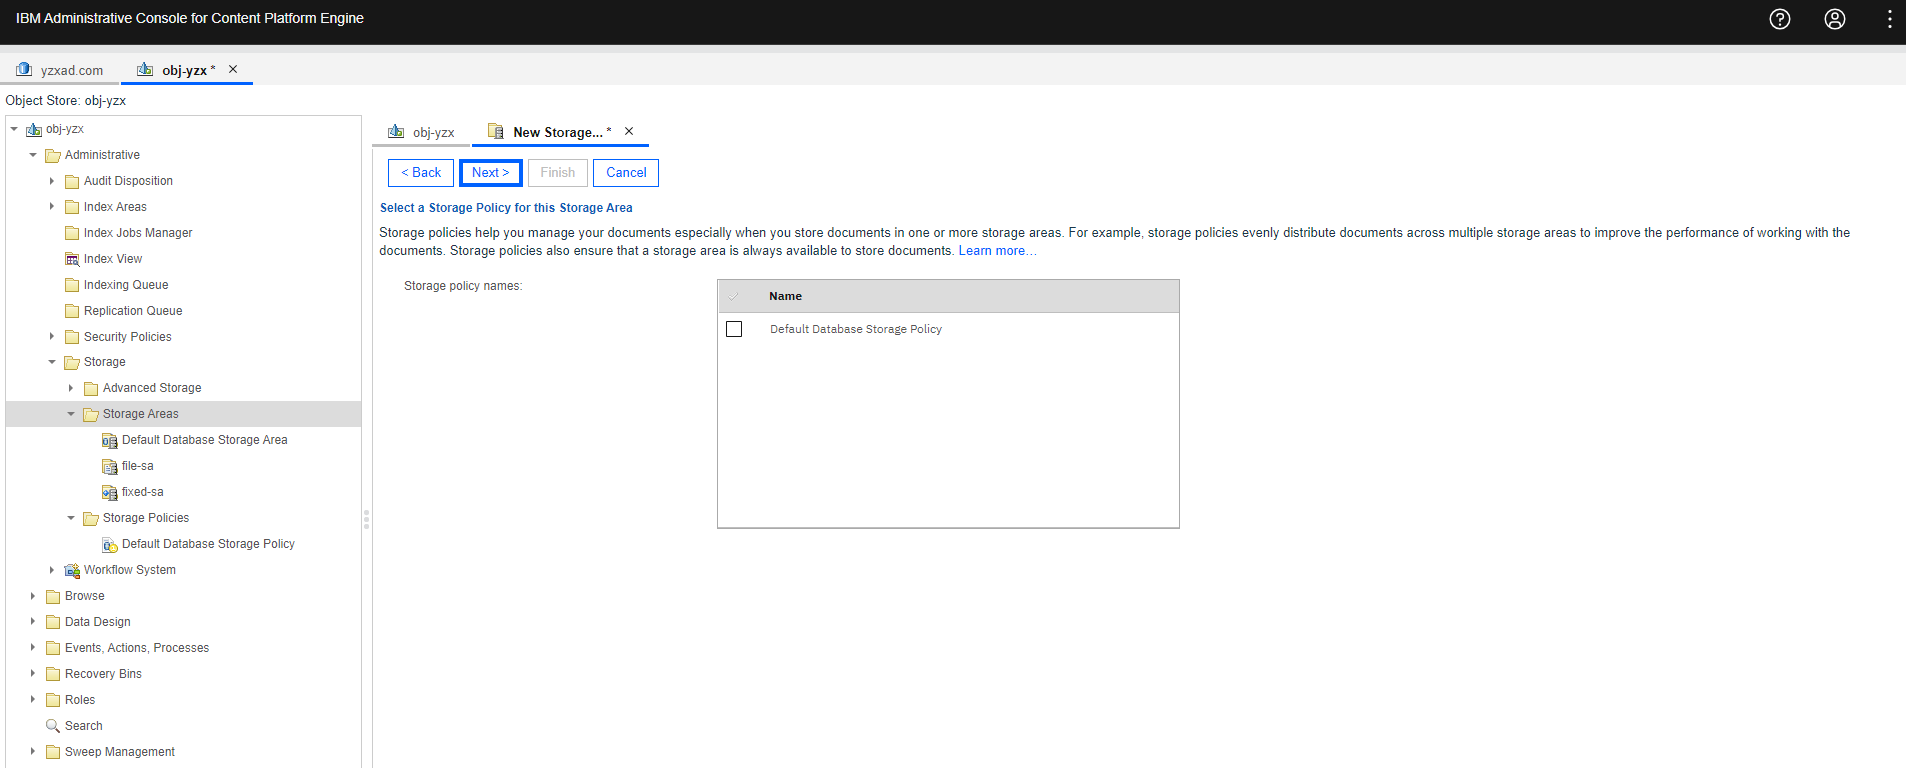 6. Check the configuration and finish. 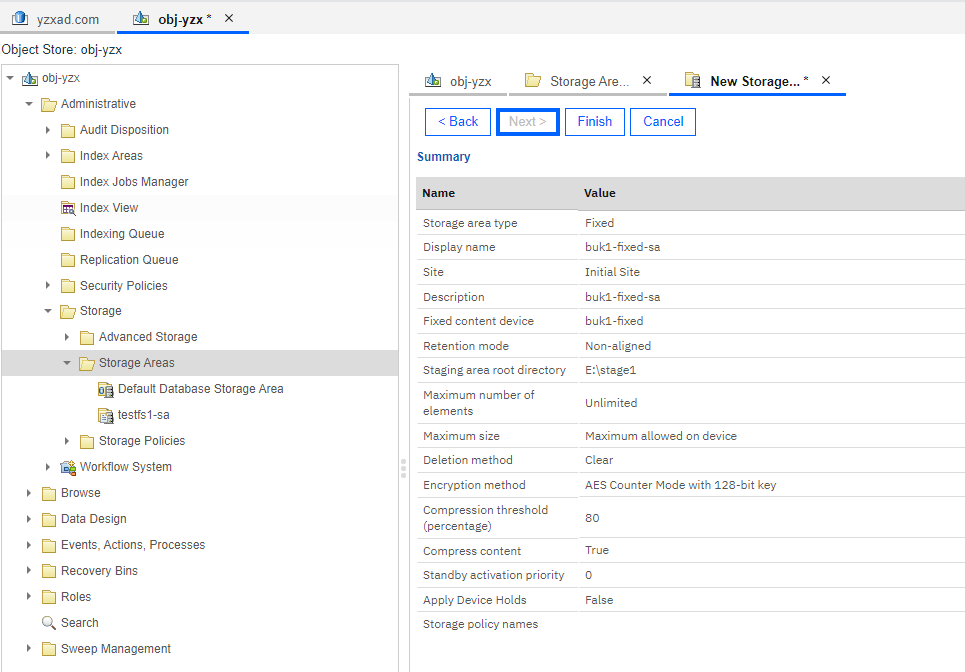 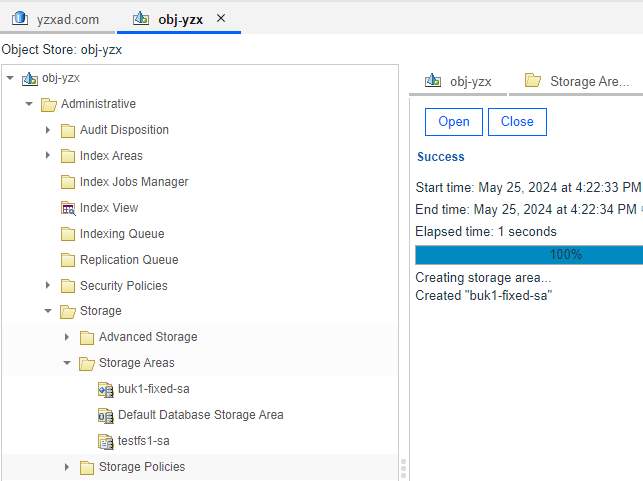 7. Select the Object Store > Administrative > Storage > Storage Policies, and right-click to New Storage Policy. 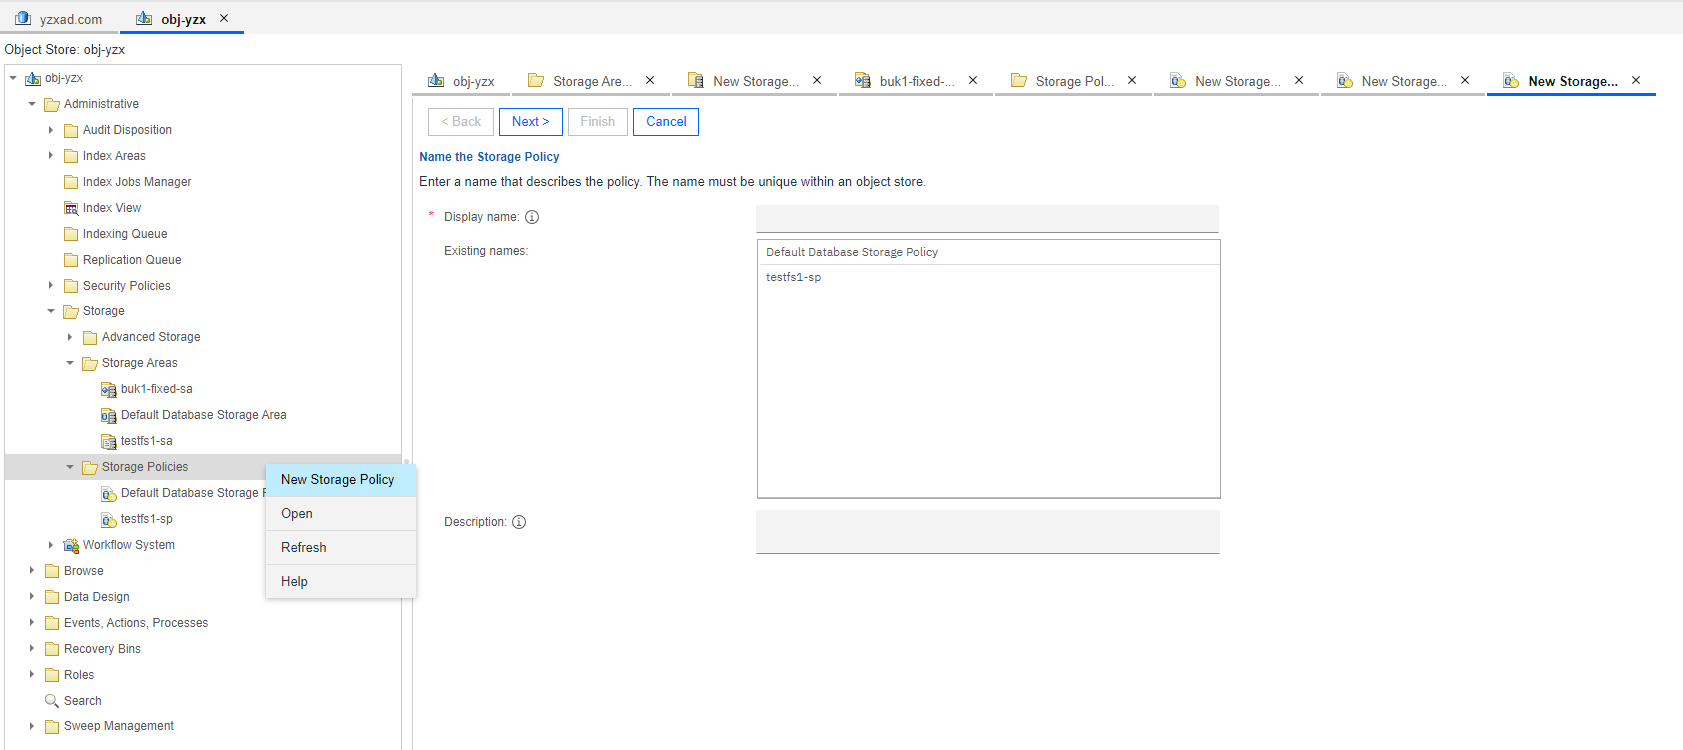 8. Enter a display name and next. 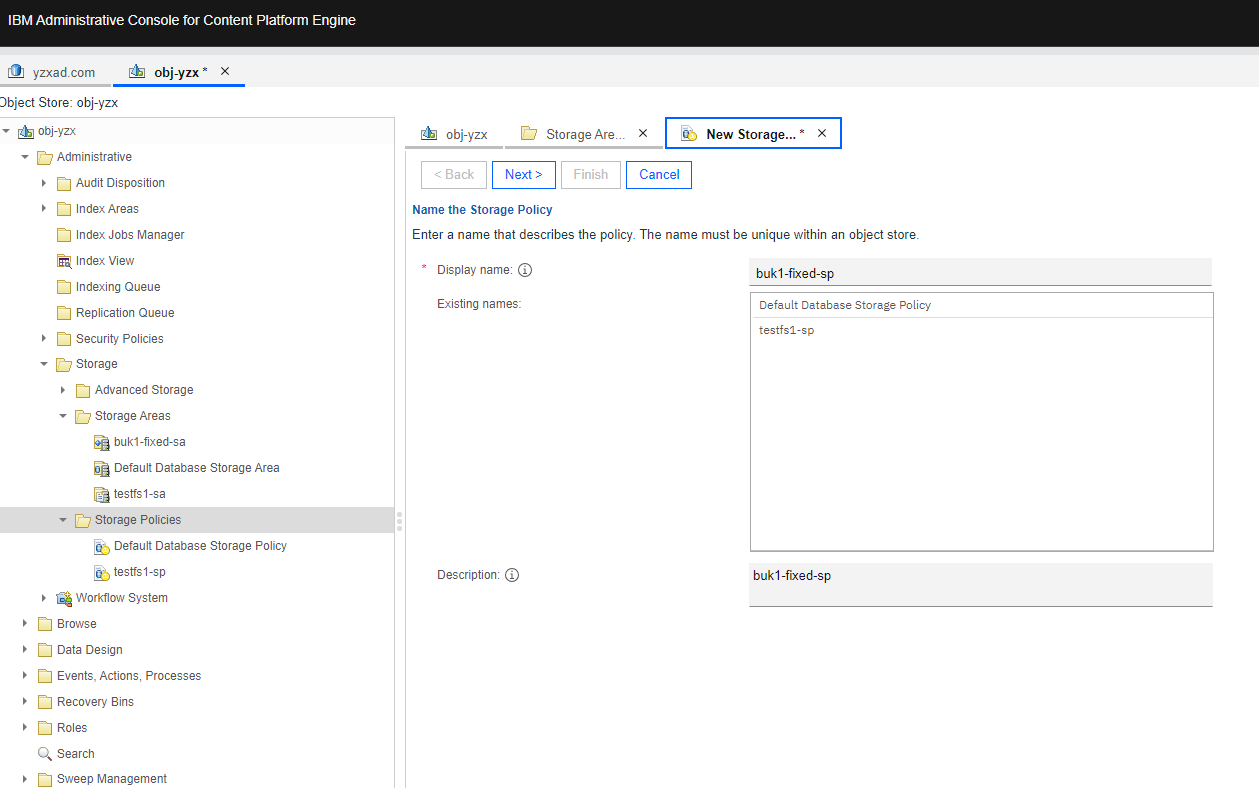

 11. Check the configuration and finish. 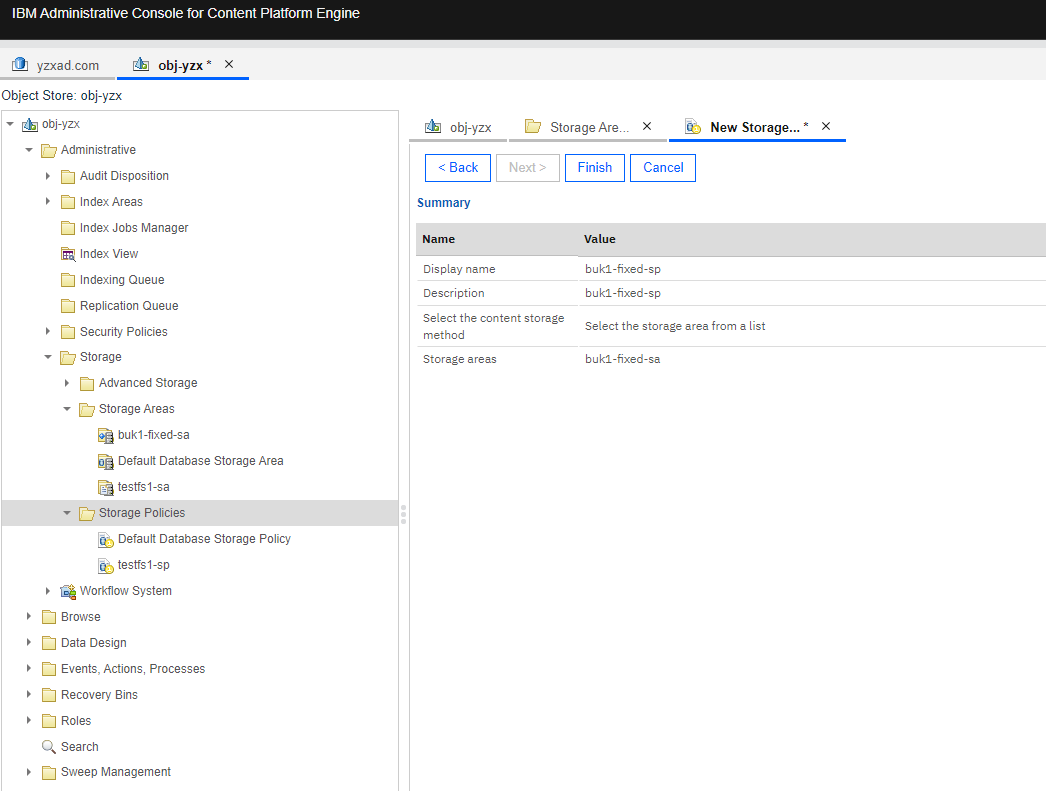 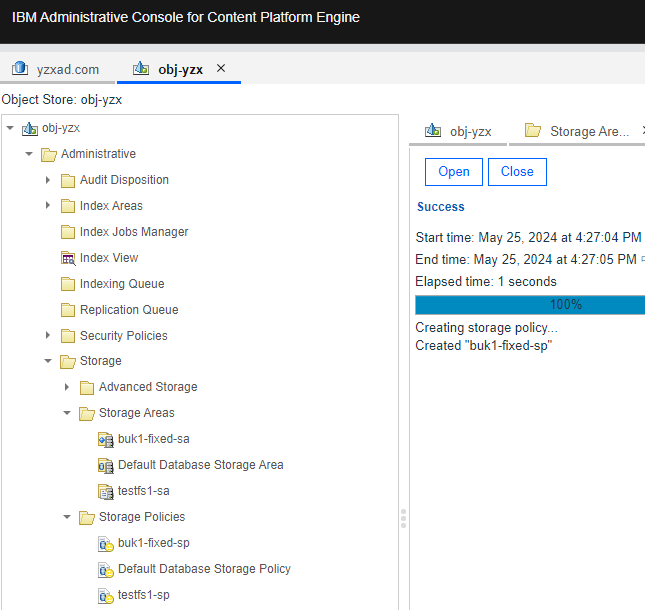
|
Test Conclusion | Passed |
5.3 Add the documents to the Fixed storage area with retention
Test Purpose | To verify that the retention period is supported when the Pacific storage is used as Fixed storage area on the CPE server. |
Test Networking | Storage as the IBM FileNet P8 Content Platform Engine Storage Area Test Networking |
Prerequisites | 1. The Pacific storage, CPE server, VMware ESXi deployment and networking have been completed. 2. The S3 services of the Pacific storage have been configured successfully, including accounts, namespace, access certificates, security certificates, and service network. 3. NTP clock synchronization has been configured for the WORM clock of the storage device and the CPE server. 4. The Object Store of “obj-yzx” has been created on CPE. 5. The Fixed storage area has been created on CPE in section 5.2. |
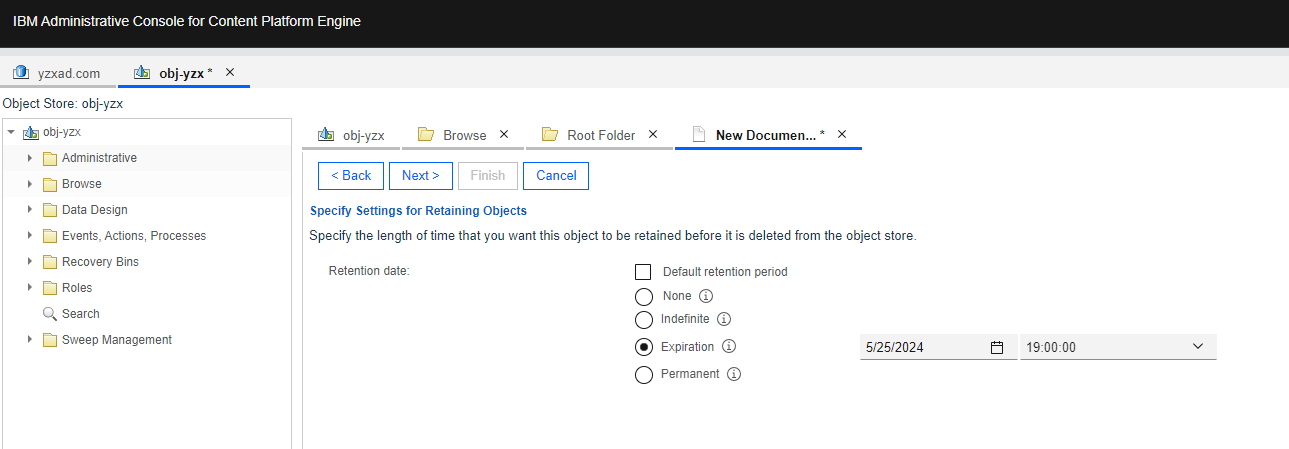
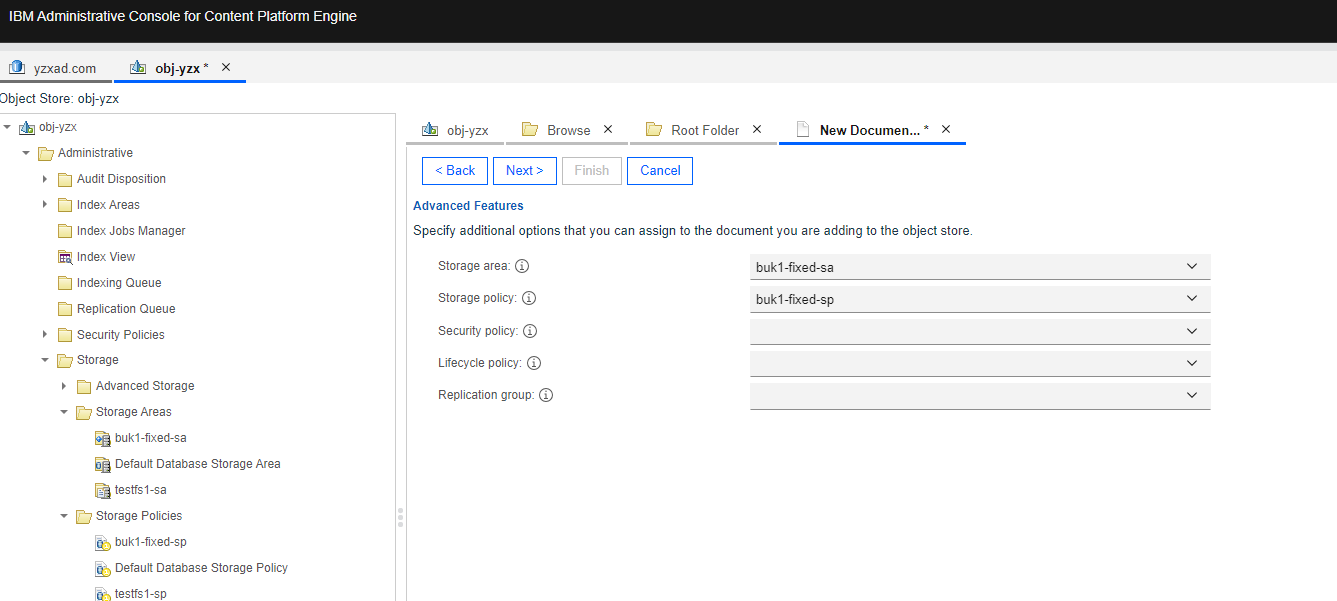
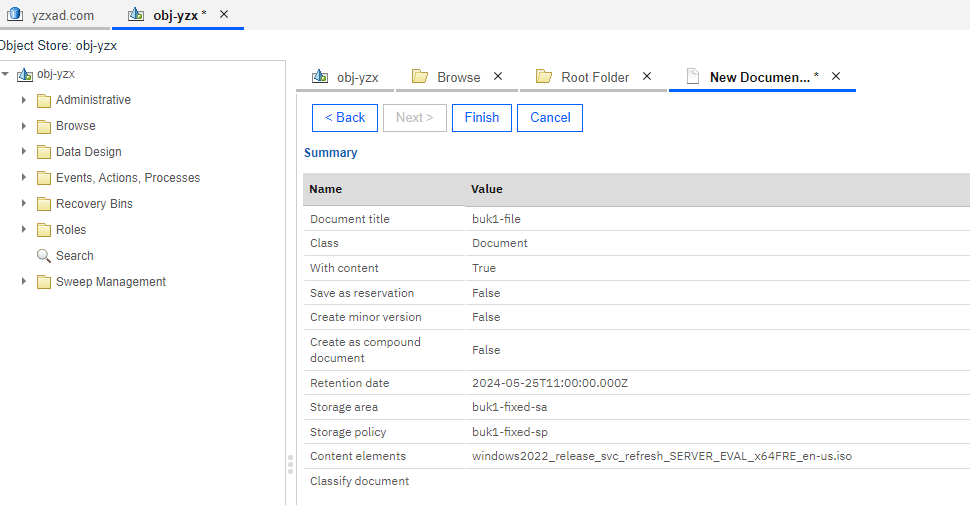
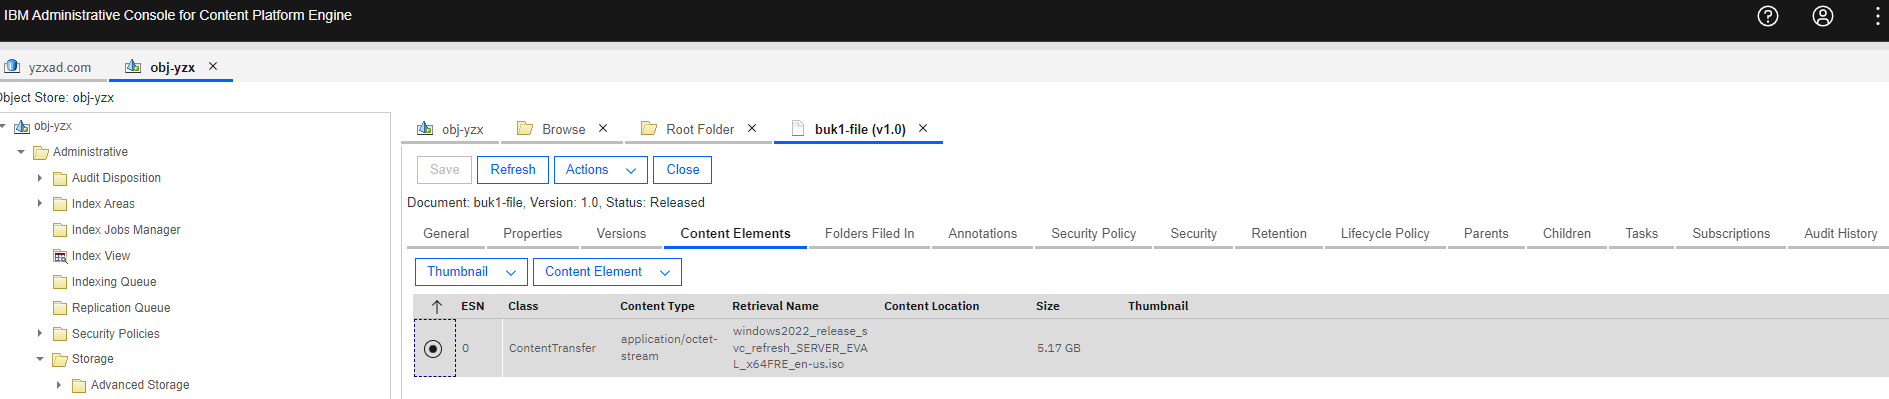
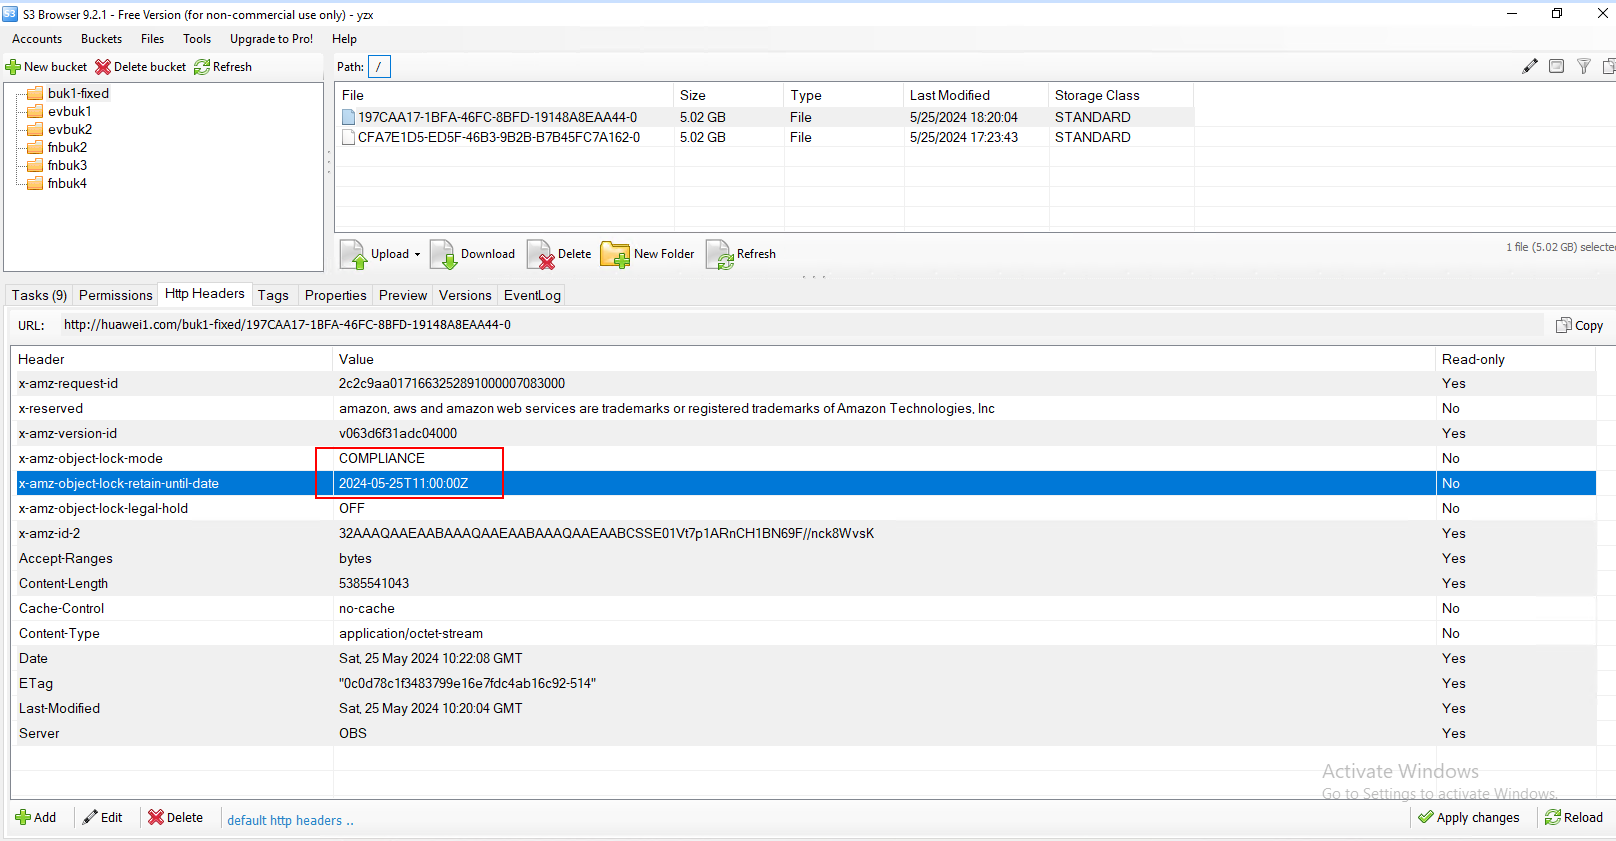
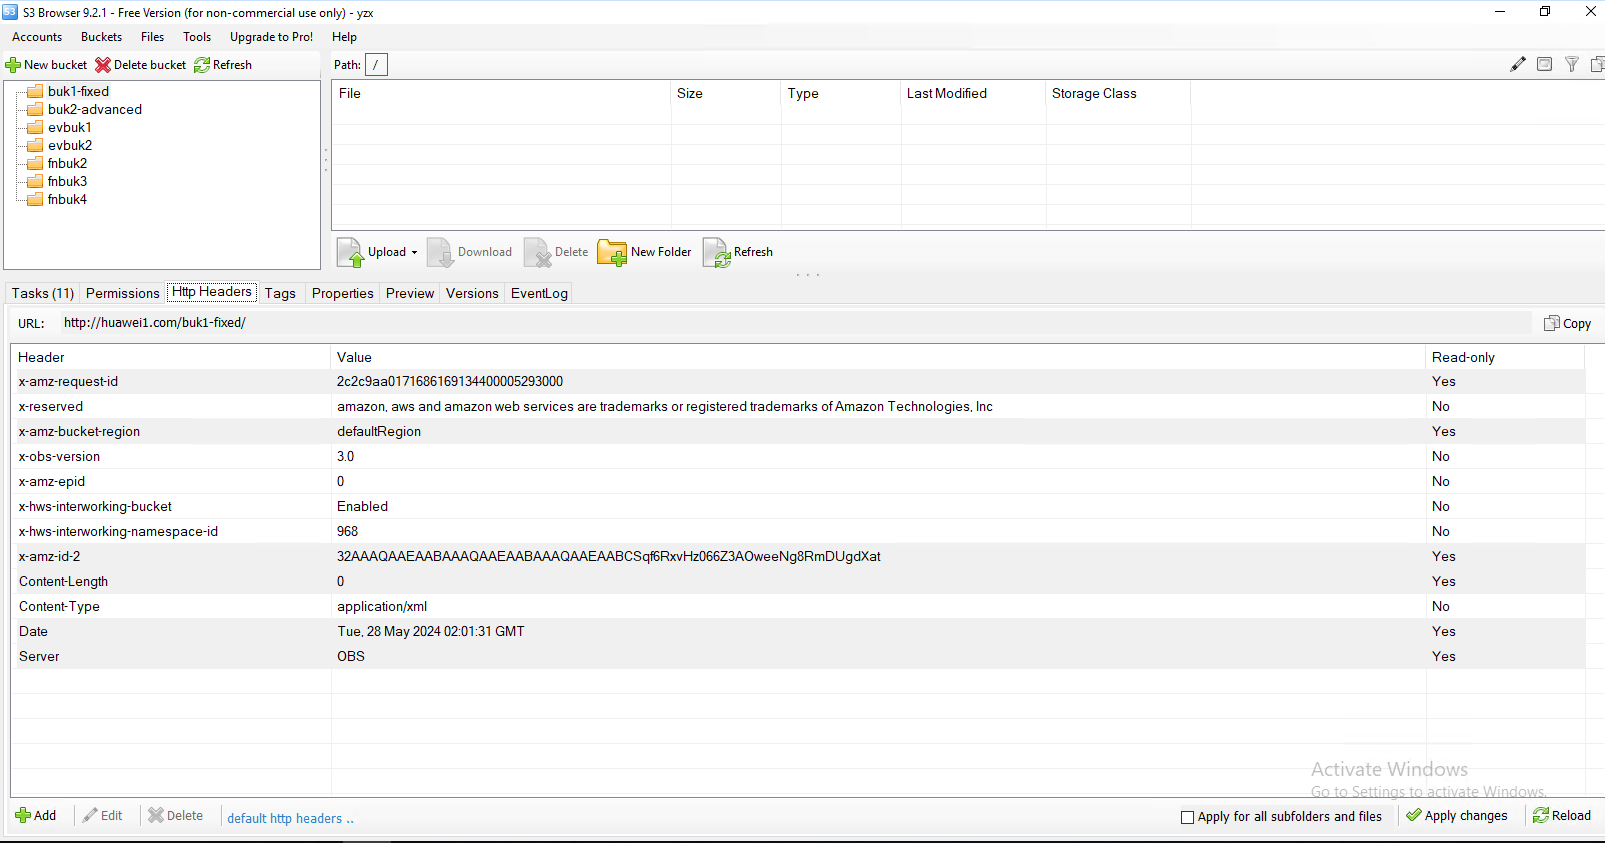
Test Procedure | 1. Configure the Retention mode of Aligned on the created Fixed Storage Area in section 5.2. 2. Select the Object Store > Browse > Root Folder > Actions > New Document. Enter the document title and next. 3. Add the content element and next. 4. Retain the default settings and next. 5. Specify the length of time that this object to be retained. 6. Select the created storage area and storage policy in section 5.2 and next. 7. Check the configuration and finish. 8. Check the headers of the documents on the S3 Browser. |
Expected Result | 1. In step 1, succeed to configure the Retention mode of Aligned. 2. In step 7, succeed to add the documents to the Fixed storage area. 3. In step 8, succeed to add the documents to bucket. The headers of the files show that ‘x-amz-object-lock-mode’ is ‘COMPLIANCE’, and contain the ‘x-amz-object-lock-retain-until-date’. The document is locked based on the retention period set on the CPE server. |
Test Results | 1. Configure the Retention mode of Aligned on the created Fixed Storage Area in section 5.2. 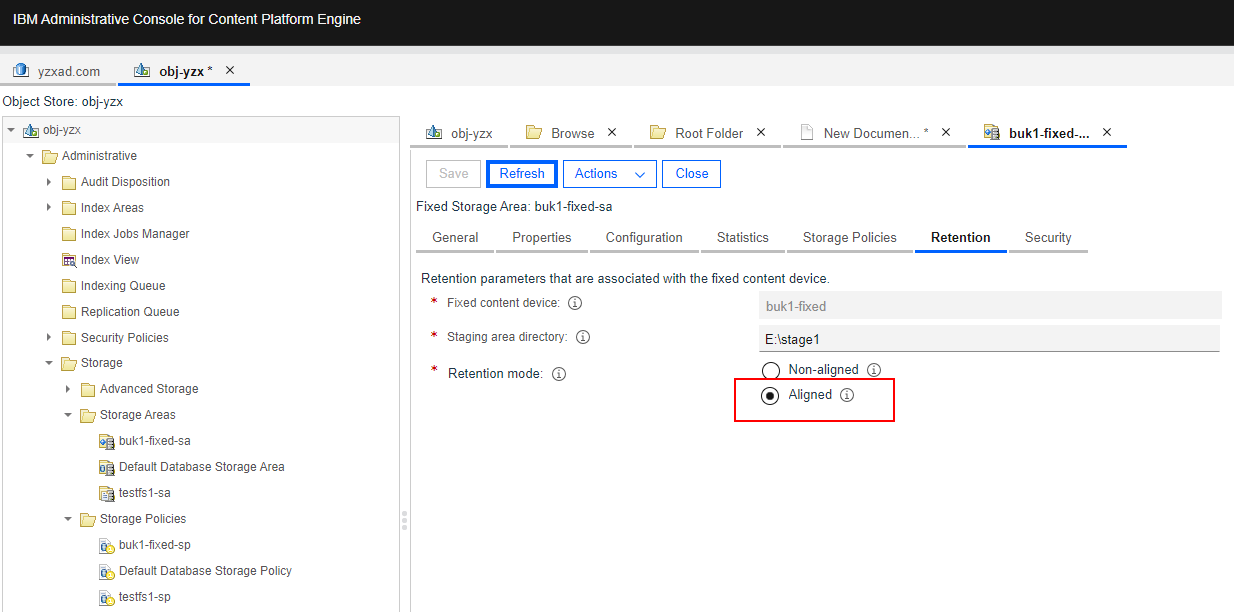 2. Select the Object Store > Browse > Root Folder > Actions > New Document. Enter the document title and next. 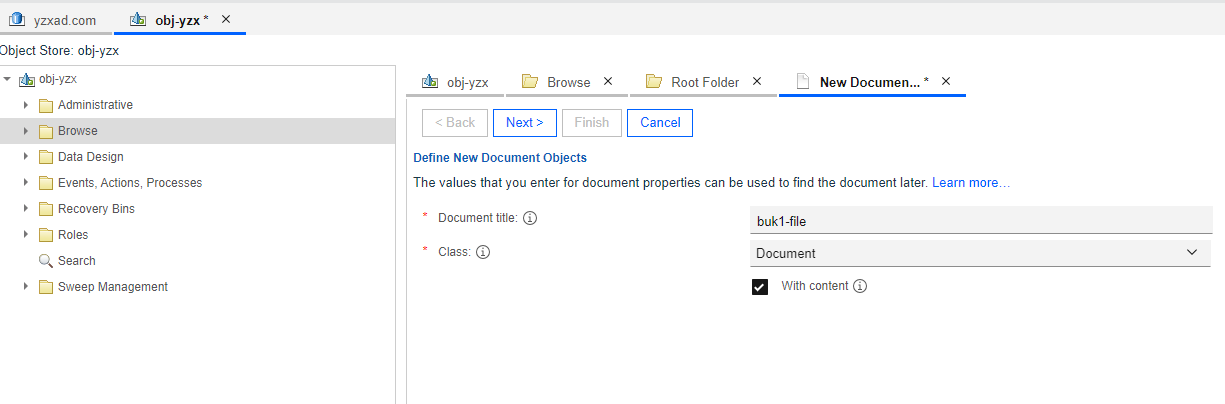 3. Add the content element and next. 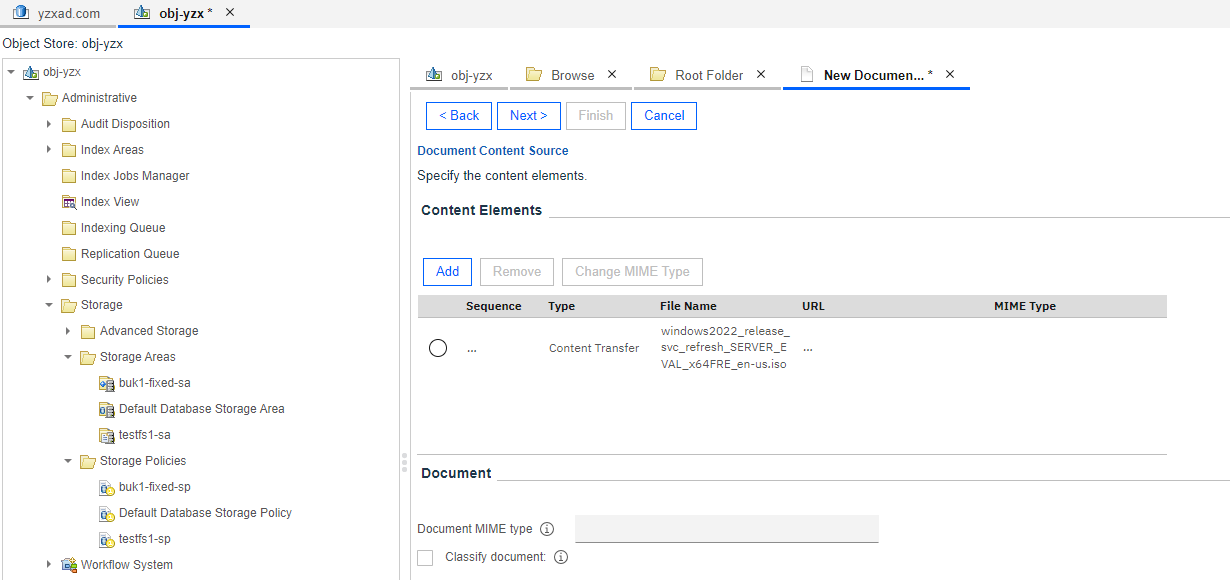 4. Retain the default settings and next.  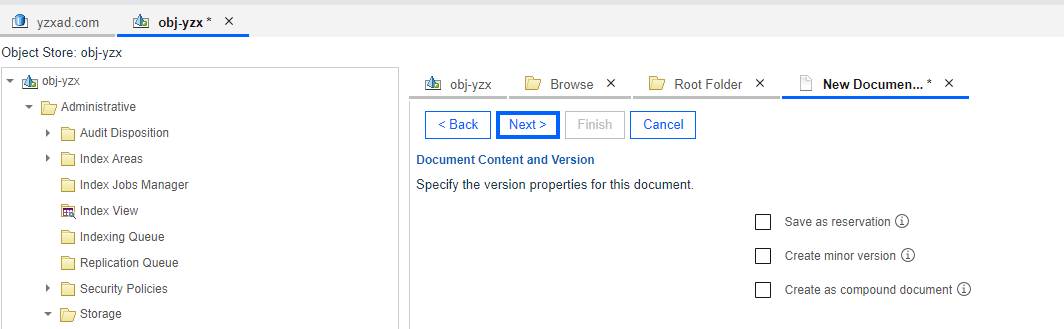
 |
Test Conclusion | Passed |
5.4 Download the file from the Fixed Content Area
Test Purpose | To verify that Fixed storage area can work properly. |
Test Networking | Storage as the IBM FileNet P8 Content Platform Engine Storage Area Test Networking |
Prerequisites | 1. The Pacific storage, CPE server, VMware ESXi deployment and networking have been completed. 2. The S3 services of the Pacific storage have been configured successfully, including accounts, namespace, access certificates, security certificates, and service network. 3. NTP clock synchronization has been configured for the WORM clock of the storage device and the CPE server. 4. The Object Store of “obj-yzx” has been created on CPE. 5. The documents have been added to the Fixed storage area with retention in section 5.3. |
Test Procedure | 1. Select the Object Store > Browse > Root Folder > Actions > Contents. 2. Select the document and browse the content elements. 3. Download the content element of a document. 4. Check the downloaded document consistency. |
Expected Result | 1. In step 3, succeed to download the document. 2. In step 4, the downloaded file is complete and correct. |
Test Results | 1. Select the Object Store > Browse > Root Folder > Actions > Contents. 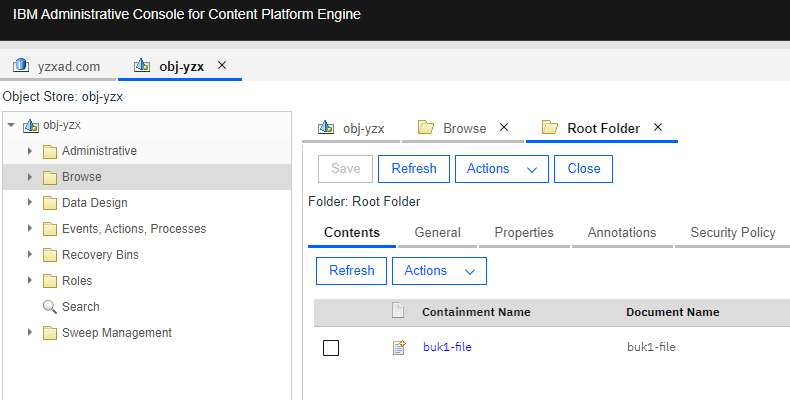 2. Select the document and browse the content elements.  3. Download the content element of a document. 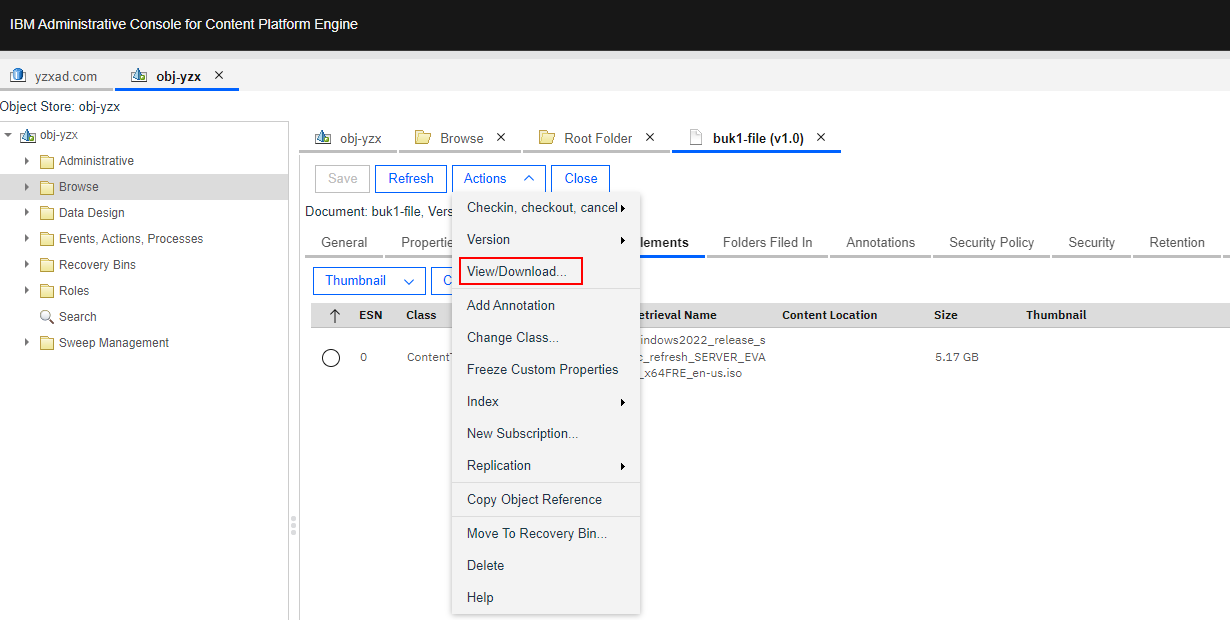 4. Check the downloaded document consistency.  |
Test Conclusion | Passed |
5.5 Delete the documents within and out of the retention period from the Fixed Storage Area
Test Purpose | To verify the WORM retention is supported when the Pacific storage is used as Fixed storage area on the CPE server. |
Test Networking | Storage as the IBM FileNet P8 Content Platform Engine Storage Area Test Networking |
Prerequisites | 1. The Pacific storage, CPE server, VMware ESXi deployment and networking have been completed. 2. The S3 services of the Pacific storage have been configured successfully, including accounts, namespace, access certificates, security certificates, and service network. 3. NTP clock synchronization has been configured for the WORM clock of the storage device and the CPE server. 4. The Object Store of “obj-yzx” has been created on CPE. 5. The documents have been added to the Fixed storage area with retention in section 5.3. |
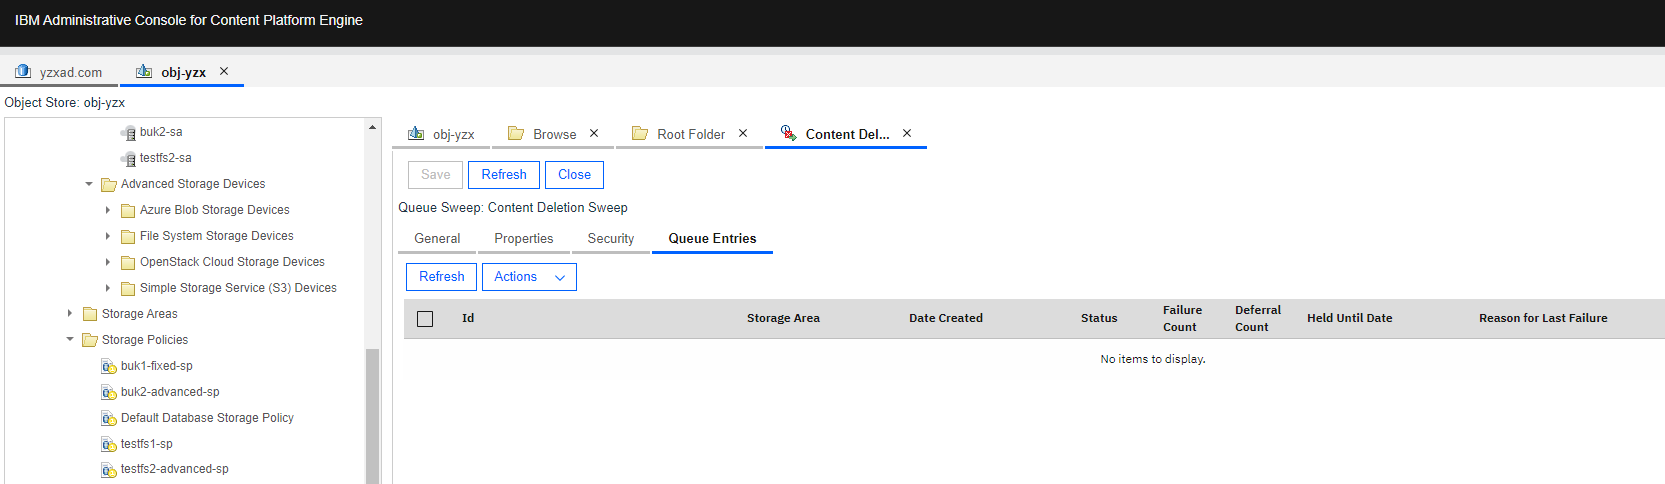
Test Procedure | 1. Select the Object Store > Browse > Root Folder > Actions > Contents. 2. Delete the documents within the retention period on the CPE server. 3. Delete the documents within the retention period on the s3 Browser. 4. Delete the documents that out of the retention period on the CPE server, and check the documents on the s3 Browser. |
Expected Result | 1. In step 2, fail to delete the documents within the retention period on the CPE. 2. In step 3, fail to delete the documents within the retention period on the on the s3 Browser. 3. In step 4, succeed to delete the documents from the bucket after the retention period expires. |
Test Results | 1. Select the Object Store > Browse > Root Folder > Actions > Contents.  2. Delete the documents within the retention period on the CPE server.  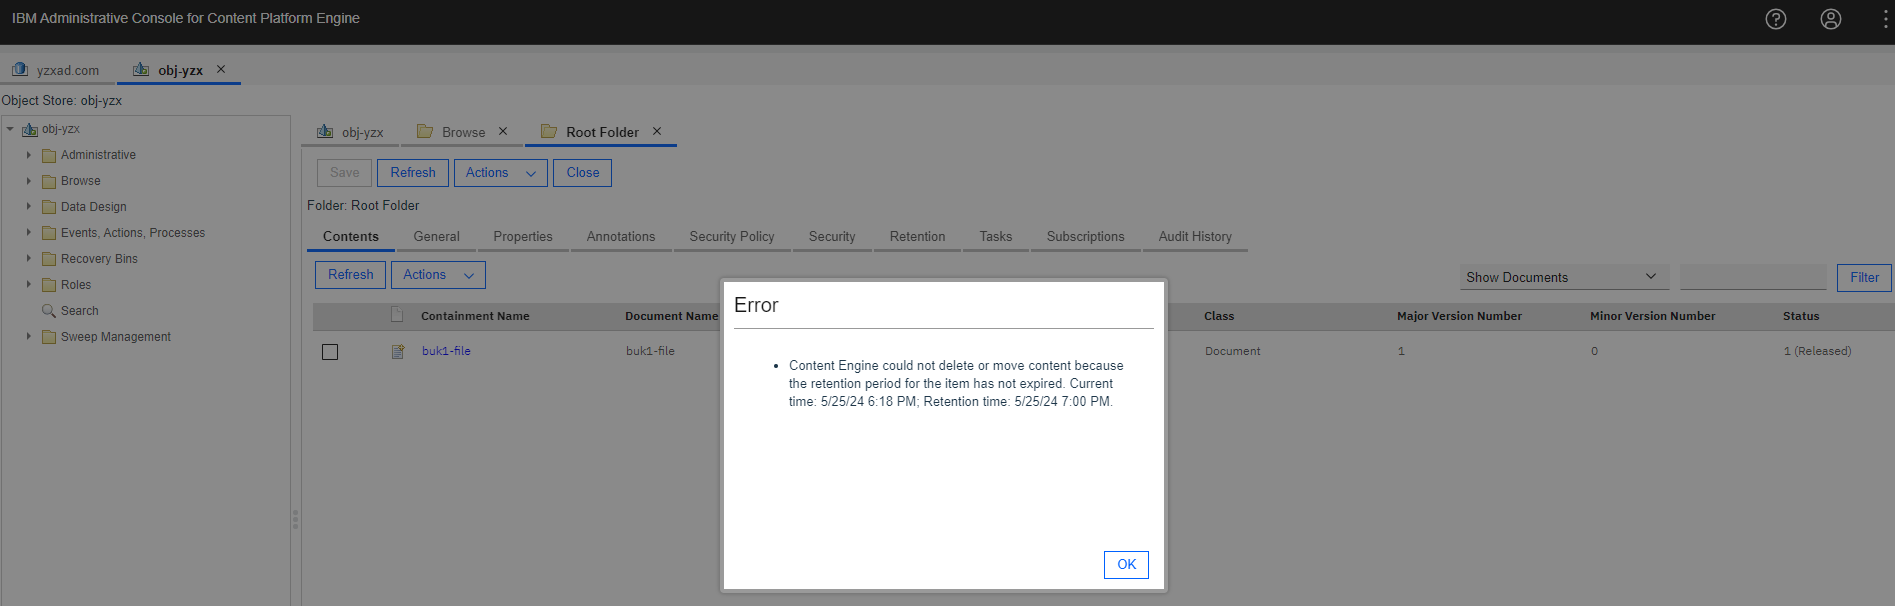 3. Delete the documents within the retention period on the s3 Browser. 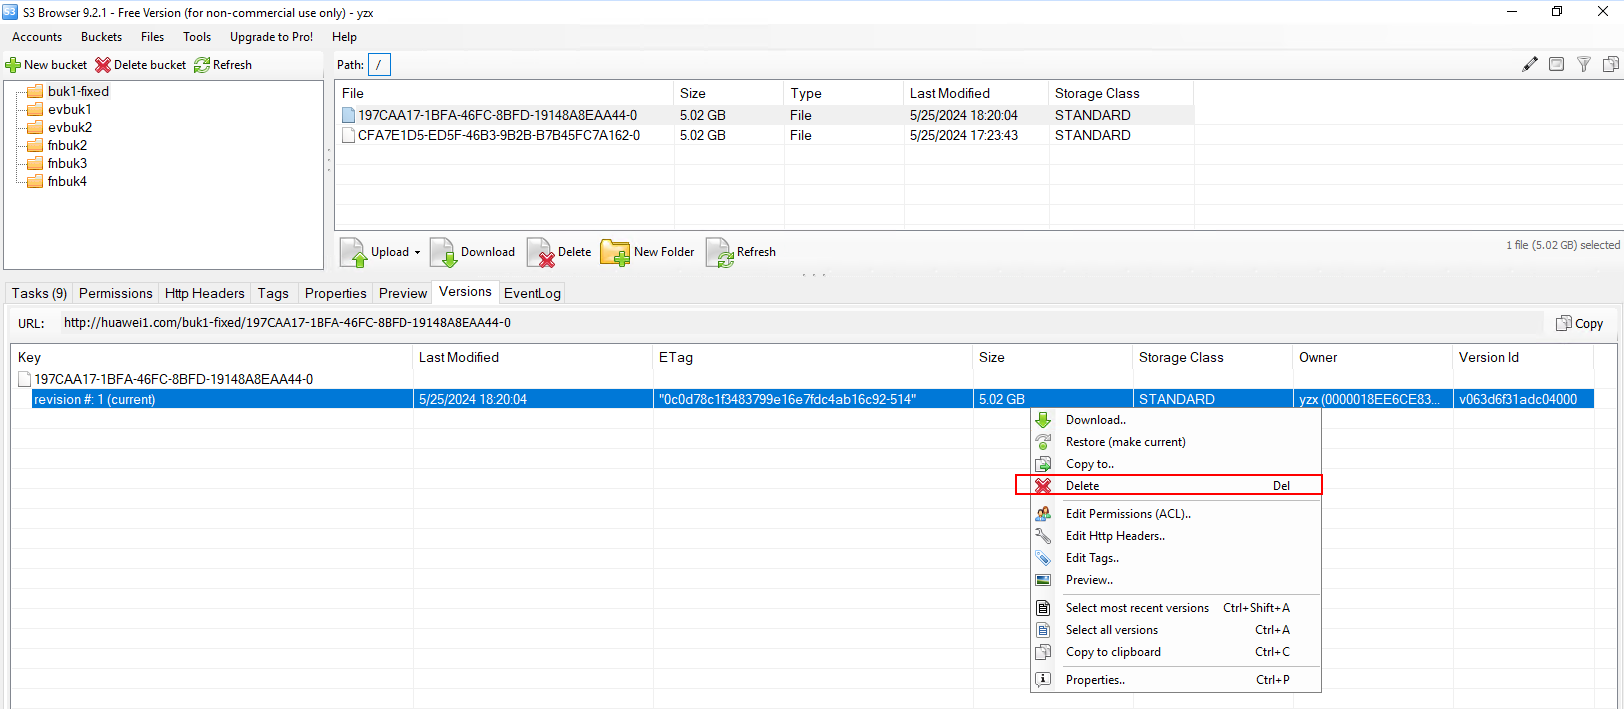 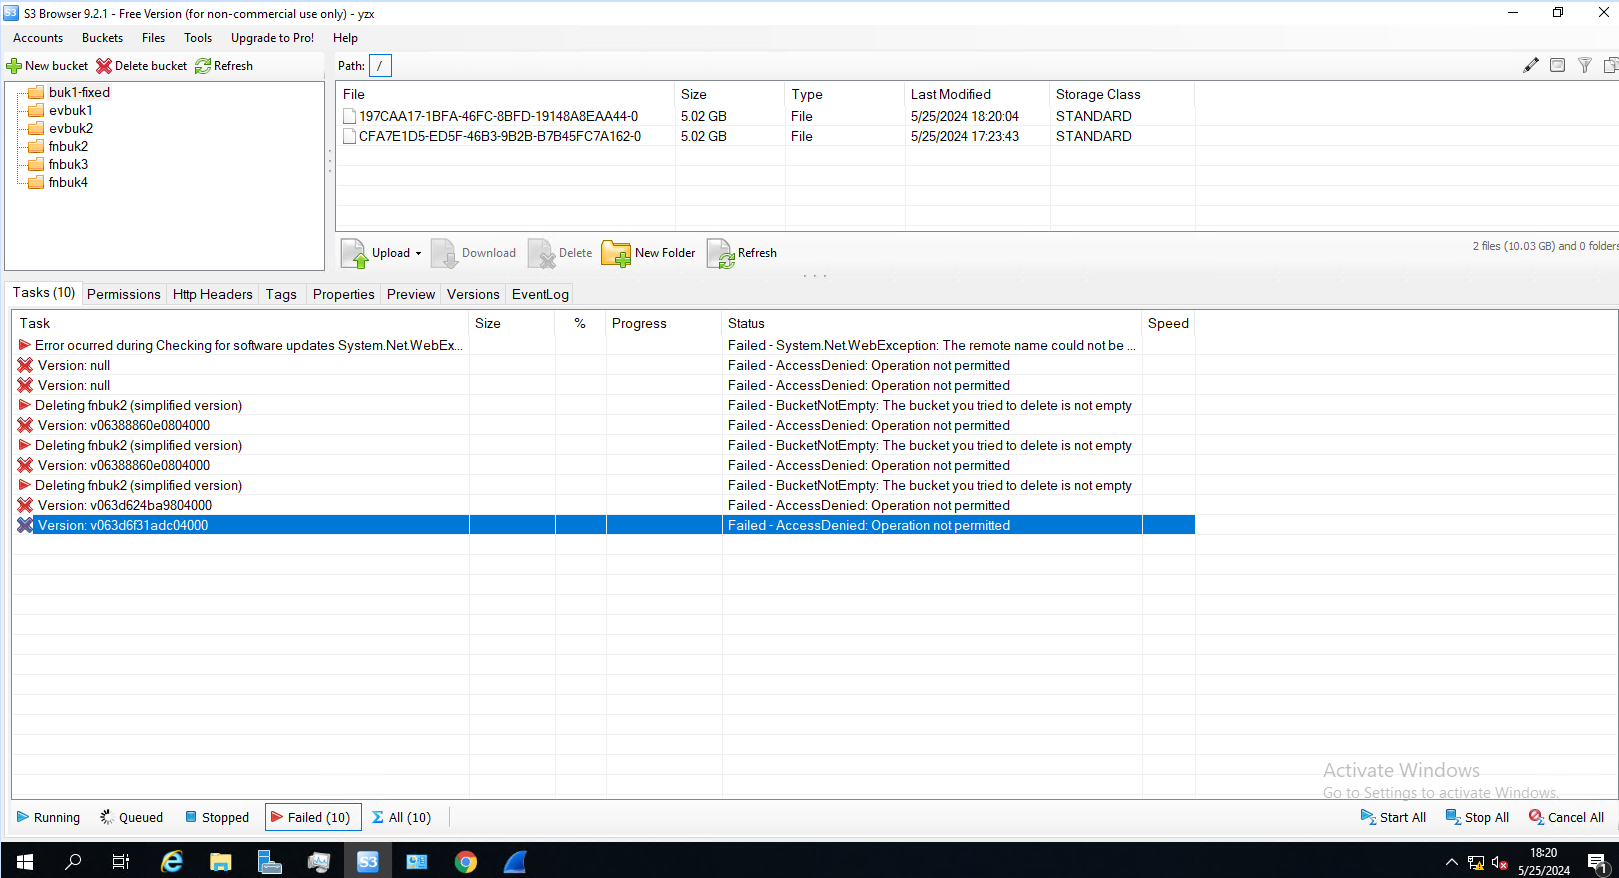 4. Delete the documents that out of the retention period on the CPE server, and check the documents on the s3 Browser. 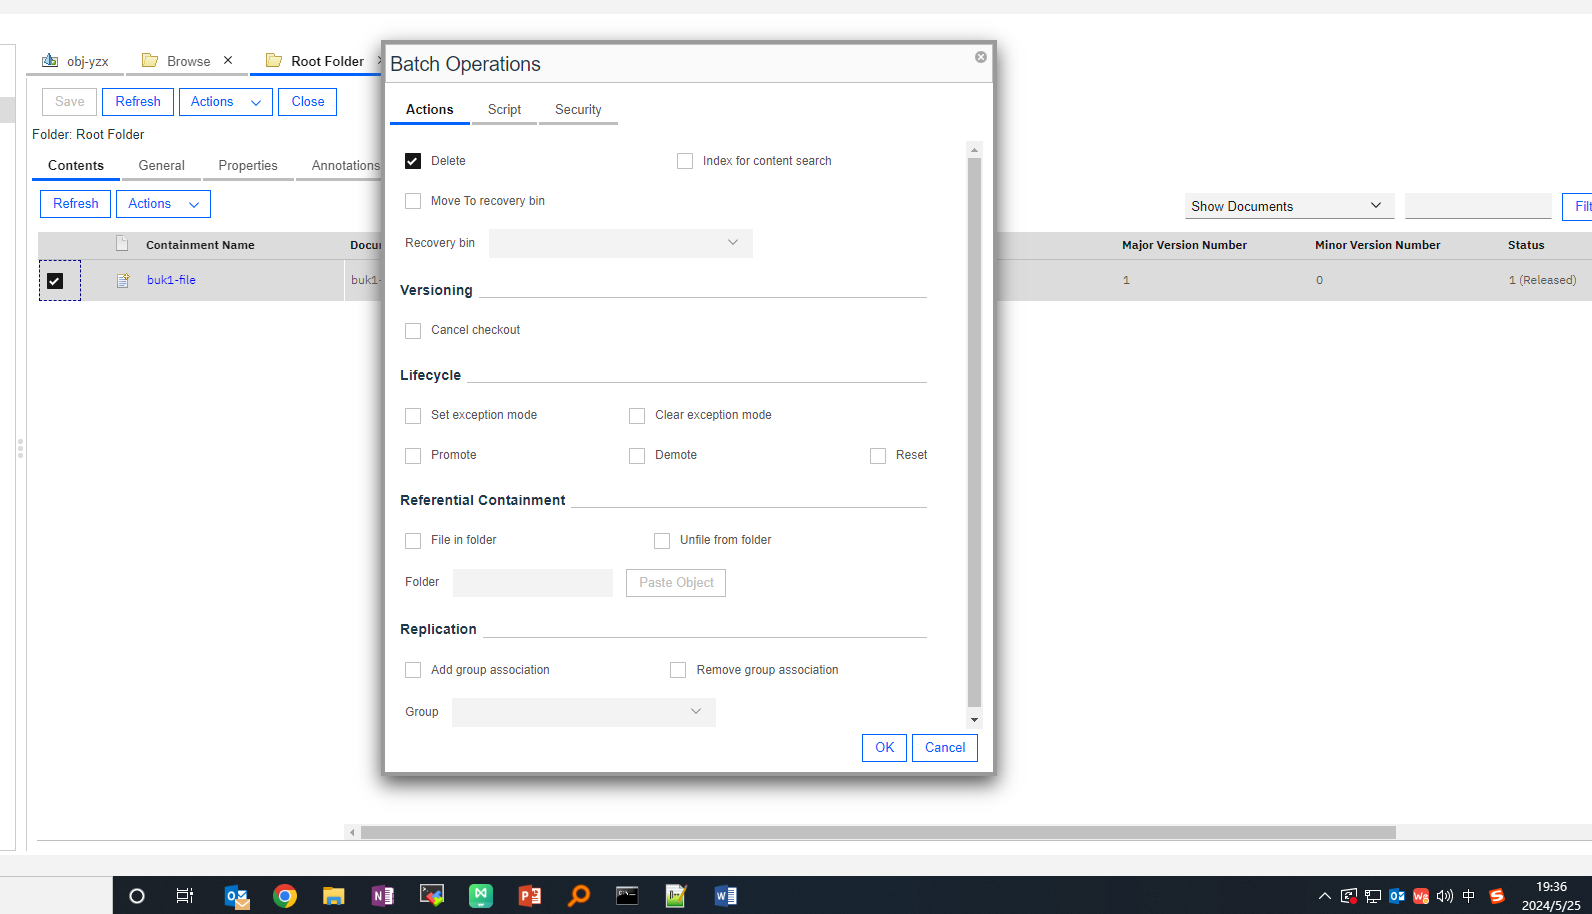 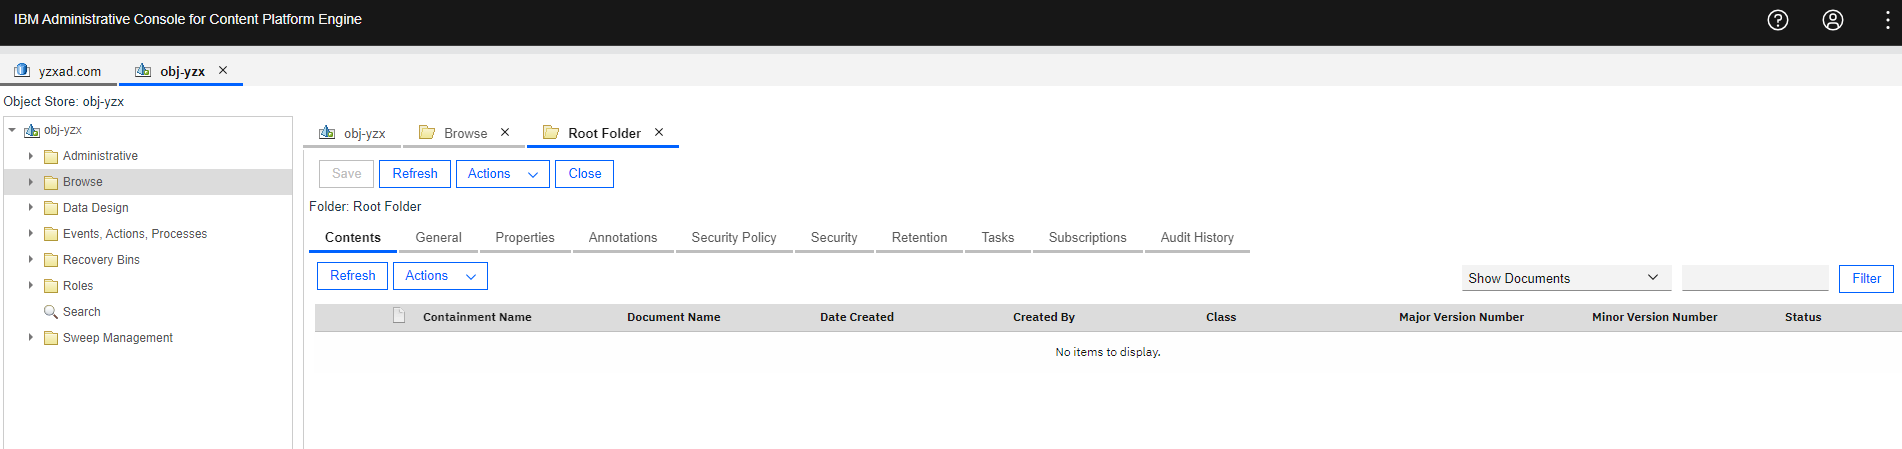
 |
Test Conclusion | Passed |
6. Verification the Pacific Storage as the Advanced storage area
6.1 Add the bucket to the CPE as the Advanced Storage Device
Test Purpose | To verify that the Pacific storage can be added to the to the CPE as the Advanced storage device |
Test Networking | Storage as the IBM FileNet P8 Content Platform Engine Storage Area Test Networking |
Prerequisites | 1. The Pacific storage, CPE server, VMware ESXi deployment and networking have been completed. 2. The S3 services of the Pacific storage have been configured successfully, including accounts, namespace, access certificates, security certificates, and service network. 3. NTP clock synchronization has been configured for the WORM clock of the storage device and the CPE server. 4. The Object Store of “obj-yzx” has been created on CPE. |
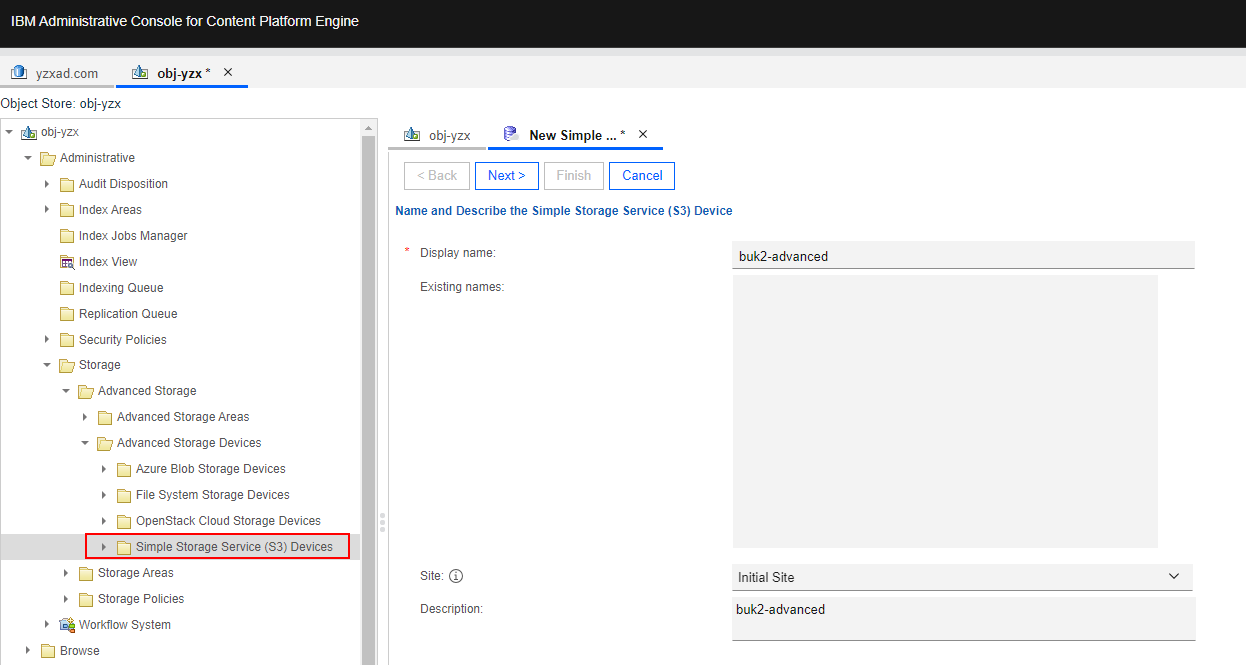
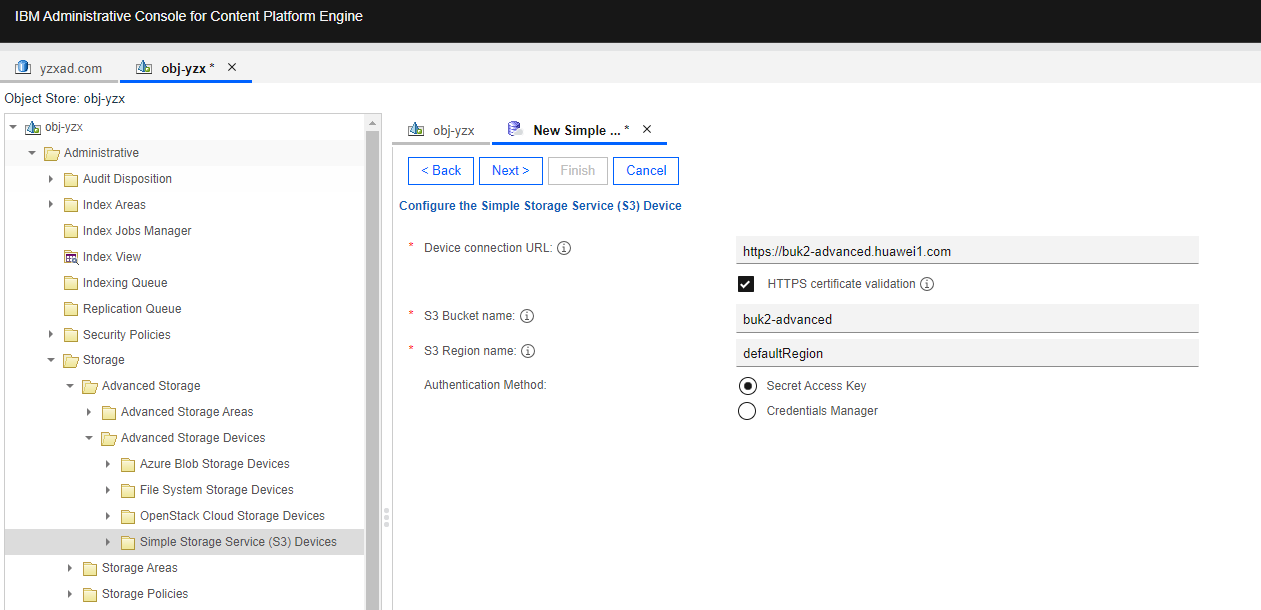
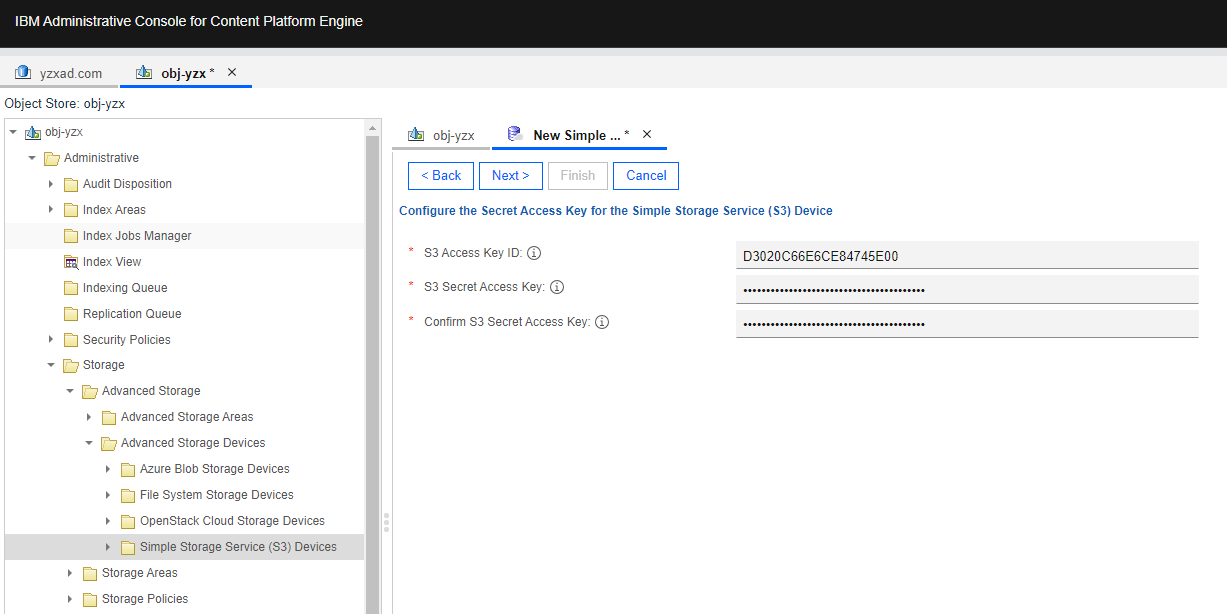
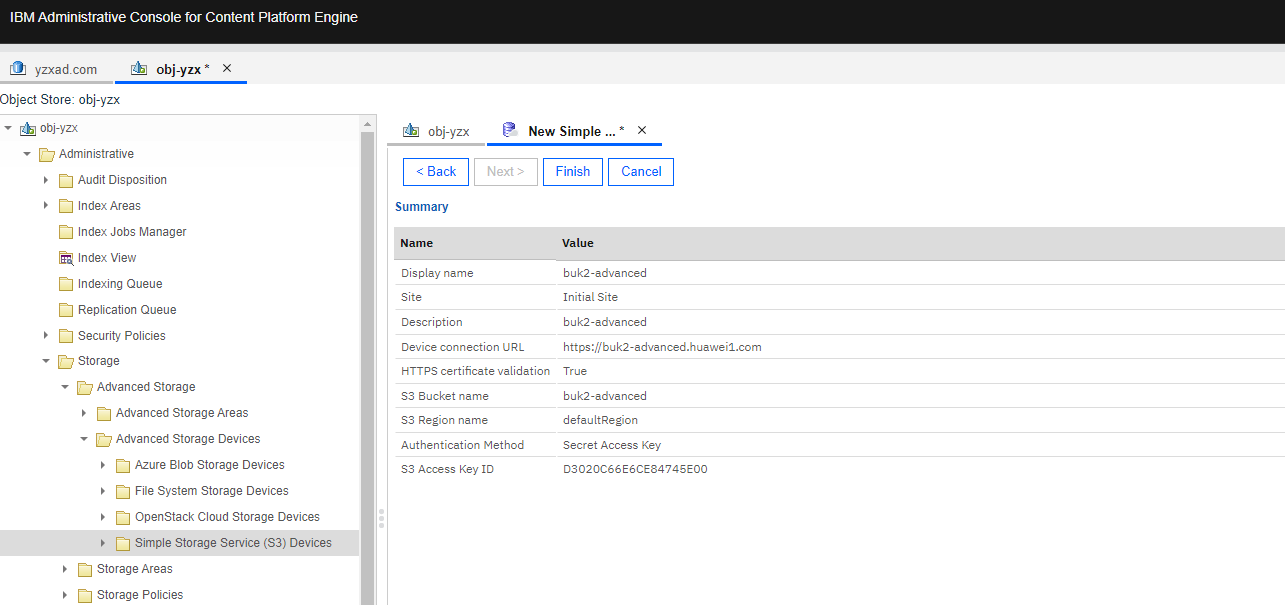
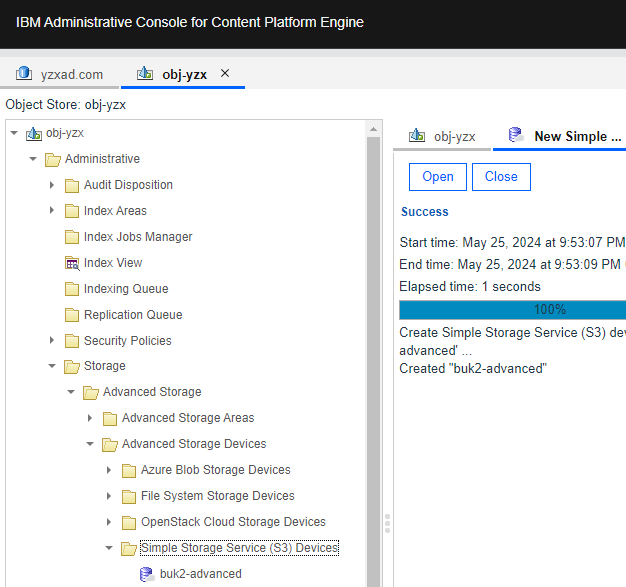
Test Procedure | 1. Select the Object Store > Administrative > Storage > Advanced Storage > Advanced Storage Devices > Simple Storage Service (S3) Devices, and right-click to NEW Simple Storage Service (S3) Devices. Enter a display name and next. 2. Enter the Device connection URL, AWS S3 Bucket Name, AWS S3 Region Name. Select the Authentication Method of Secret Key. 3. Enter the AK&SK and next. 4. Check the configuration and finish. 5. check the bucket data on the s3 Browser. |
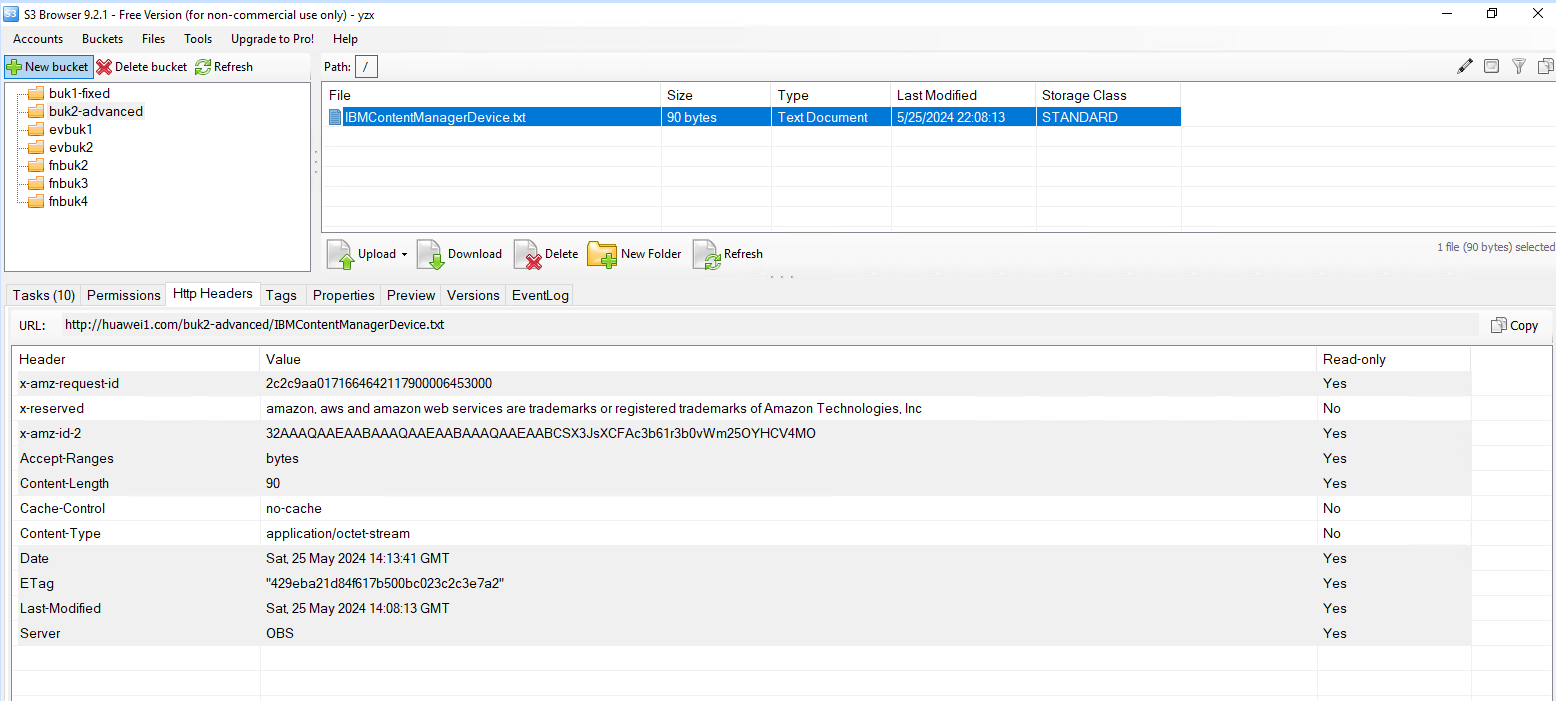
Expected Result | 1. In step 4, succeed to connect to the Pacific storage, and create the Advanced storage device. 2. In step 5, succeed to create one file (IBMContentManagerDevice.txt) in the bucket. |
Test Results | 1. Select the Object Store > Administrative > Storage > Advanced Storage > Advanced Storage Devices > Simple Storage Service (S3) Devices, and right-click to NEW Simple Storage Service (S3) Devices. Enter a display name and next.
|
Test Conclusion | Passed |
6.2 Create the Advanced storage area
Test Purpose | To verify that the Pacific storage can be added to the CPE as the Advanced storage area. |
Test Networking | Storage as the IBM FileNet P8 Content Platform Engine Storage Area Test Networking |
Prerequisites | 1. The Pacific storage, CPE server, VMware ESXi deployment and networking have been completed. 2. The S3 services of the Pacific storage have been configured successfully, including accounts, namespace, access certificates, security certificates, and service network. 3. NTP clock synchronization has been configured for the WORM clock of the storage device and the CPE server. 4. The Object Store of “obj-yzx” has been created on CPE. 5. The Advanced storage device has been created on CPE in section 6.1. |
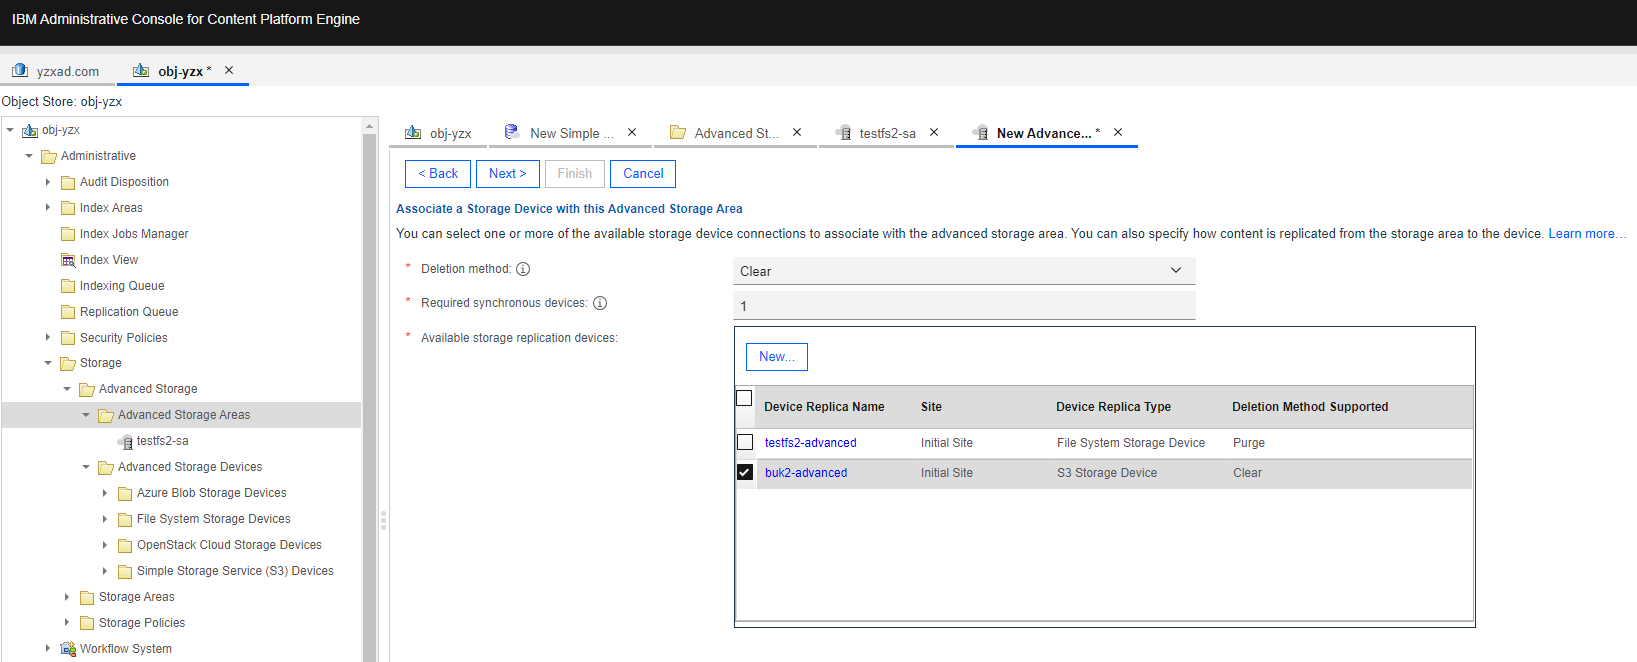
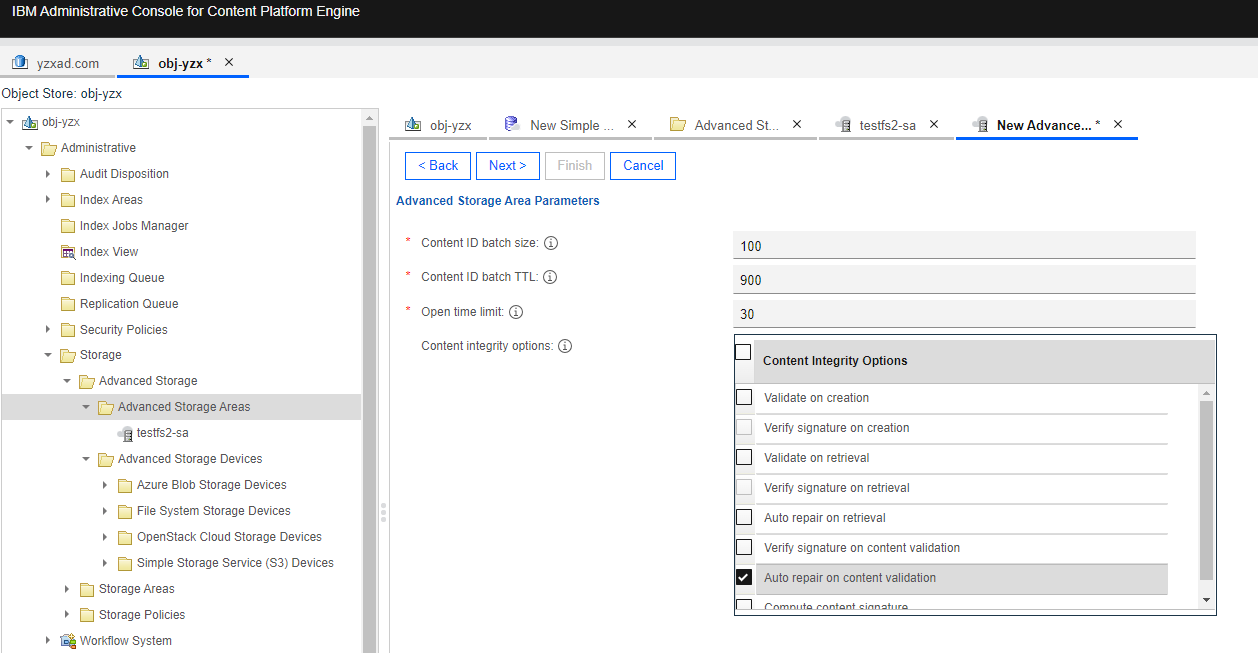
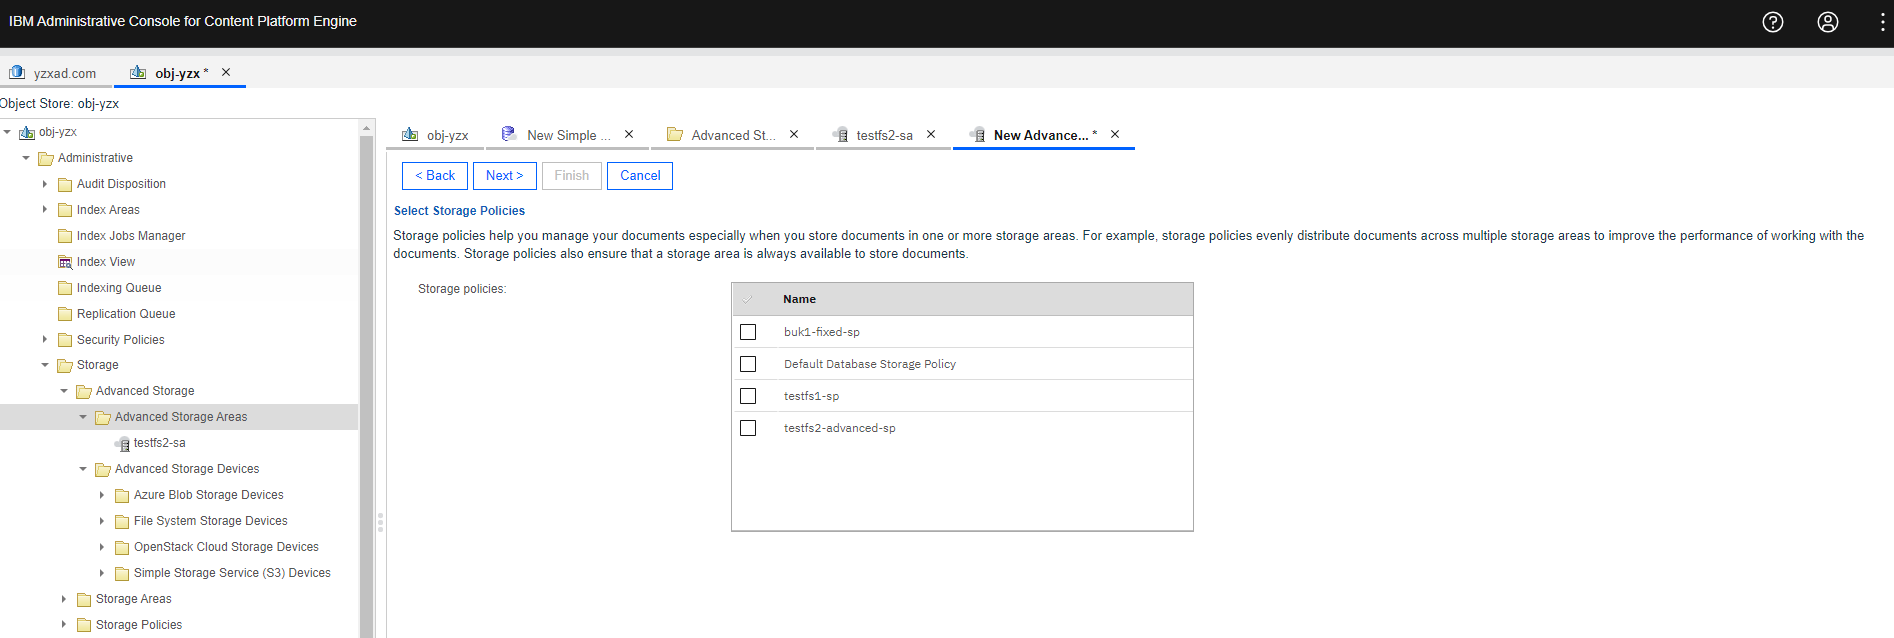
Test Procedure | 1. Select the Object Store > Administrative > Storage > Advanced Storage > Advanced Storage Areas, and right-click to New Advanced Storage Area. 2. Select the created Advanced Storage Device in section 6.1 and next. 3. Retain the default settings and next. 4. Check the configuration and finish. 5. Select the Object Store > Administrative > Storage > Storage Policies, and right-click to New Storage Policy. Enter a display name and next. 6. Retain the default settings and next. 7. Select the created Storage Area in step 4 and next. 8. Check the configuration and finish. |
Expected Result | 1. In step 4, succeed to create the Advanced storage area. 2. In step 8, succeed to create the Storage Policy. |
Test Results | 1. Select the Object Store > Administrative > Storage > Advanced Storage > Advanced Storage Areas, and right-click to New Advanced Storage Area. 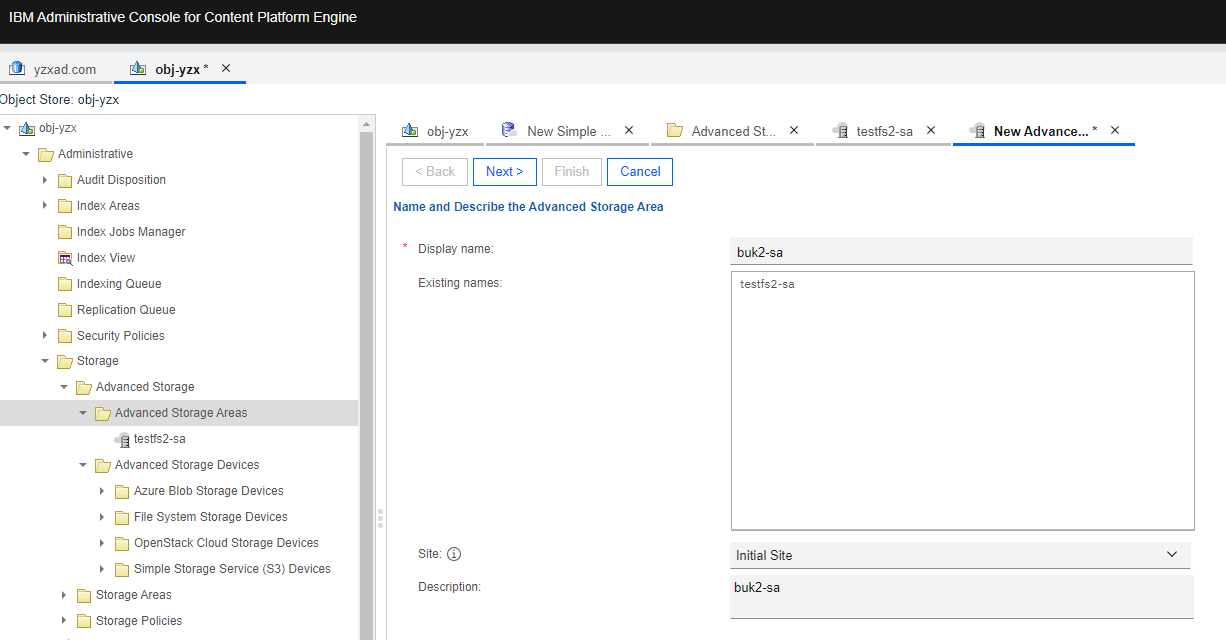 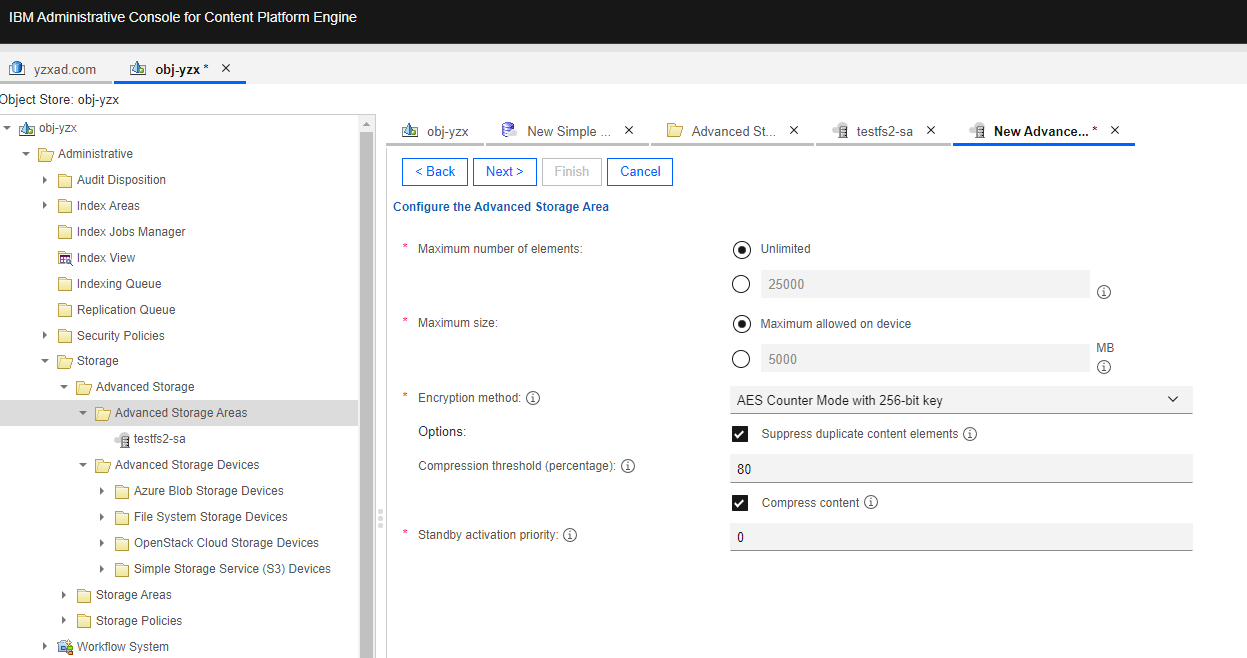
  |
Test Conclusion | Passed |
6.3 Add the documents to the Advanced storage area
Test Purpose | To verify that Advanced storage area can work properly. |
Test Networking | Storage as the IBM FileNet P8 Content Platform Engine Storage Area Test Networking |
Prerequisites | 1. The Pacific storage, CPE server, VMware ESXi deployment and networking have been completed. 2. The S3 services of the Pacific storage have been configured successfully, including accounts, namespace, access certificates, security certificates, and service network. 3. NTP clock synchronization has been configured for the WORM clock of the storage device and the CPE server. 4. The Object Store of “obj-yzx” has been created on CPE. 5.The Advanced storage area has been created on CPE in section 6.2. |
Test Procedure | 1. Select the Object Store > Browse > Root Folder > Actions > New Document. Enter the document title and next. 2. Add the content element and next. 3. Retain the default settings and next. 4. Select the created storage area and storage policy in section 6.2 and next. 5. Check the configuration and finish. 6. Check the data of the bucket.. |
Expected Result | 1. In step 5, succeed to add the documents to the Advanced storage area. 2. In step 6, succeed to add the documents to the bucket. |
Test Results | 1. Select the Object Store > Browse > Root Folder > Actions > New Document.Enter the document title and next. 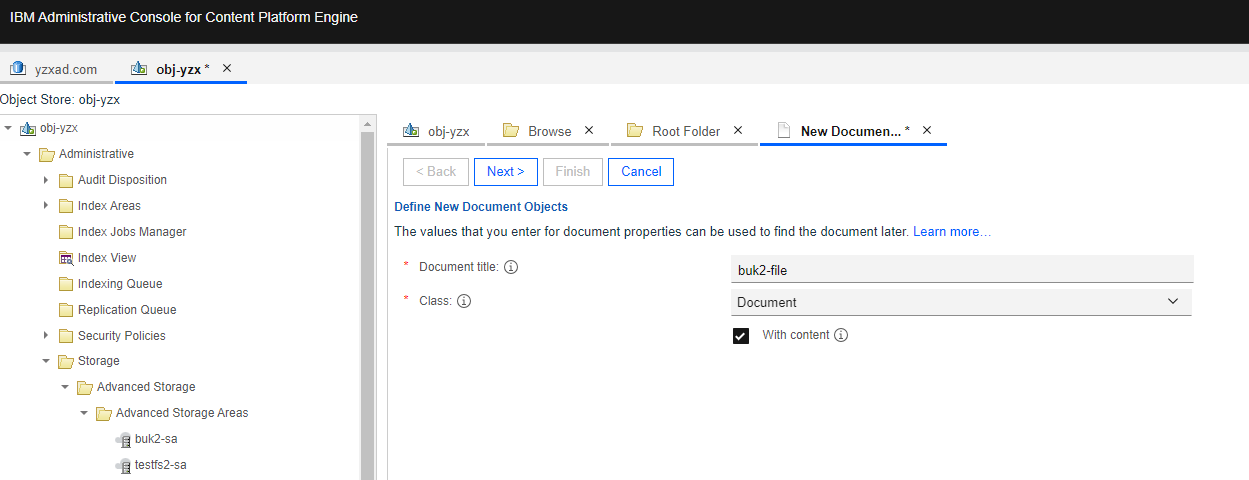
 3. Retain the default settings and next. 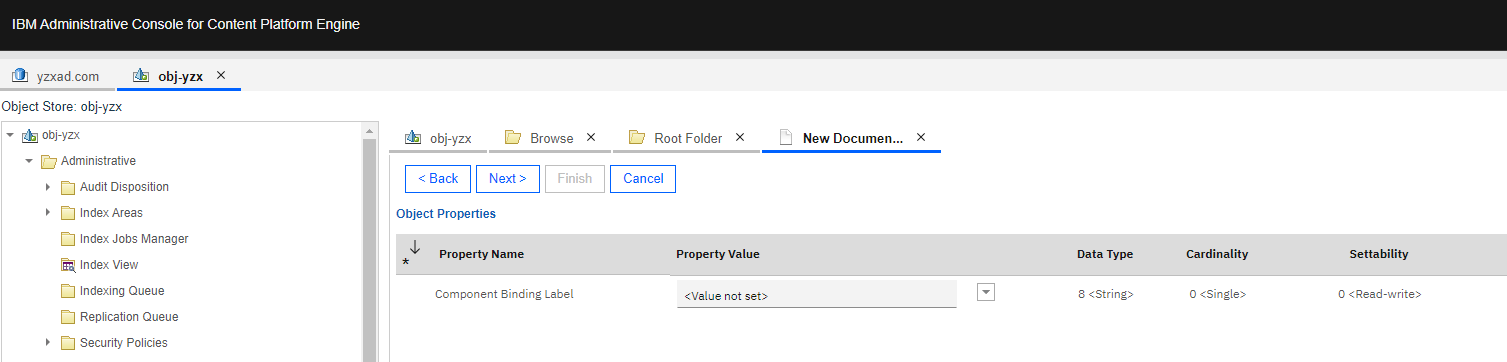 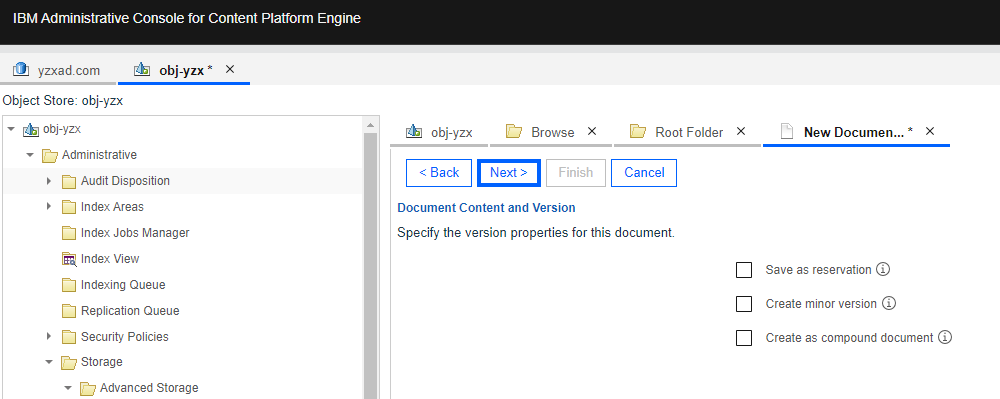 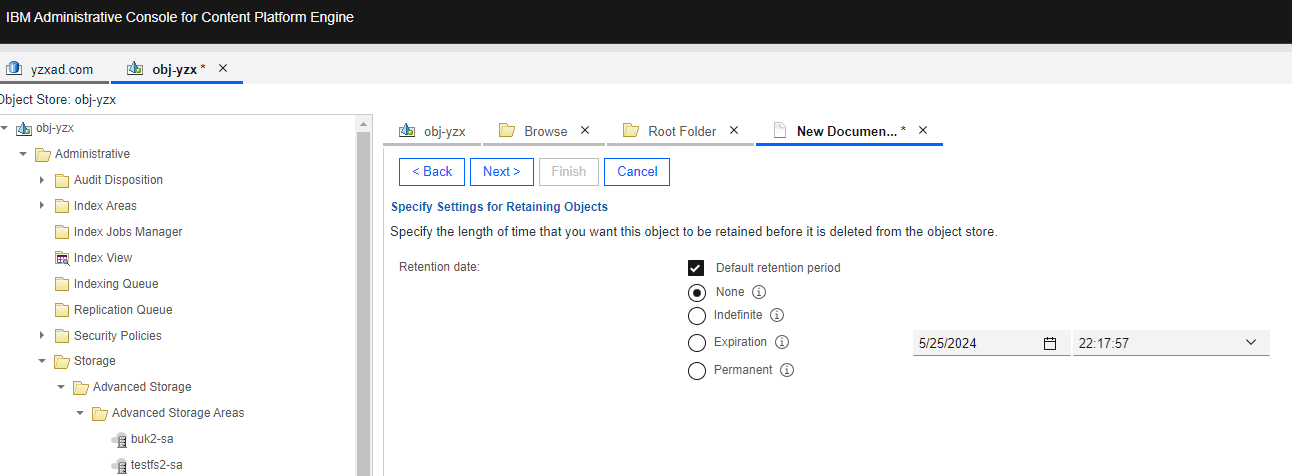
4. Select the created storage area and storage policy in section 6.2 and next. 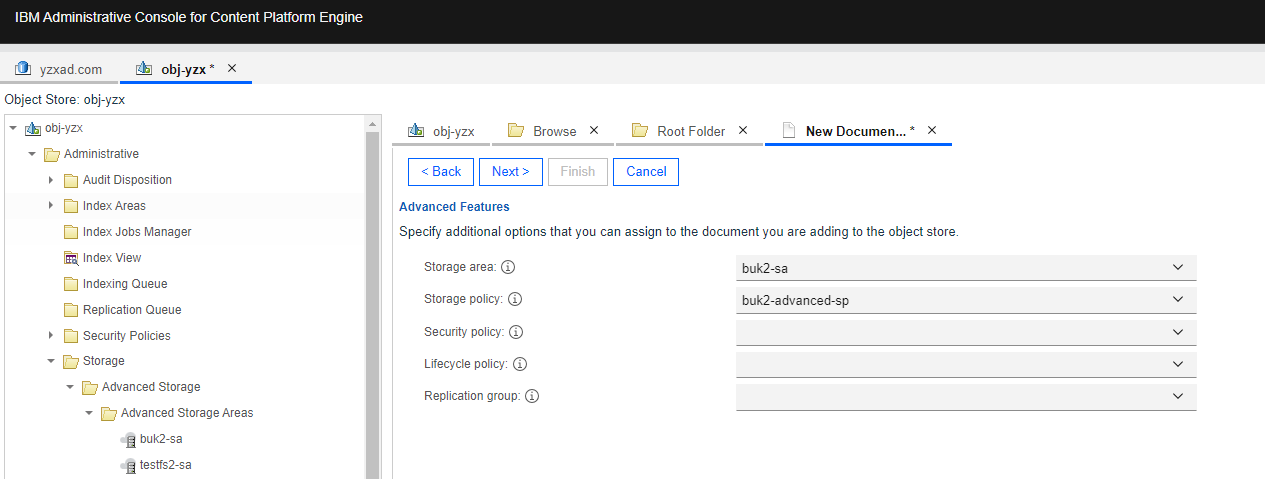 5. Check the configuration and finish.  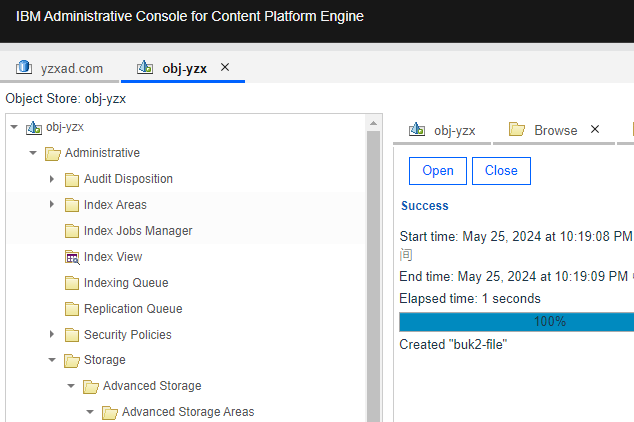  6. Check the data of the bucket. 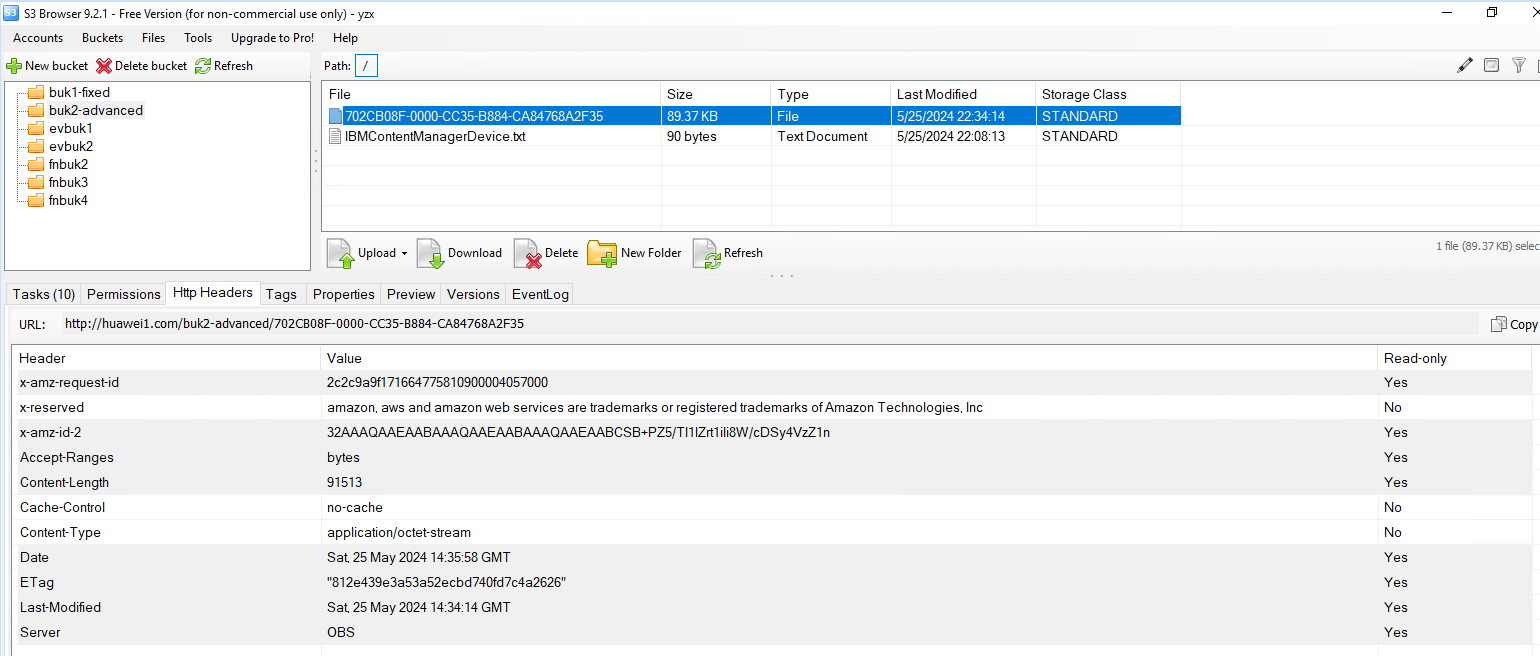 |
Test Conclusion | Passed |
6.4 Download the documents form the Advanced storage area
Test Purpose | To verify that Advanced storage area can work properly. |
Test Networking | Storage as the IBM FileNet P8 Content Platform Engine Storage Area Test Networking |
Prerequisites | 1. The Pacific storage, CPE server, VMware ESXi deployment and networking have been completed. 2. The S3 services of the Pacific storage have been configured successfully, including accounts, namespace, access certificates, security certificates, and service network. 3. NTP clock synchronization has been configured for the WORM clock of the storage device and the CPE server. 4. The Object Store of “obj-yzx” has been created on CPE. 5. The documents have been added to the Advanced storage area in section 6.3. |
Test Procedure | 1. Select the Object Store > Browse > Root Folder > Actions > Contents. 2. Select the document and browse the content elements. 3. Download the content element of a document. 4. Check the downloaded document consistency. |
Expected Result | 1. In step 3, succeed to download the document. 2. In step 4, the downloaded file is complete and correct. |
Test Results | 1. Select the Object Store > Browse > Root Folder > Actions > Contents. 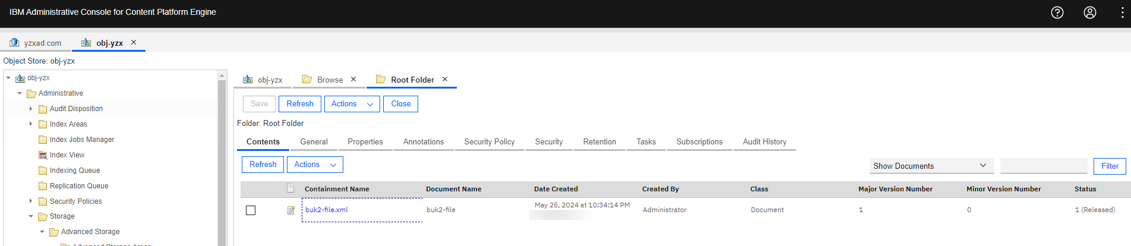
 |
Test Conclusion | Passed |
6.5 Delete the documents form the Advanced storage area
Test Purpose | To verify that Advanced storage area can work properly. |
Test Networking | Storage as the IBM FileNet P8 Content Platform Engine Storage Area Test Networking |
Prerequisites | 1. Deployment of storage device, CPE Server and networking have been completed. 2. The storage device is running properly. 3. File System and CIFS share have been created on storage device. 4. The Object Store of “obj-yzx” has been created on CPE. 5. The documents have been added to the File storage area in section 6.3. |
Test Procedure | 1. Select the Object Store > Browse > Root Folder > Actions > Contents. 2. Select the document and delete the document. 3. Check the data of the bucket. |
Expected Result | 1. In step 2, succeed to delete the document on CPE. 2. In step 3, succeed to delete the document from the bucket. |
Test Results | 1. Select the Object Store > Browse > Root Folder > Actions > Contents. 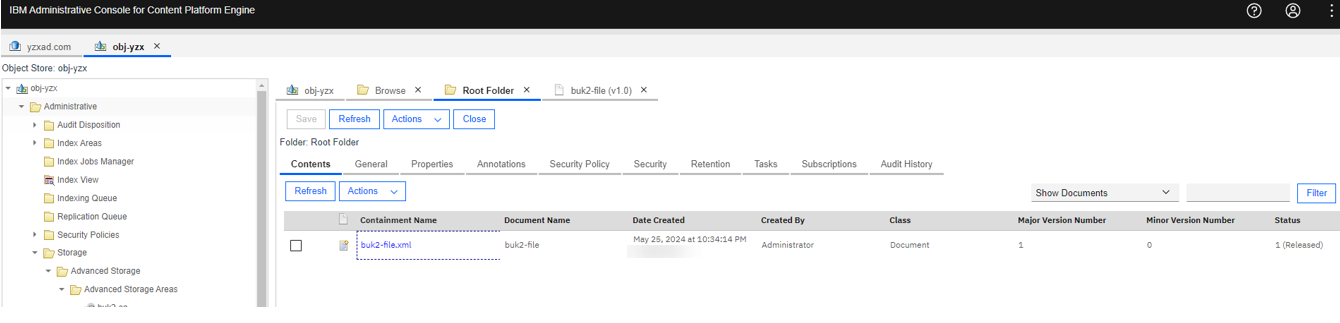
3. Check the data of the bucket. 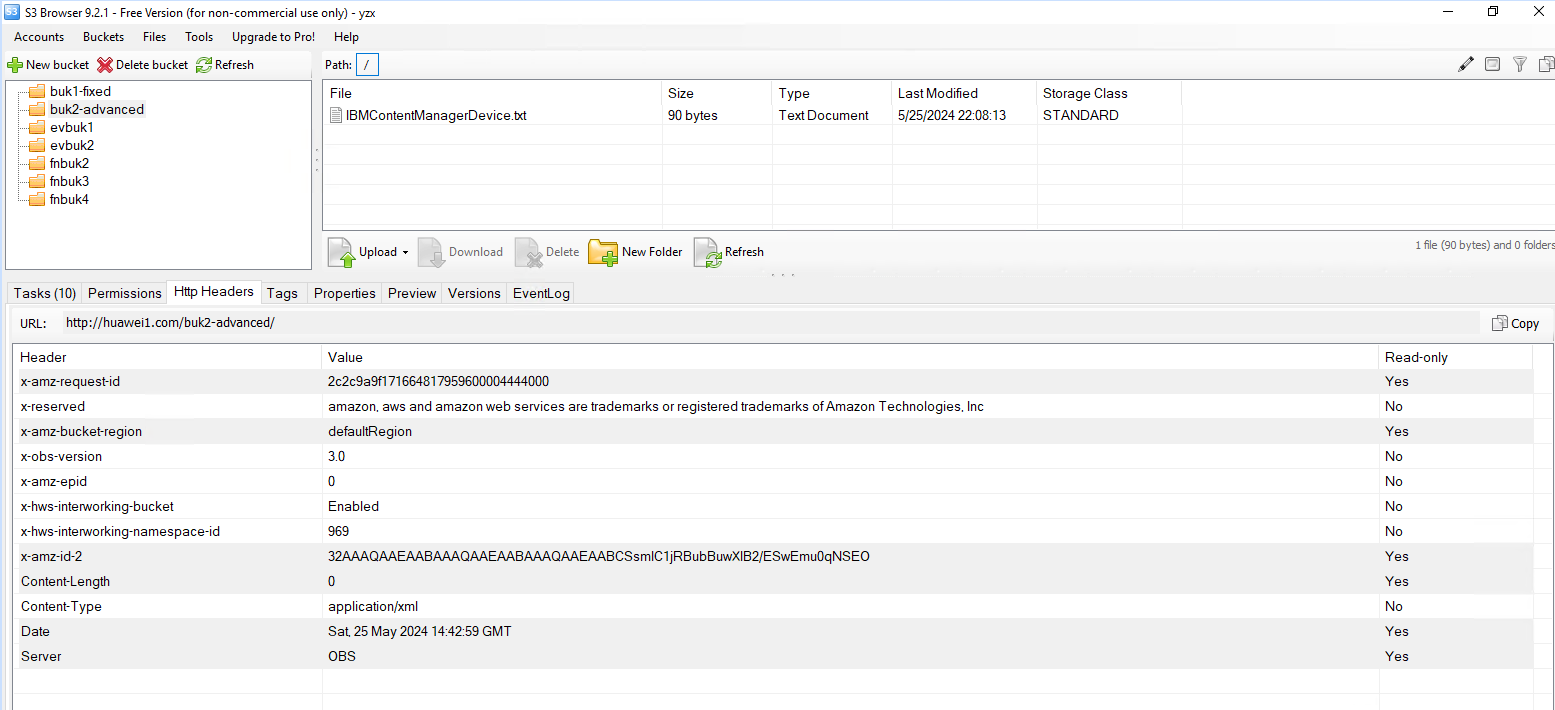 |
Test Conclusion | Passed |
7. Verification the moving content between storage areas
7.1 Move the documents from the File storage area to the Fixed Storage Area
Test Purpose | To verify that the moving content between storage areas can work properly. |
Test Networking | Storage as the IBM FileNet P8 Content Platform Engine Storage Area Test Networking |
Prerequisites | 1. Deployment of storage device, CPE Server and networking have been completed. 2. The storage device is running properly. 3. File System and CIFS share have been created on storage device. 4. The Object Store of “obj-yzx” has been created on CPE. 5. The file storage area has been created in section 3.3. 6. The Fixed storage area has been created in section 5.2. |
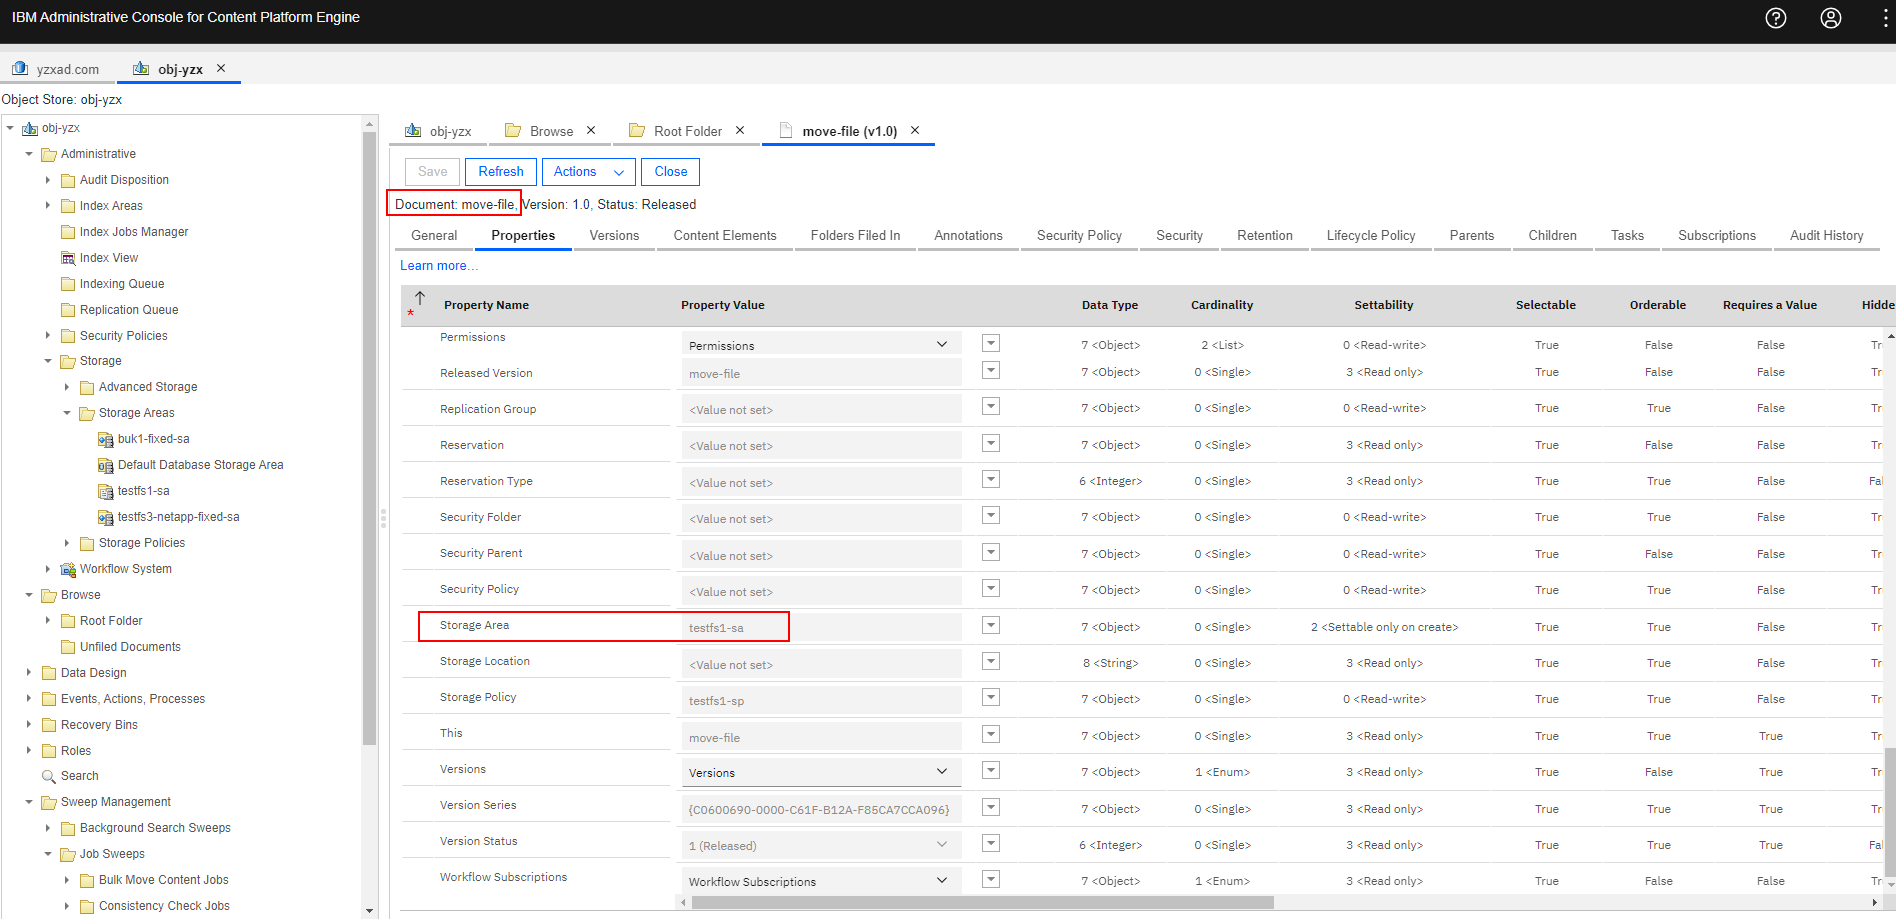
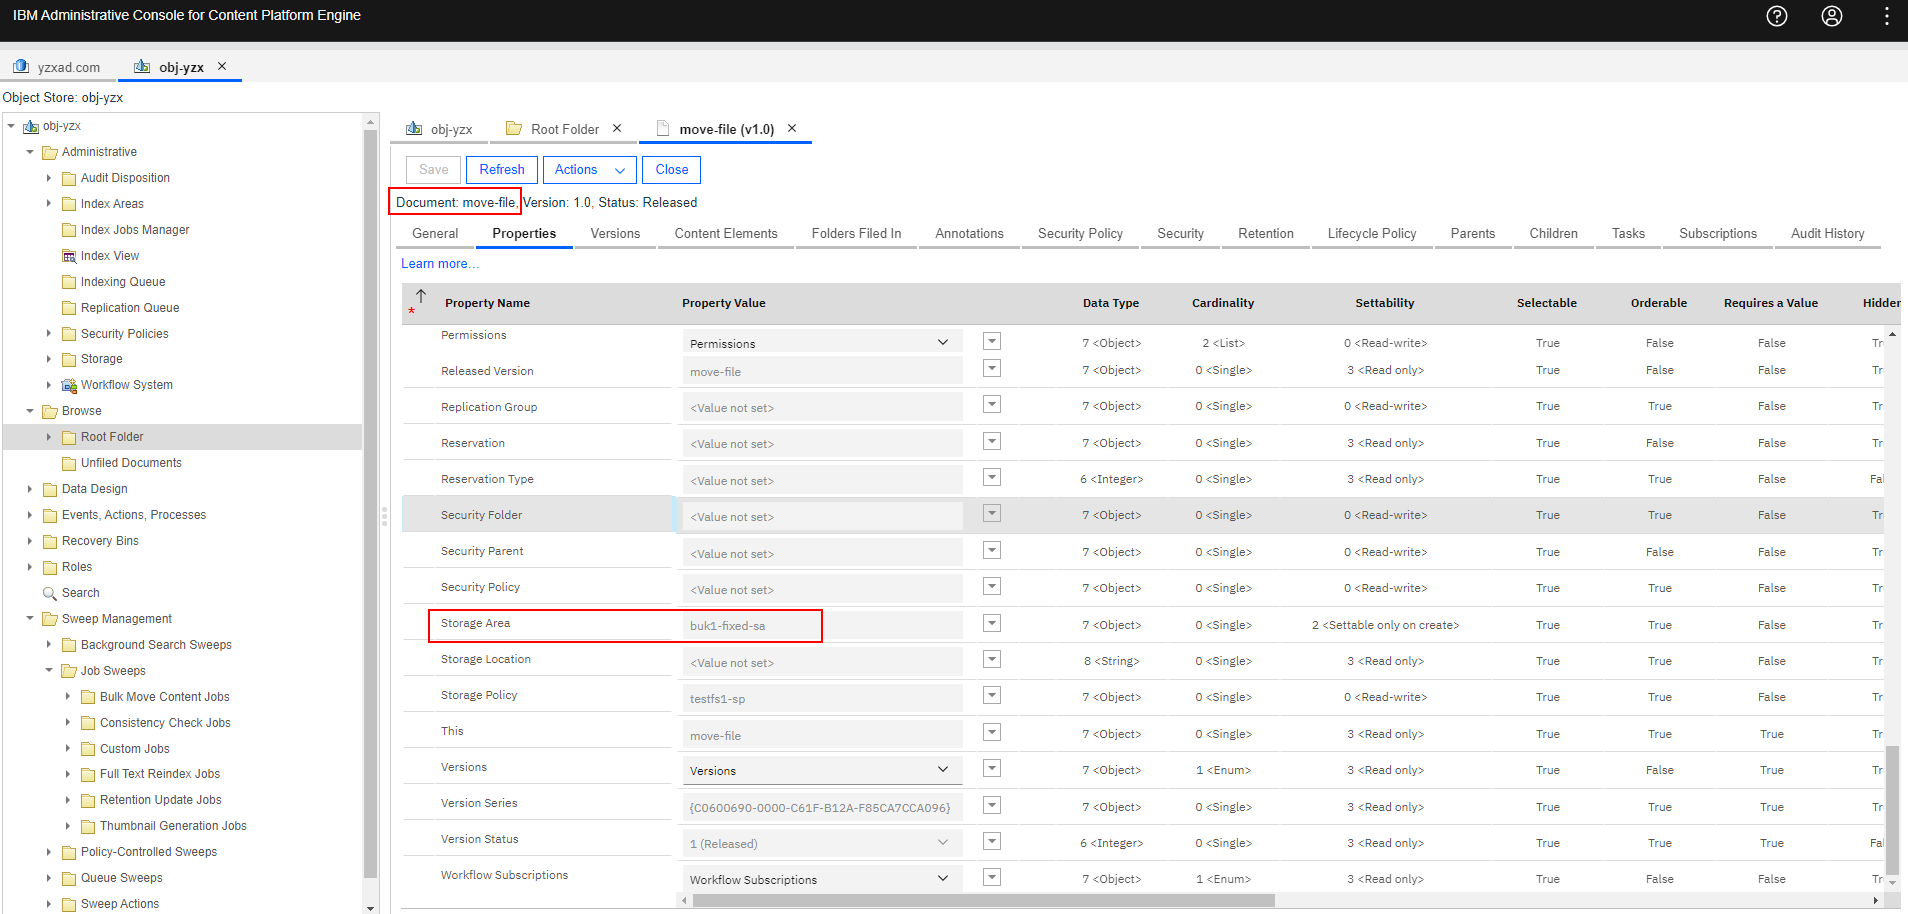
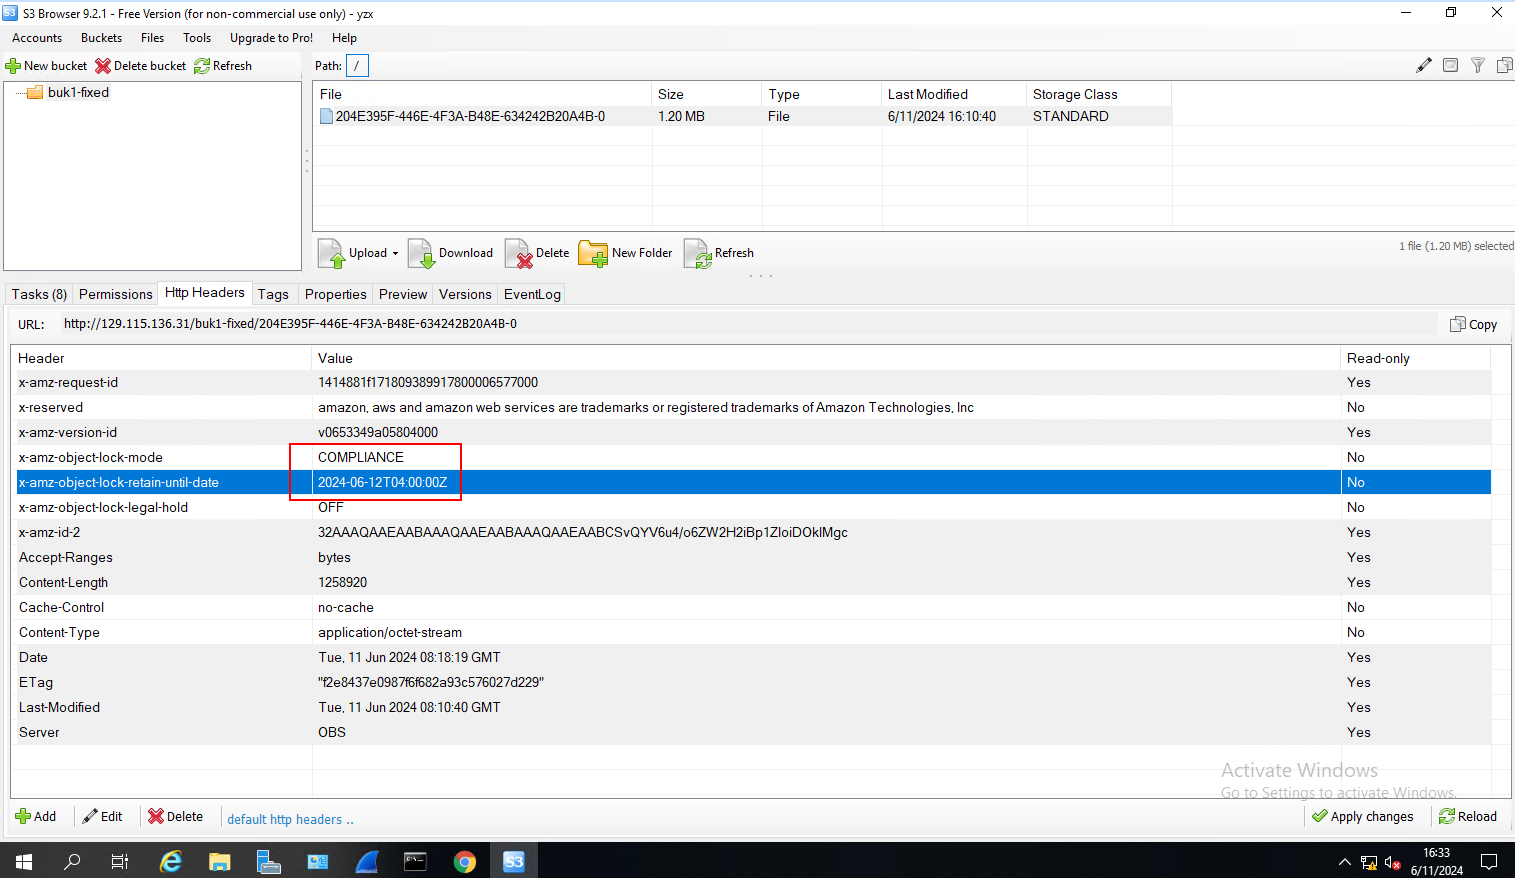
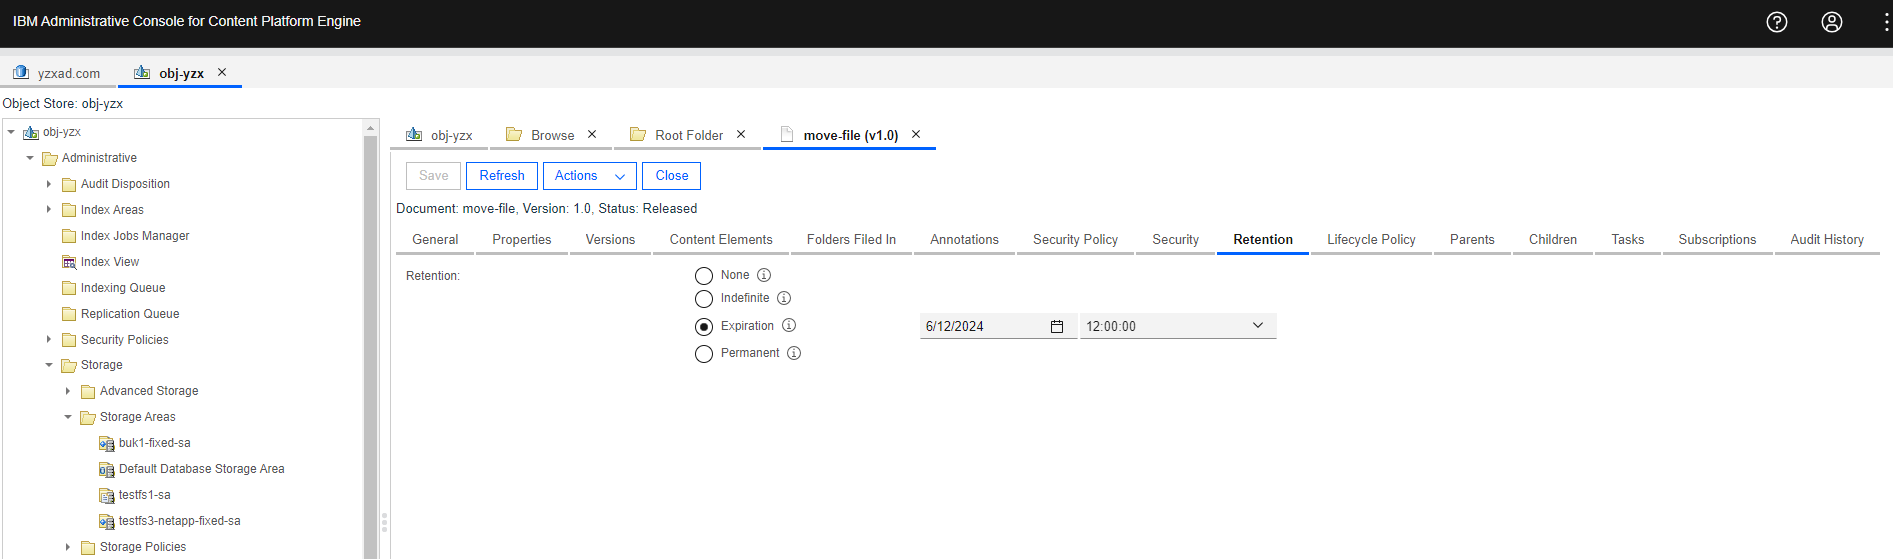
Test Procedure | 1. Add the document to the file storage area with retention. 2. Check the document in the CIFS share. 3. Check the document property of the Storage Area before the moving. 4. Create and enable the Bulk Move Content Job. 5. Check the document property of the Storage Area after the moving. 6. Check the directory size of the CIFS share after the moving. 7. Check the headers of the documents on the S3 Browser. |
Expected Result | 1. In step 2, succeed to add the document to the file storage area. 2. In step 3, the document storage area is file storage area before the moving. 3. In step 4, succeed to run the moving job. 4. In step 5, the document storage area changes to fixed storage area after the moving. 5. In step 6, the document is deleted from the CIFS share after the moving. 6. In step 7, succeed to move the document to the fixed storage area. The headers of the files show that ‘x-amz-object-lock-mode’ is ‘COMPLIANCE’, and contain the ‘x-amz-object-lock-retain-until-date’. The document is locked based on the retention period set on the CPE server. |
Test Results | 1. Add the documents to the file storage area with retention. 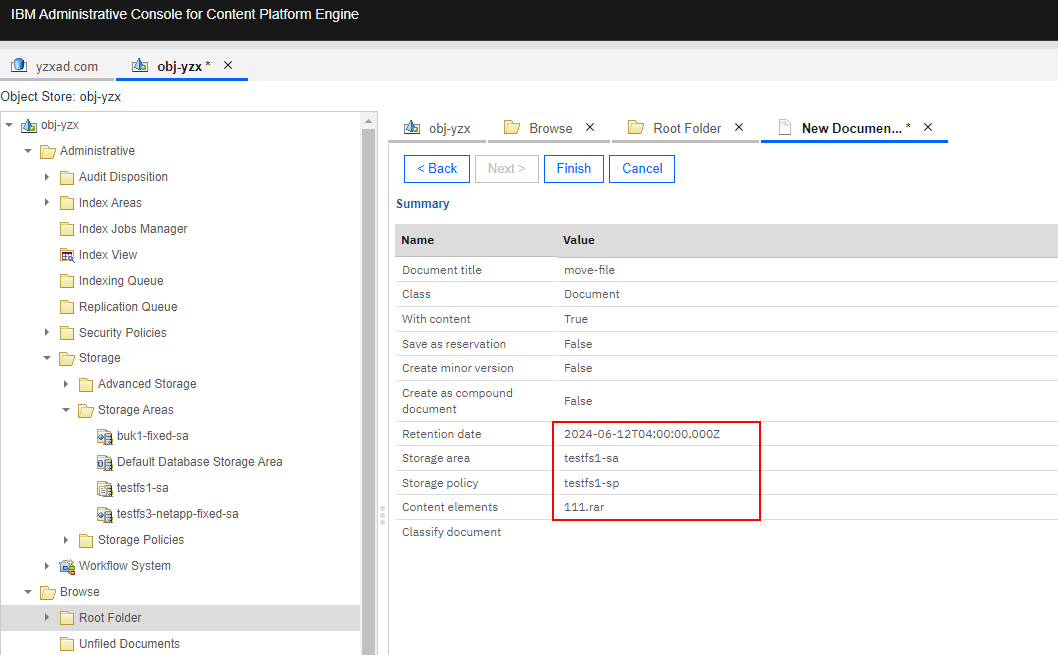 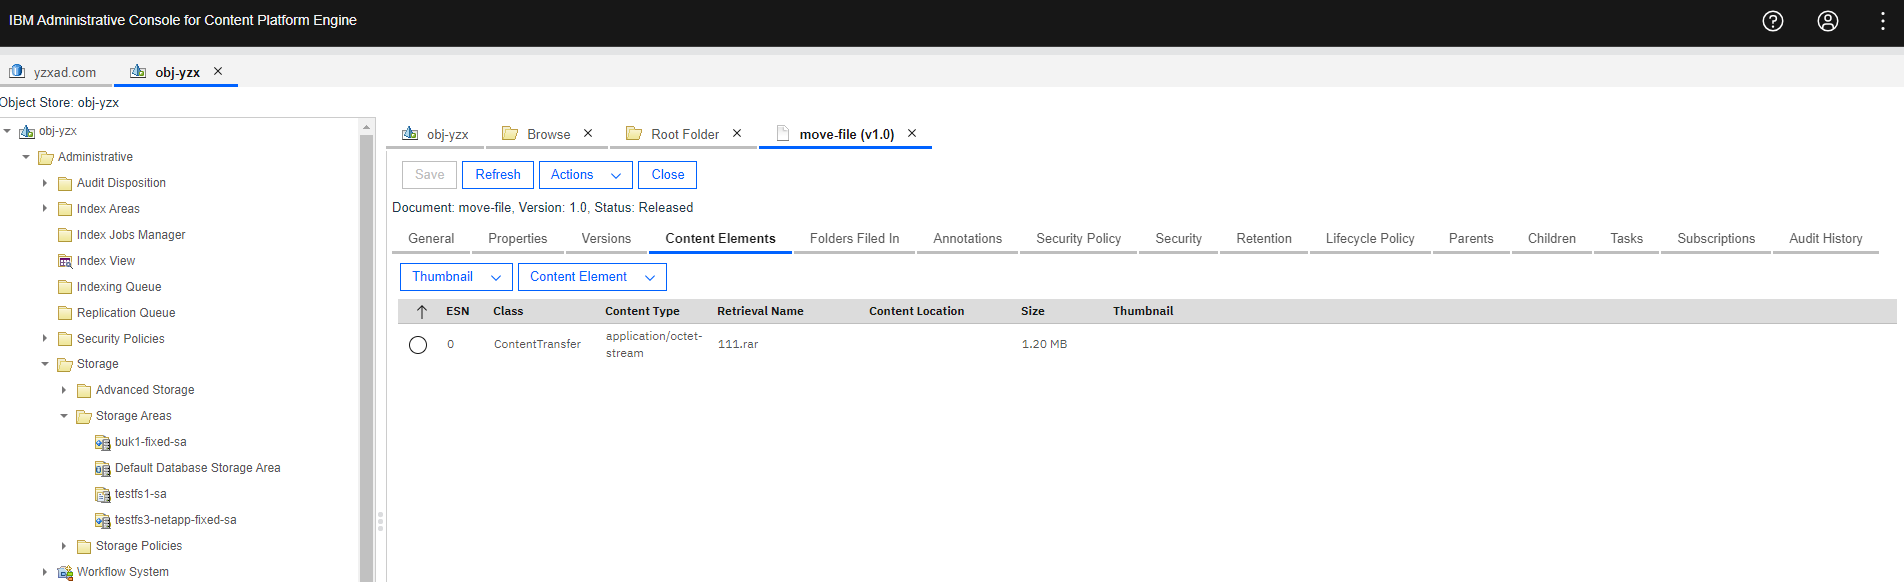
2. Check the document in the CIFS share. 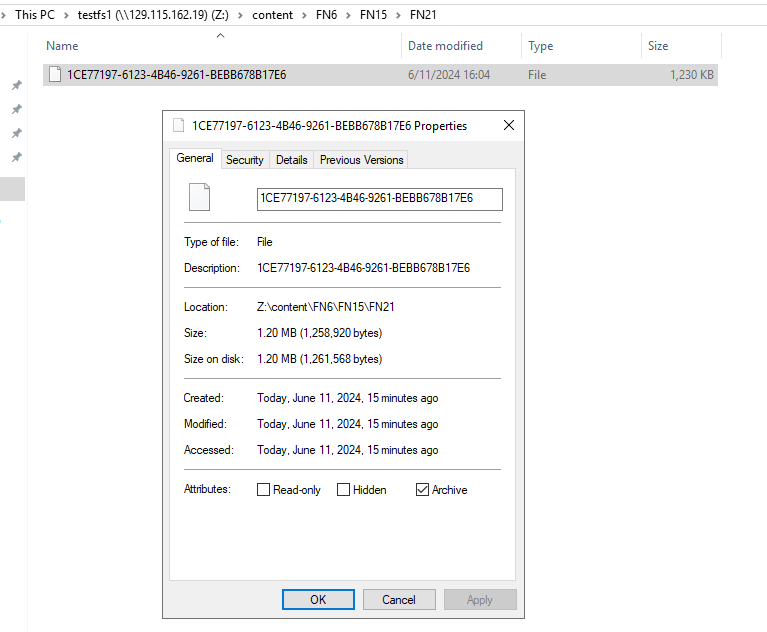
 4. Create and enable the Bulk Move Content Job. 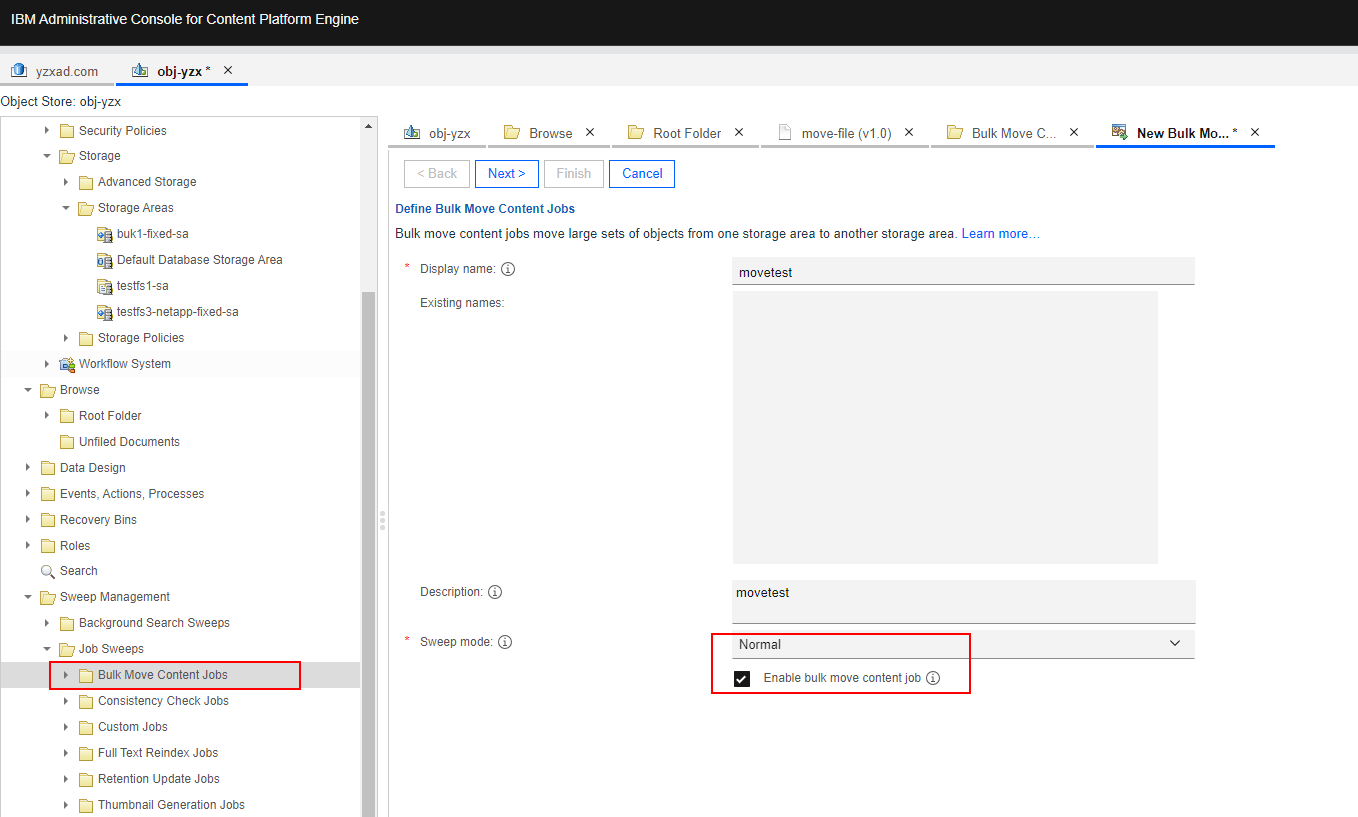 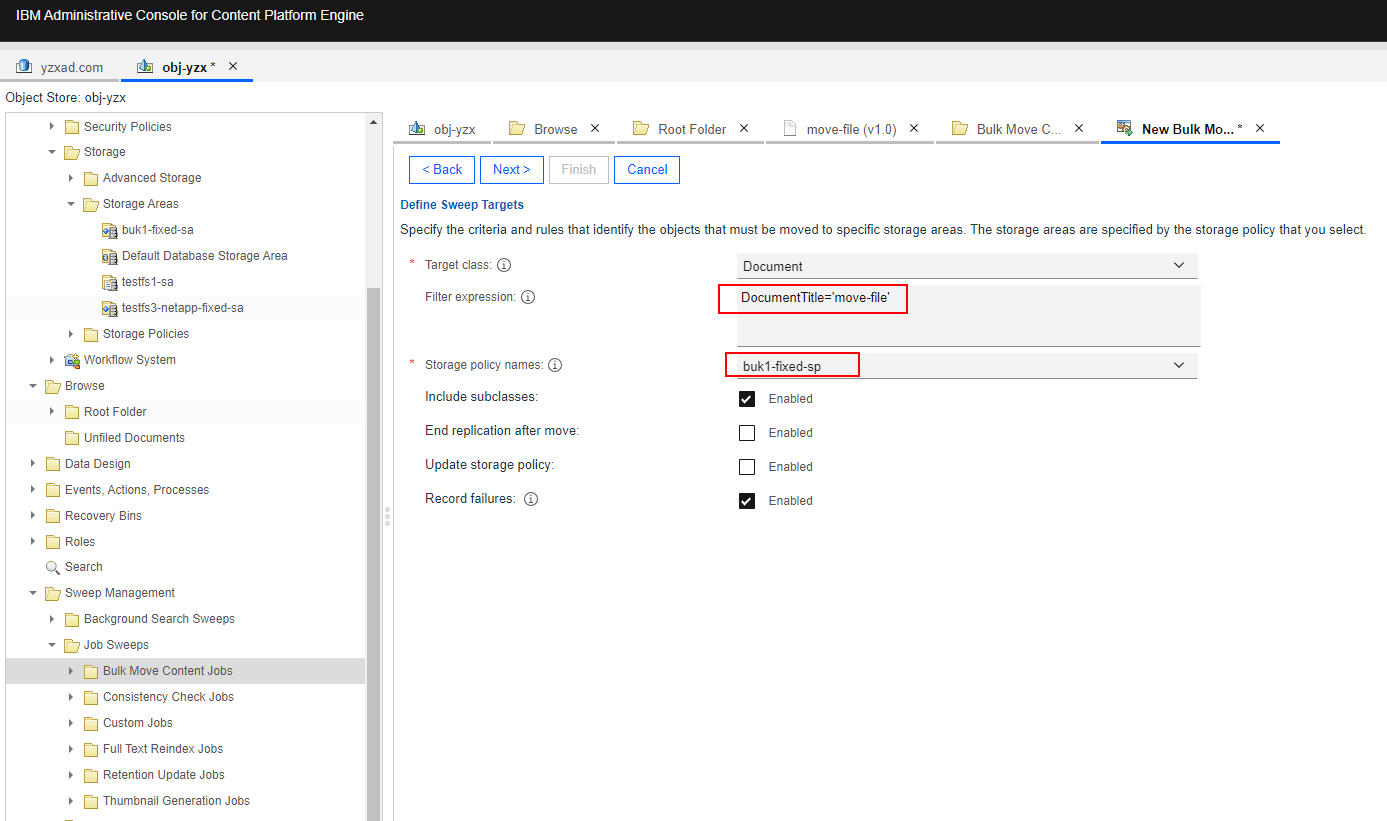 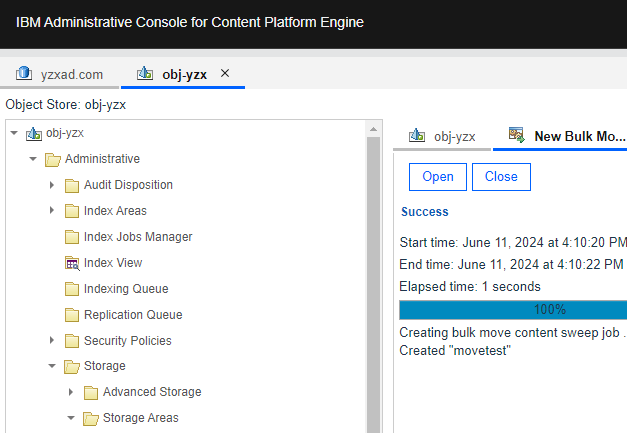
 6. Check the directory size of the CIFS share after the moving. 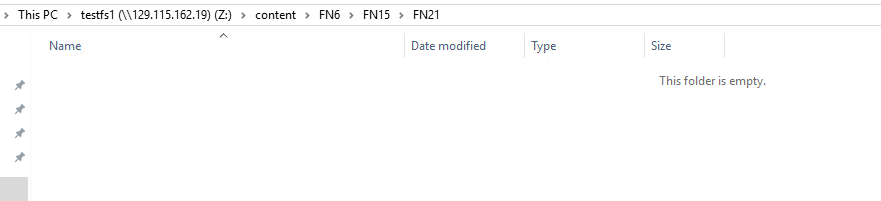
 |
Test Conclusion | Passed |
7.2 Download the file from the Fixed Content Area after moving
Test Purpose | To verify that Fixed storage area can work properly after moving. |
Test Networking | Storage as the IBM FileNet P8 Content Platform Engine Storage Area Test Networking |
Prerequisites | 1. The Pacific storage, CPE server, VMware ESXi deployment and networking have been completed. 2. The S3 services of the Pacific storage have been configured successfully, including accounts, namespace, access certificates, security certificates, and service network. 3. NTP clock synchronization has been configured for the WORM clock of the storage device and the CPE server. 4. The Object Store of “obj-yzx” has been created on CPE. 5. The documents have been moved to the Fixed storage area with retention in section 7.1. |
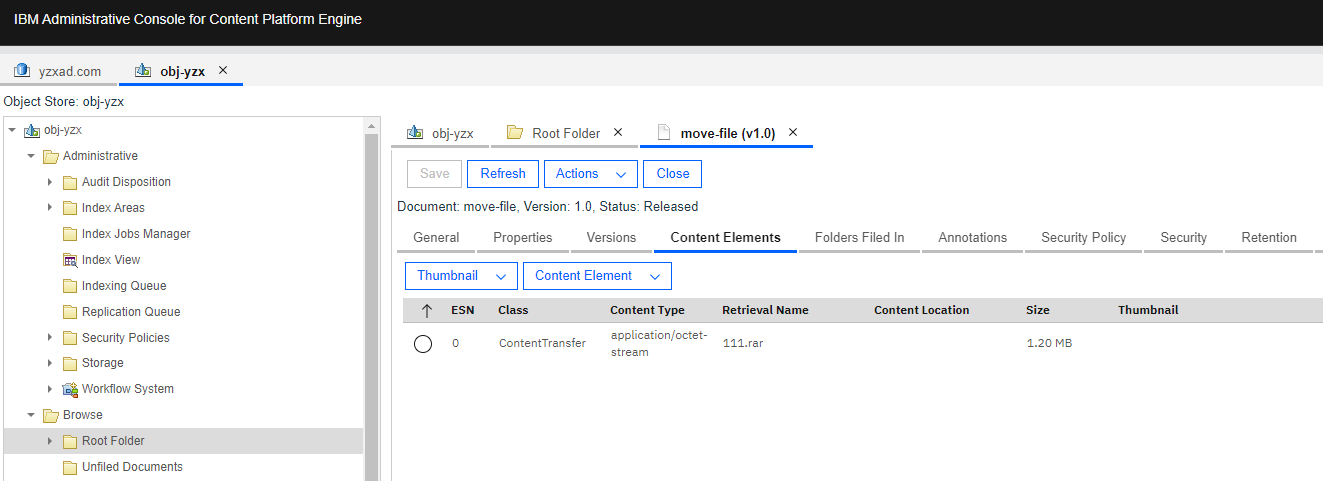
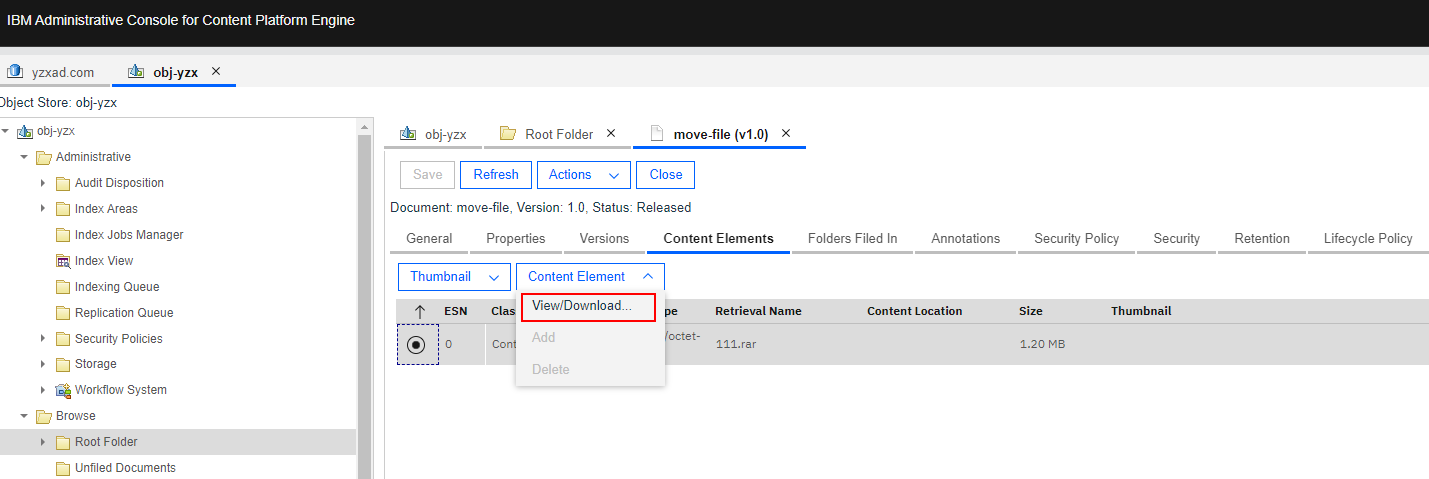
Test Procedure | 1. Select the Object Store > Browse > Root Folder > Actions > Contents. 2. Select the document and browse the content elements. 3. Download the content element of a document. 4. Check the downloaded document consistency. |
Expected Result | 1. In step 3, succeed to download the document. 2. In step 4, the downloaded file is complete and correct. |
Test Results | 1. Select the Object Store > Browse > Root Folder > Actions > Contents. 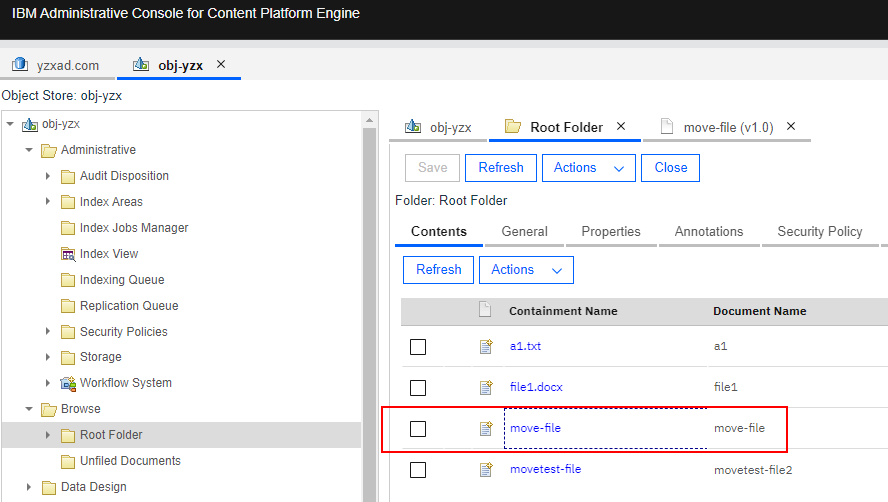
 |
Test Conclusion | Passed |