Huawei OceanStor Dorado All-Flash Storage & Huawei OceanStor Hybrid Flash Storage and VMware VASA 2.0&VVOL 1.0
![]()
Axians Global
All Rights Reserved
Executive Summary
Axians Global (“Axians”) assessed the interoperability of Huawei OceanStor Dorado All-Flash Storage & Huawei OceanStor Hybrid Flash Storage (hereinafter referred to as “the storage” as well) and VMware vVol 1.0 through FC and iSCSI.
In the assessment, Axians has determined that VMware vVol 1.0 will function with Huawei OceanStor Dorado All-Flash Storage & Huawei OceanStor Hybrid Flash Storage for the following scenarios:
Storage Tested | Protocol(s) Tested | Test Scenario | Result |
Huawei OceanStor Dorado All-Flash Storage & Huawei OceanStor Hybrid Flash Storage | FC and iSCSI | Basic Connectivity Test and Reliability Test | Passed |
1. Environment Configuration
1.1 Networking Diagram
Figure 1.1 Storage and VMware vVol 1.0 Compatibility Test Networking
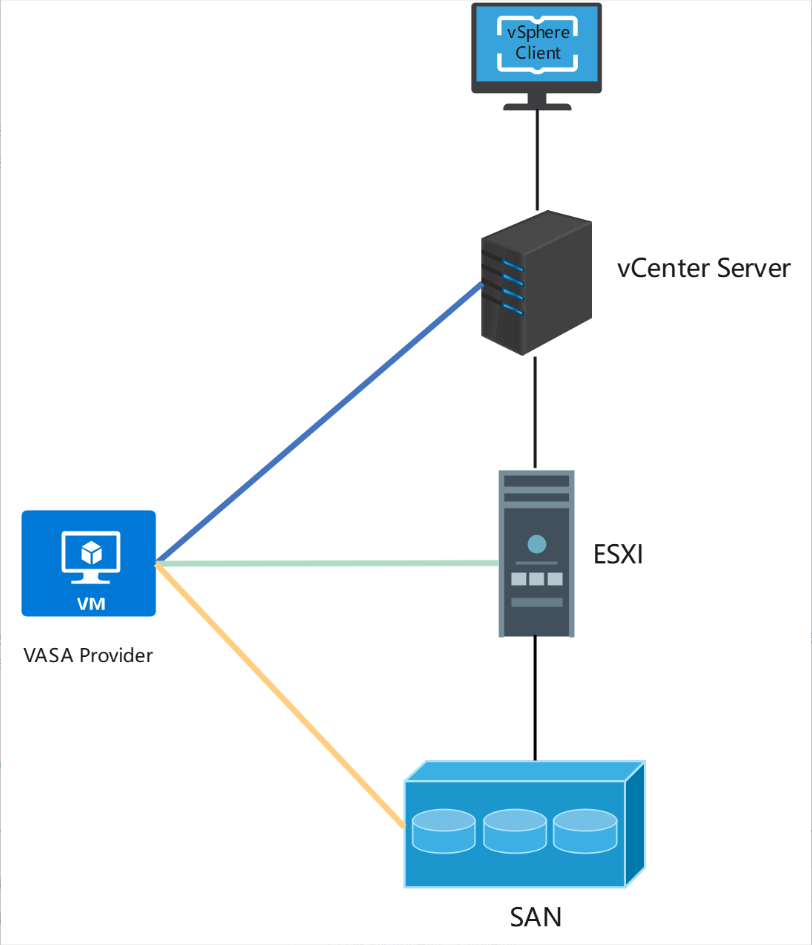
Networking description:
The ESXi host connects to the storage device via FC/iSCSI and simultaneously connects to the VASA Provider server through the management network.
The vCenter server connects to the ESXi host and the VASA Provider server through the management network.
The VASA Provider server connects to the storage device through the management network.
1.2 Hardware and Software Configuration
1.2.1 Storage Configuration
Table 1-1 Storage Configuration Table
Name | Description | Version | Quantity |
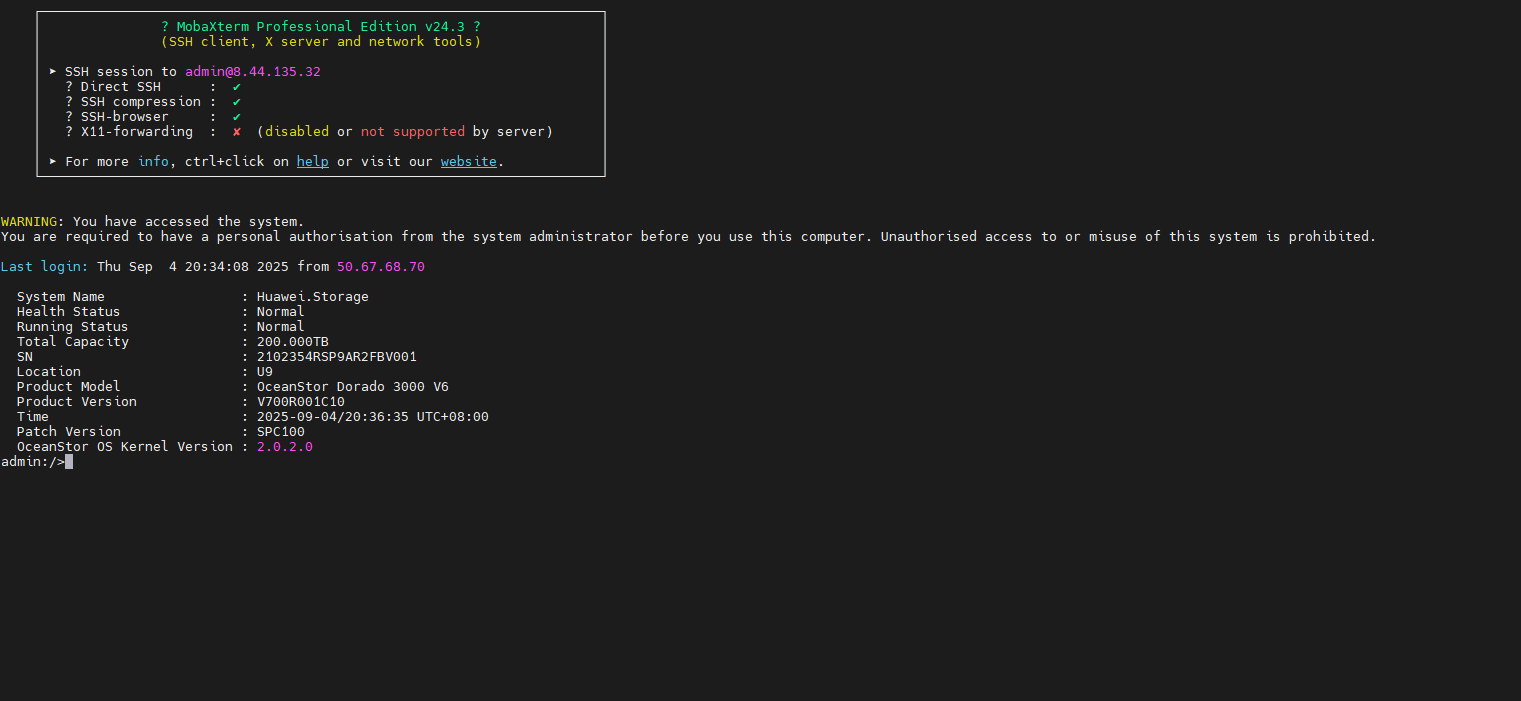
Storage | Huawei OceanStor Dorado All-Flash Storage & Huawei OceanStor Hybrid Flash Storage | V700 | 1 |
1.2.2 Test Software and Tools
Table 1-3 Test Software and Tool List
Software Name | Description | Version |
Huawei Storage VASA Plug-in | vSphere Client Plug-In | 2.0 |
VMware VVOL | A model for provisioning, managing, and accessing vSphere virtual machine virtual disks (VMDKs) | 1.0 |
VMware ESXi | VMware Virtualization Platform | 8.0 |
Red Hat Enterprise Linux | Plugin Host | 8.3 |
2. Basic Functions Test
2.1 Online Migration Between vVols Datastore and VMFS Datastore
Test Purpose | Test whether the online migration between vVols Datastore and VMFS Datastore is successful. (Protocol: FC) |
Test Networking | Storage and VMware ESXi Compatibility Test Networking |
Prerequisites | 1. The VASA Provider has been installed and configured. 2. The VASA Provider has been registered with vCenter and initial configuration is complete. 3. The host, storage, and networking have been completed. |
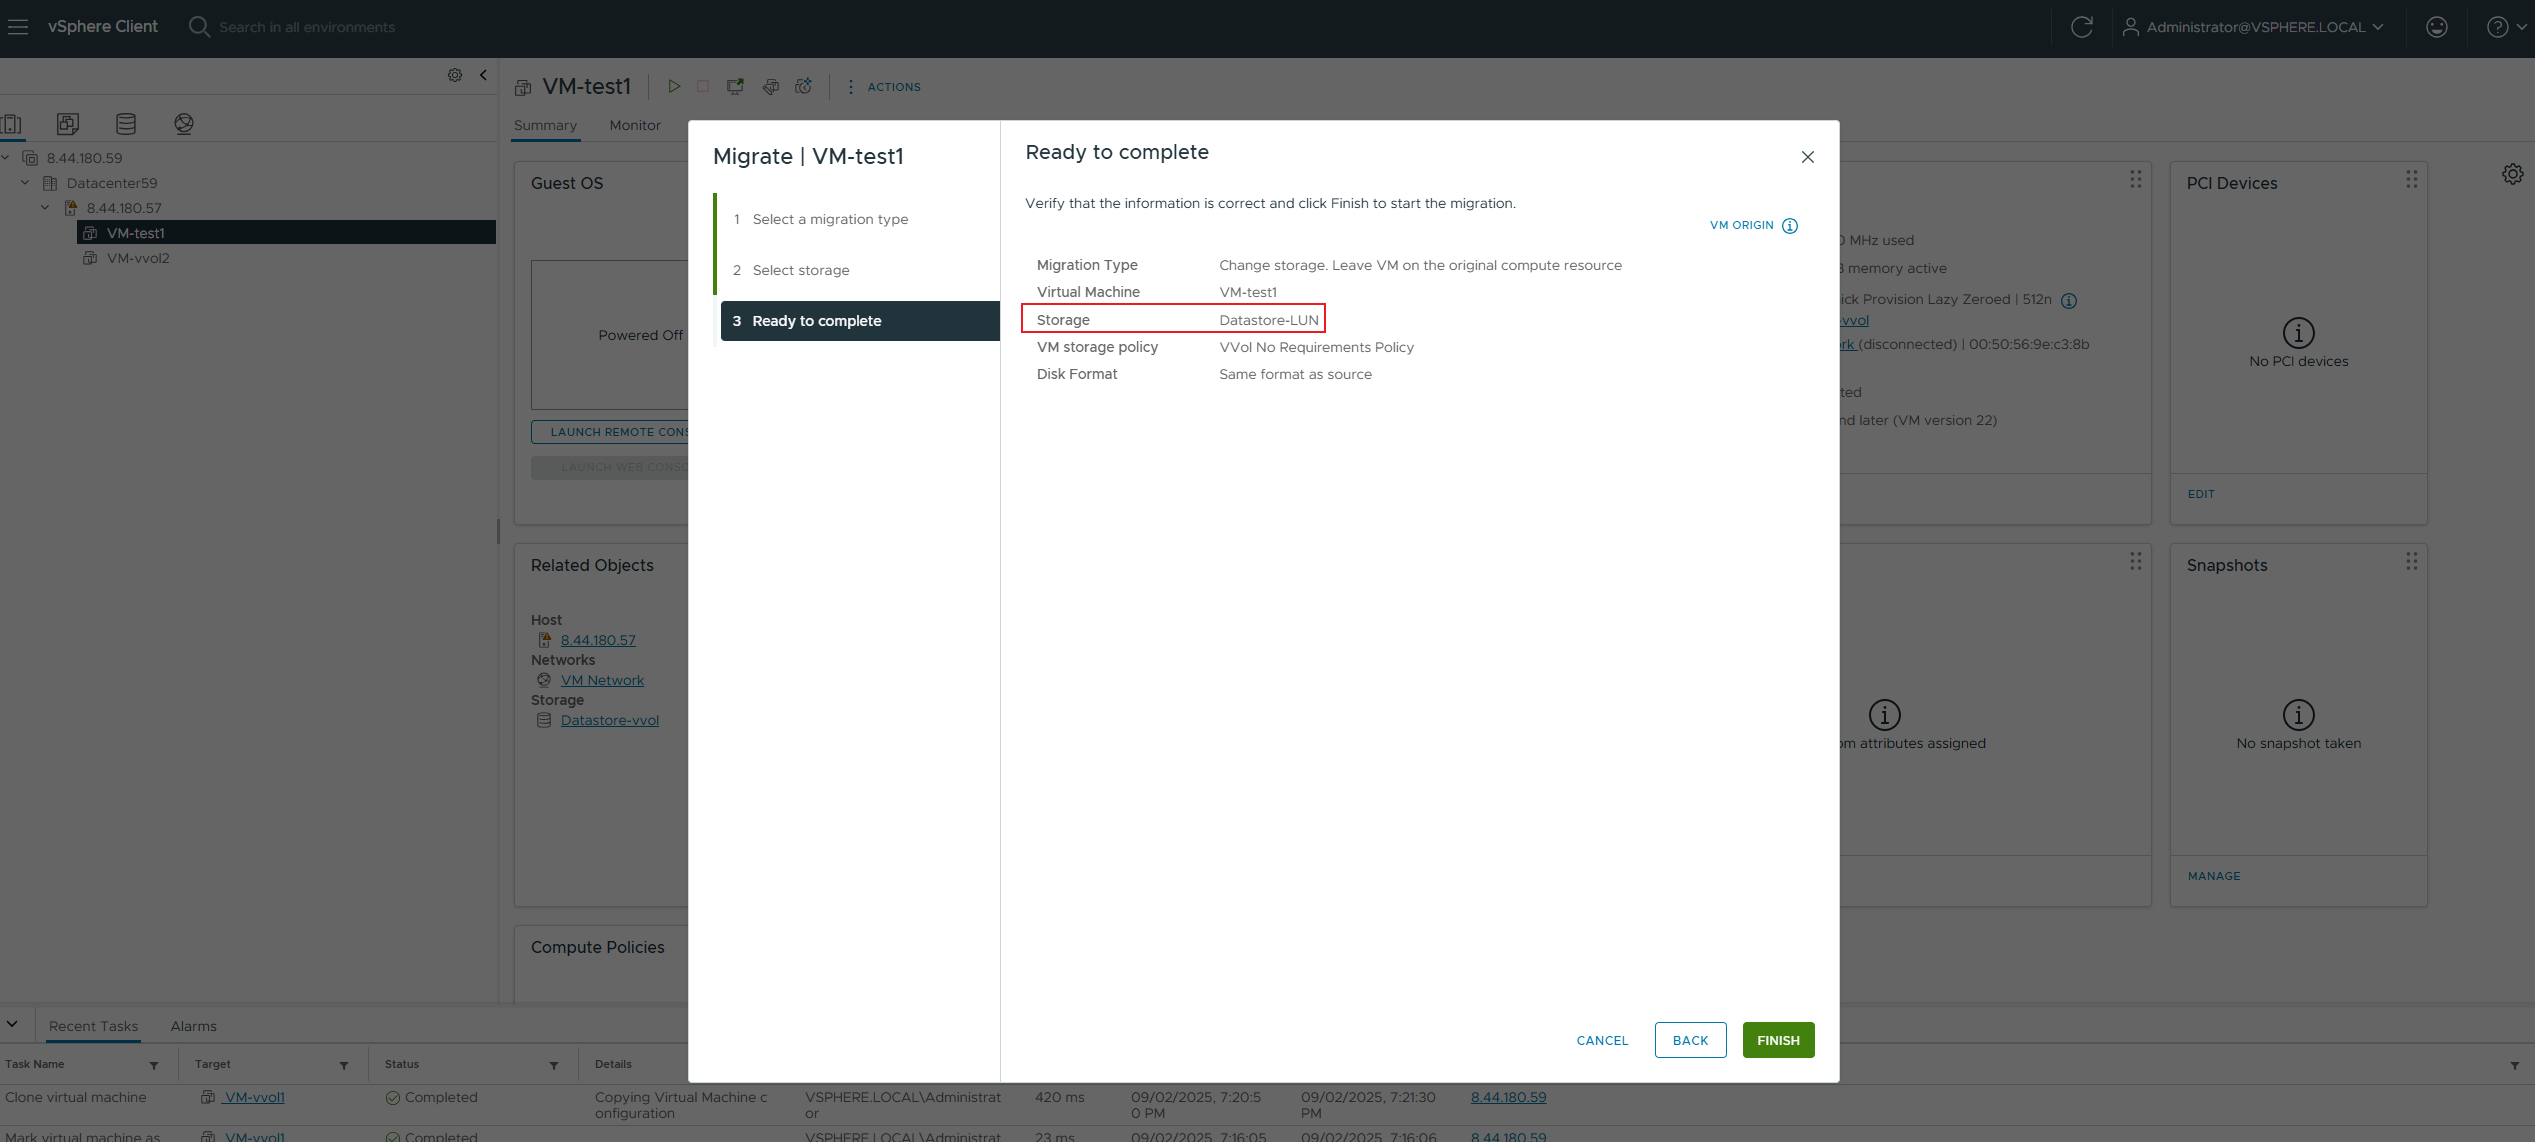
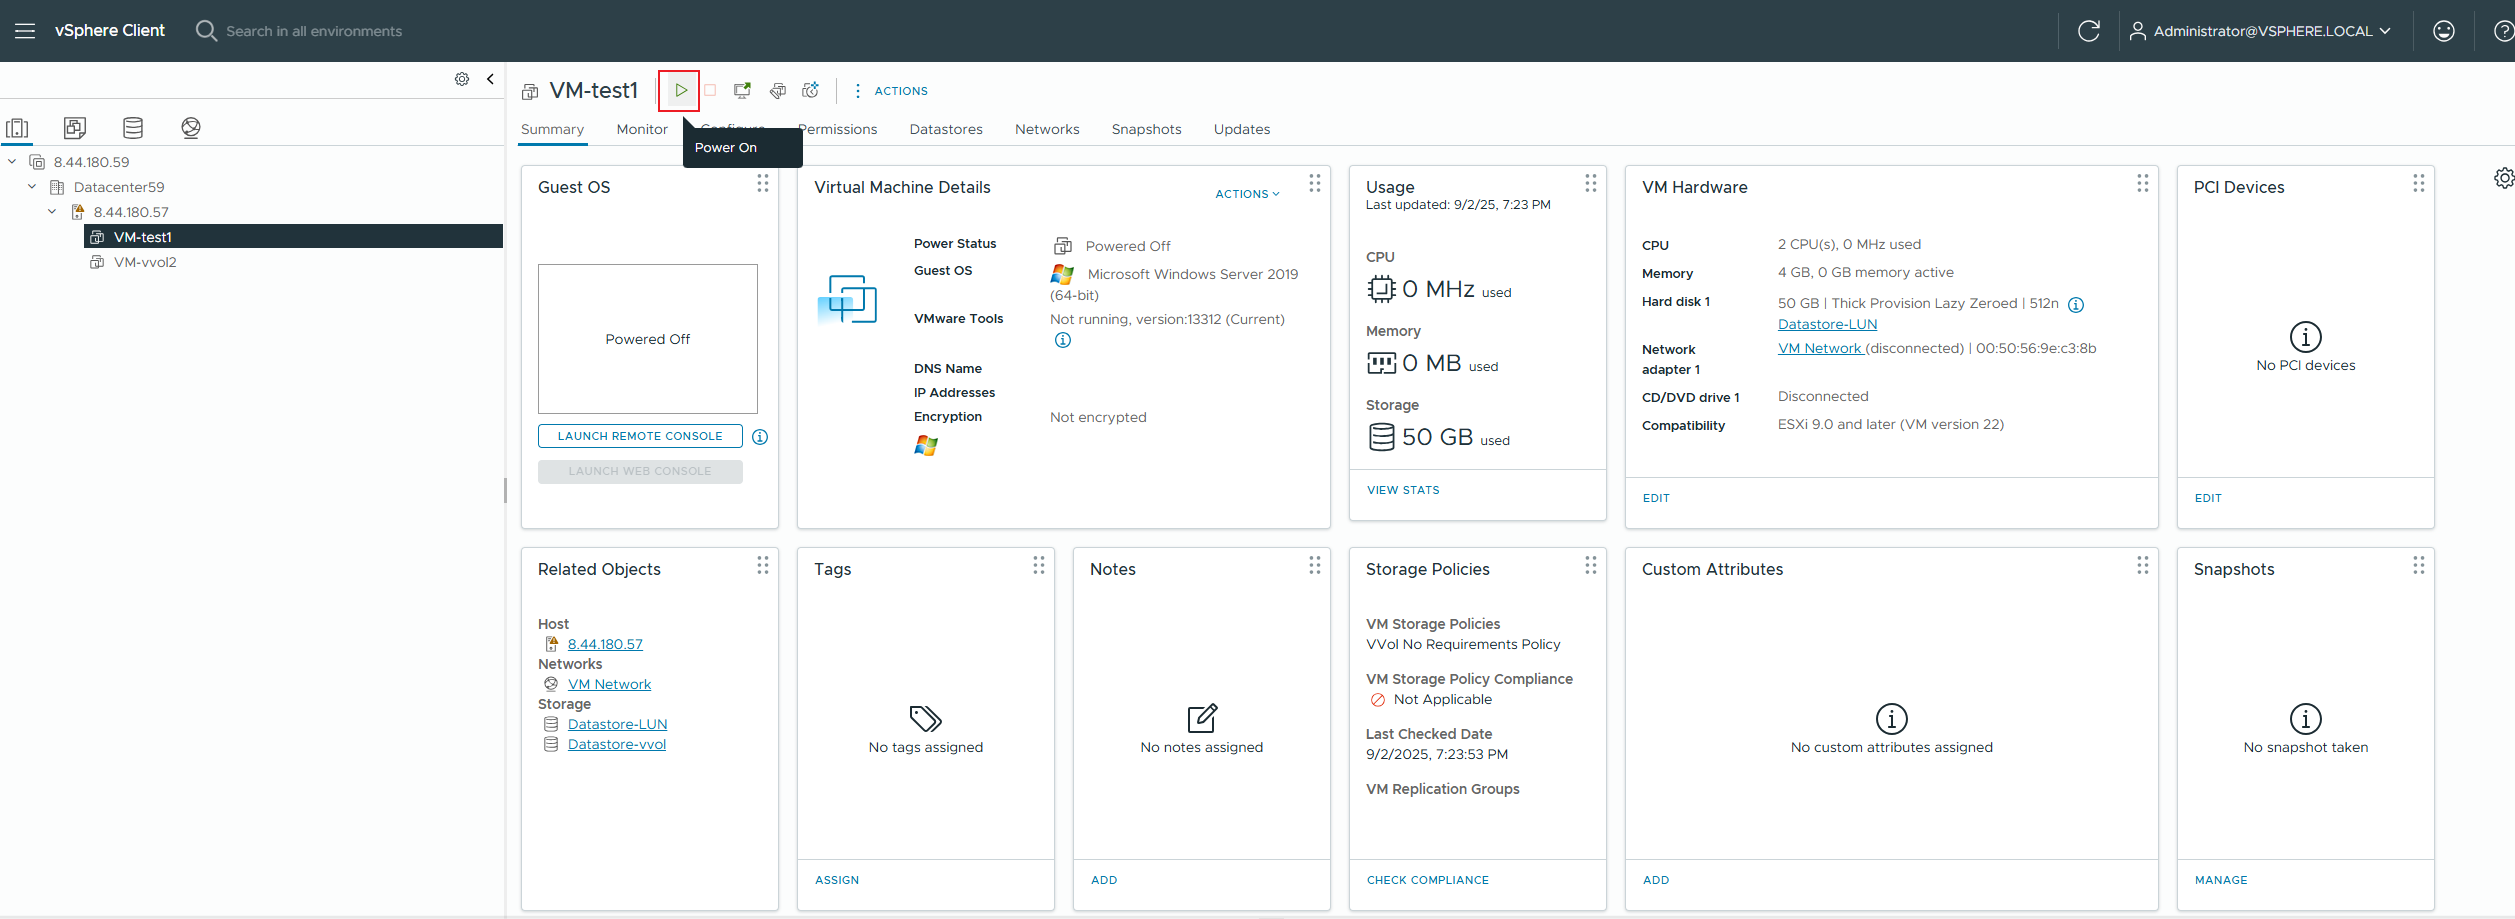
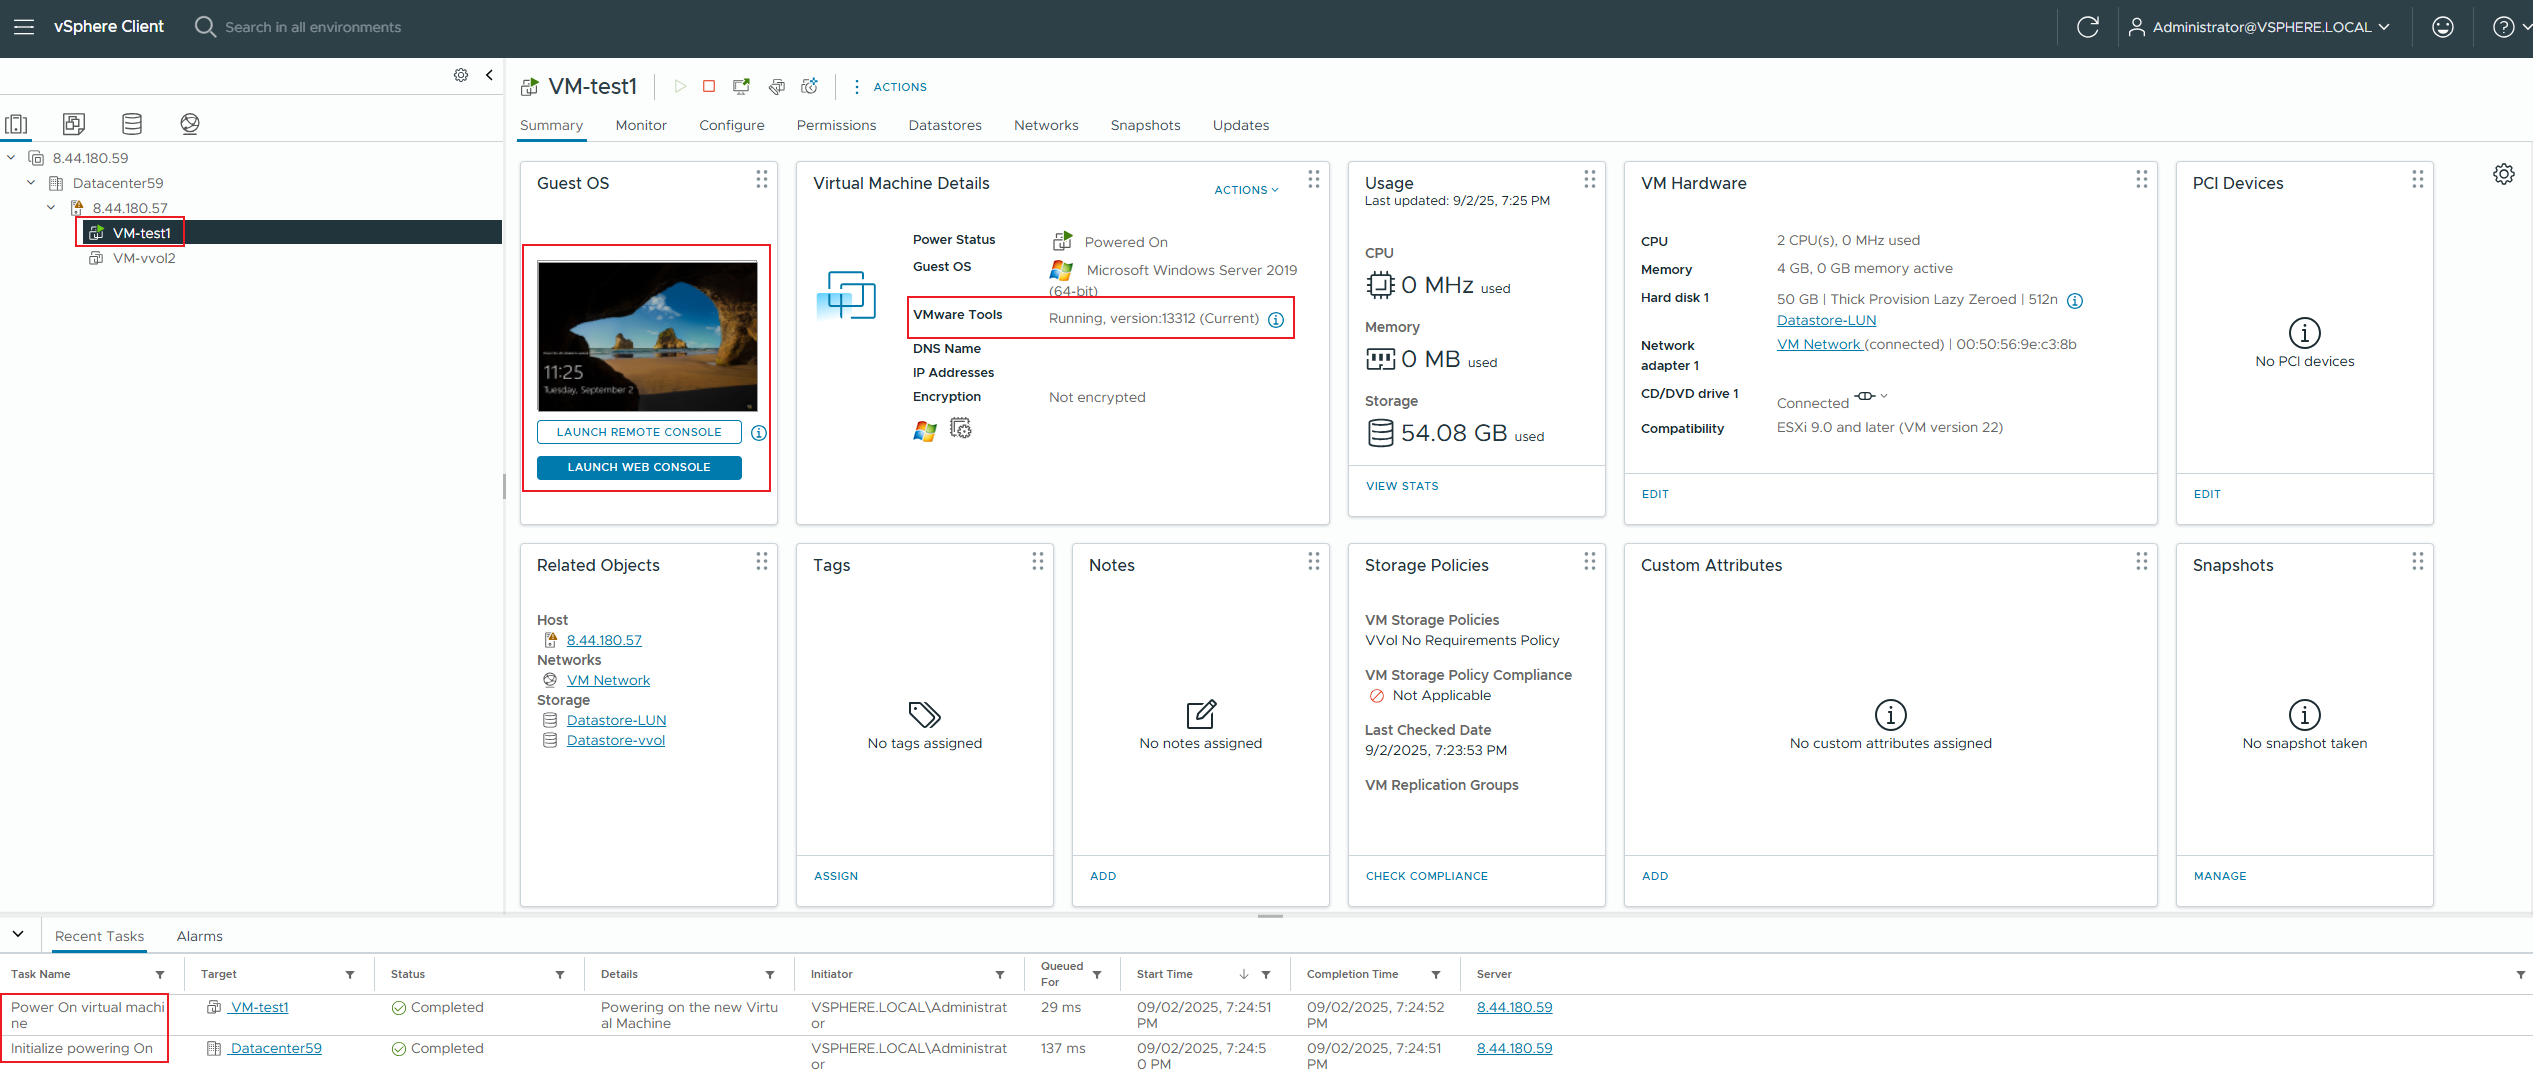
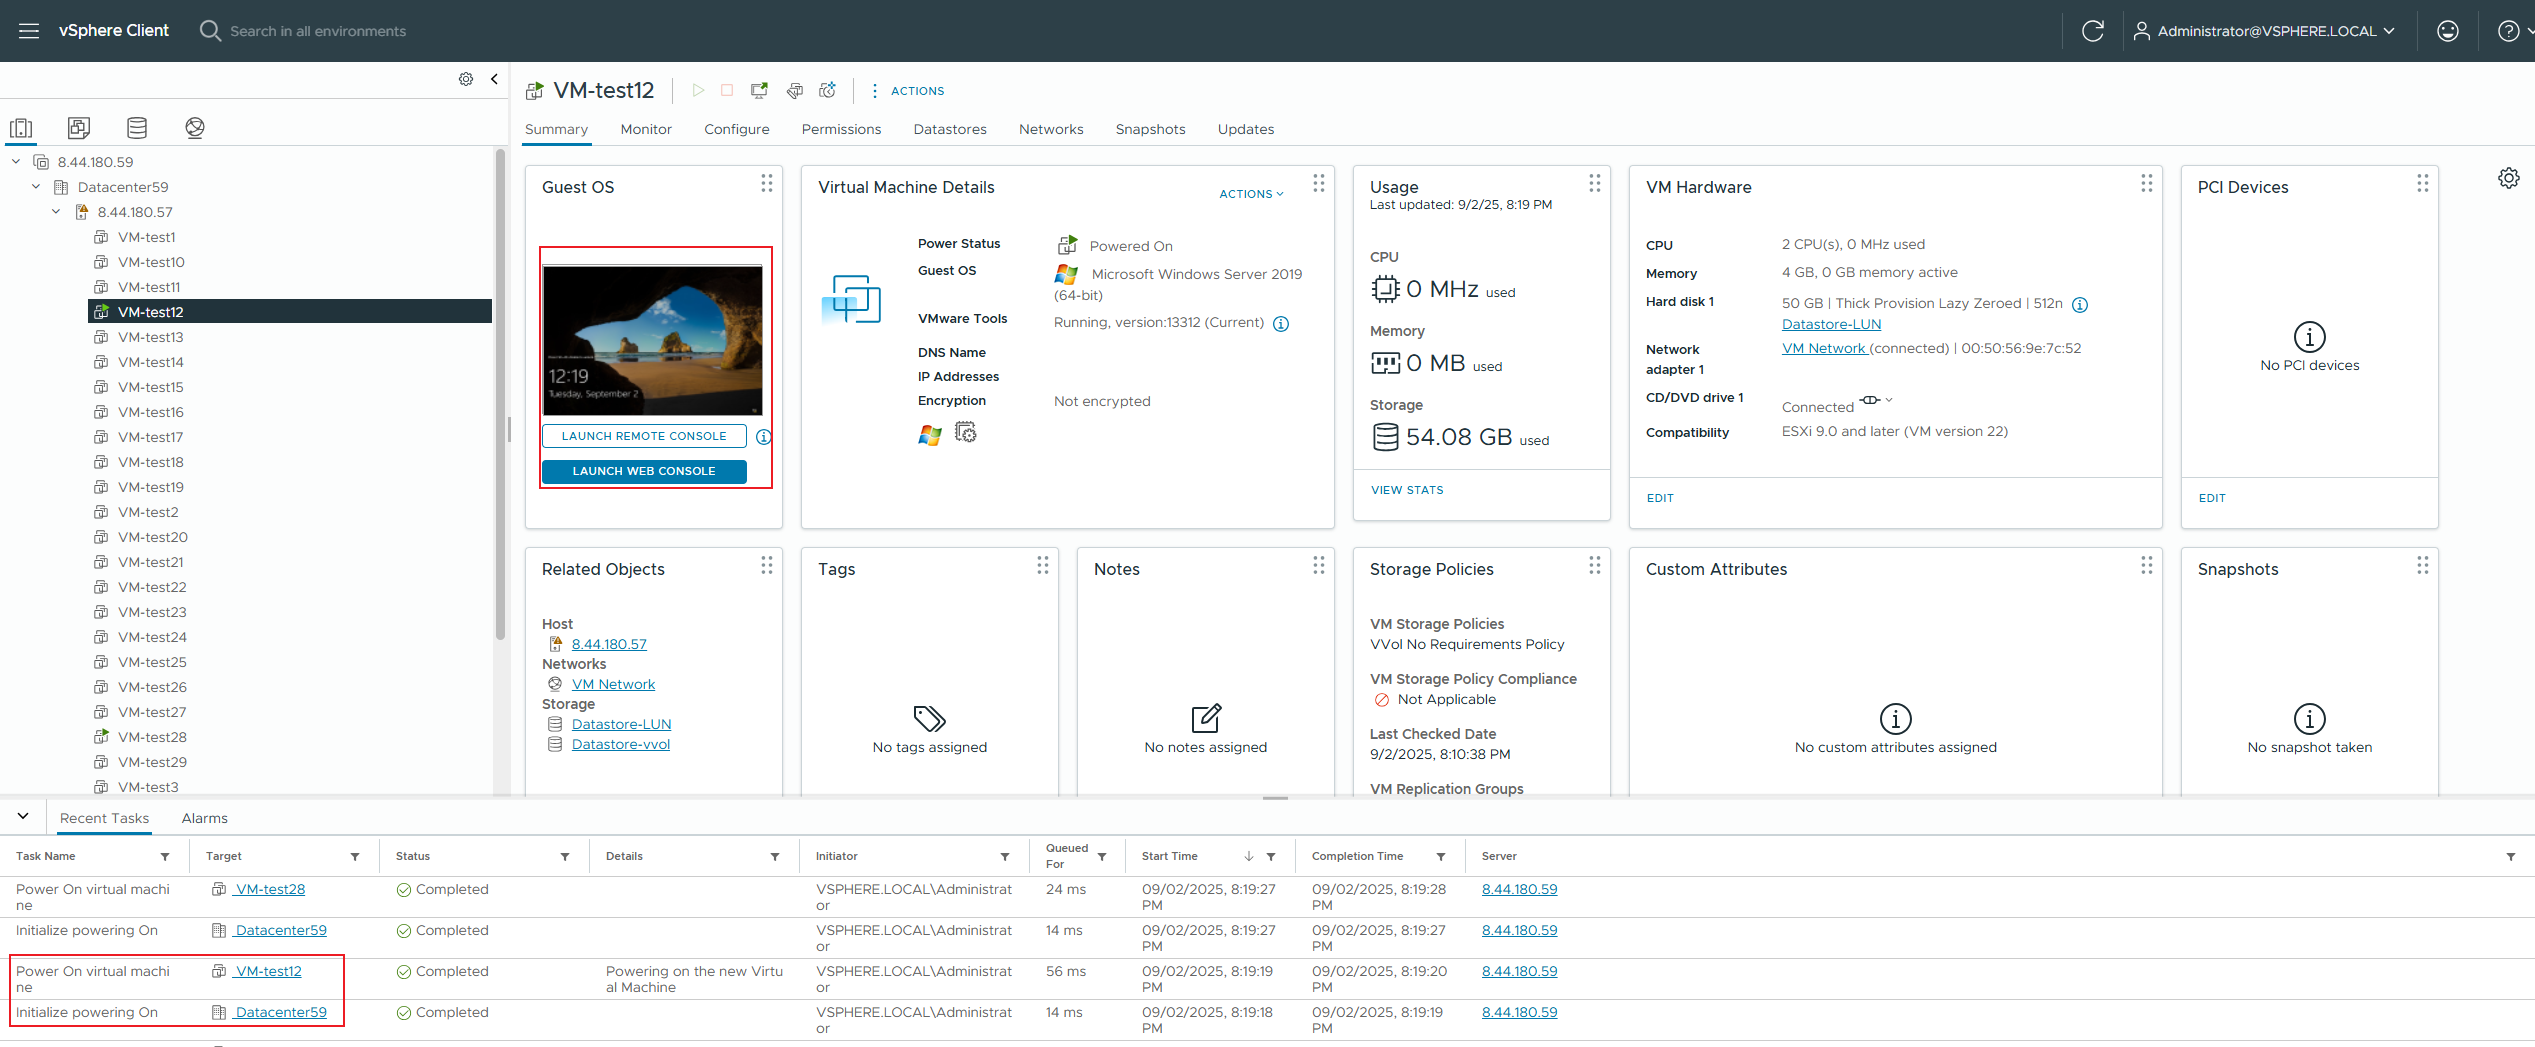
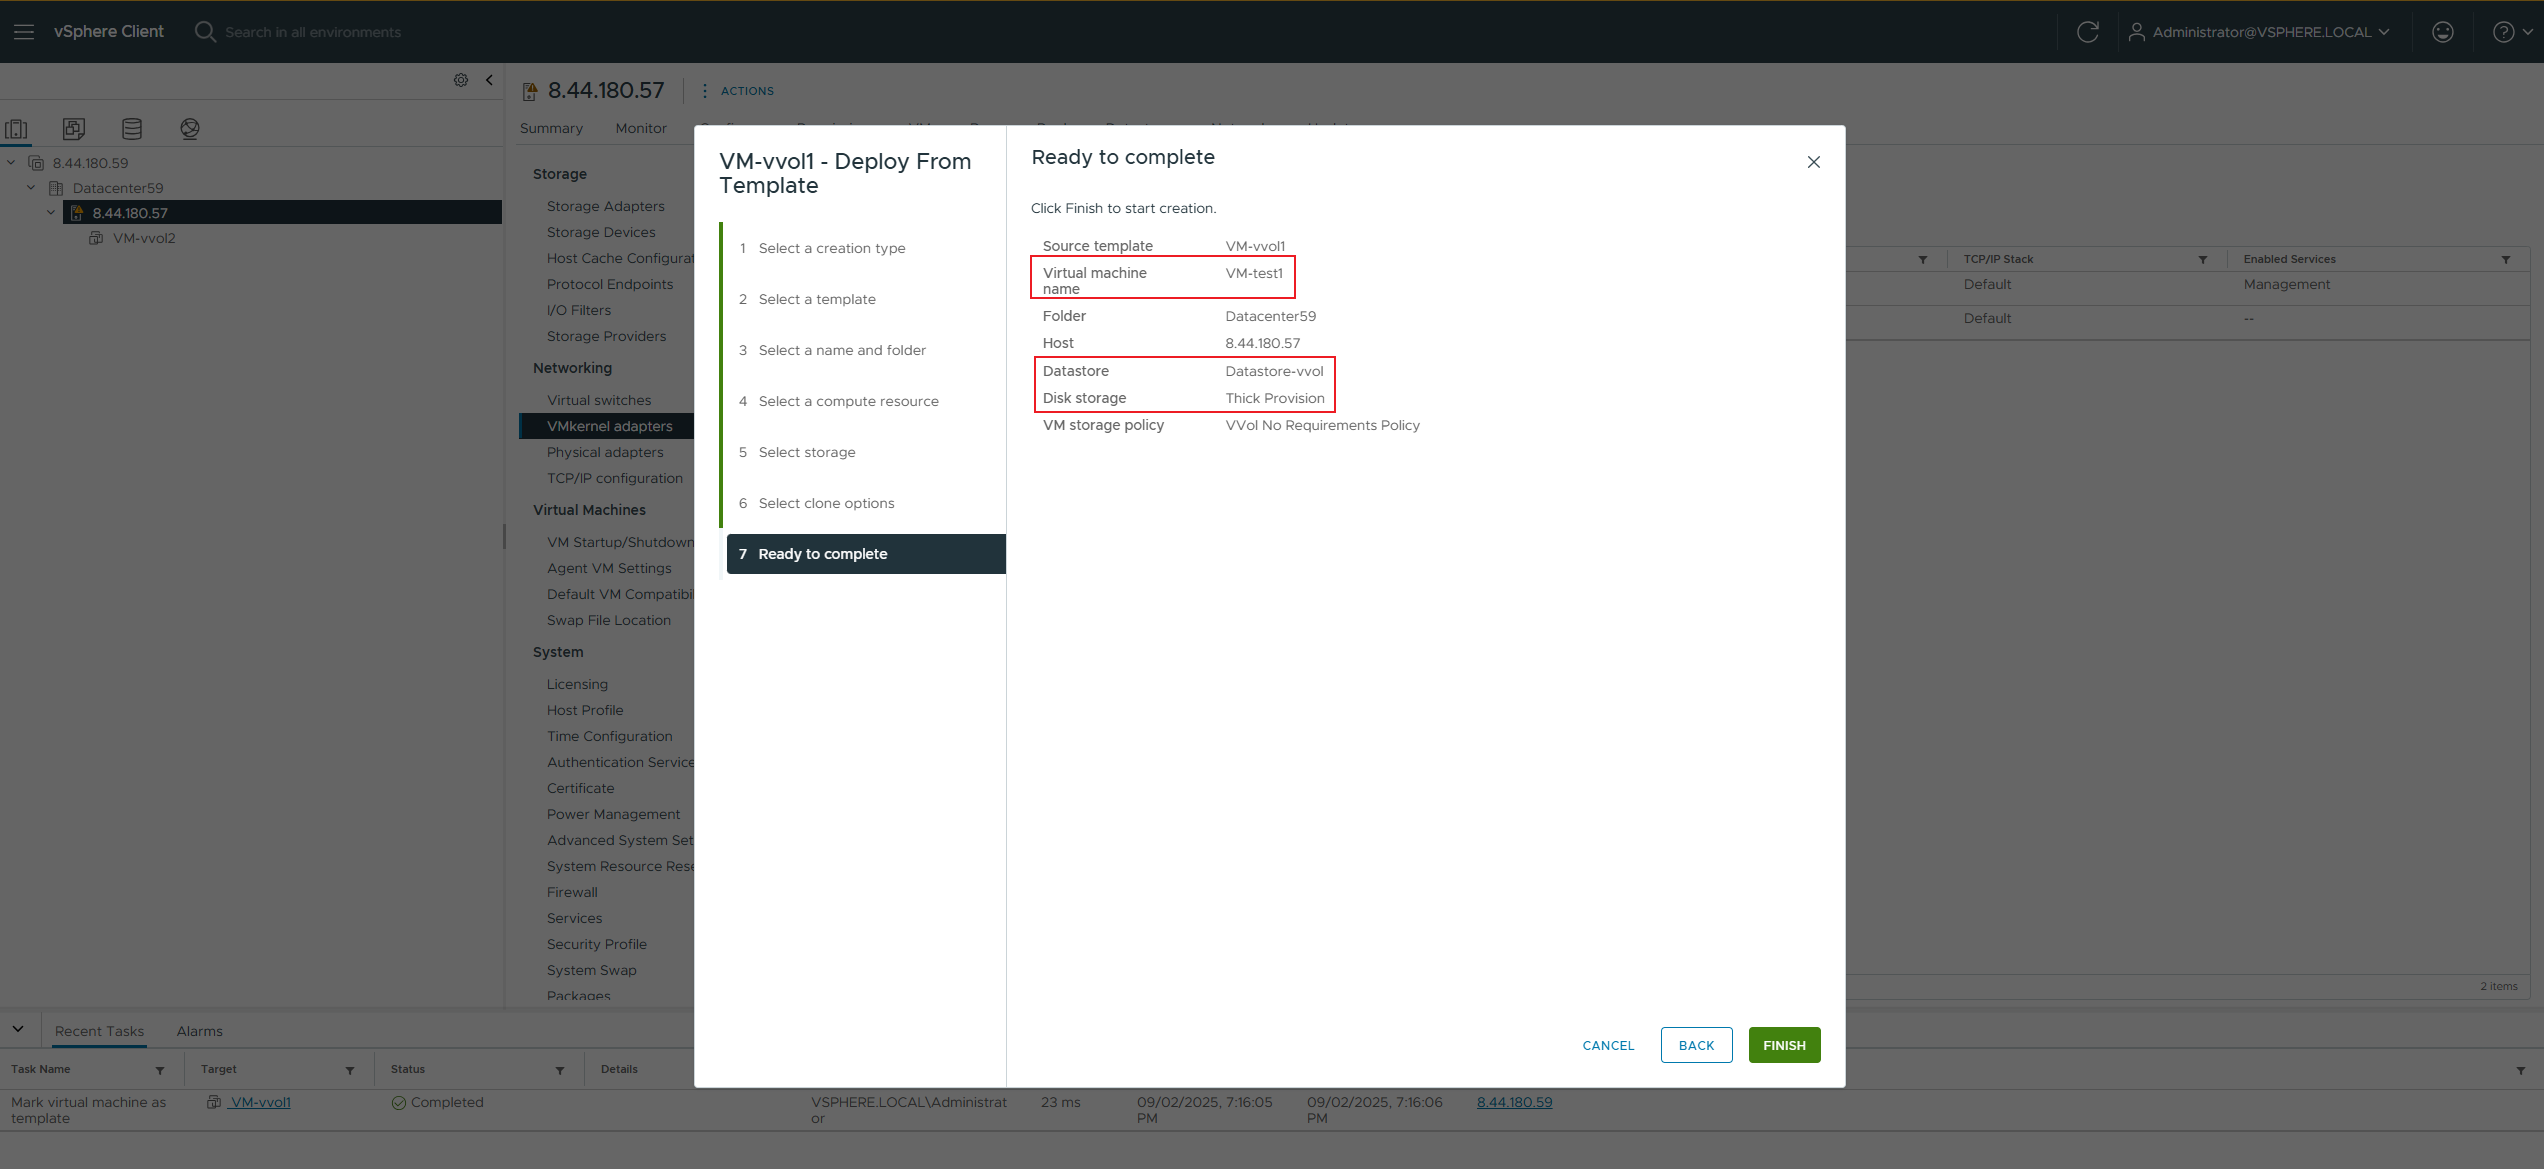
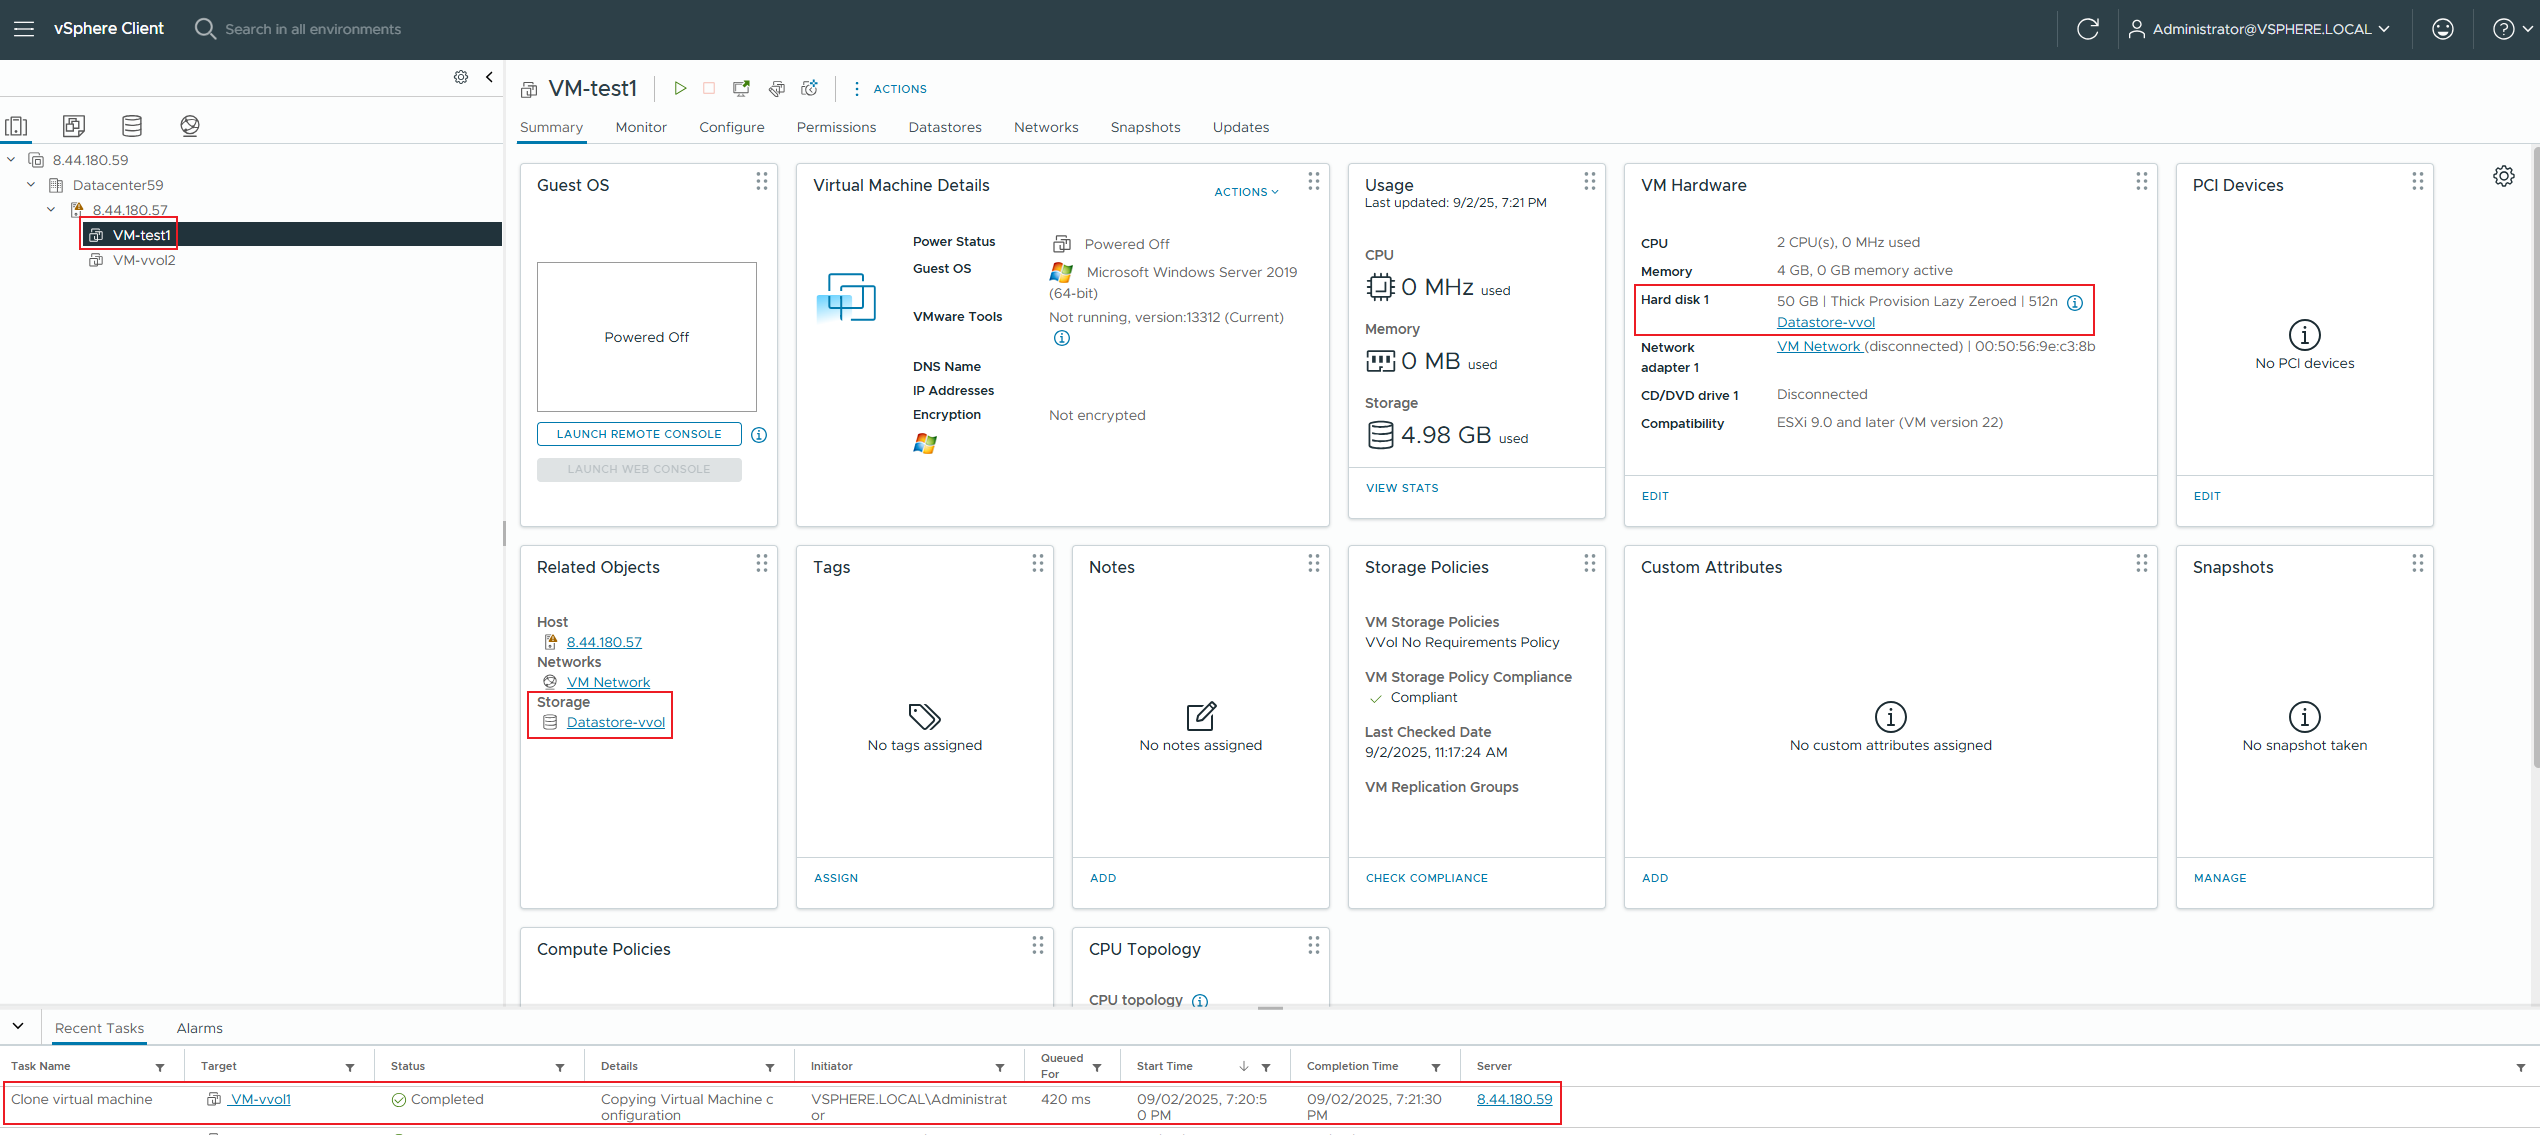
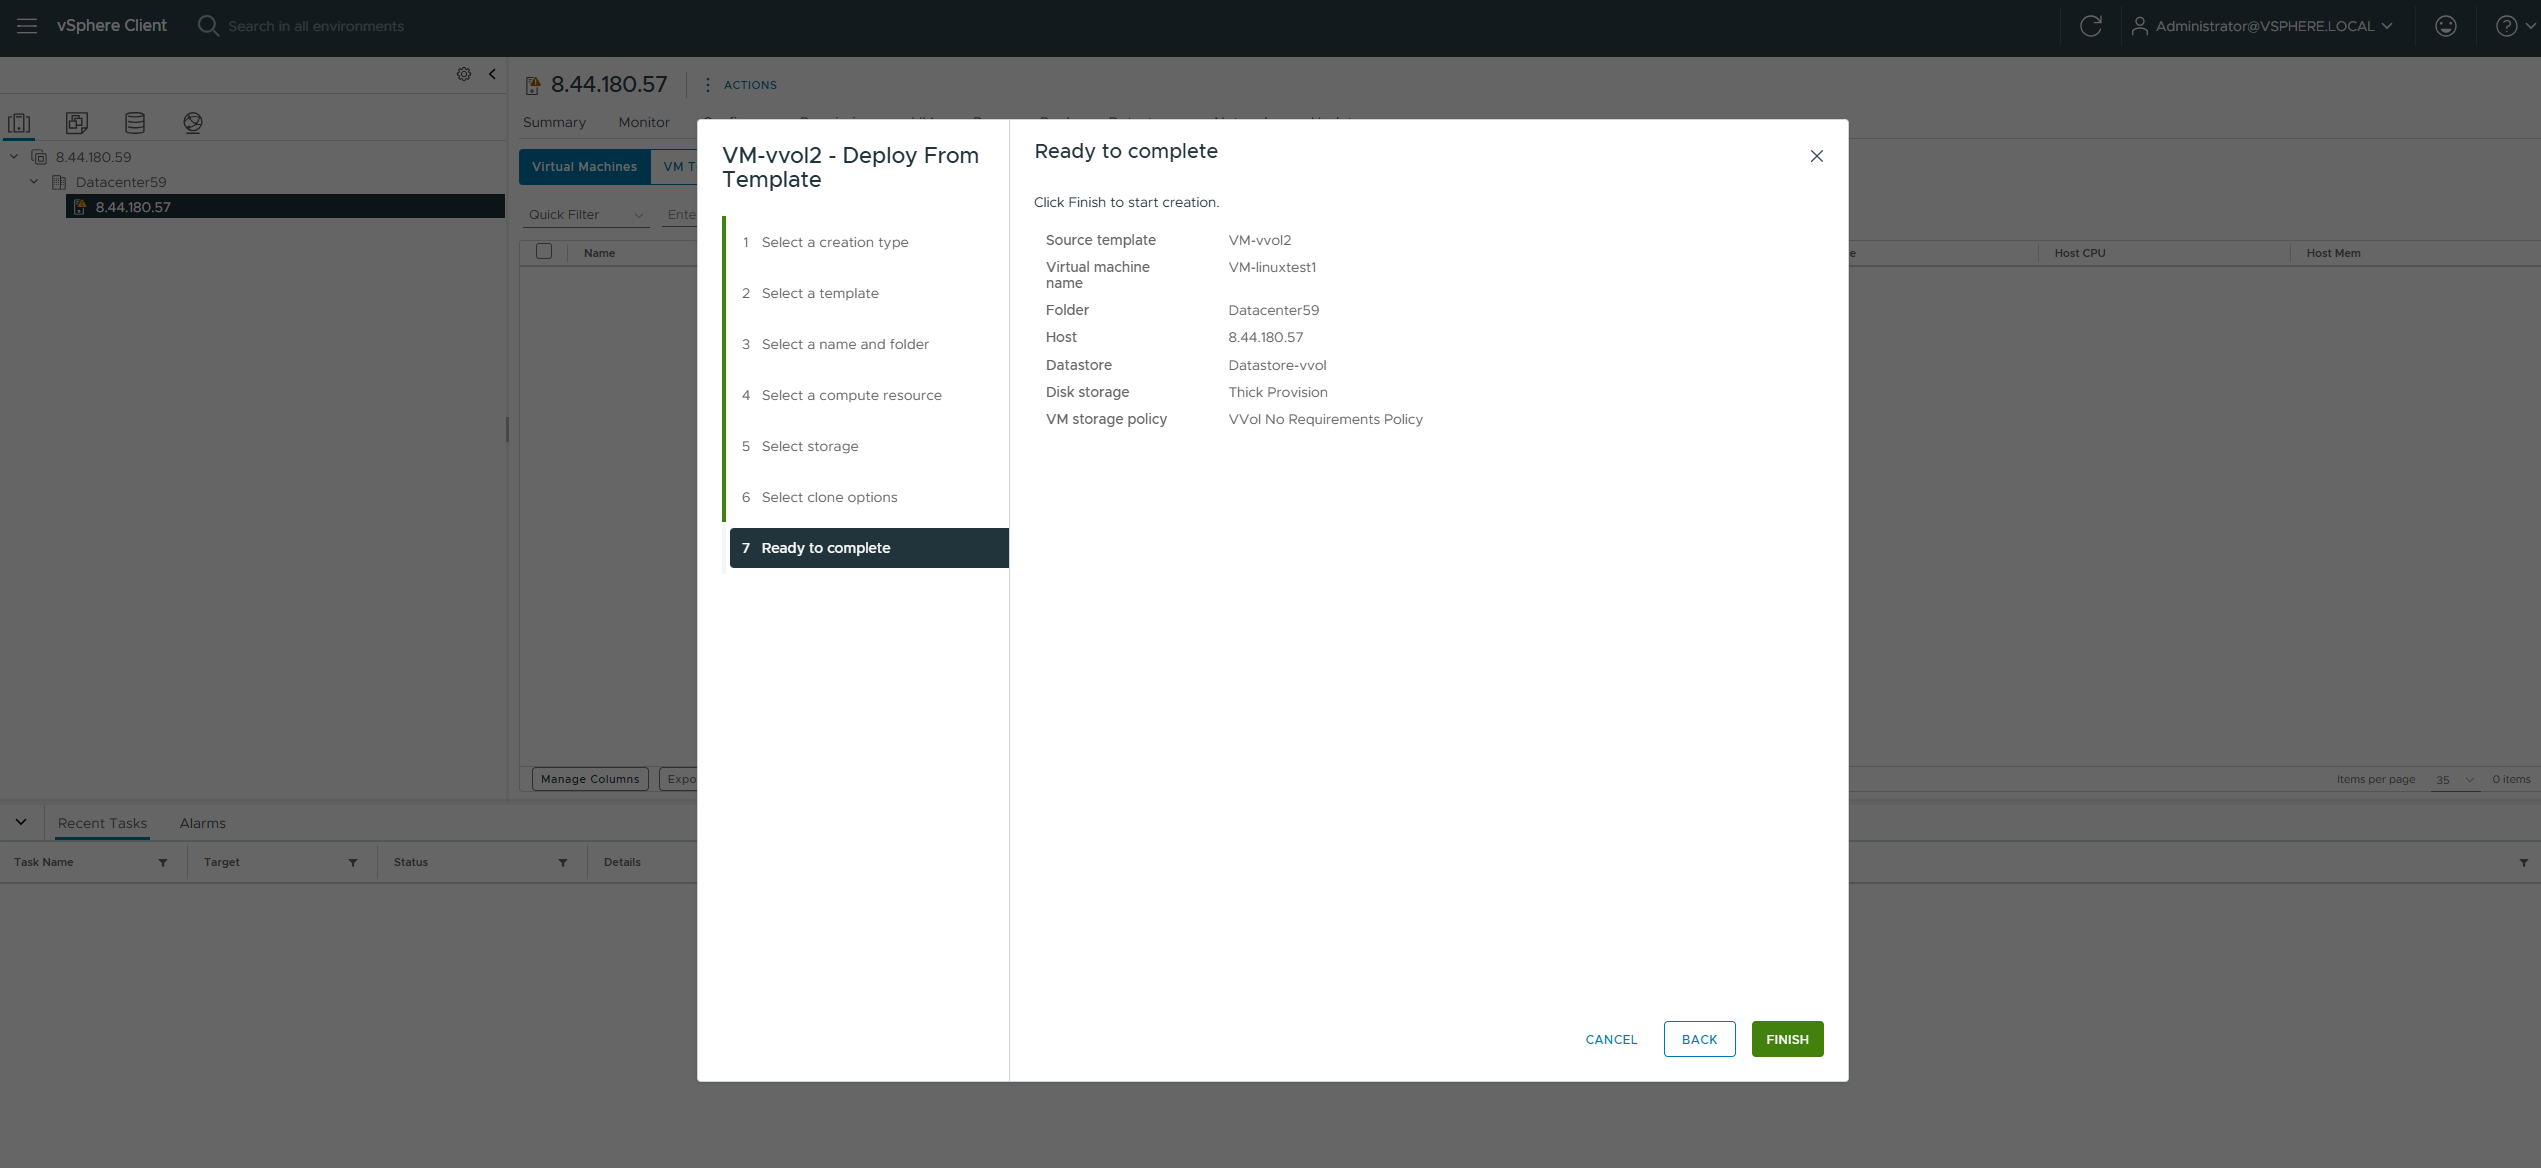
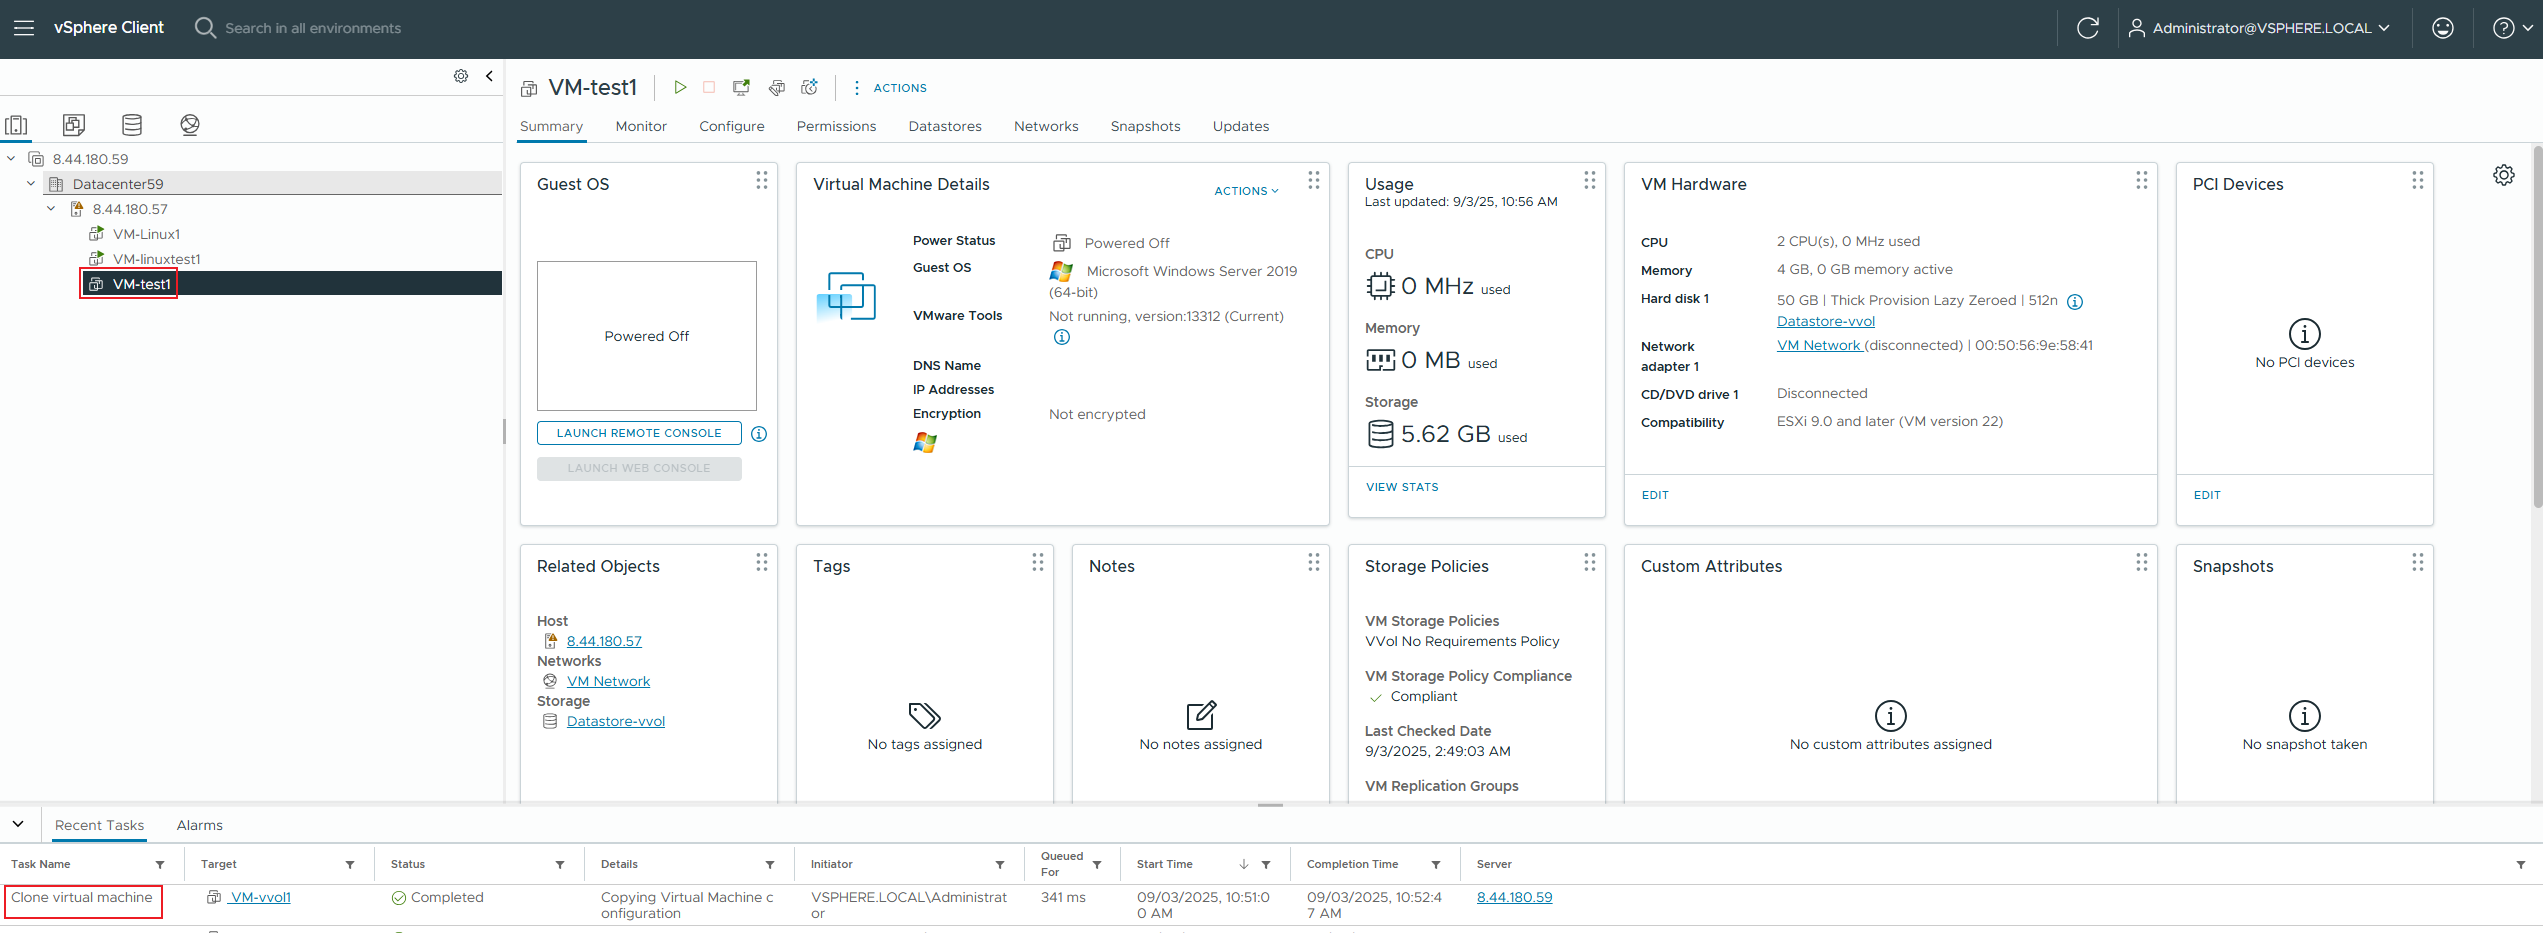
Test Procedure | 1. Clone a 50GB thick-provisioned zeroed virtual machine from the VVOL_TEMPLATE to the vVols Datastore; 2. Migrate this virtual machine online to the VMFS Datastore; 3. Check if the virtual machine is powered on normally. |
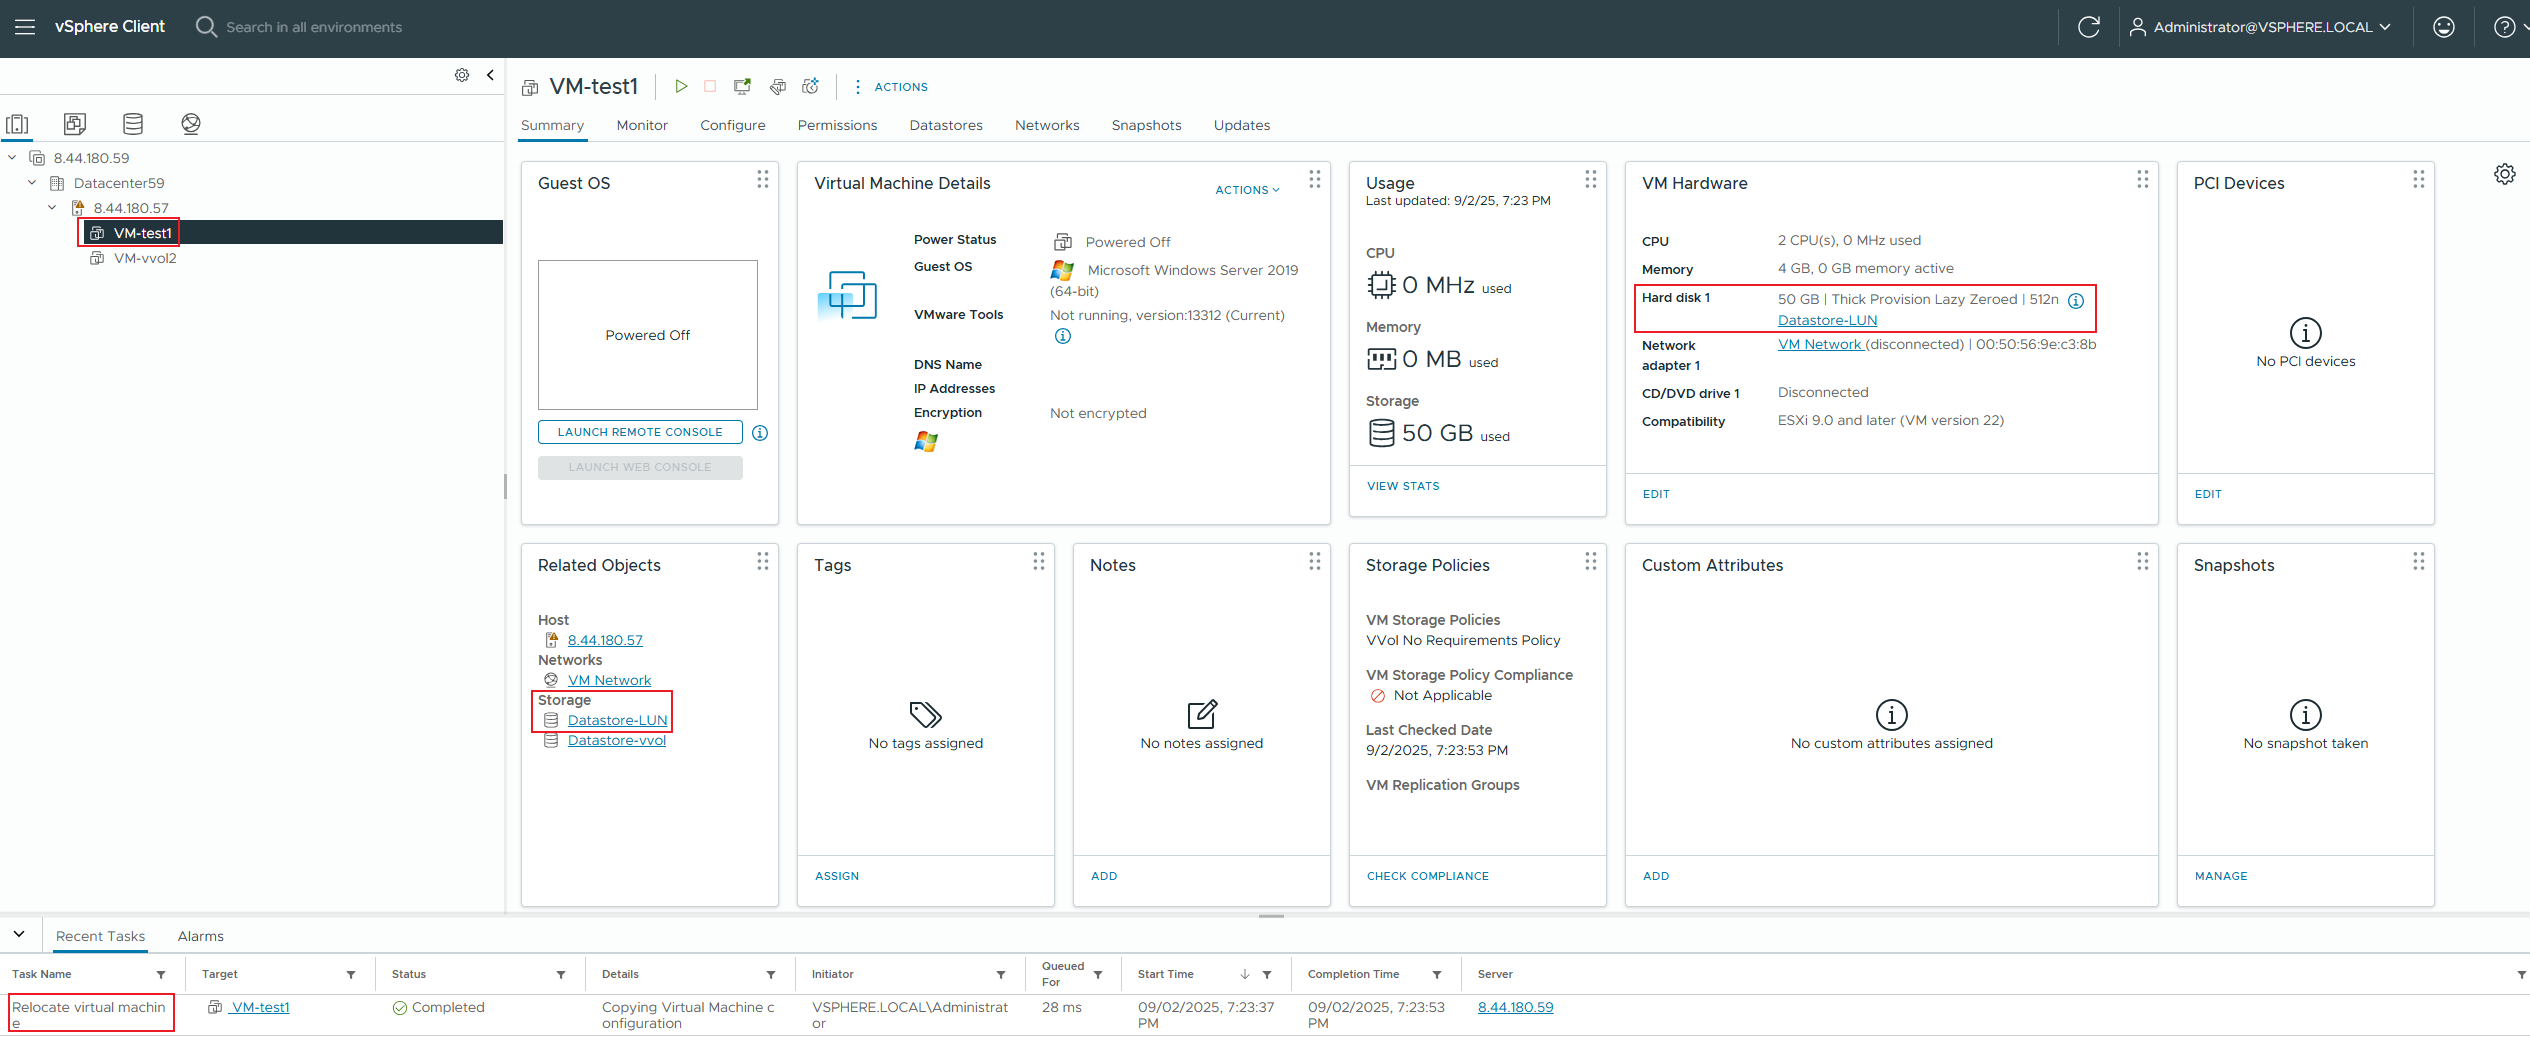
Expected Result | 1. Step 1: The VVOL virtual machine cloning was successful, and the VVol LUN for the virtual machine was created successfully. 2. Step 2: The virtual machine migration was successful. 3. Step 3: The virtual machine is operating normally. |
Test Record |

2. Migrate this virtual machine online to the vmfs datastore; 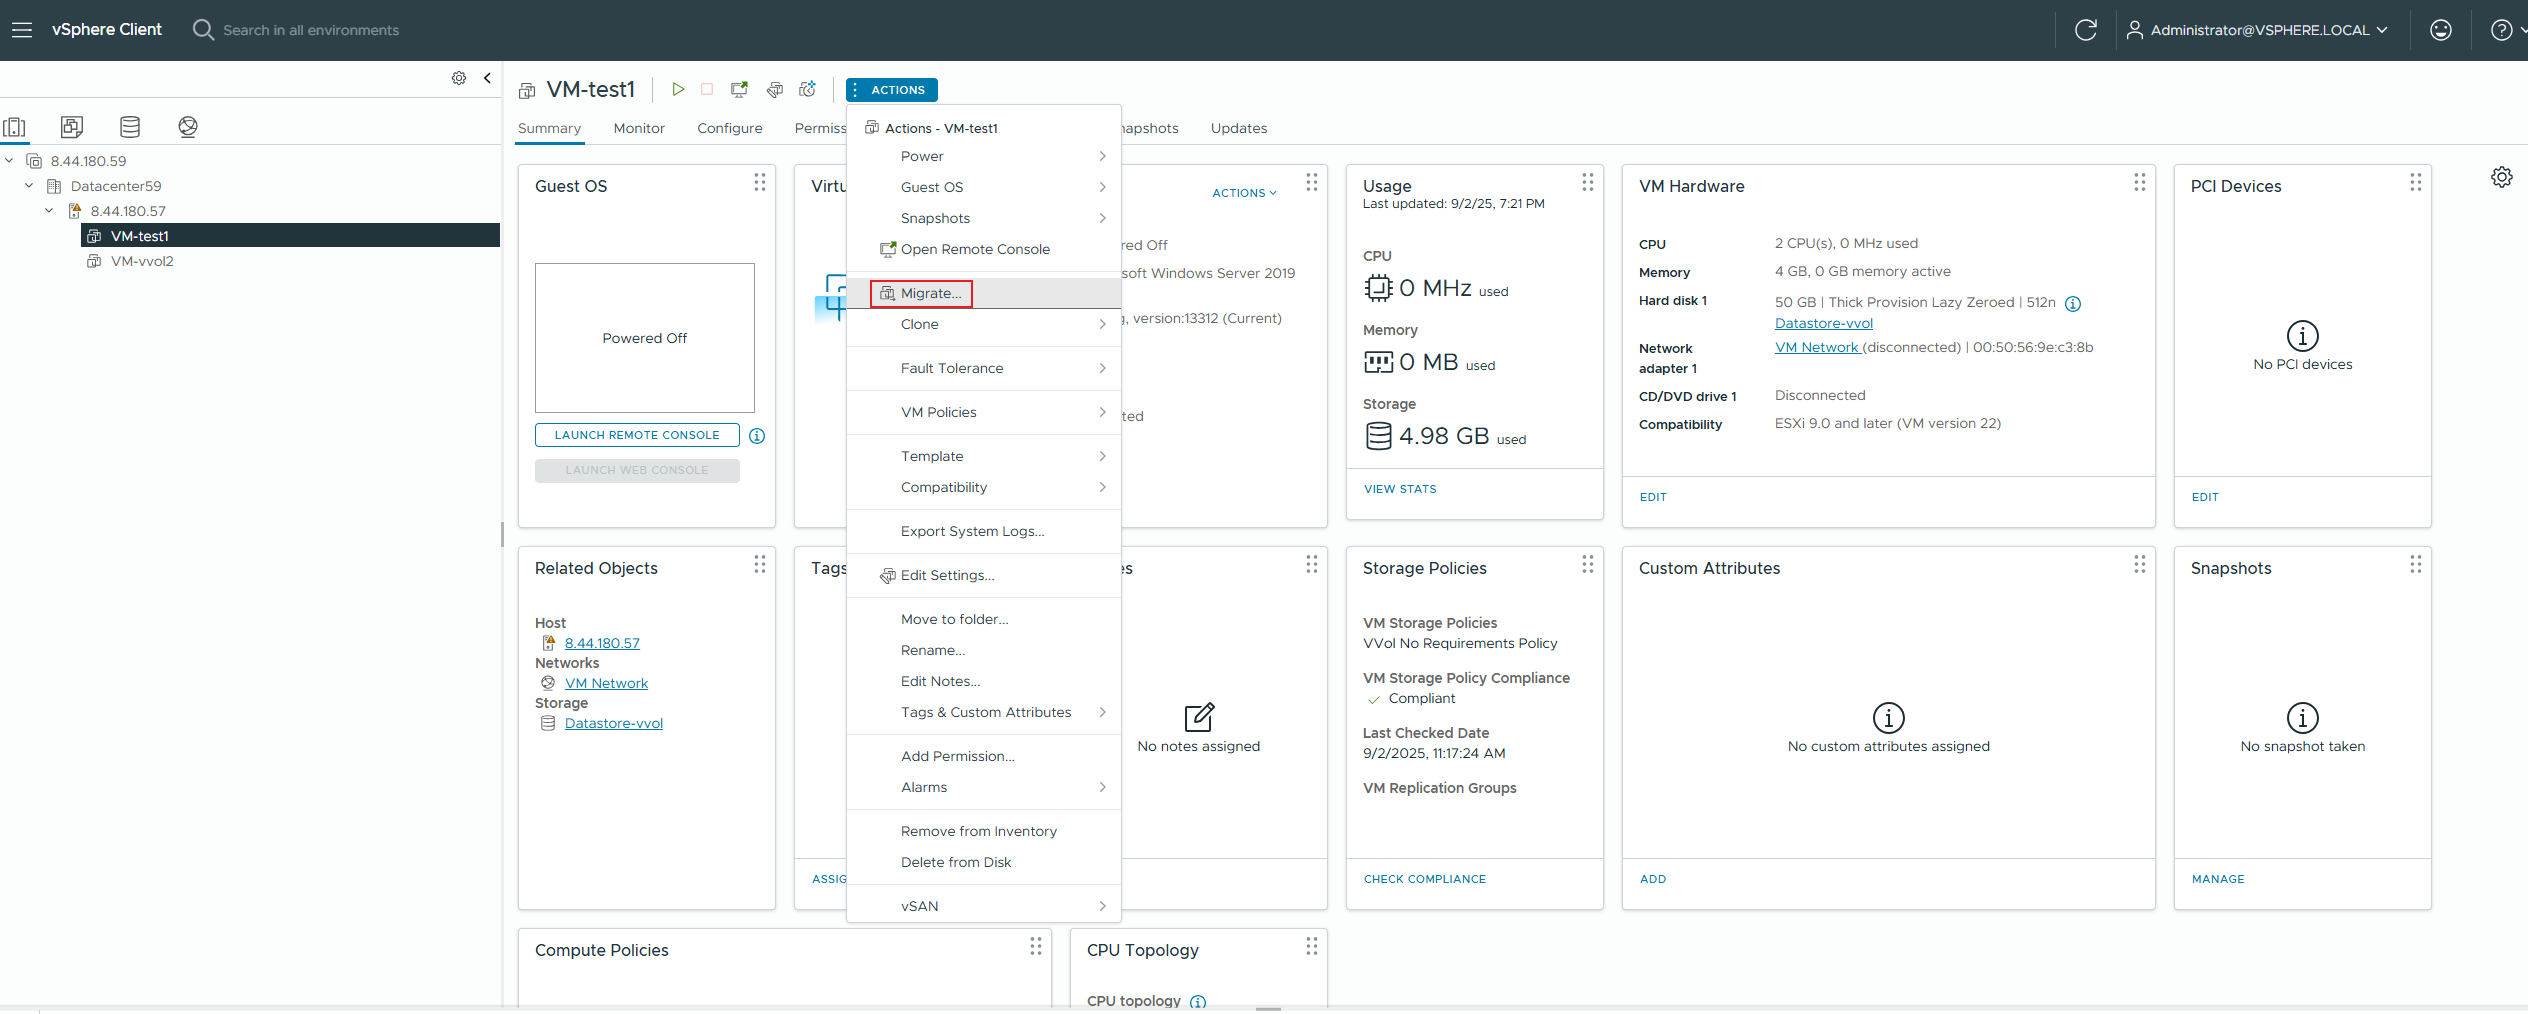
|
Test Conclusion | PASS |

2.2 Multi-concurrent online migration between vVols Datastore and VMFS Datastore
Test Purpose | Whether the multi-concurrent online migration between vVols Datastore and VMFS Datastore is successful. (Protocol: FC) |
Test Networking | Storage and VMware ESXi Compatibility Test Networking |
Prerequisites | 1. The VASA Provider has been installed and configured. 2. The VASA Provider has been registered with vCenter and initial configuration is complete. 3. The host, storage, and networking have been completed. |
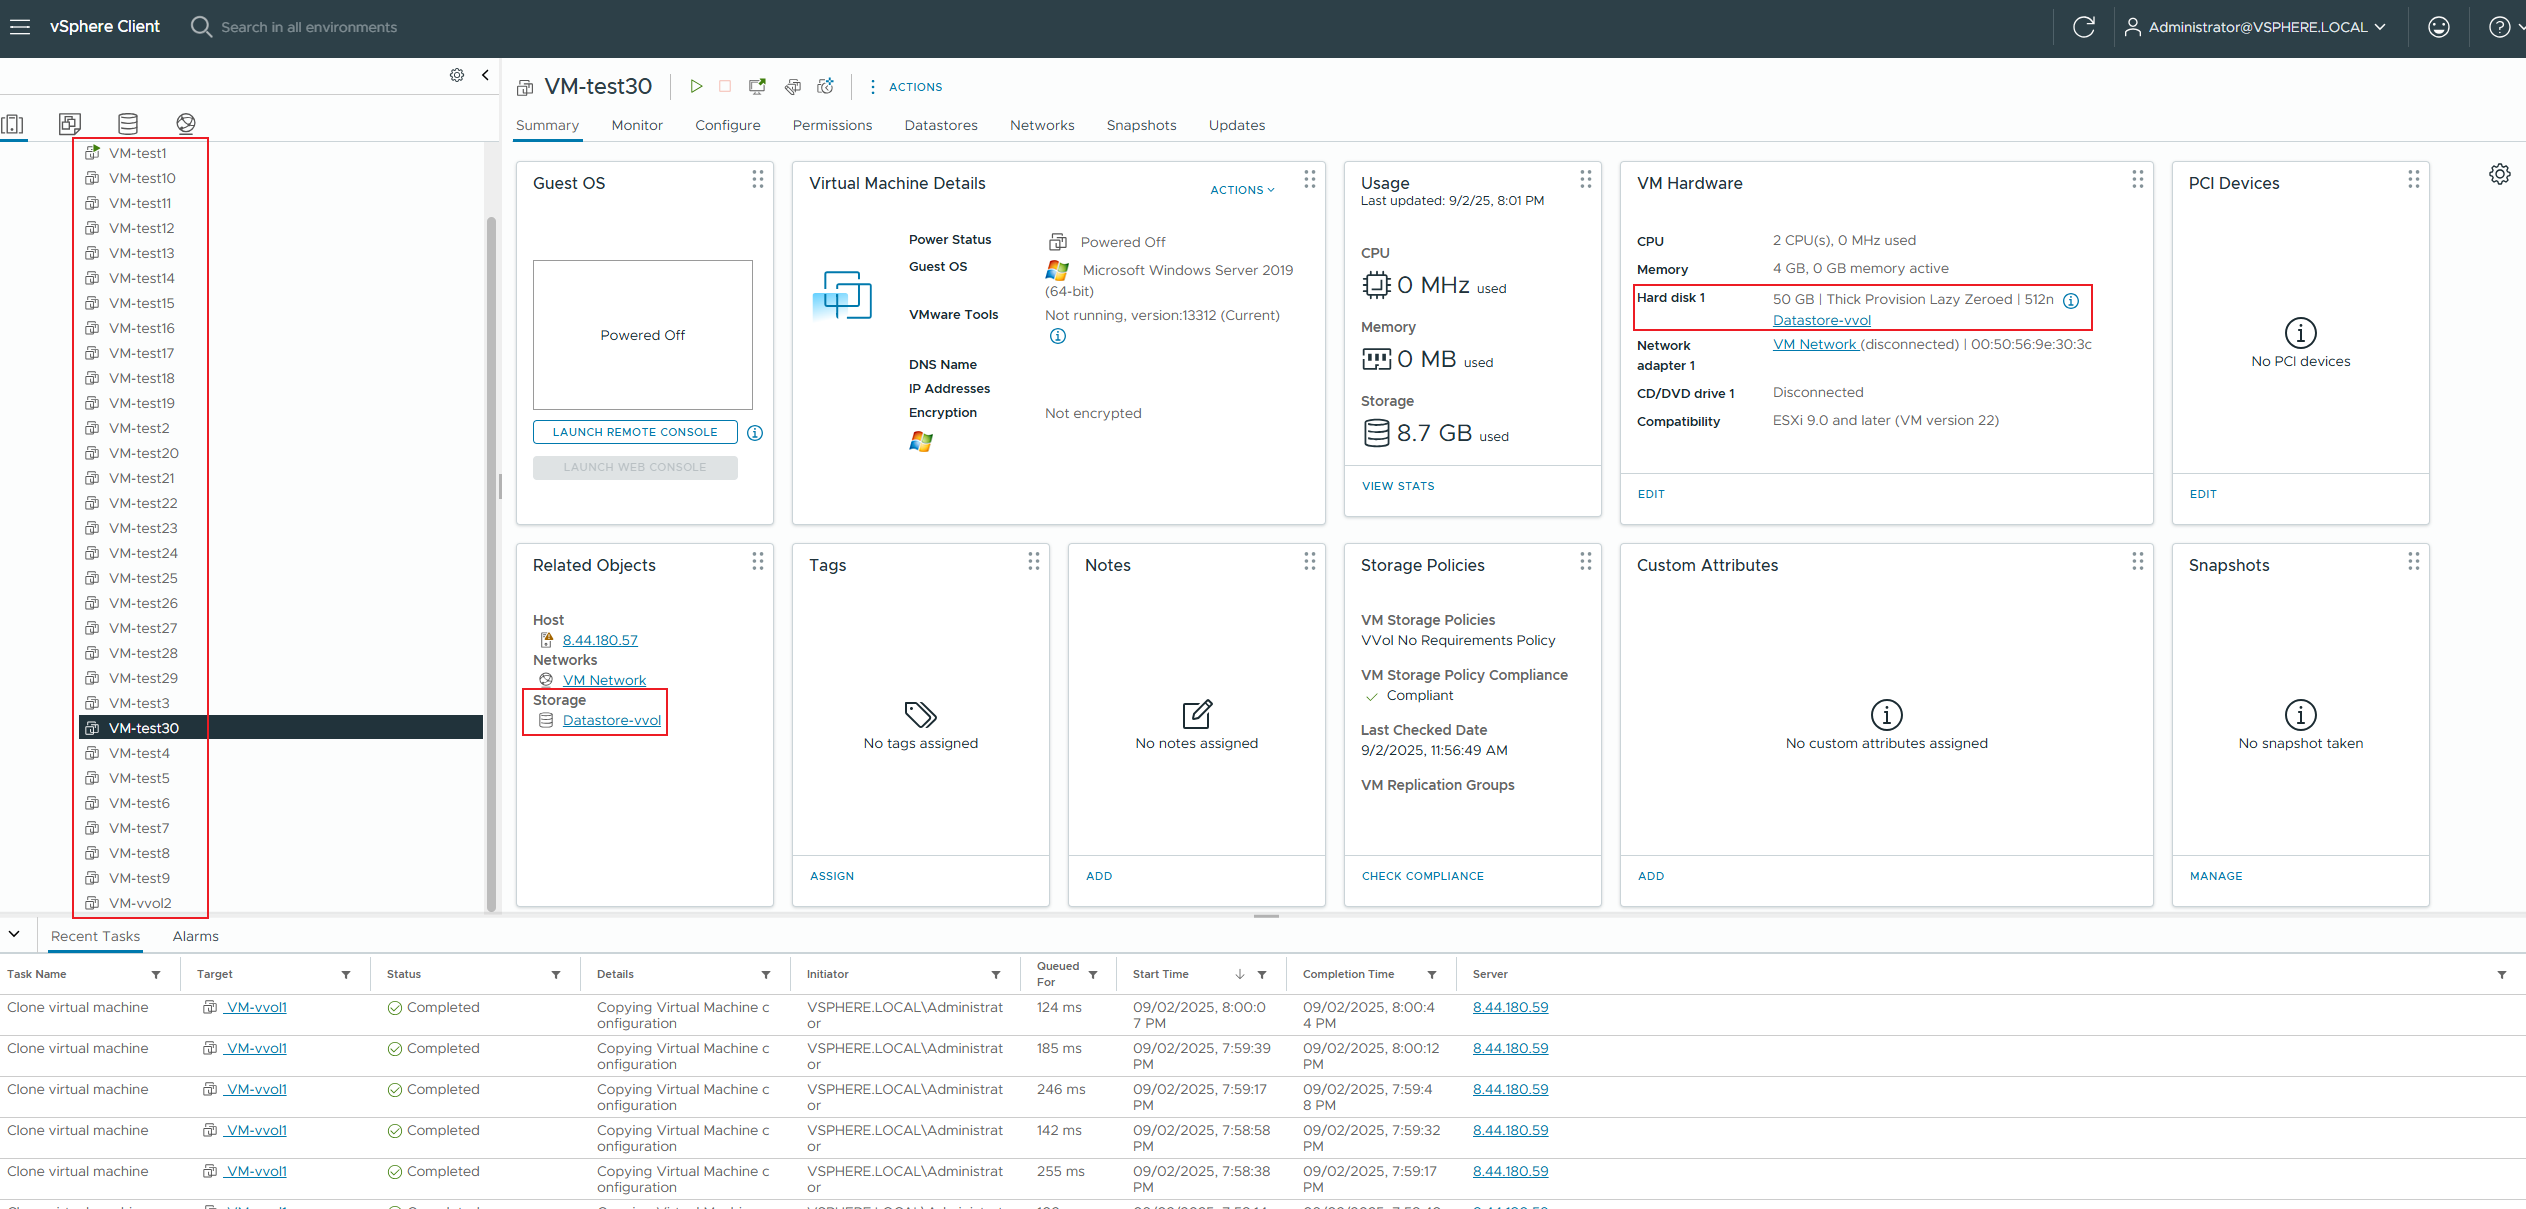
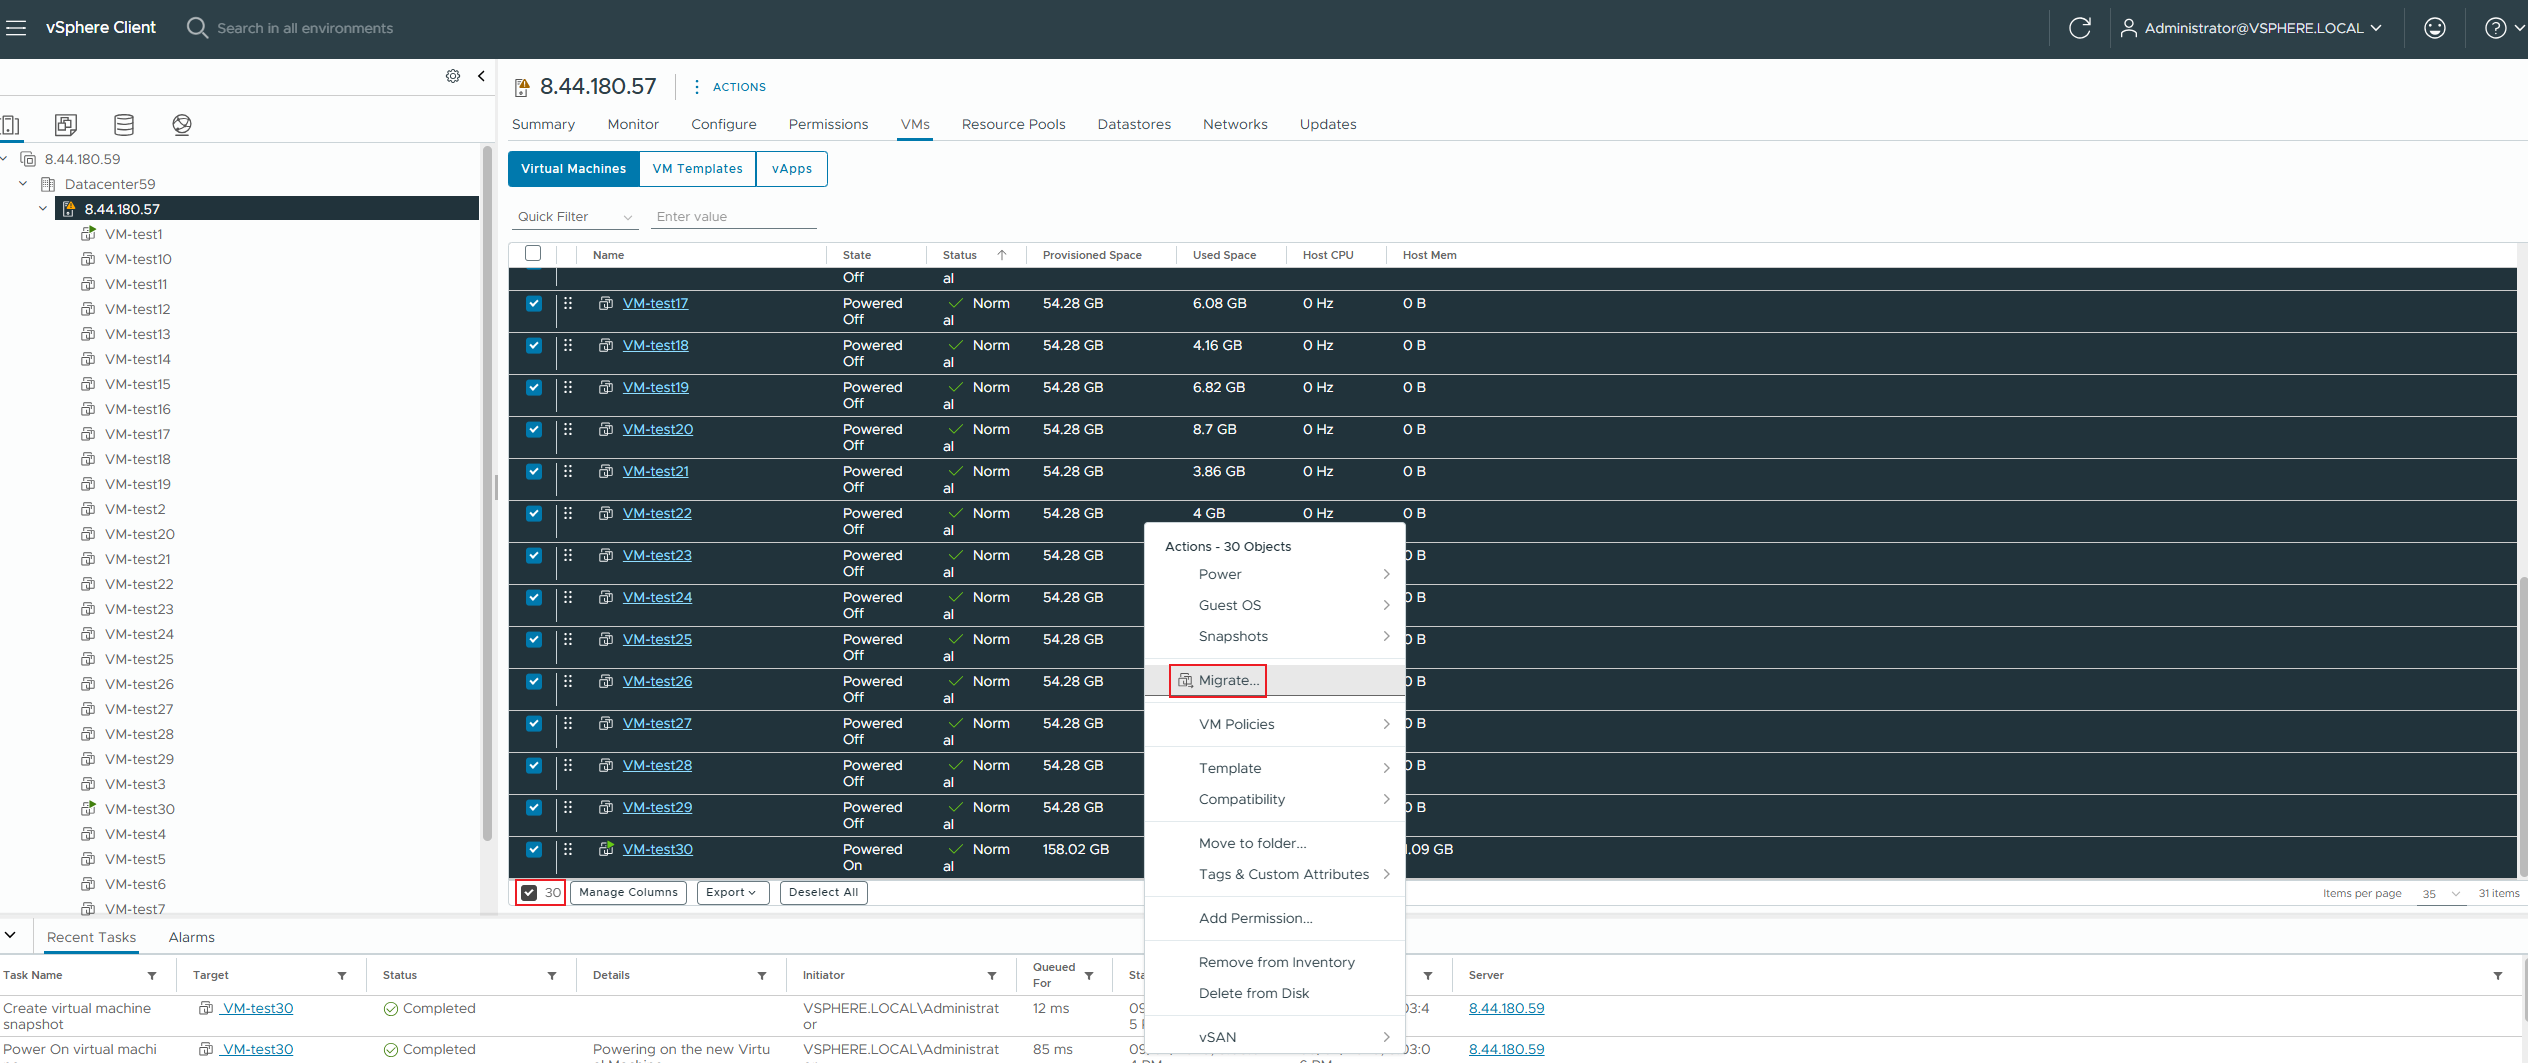
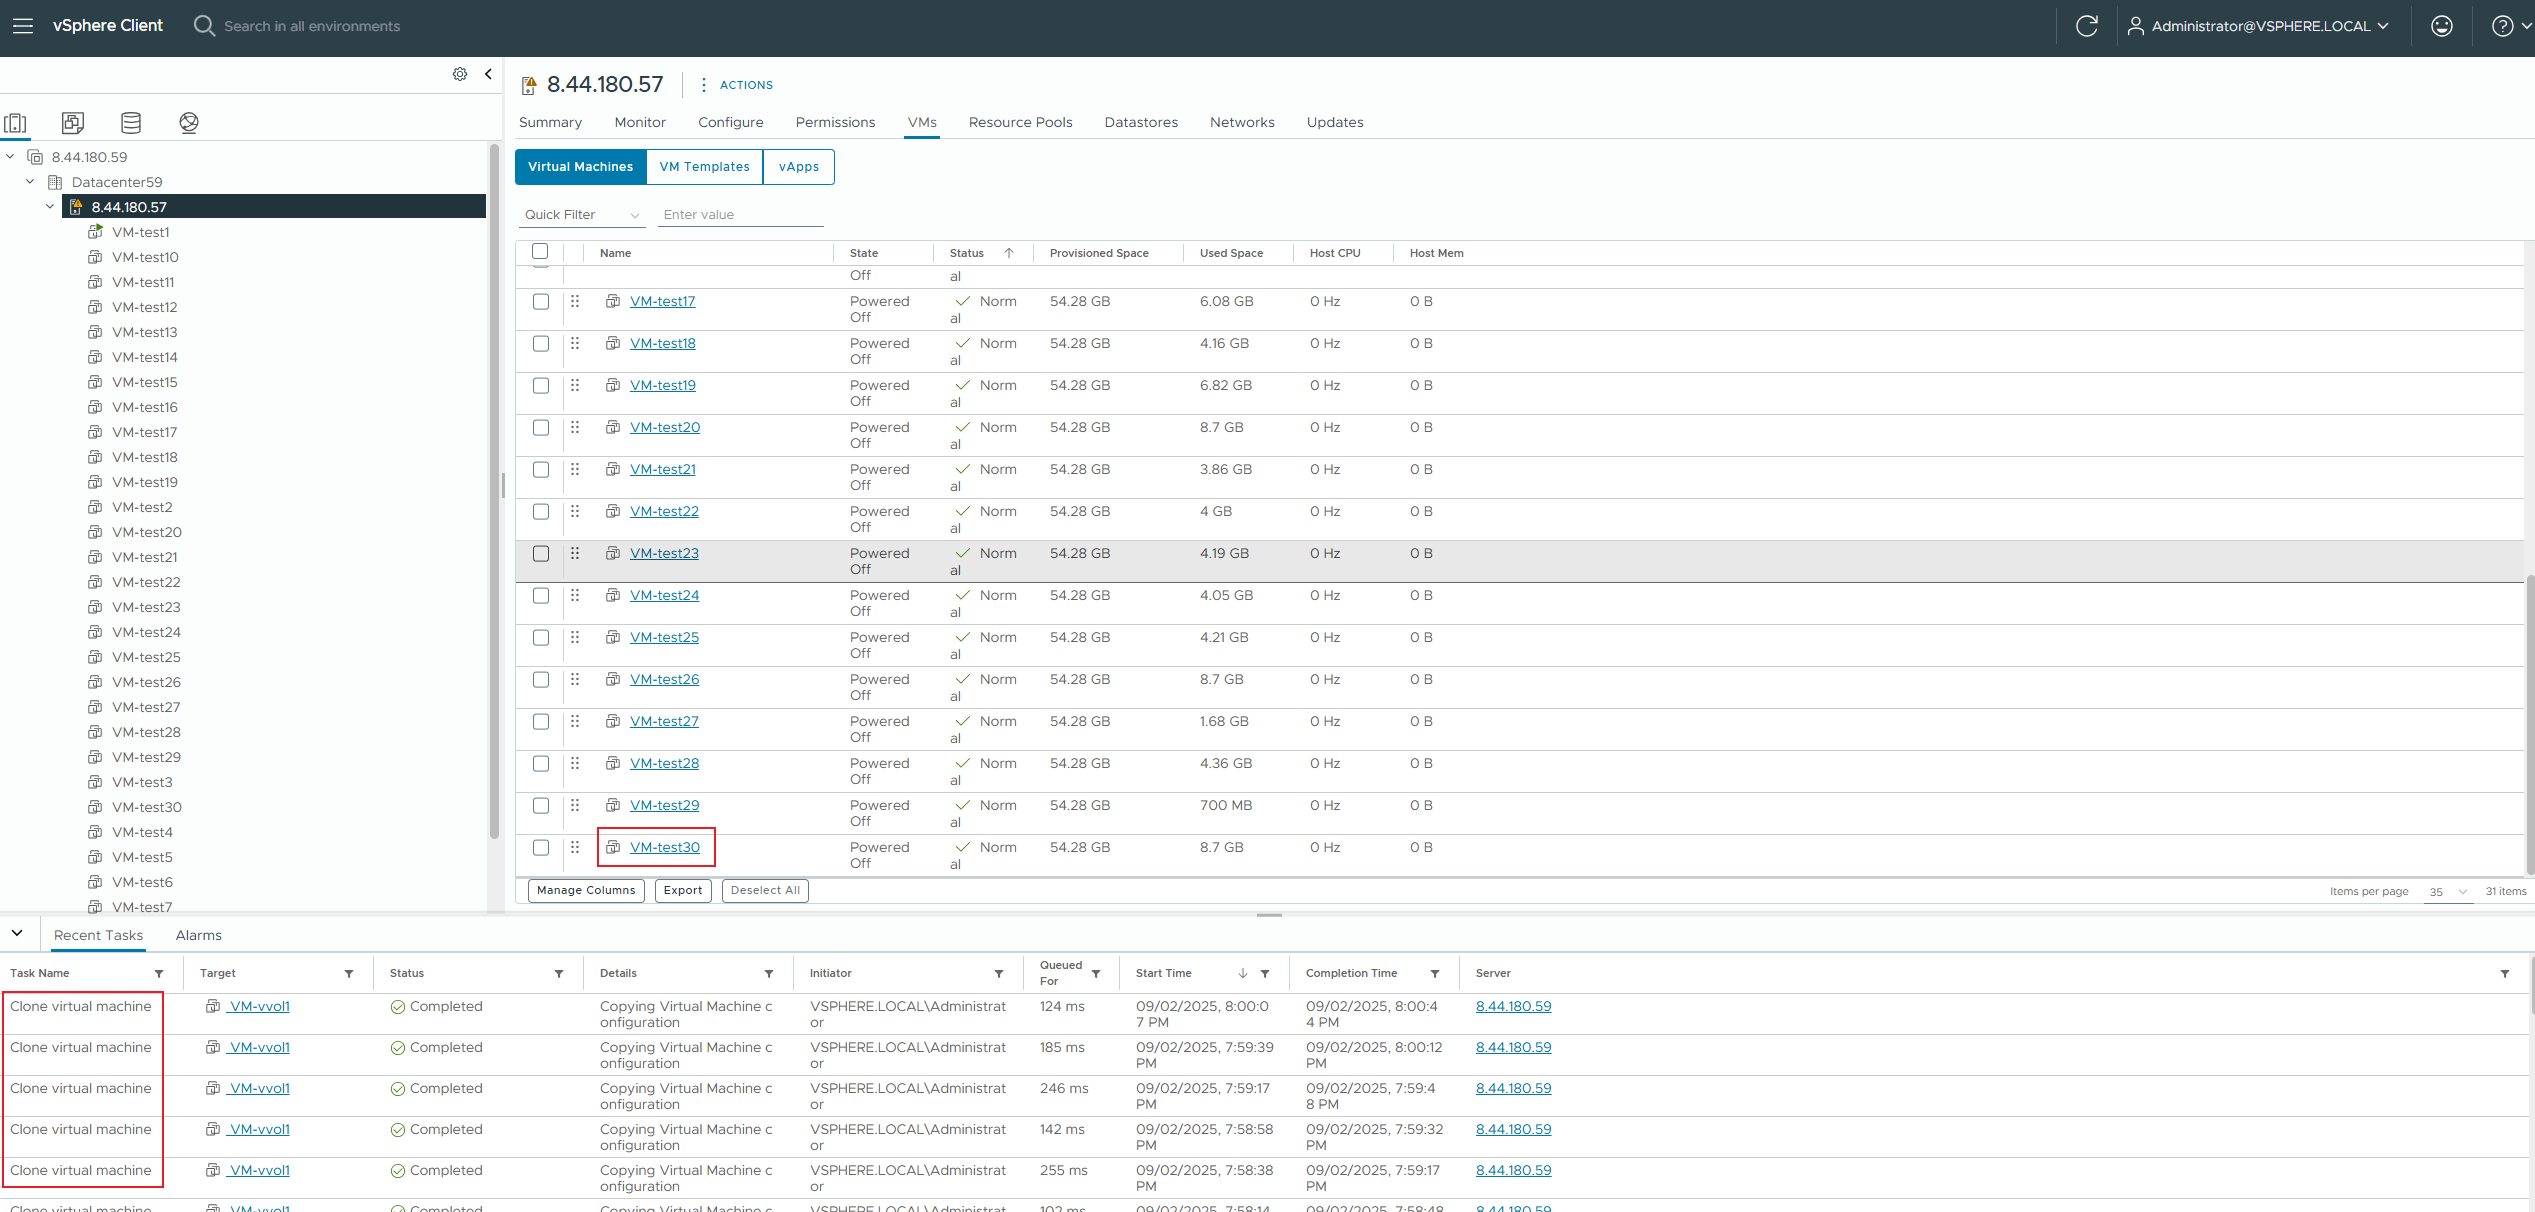
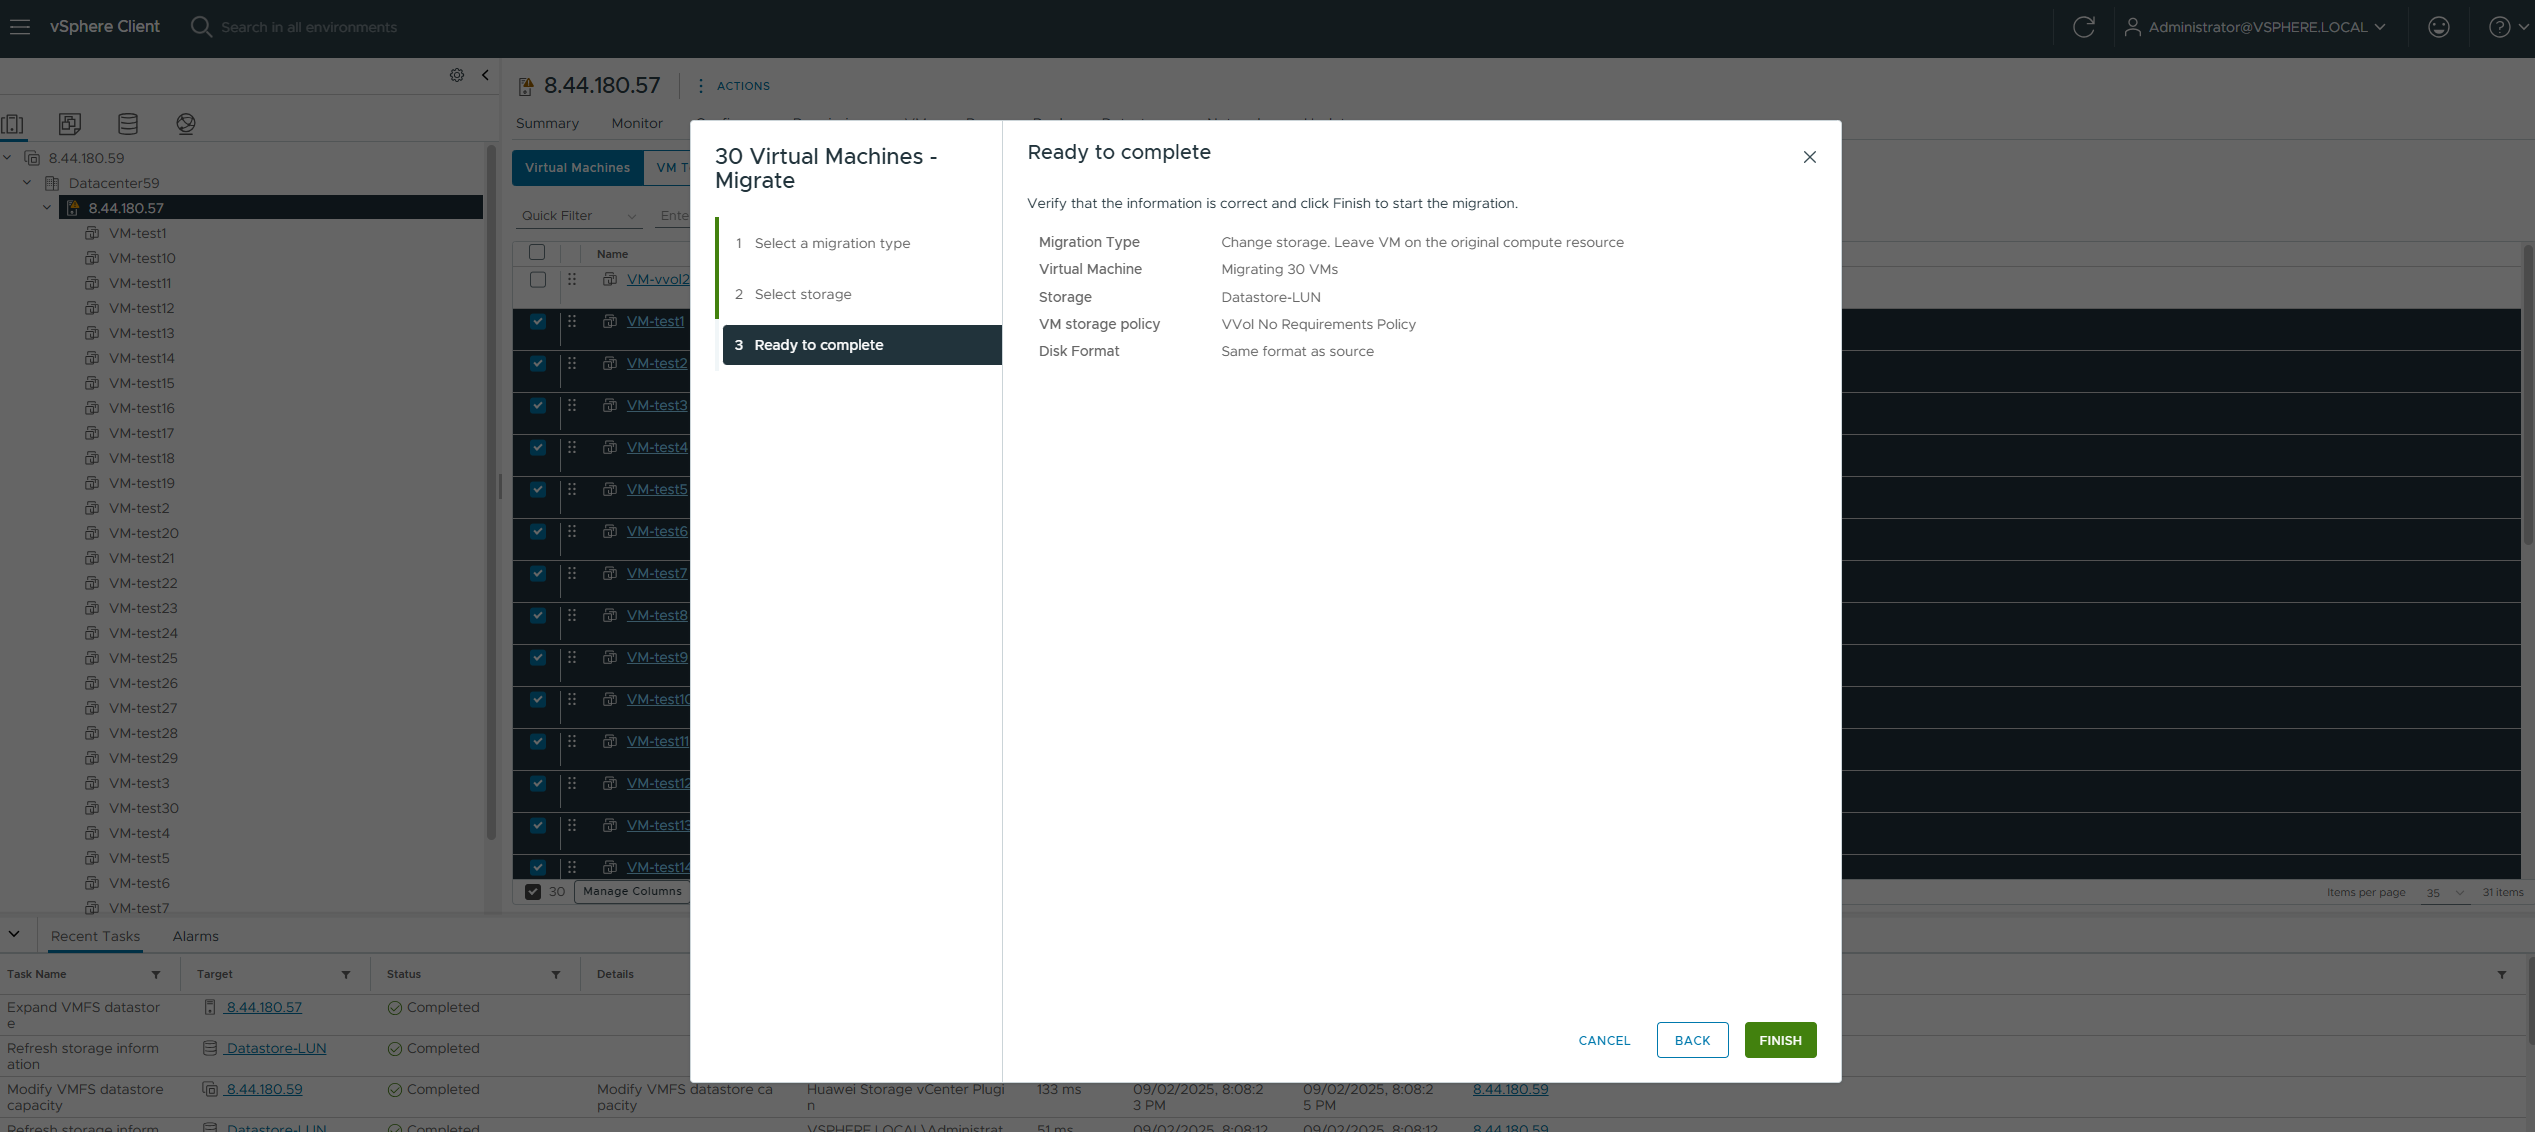
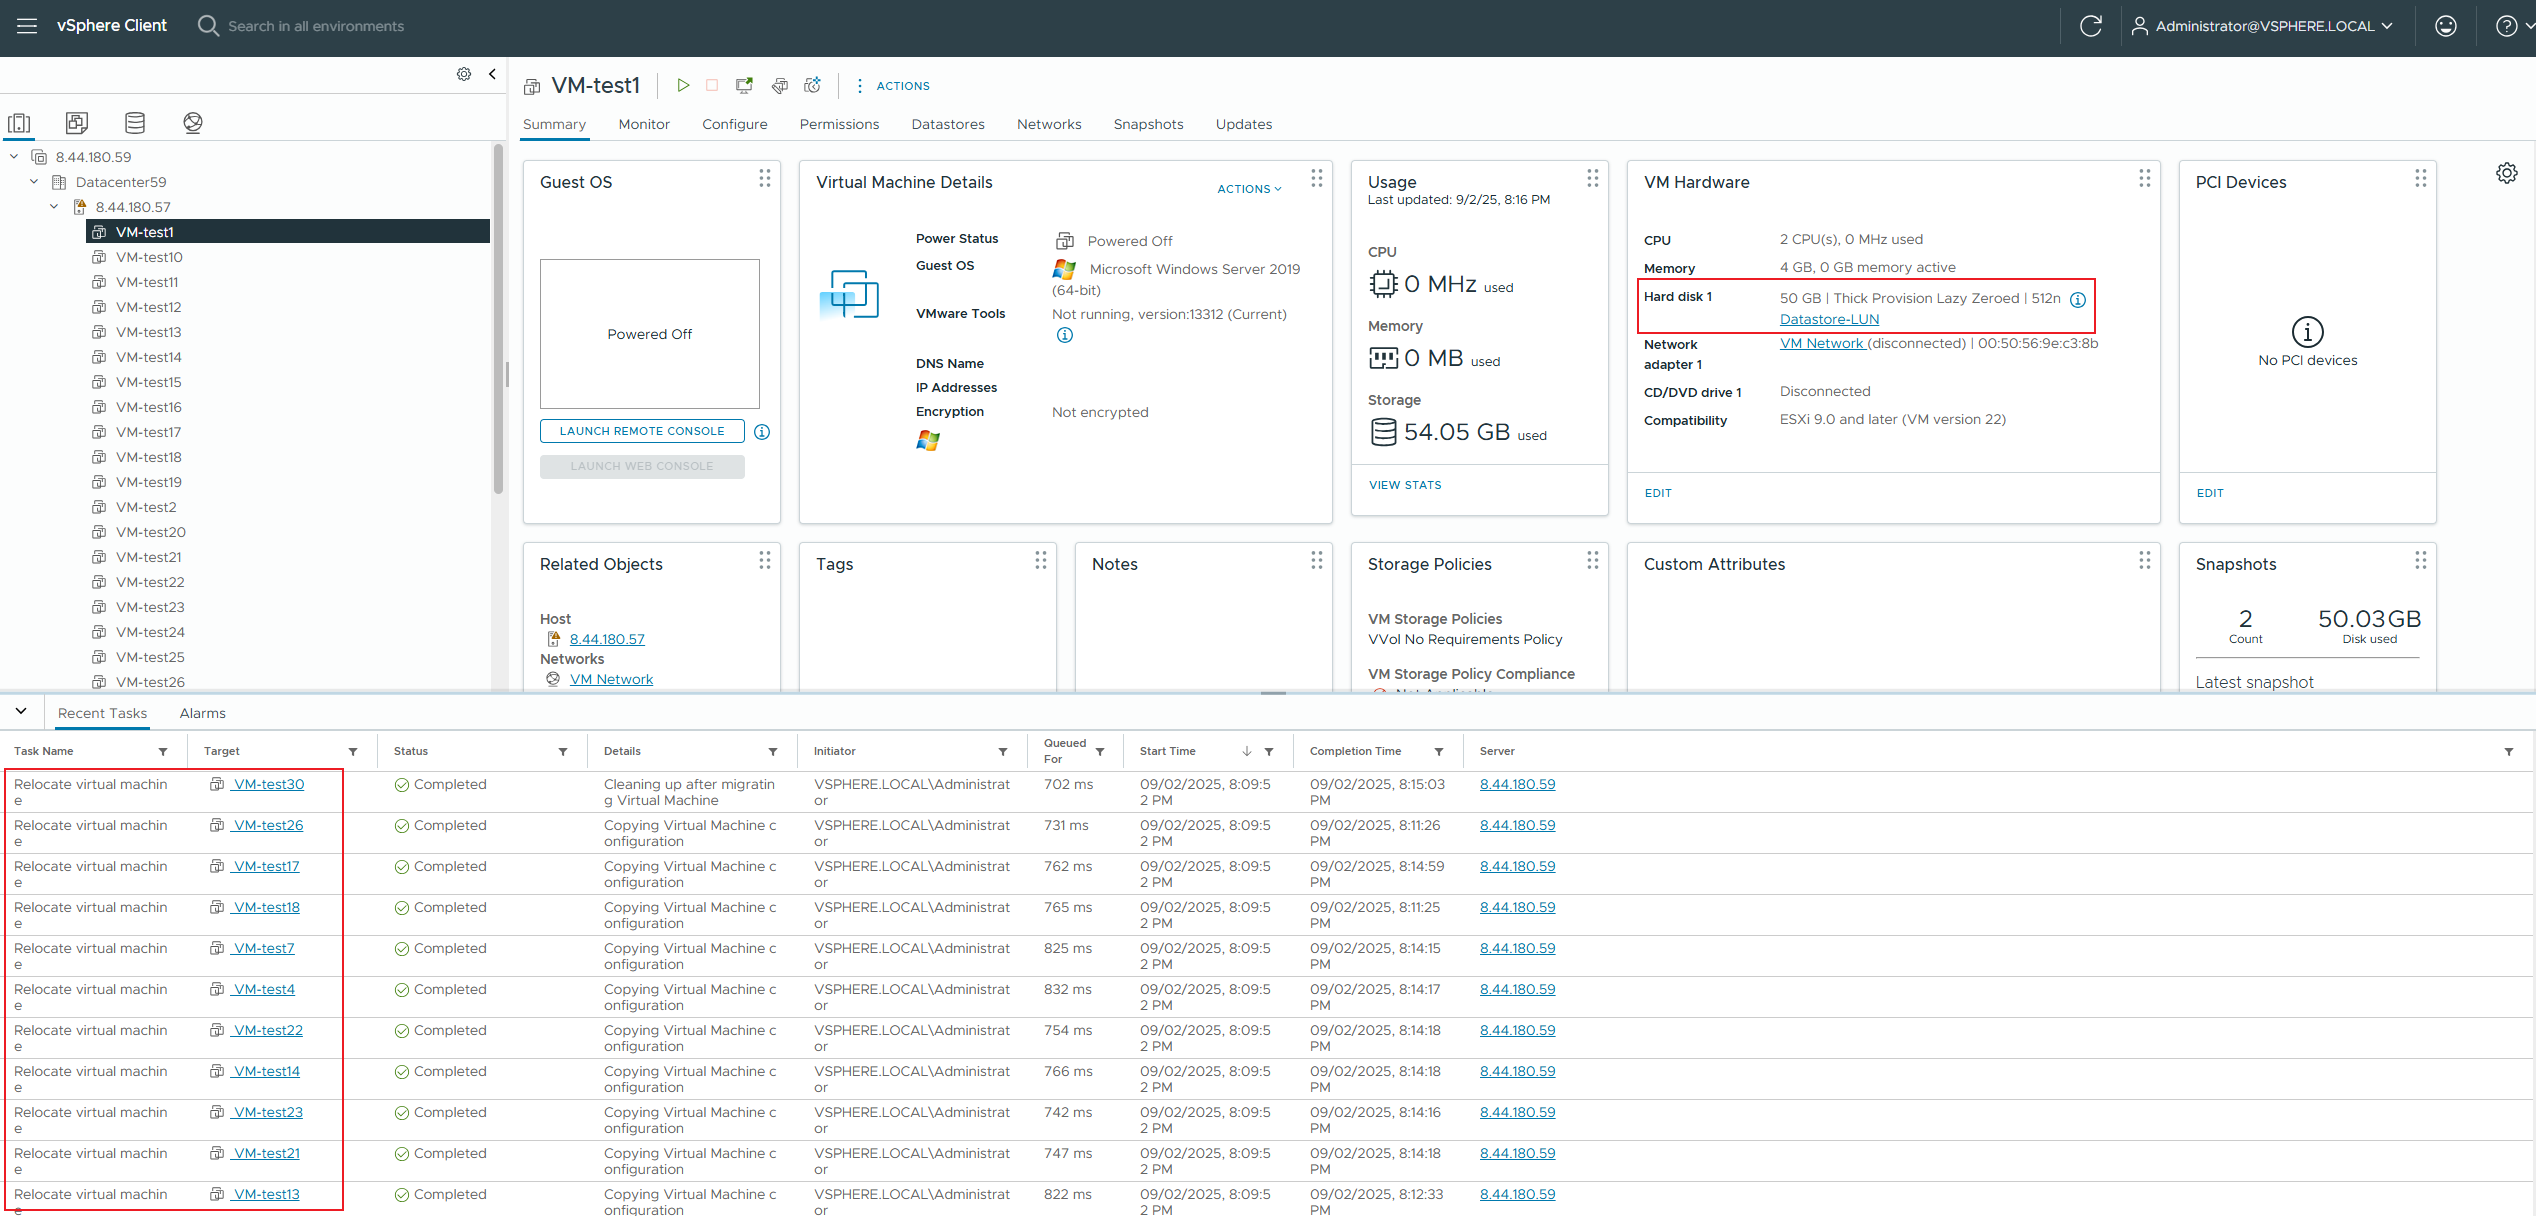
Test Procedure | 1. Clone 30 VVOL50GB thick-provisioned zeroed-out virtual machines from the VVOL_TEMPLATE virtual machine template to the vVols Datastore; 2. Migrate this virtual machine online to the VMFS Datastore; 3. Check if the virtual machine is powered on normally. |
Expected Result | 1. Step 1: The VVOL virtual machine cloning was successful, and the VVol LUN for the virtual machine was created successfully. 2. Step 2: The virtual machine migration was successful. 3. Step 3: The virtual machine is operating normally. |
Test Record |

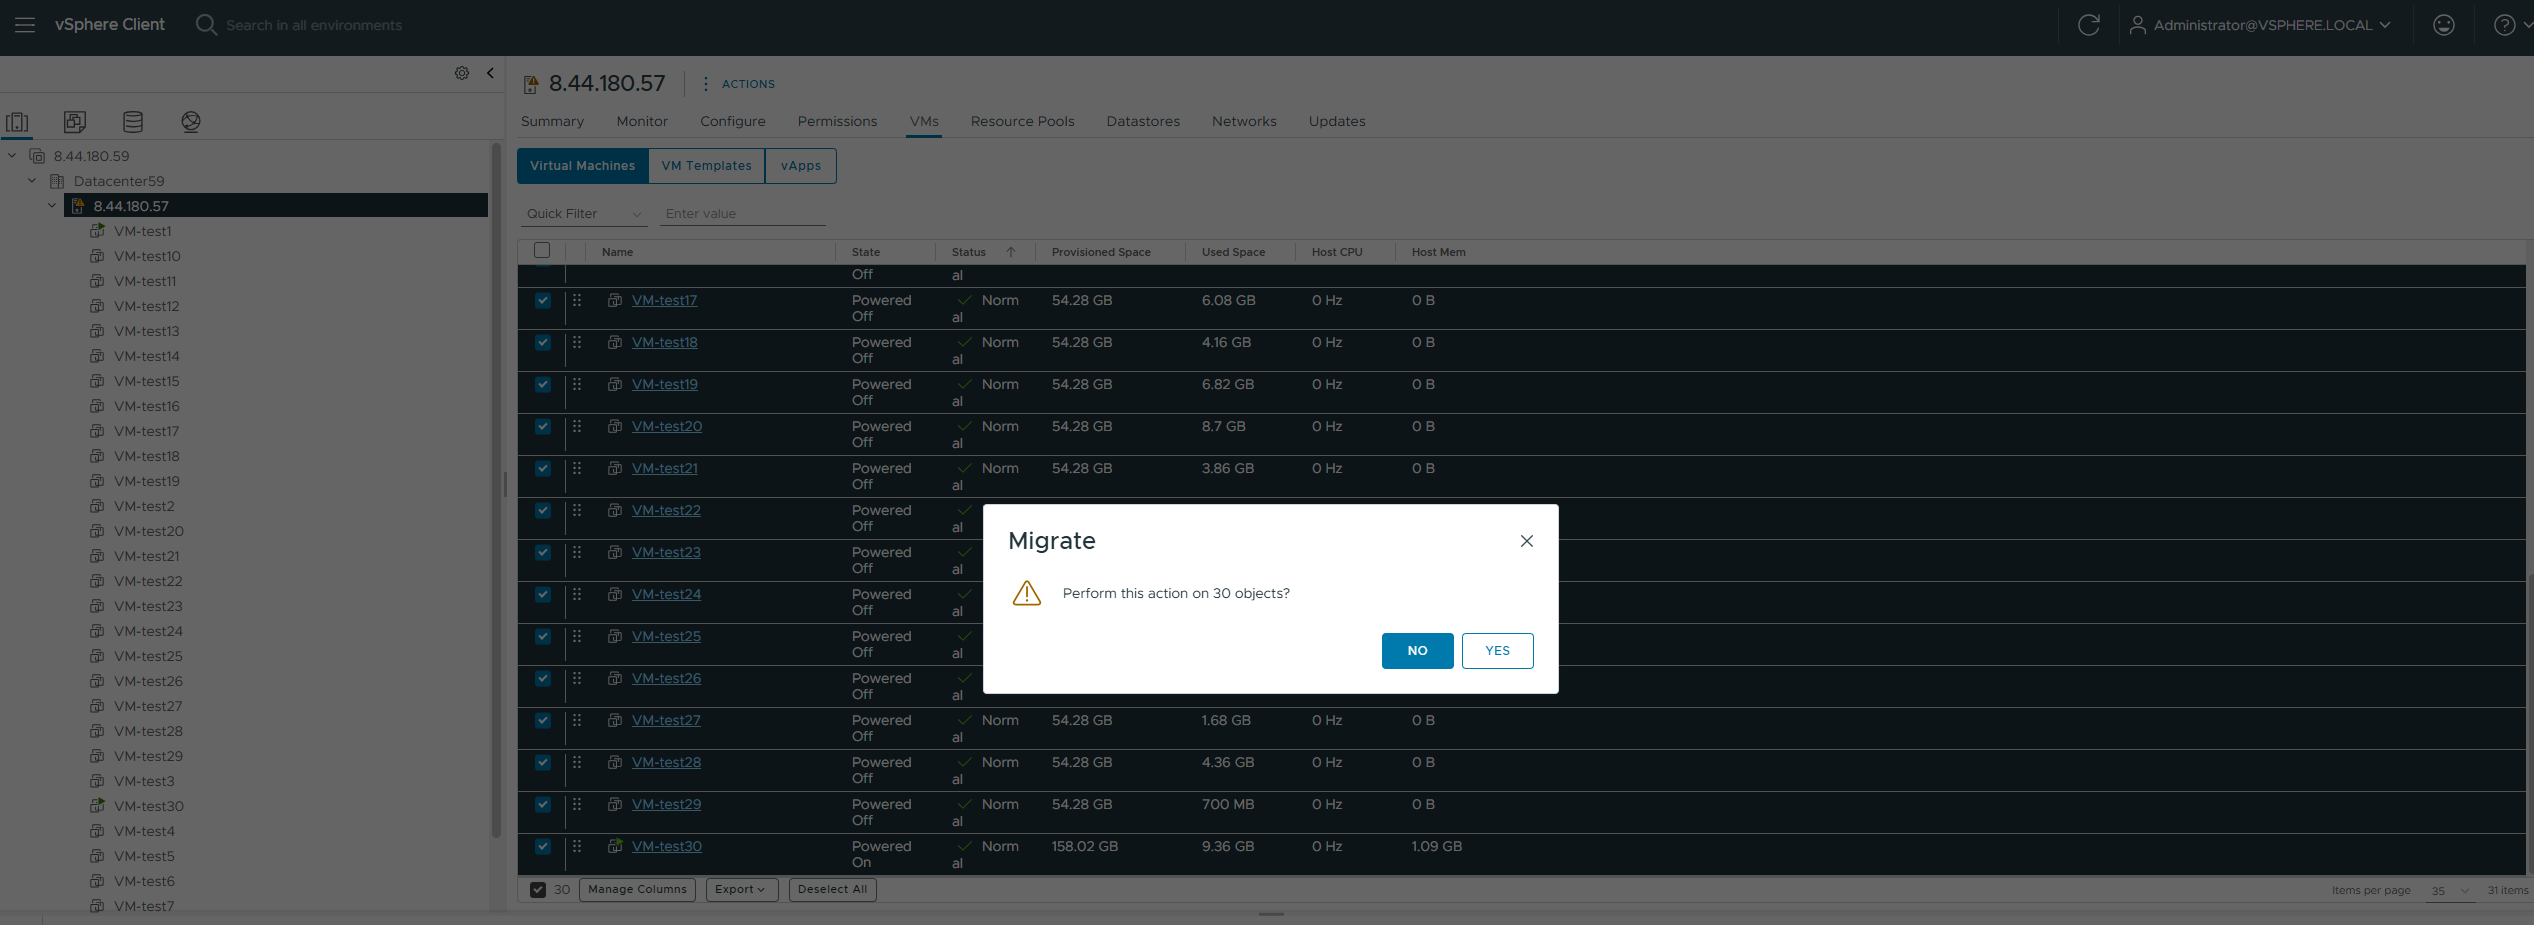


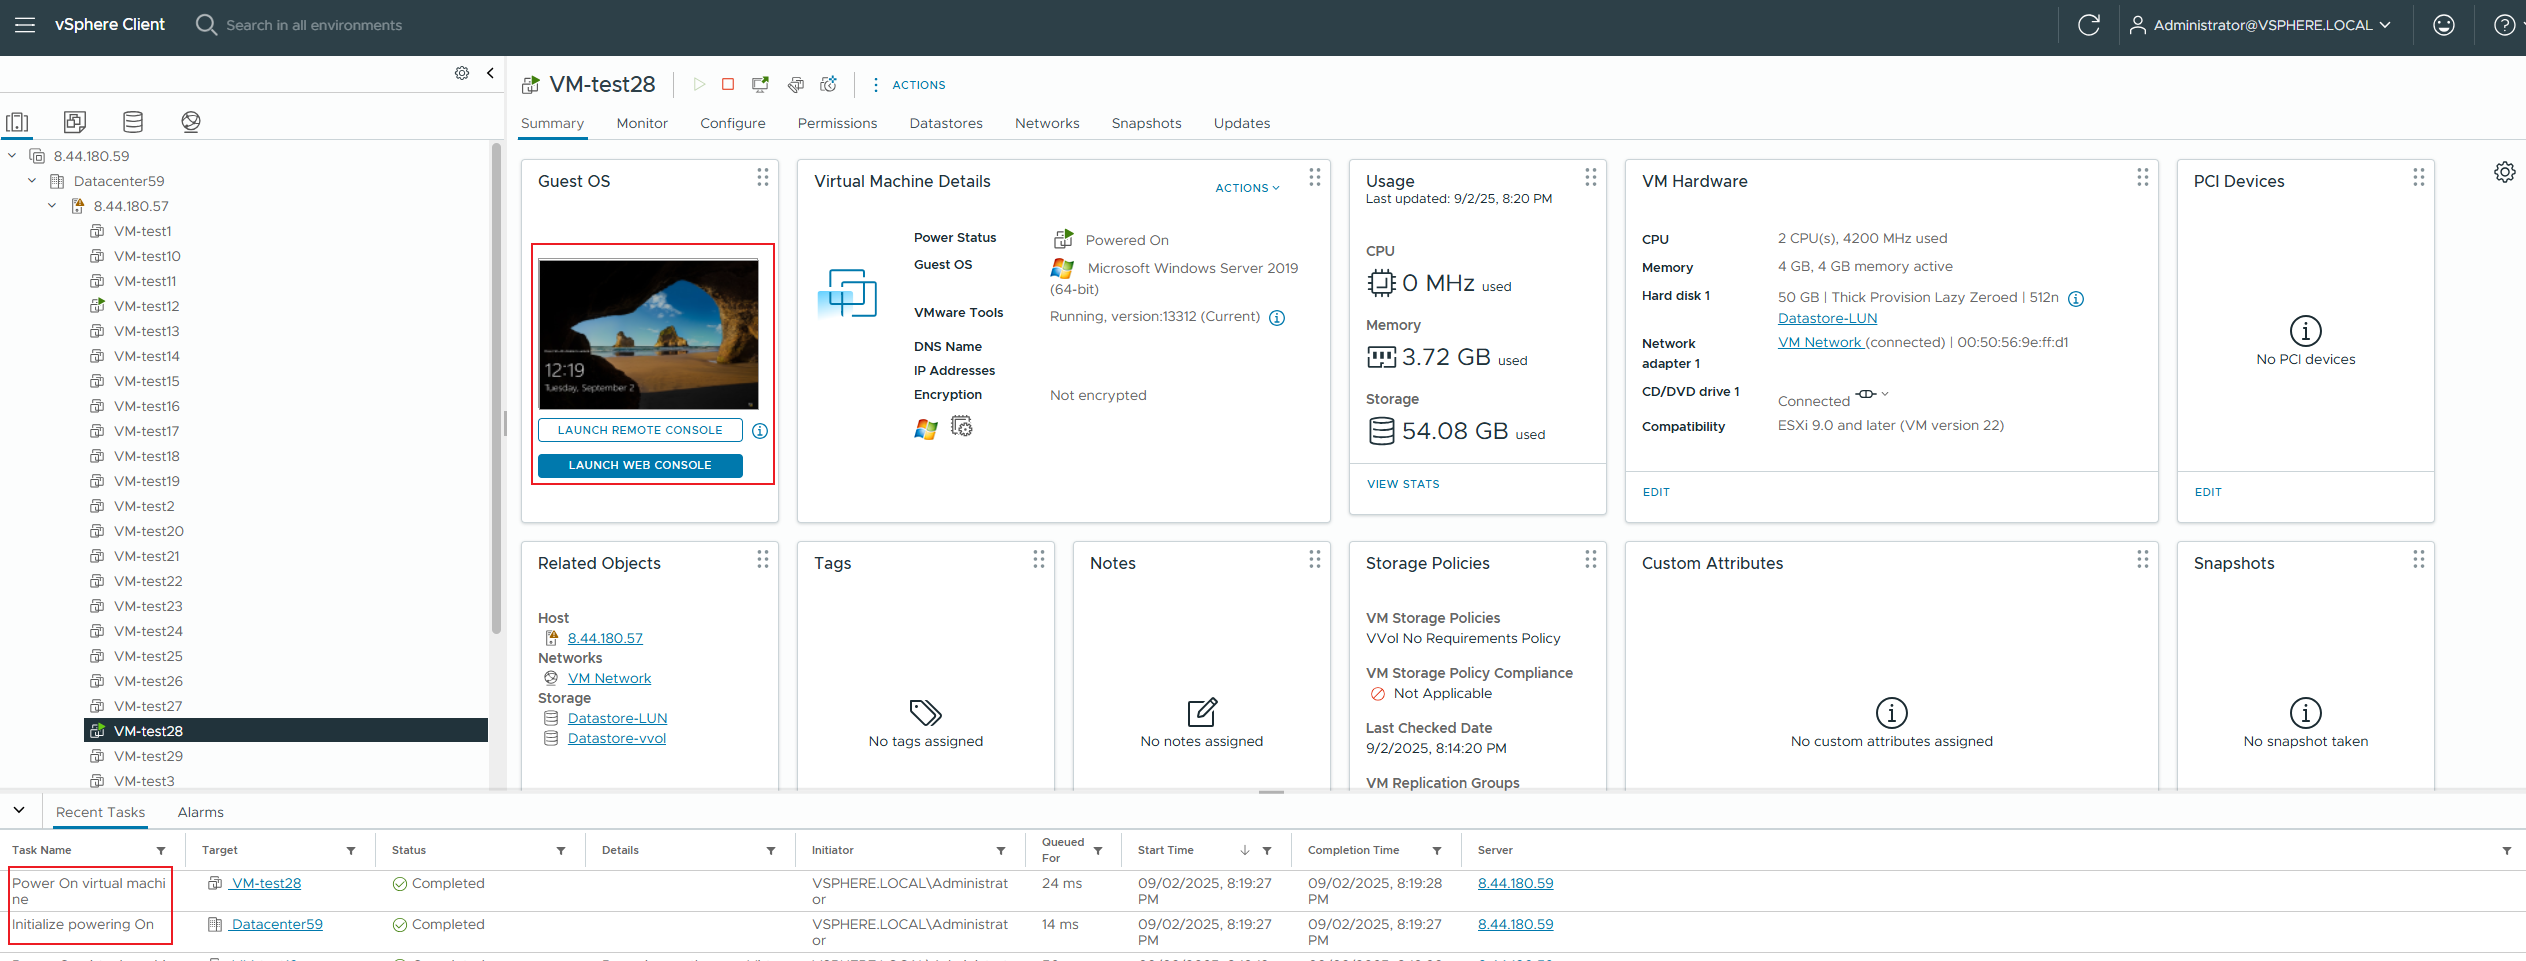 |
Test Conclusion | PASS |
2.3 Multiple concurrent migrations with snapshots between vVols Datastore and VMFS Datastore
Test Purpose | Whether the multi-concurrent snapshot migration between vVols Datastore and VMFS Datastore is successful. (Protocol: FC) |
Test Networking | Storage and VMware ESXi Compatibility Test Networking |
Prerequisites | 1. The VASA Provider has been installed and configured. 2. The VASA Provider has been registered with vCenter and initial configuration is complete. 3. The host, storage, and networking have been completed. |
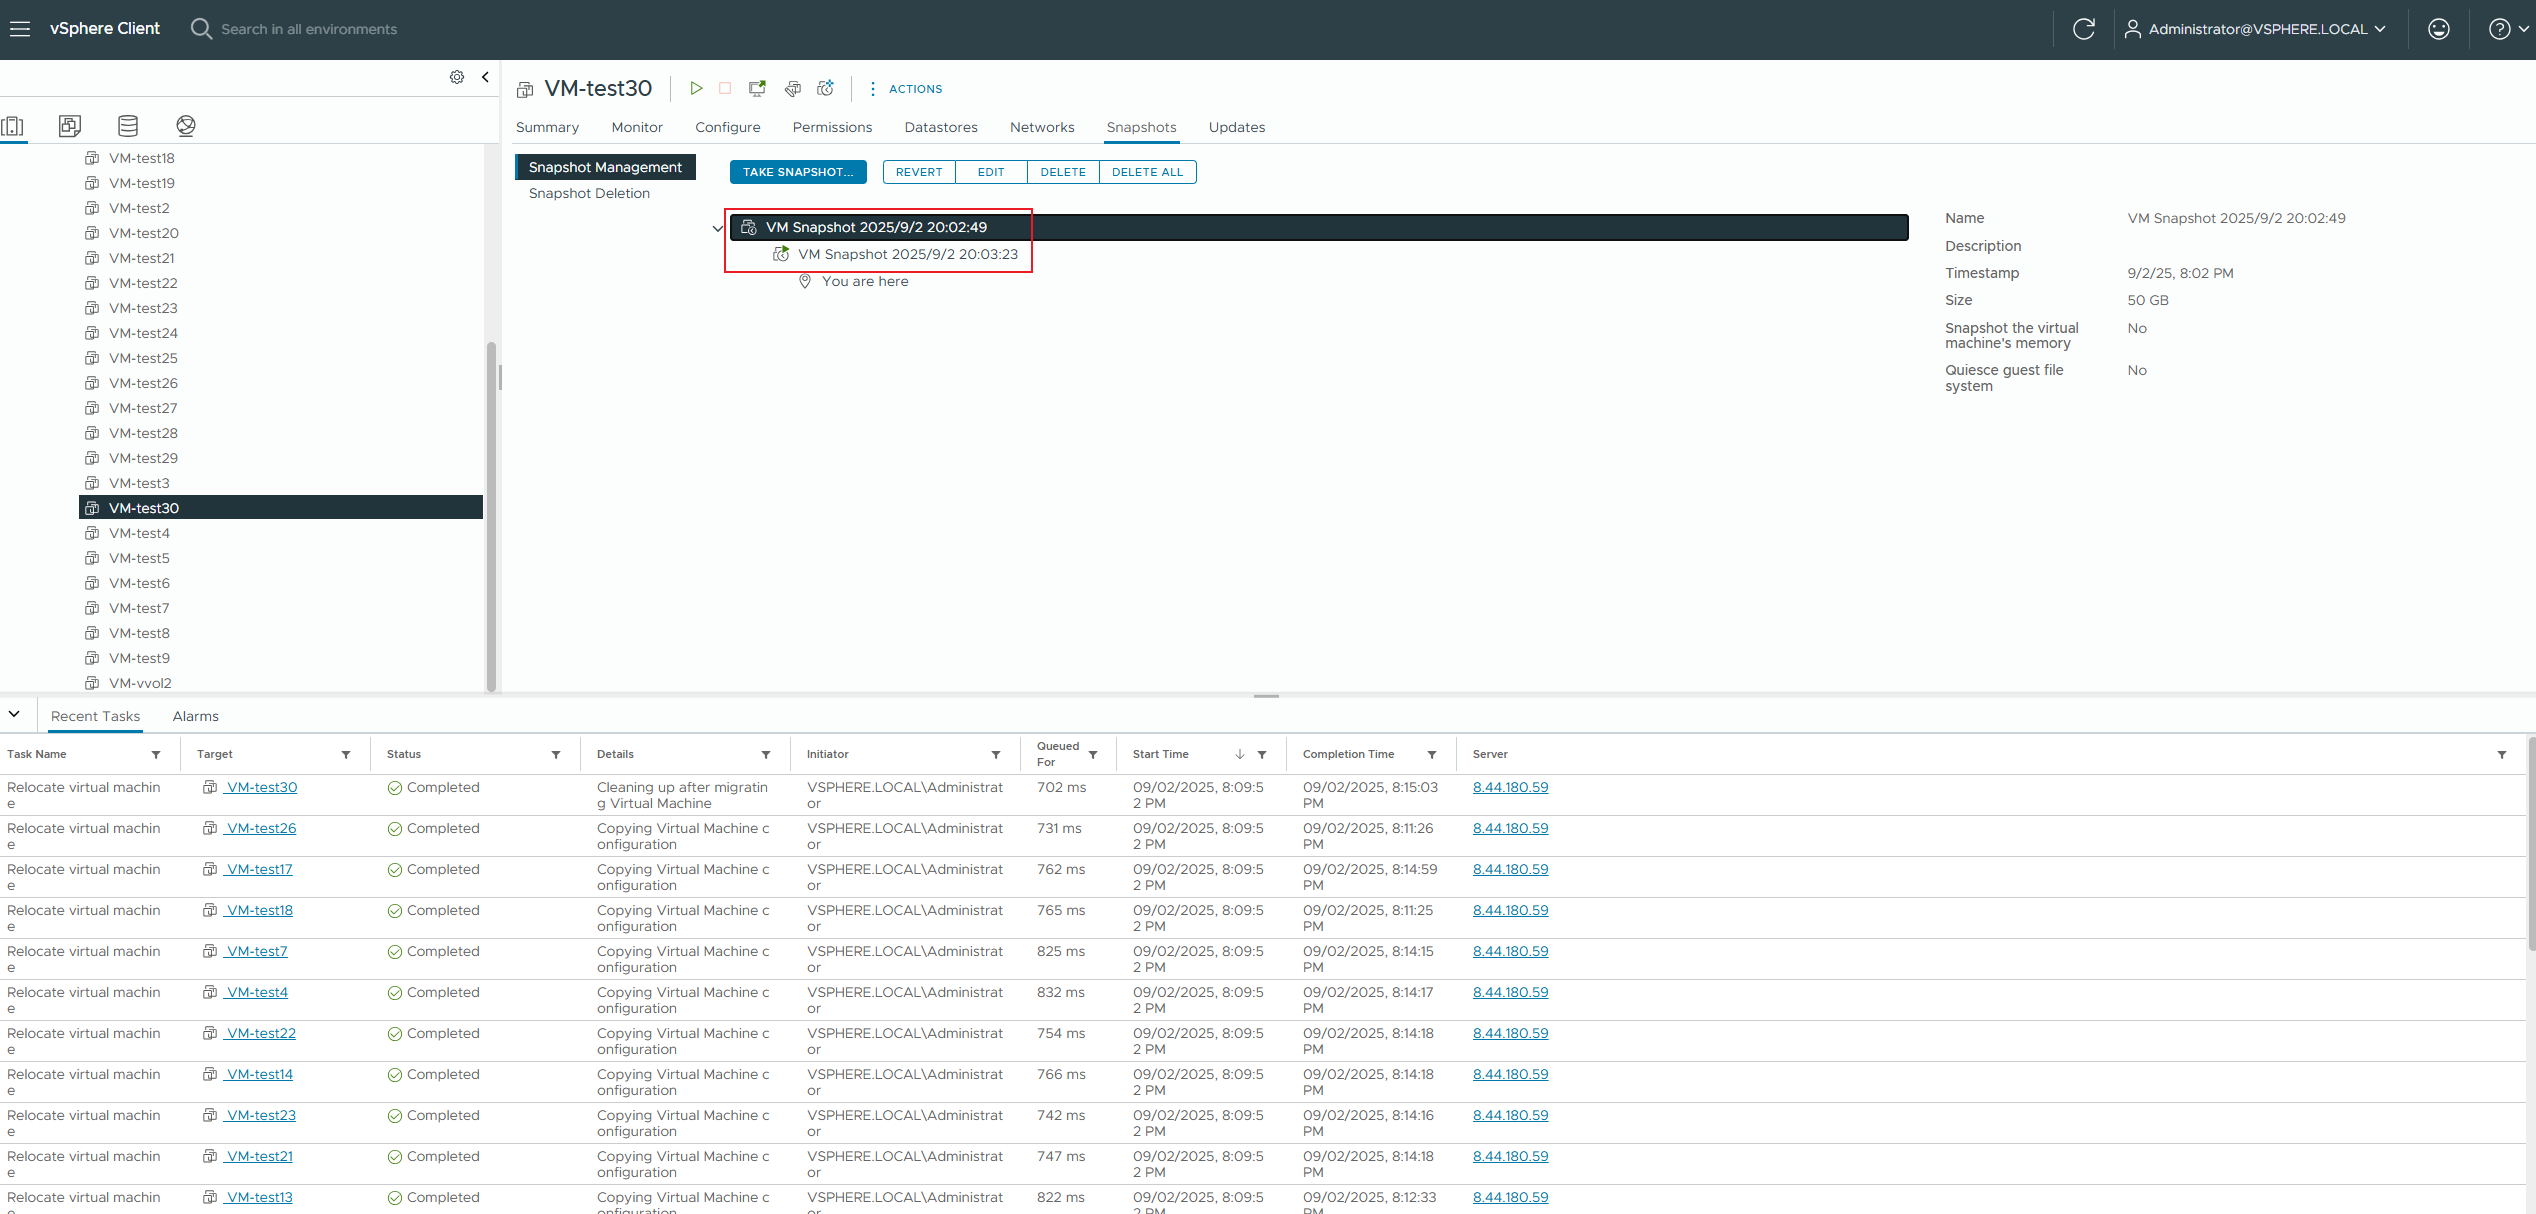
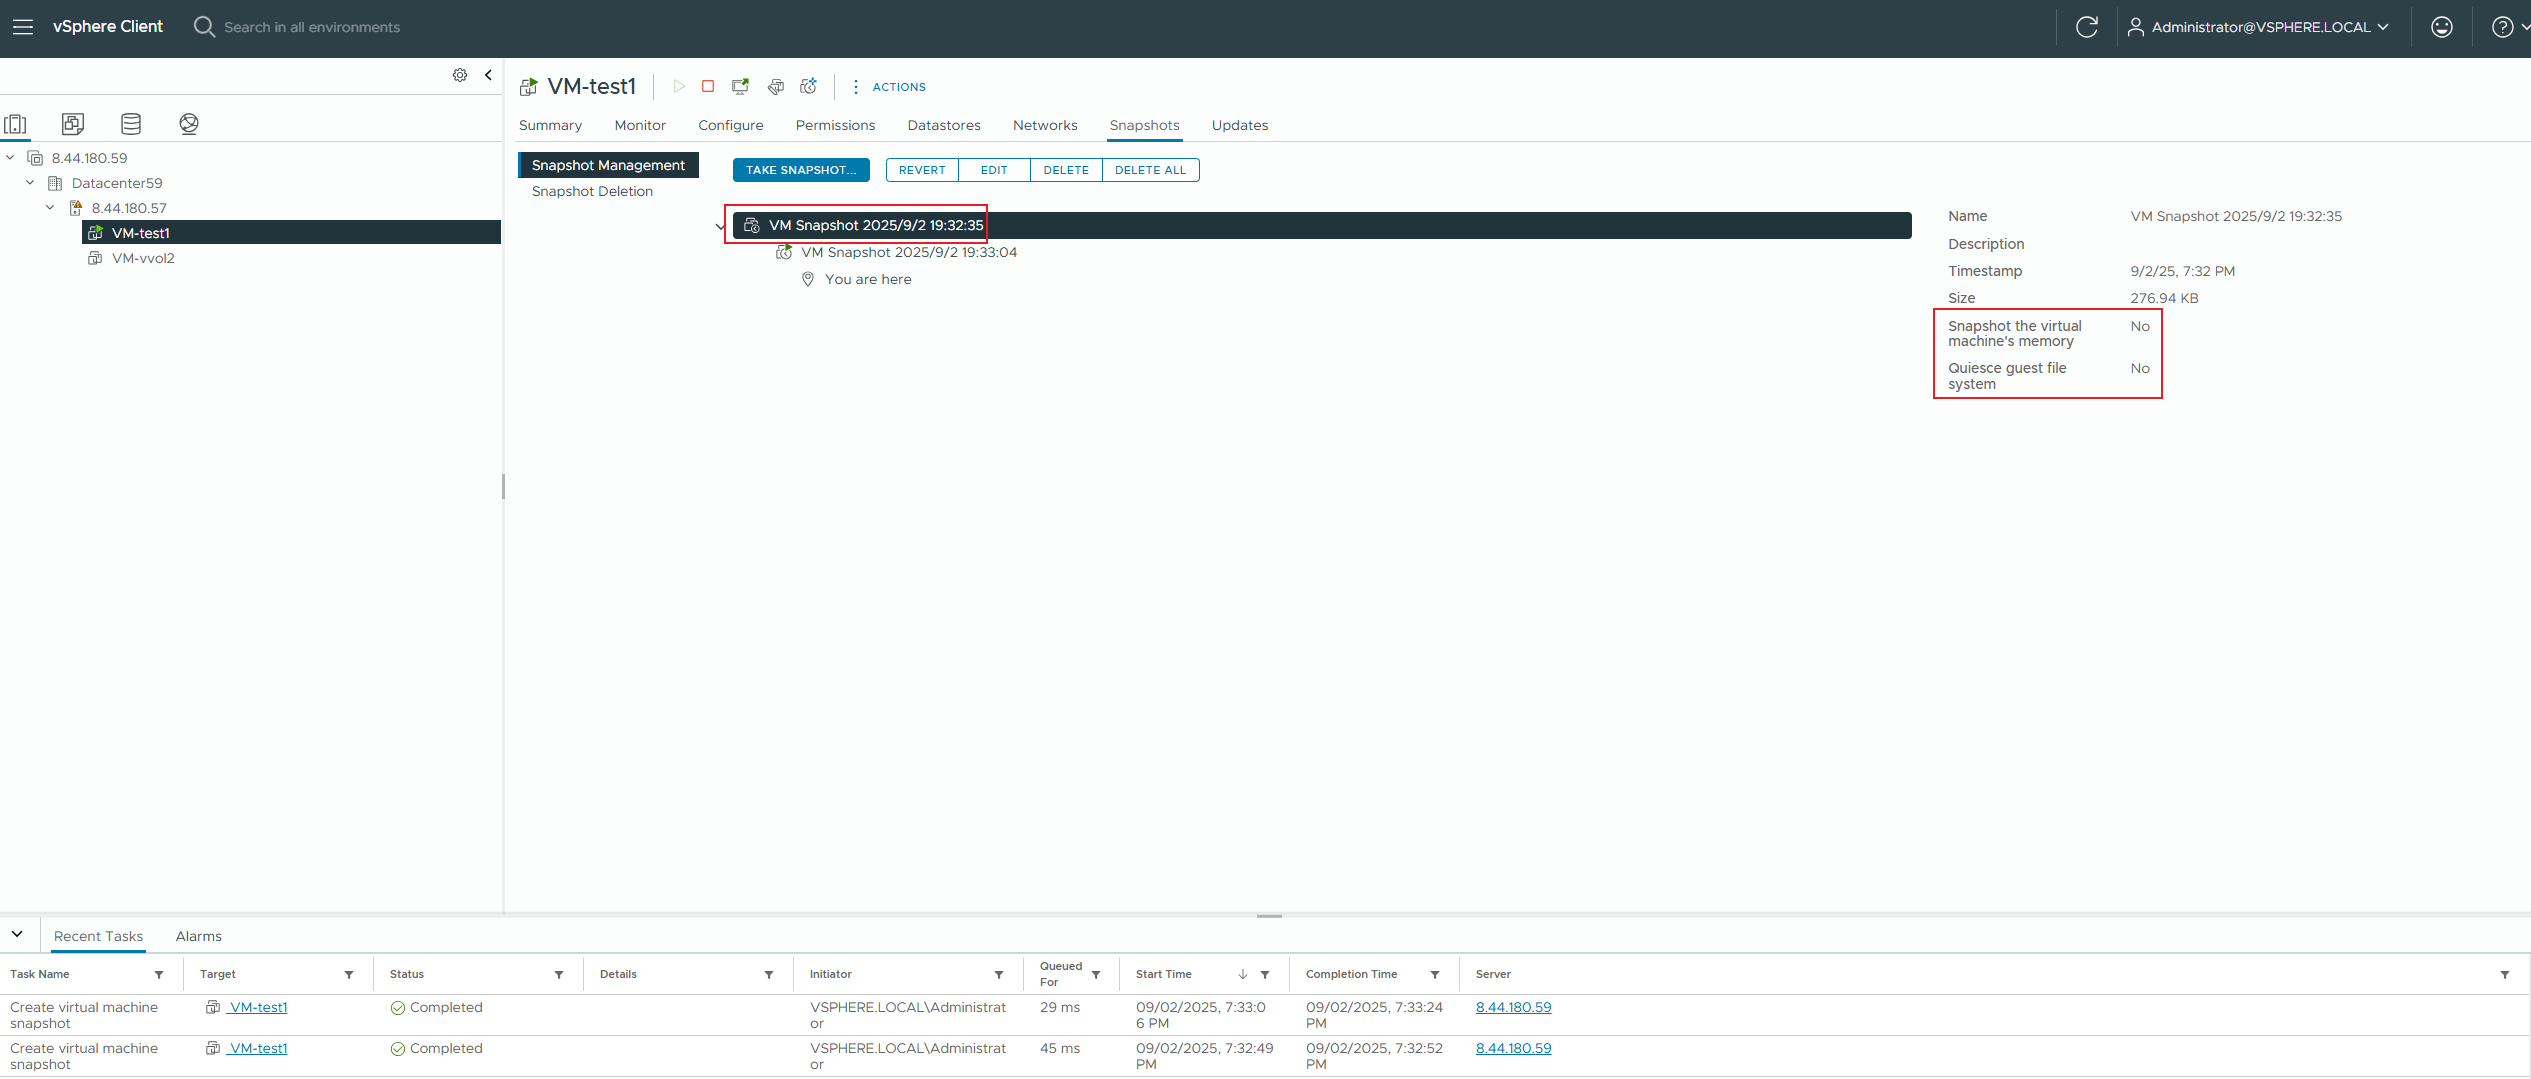
Test Procedure | 1. Clone 30 VVOL50GB thick-provisioned zeroed-out virtual machines from the VVOL_TEMPLATE virtual machine template to the vVols Datastore; 2. Create a regular snapshot and a memory snapshot; 3. Migrate this virtual machine online to the VMFS Datastore; 4. Check if the virtual machine is powered on normally. |
Expected Result | 1. Step 1: The VVOL virtual machine cloning was successful, and the VVol LUN for the virtual machine was created successfully. 2. Step 2: The snapshot was created successfully, and the array generated the corresponding volume. 3. Step 3: The virtual machine migration was successful. 4. Step 4: The virtual machine is in a normal state. |
Test Record |
 2. Create a regular snapshot and a memory snapshot; 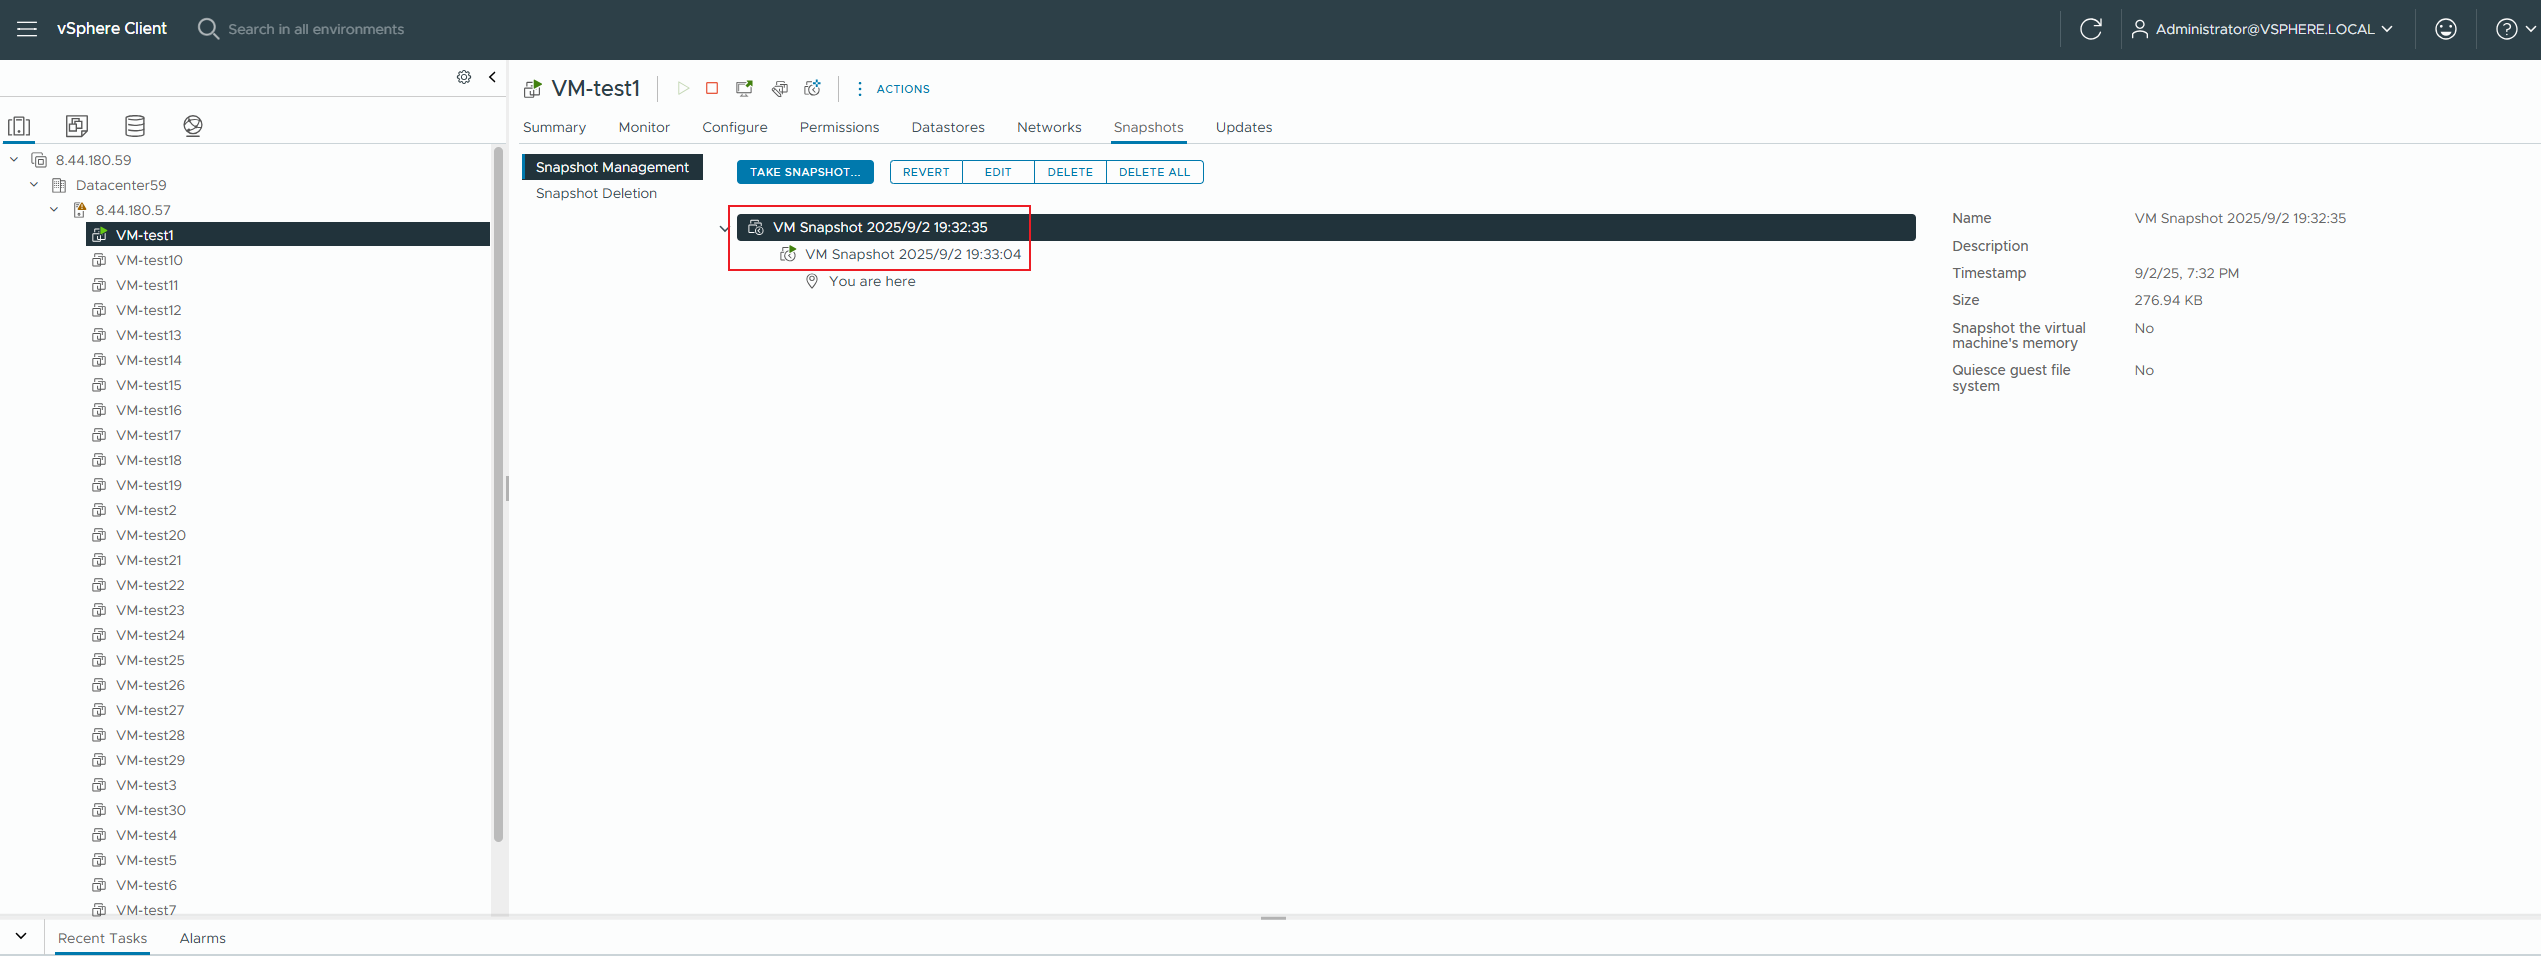
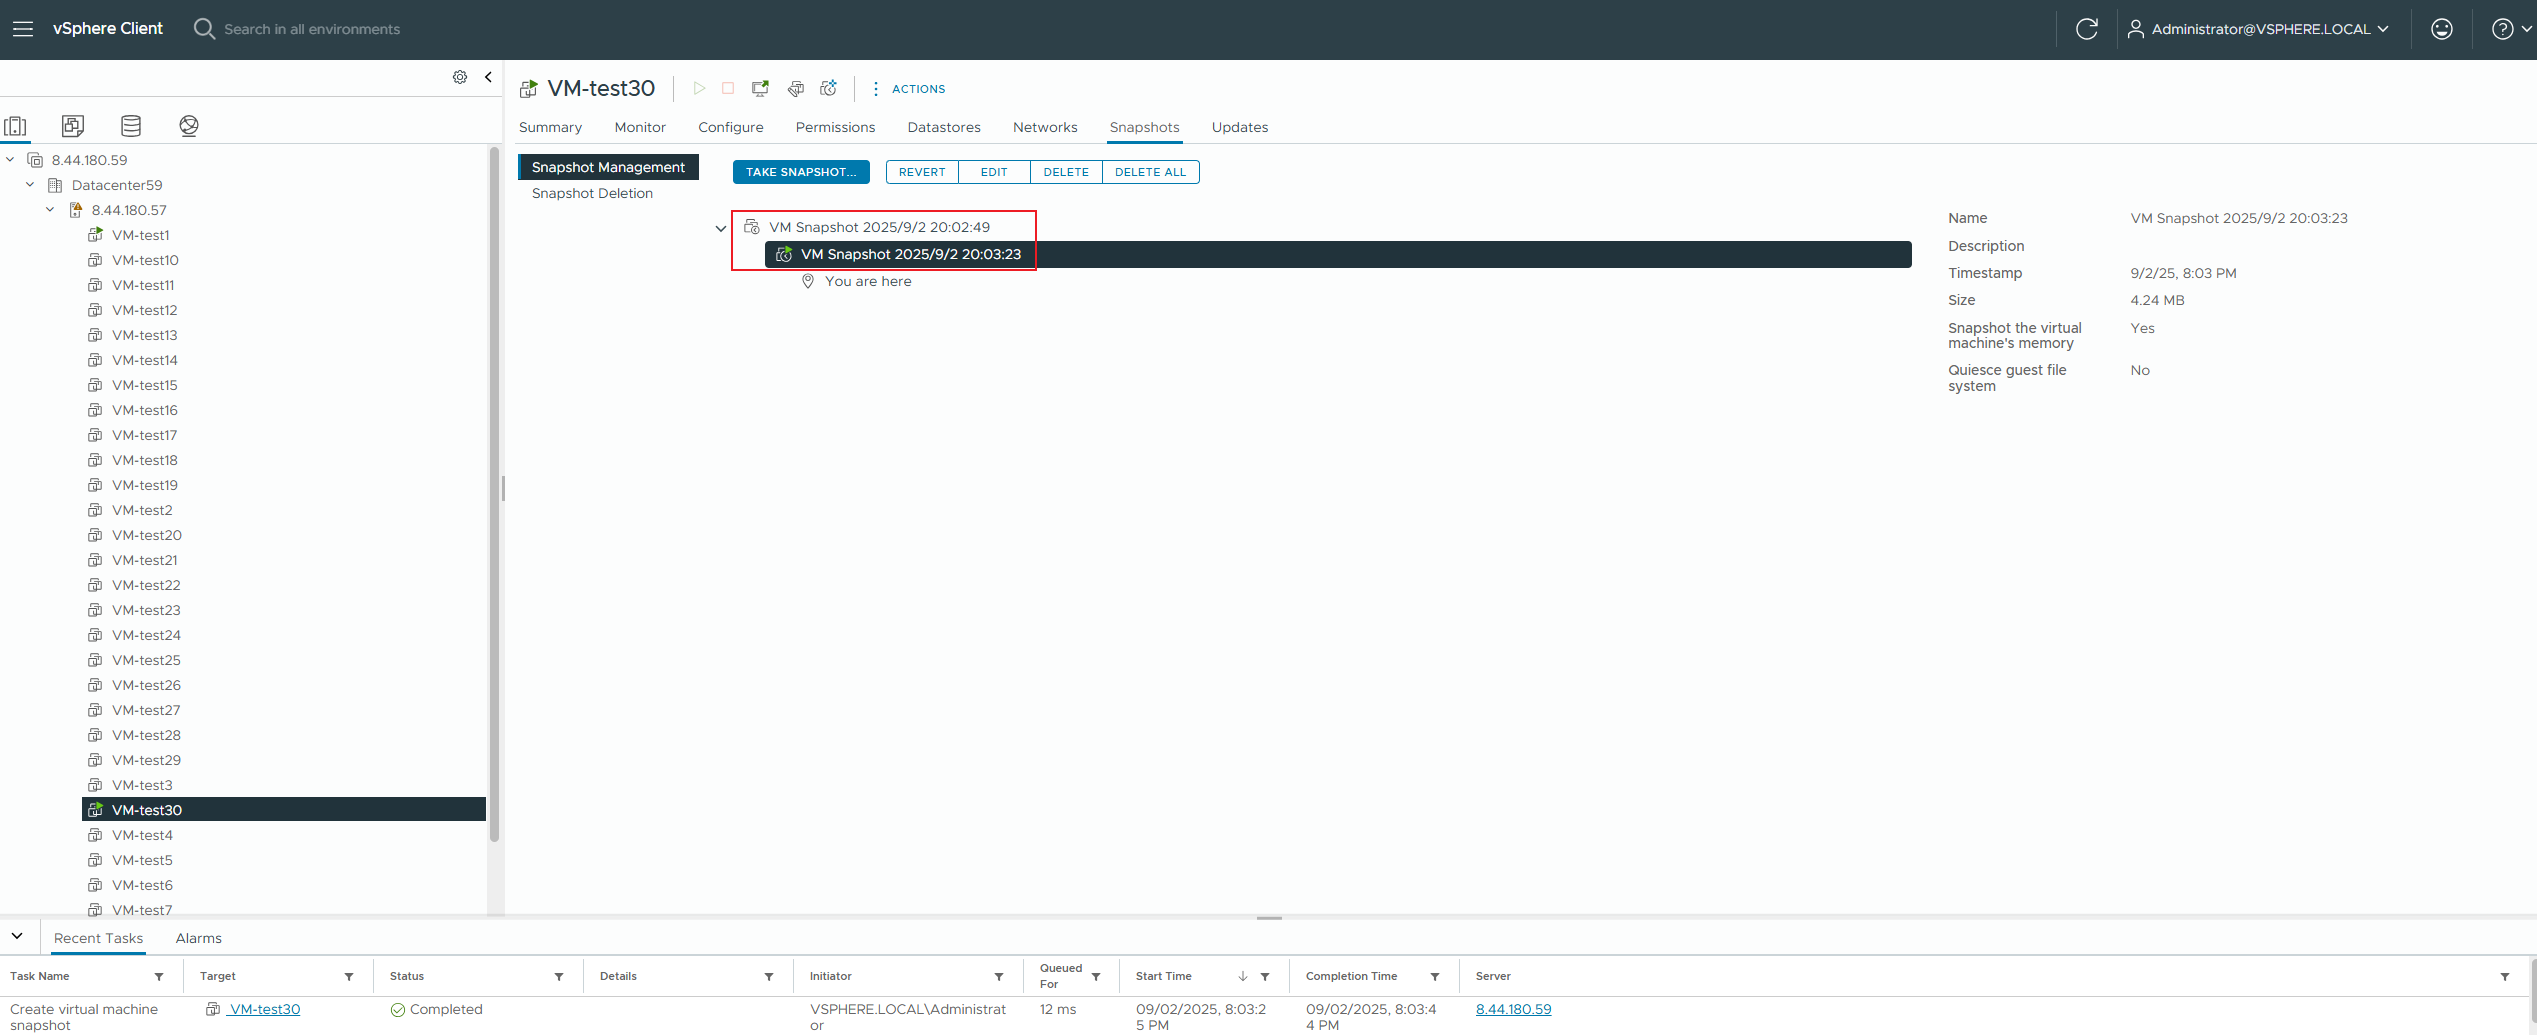 3. Migrate this virtual machine online to the vmfs datastore; 


|
Test Conclusion | PASS |
2.4 Snapshot migration between vVols Datastore and VMFS Datastore
Test Purpose | Whether the snapshot migration between vVols Datastore and VMFS Datastore is successful. (Protocol: FC) |
Test Networking | Storage and VMware ESXi Compatibility Test Networking |
Prerequisites | 1. The VASA Provider has been installed and configured. 2. The VASA Provider has been registered with vCenter and initial configuration is complete. 3. The host, storage, and networking have been completed. |
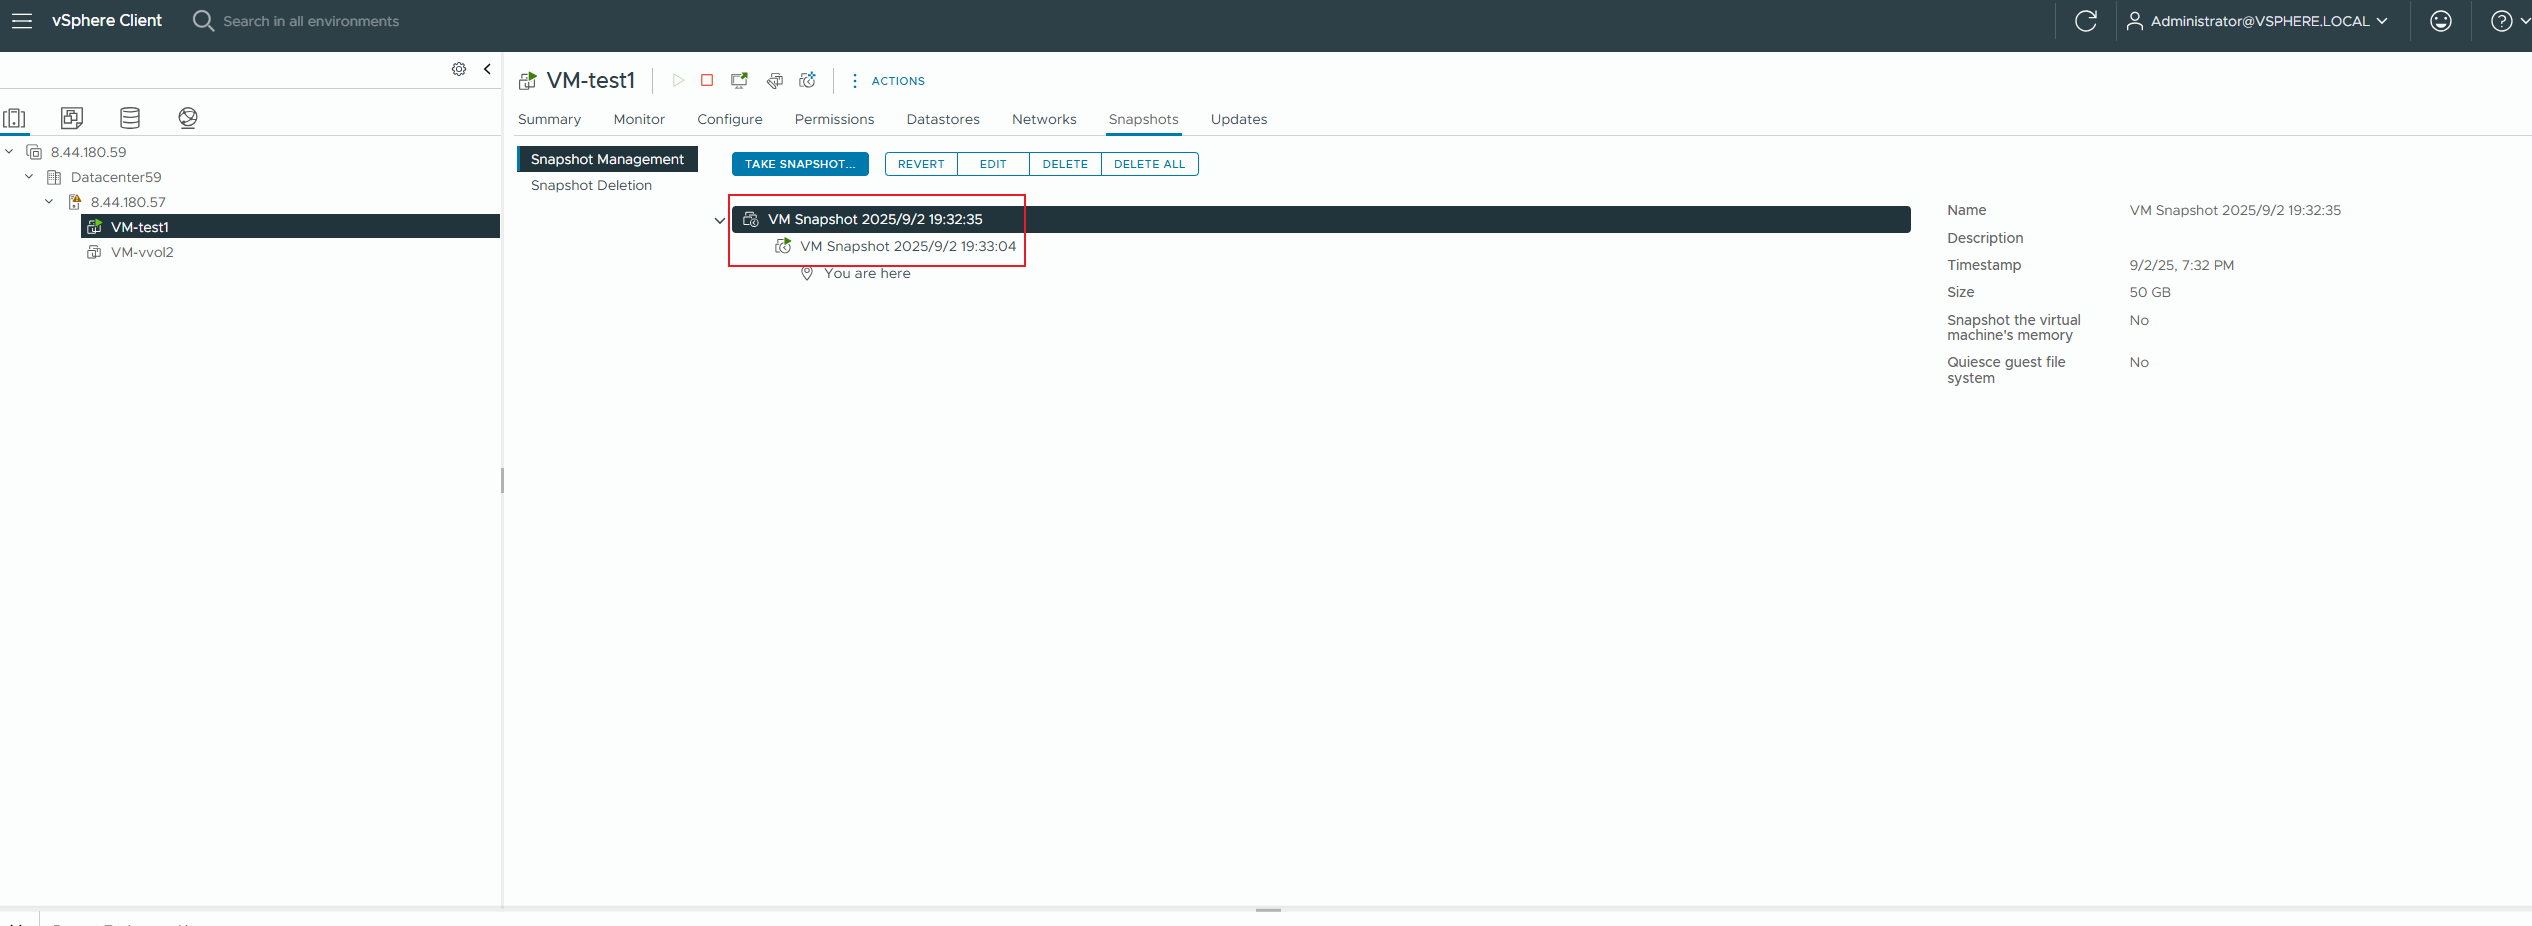
Test Procedure | 1. Clone a 50GB thick-provisioned zeroed virtual machine from the VVOL_TEMPLATE virtual machine template to the vVols Datastore; 2. Create a regular snapshot and a memory snapshot; 3. Migrate this virtual machine online to the VMFS Datastore; 4. Check if the virtual machine is powered on normally. |
Expected Result | 1. Step 1: The virtual machine cloning was successful, and the VVol LUN for the virtual machine was created successfully. 2. Step 2: The snapshot was created successfully, and the array generated the corresponding volume. 3. Step 3: The virtual machine migration was successful. 4. Step 4: The virtual machine is functioning normally. |
Test Record |
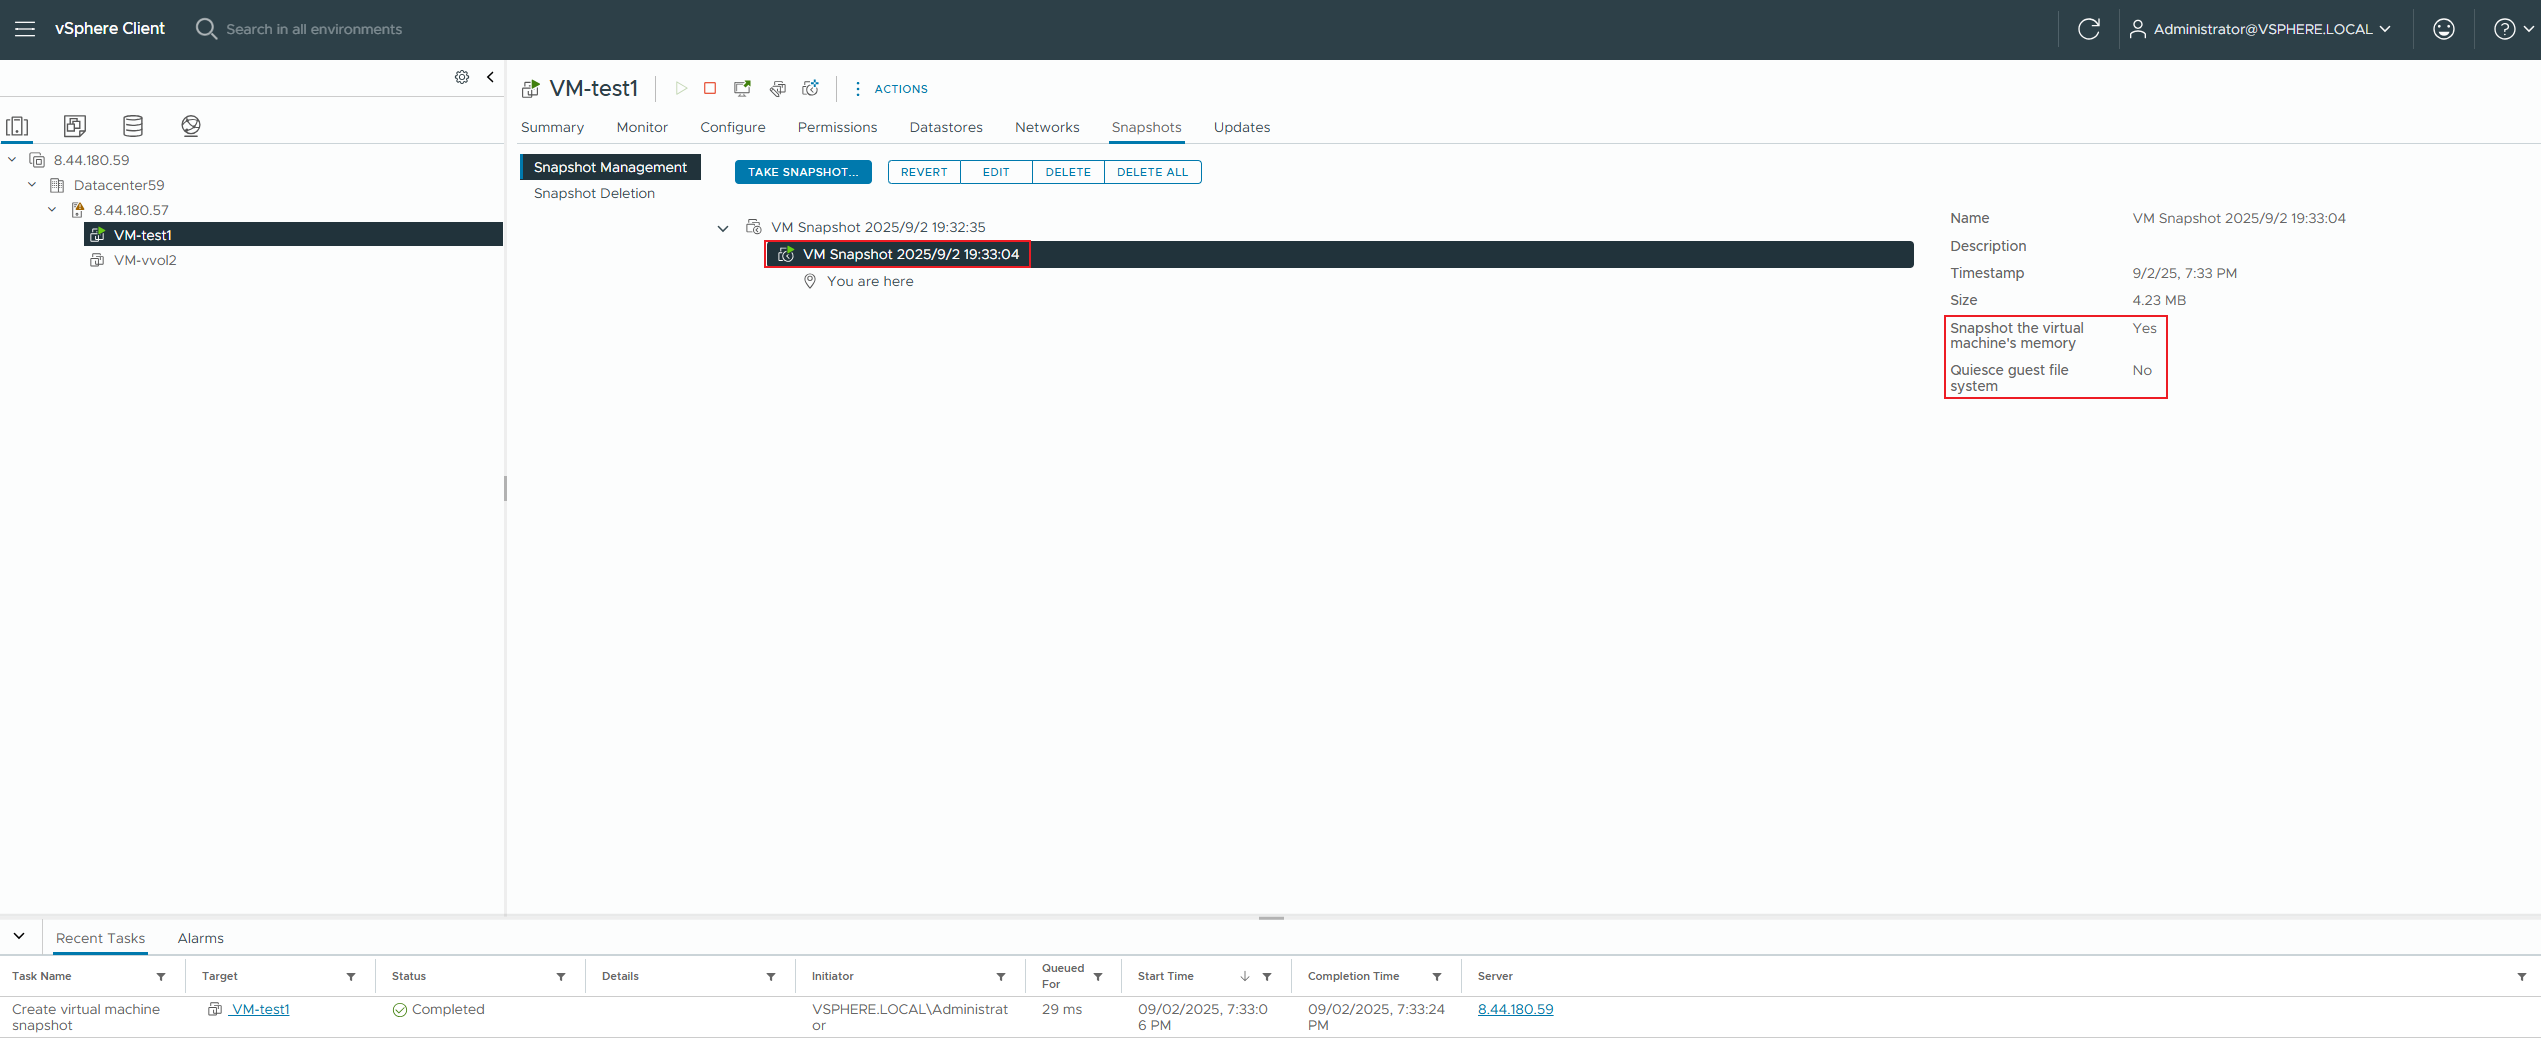 3. Migrate this virtual machine online to the vmfs datastore; 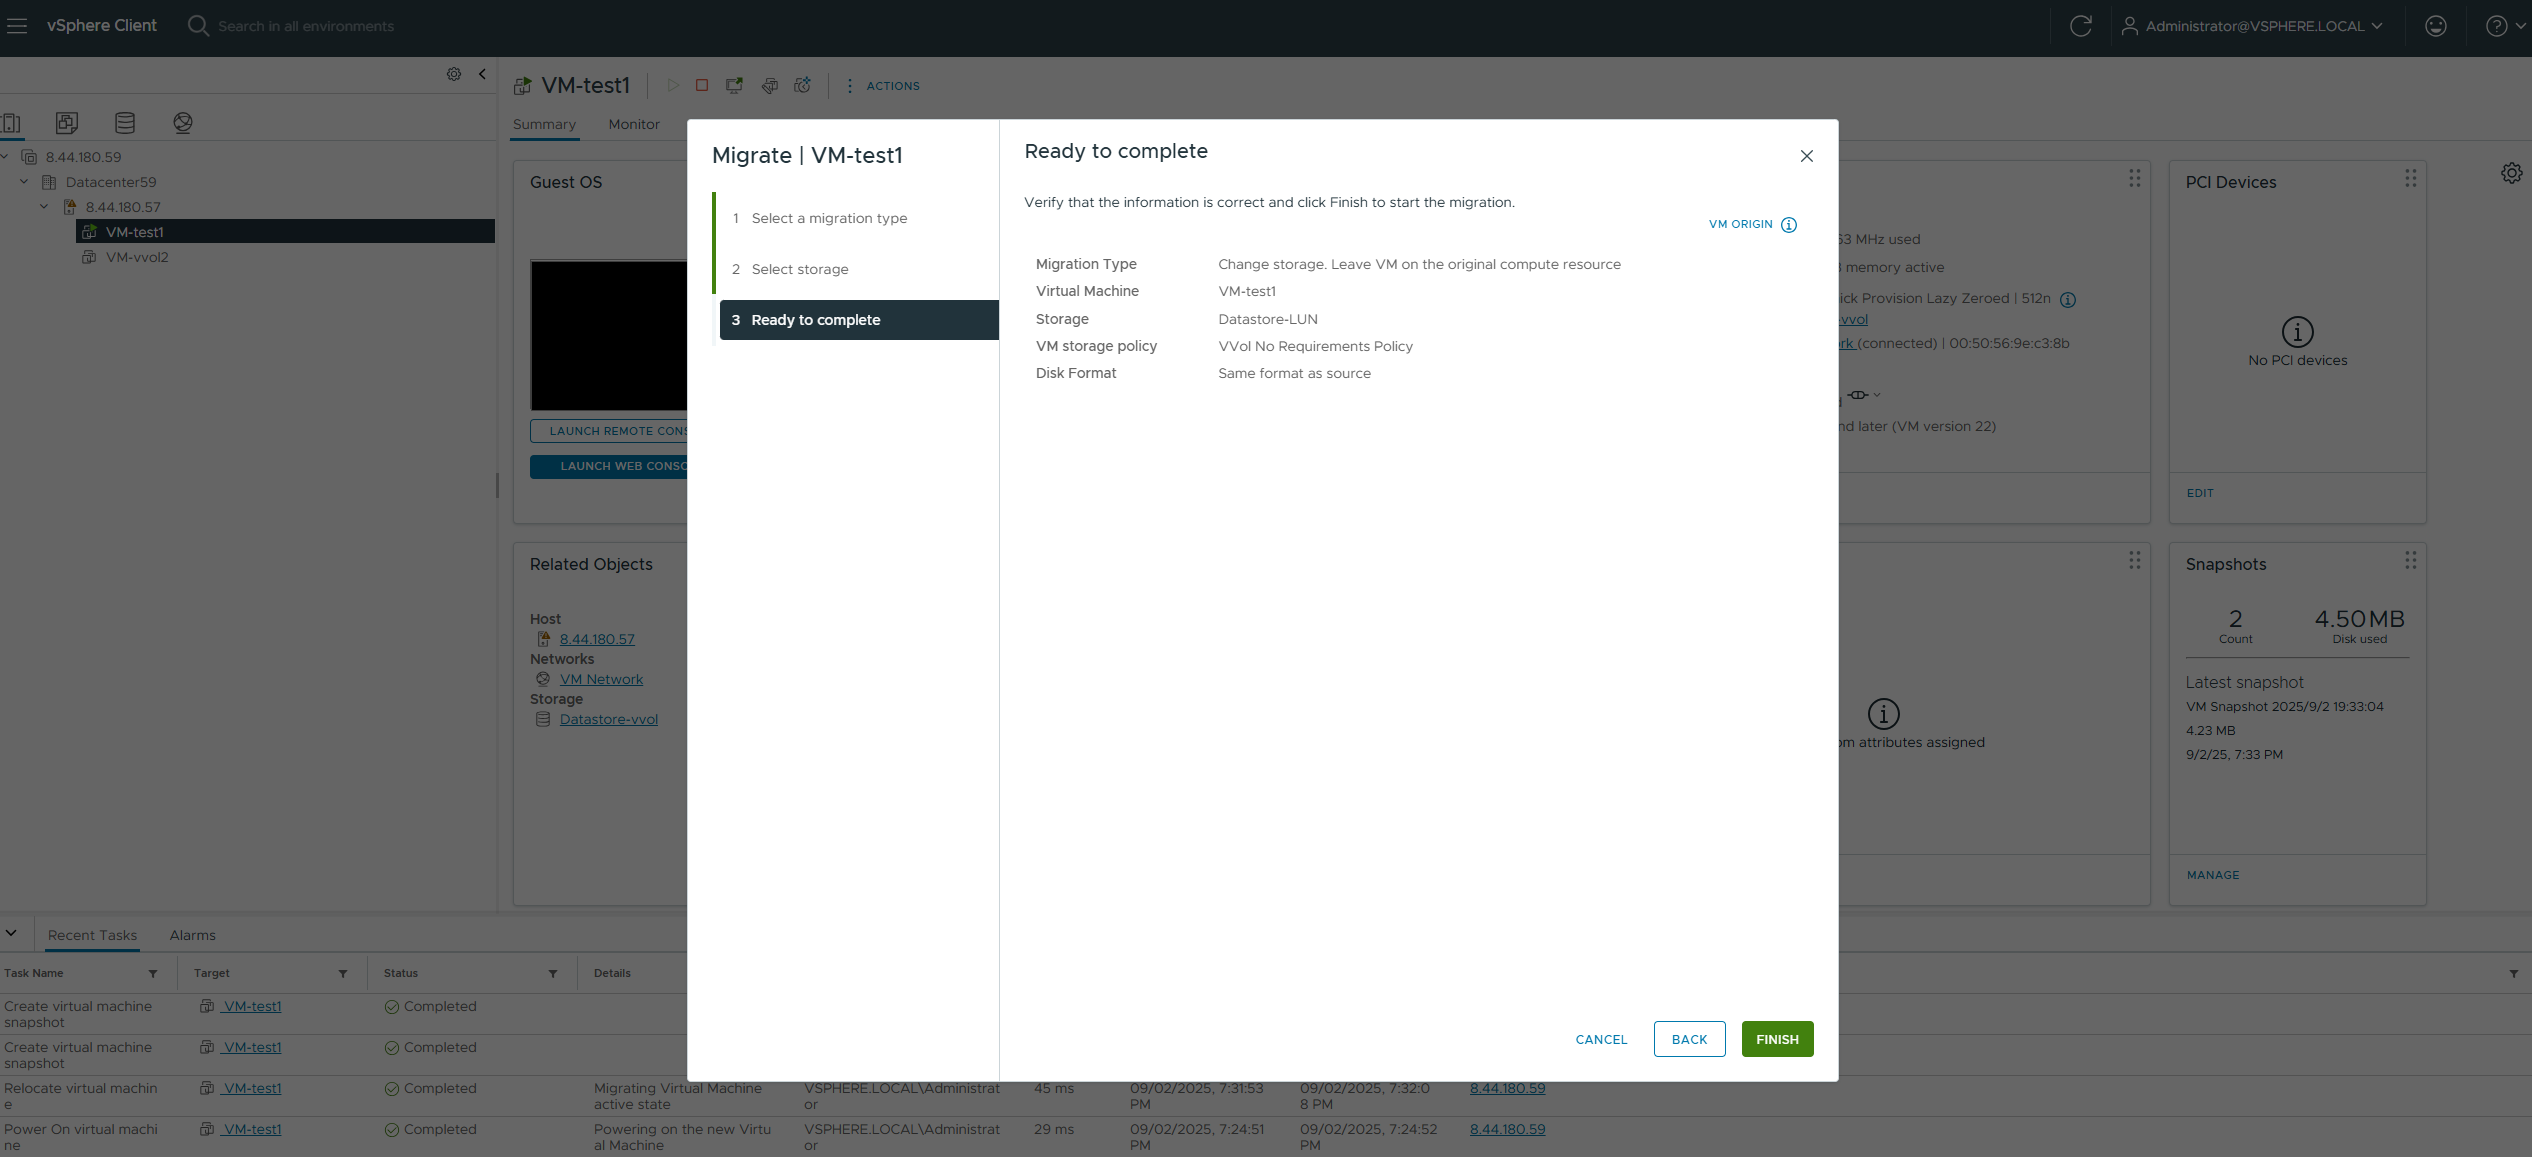
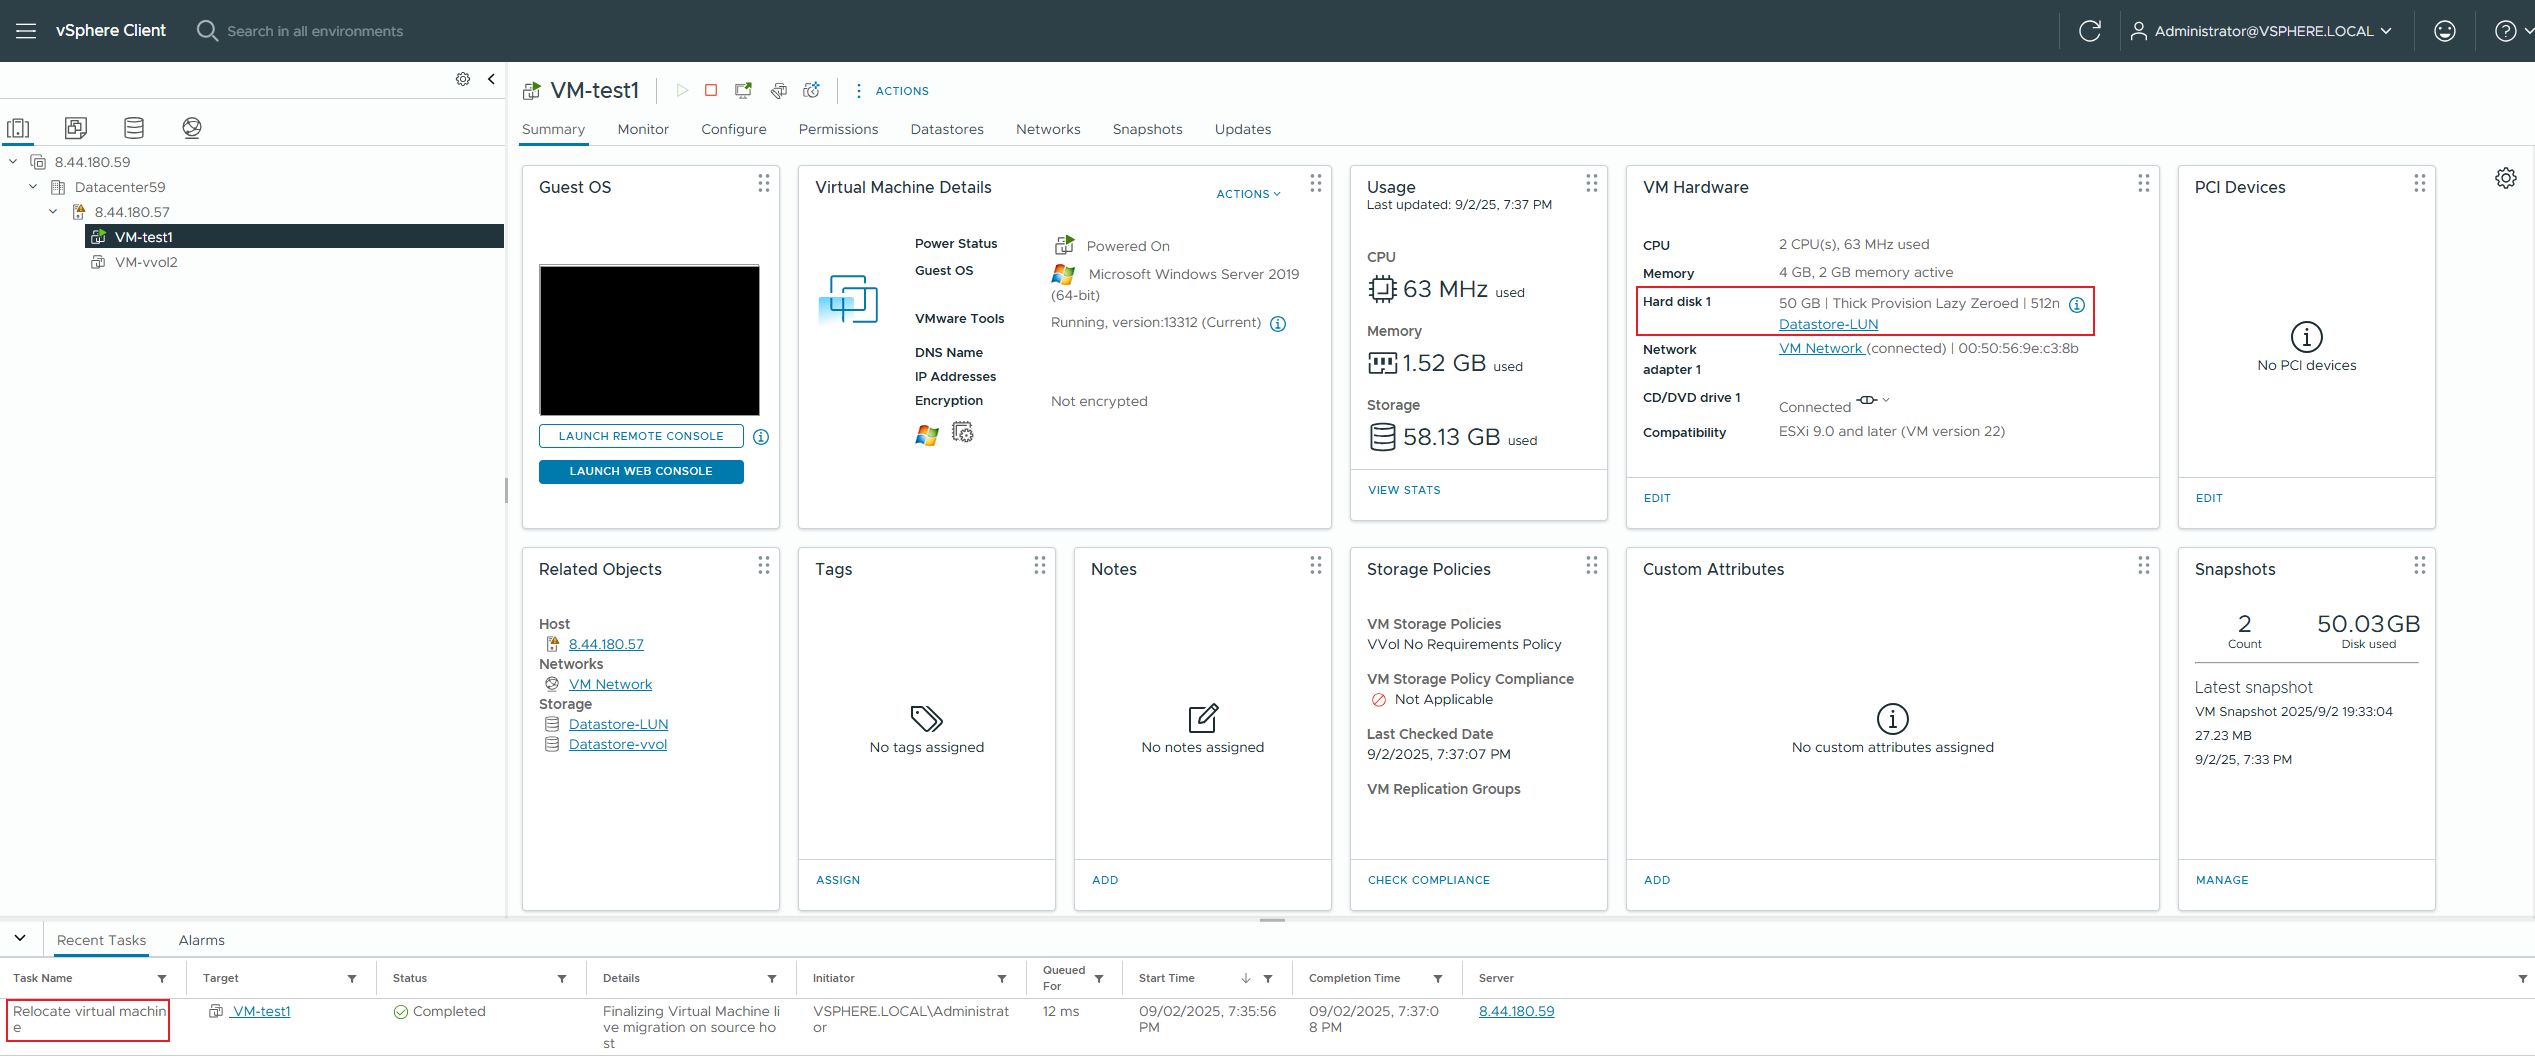
 4. Check if the virtual machine is powered on normally. 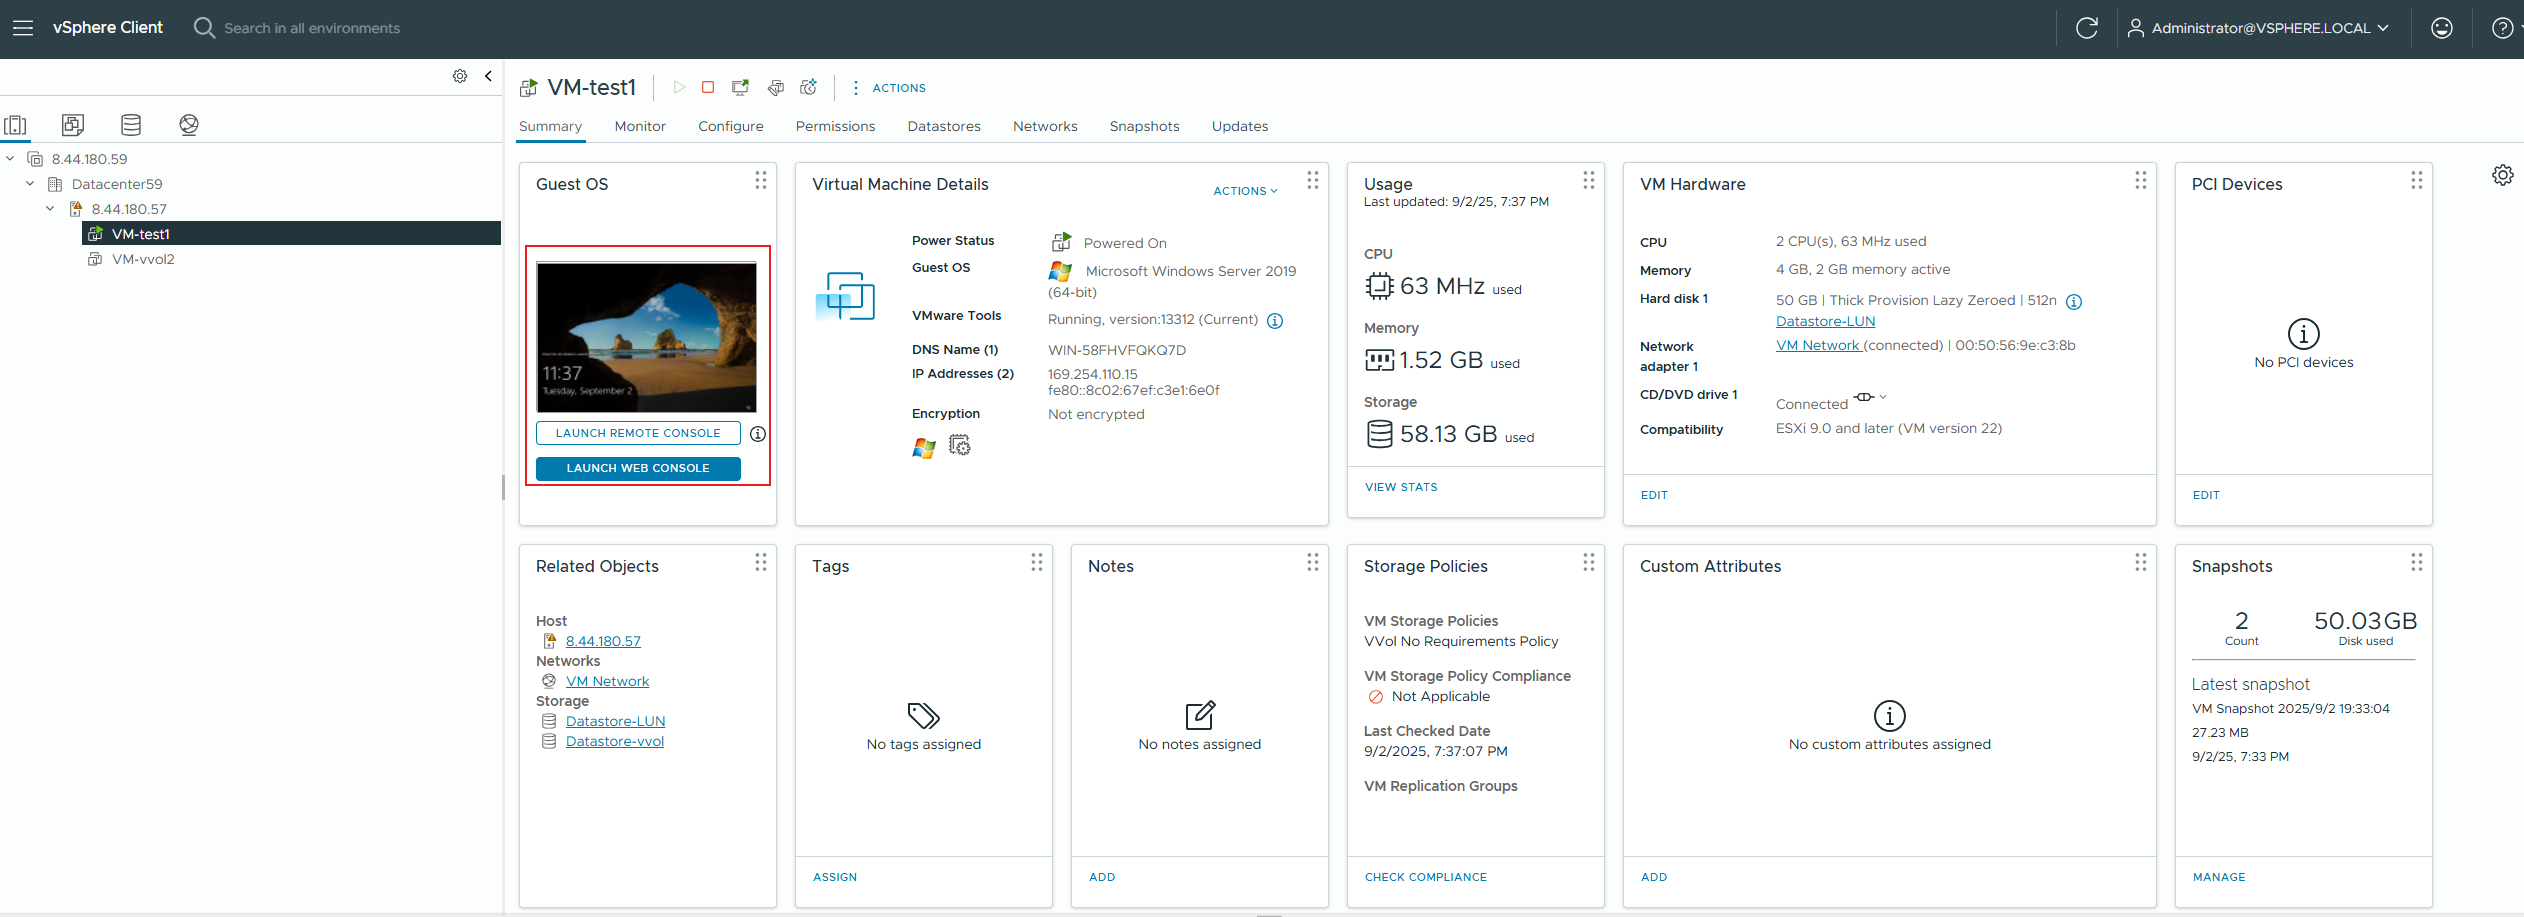 |
Test Conclusion | PASS |
2.5 VVOL Virtual Machine In-Guest UNMAP Space Reclamation (Linux)
Test Purpose | Whether the VVOL virtual machine’s In-Guest UNMAP space reclamation (Linux) was successful. (Protocol: FC) |
Test Networking | Storage and VMware ESXi Compatibility Test Networking |
Prerequisites | 1. The VASA Provider has been installed and configured. 2. The VASA Provider has been registered with vCenter and initial configuration is complete. 3. The host, storage, and networking have been completed. |
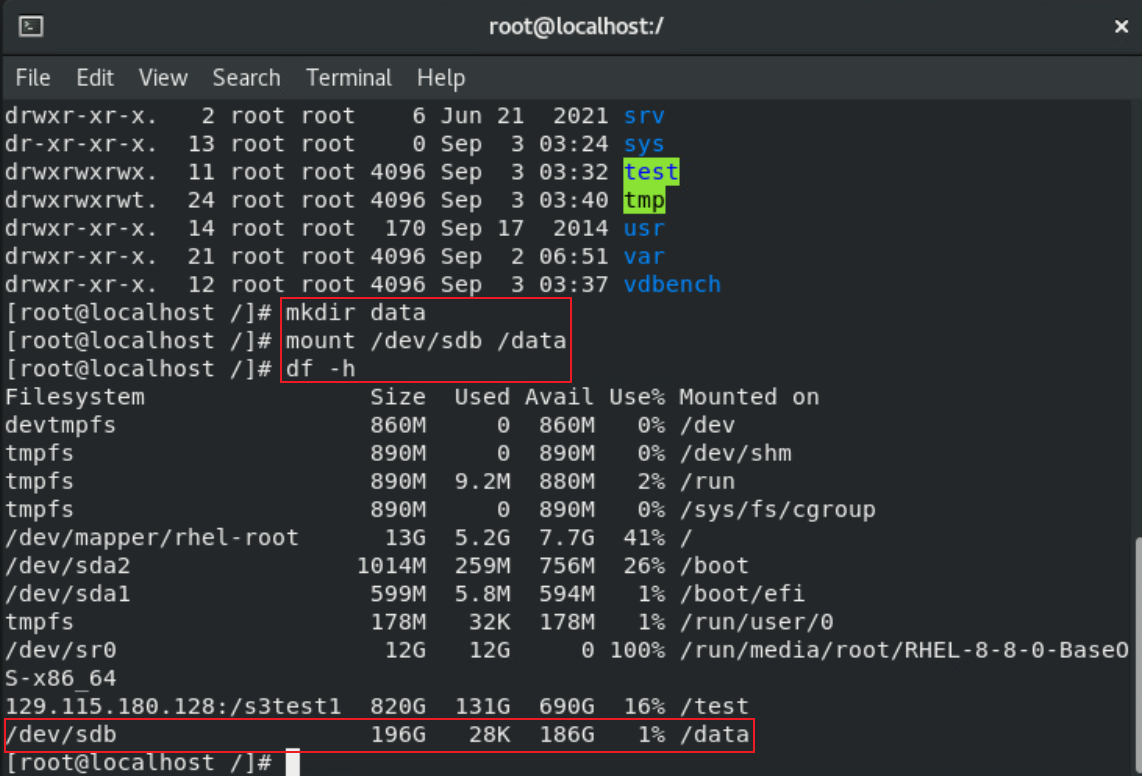
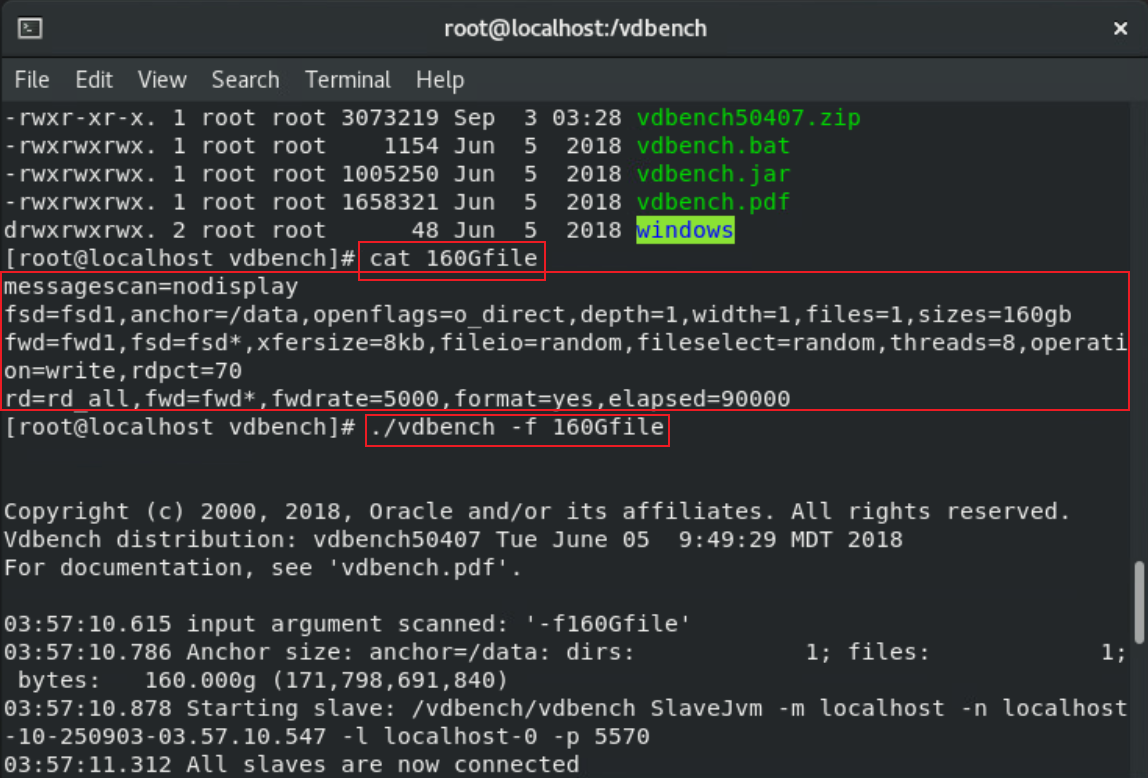
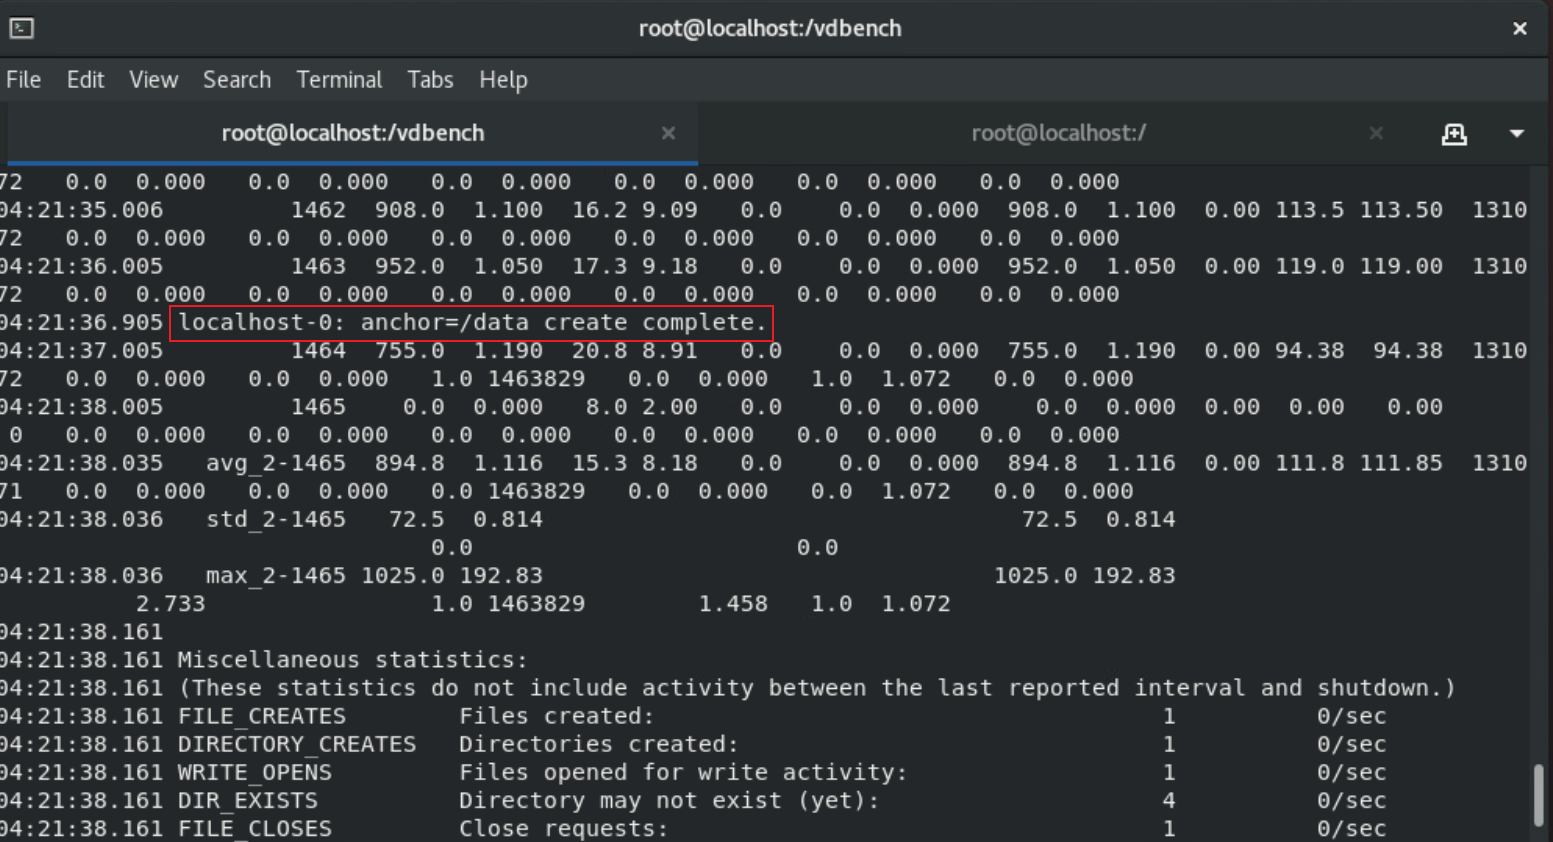
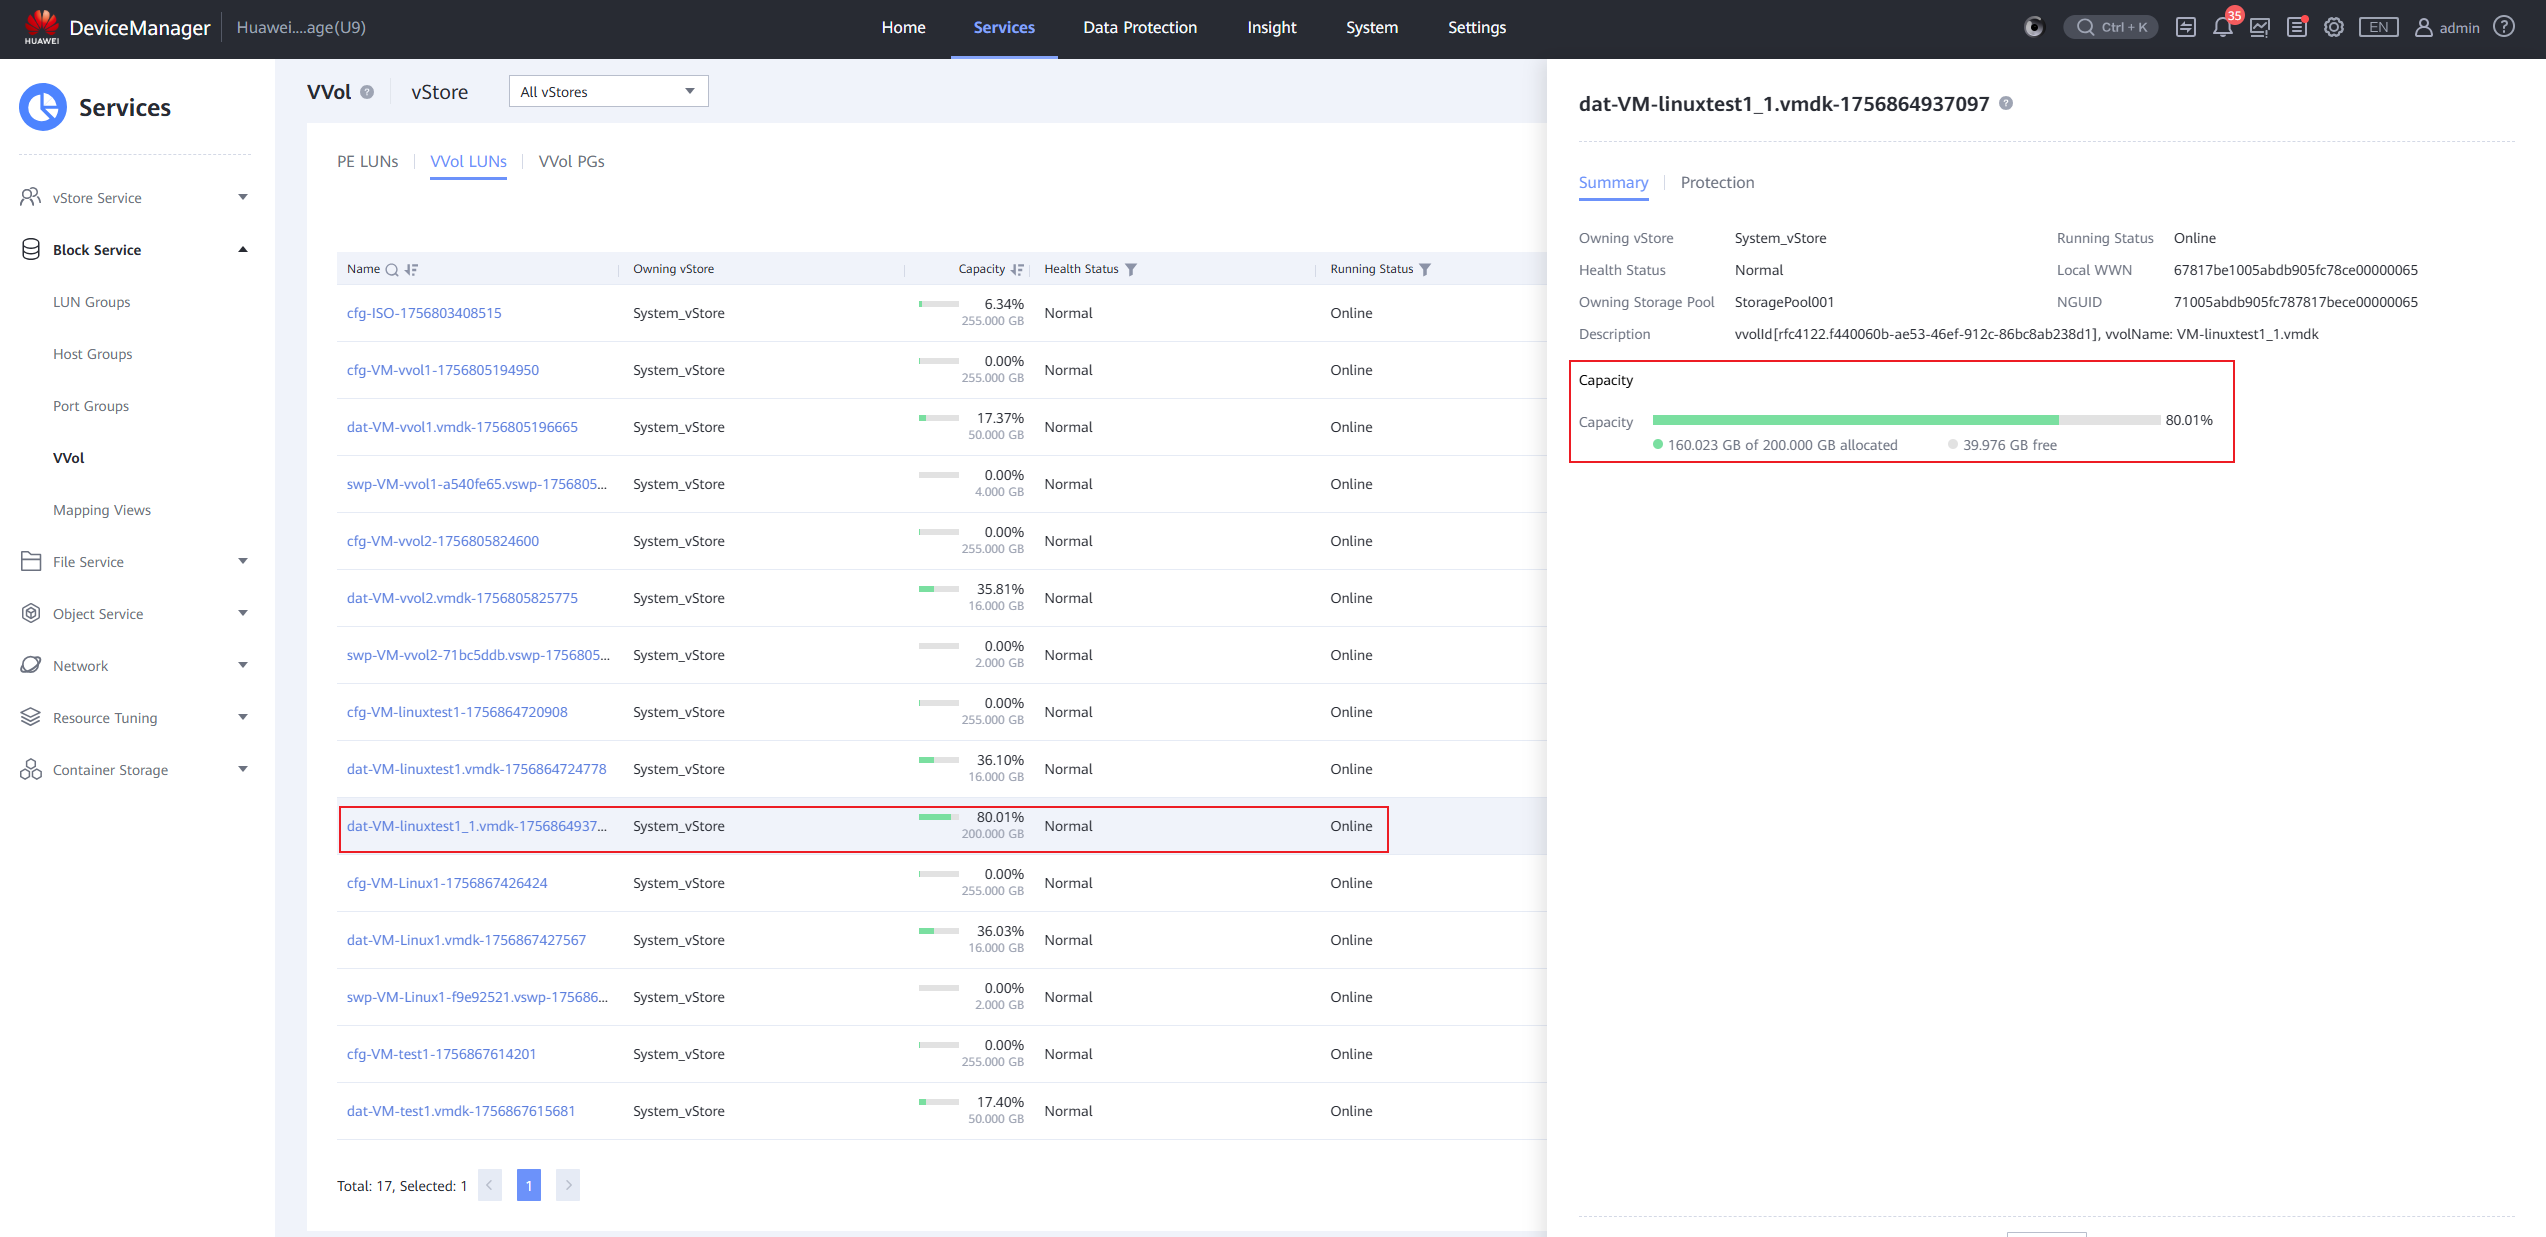
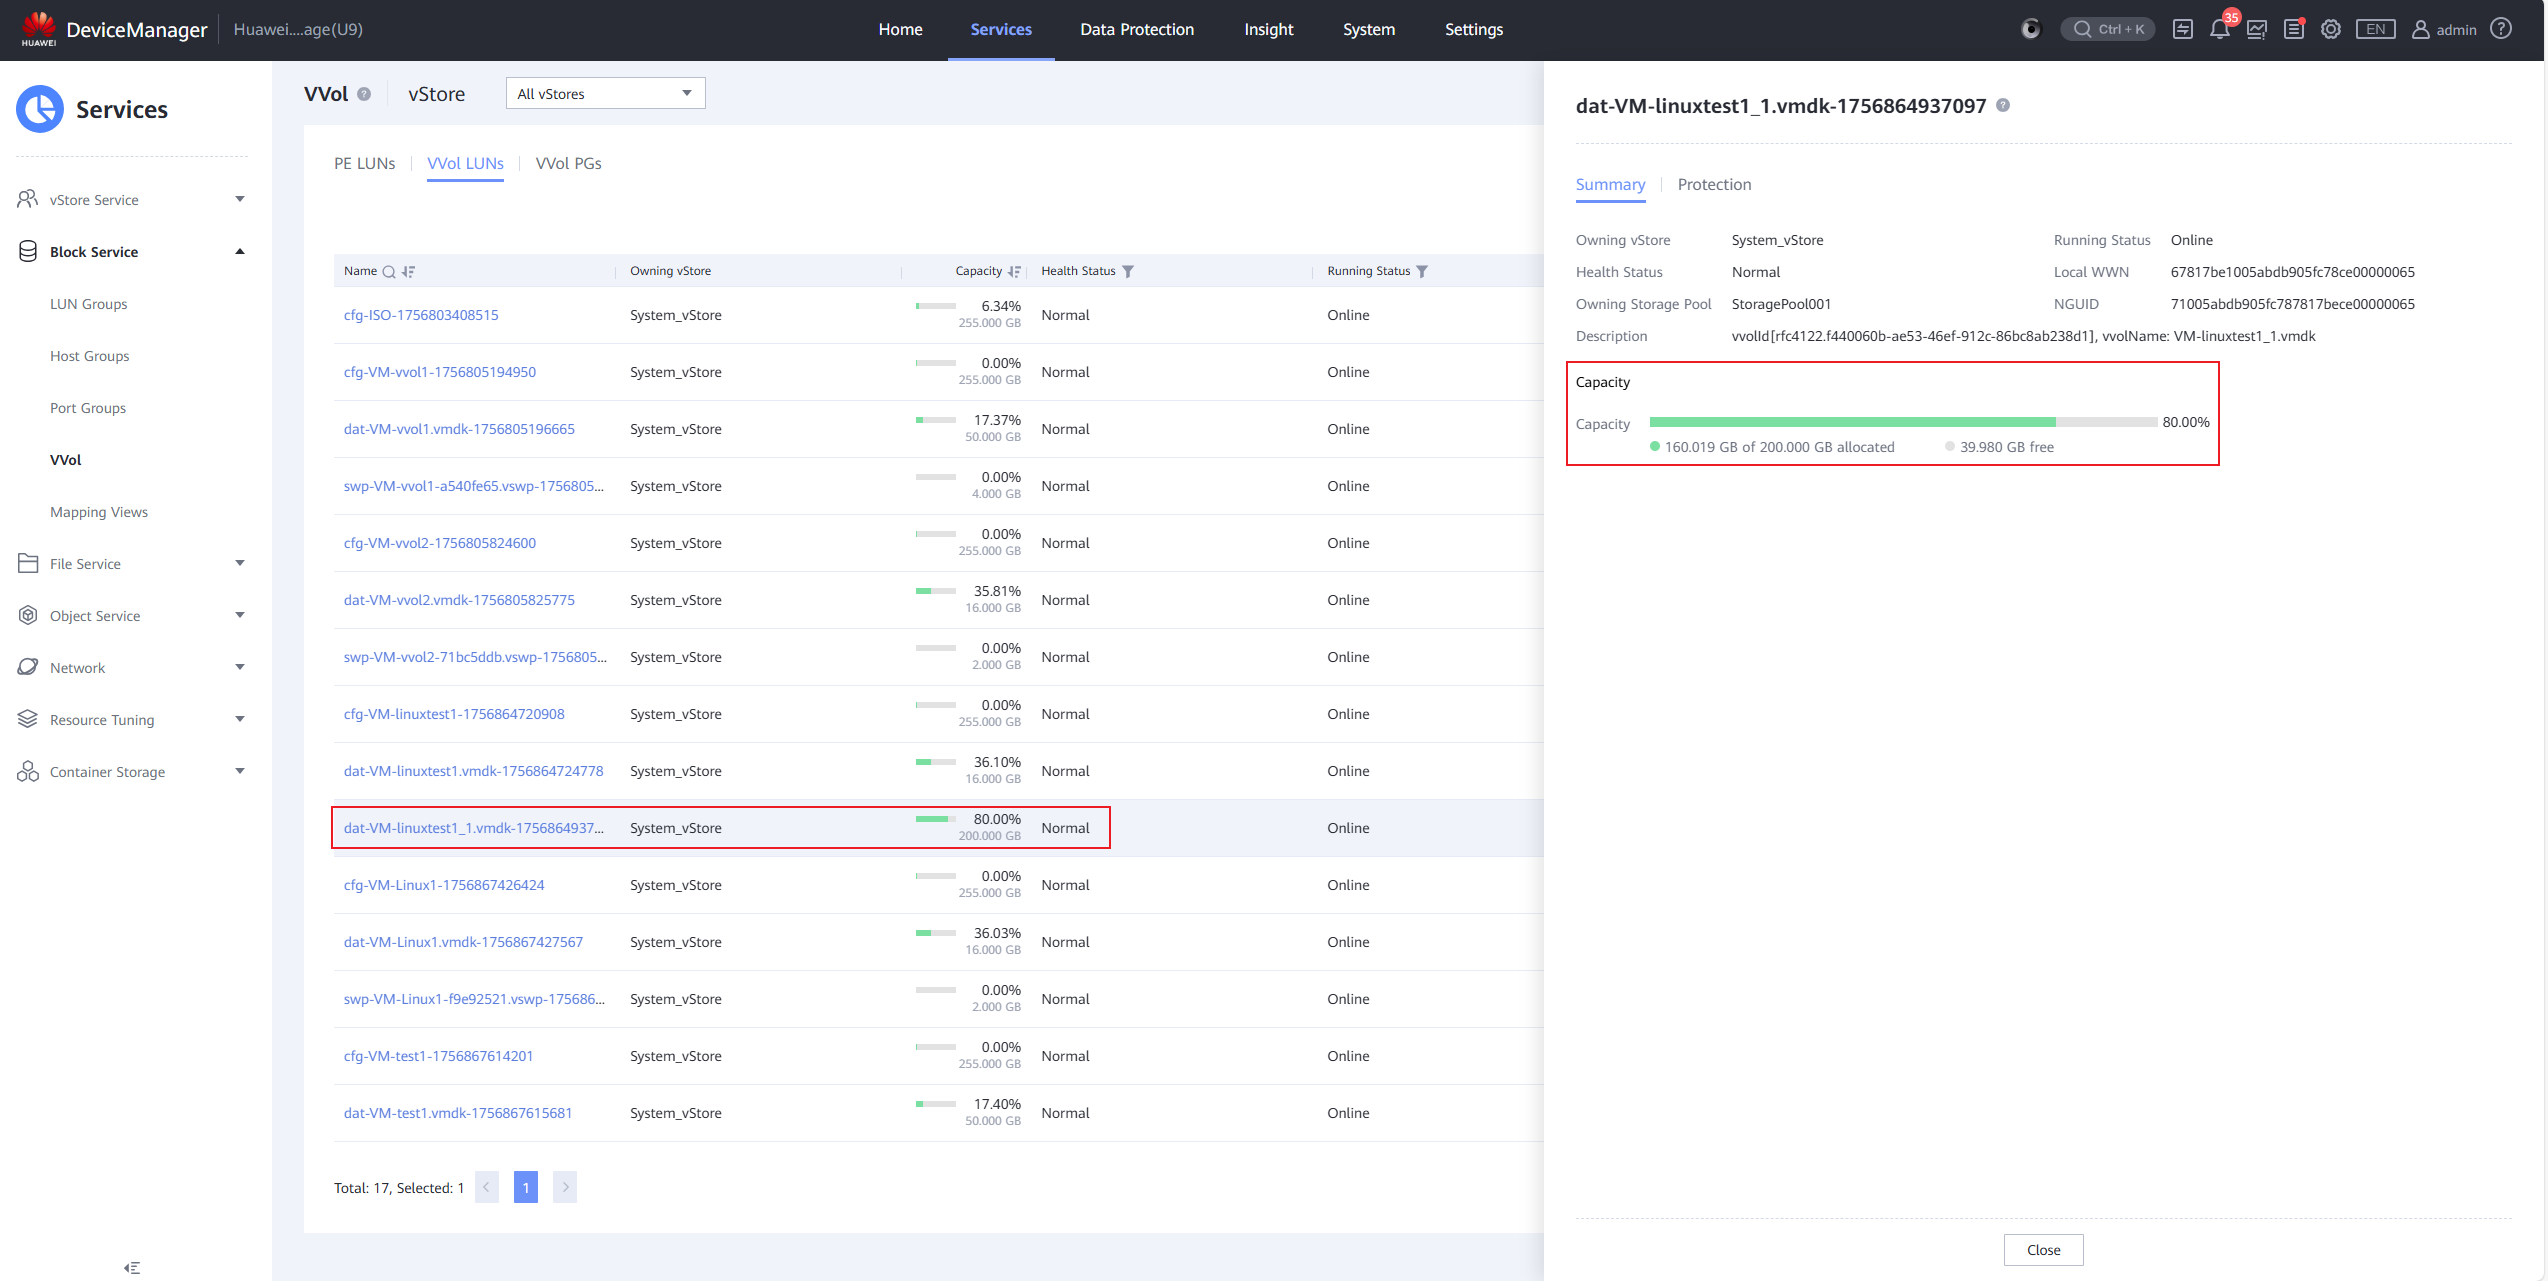
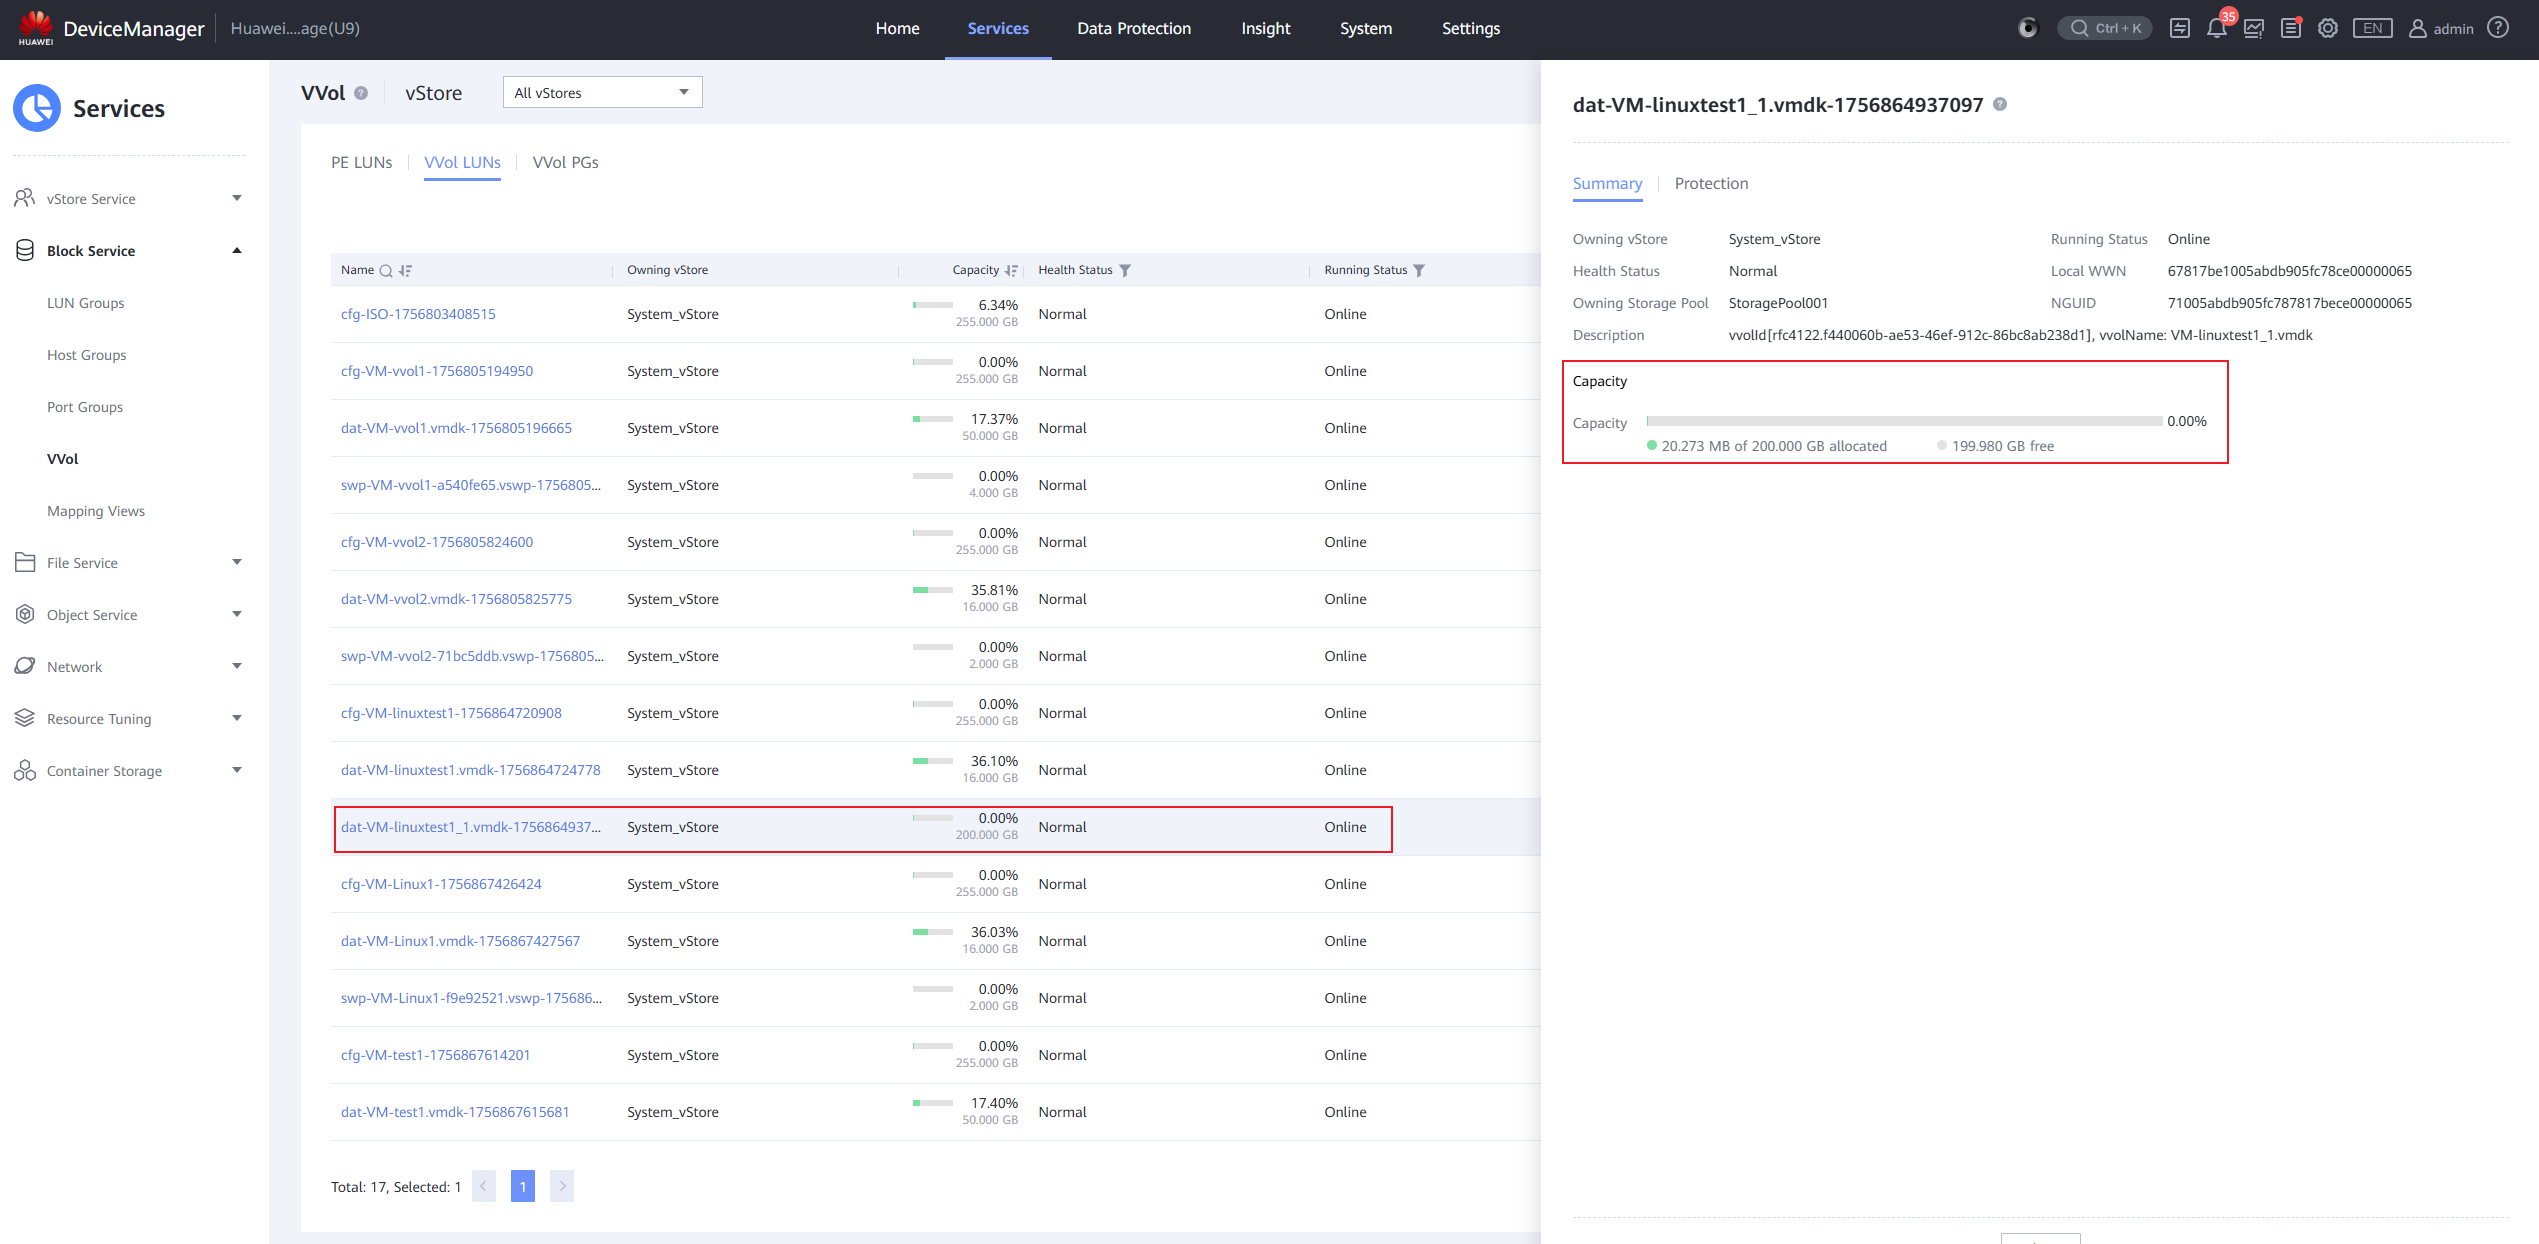
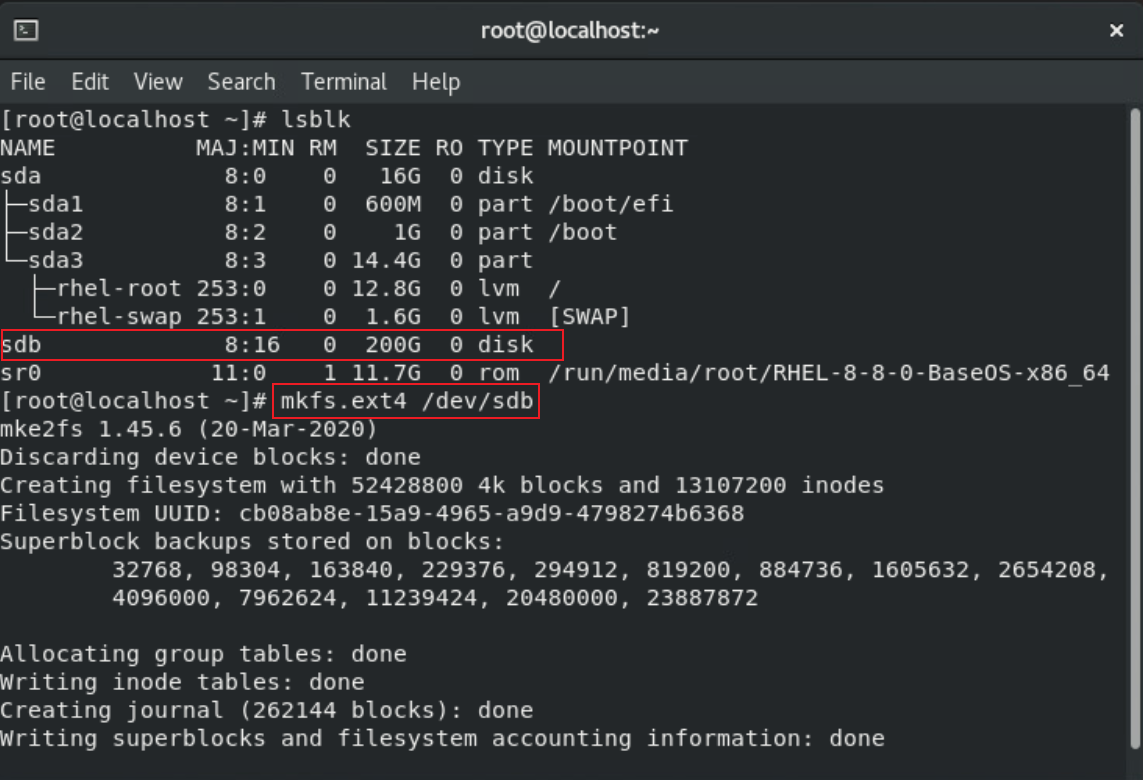
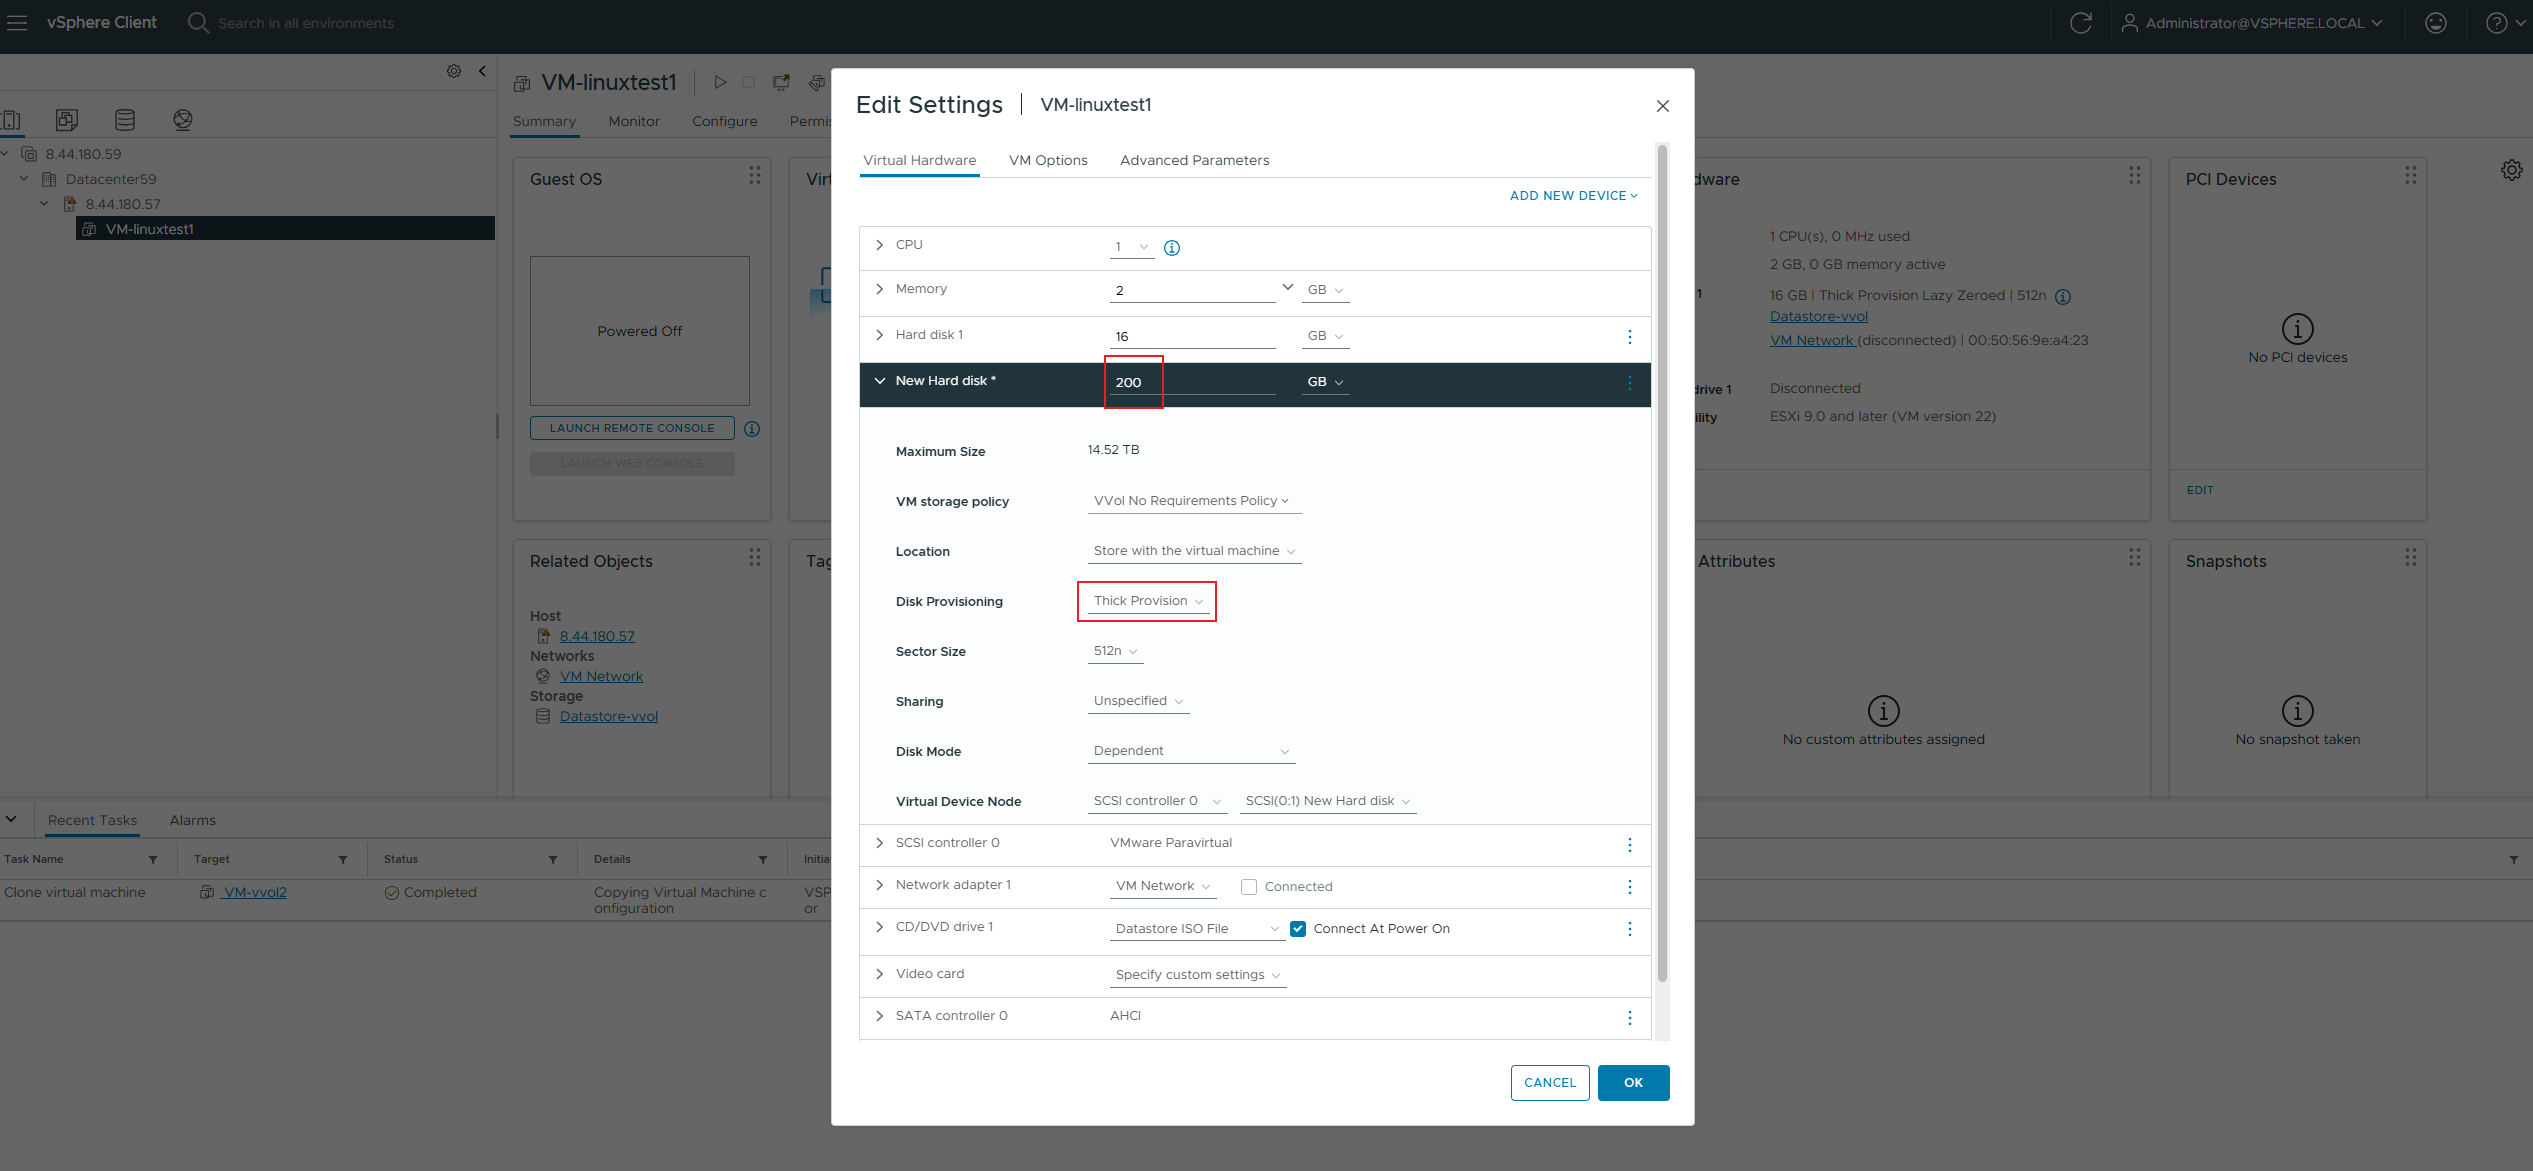
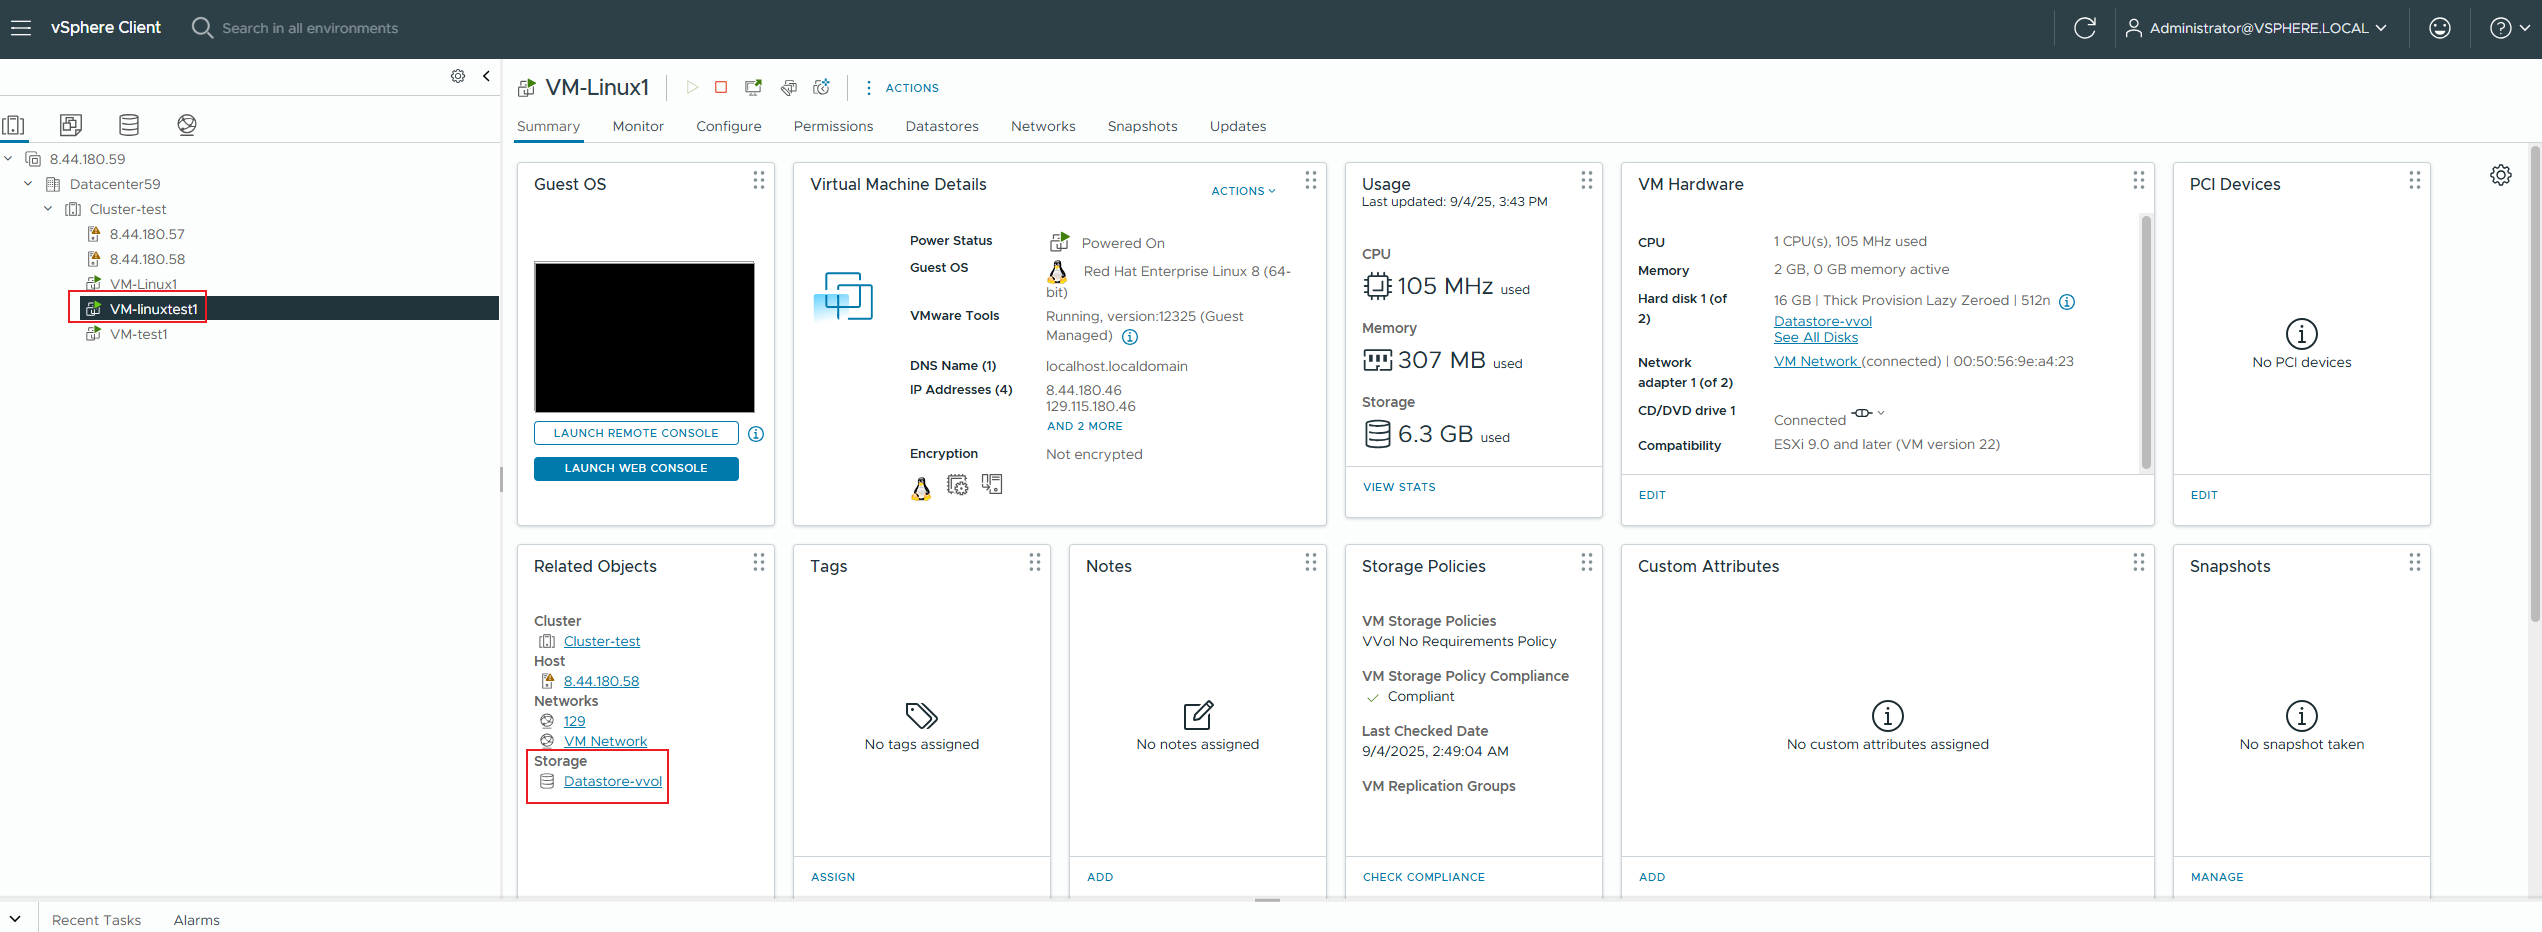
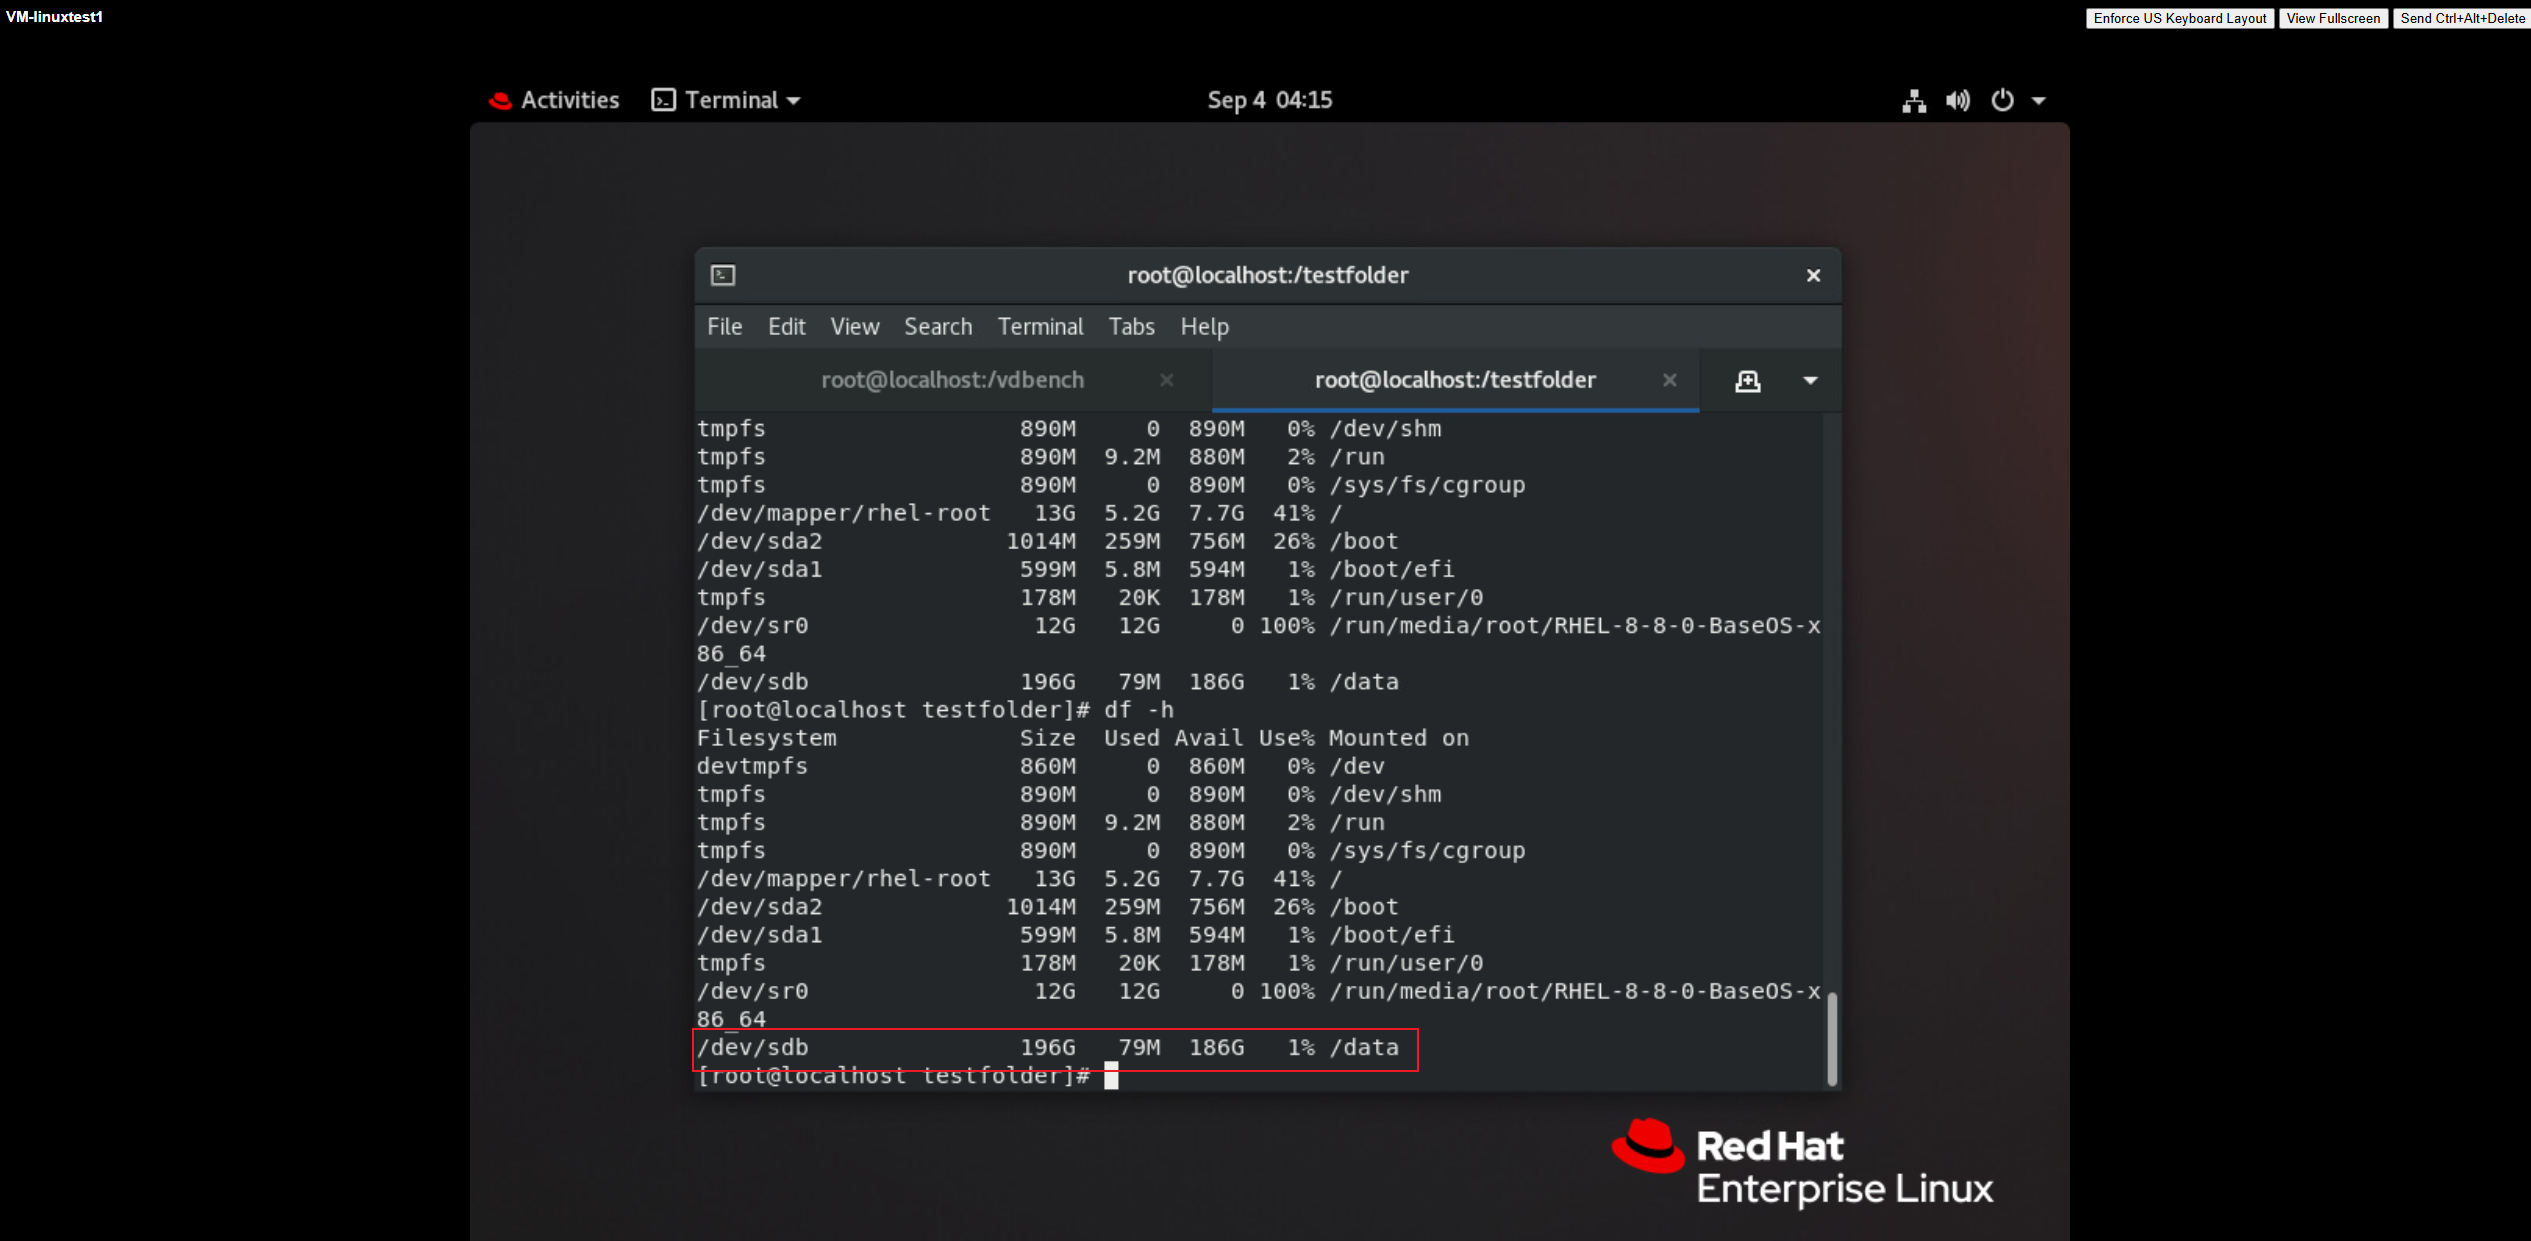
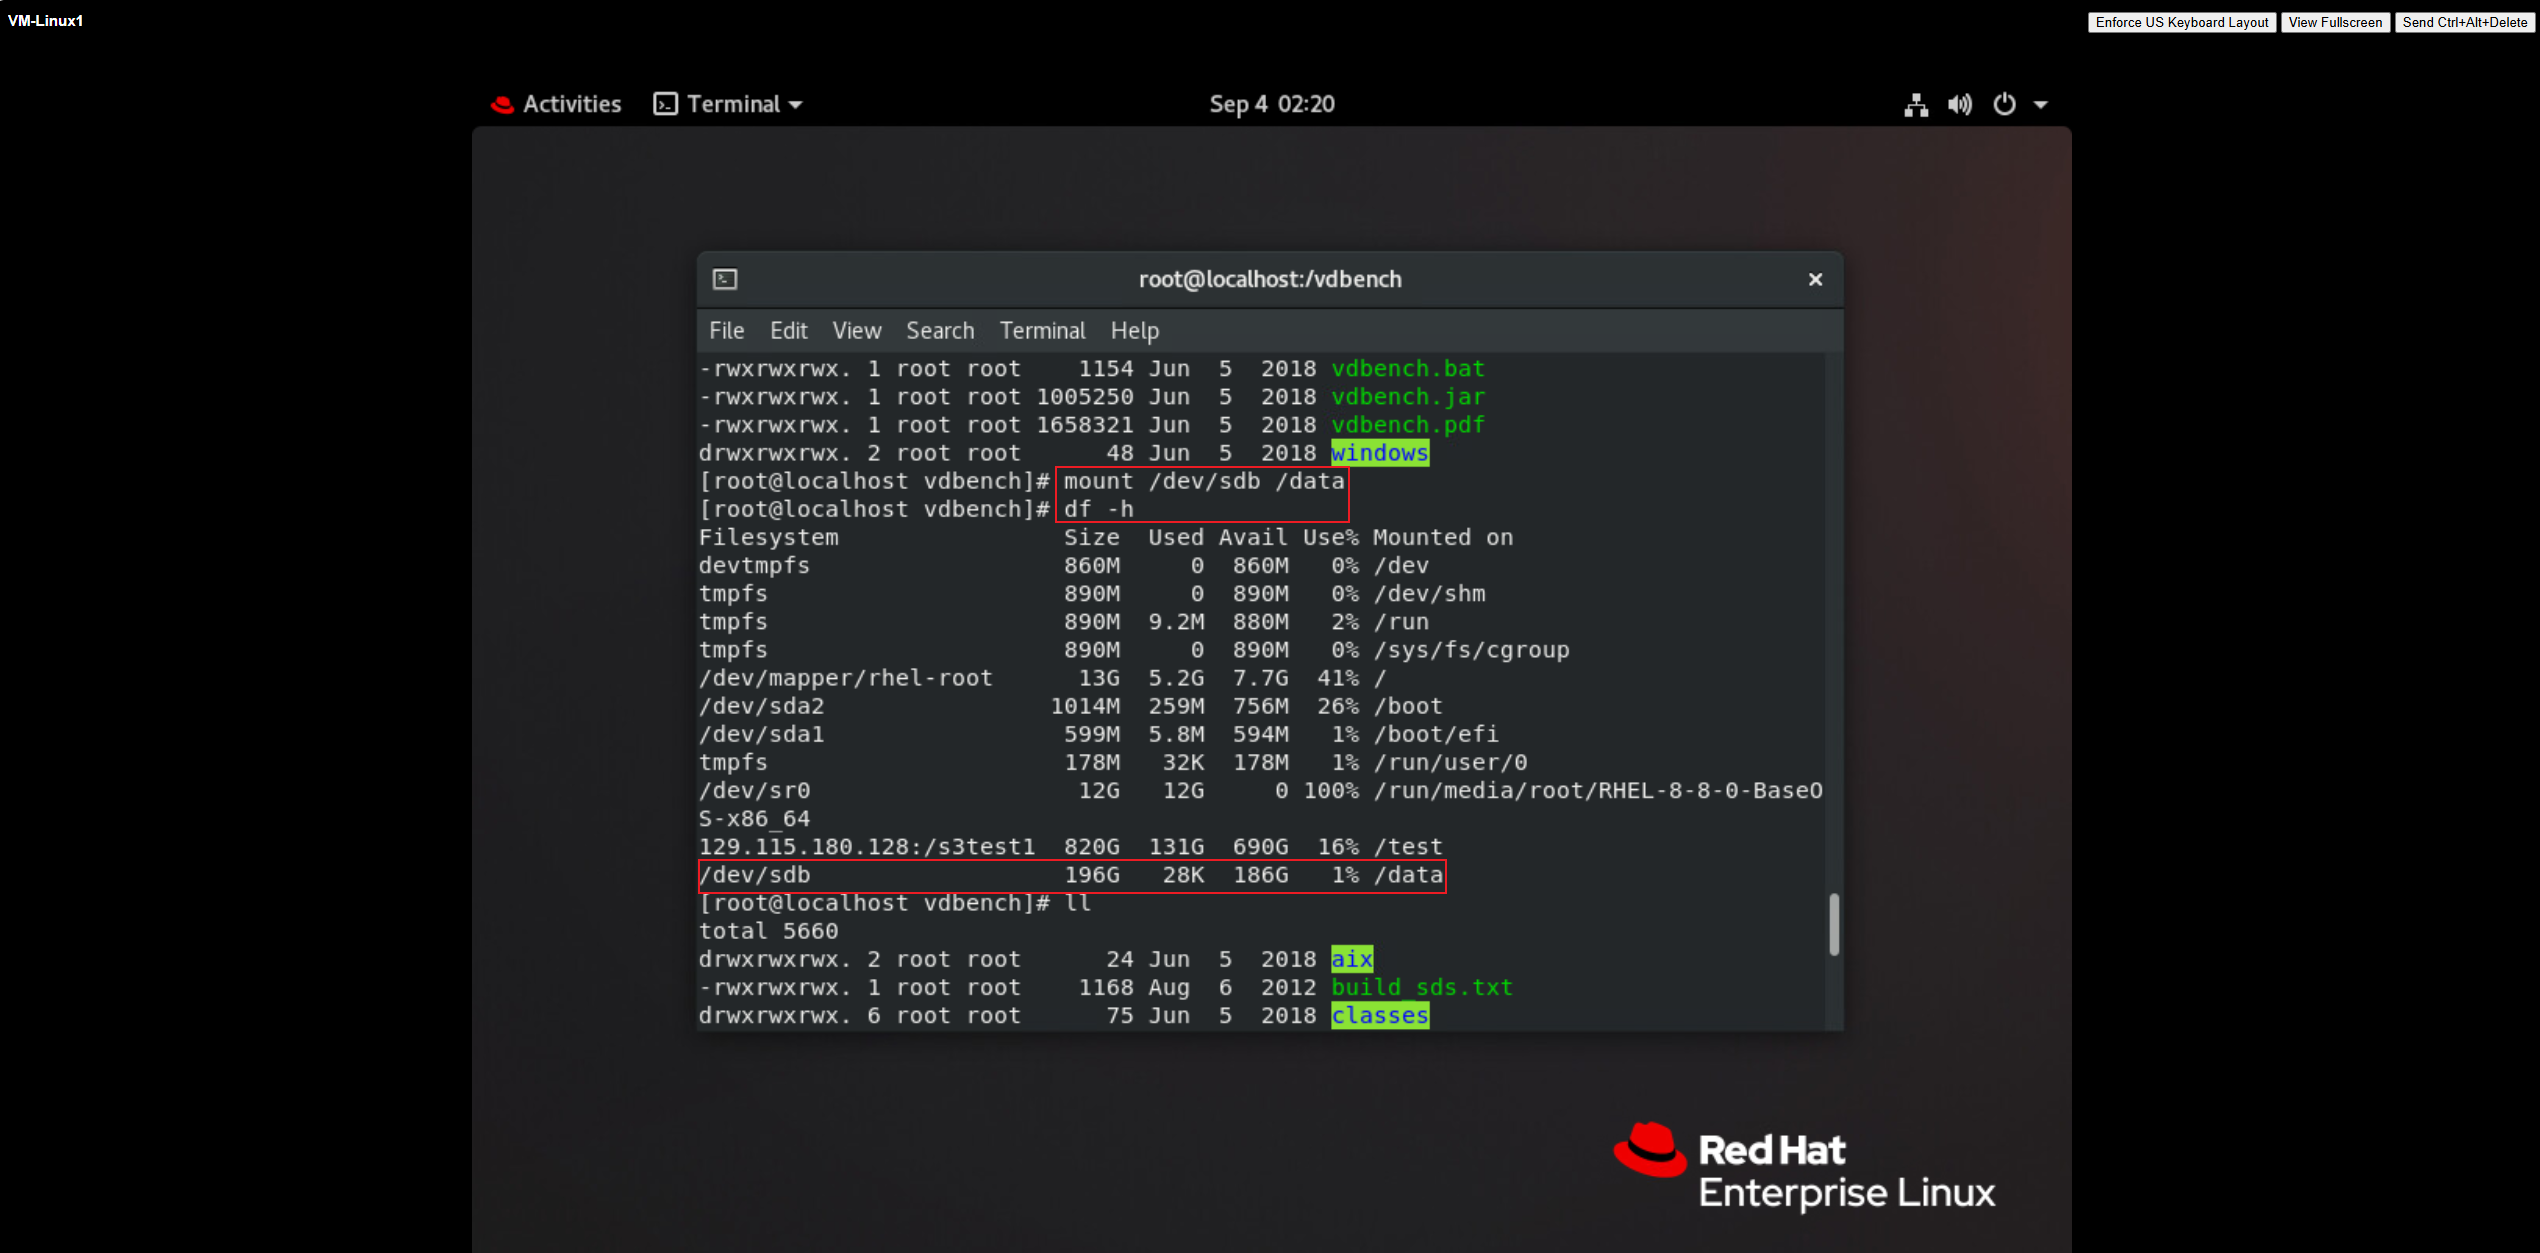
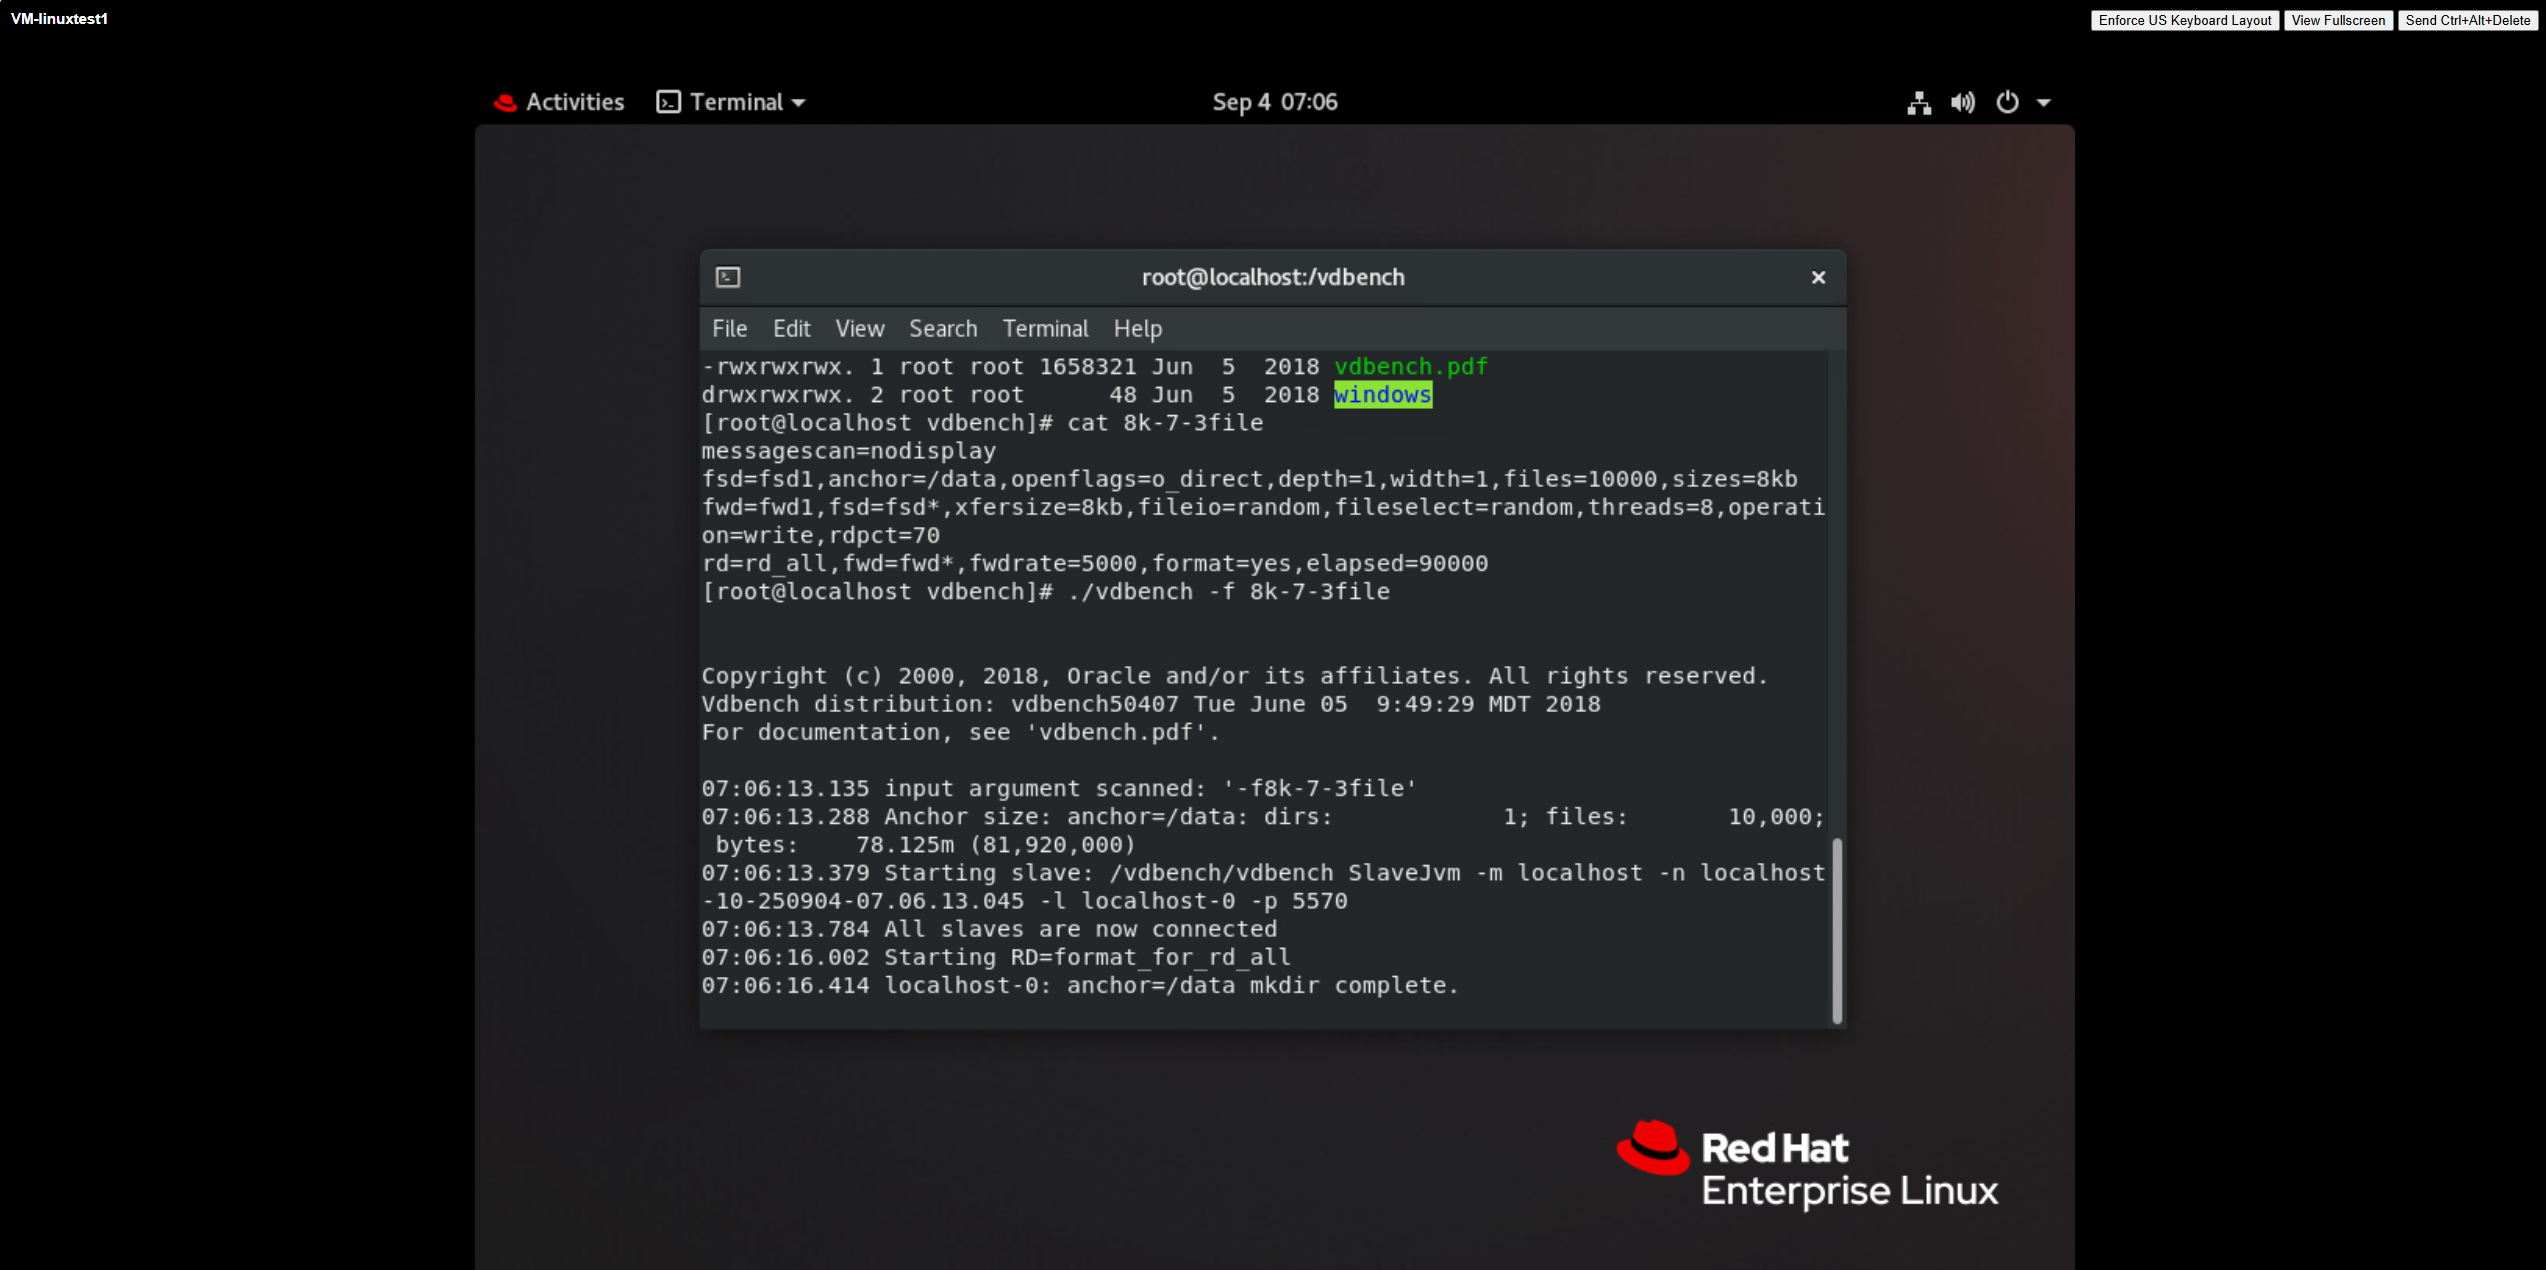
Test Procedure | 1. Clone a virtual machine from the VVOL_TEMPLATE to the vVols Datastore using the virtual machine template; 2. Add a new 200GB thick-provisioned hard disk to the vVols virtual machine, format it with the ext4 file system and mount it. After mounting, write 80% of the data into the file system and check the capacity usage of the vVols LUN on the array; 3. Delete the files in the file system from step 2 on the virtual machine and observe the capacity usage of the VVol LUN on the array; 4. Issue a file system space reclamation command on the virtual machine, wait for the space reclamation to complete, and after completion, check the capacity usage of the VVol LUN on the array. |
Expected Result | 1. In step 4, the file system space reclamation is completed, and the used capacity of the VVol LUN has been reduced. |
Test Record |
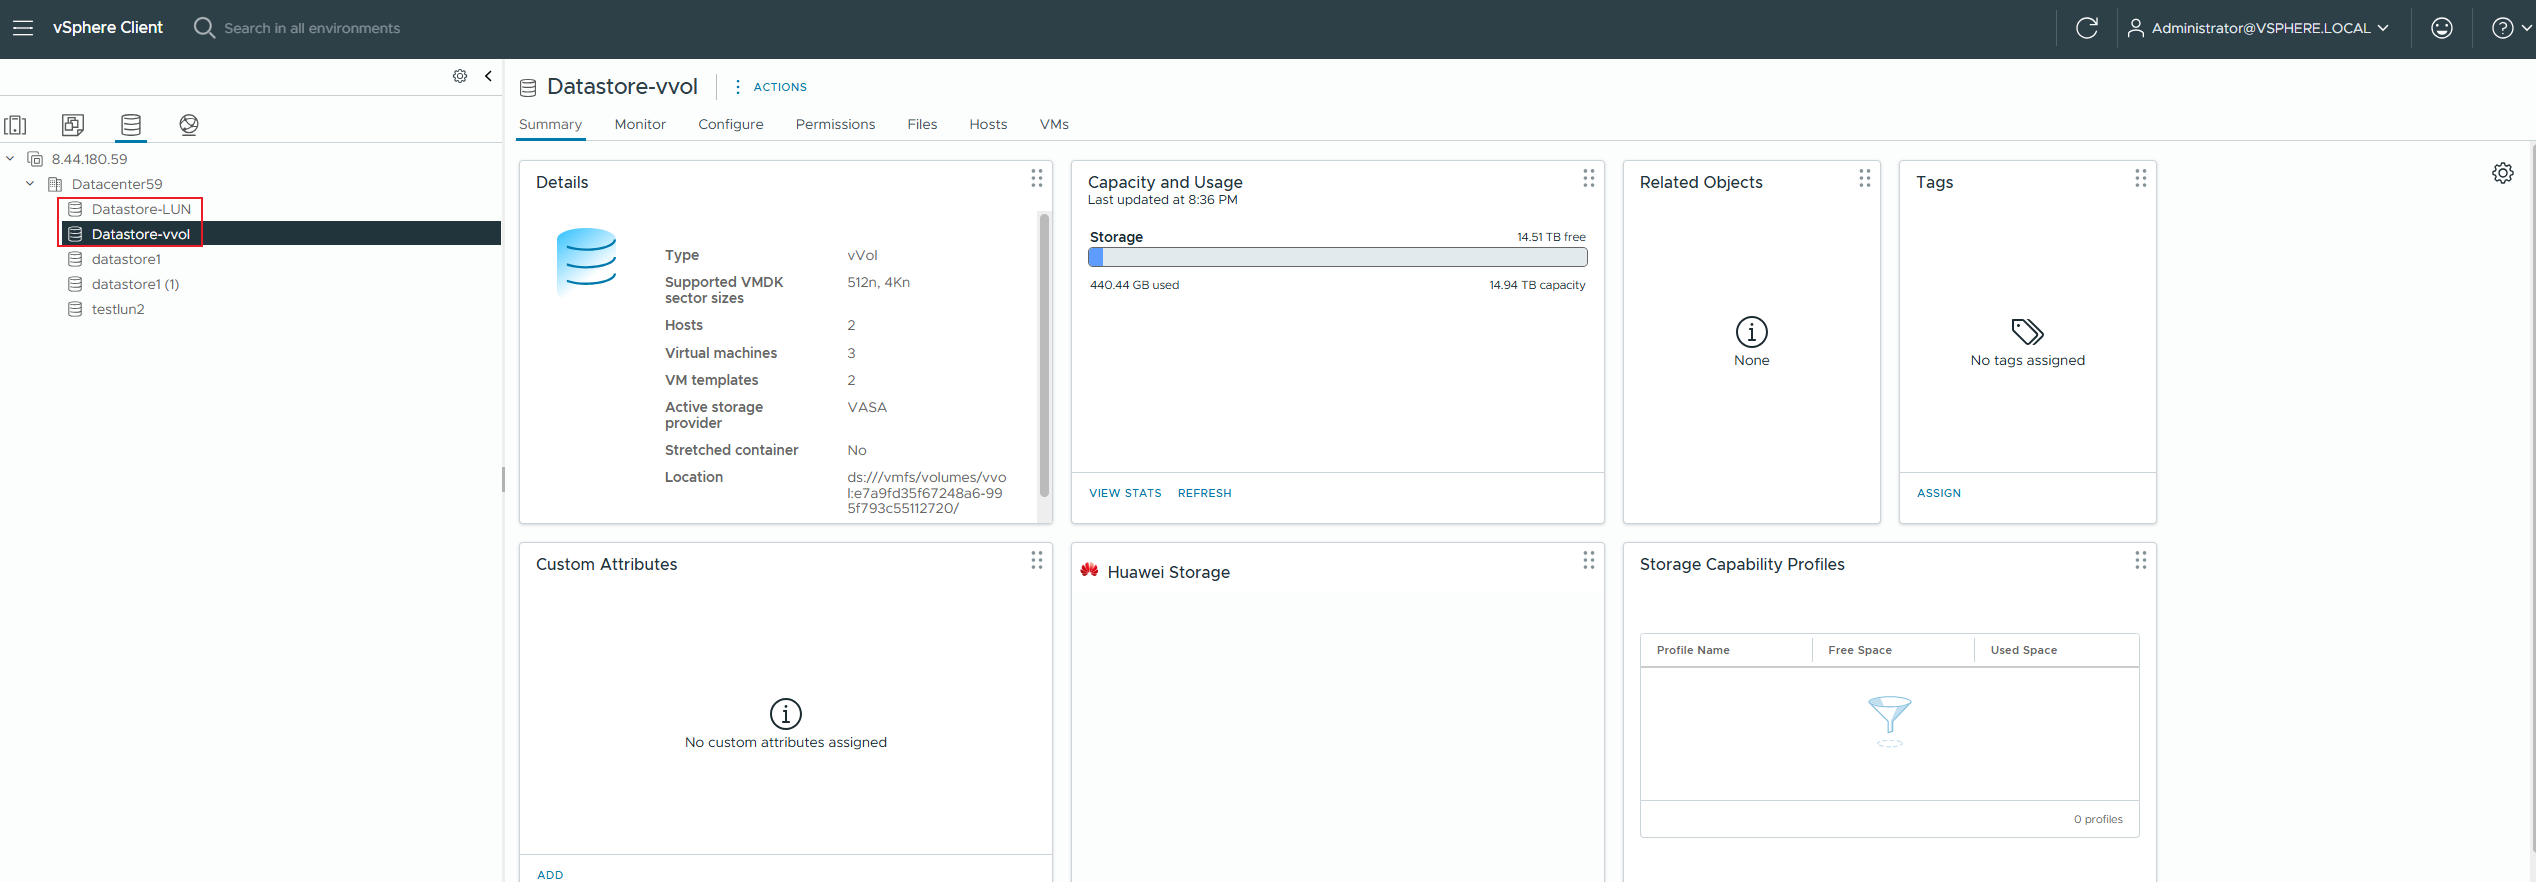
 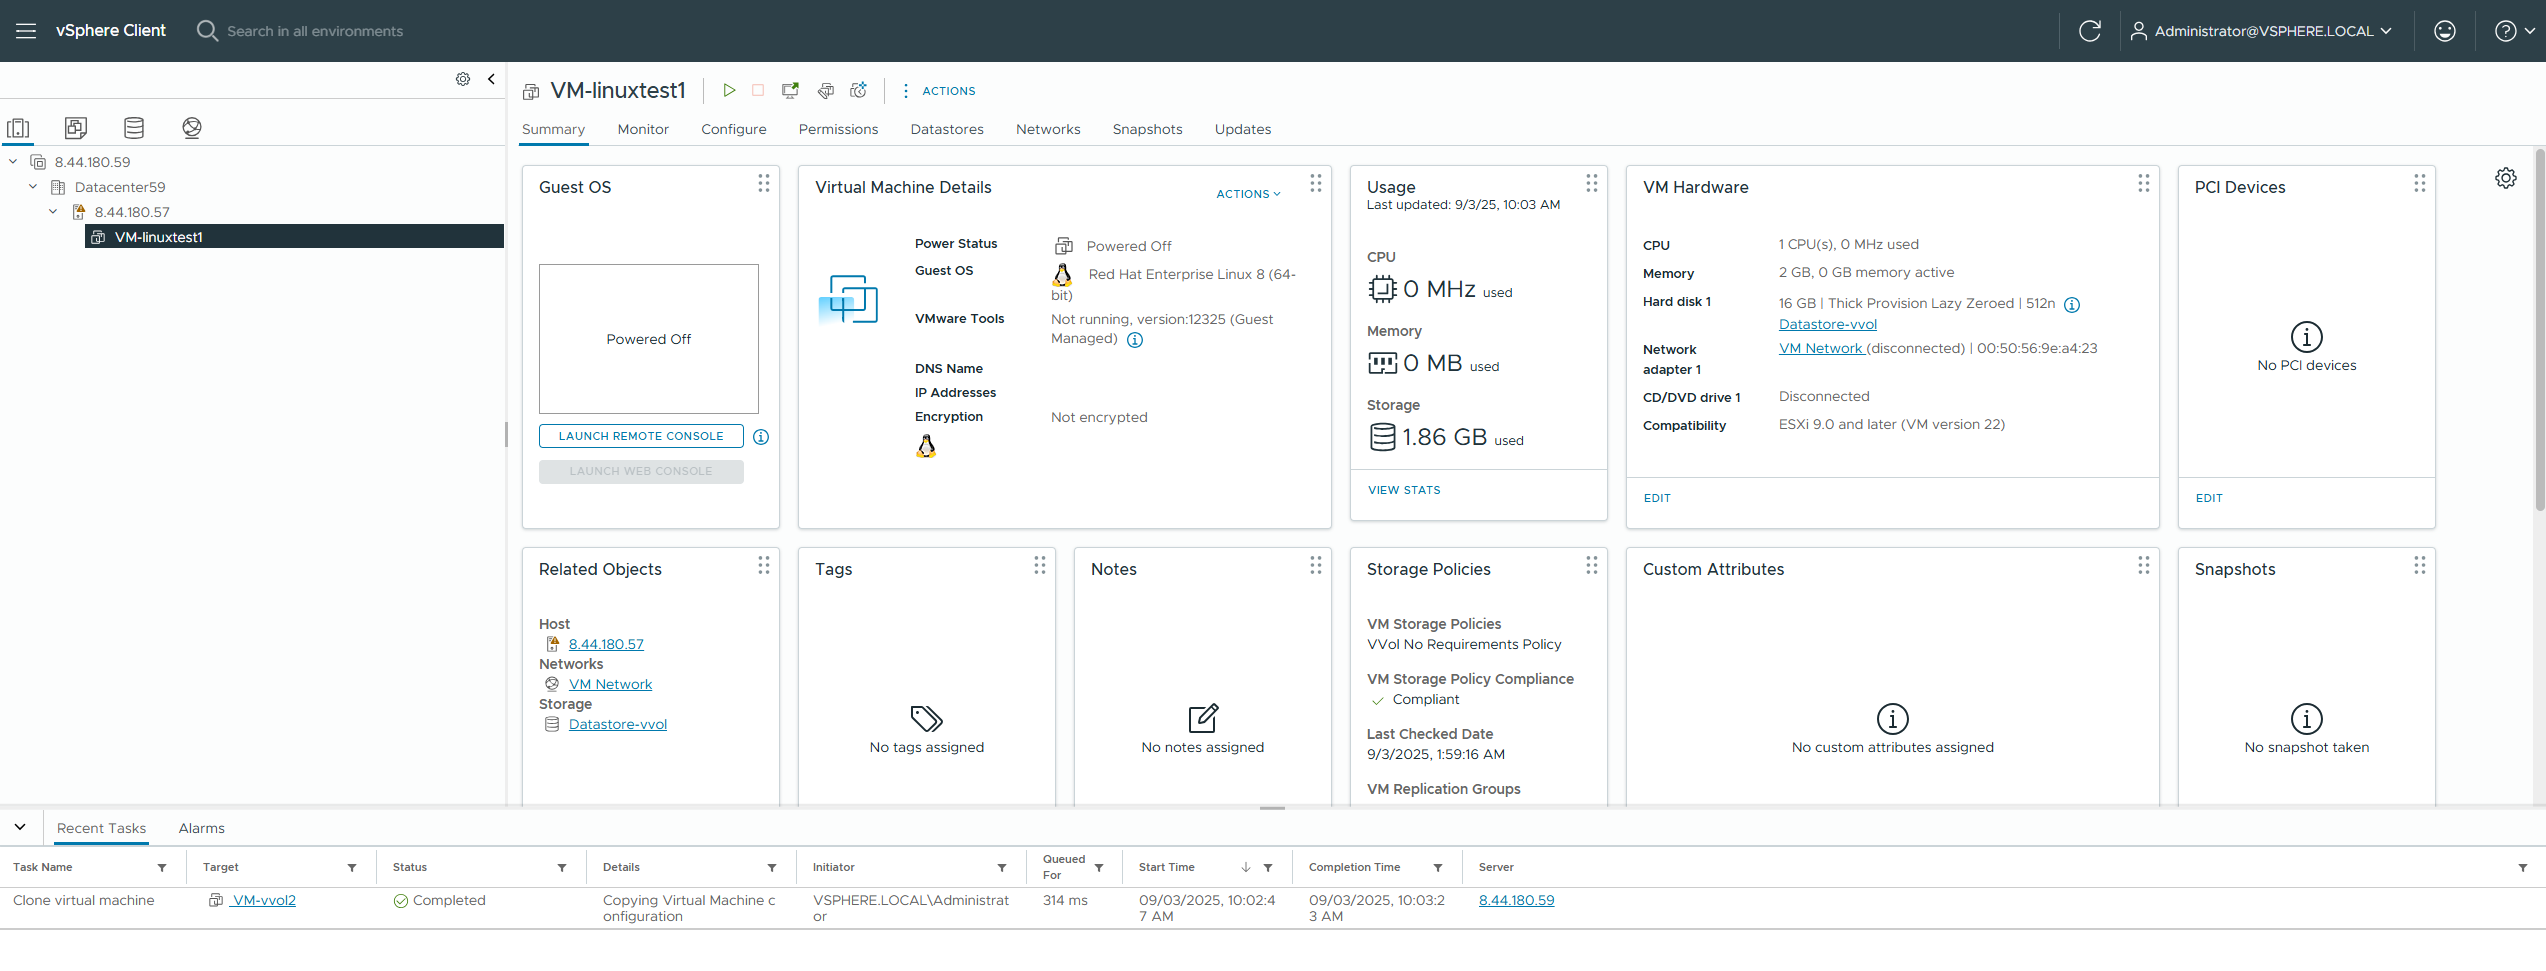 2. Add a new 200GB thick-provisioned hard disk to the vvol virtual machine, format it with the ext4 file system and mount it. After mounting, write 80% of the data into the file system and check the capacity usage of the vvol LUN on the array; 
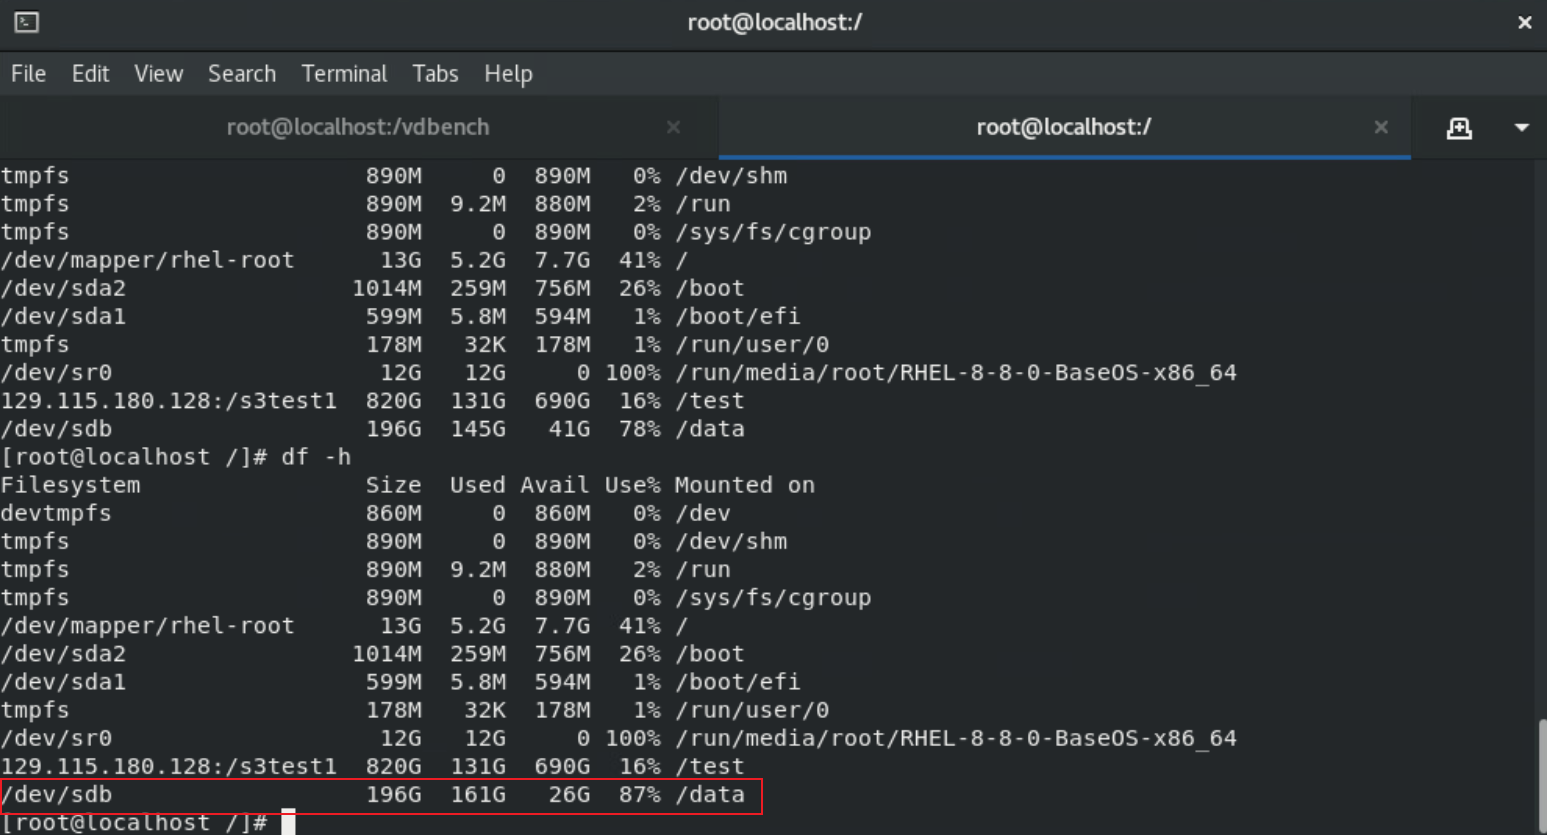
 3. Delete the files in the file system from step 2 on the virtual machine and observe the capacity usage of the vvol LUN on the array; 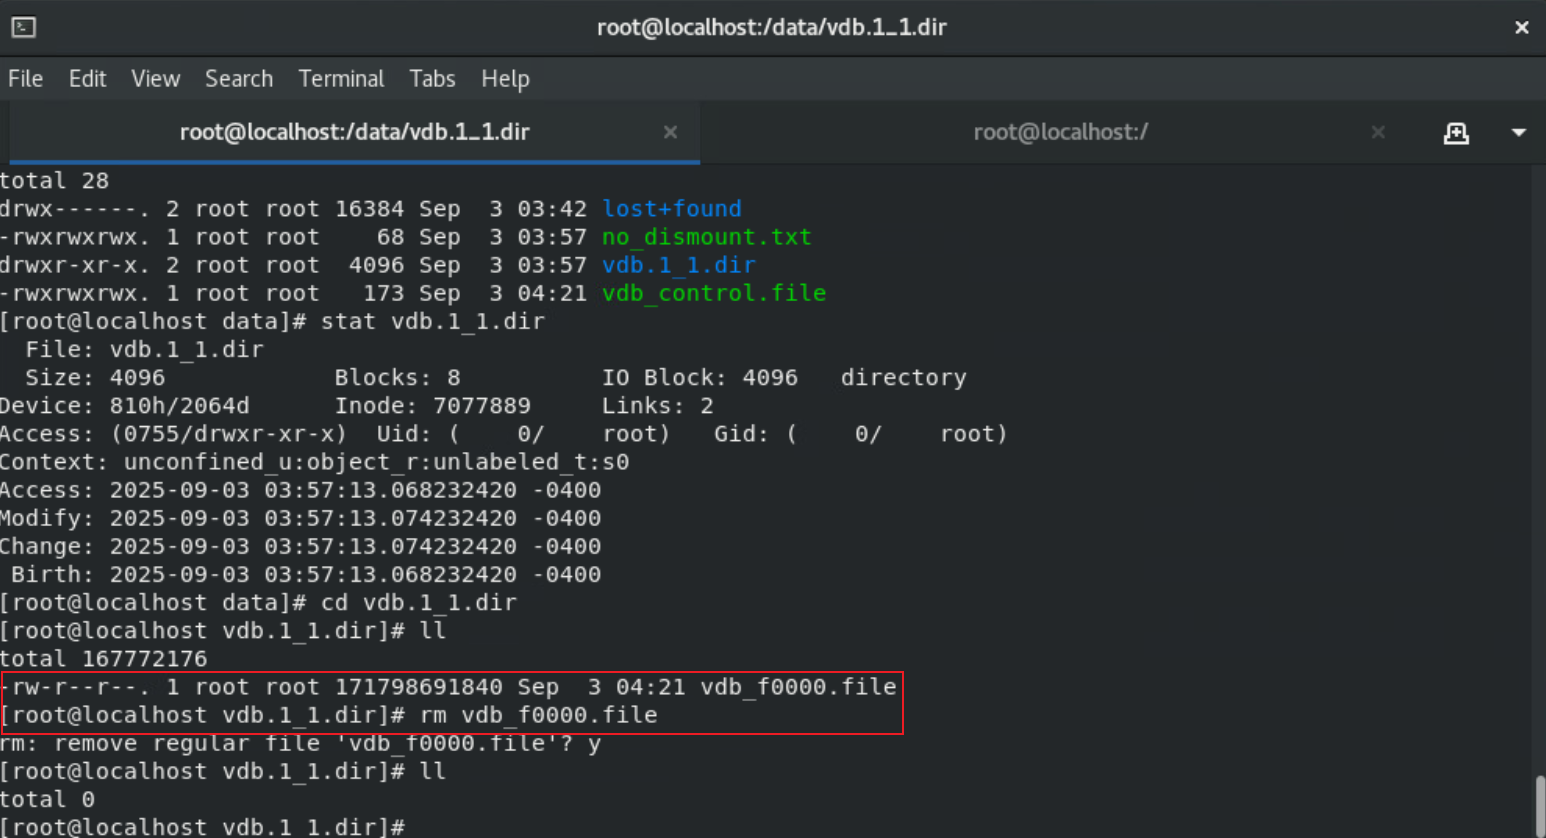

|
Test Conclusion | PASS |
2.6 The VVOL Virtual Machine QoS Policy is now effective.
Test Purpose | Is the VVOL virtual machine QoS policy effective. (Protocol: FC) |
Test Networking | Storage and VMware ESXi Compatibility Test Networking |
Prerequisites | 1. The VASA Provider has been installed and configured. 2. The VASA Provider has been registered with vCenter and initial configuration is complete. 3. The host, storage, and networking have been completed. |
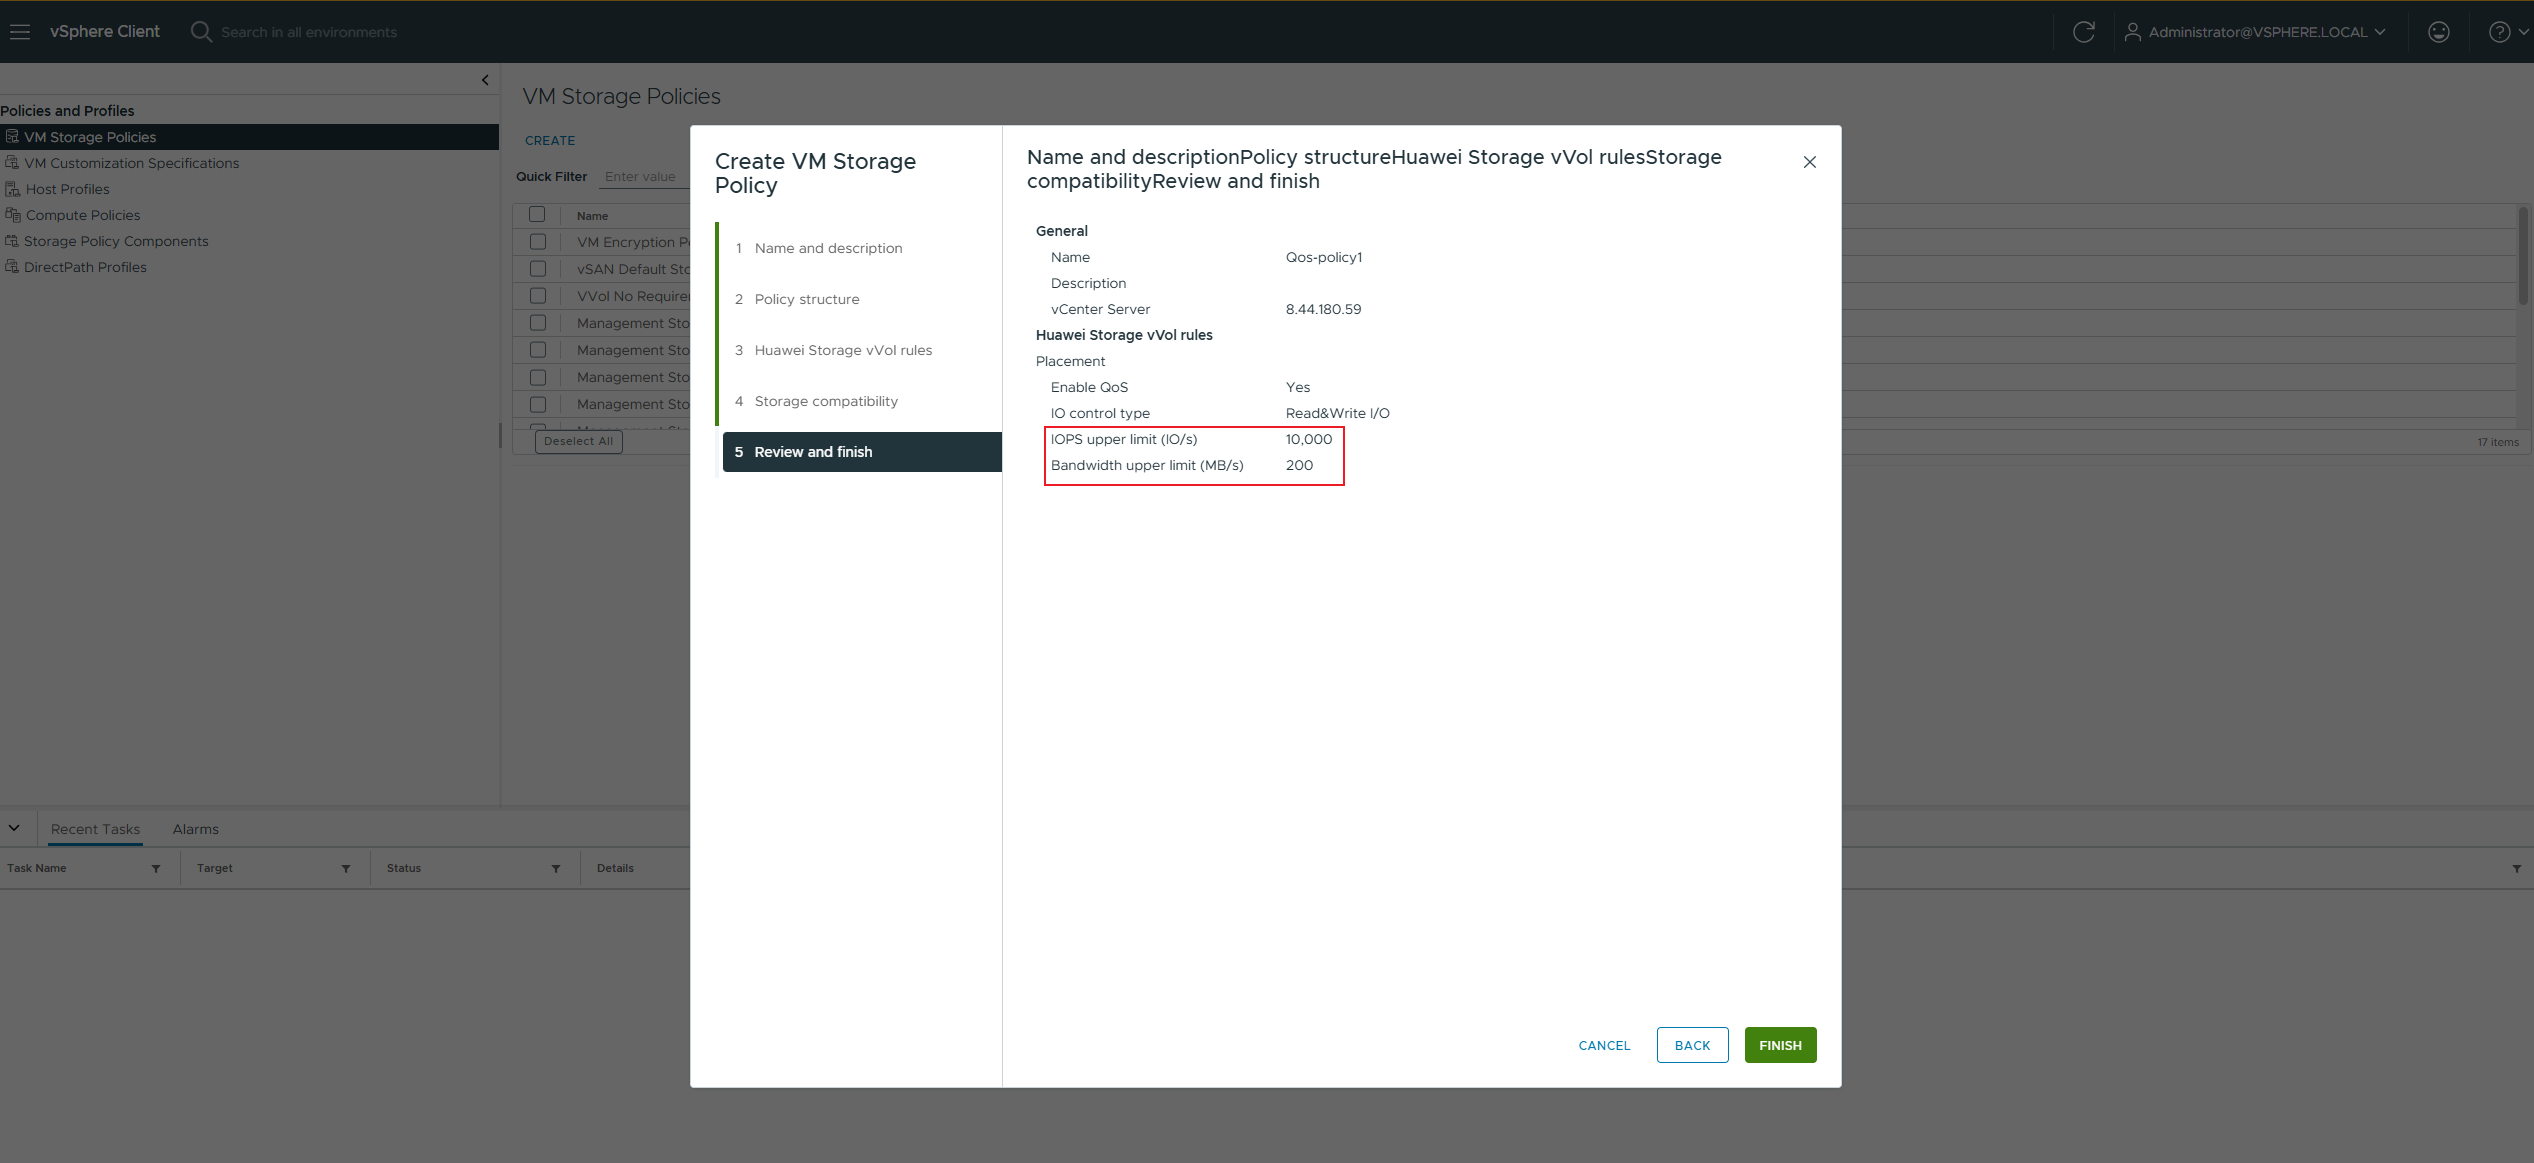
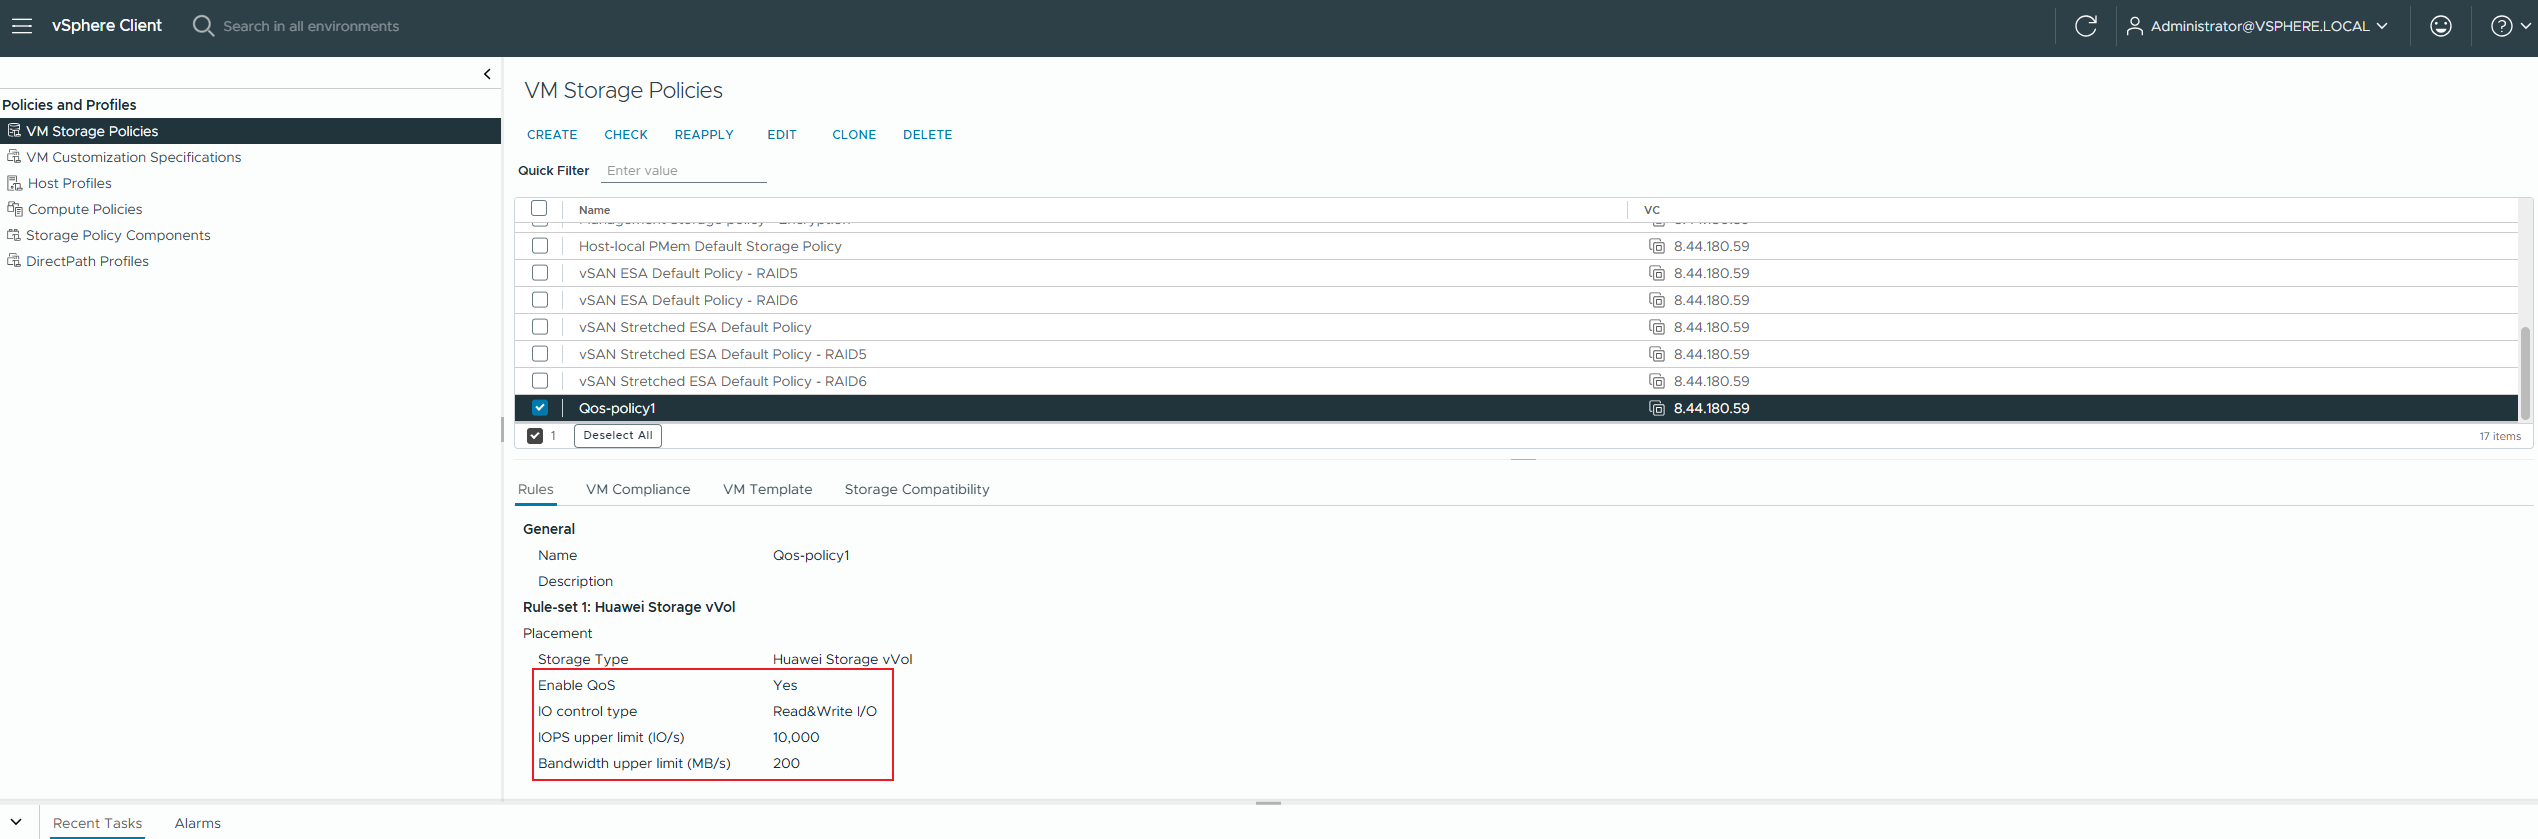
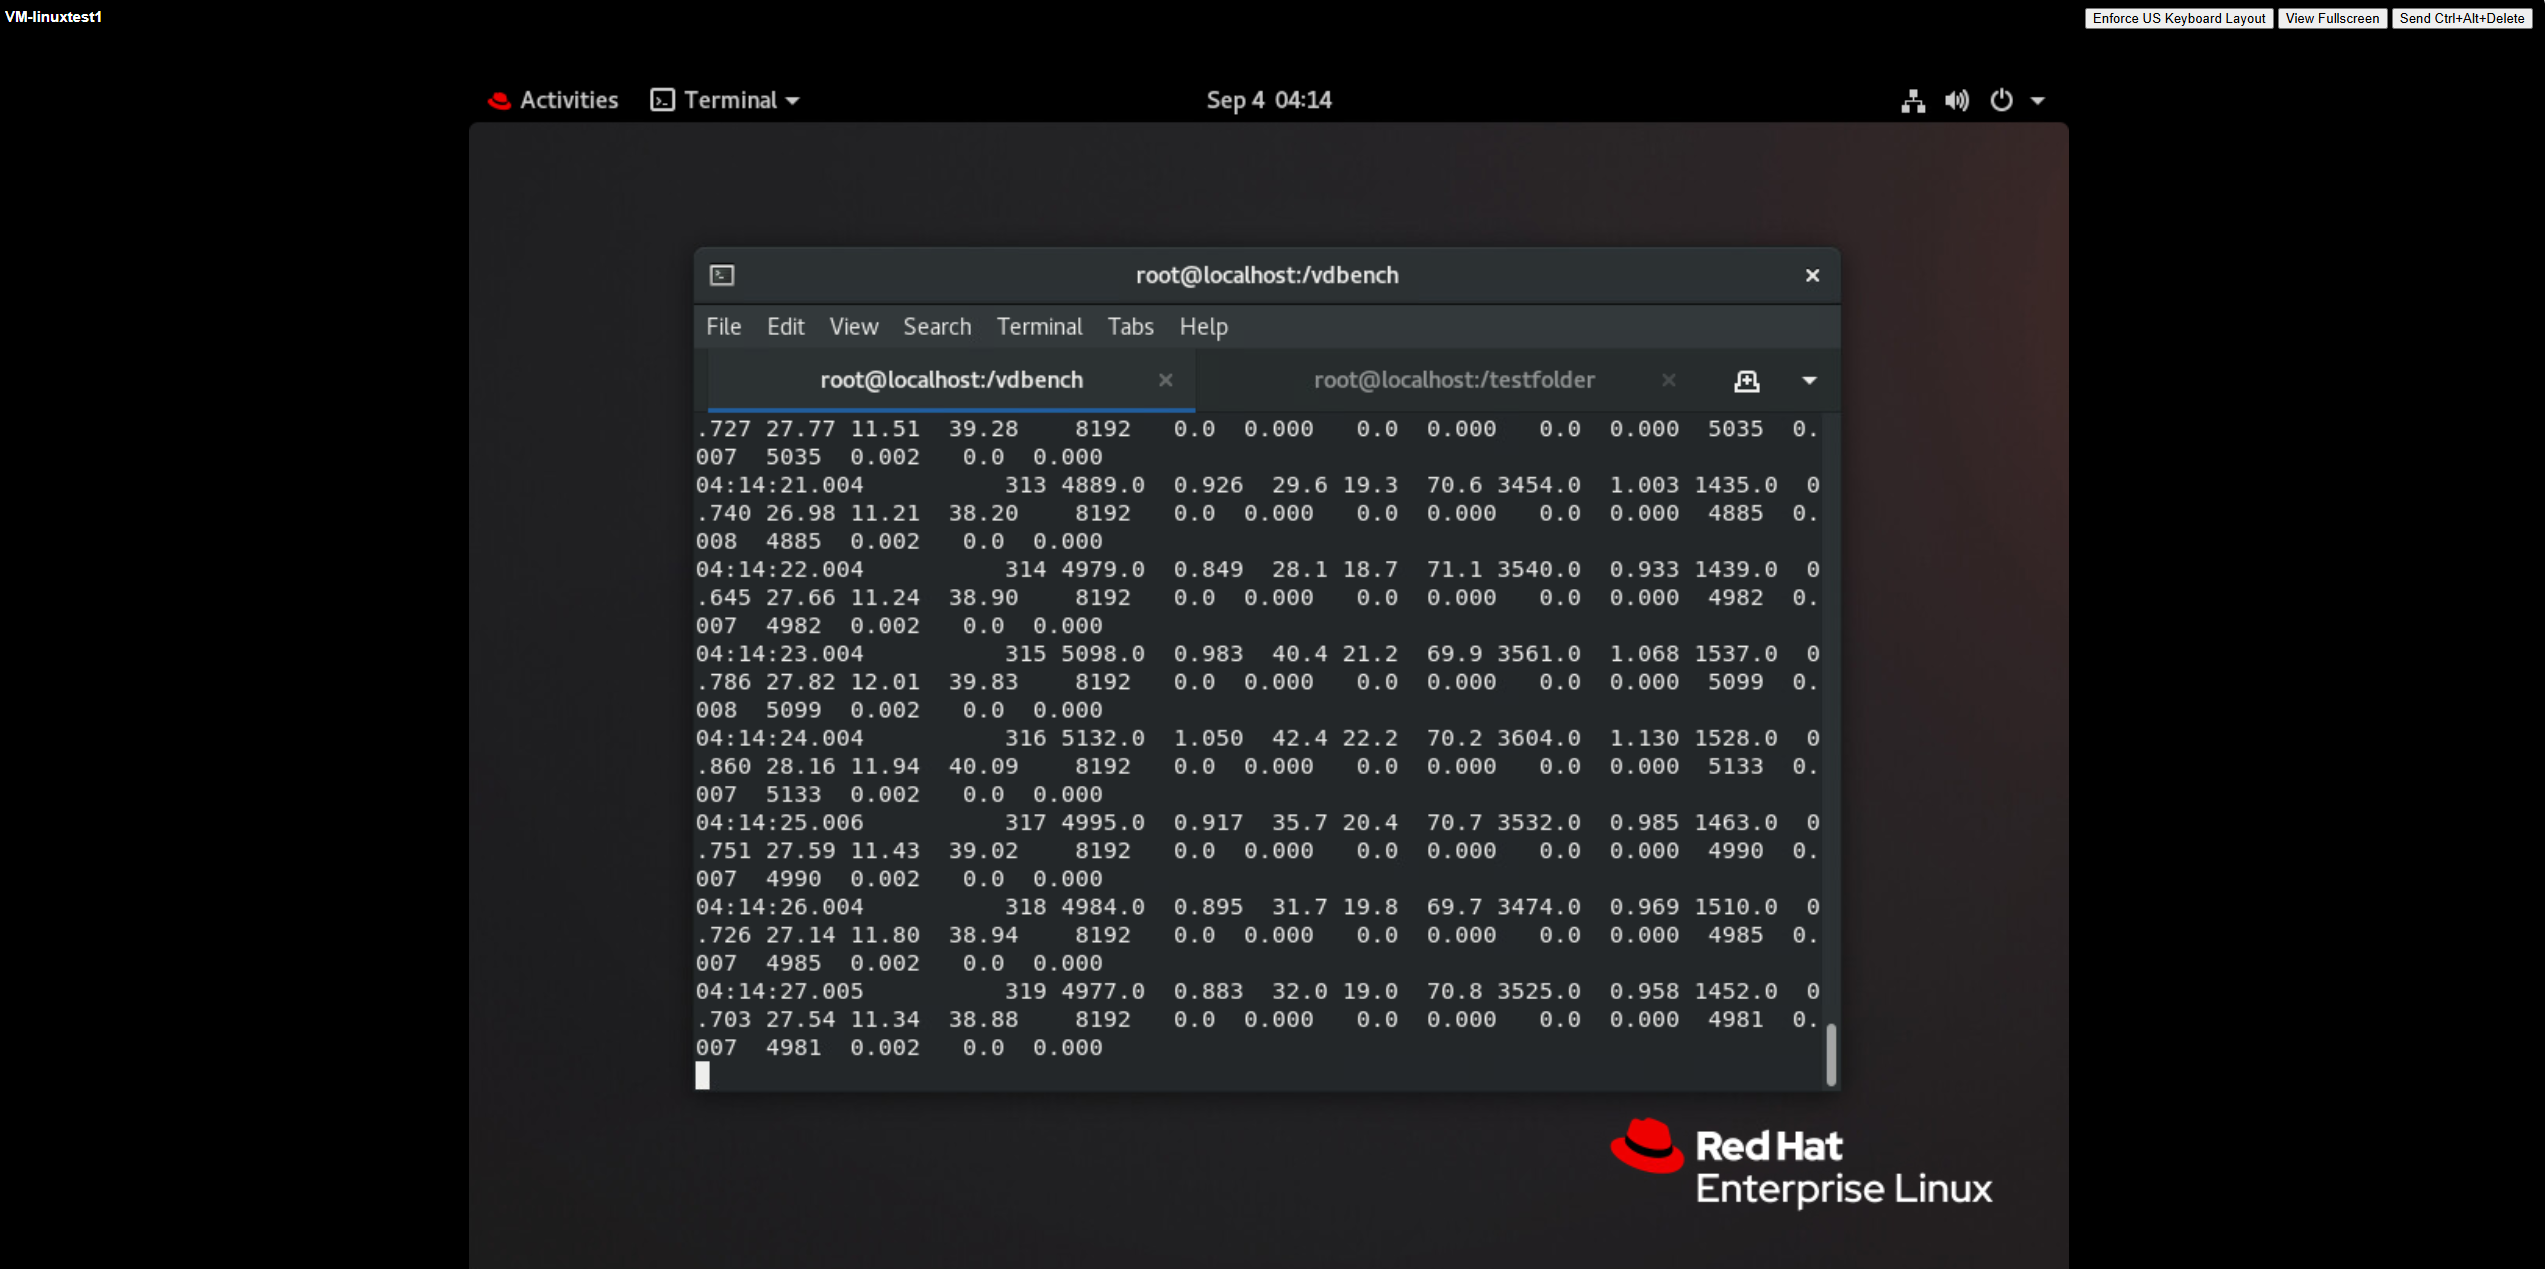
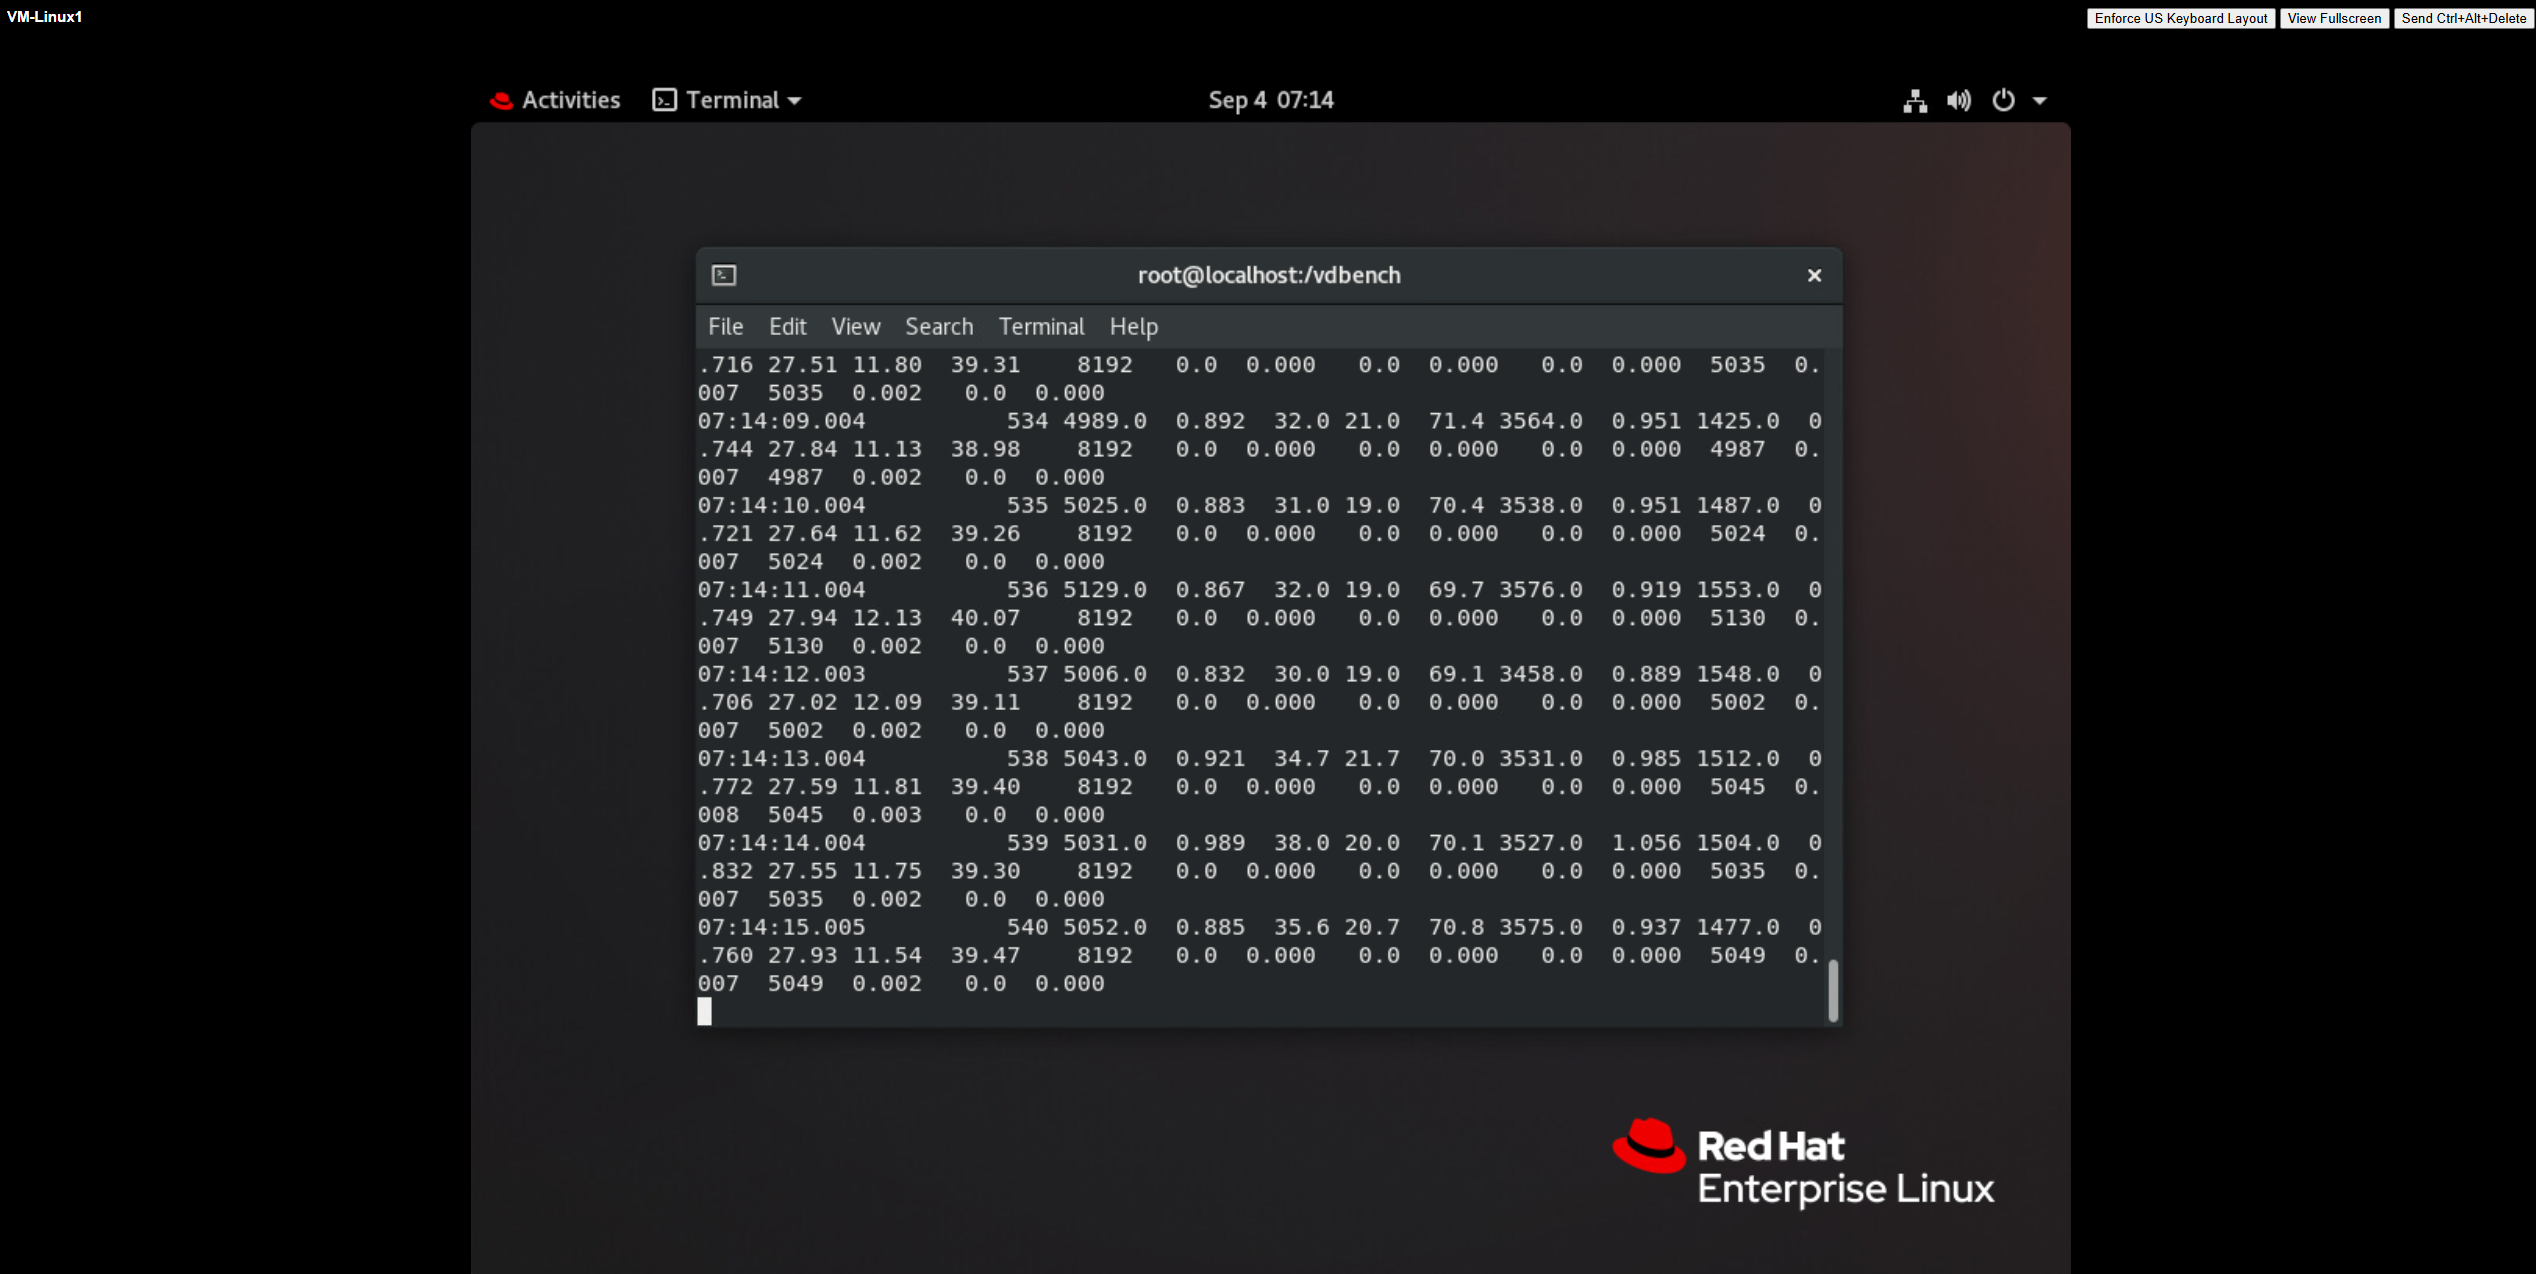
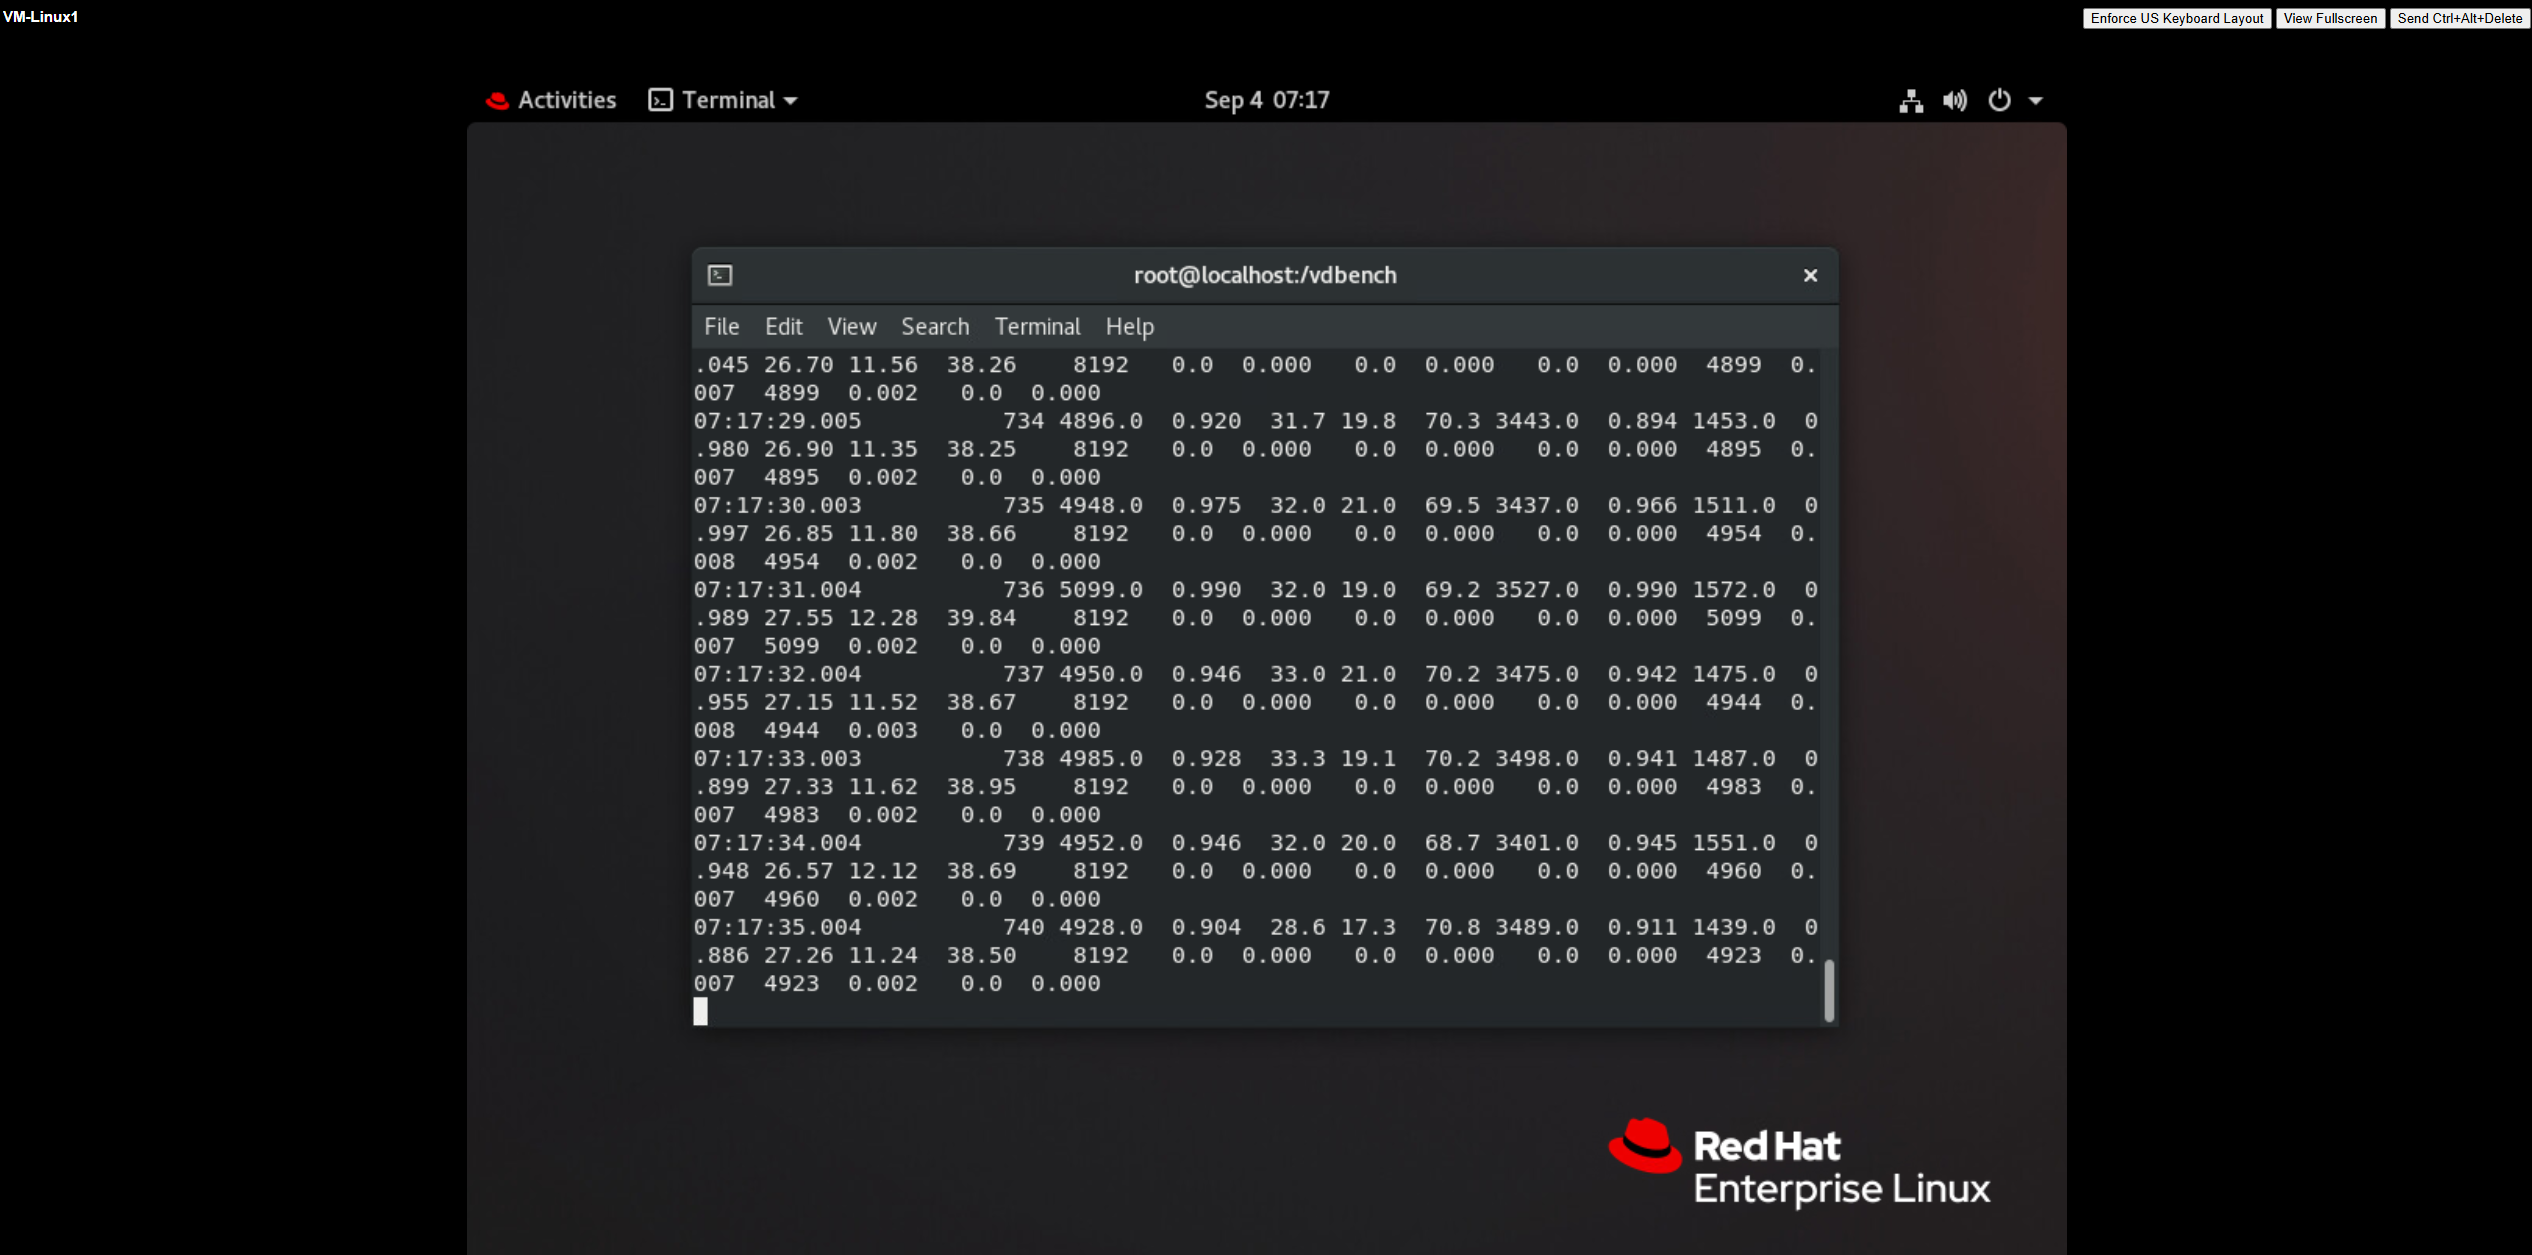
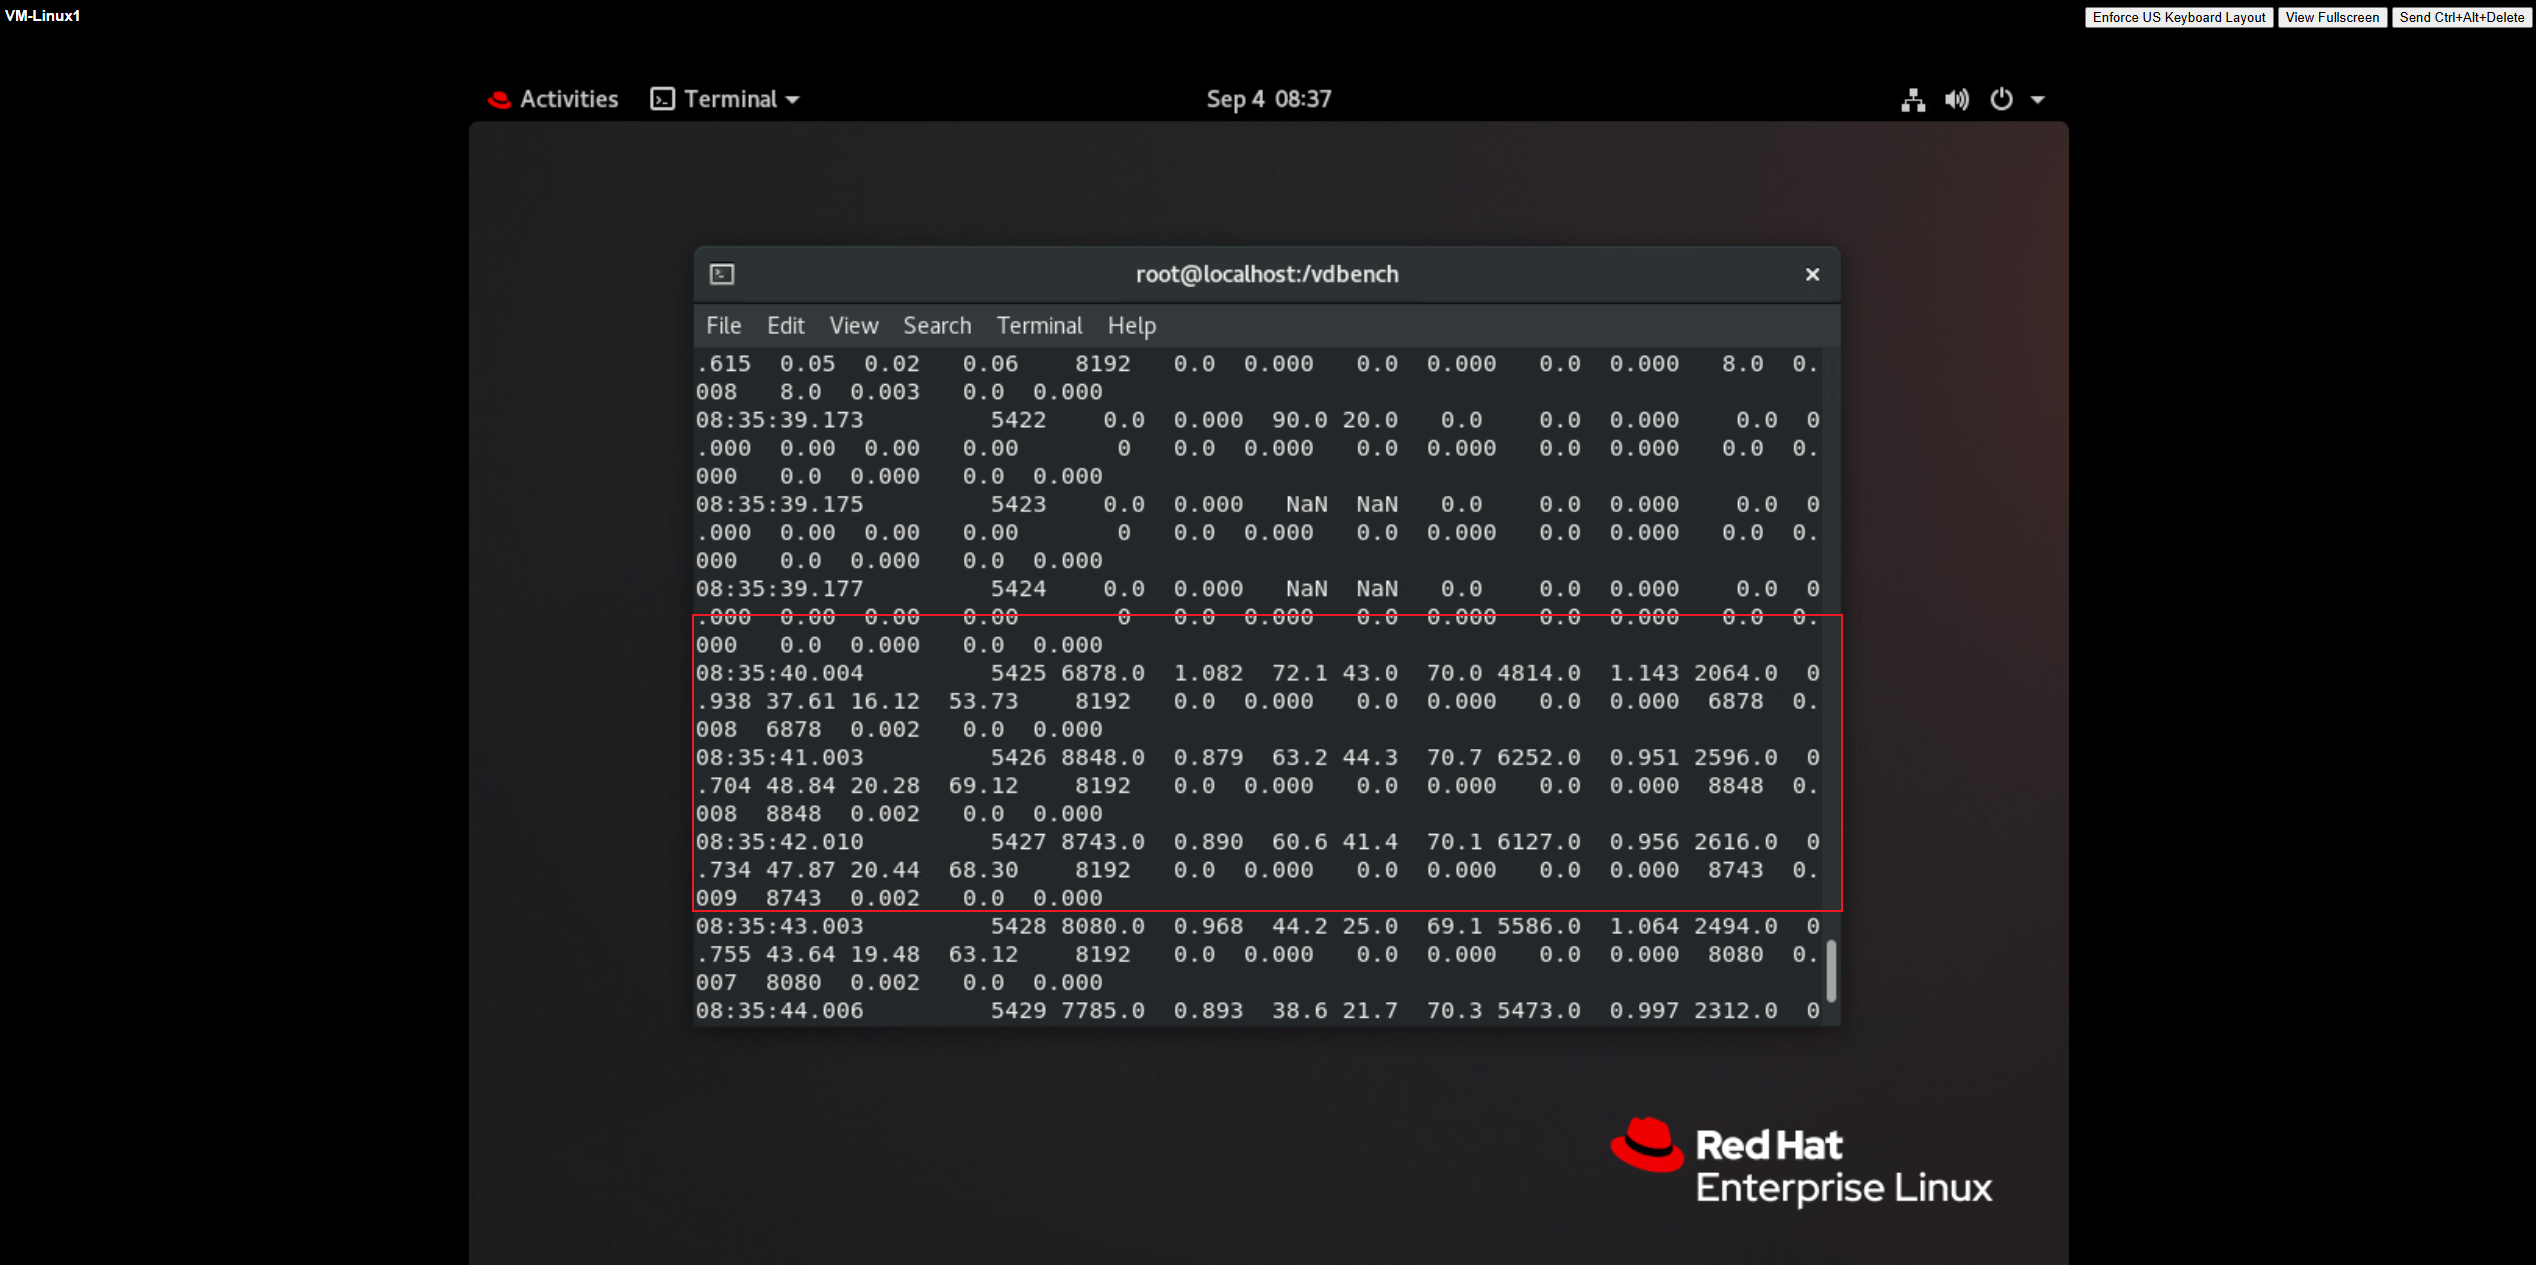
Test Procedure | 1. Clone a virtual machine from the VVOL_TEMPLATE virtual machine template to the vVols Datastore. 2. Set the QoS policy parameters, with an IOPS limit of 10,000 IOPS and a bandwidth of 200 MB/s. 3. Add a new 200GB thick-provisioned disk to the virtual machine, power on the virtual machine, and use vdbench to issue a 7:3 100% random workload to the newly added disk. 4. Observe whether the data stream parameters are within the specified threshold range. |
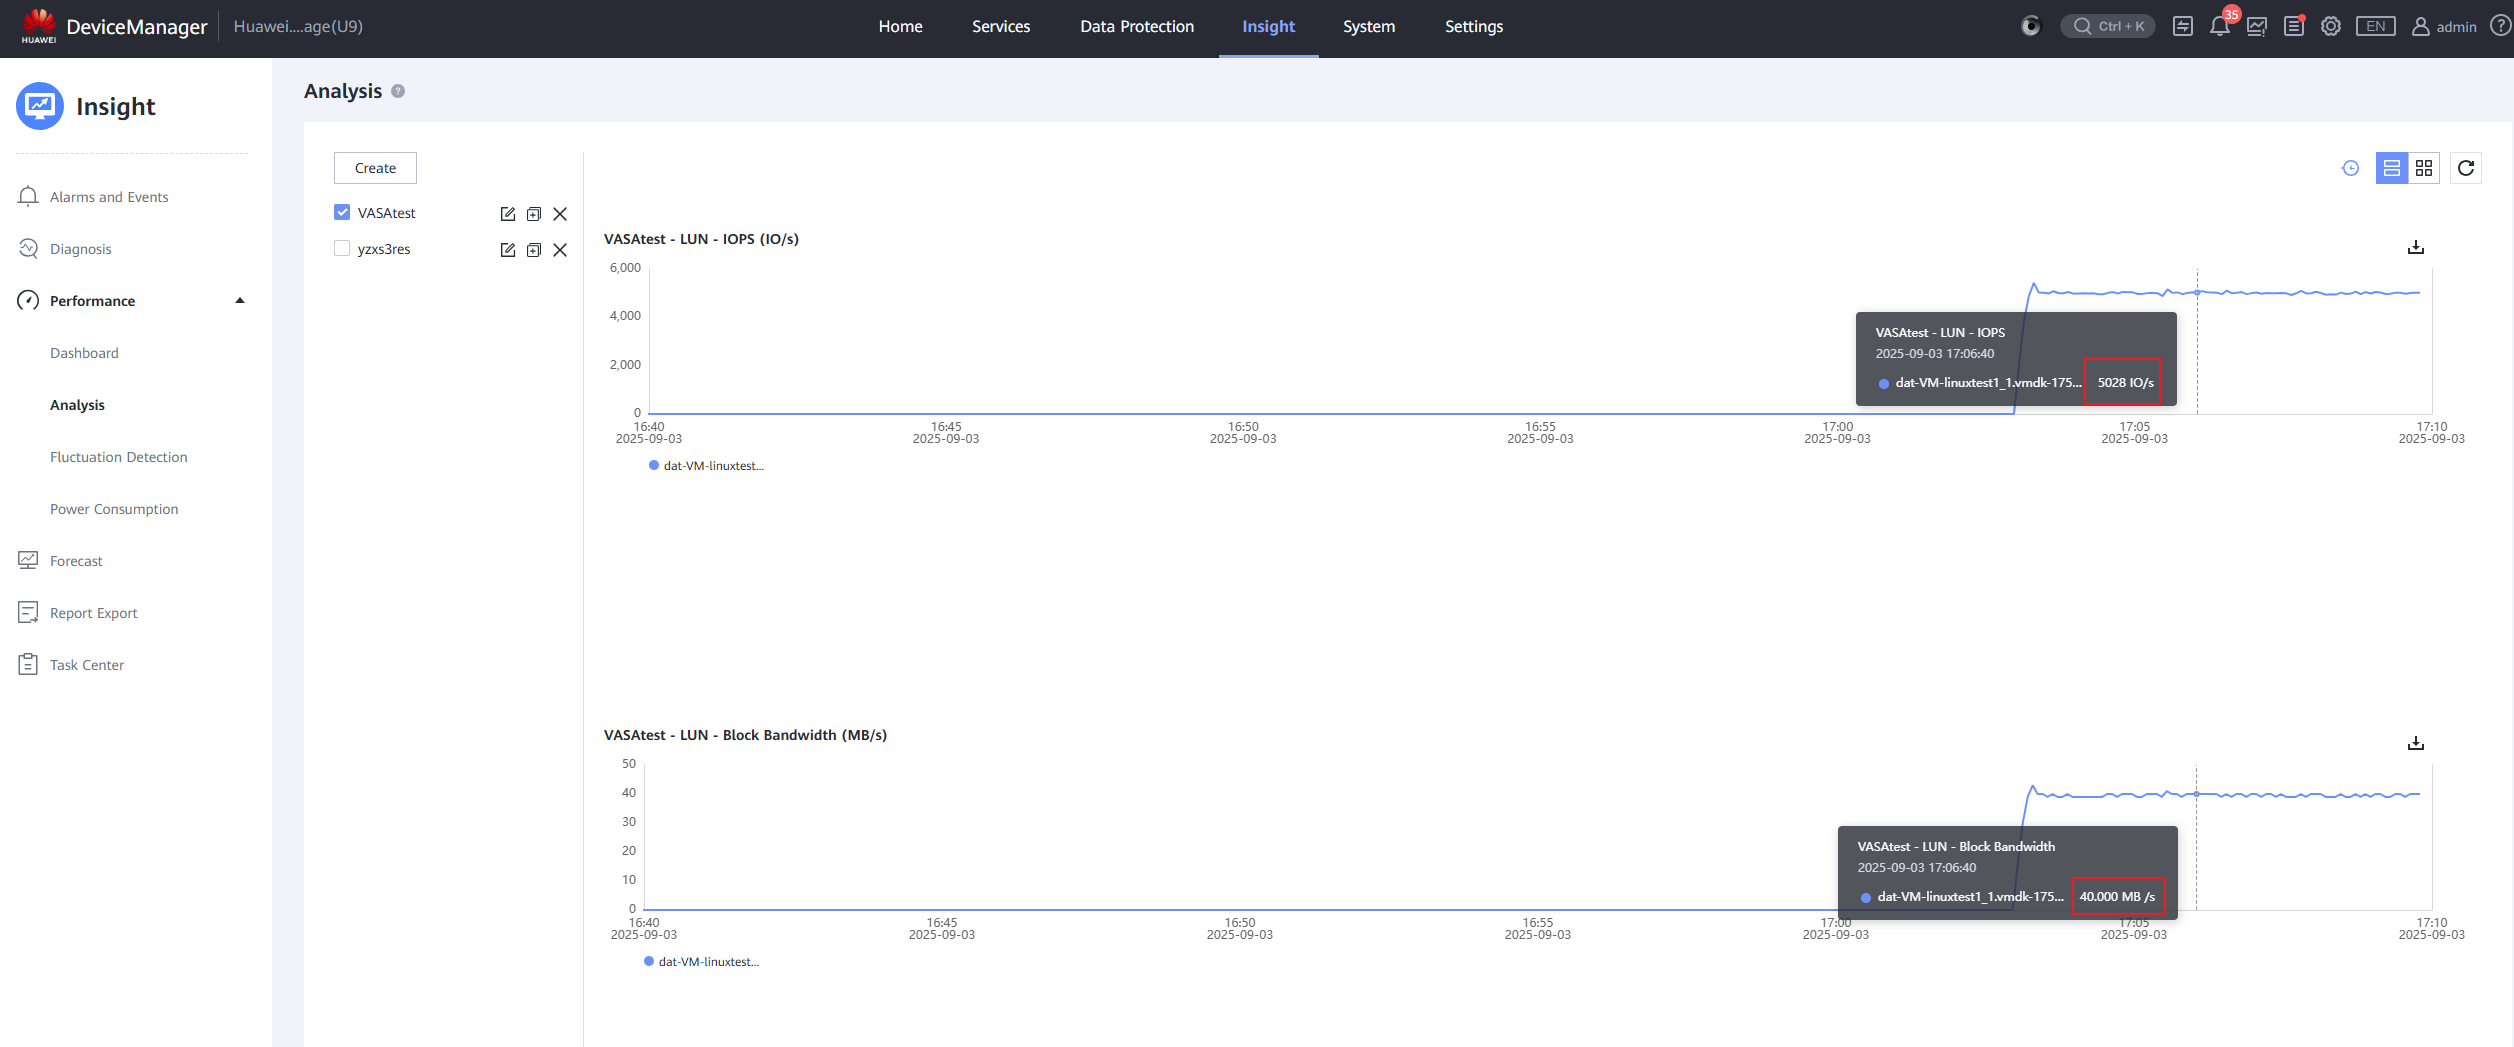
Expected Result | 1. In step 2, the parameter settings were successful. 2. In step 4, parameters such as IO read per second were restricted within the QoS parameter range. |
Test Record |
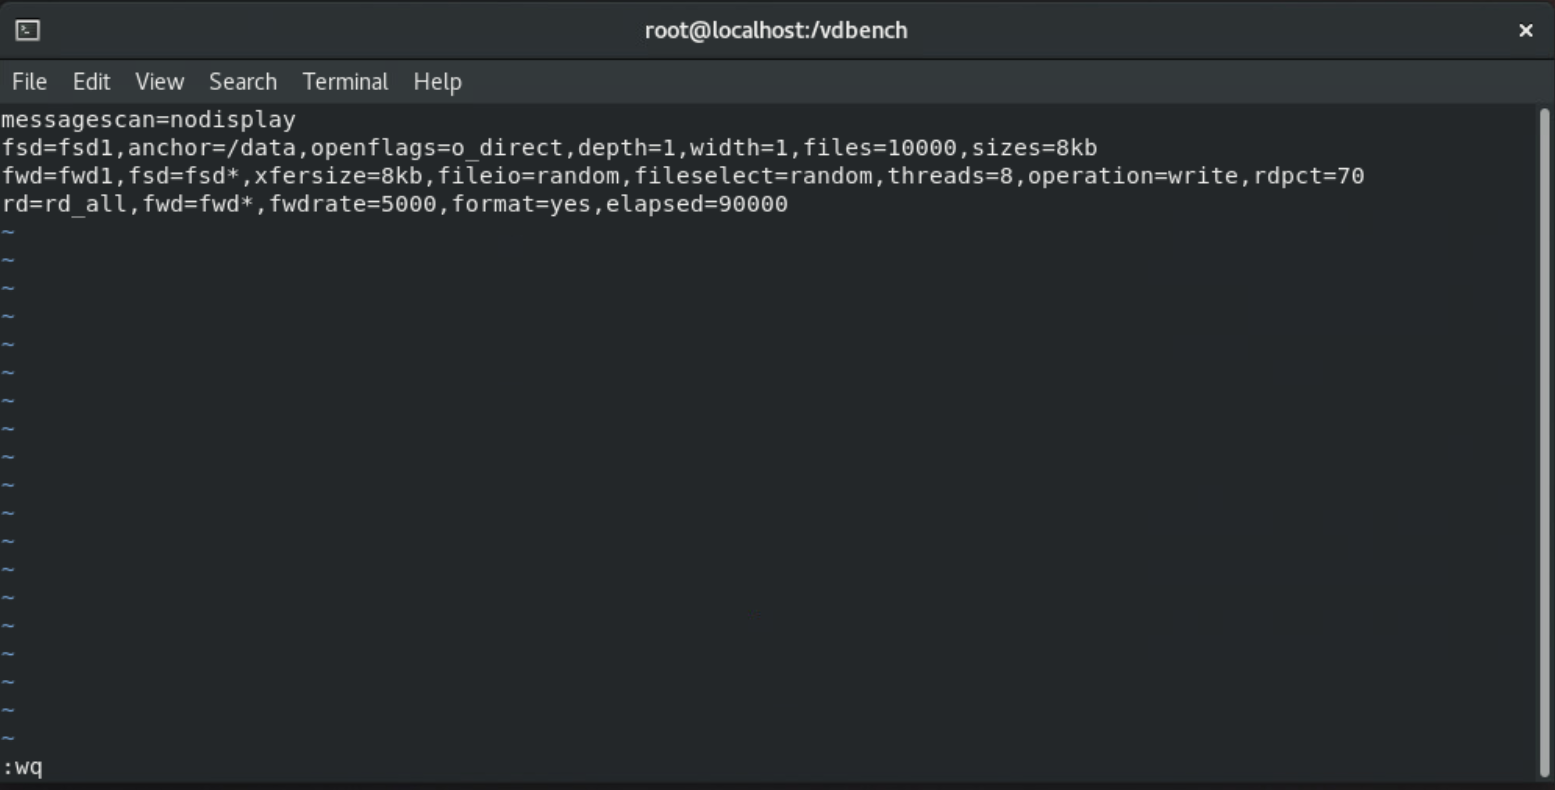
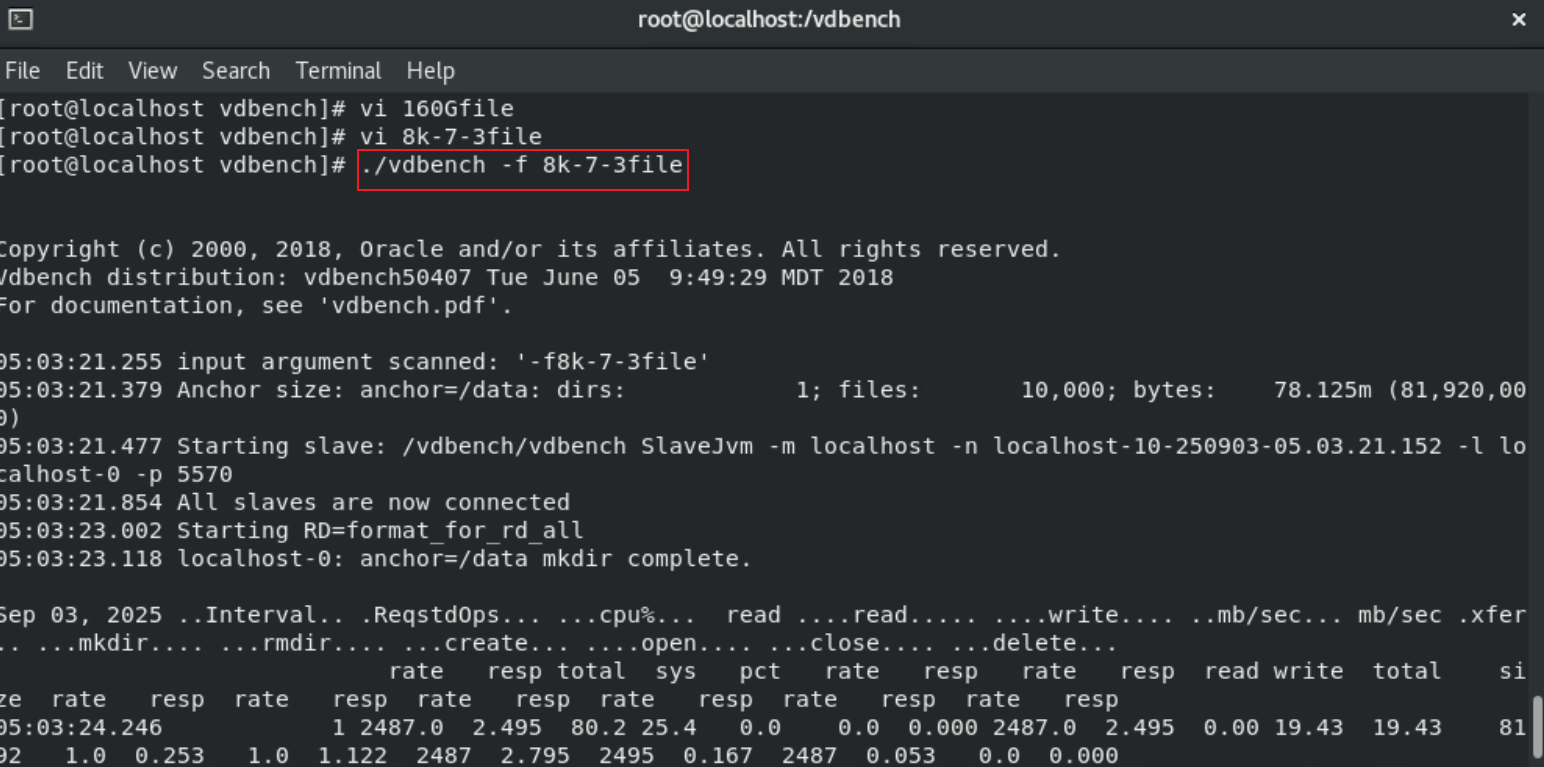 4. Observe whether the data stream parameters are within the specified threshold range. 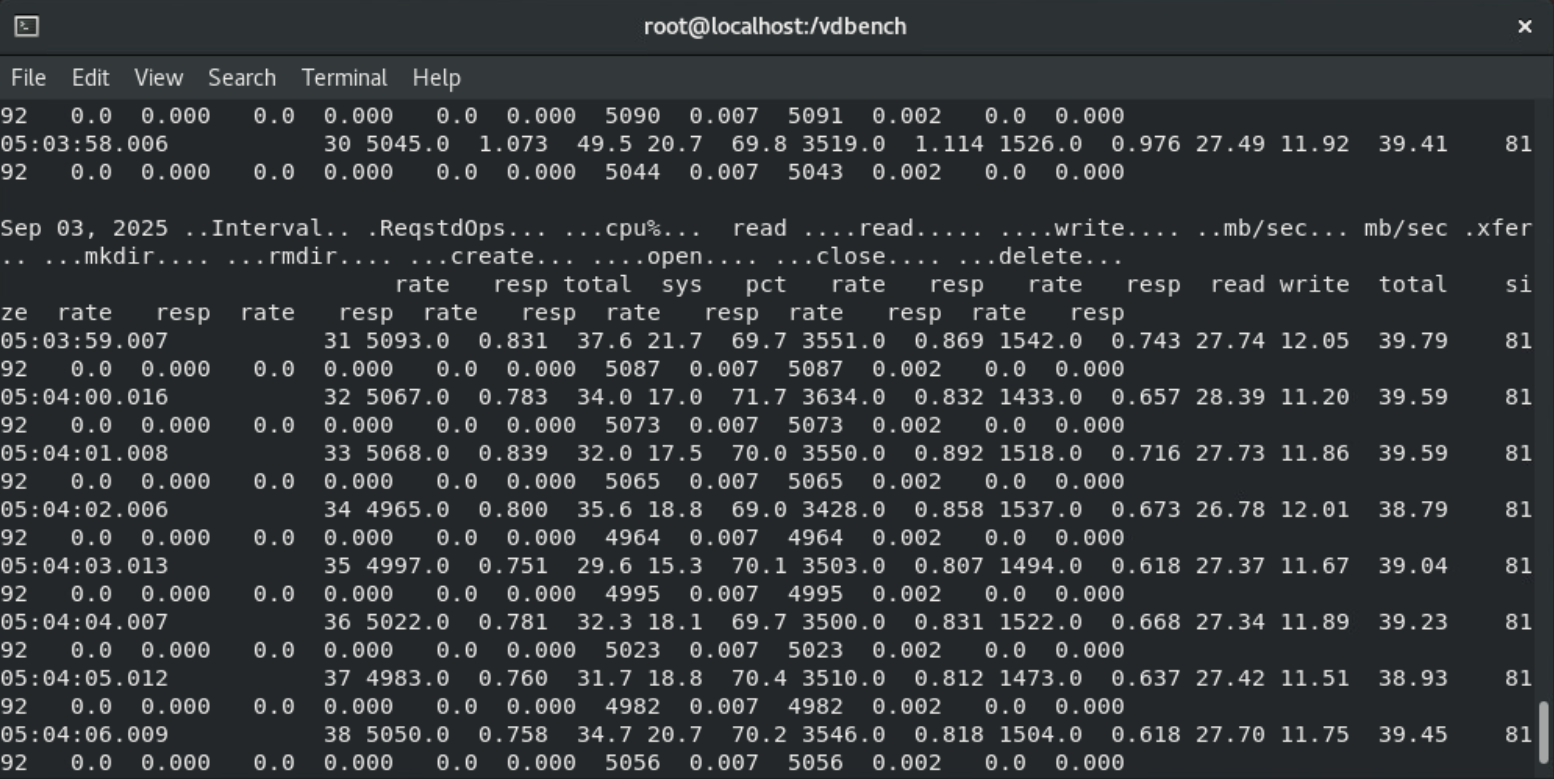
|
Test Conclusion | PASS |
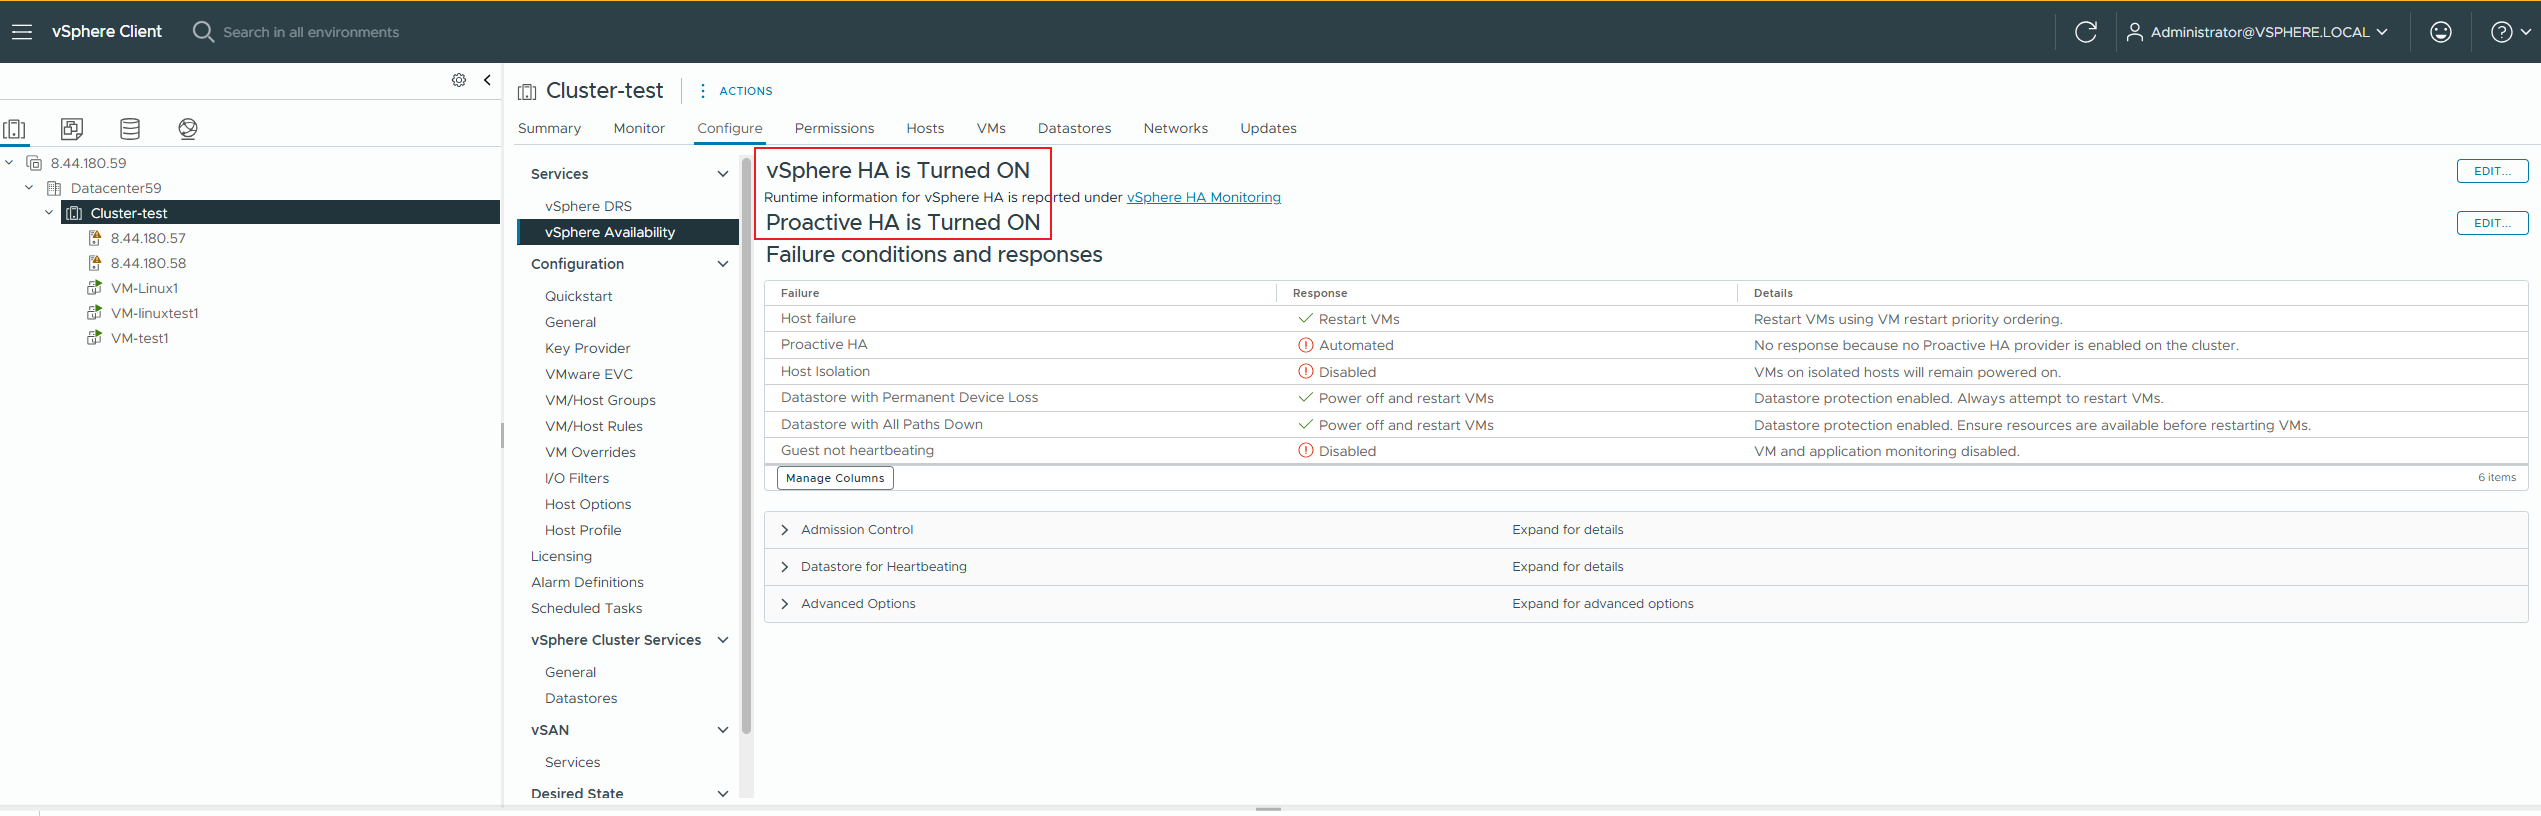
2.7 VVOL Virtual Machine Host HA Activated
Test Purpose | Check whether the HA function takes effect on the vVol VM host. (Protocol: FC) |
Test Networking | Storage and VMware ESXi Compatibility Test Networking |
Prerequisites | 1. The VASA Provider has been installed and configured. 2. The VASA Provider has been registered with vCenter and initial configuration is complete. 3. The host, storage, and networking have been completed. |
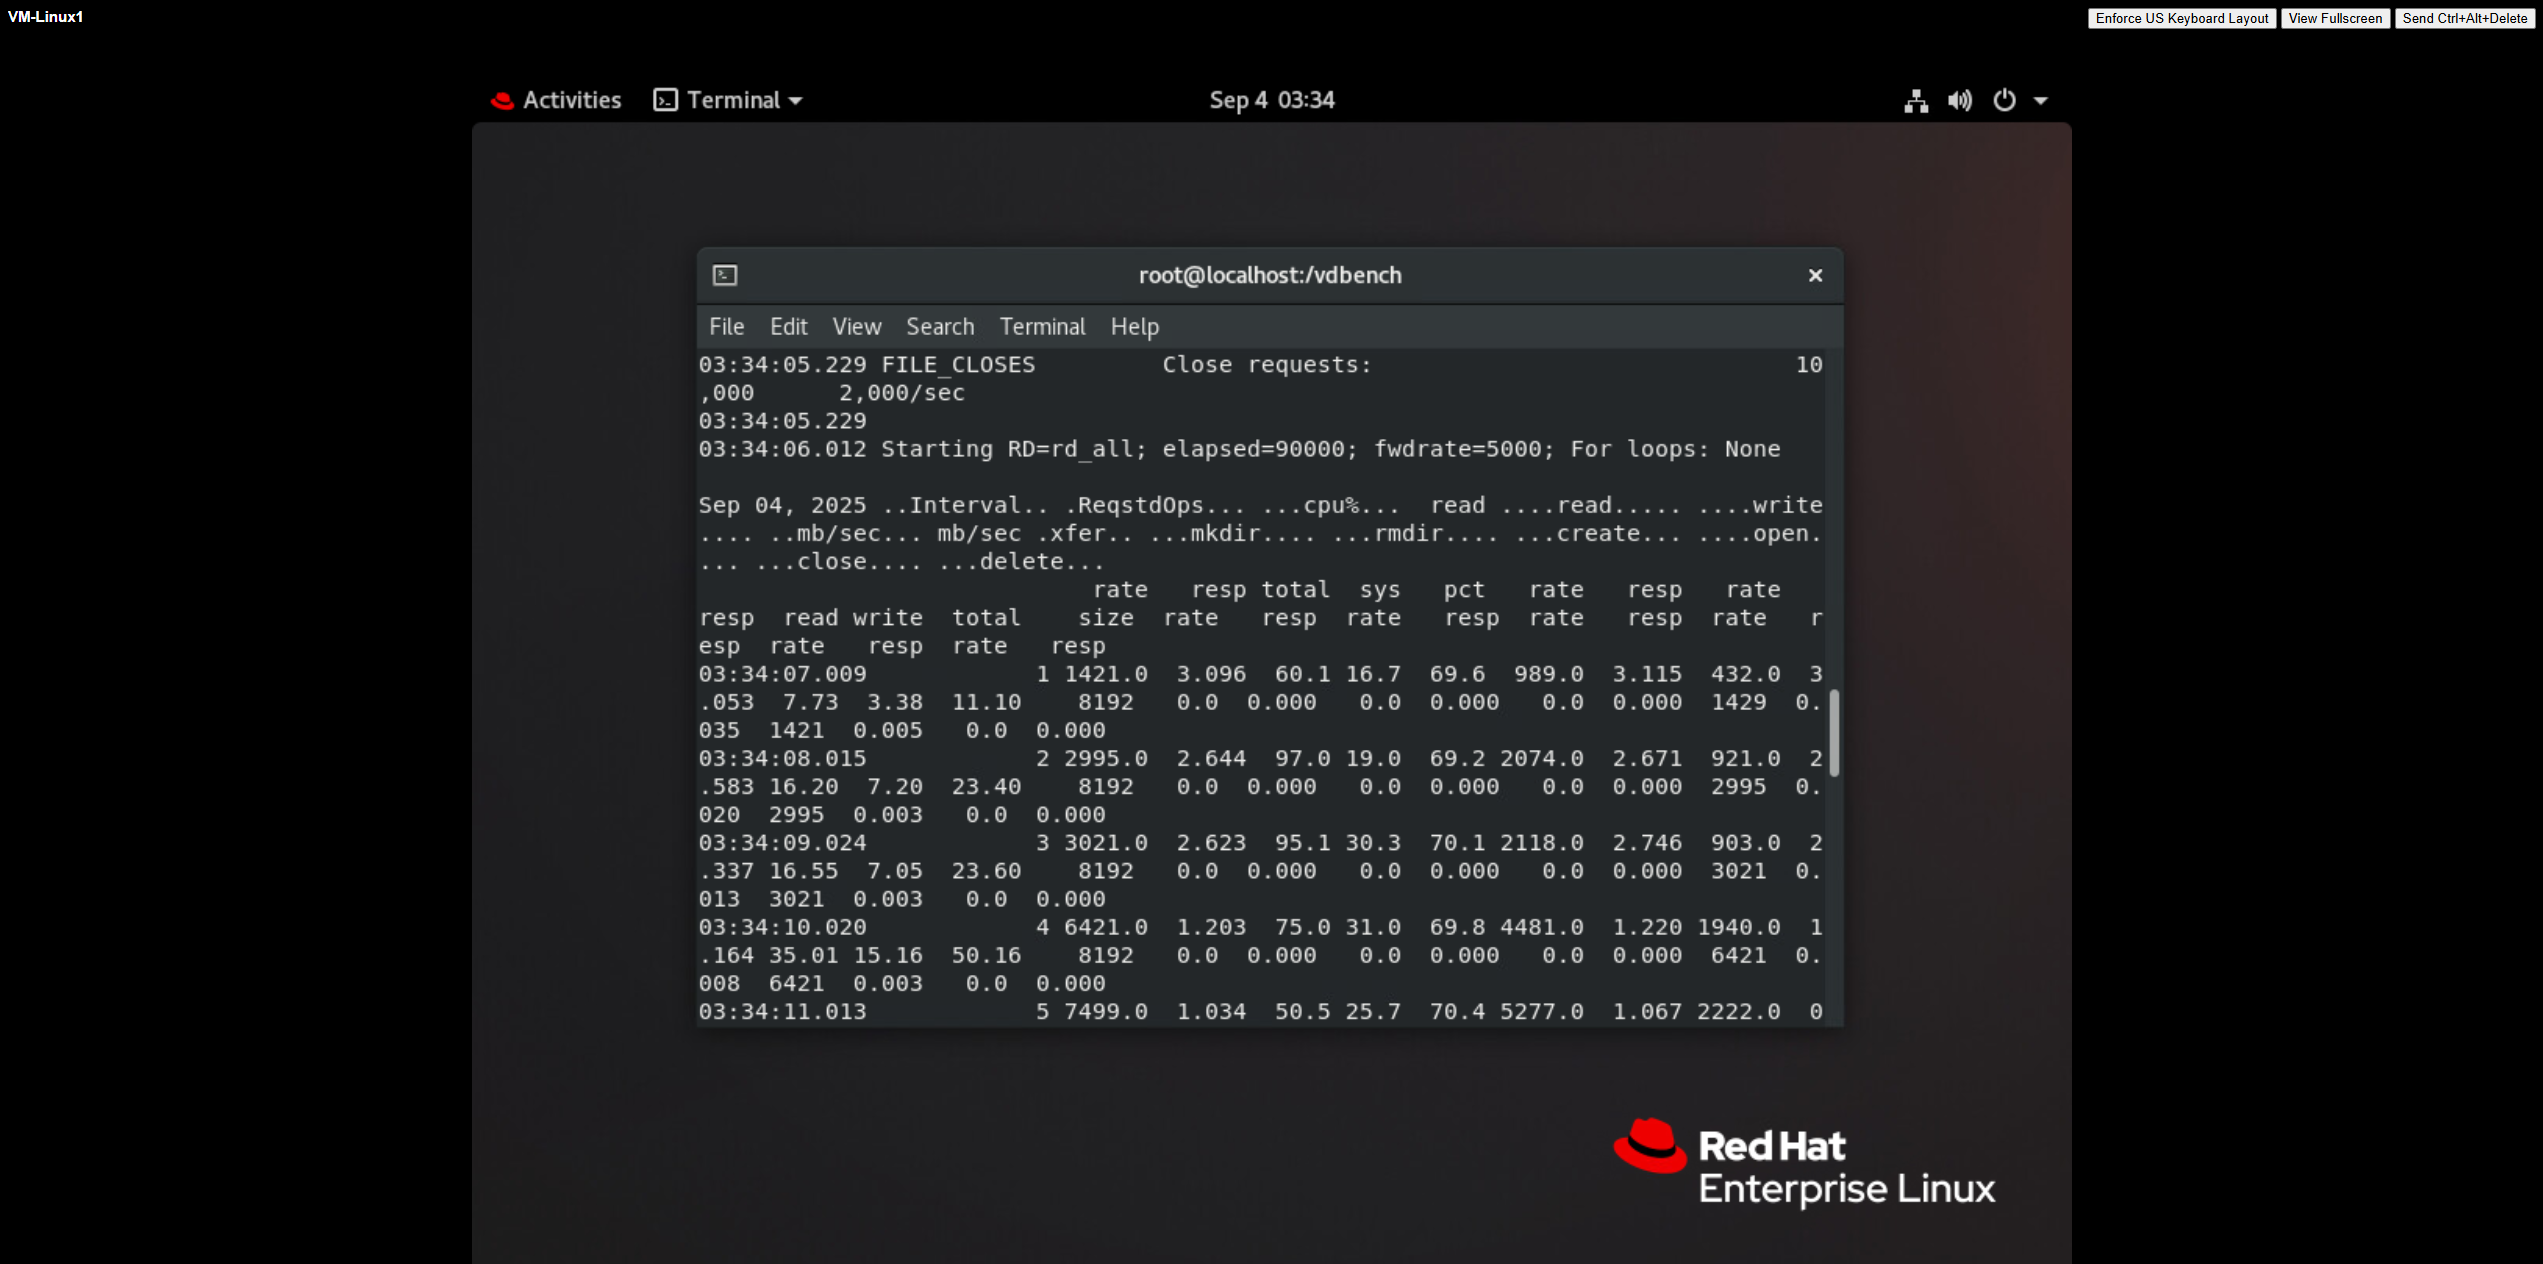
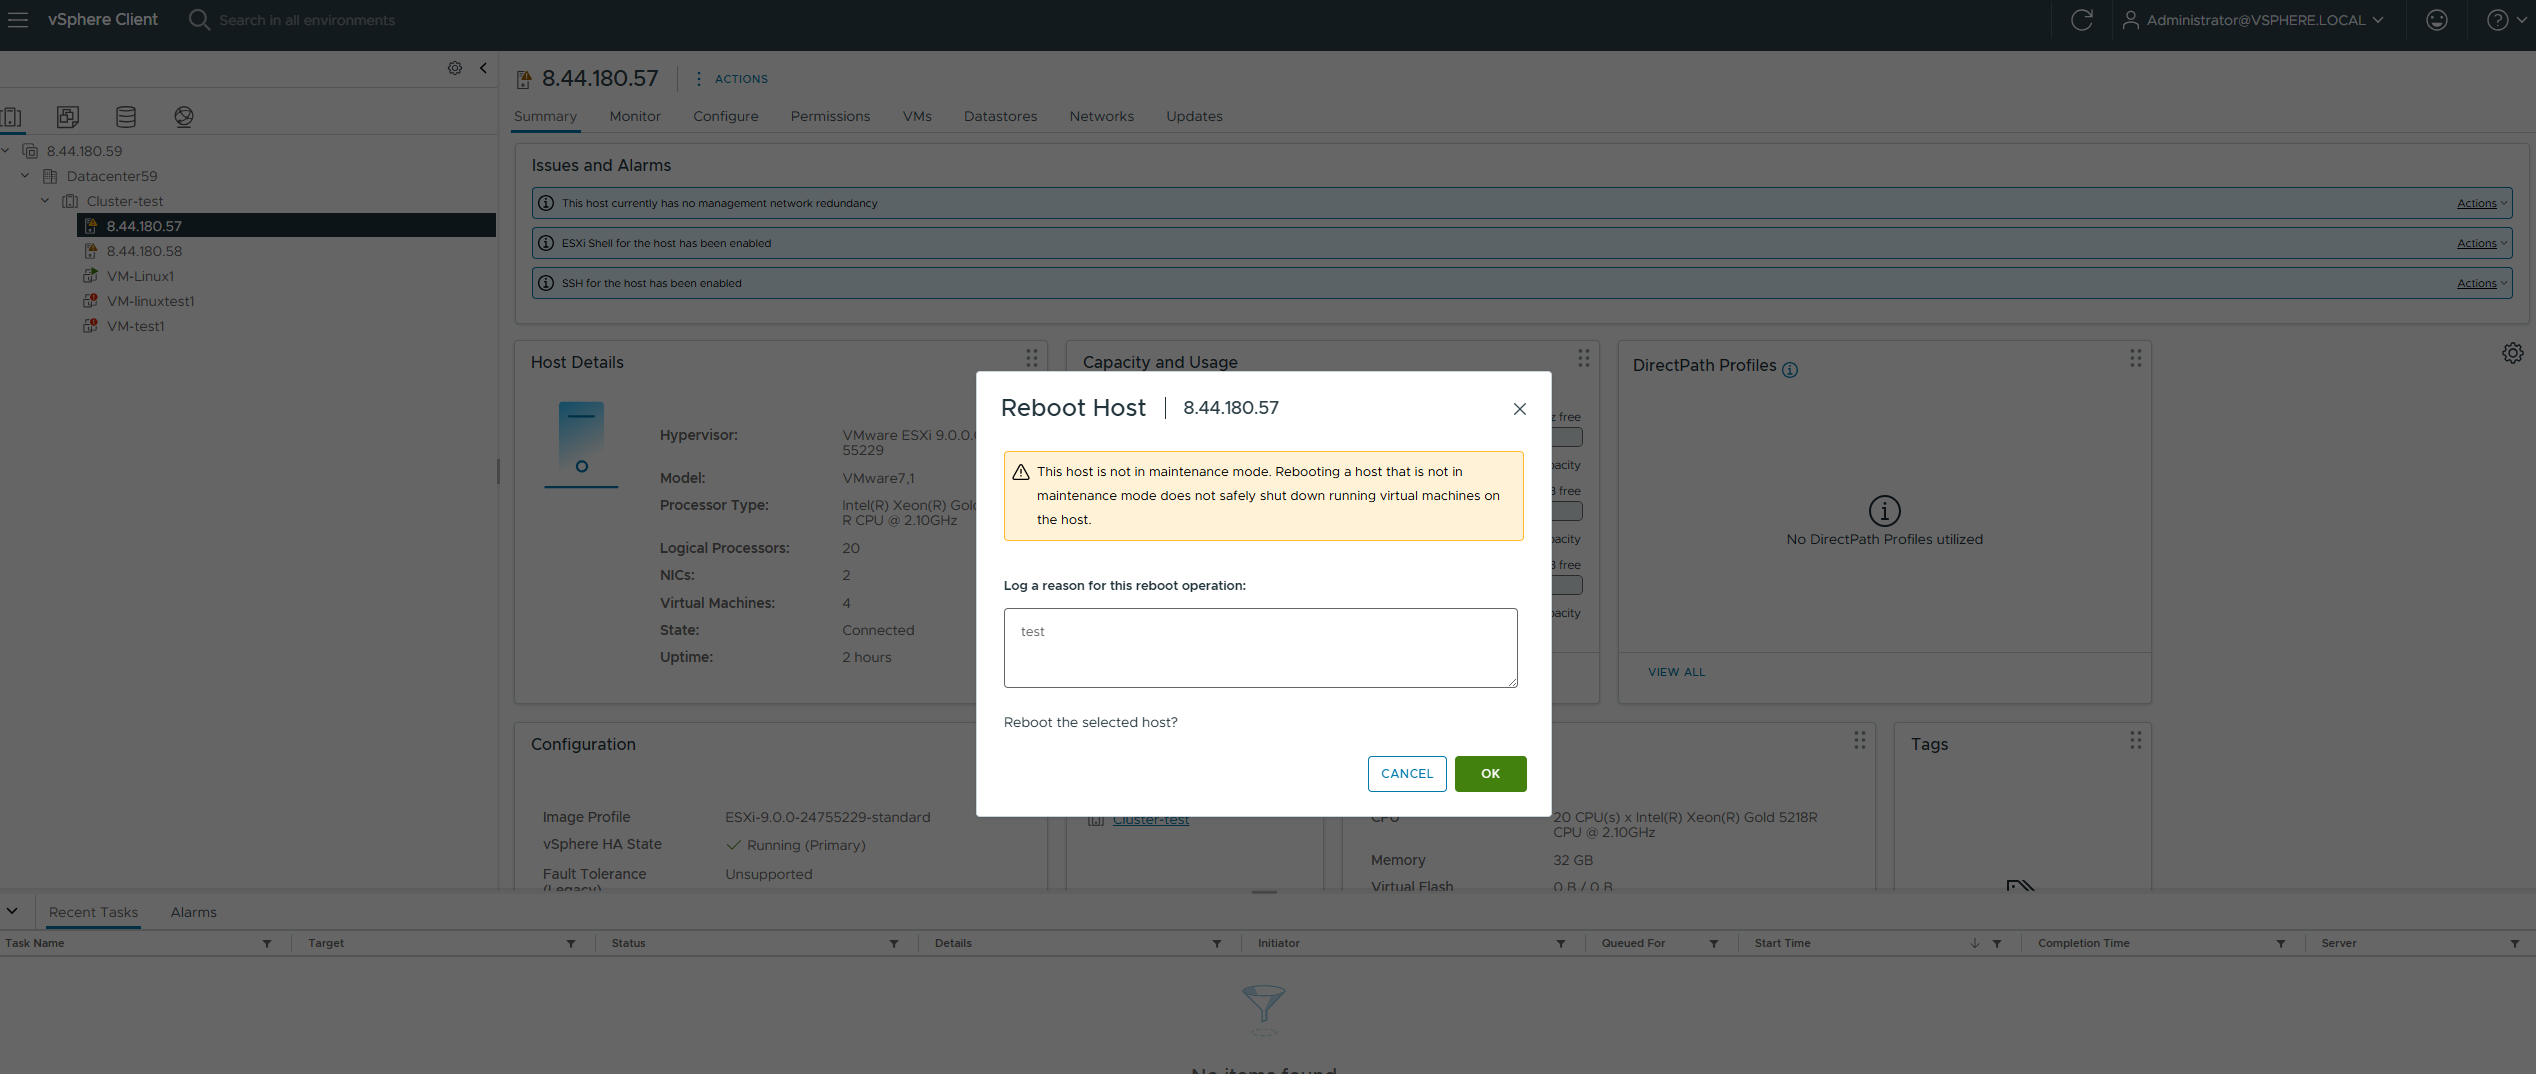
Test Procedure | 1. Open the HA configuration for the host cluster in vCenter. 2. Clone a virtual machine from the VVOL_TEMPLATE to the vVols Datastore using the virtual machine template, selecting Host 1 as the compute resource. 3. Deploy a business workload with 8K 7:3 100% random I/O on the virtual machine. 4. Perform a power-off operation on the host. 5. Deploy a business workload with 8K 7:3 100% random I/O on the virtual machine. |
Expected Result | 1. Step 4: Host 1 successfully powers down, and the virtual machine’s computing resources automatically switch to Host 2. 2. Step 5: IO is successfully issued. |
Test Record |
 2. Clone a virtual machine from the VVOL_TEMPLATE to the VVOL Datastore using the virtual machine template, selecting Host 1 as the compute resource.  3. Deploy a business workload with 8K 7:3 100% random I/O on the virtual machine. 
4. Perform a power-off operation on the host. 
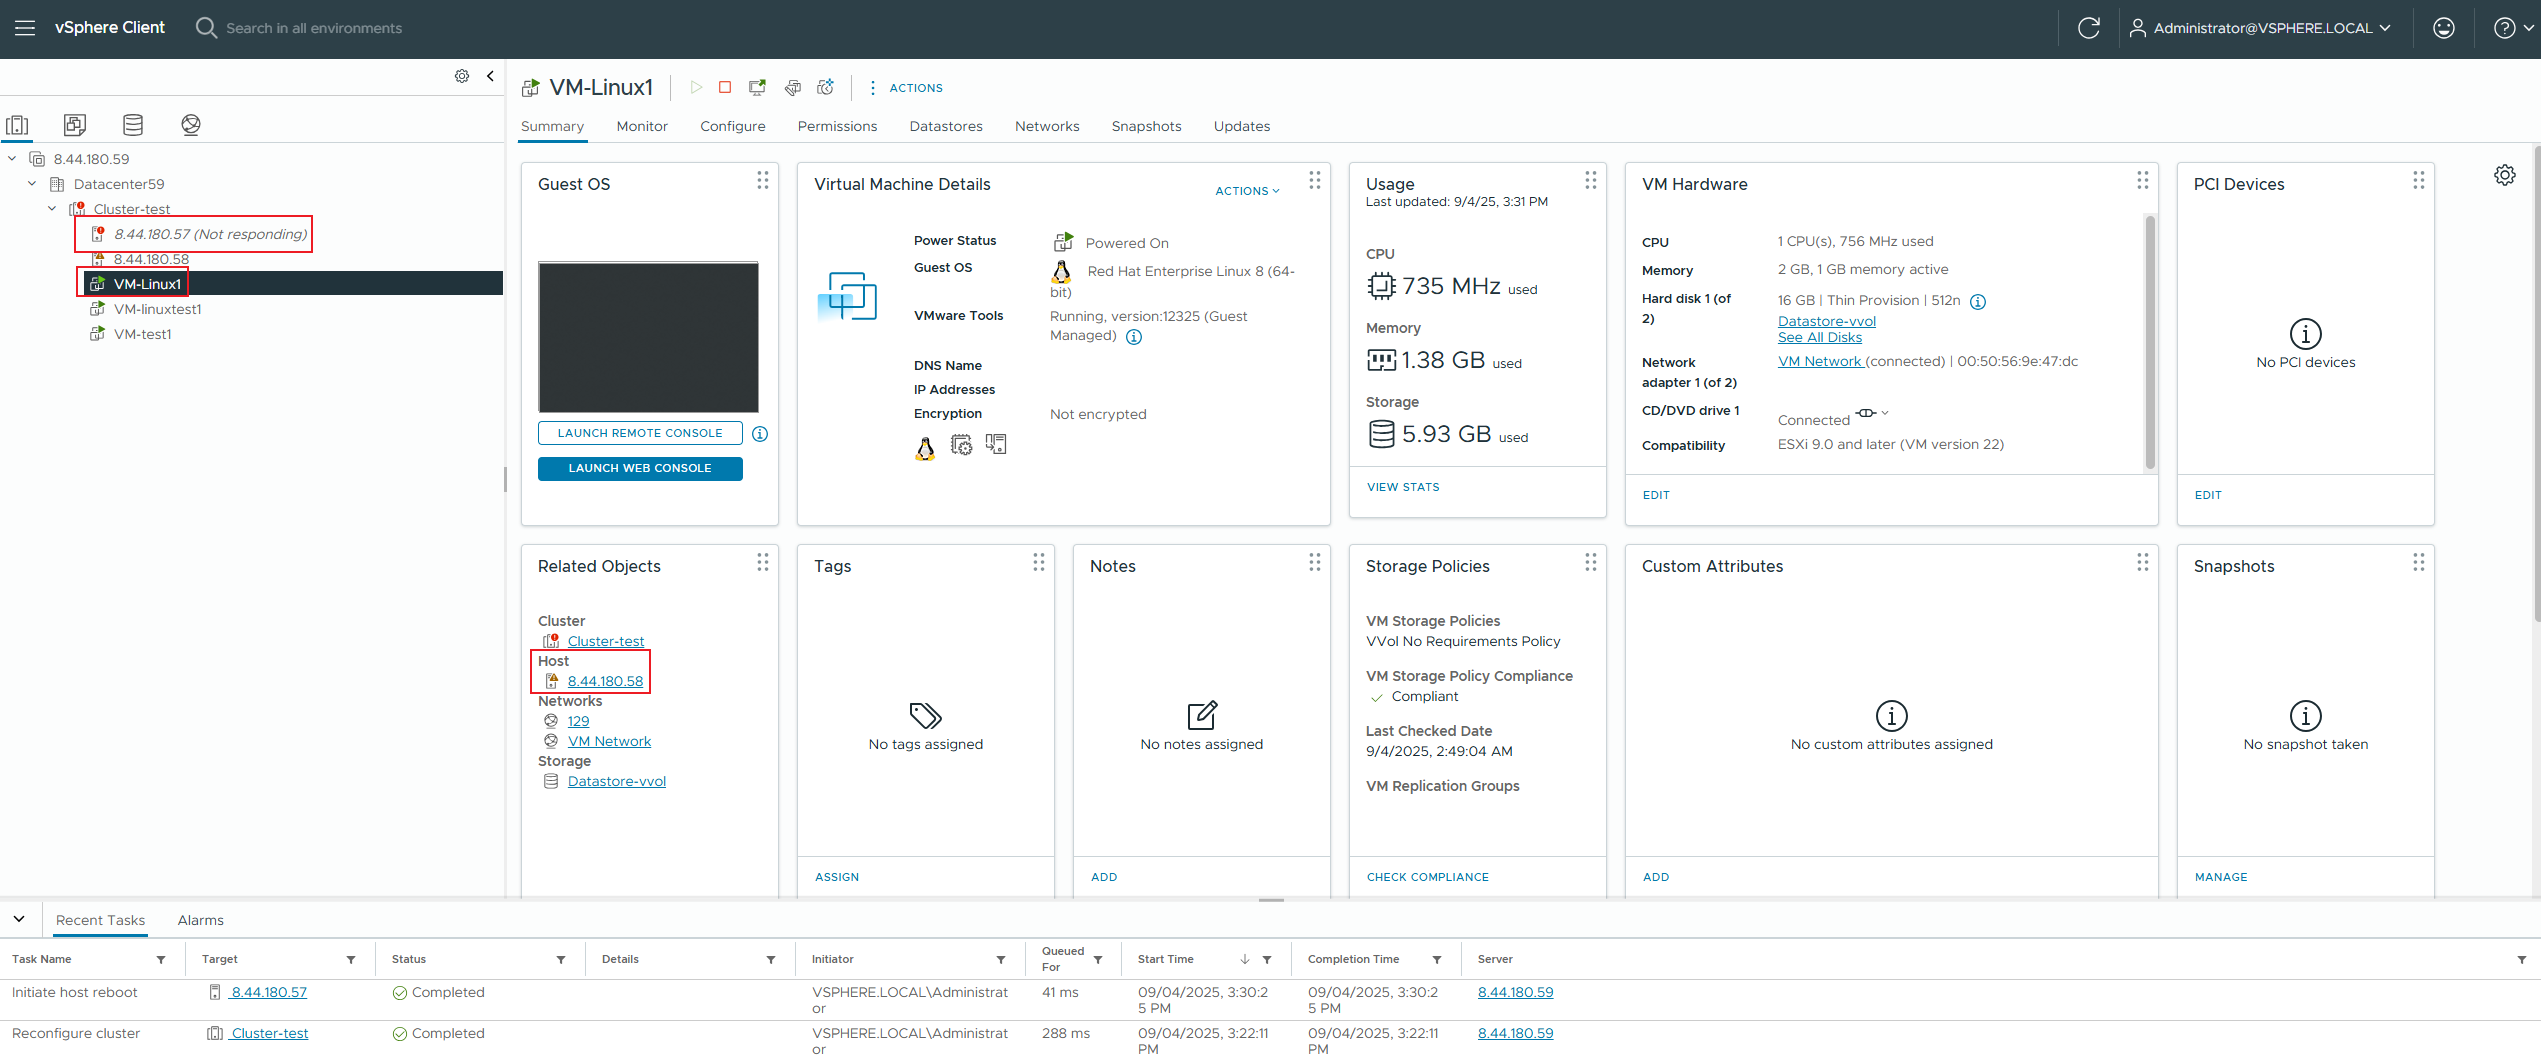 5. Deploy a business workload with 8K 7:3 100% random I/O on the virtual machine. 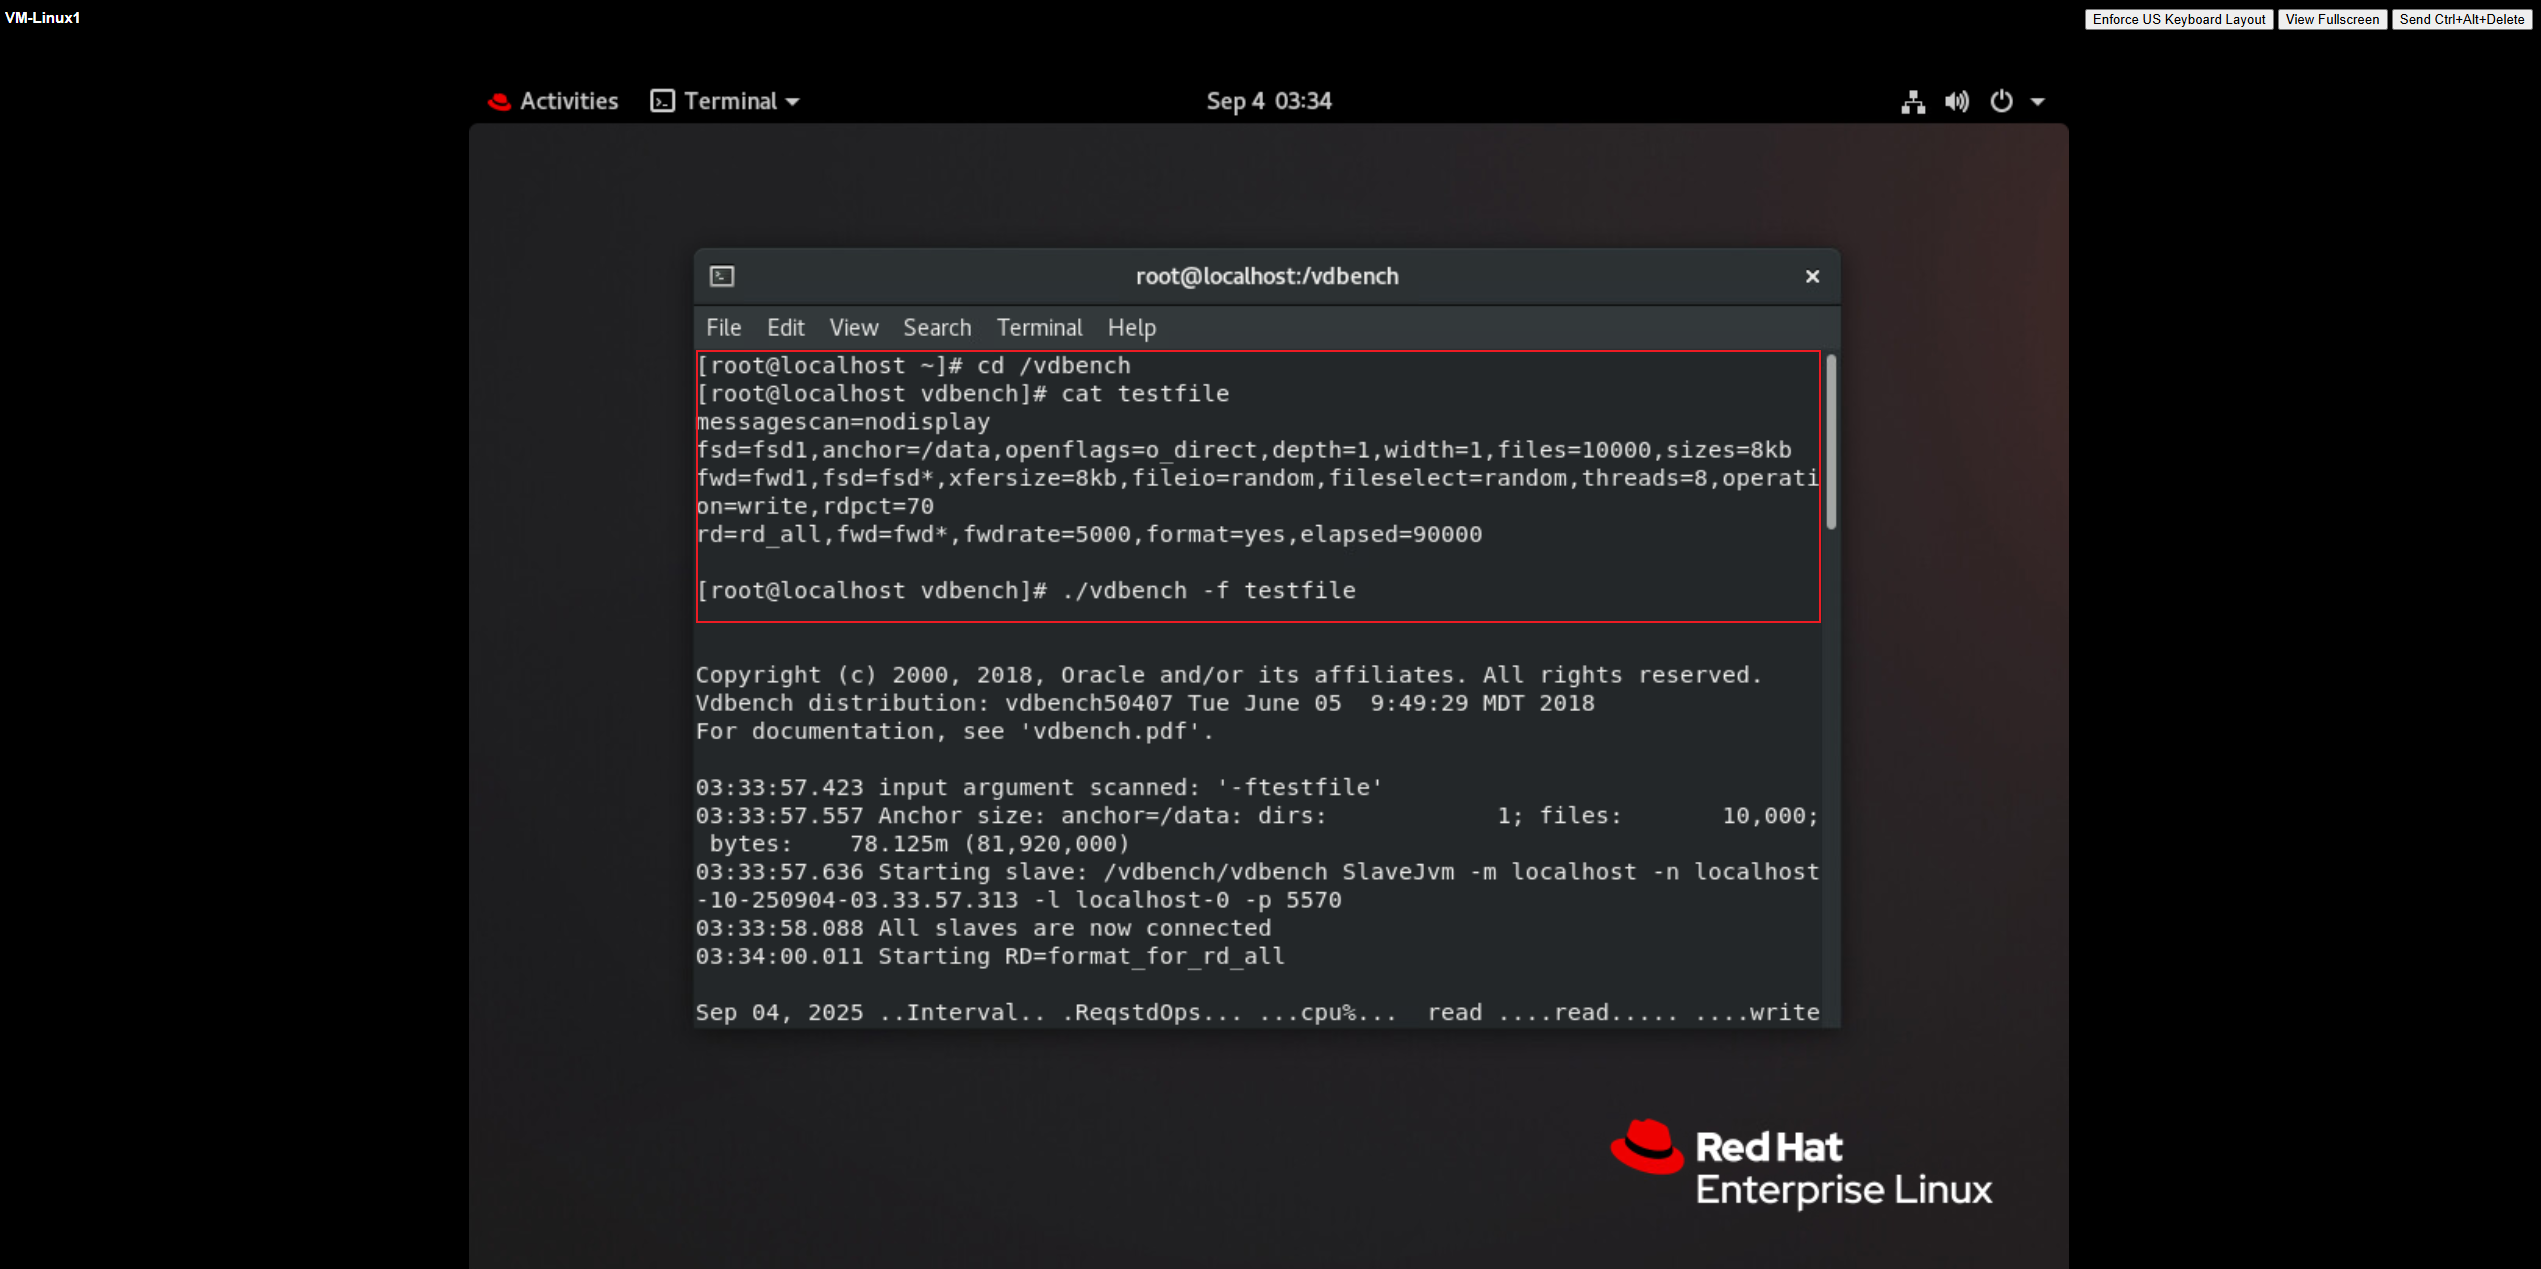
 |
Test Conclusion | PASS |

2.8 Expanding the Capacity of an Existing Disk on a vVol VM
Test Purpose | Check whether the existing disk capacity of the vVol VM is expanded successfully. (Protocol: FC) |
Test Networking | Storage and VMware ESXi Compatibility Test Networking |
Prerequisites | 1. The VASA Provider has been installed and configured. 2. The VASA Provider has been registered with vCenter and initial configuration is complete. 3. The host, storage, and networking have been completed. |
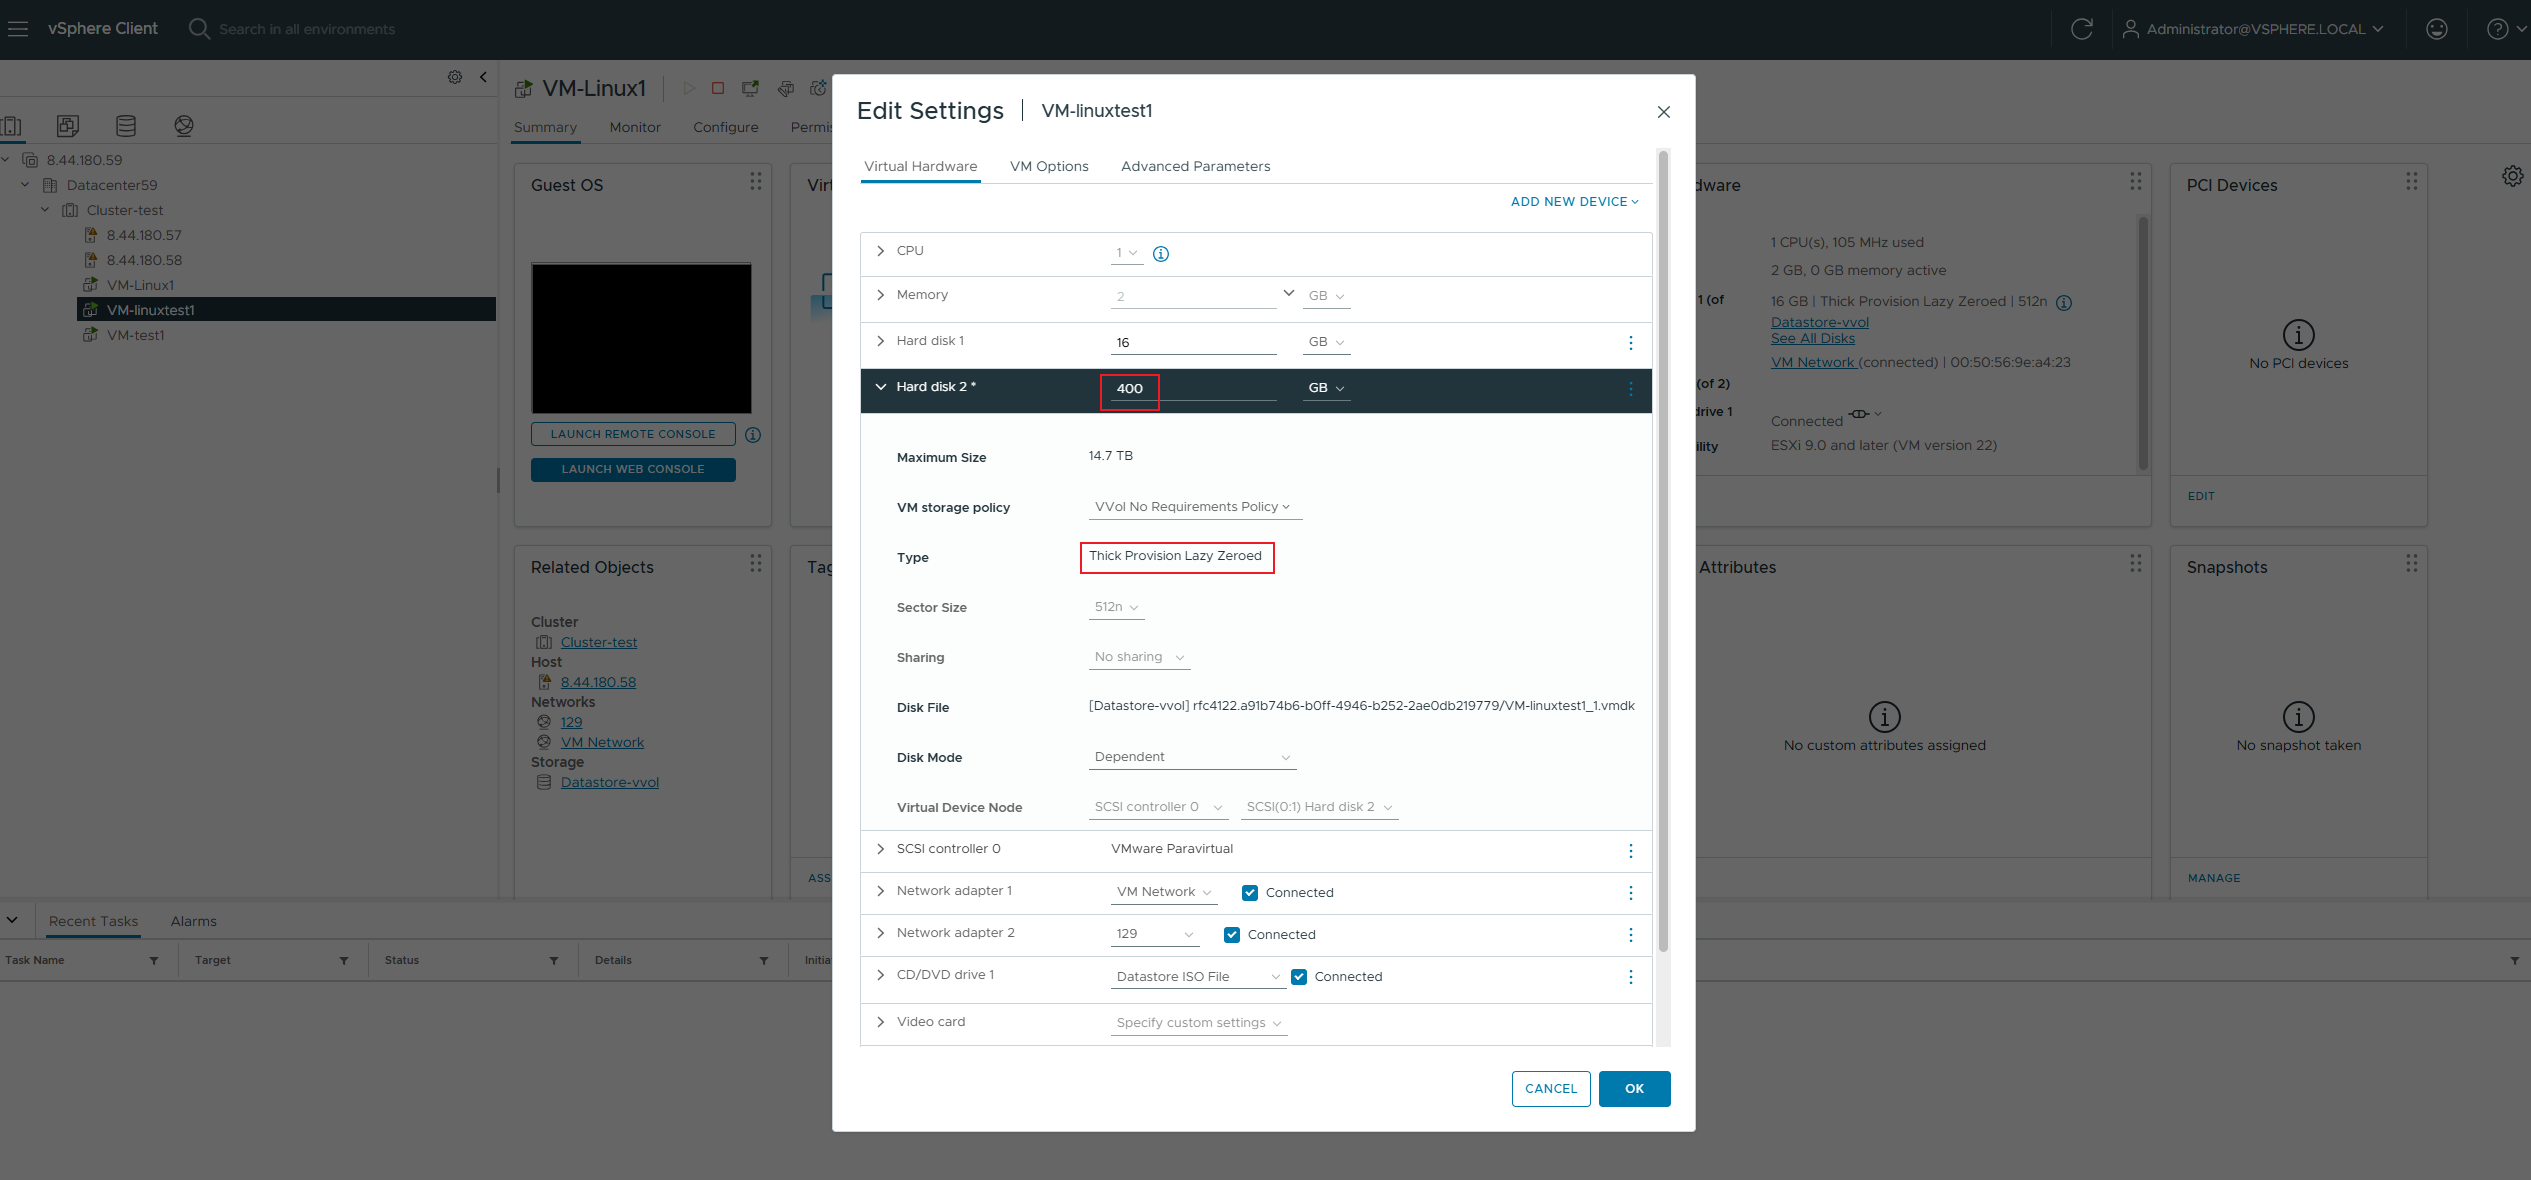
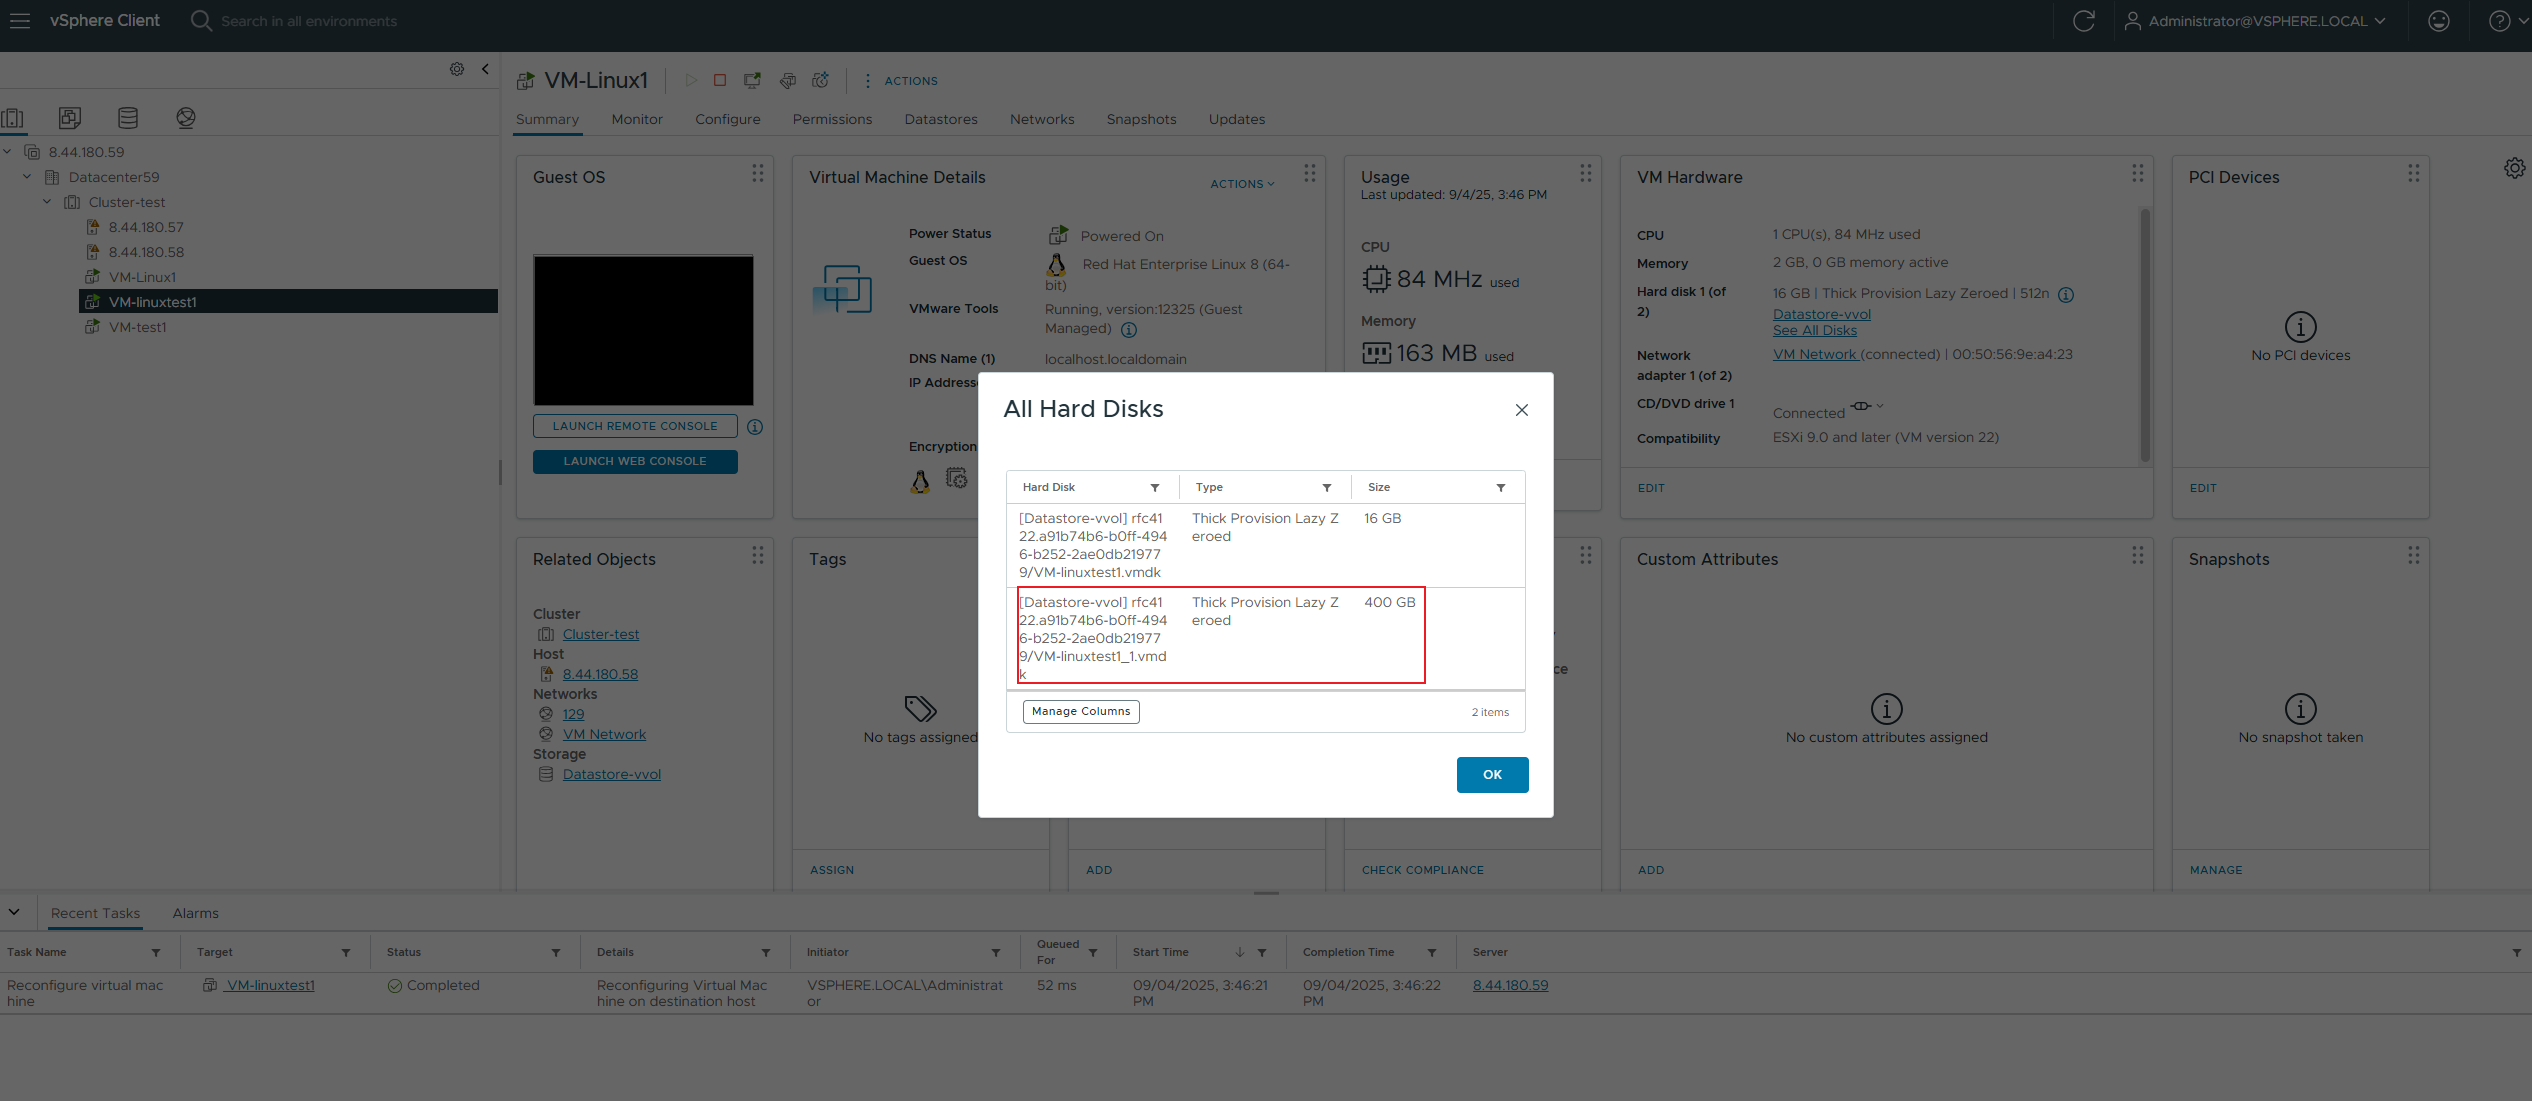
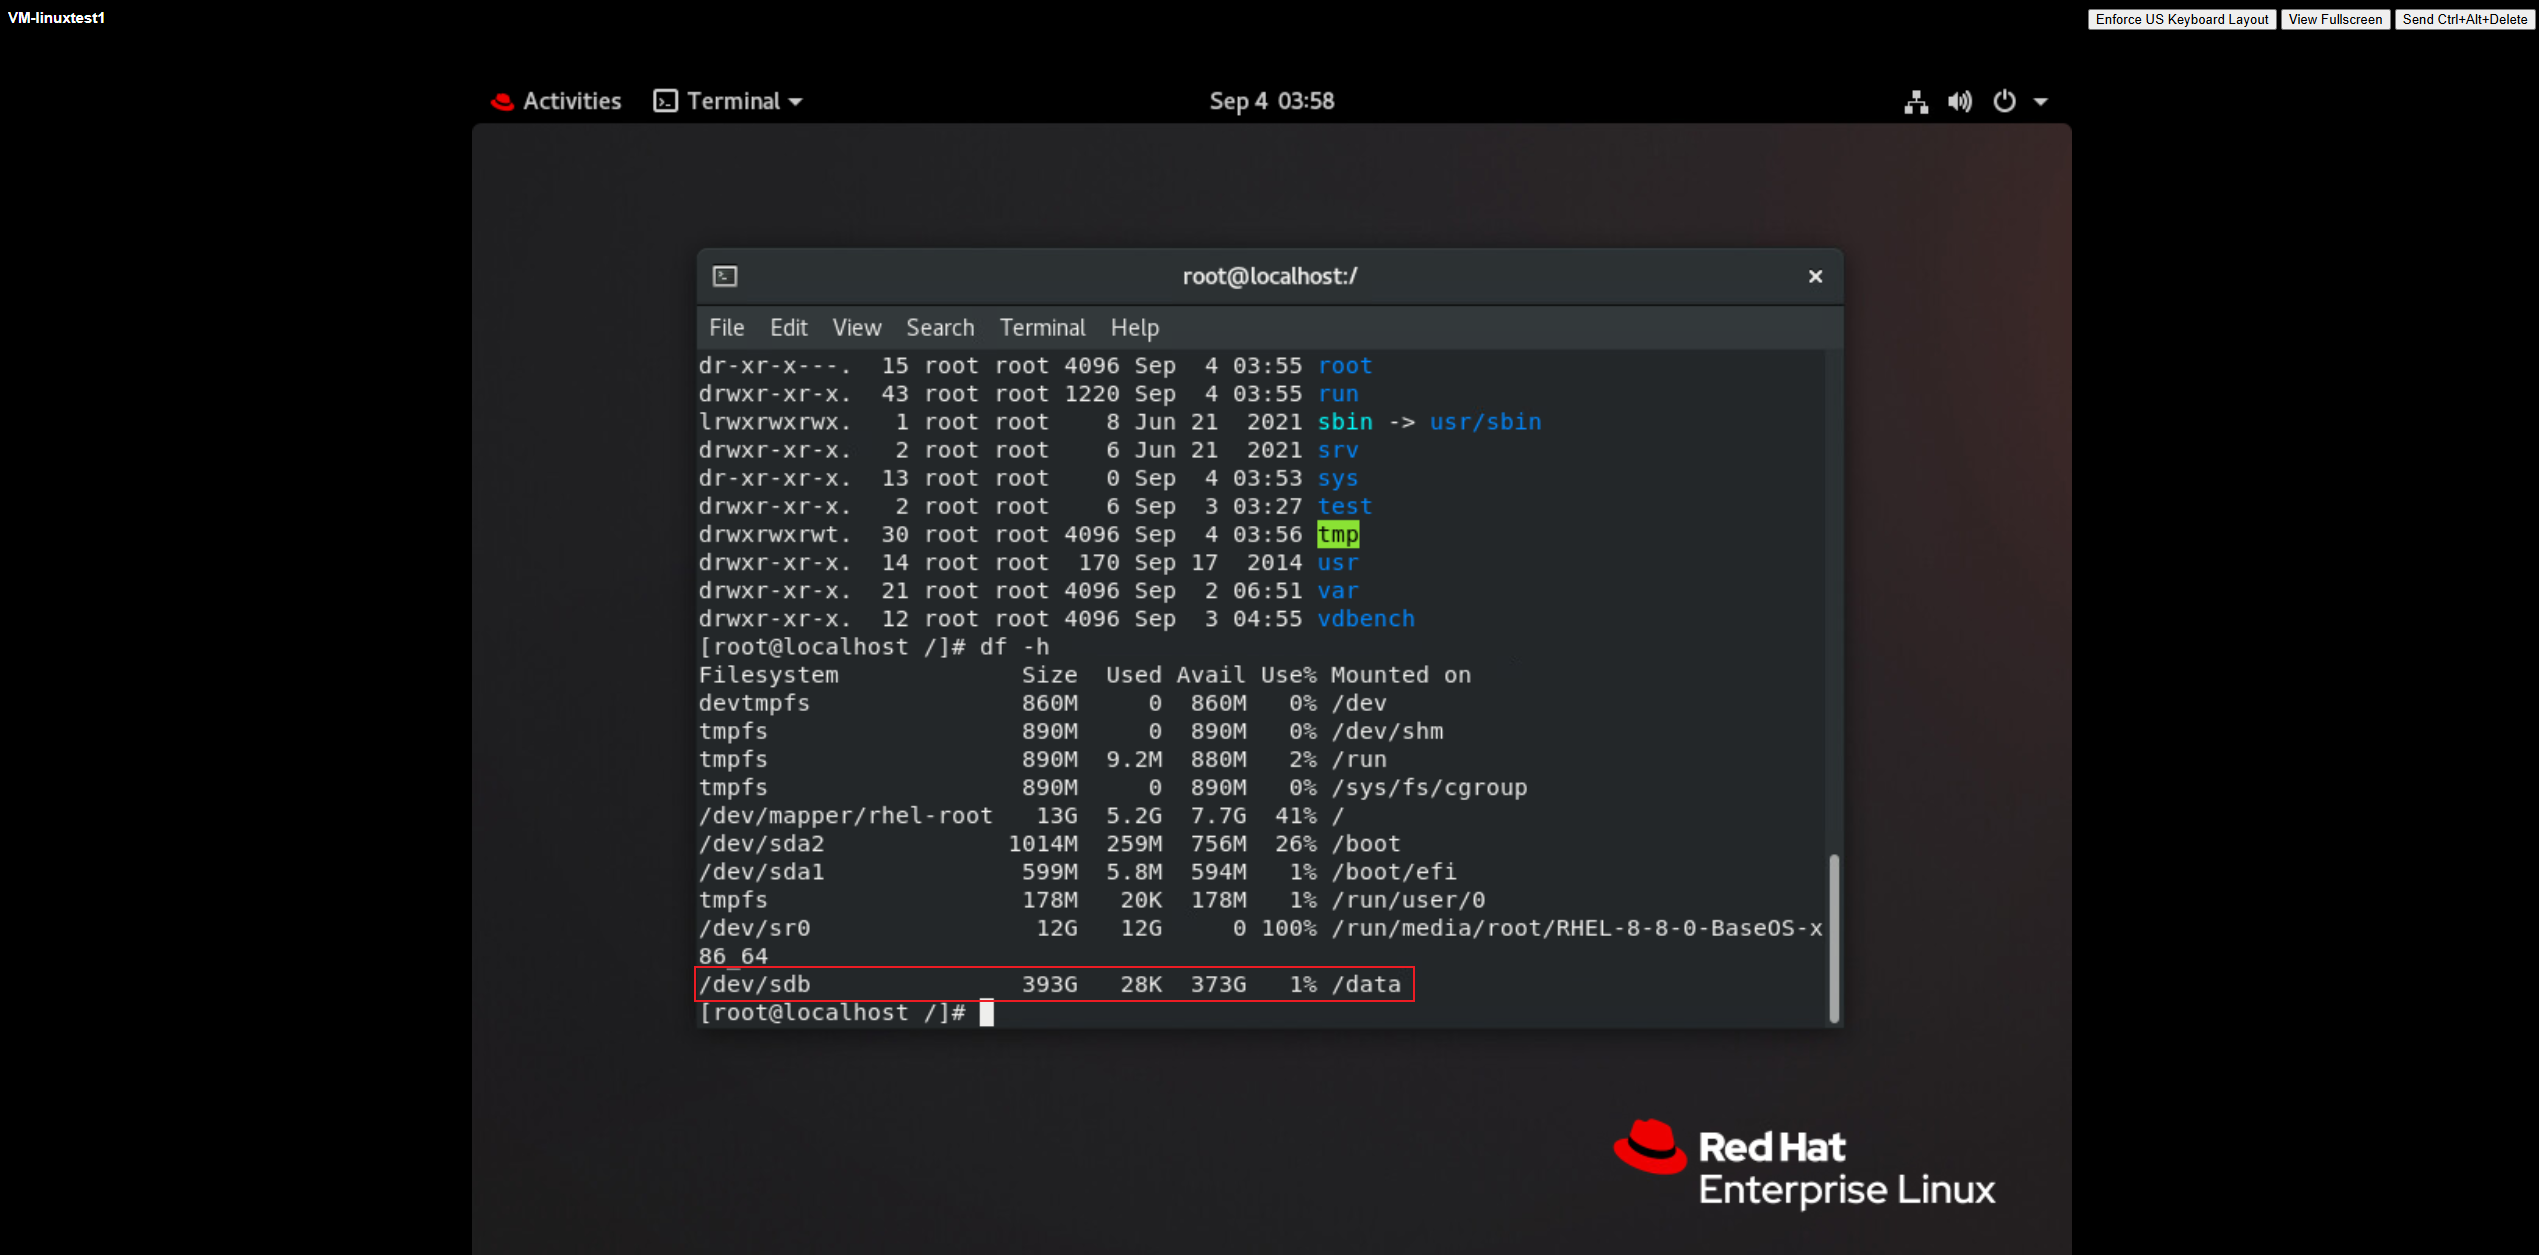
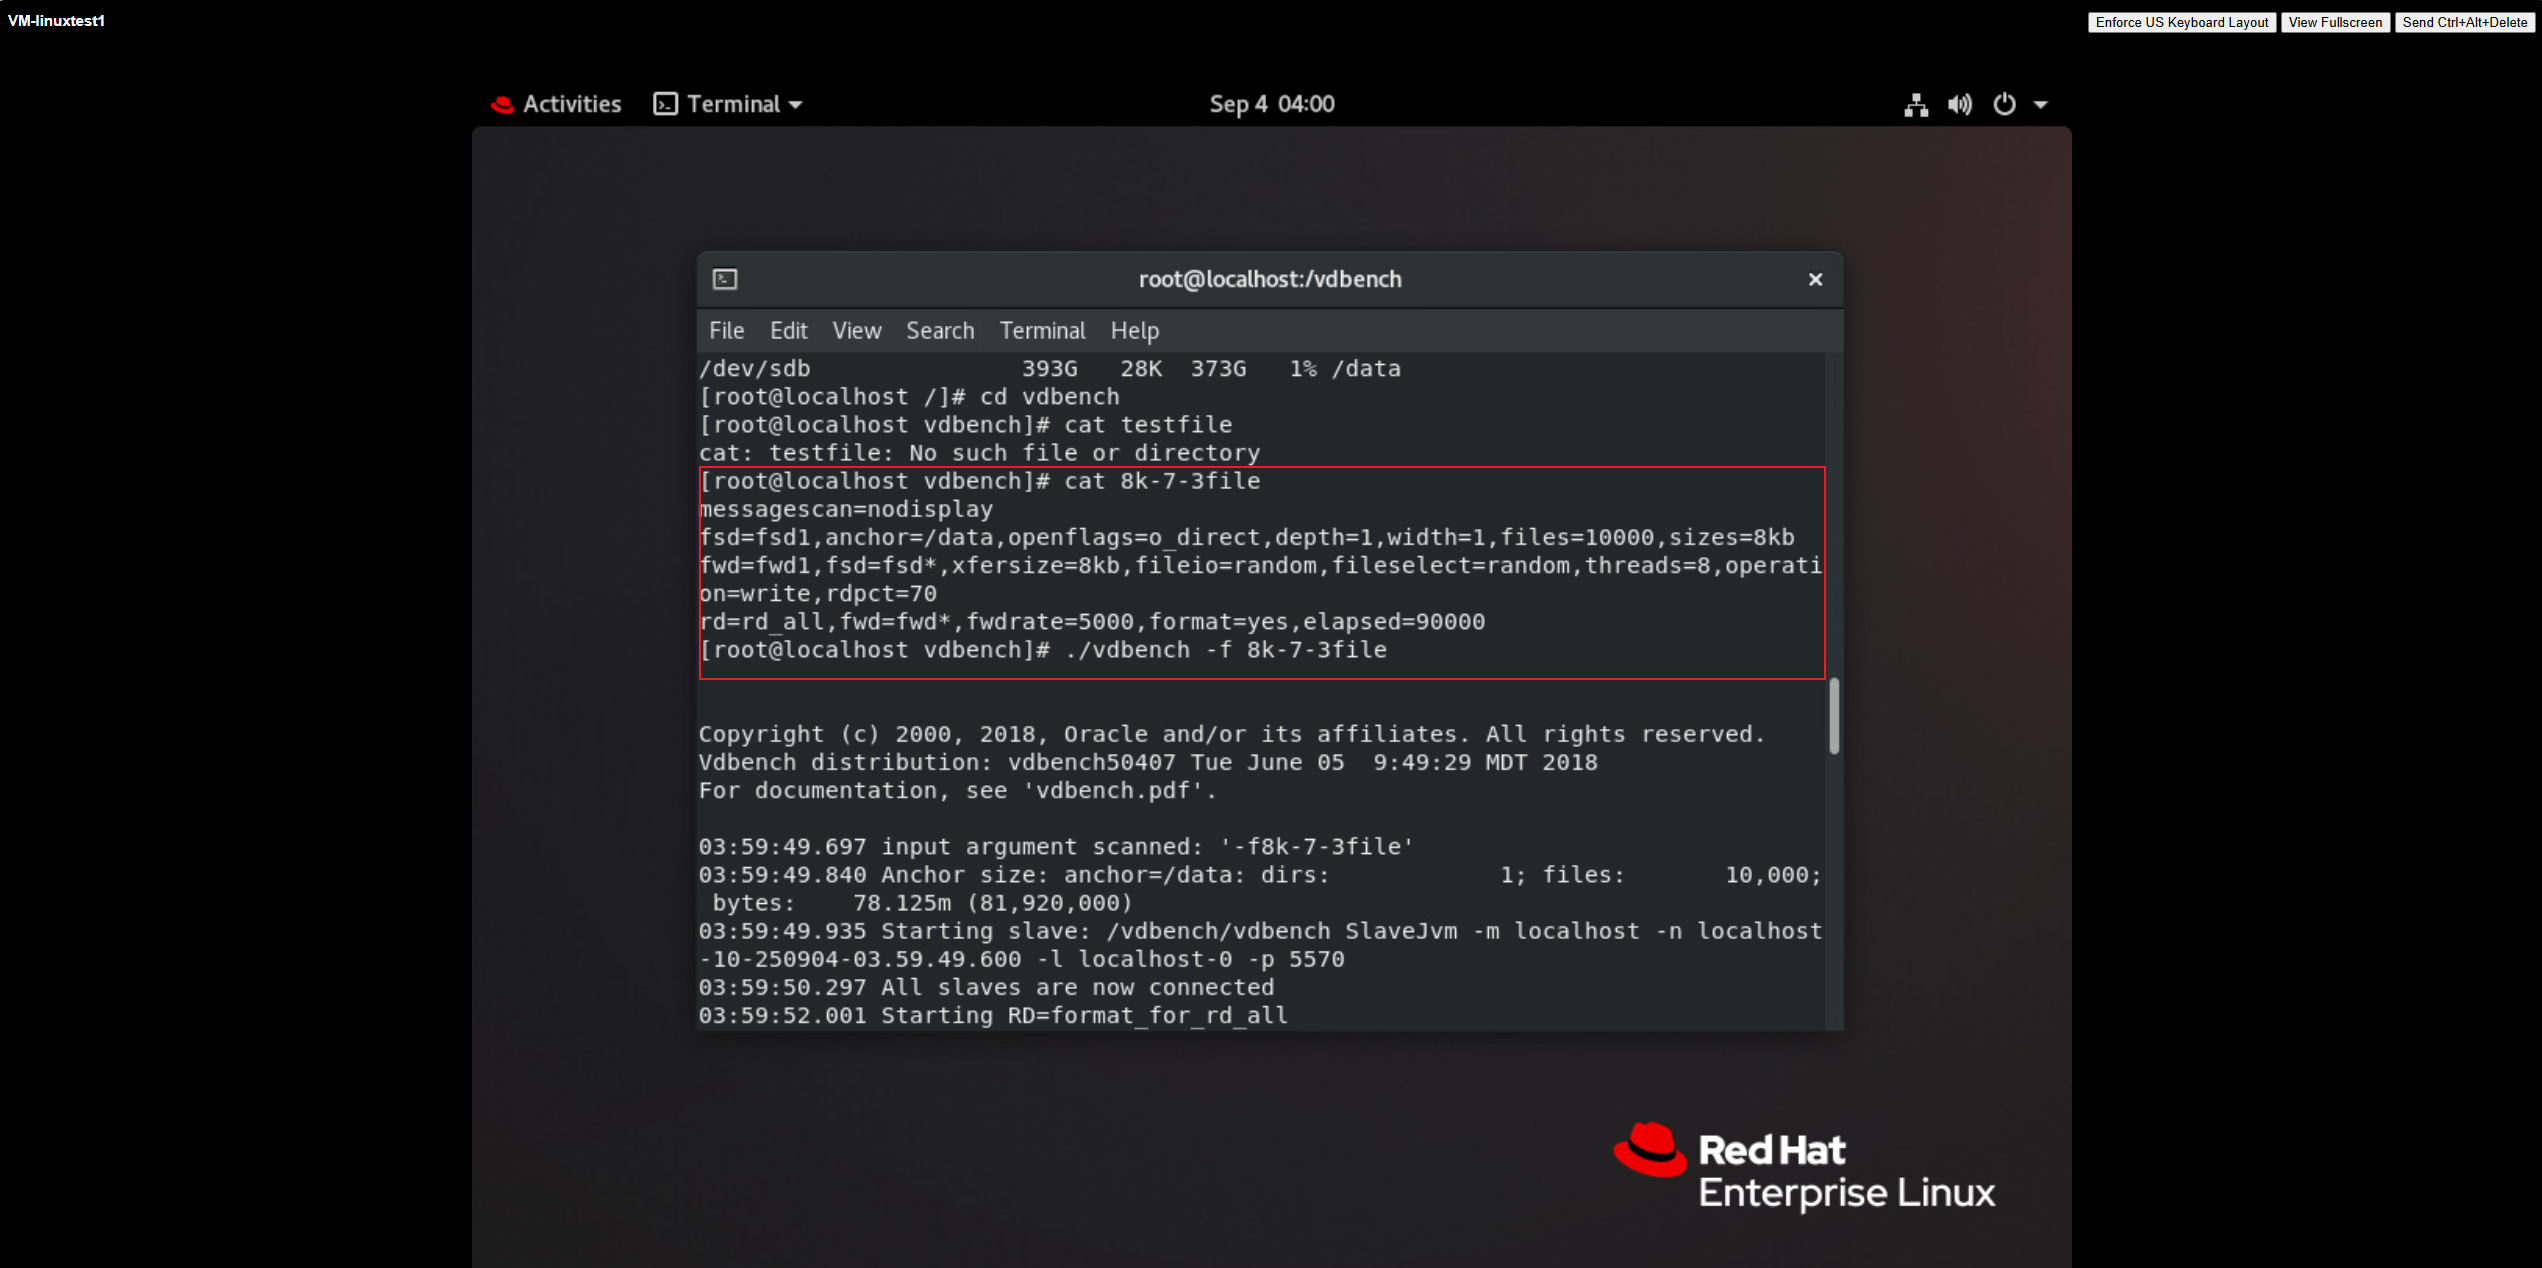
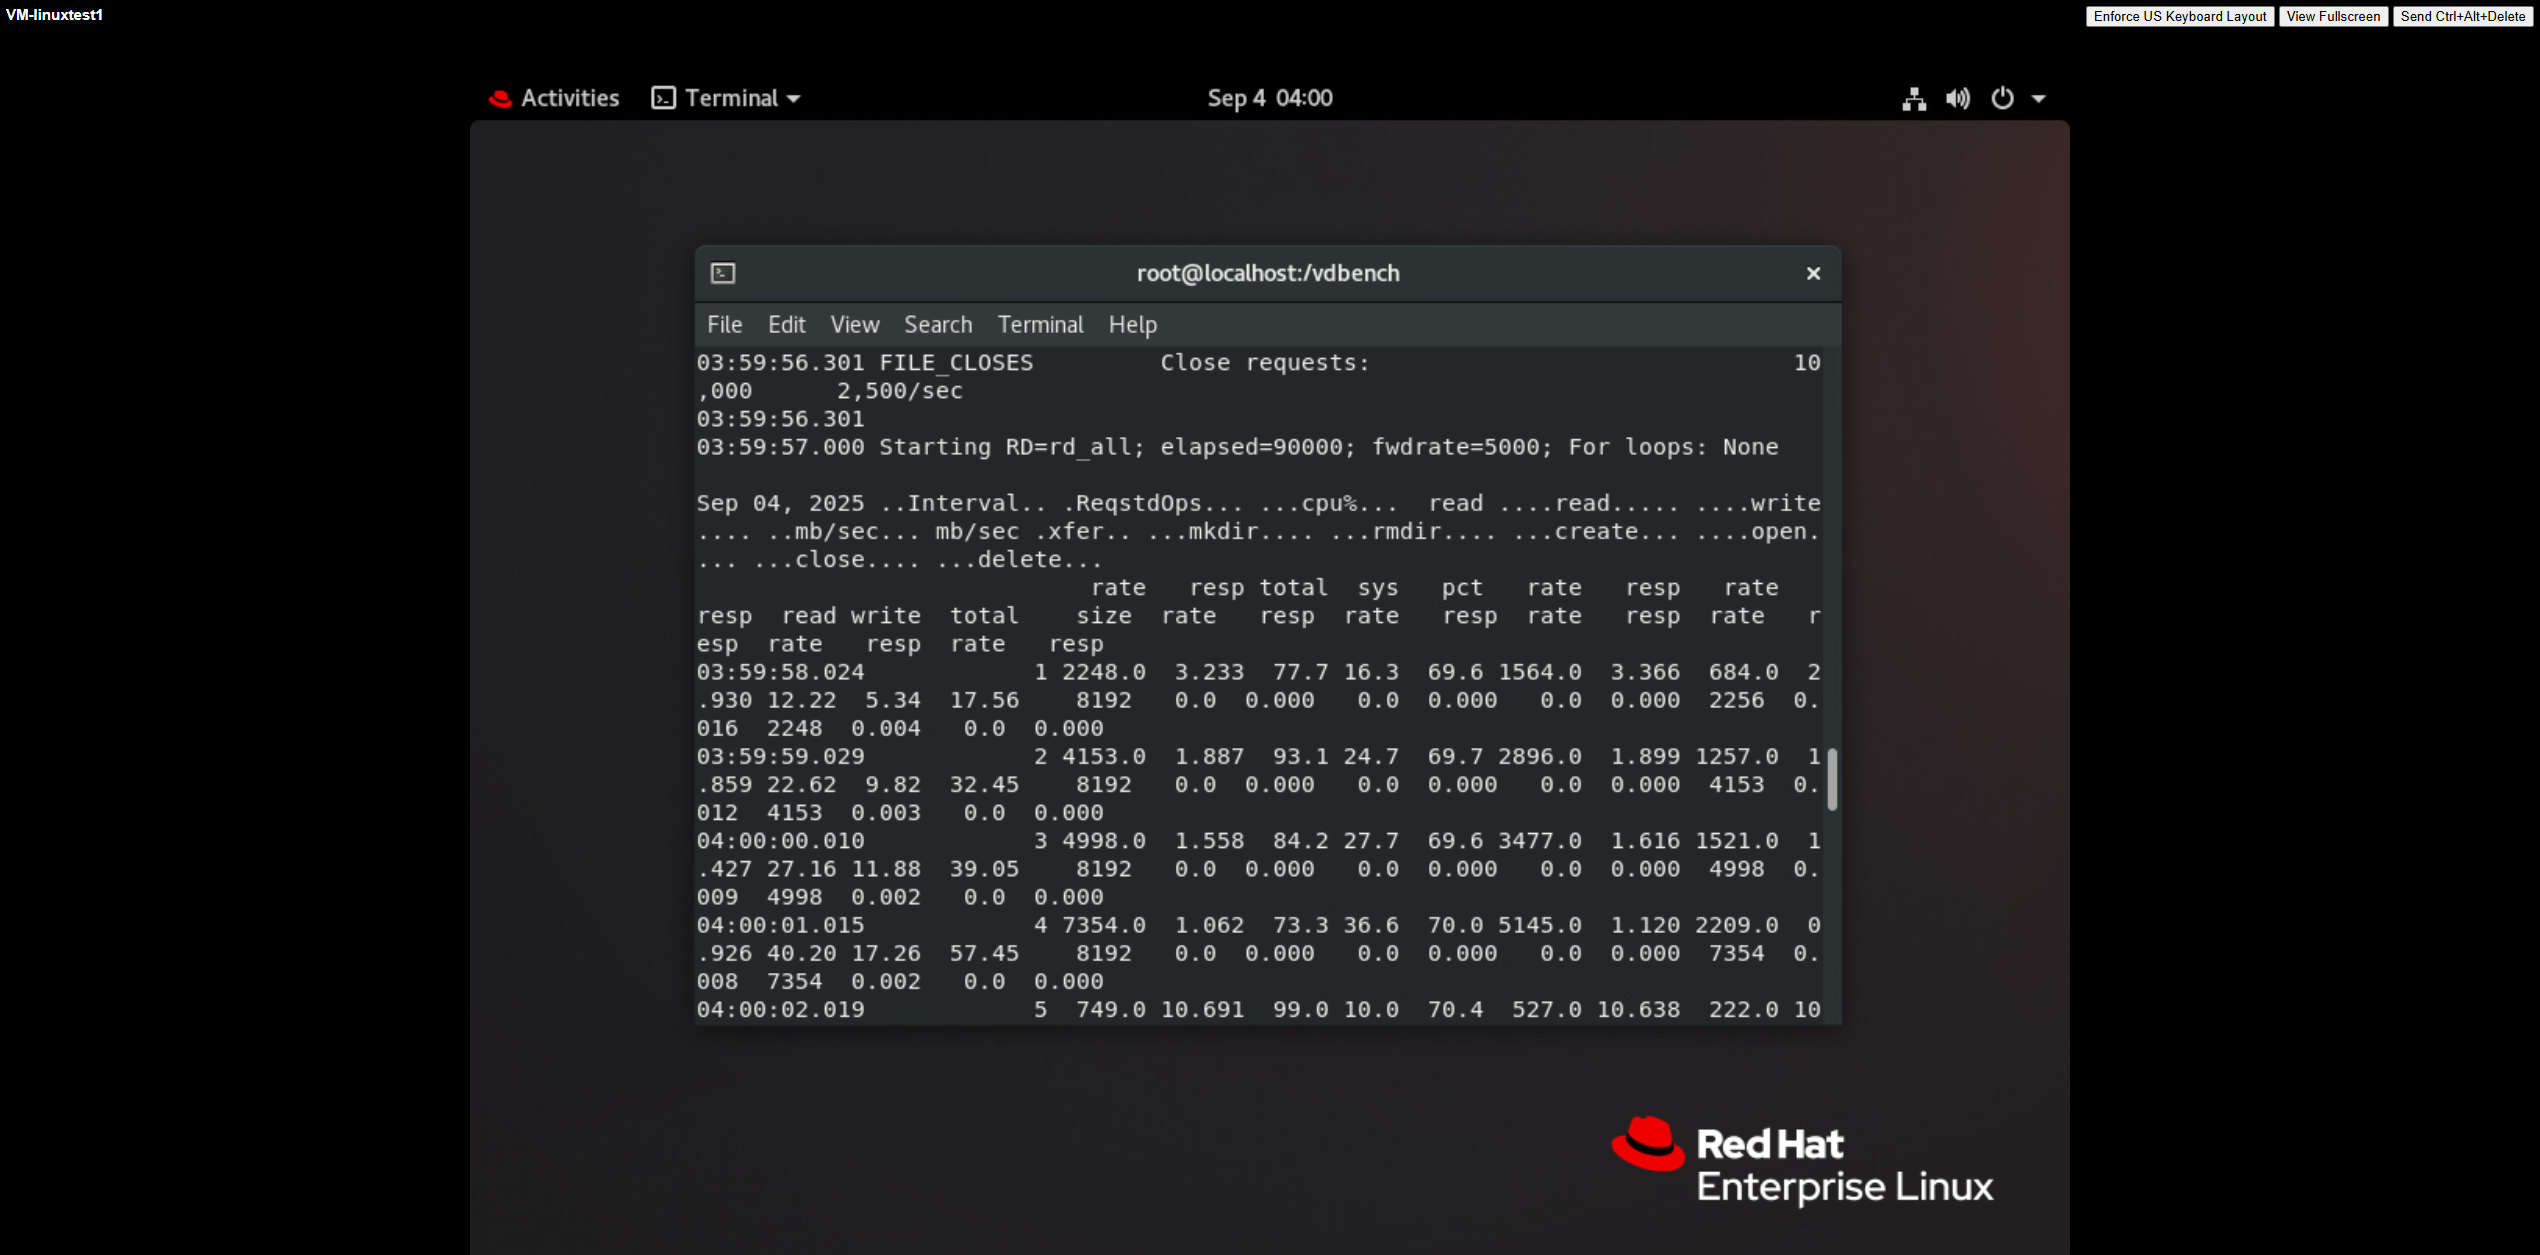
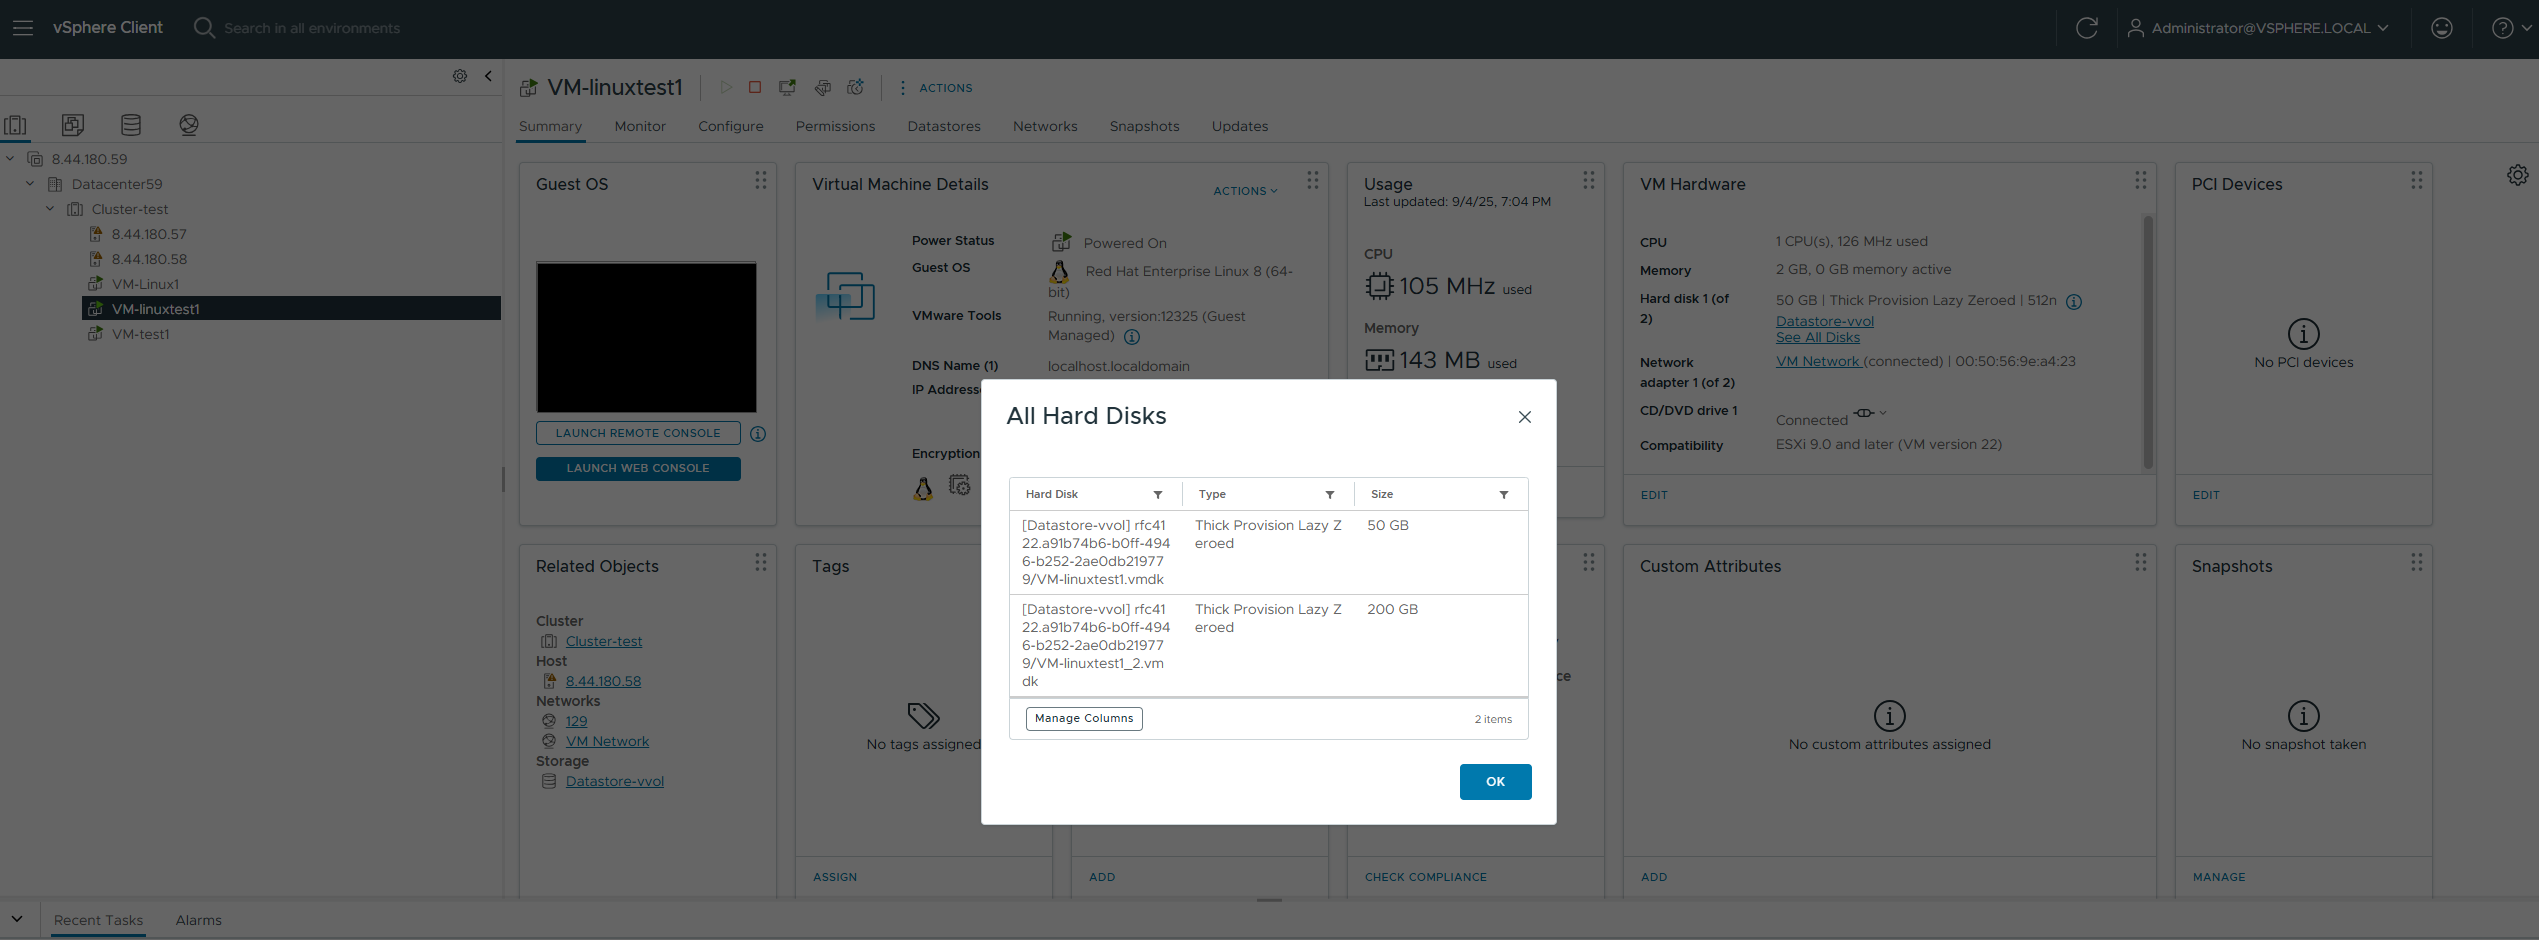
Test Procedure | 1. Clone a virtual machine from the VVOL_TEMPLATE to the vVols Datastore using the virtual machine template. 2. Increase the capacity of the existing thick-provisioned disk of the virtual machine by 200GB, power on the virtual machine, and use vdbench to issue an 8K 7:3 100% random workload to the newly added disk. |
Expected Result | 1. Step 2: The disk expansion was successful, with all VVol LUNs expanded by 200GB, and the business operations were issued normally. |
Test Record |
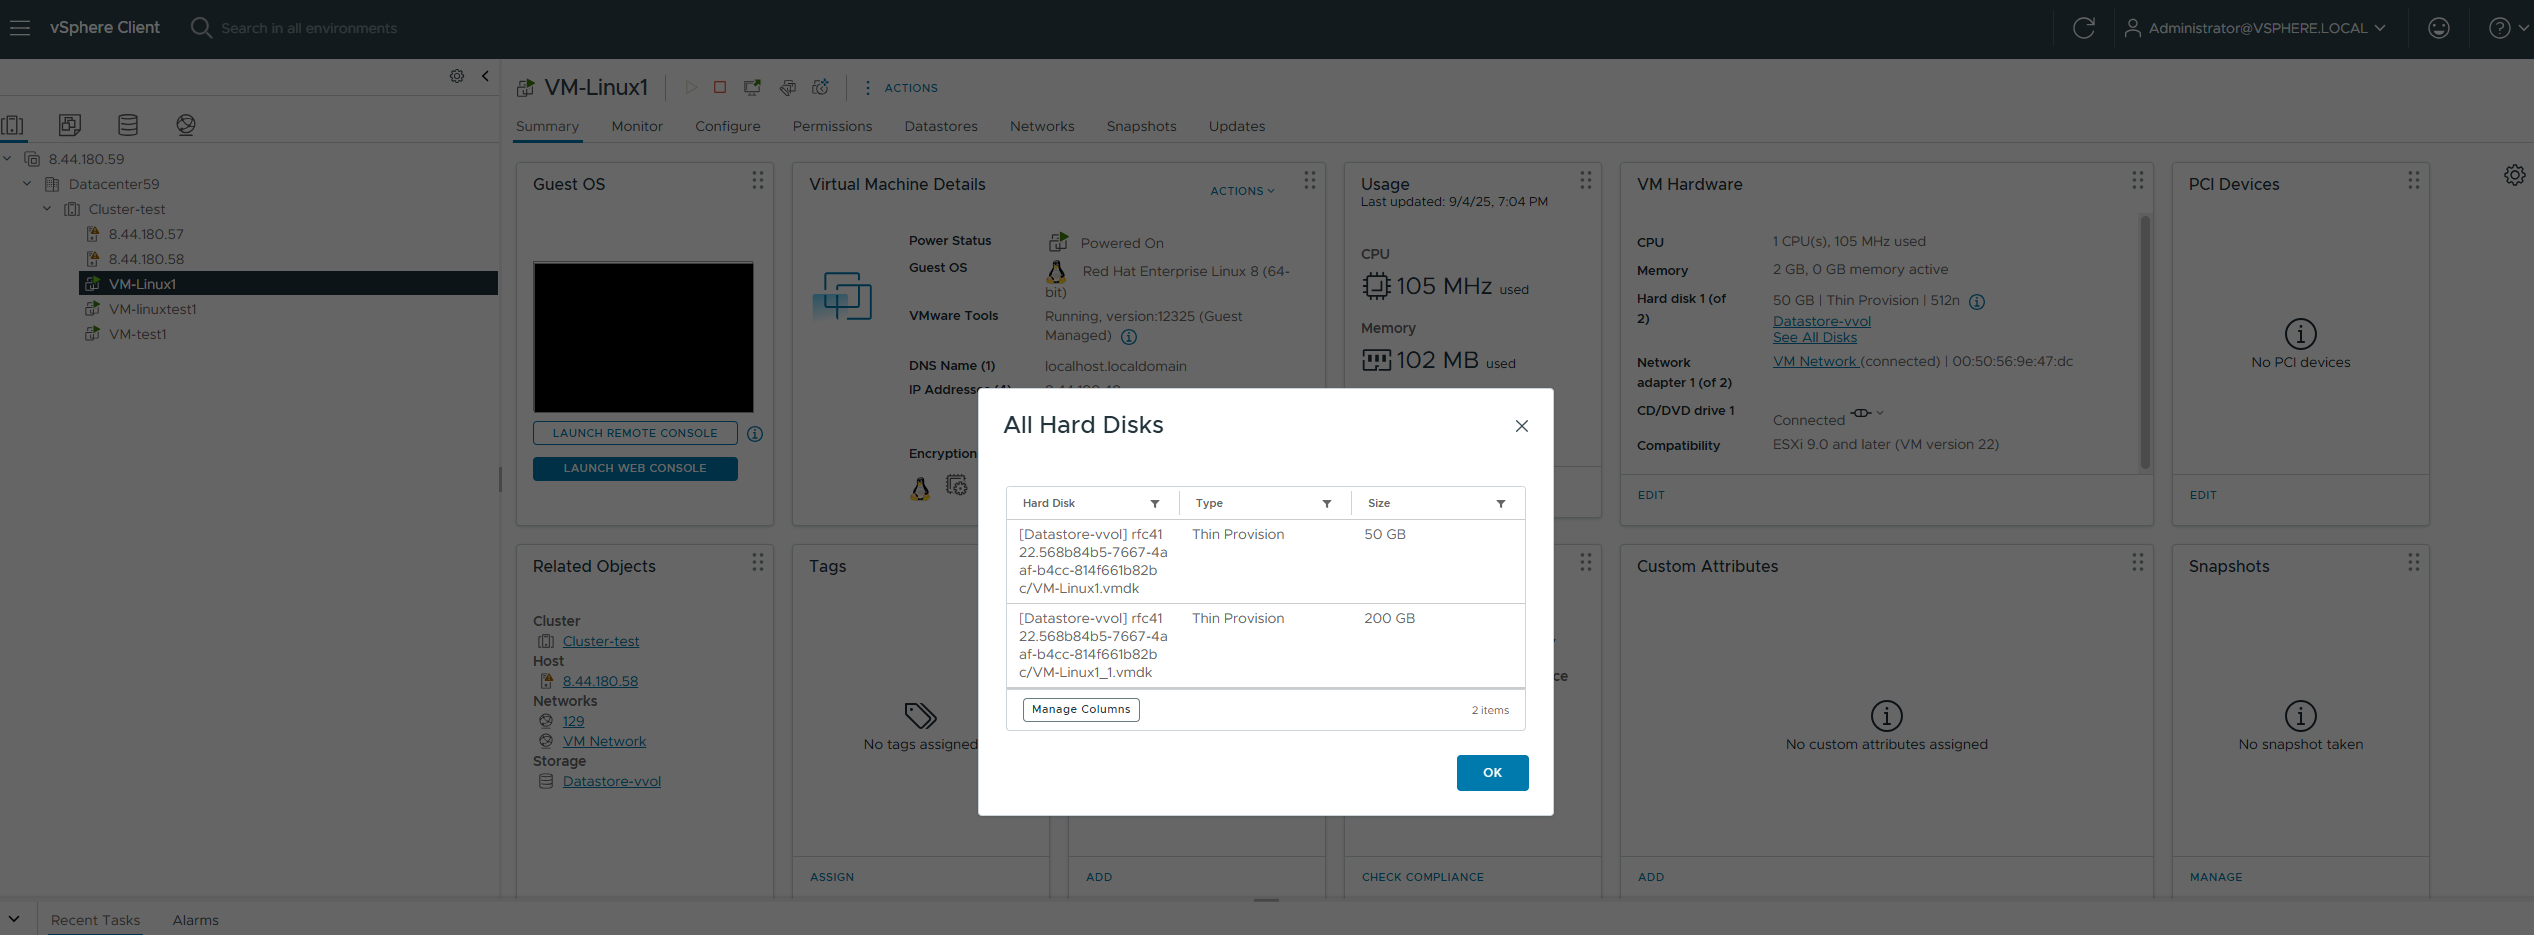
 2. Increase the capacity of the existing thick-provisioned disk of the virtual machine by 200GB, power on the virtual machine, and use vdbench to issue an 8K 7:3 100% random workload to the newly added disk. 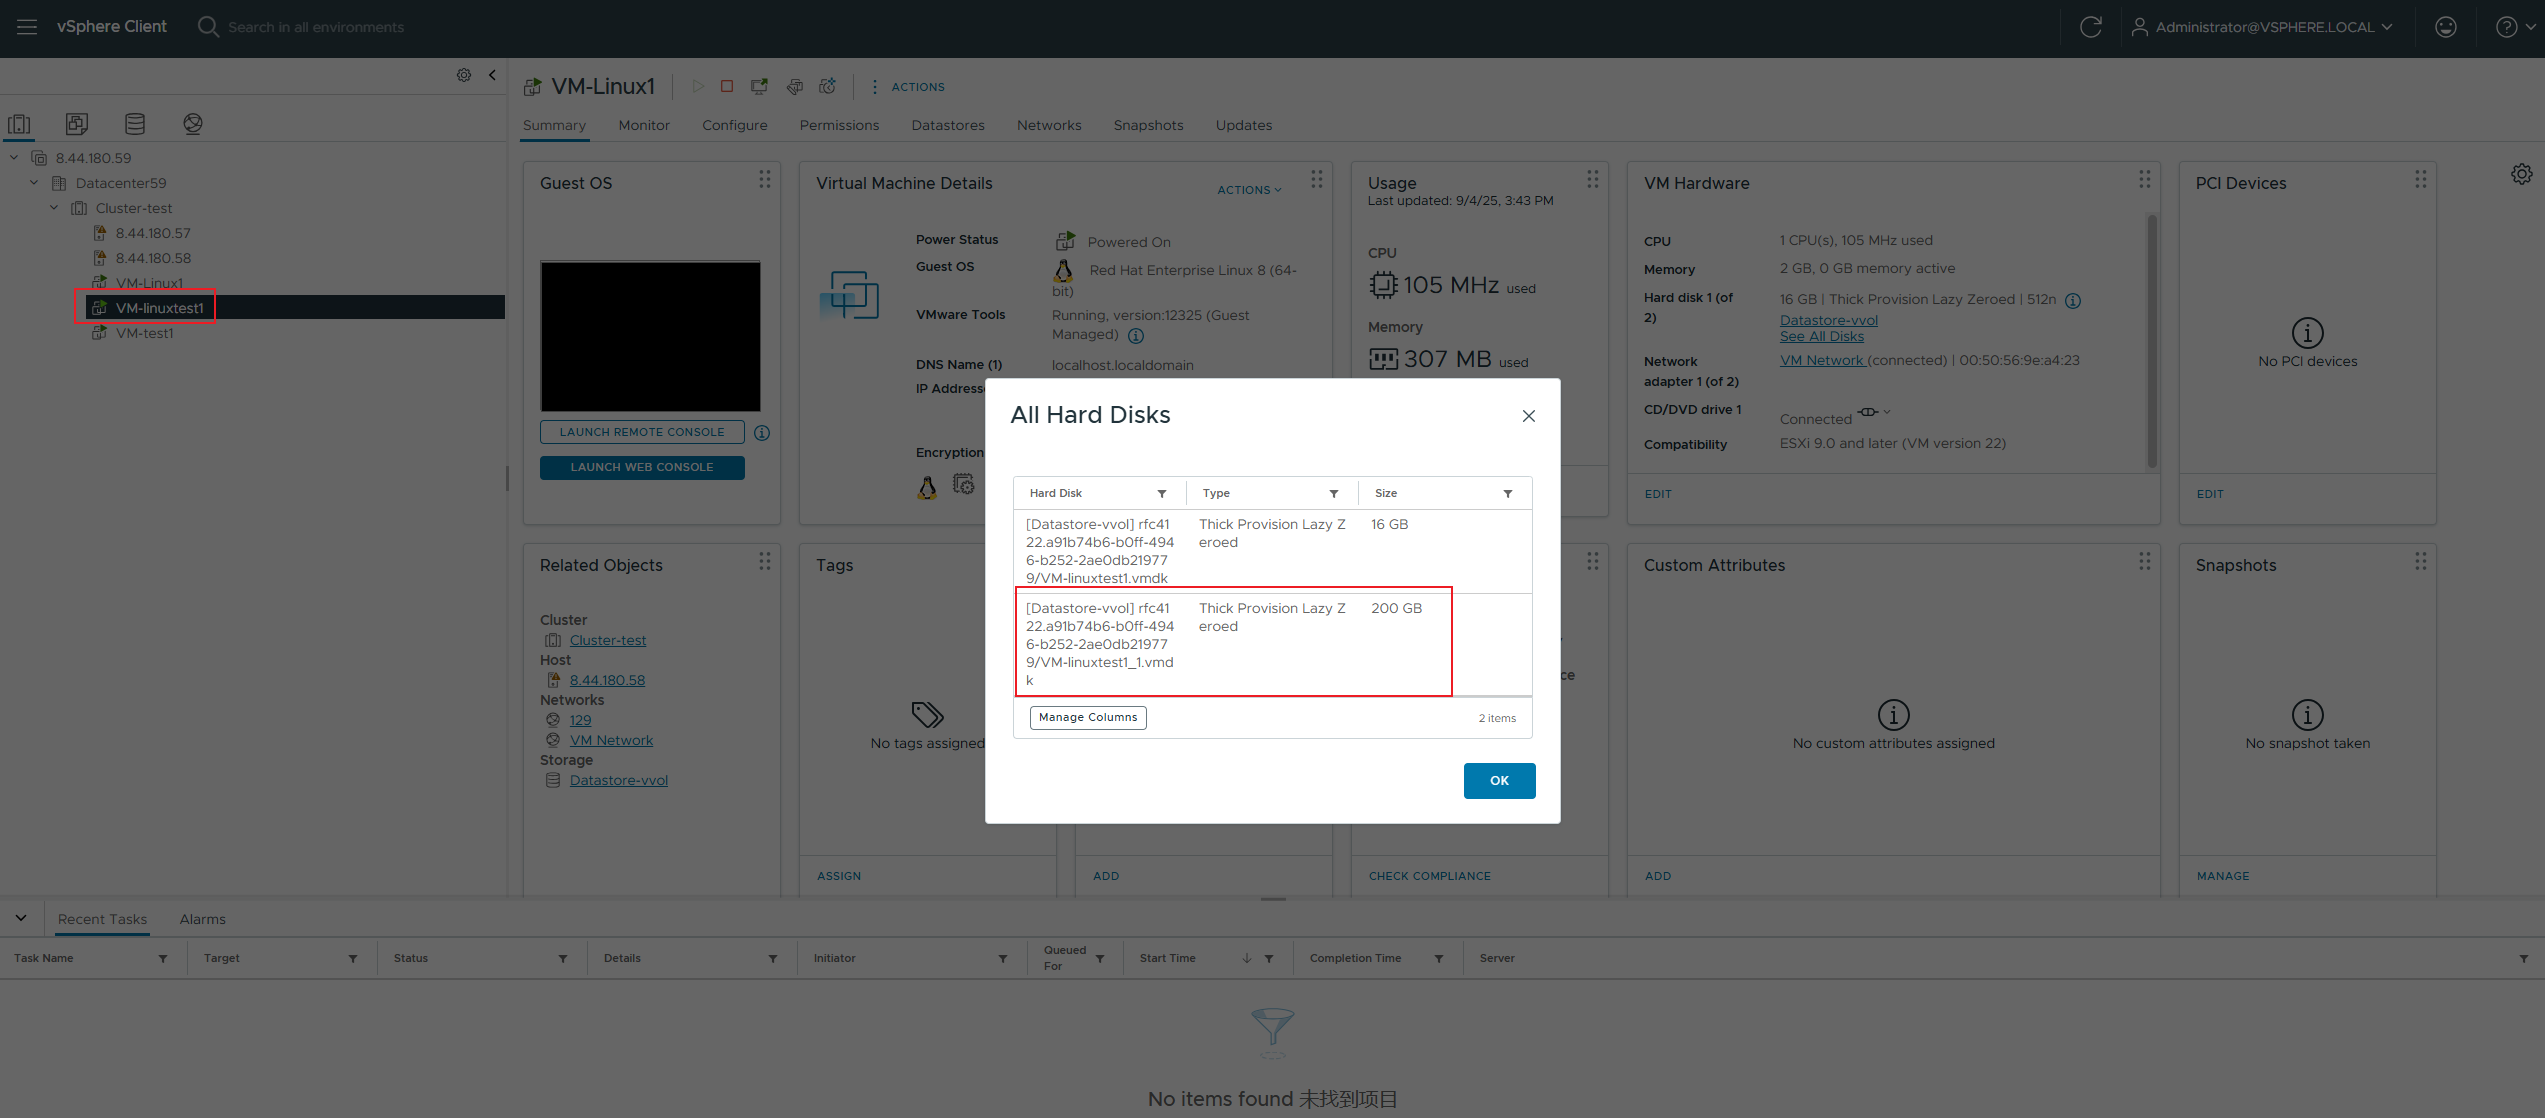
 |
Test Conclusion | PASS |
2.9 VVOL Virtual Machine Snapshot Operations
Test Purpose | Inspection of VVOL virtual machine snapshot operation and maintenance procedures. (Protocol: FC) |
Test Networking | Storage and VMware ESXi Compatibility Test Networking |
Prerequisites | 1. The VASA Provider has been installed and configured. 2. The VASA Provider has been registered with vCenter and initial configuration is complete. 3. The host, storage, and networking have been completed. |
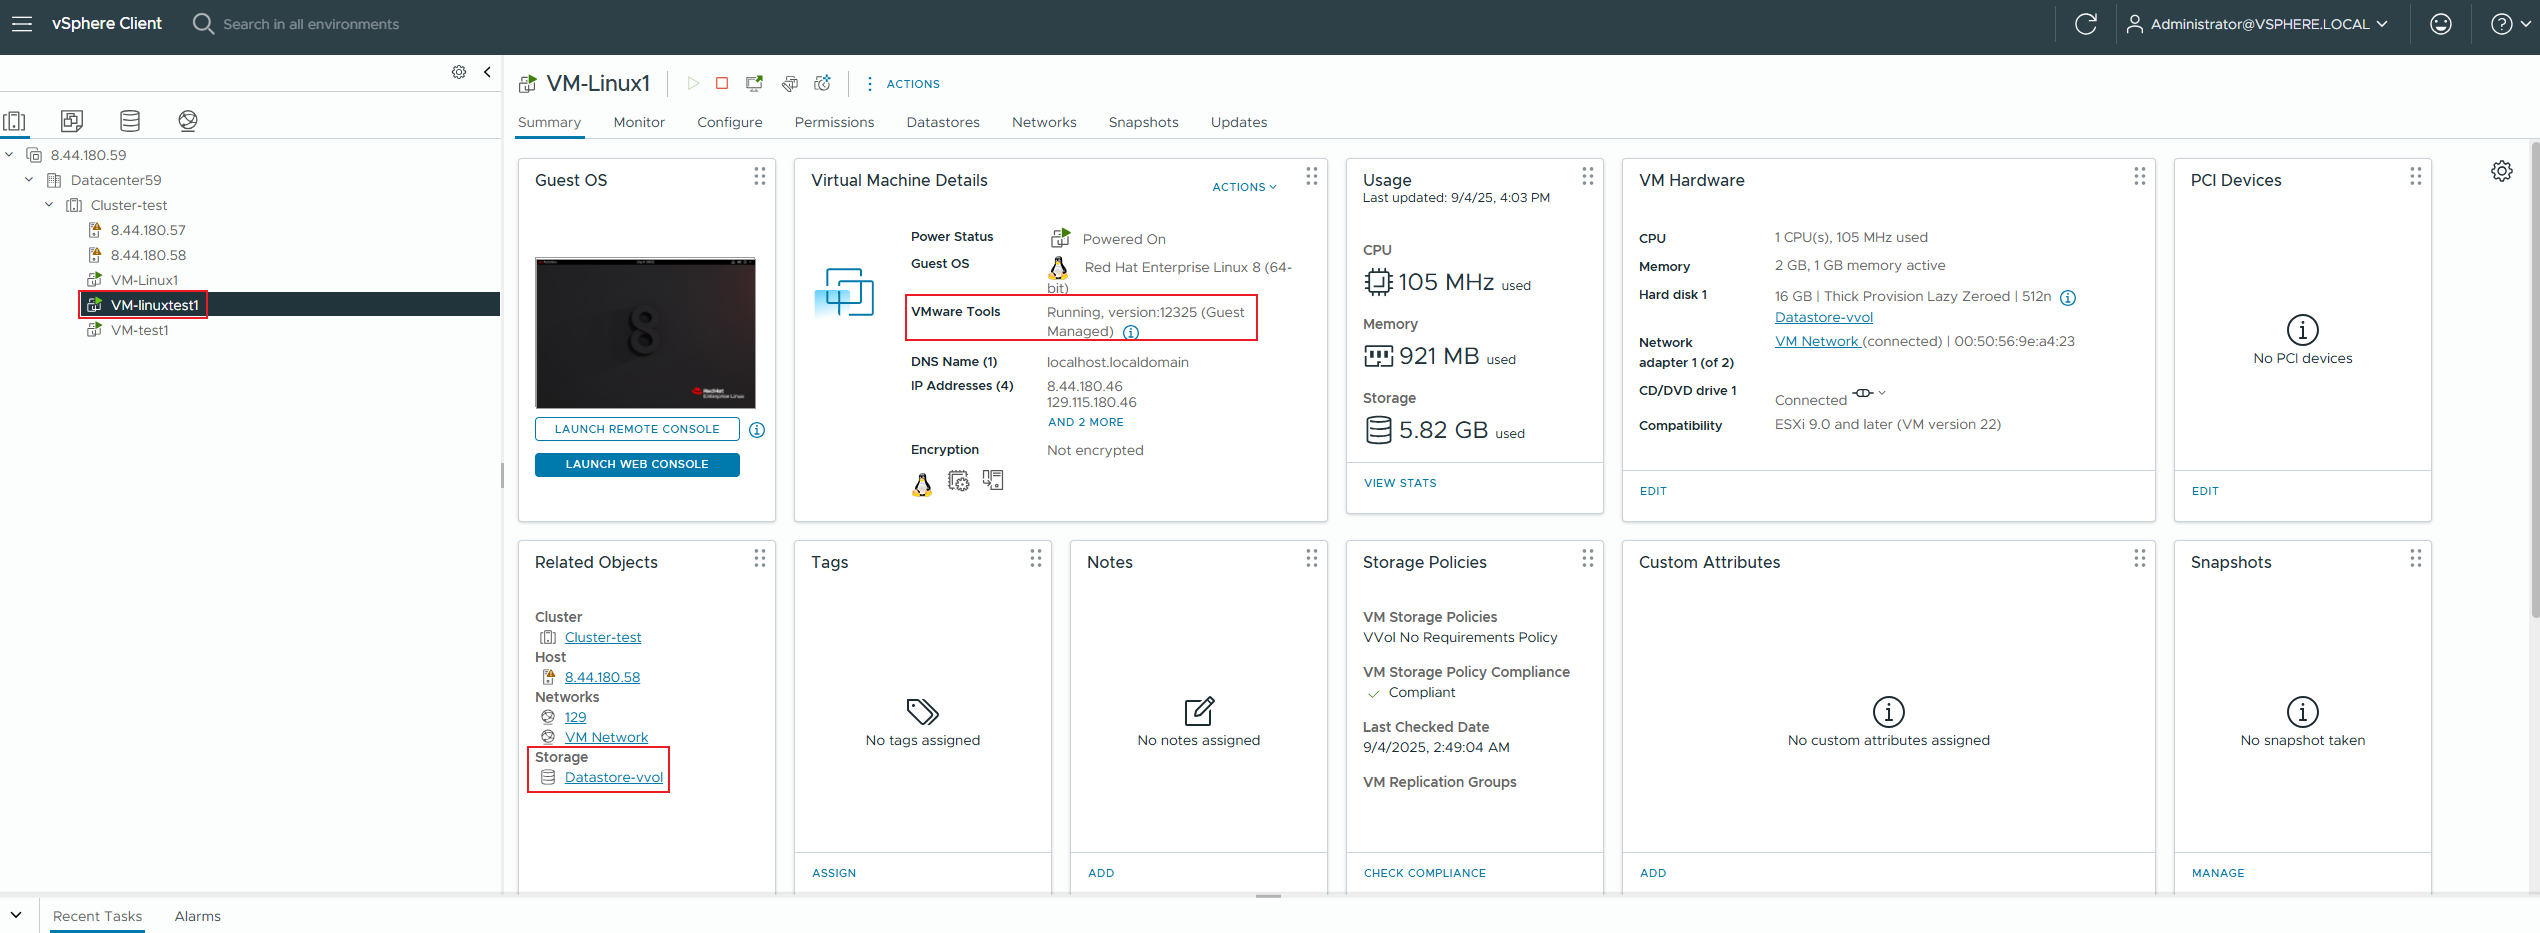
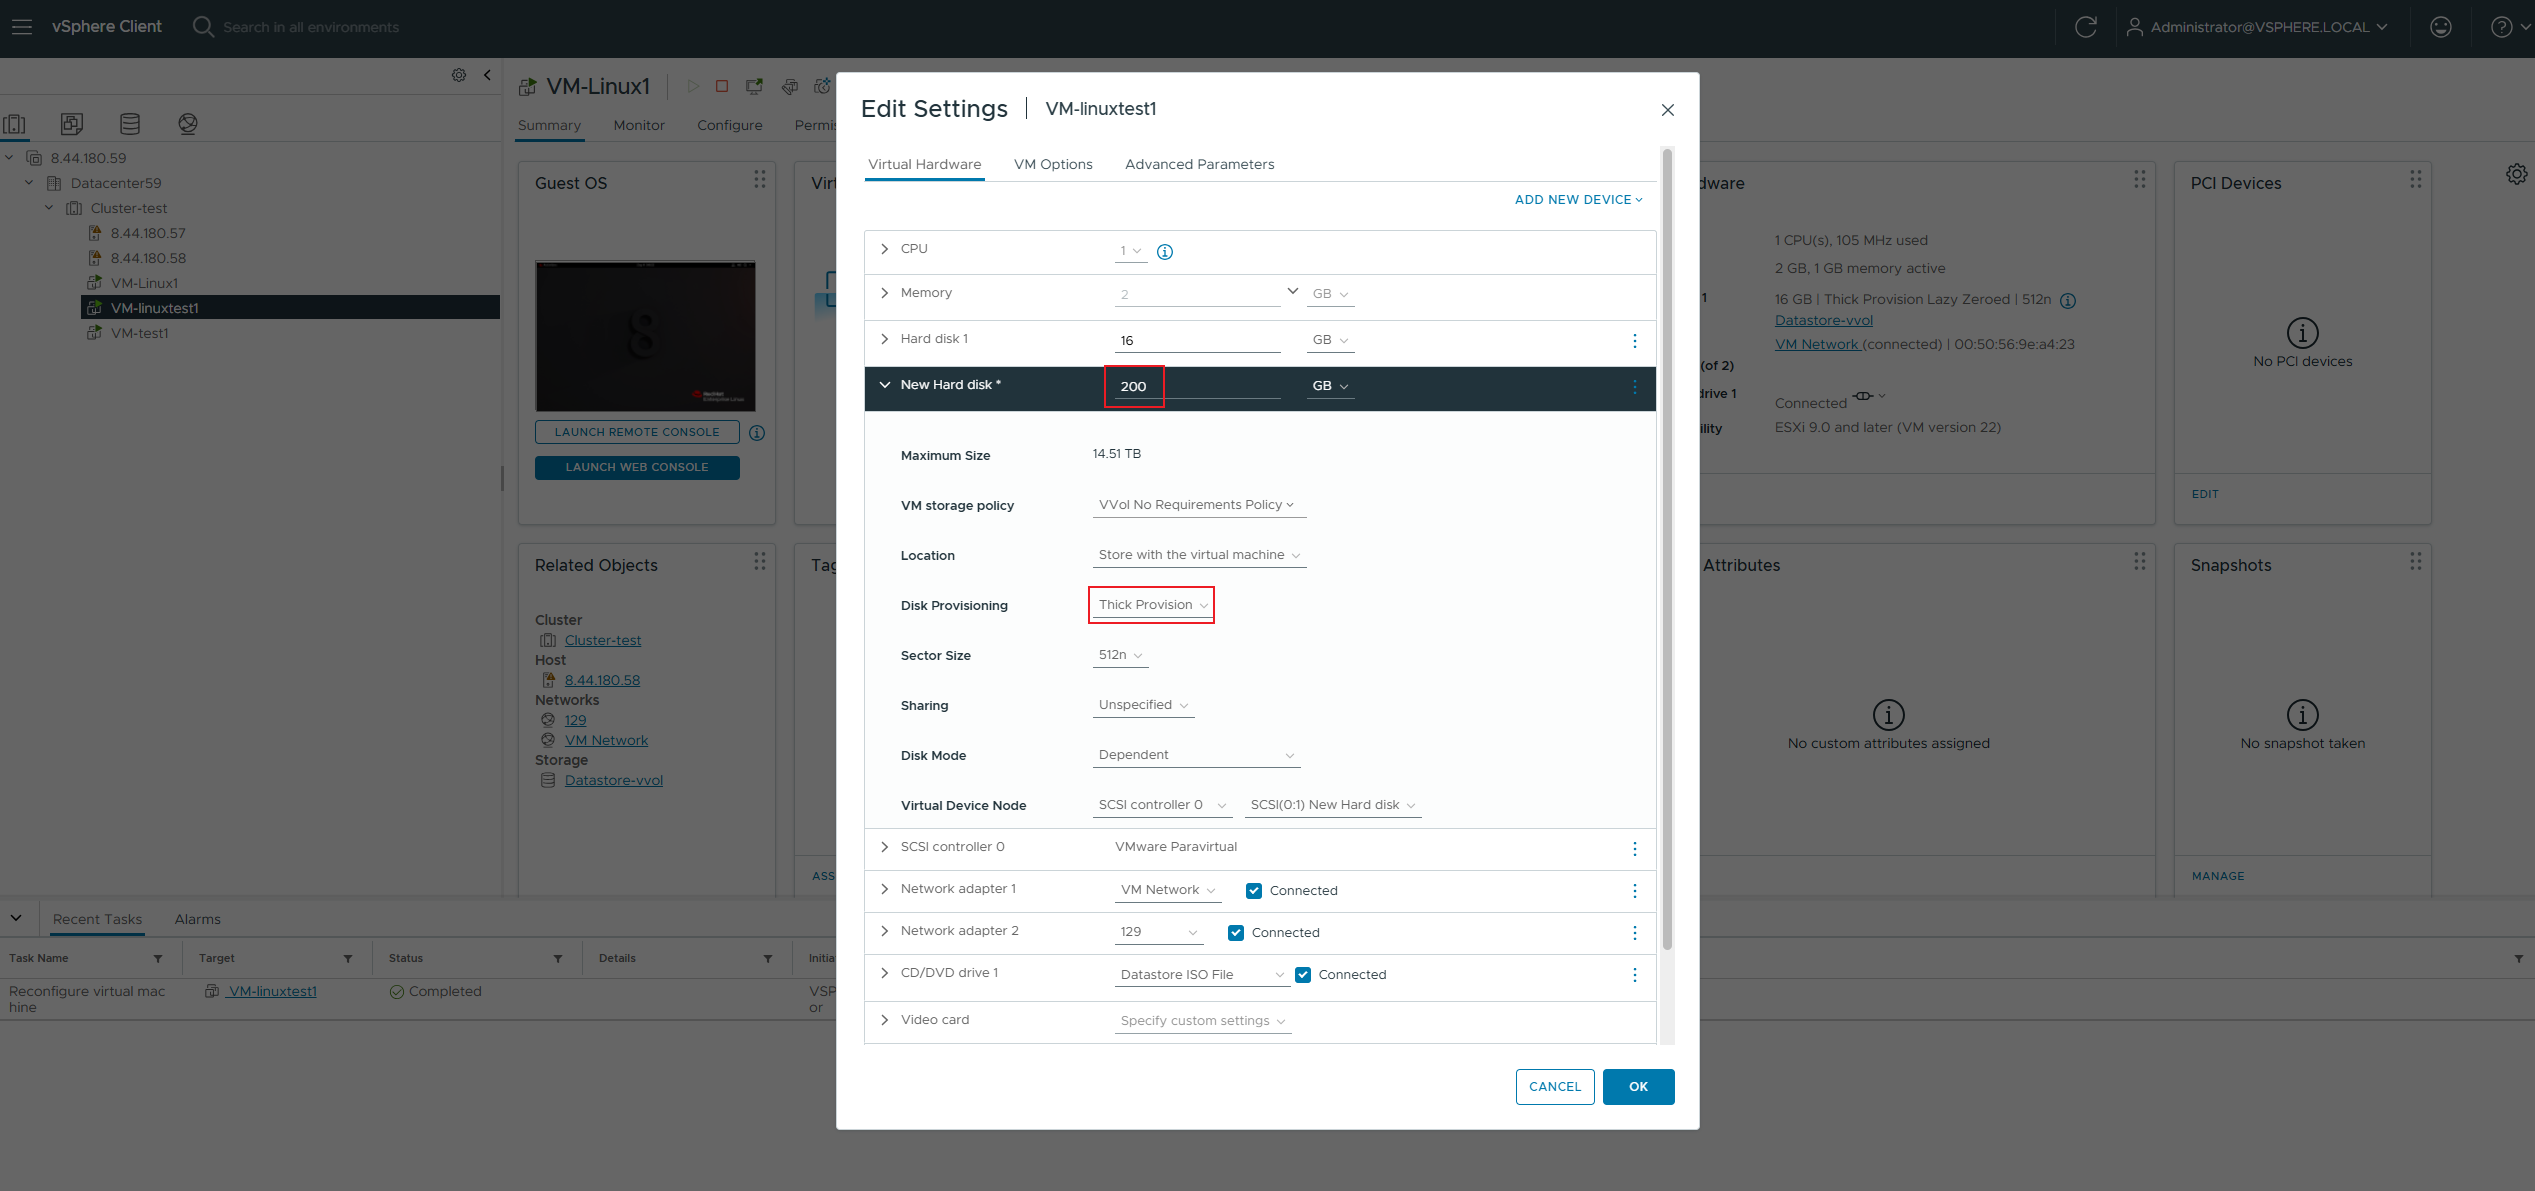
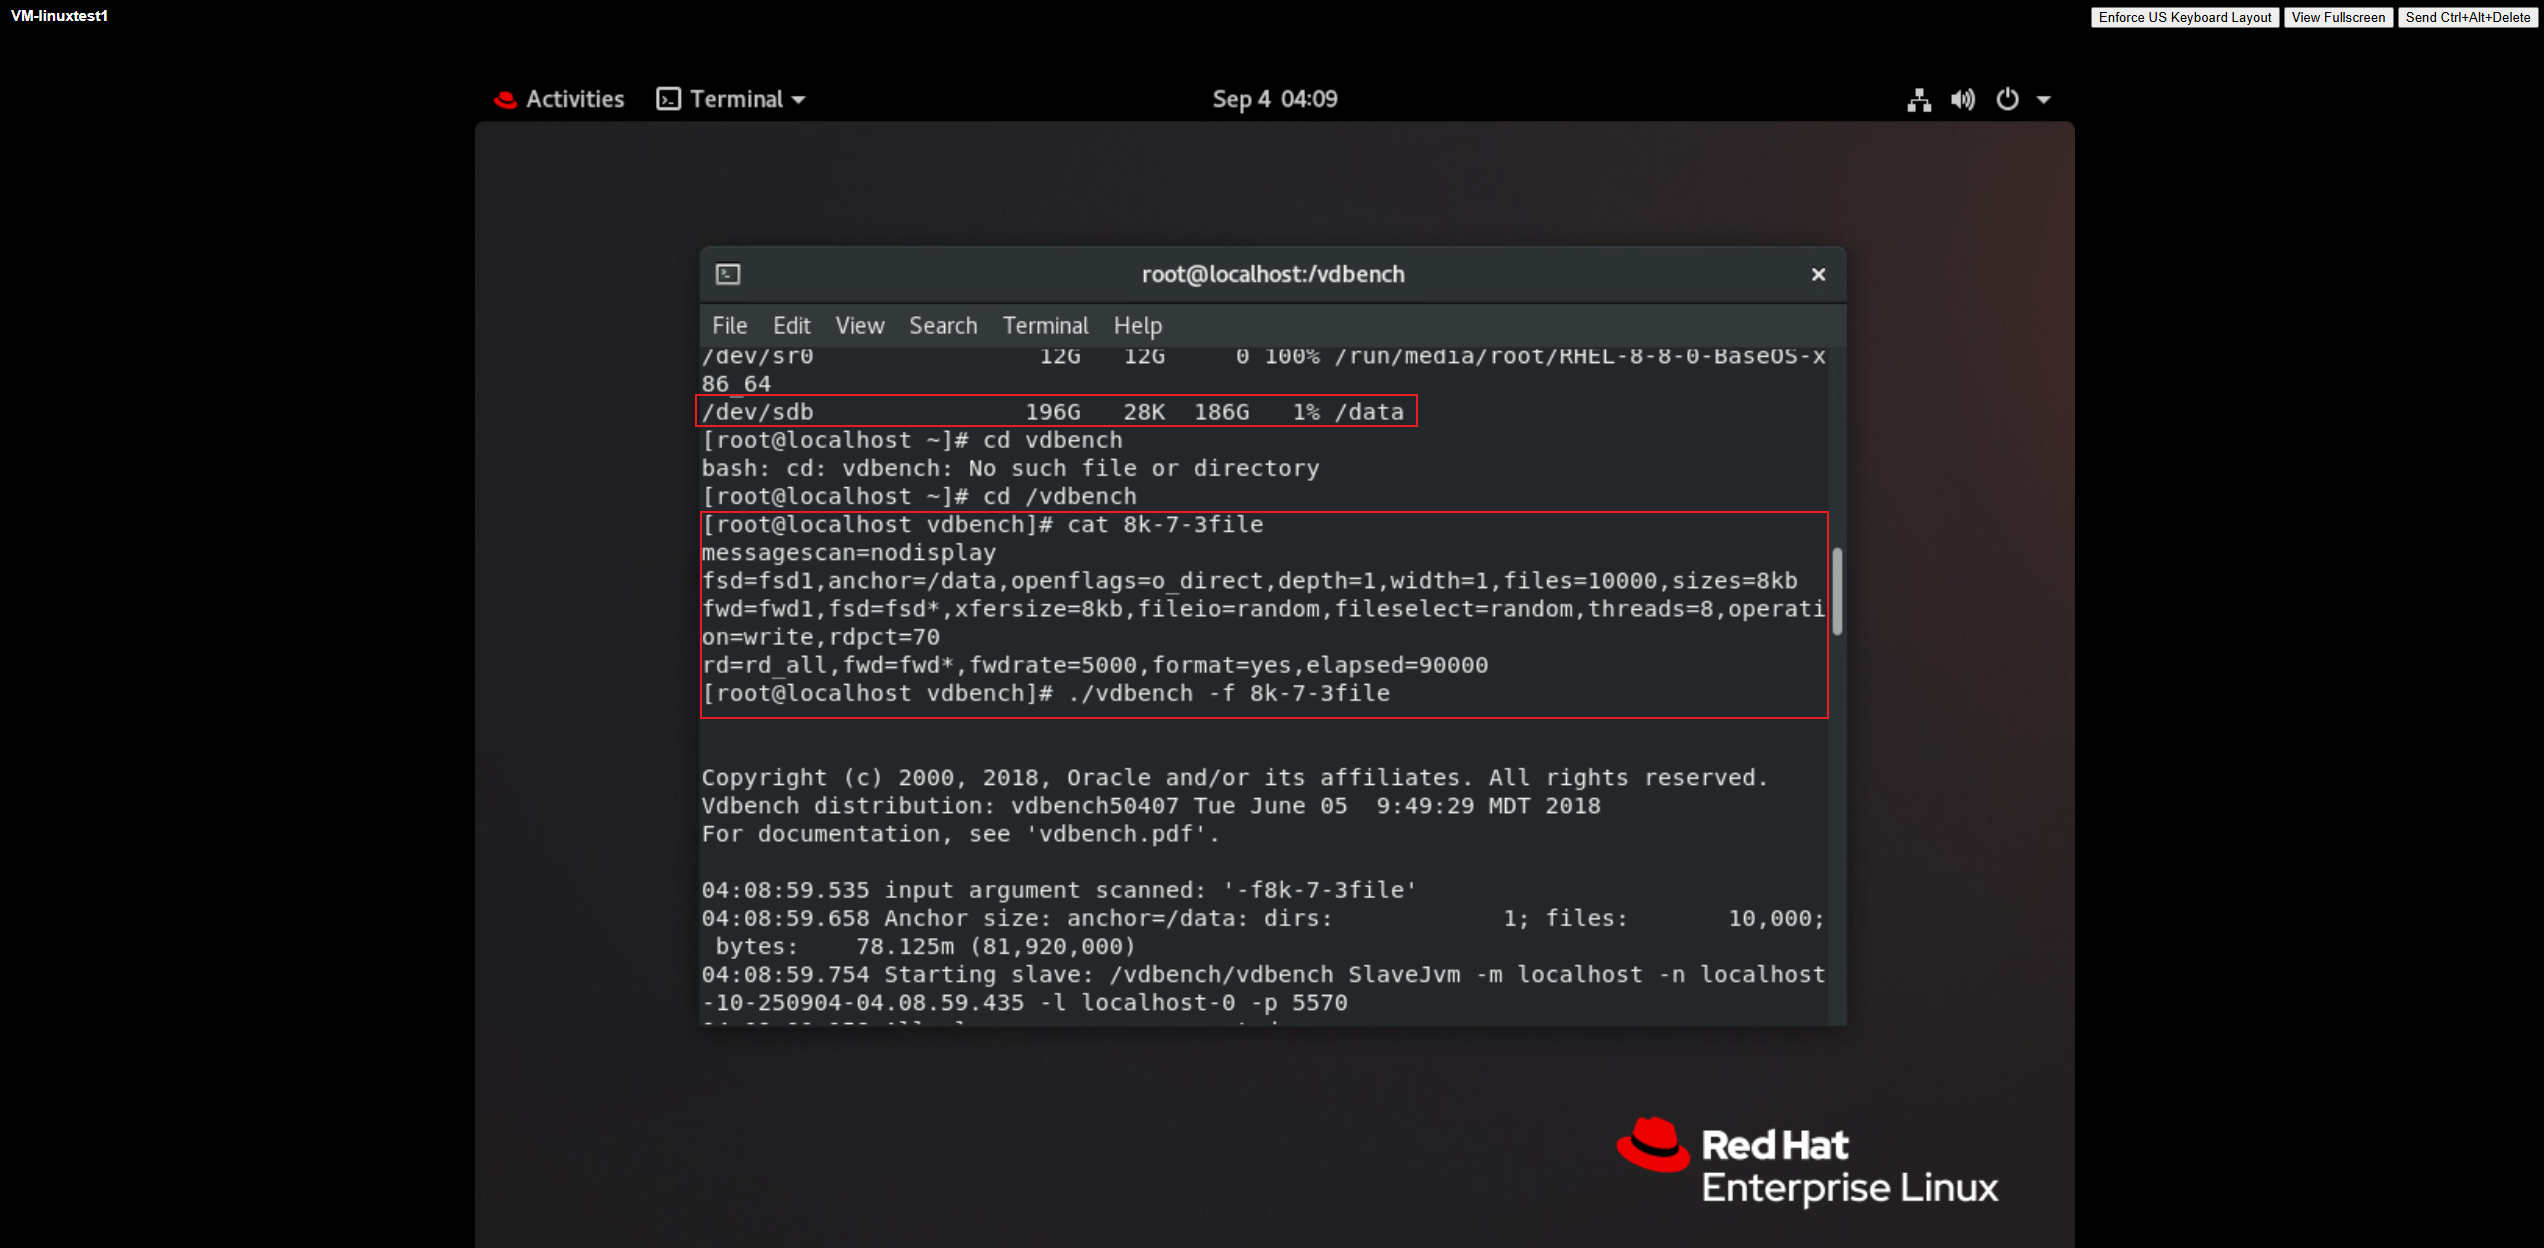
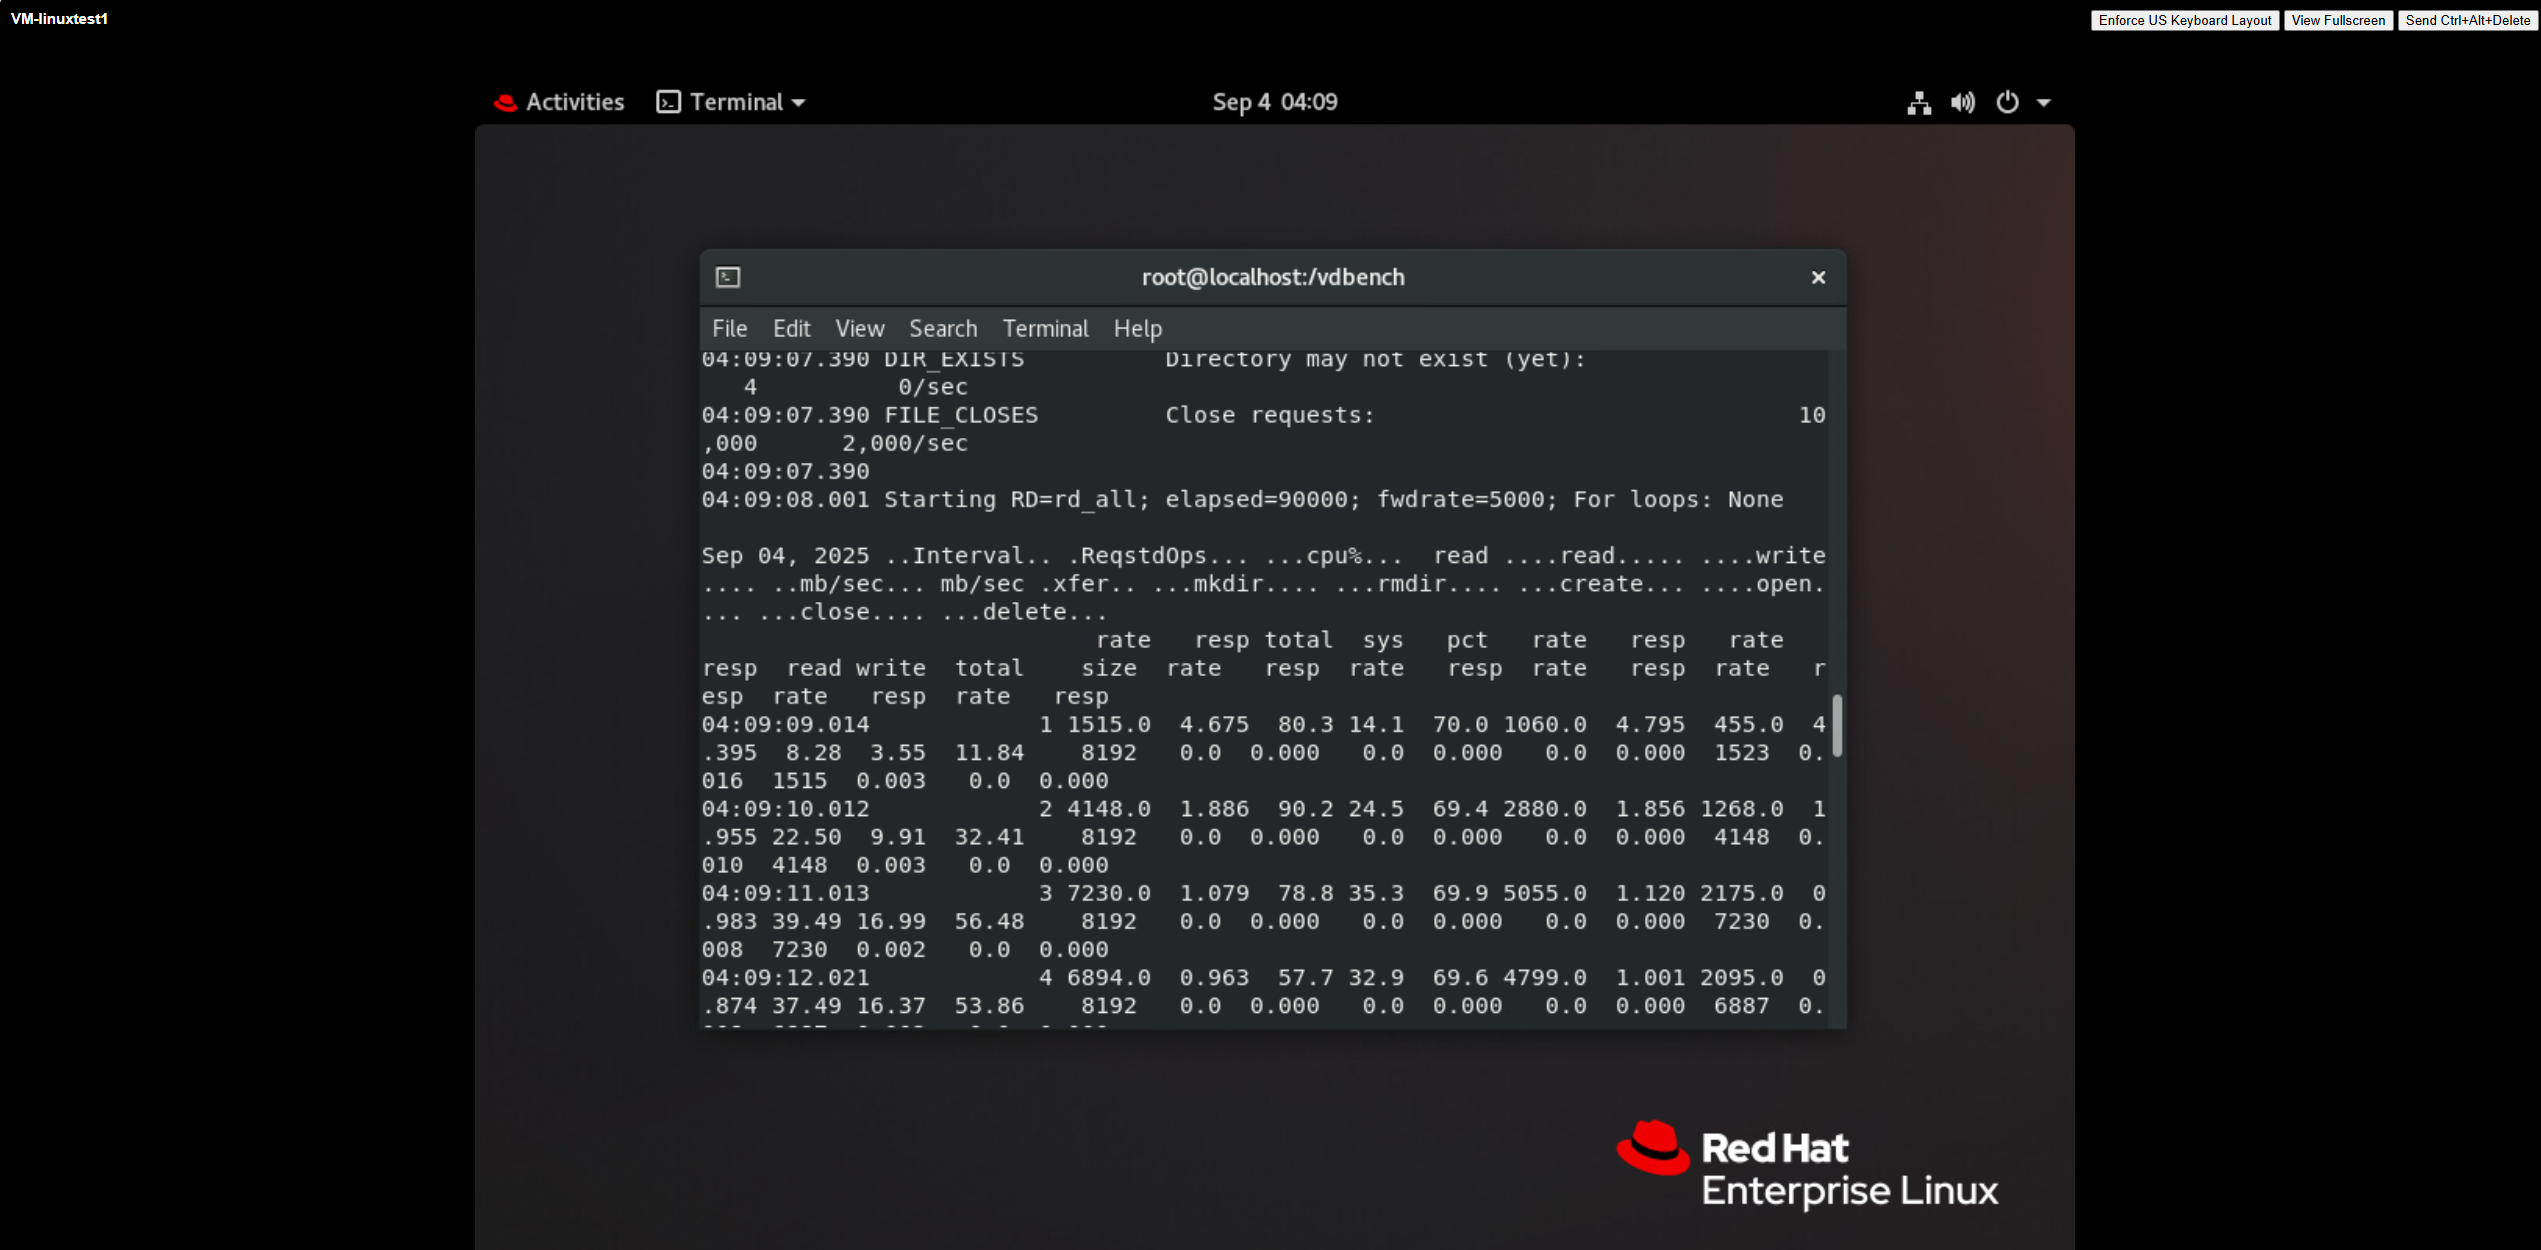
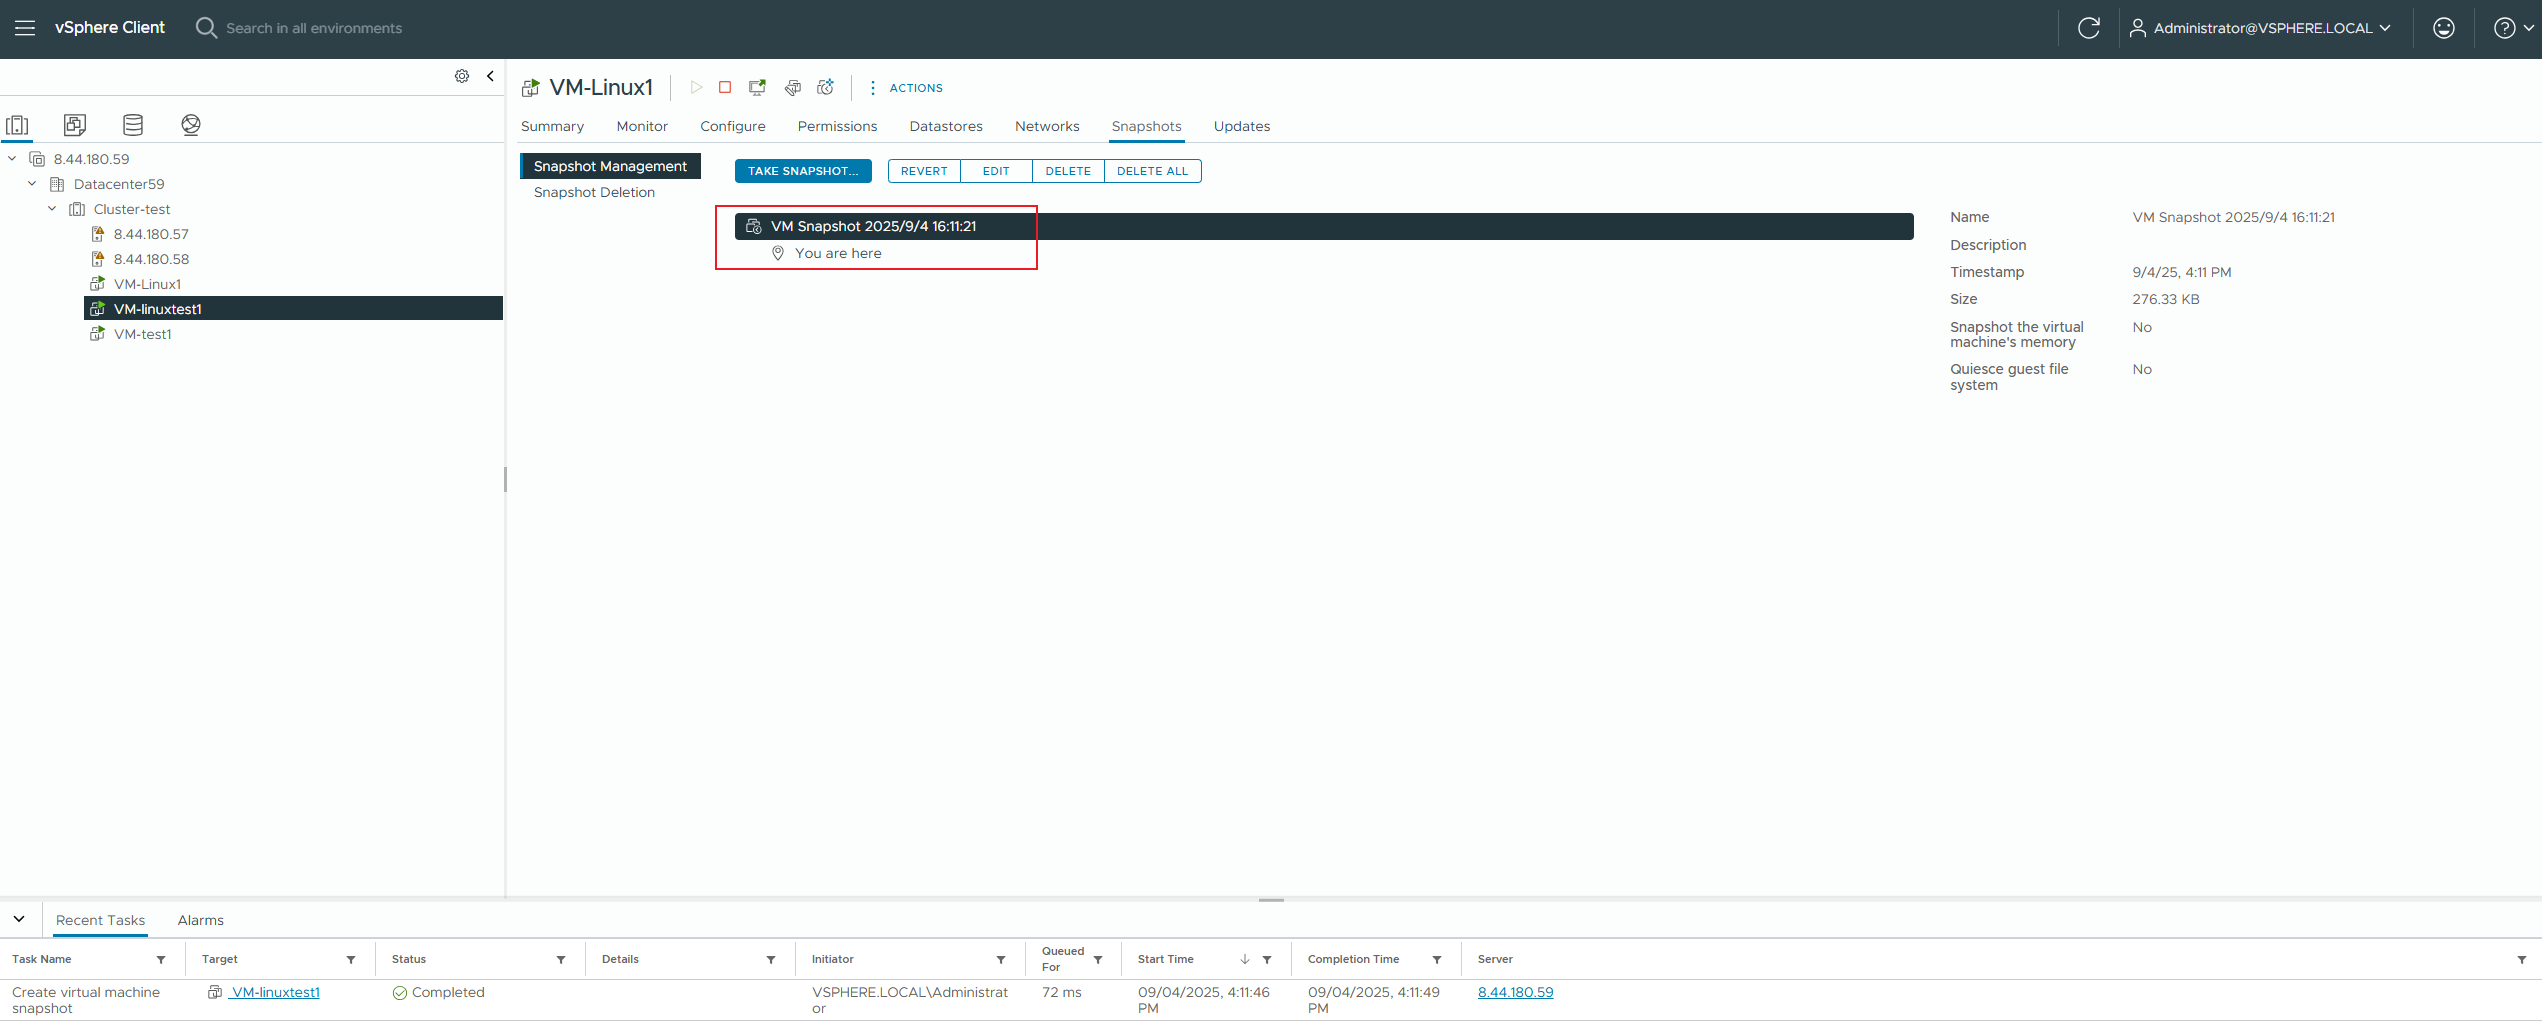
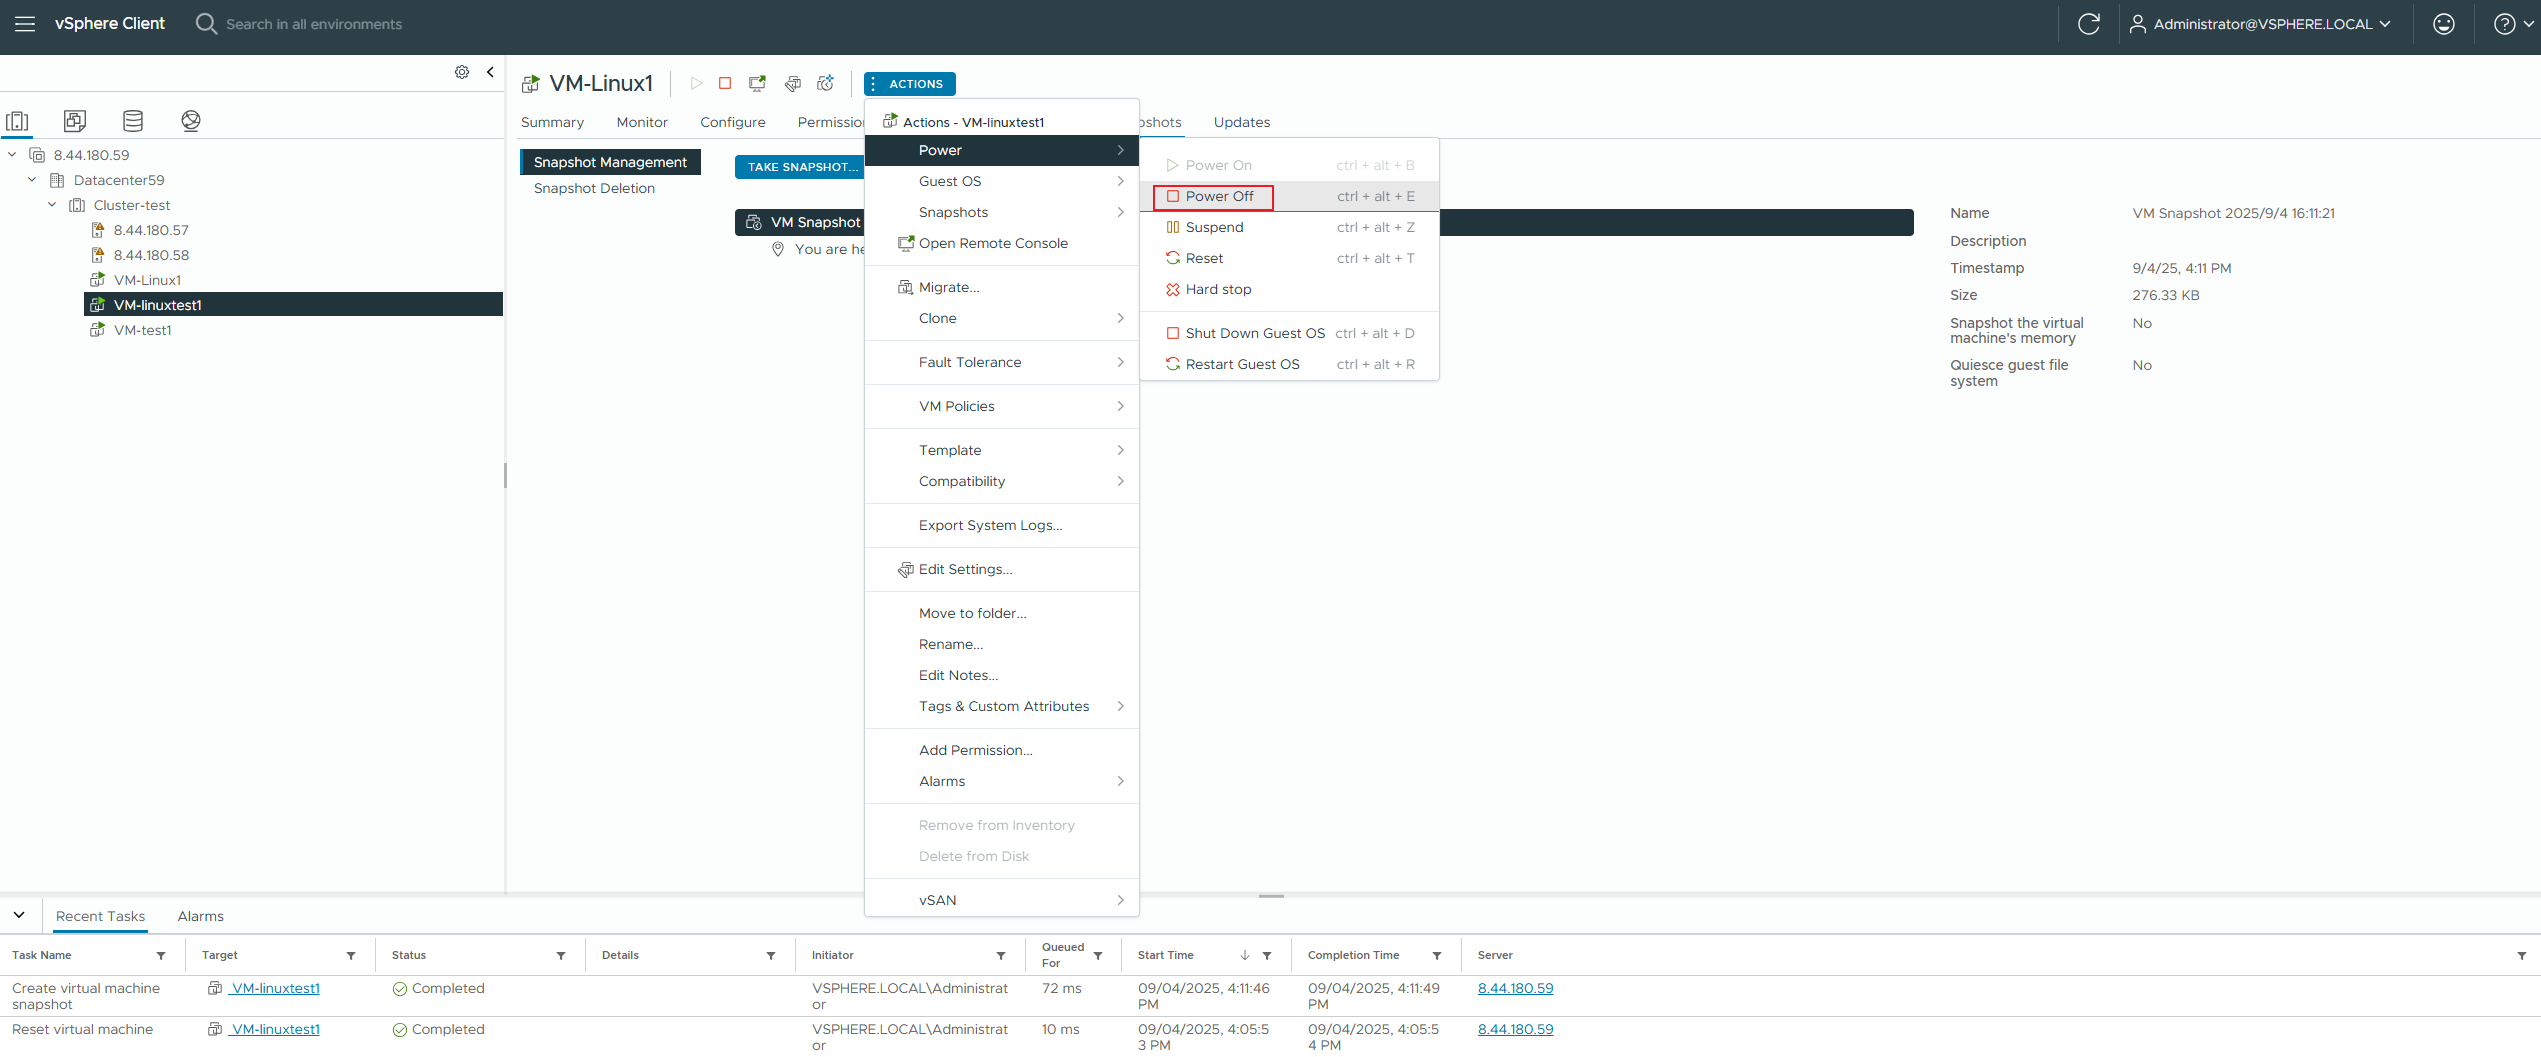
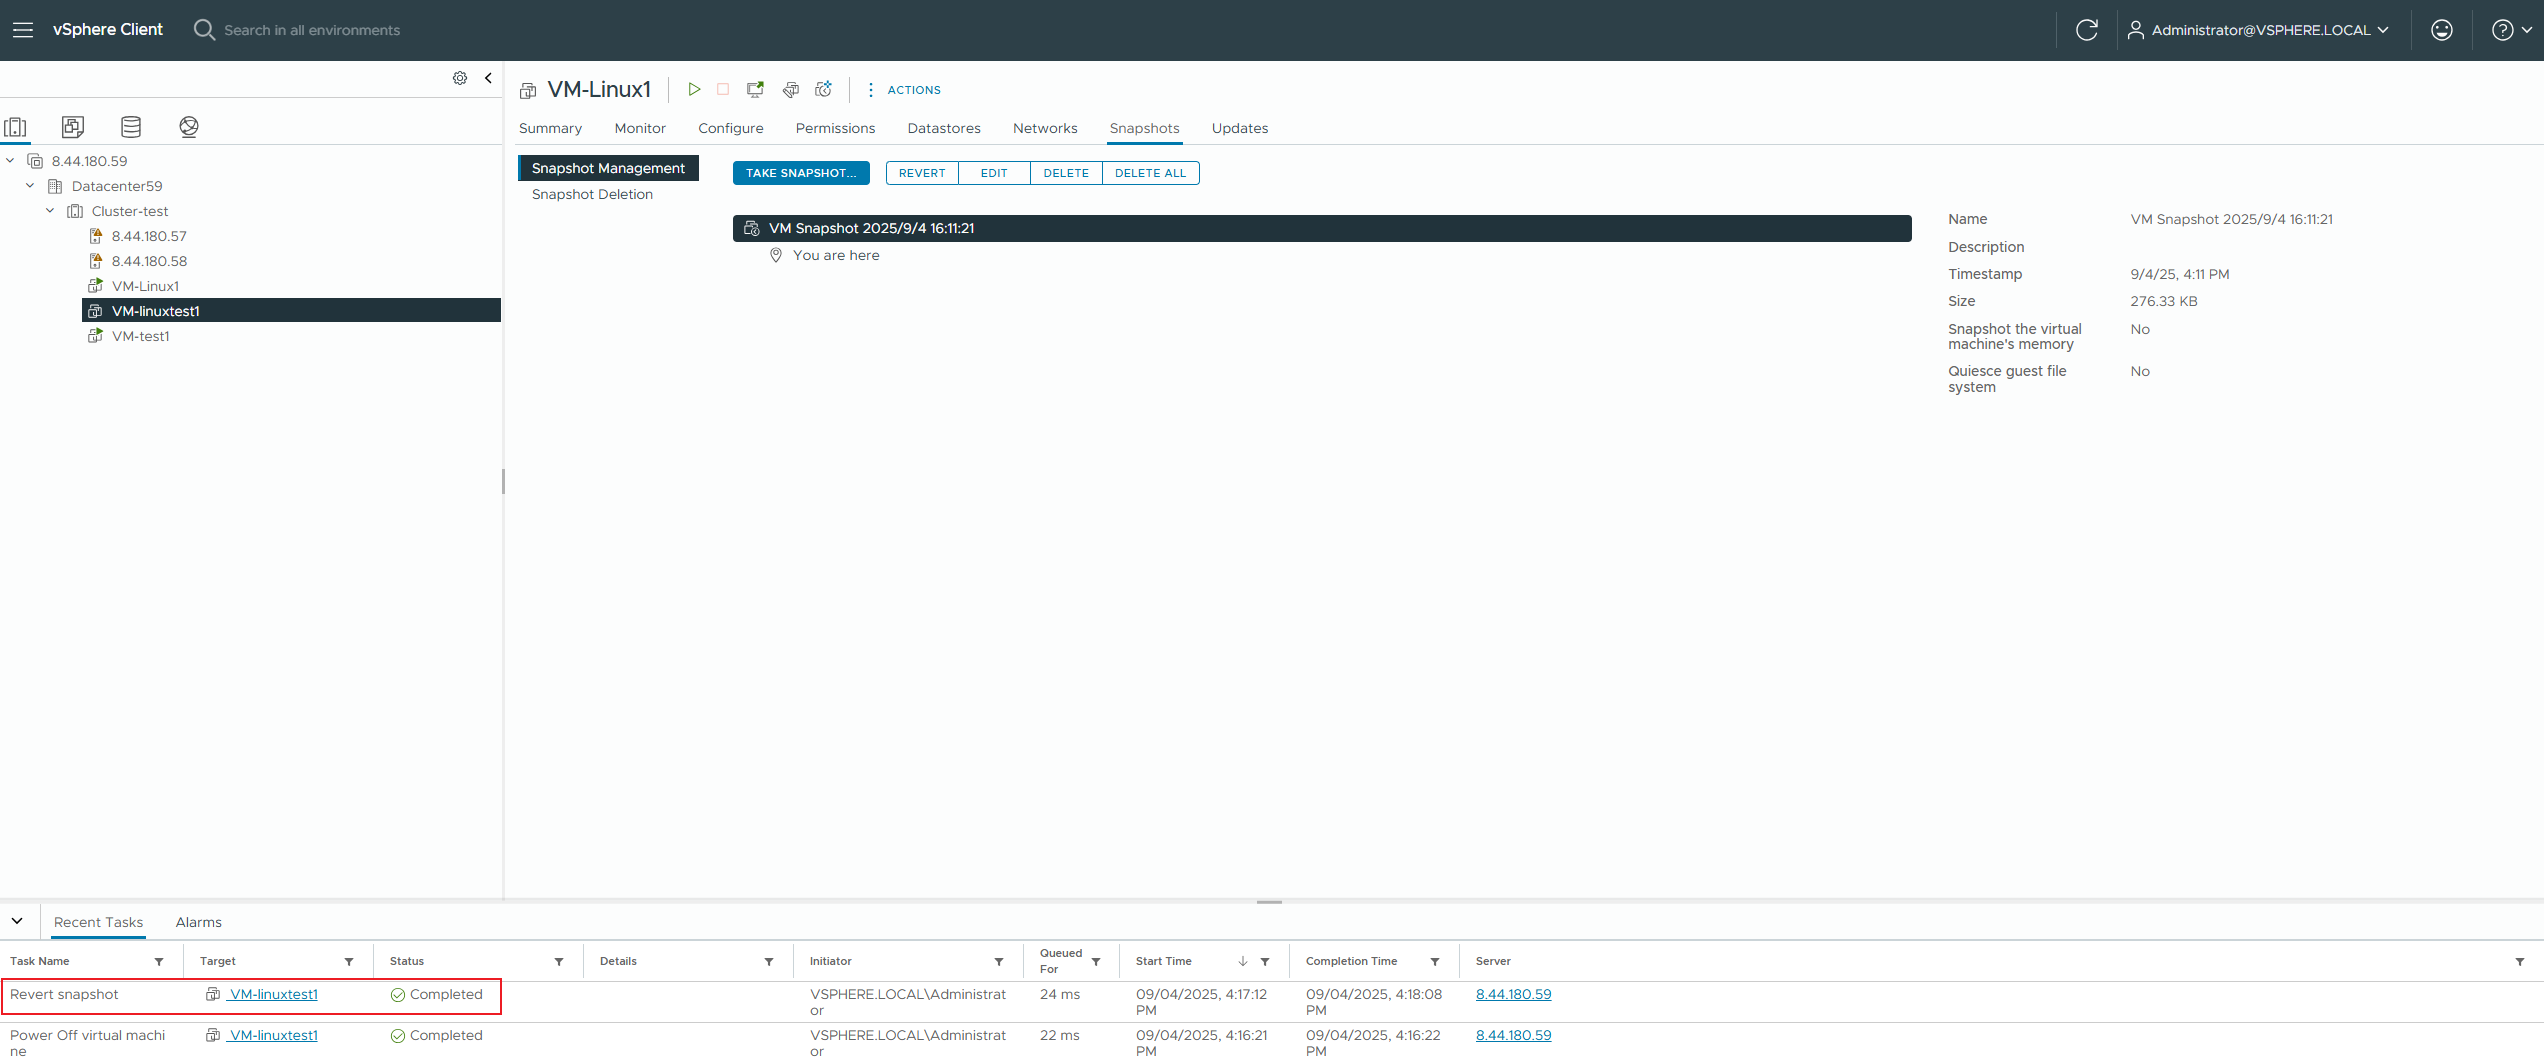
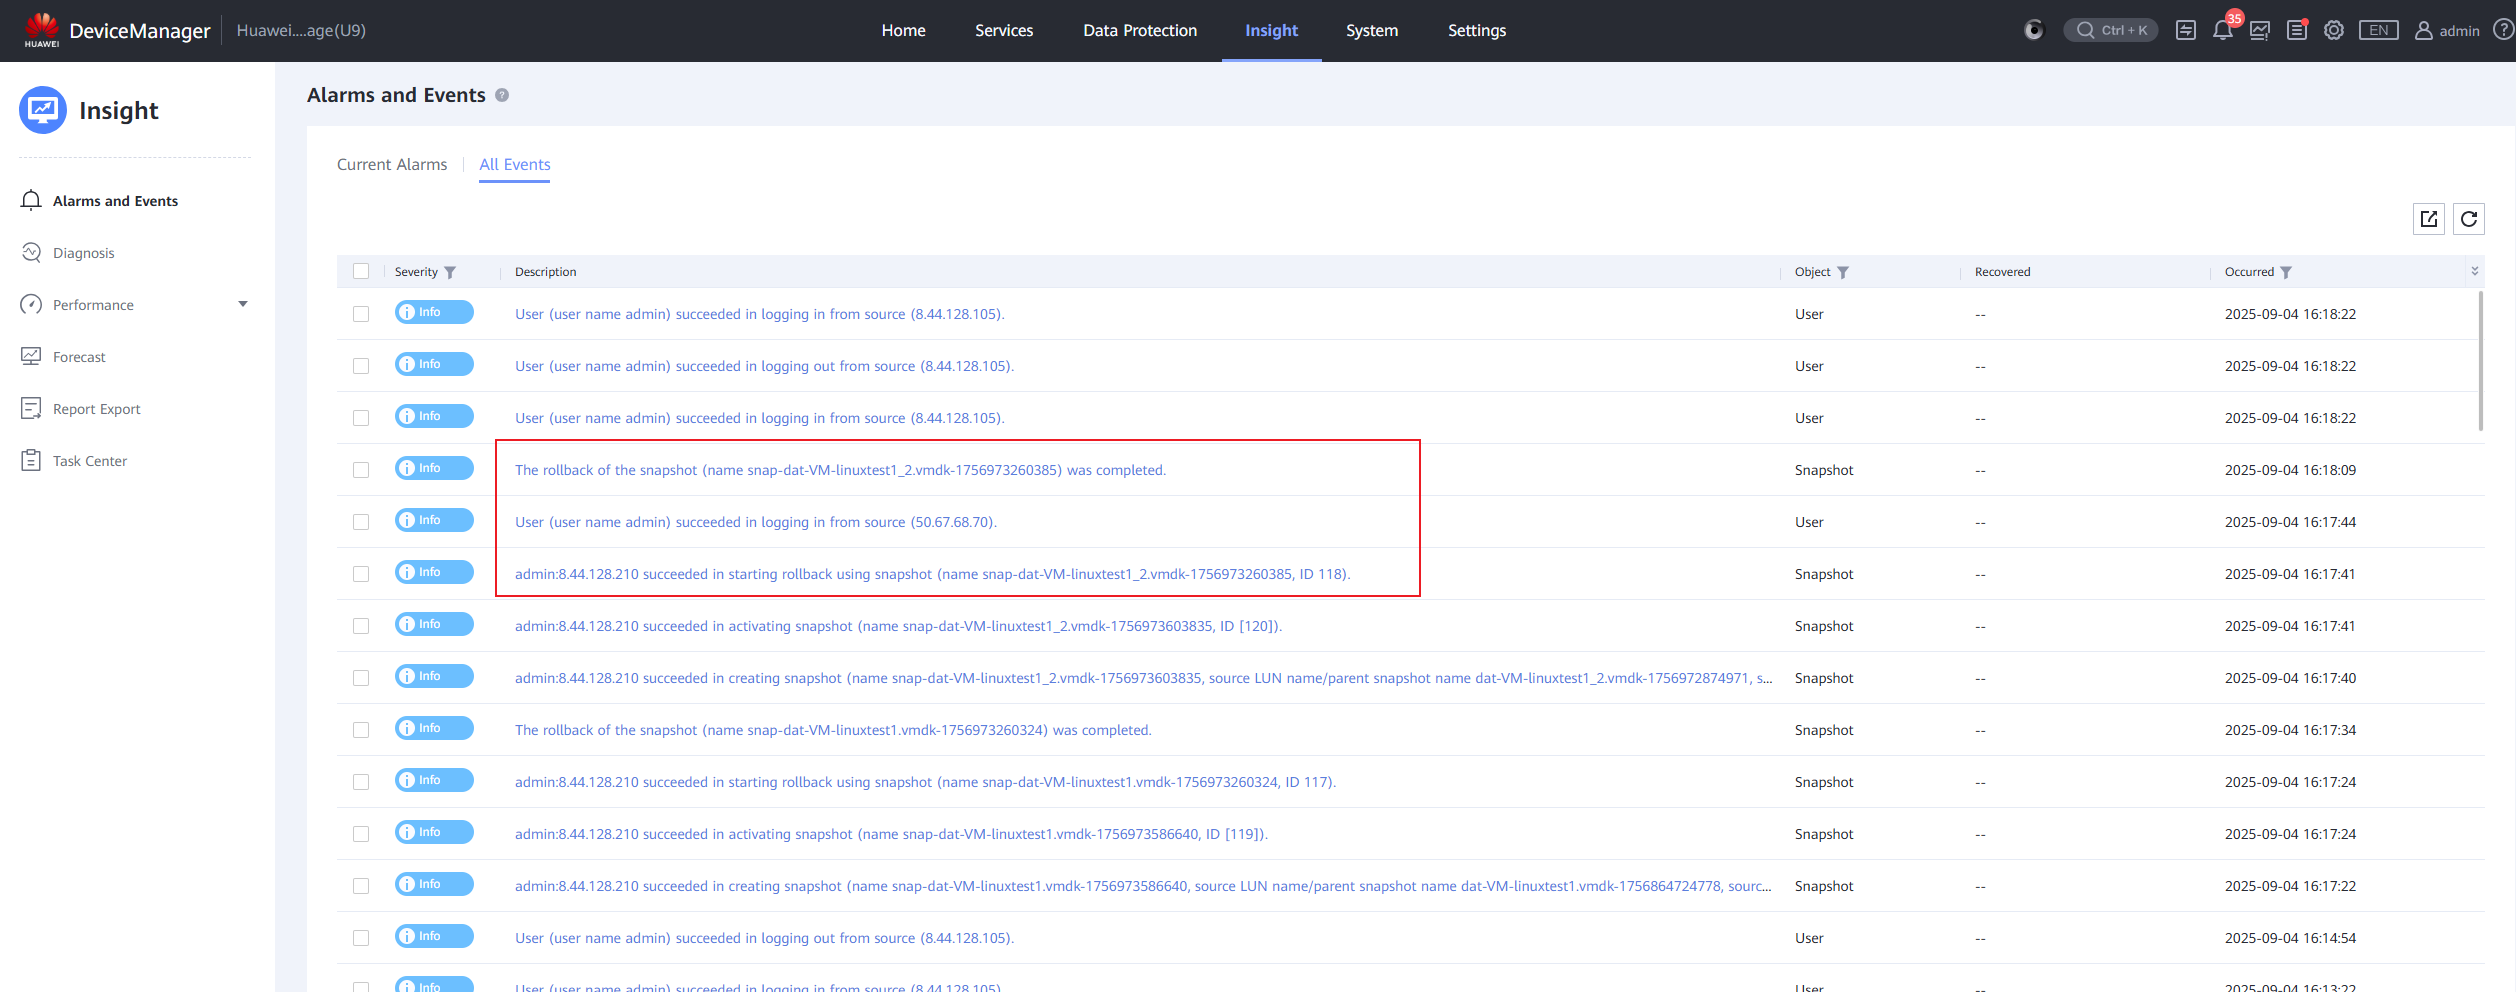
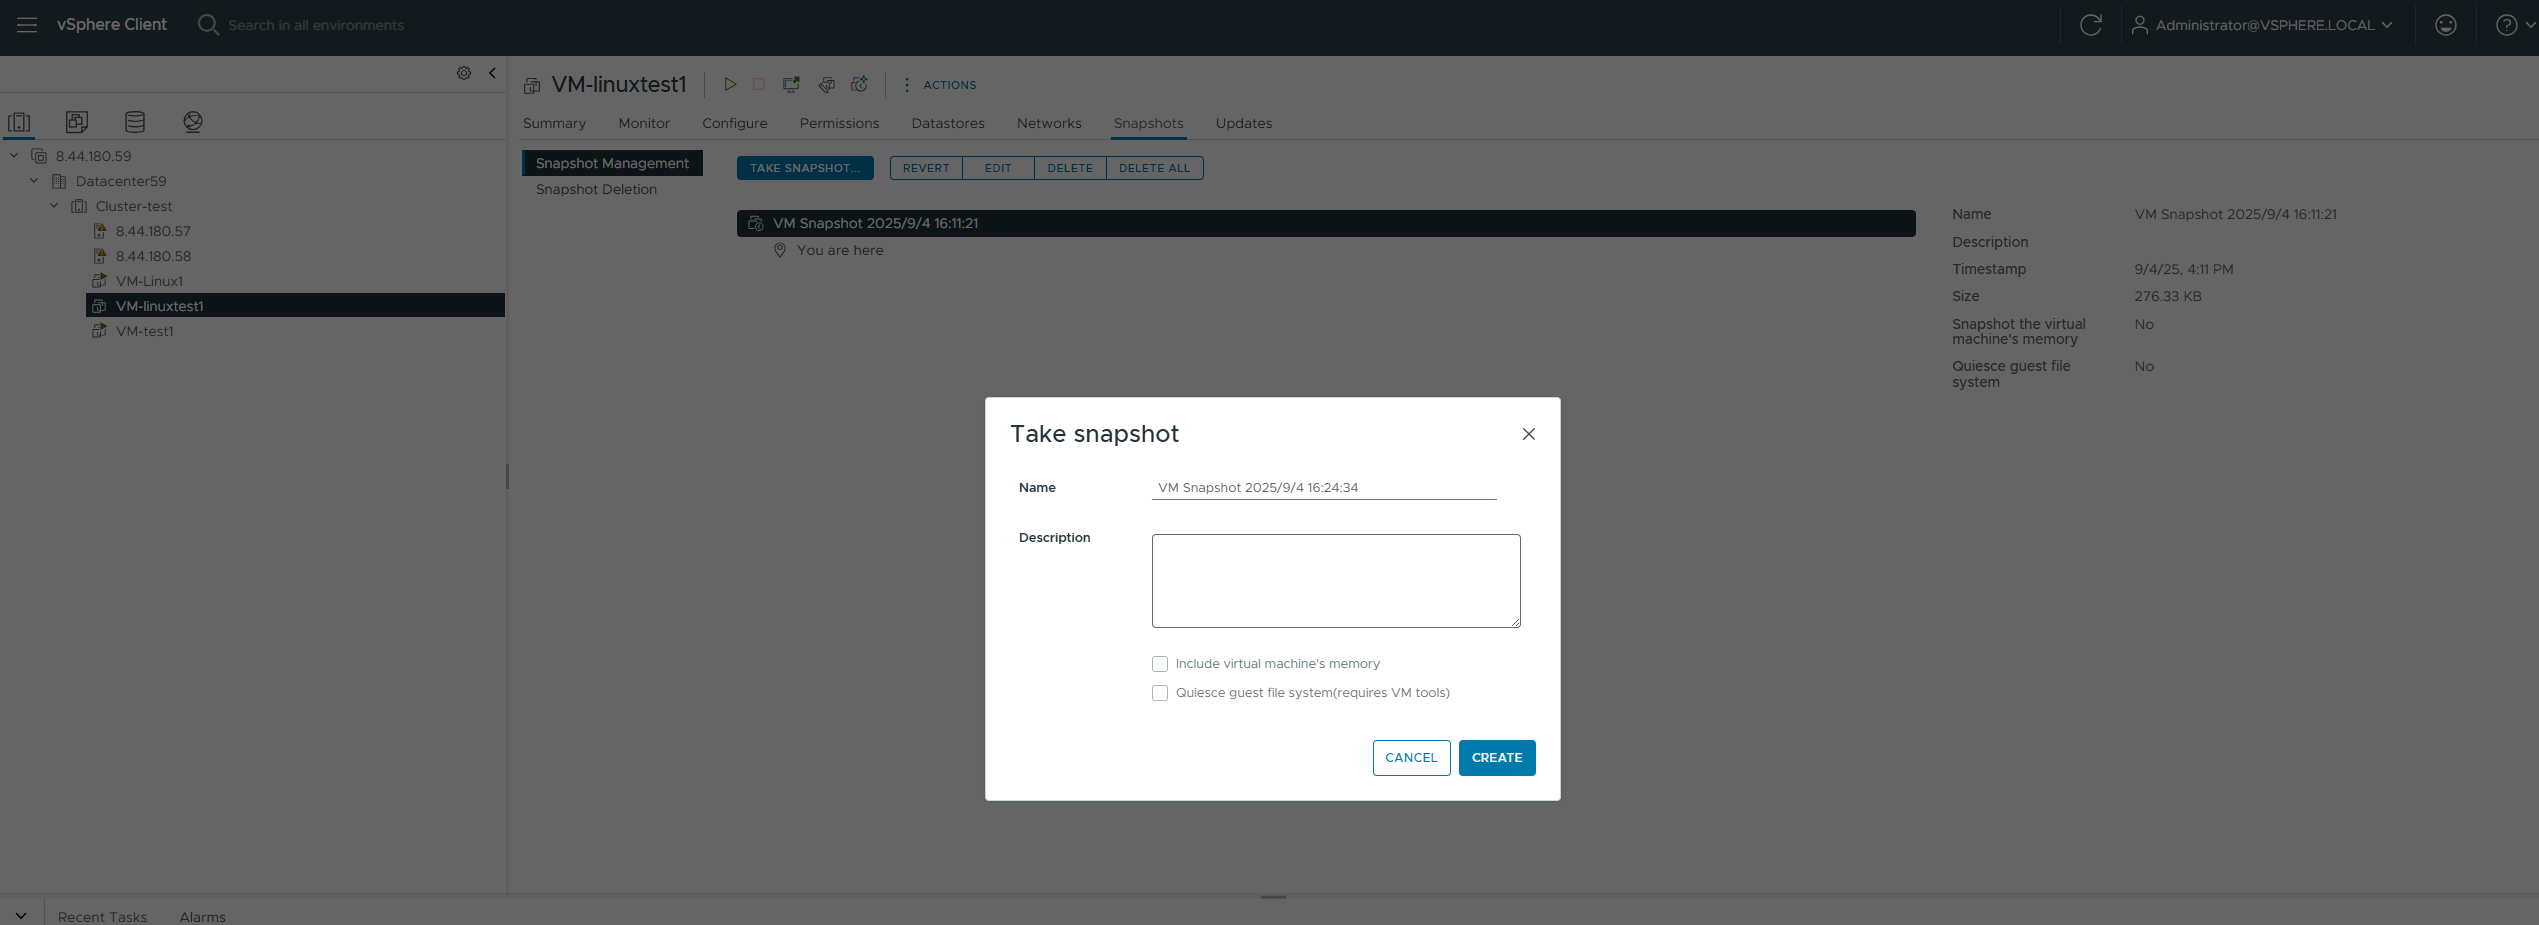
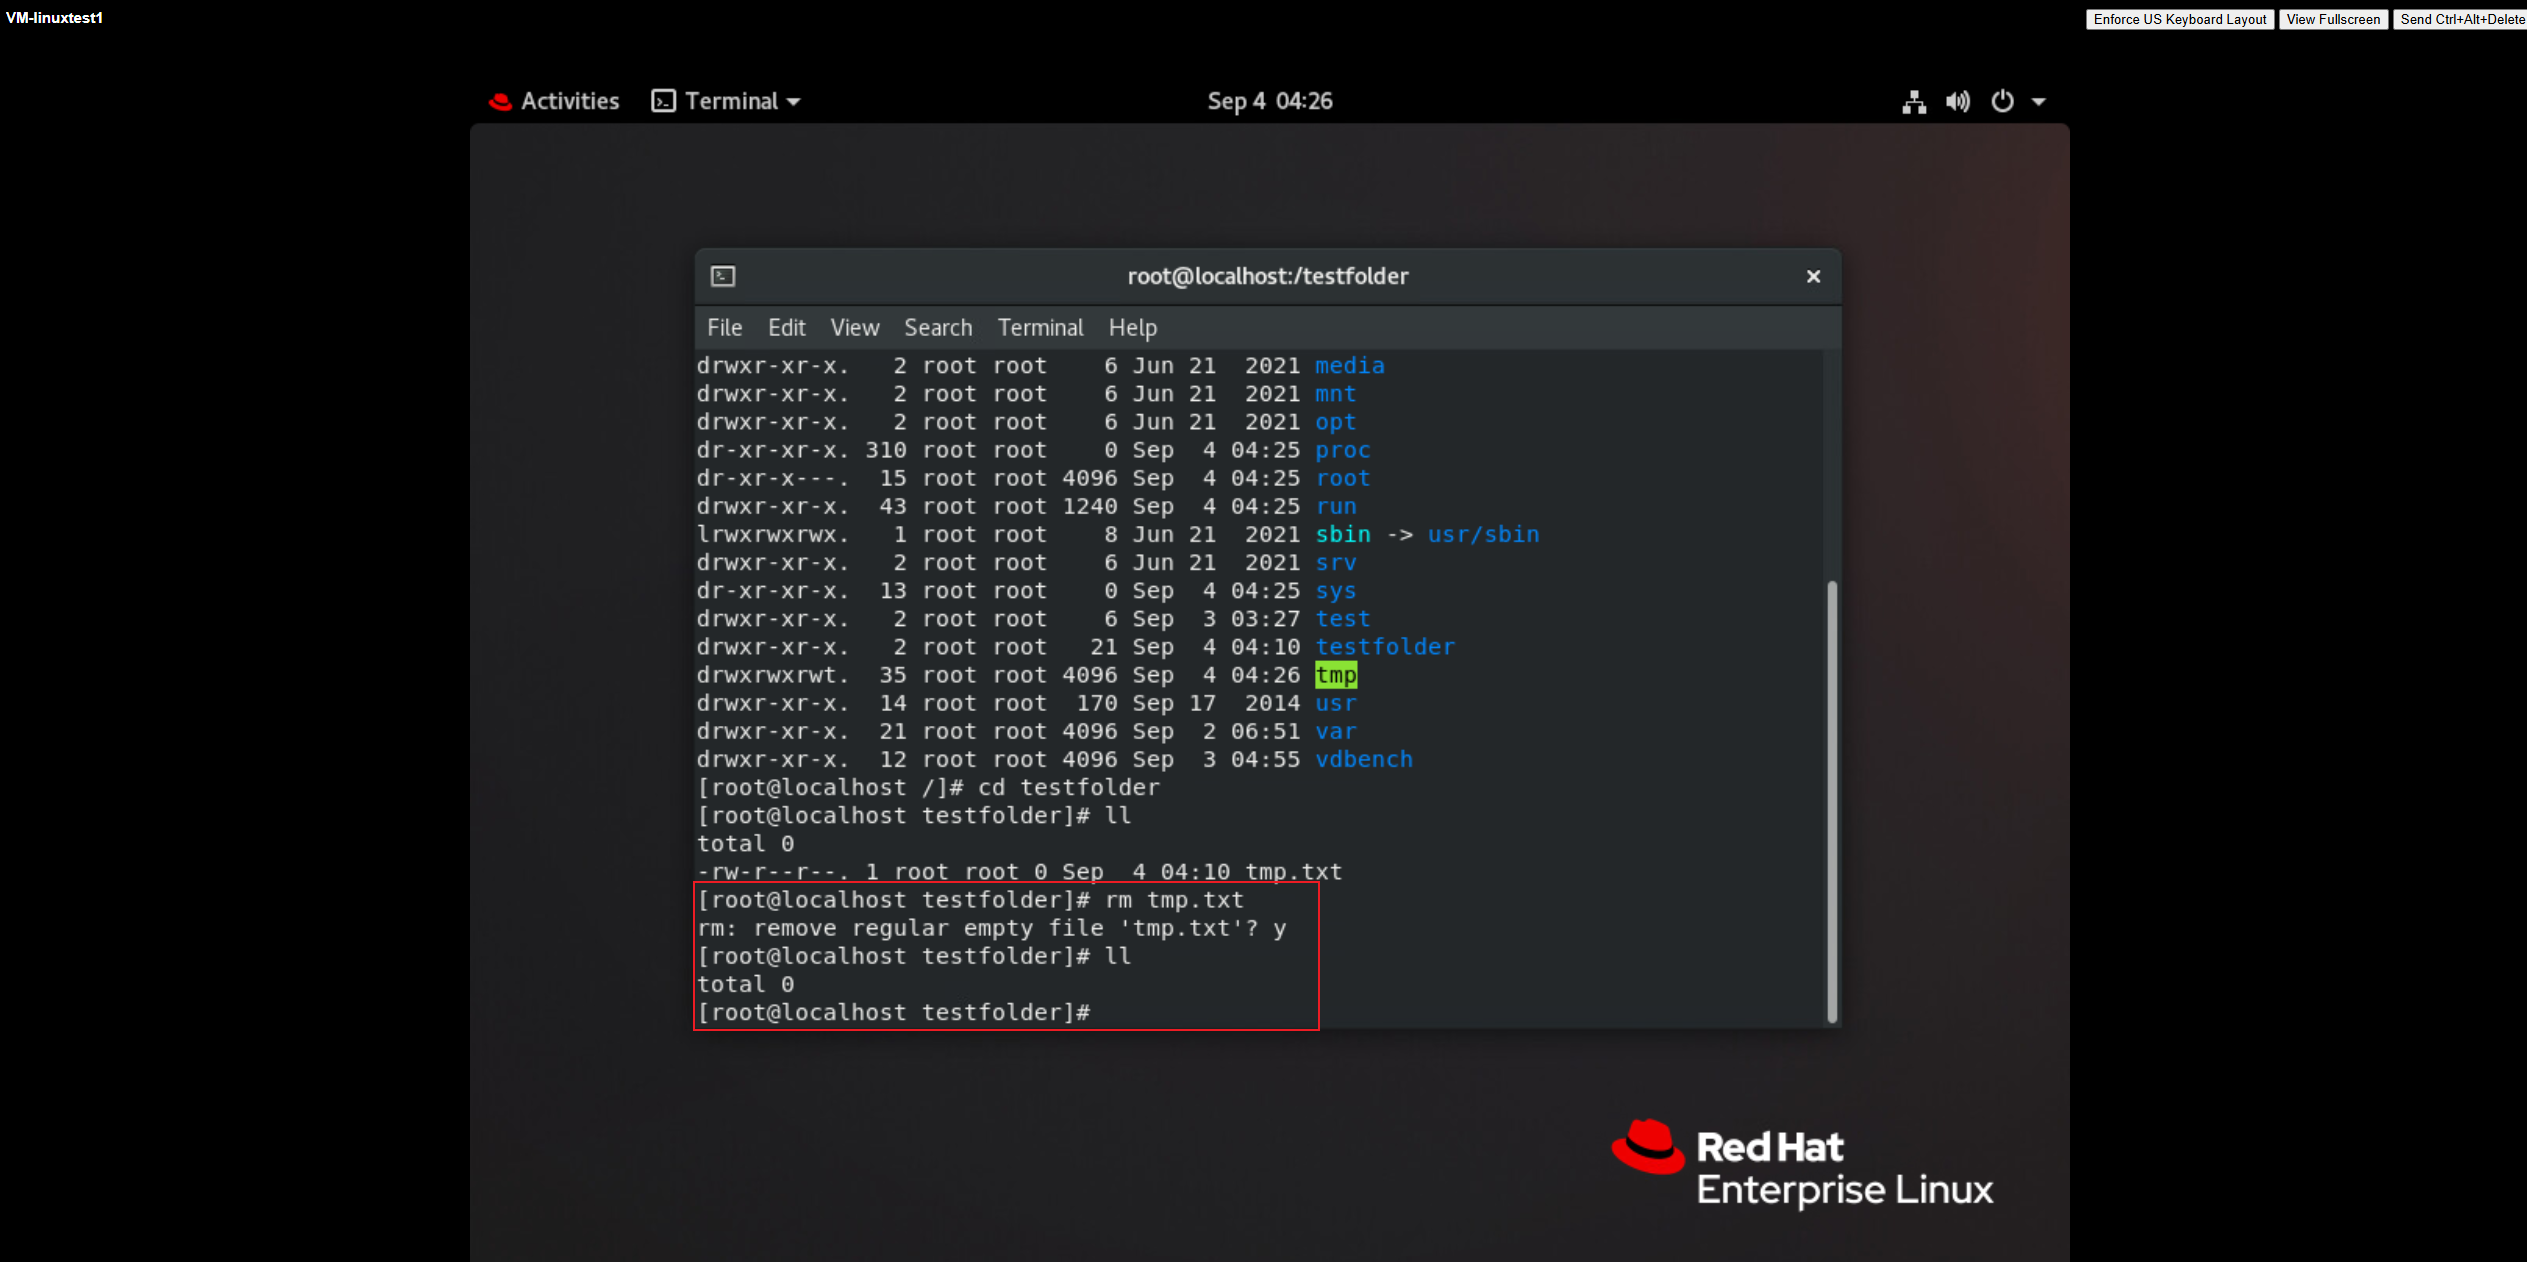
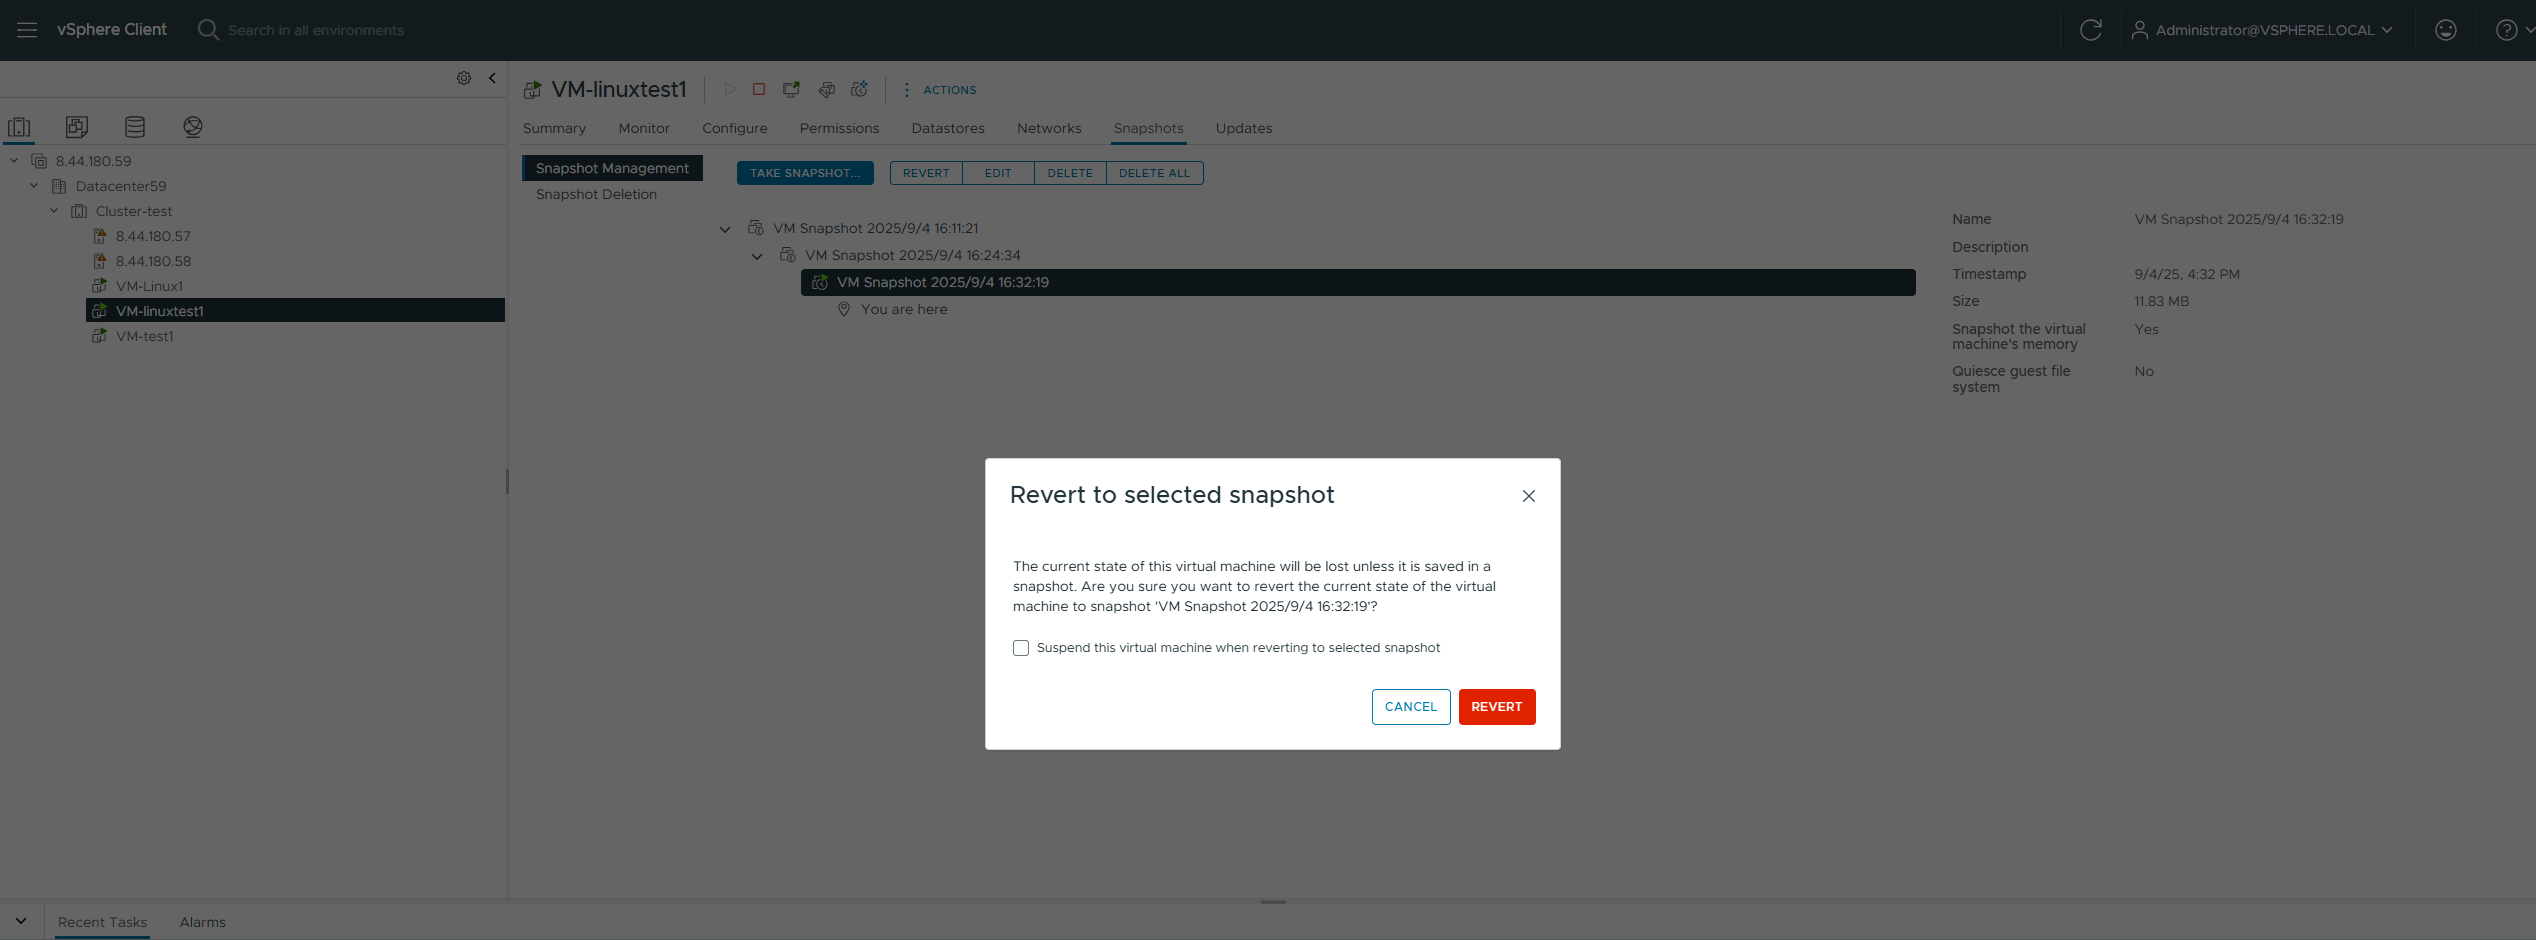
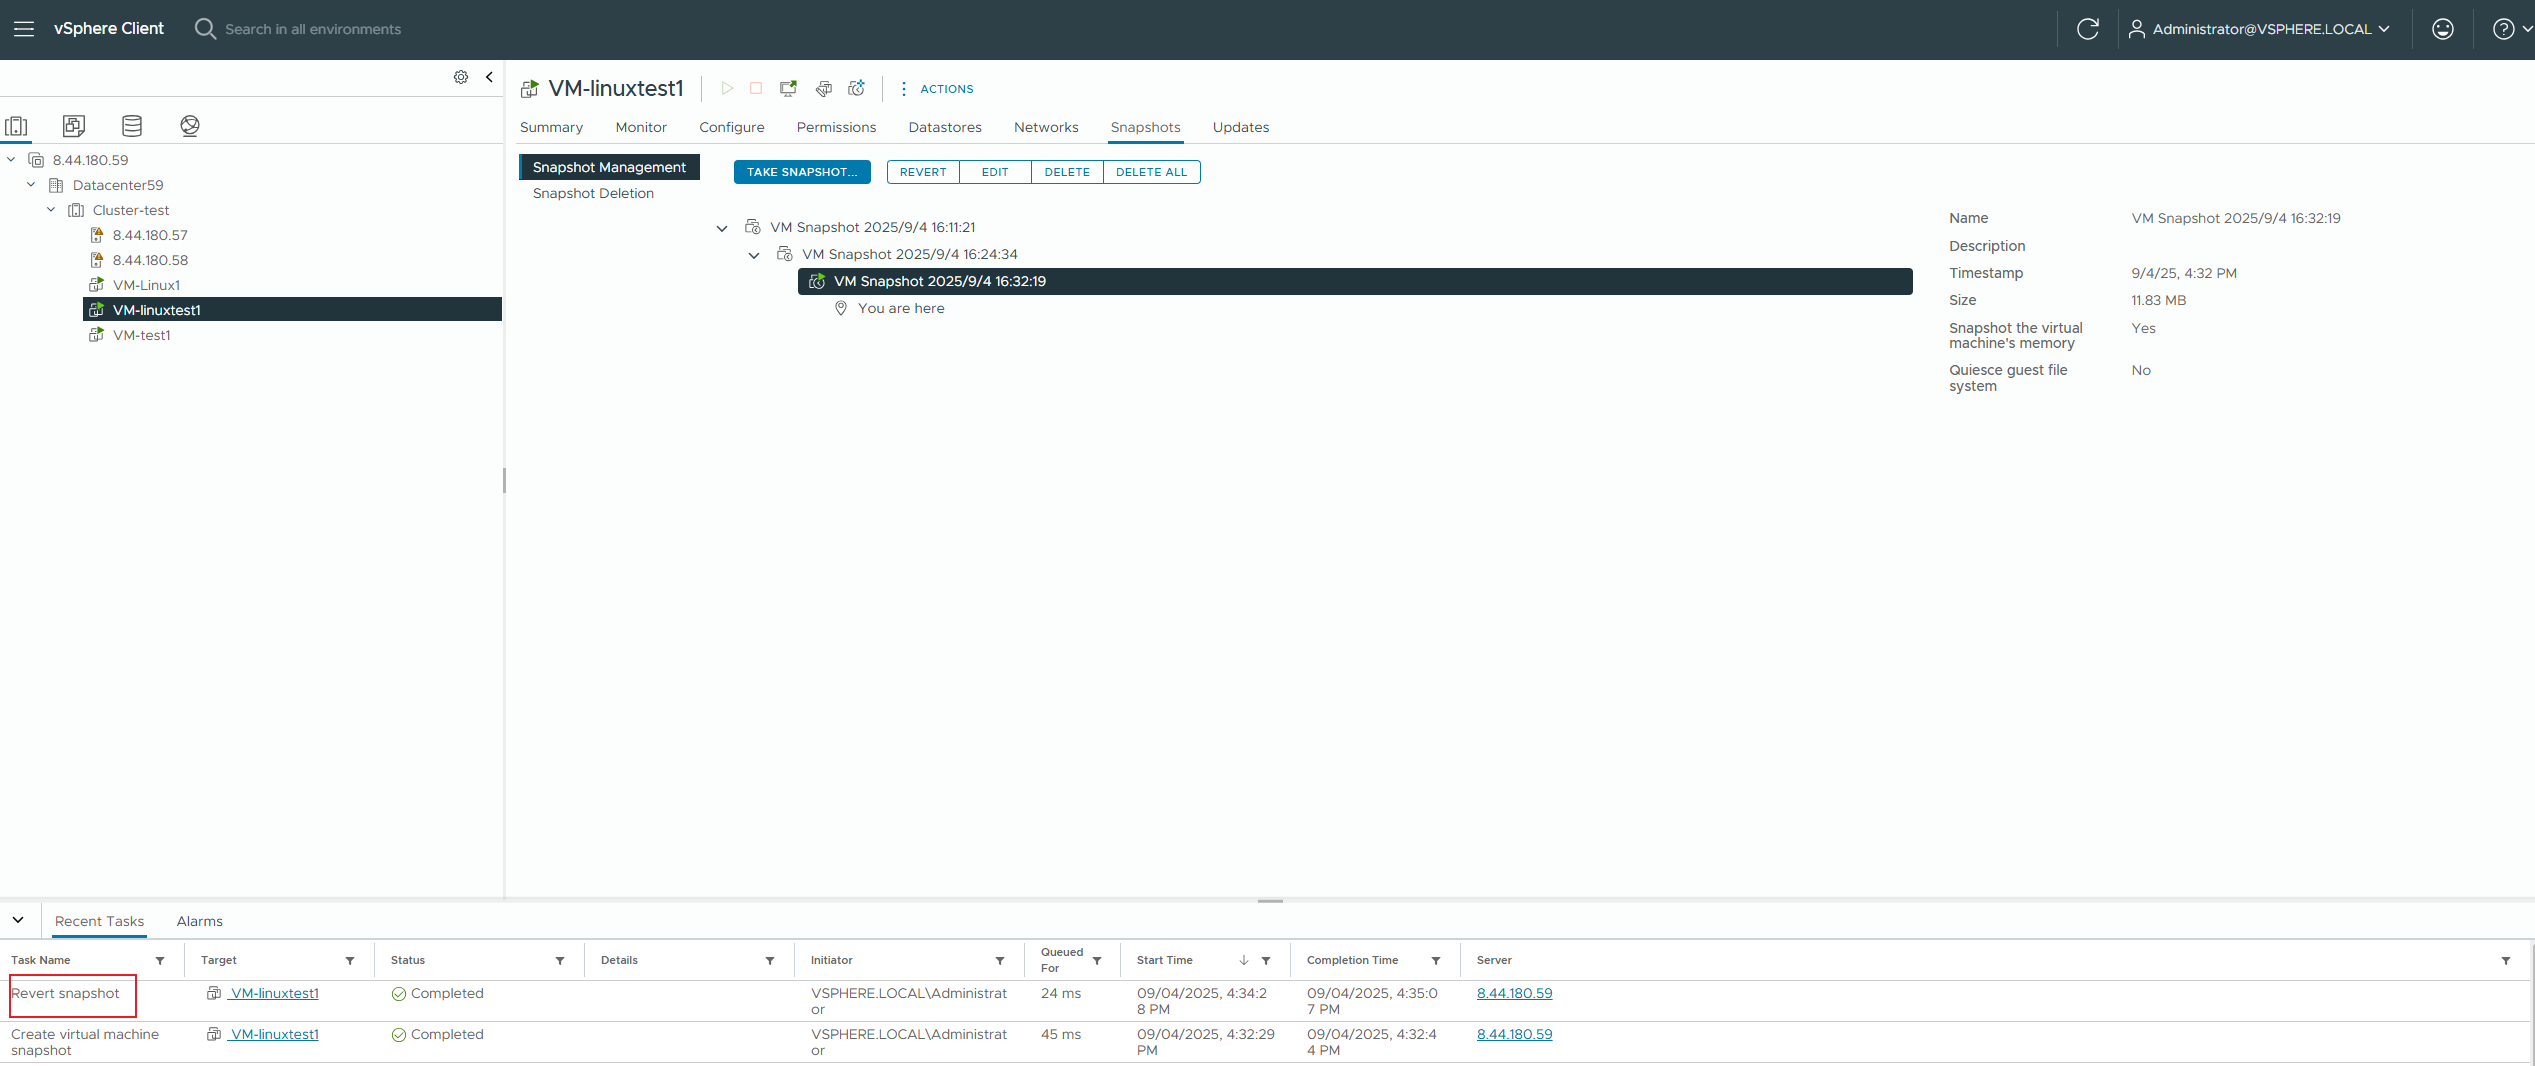
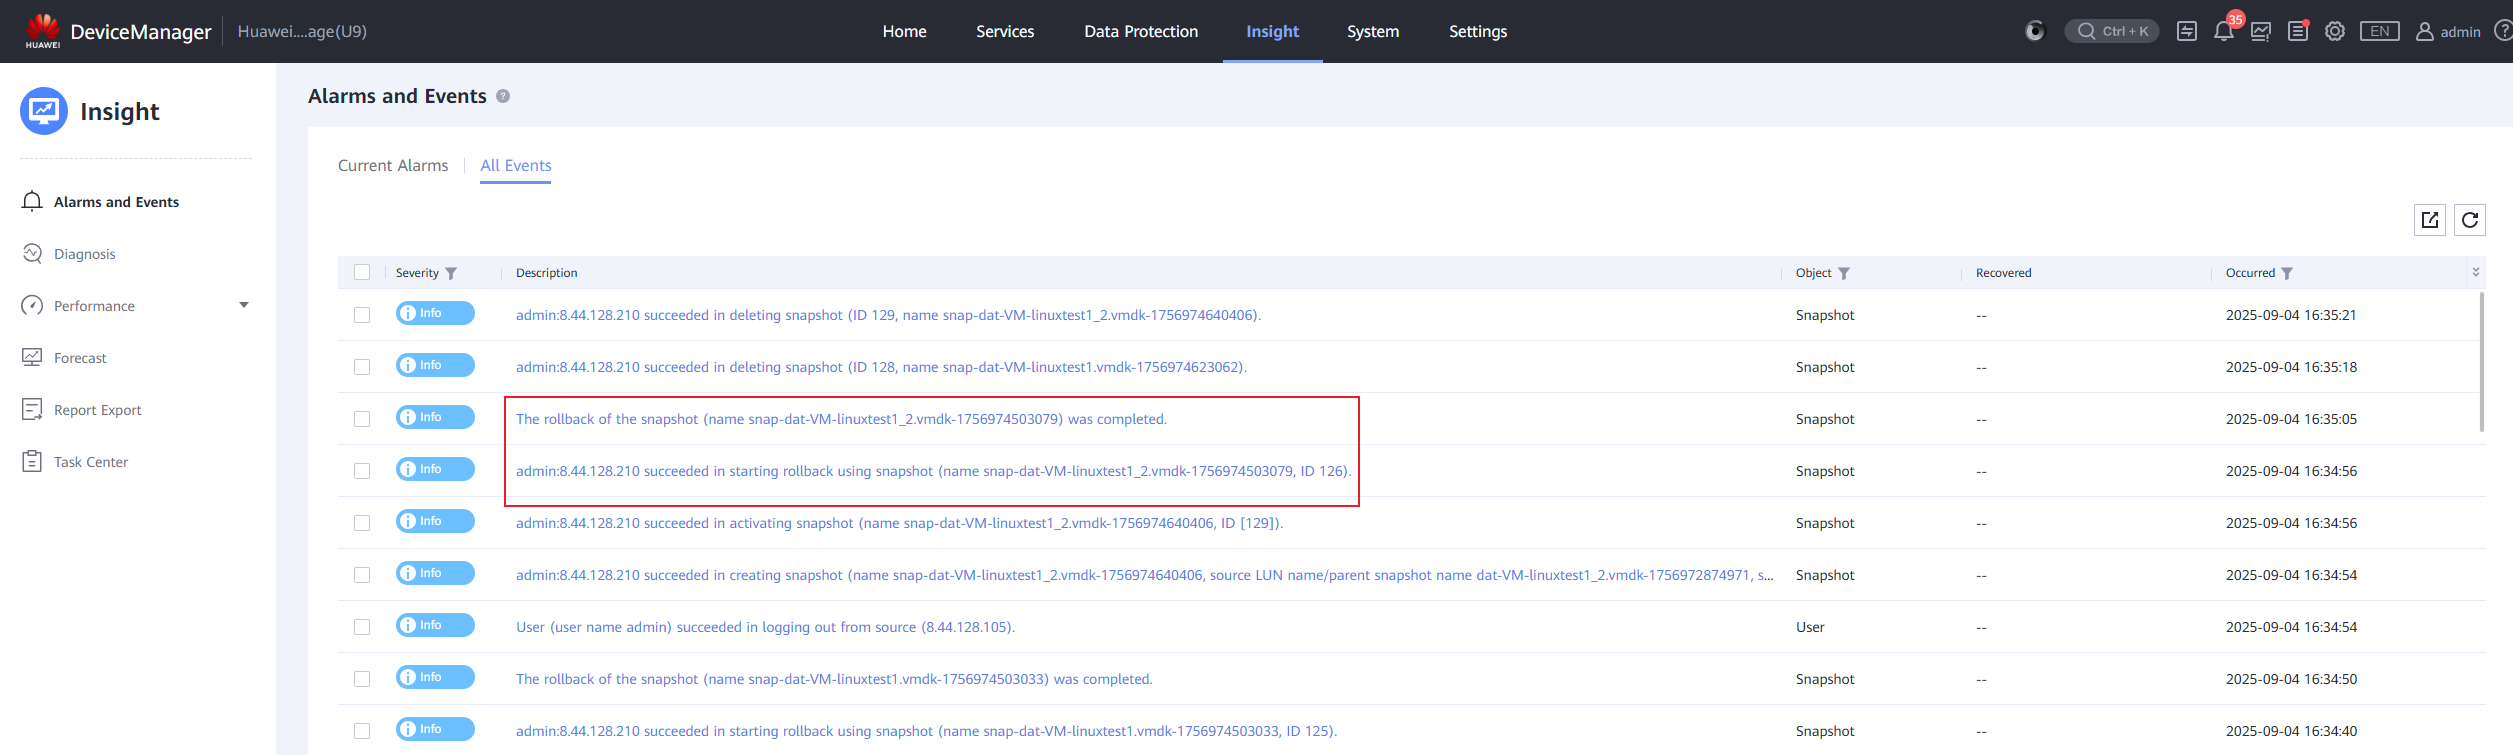
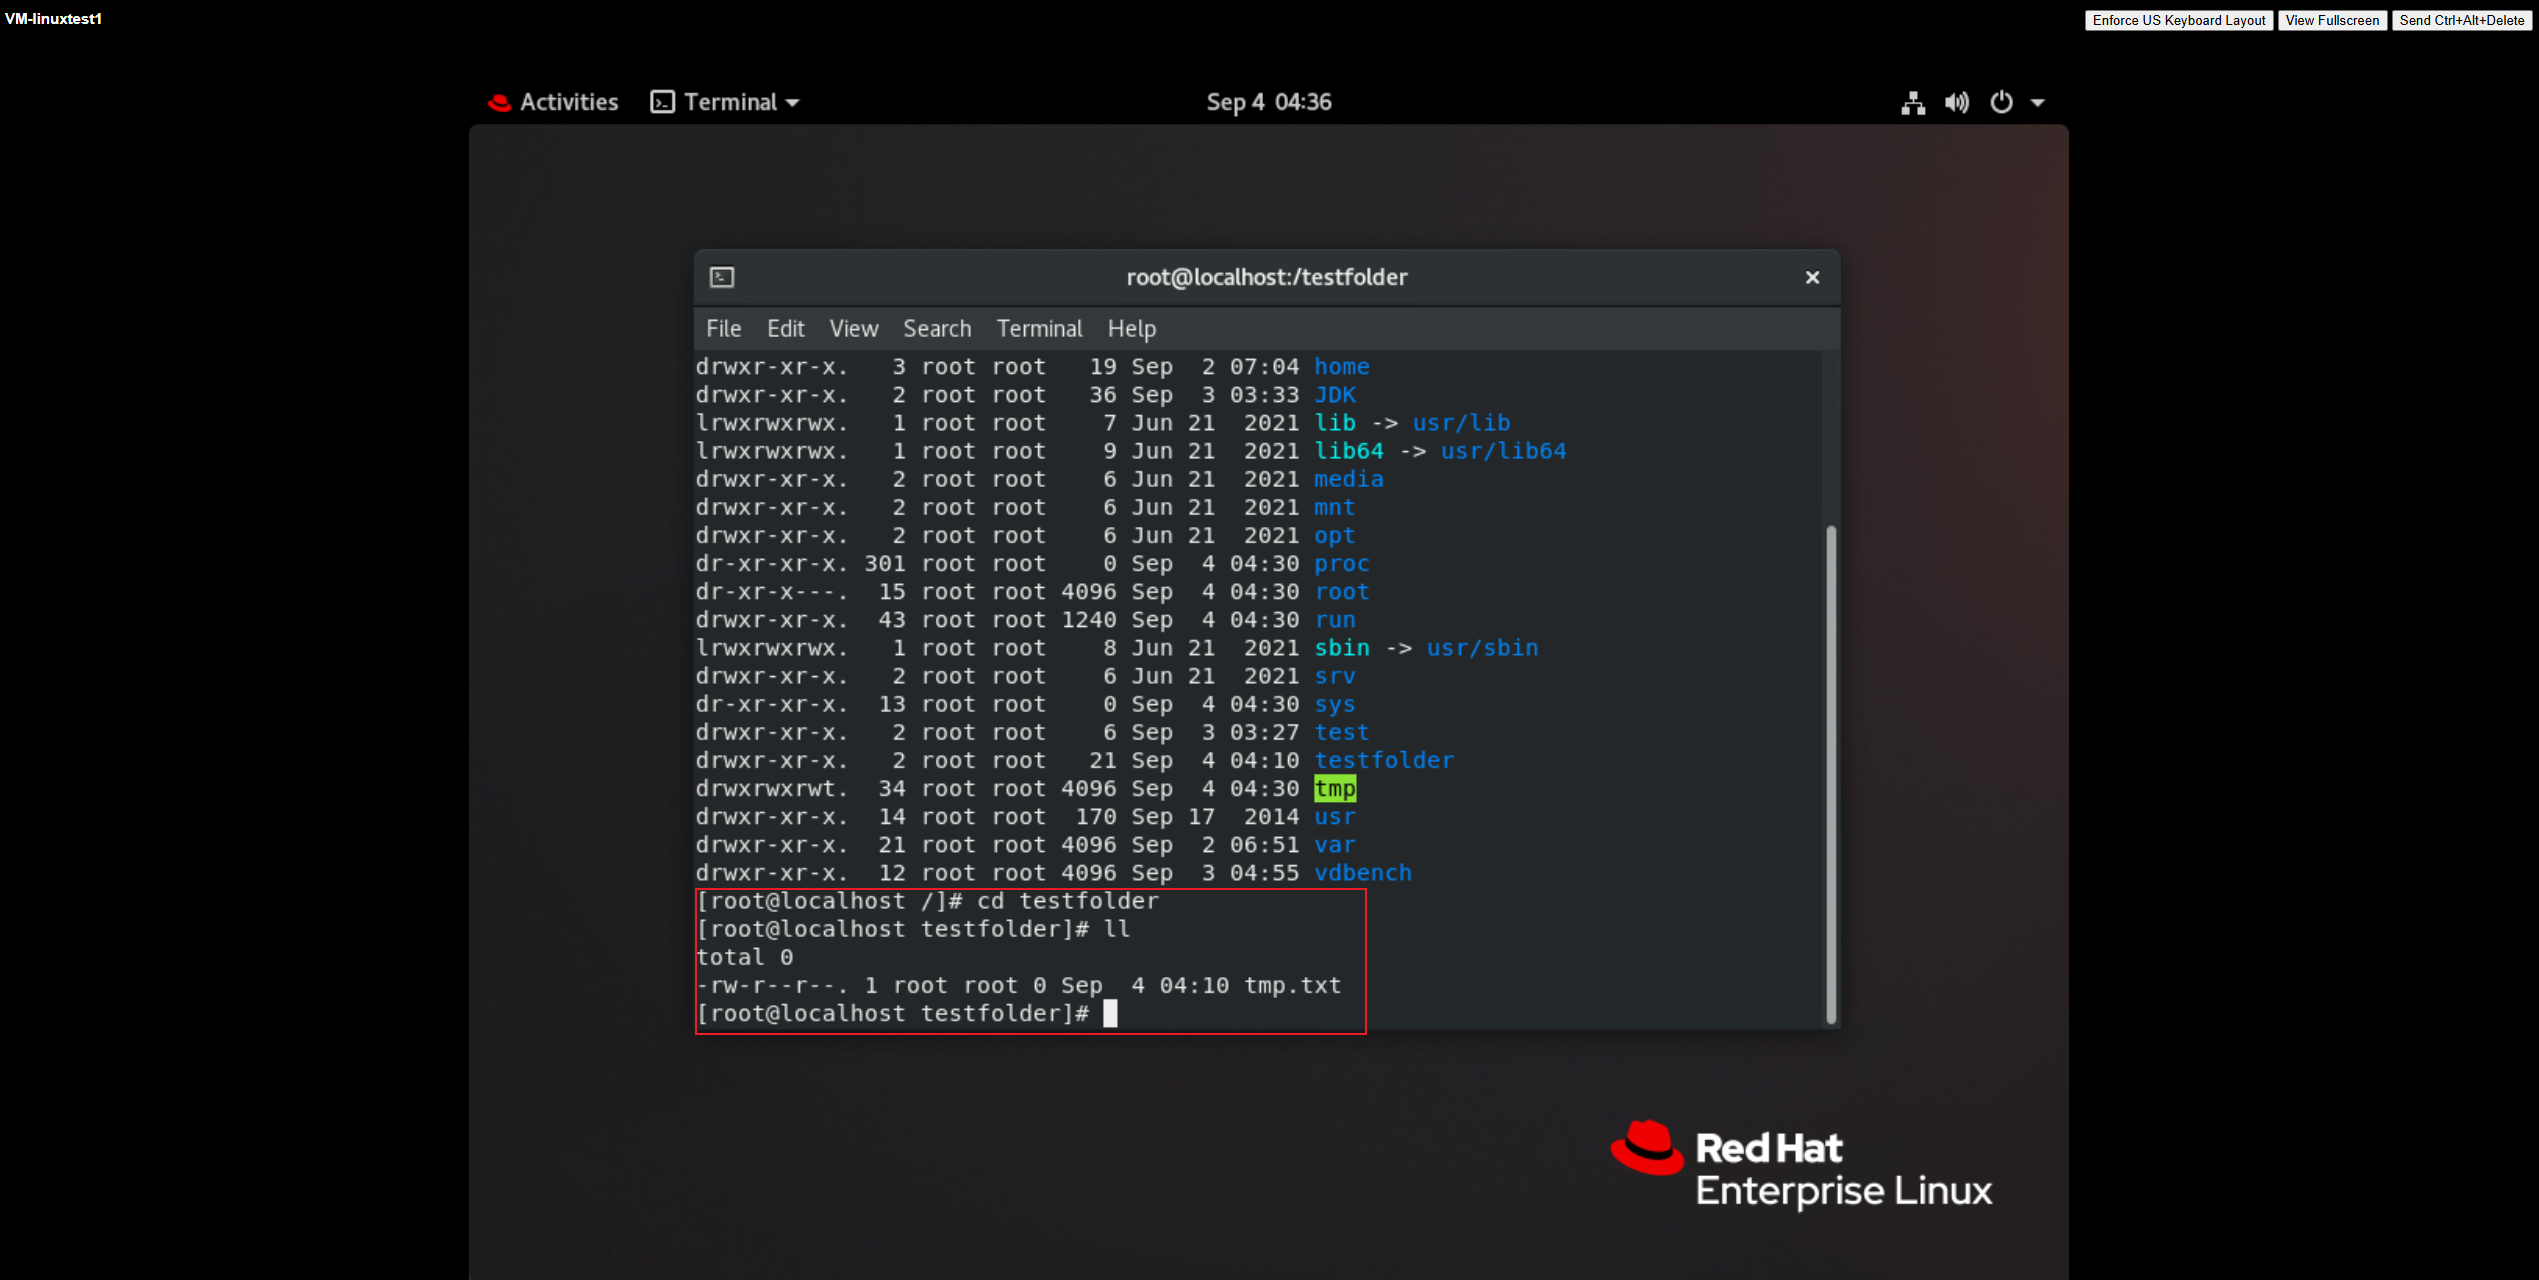
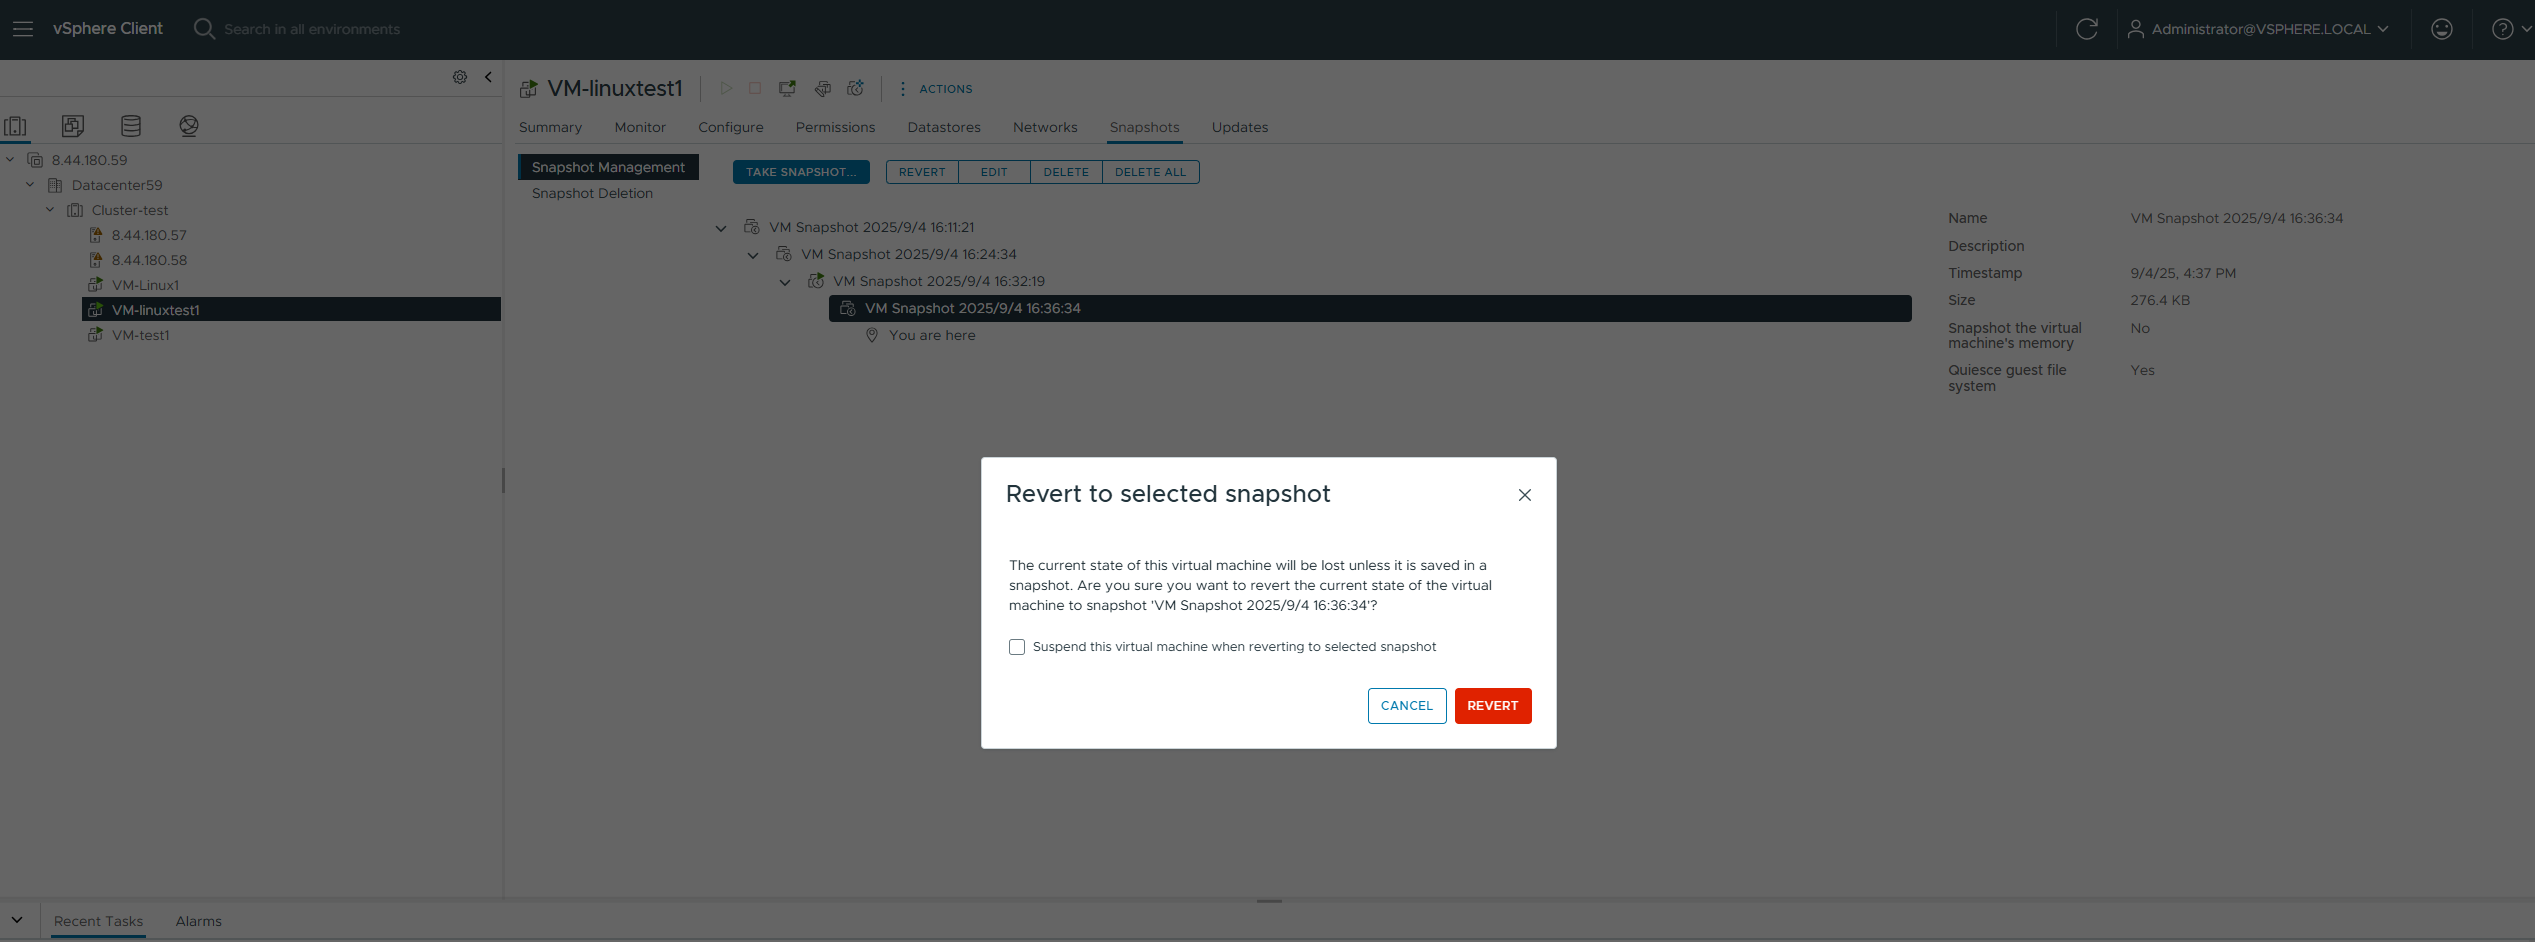
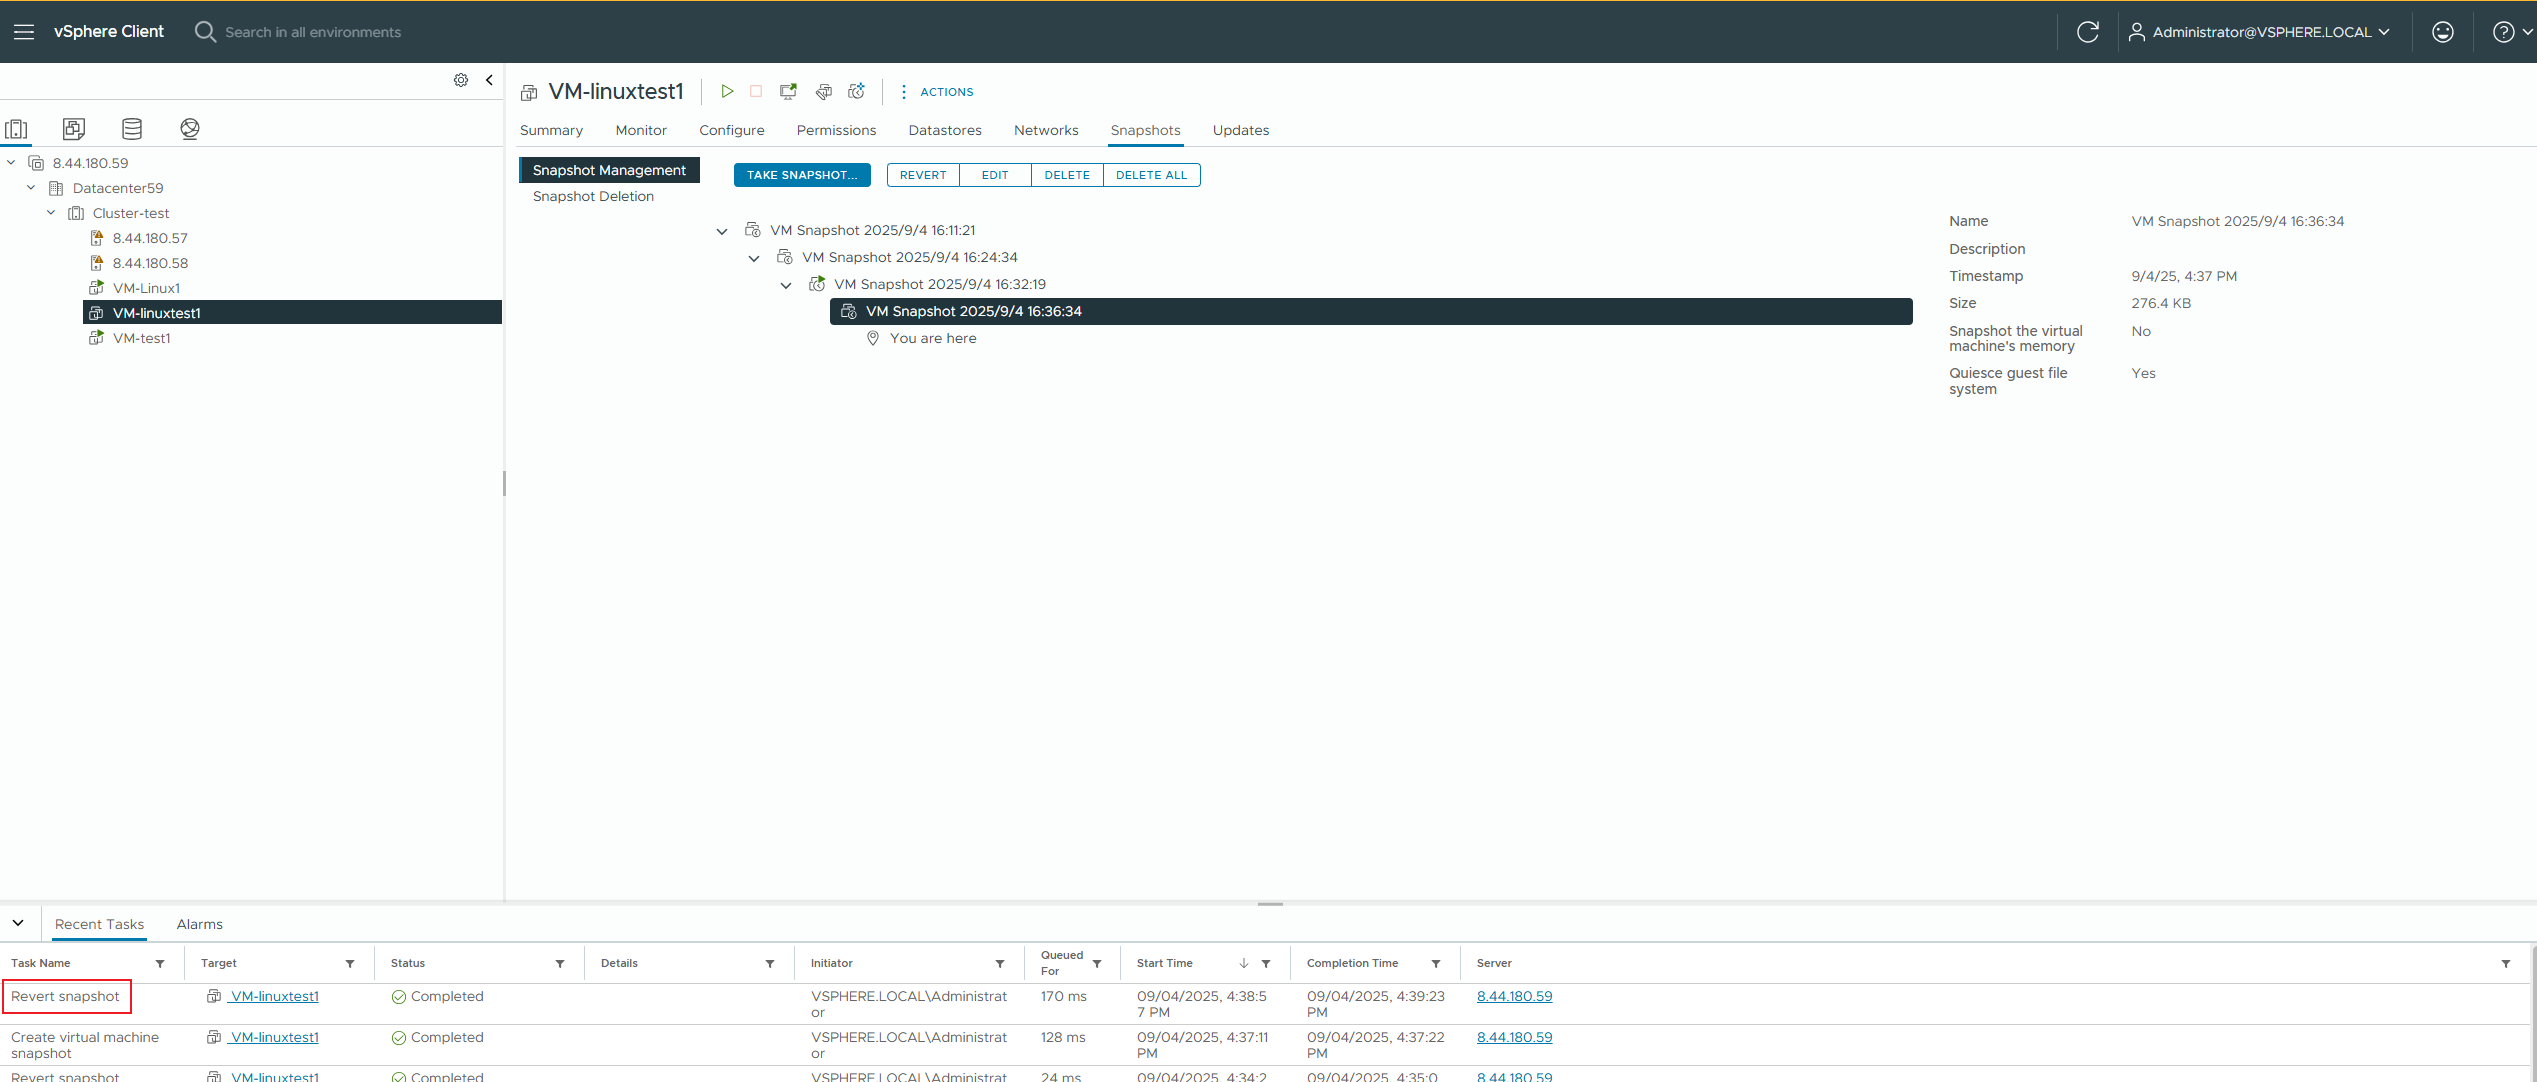
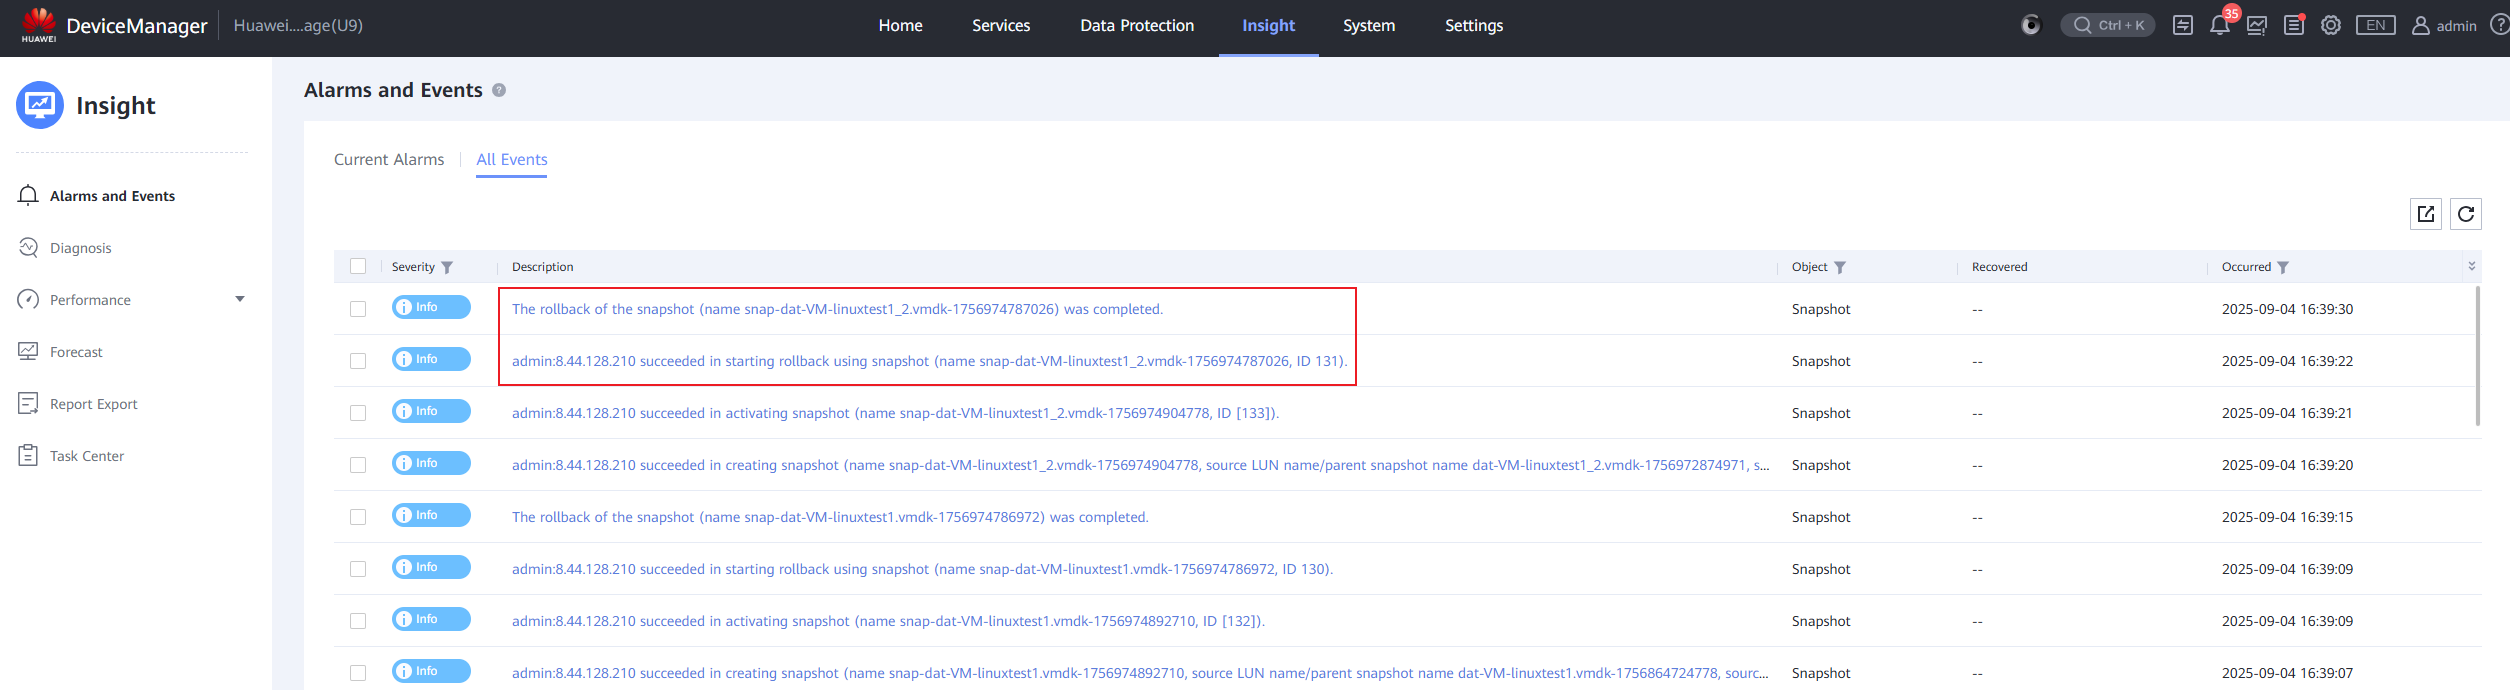
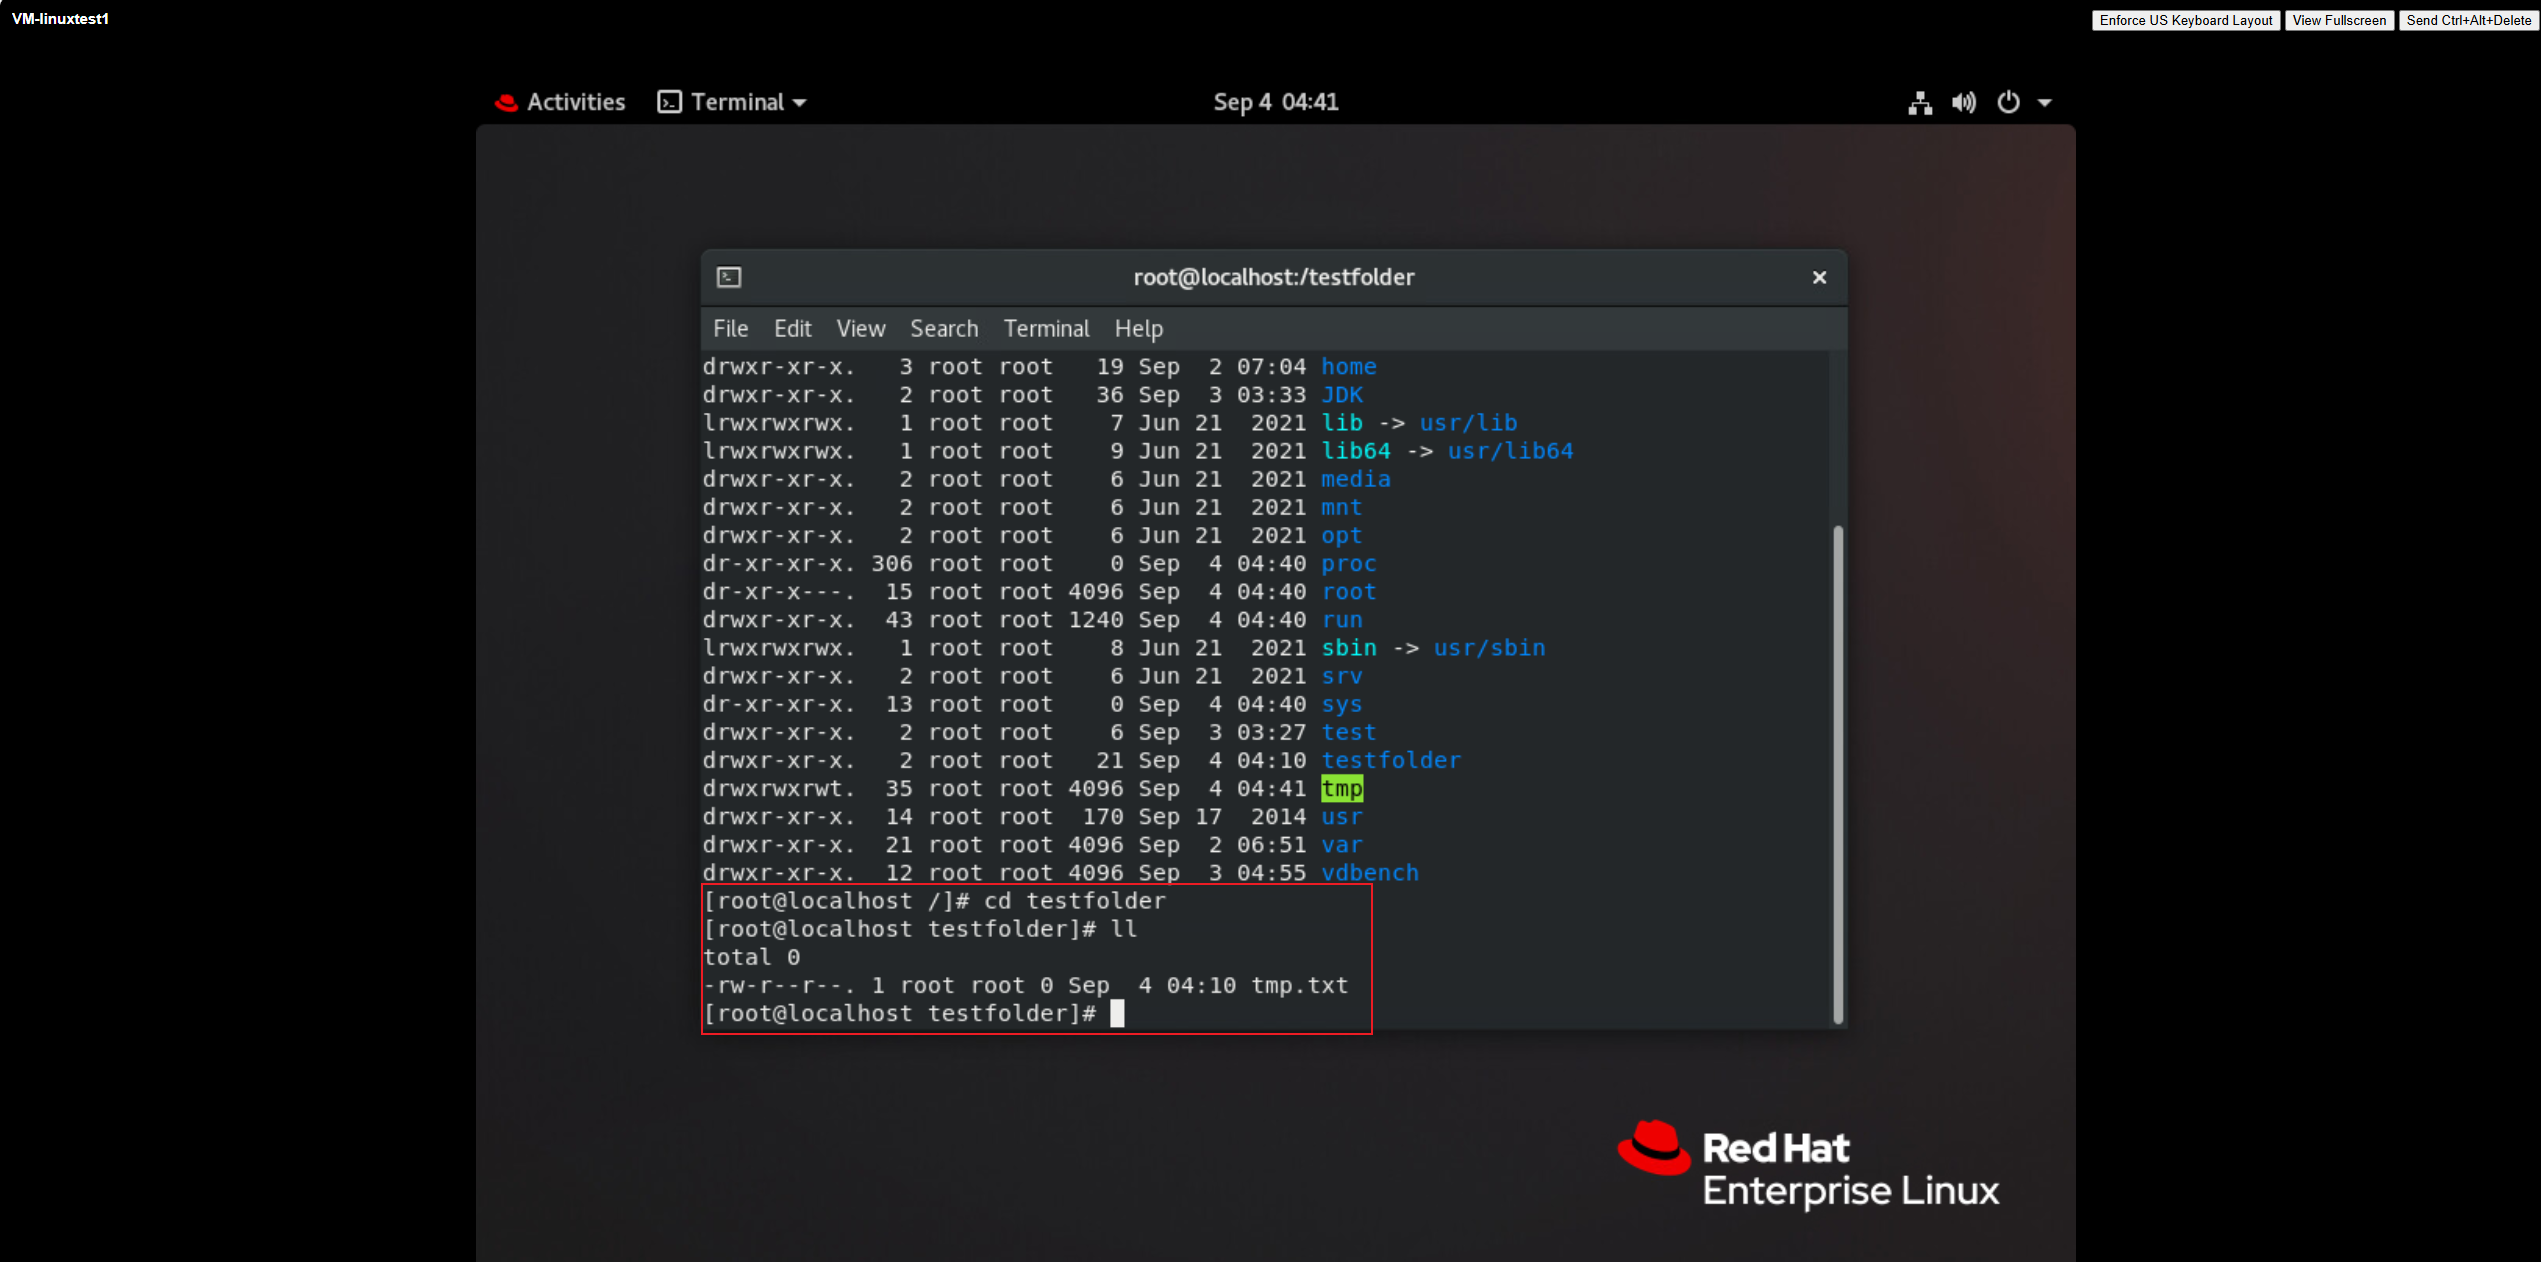
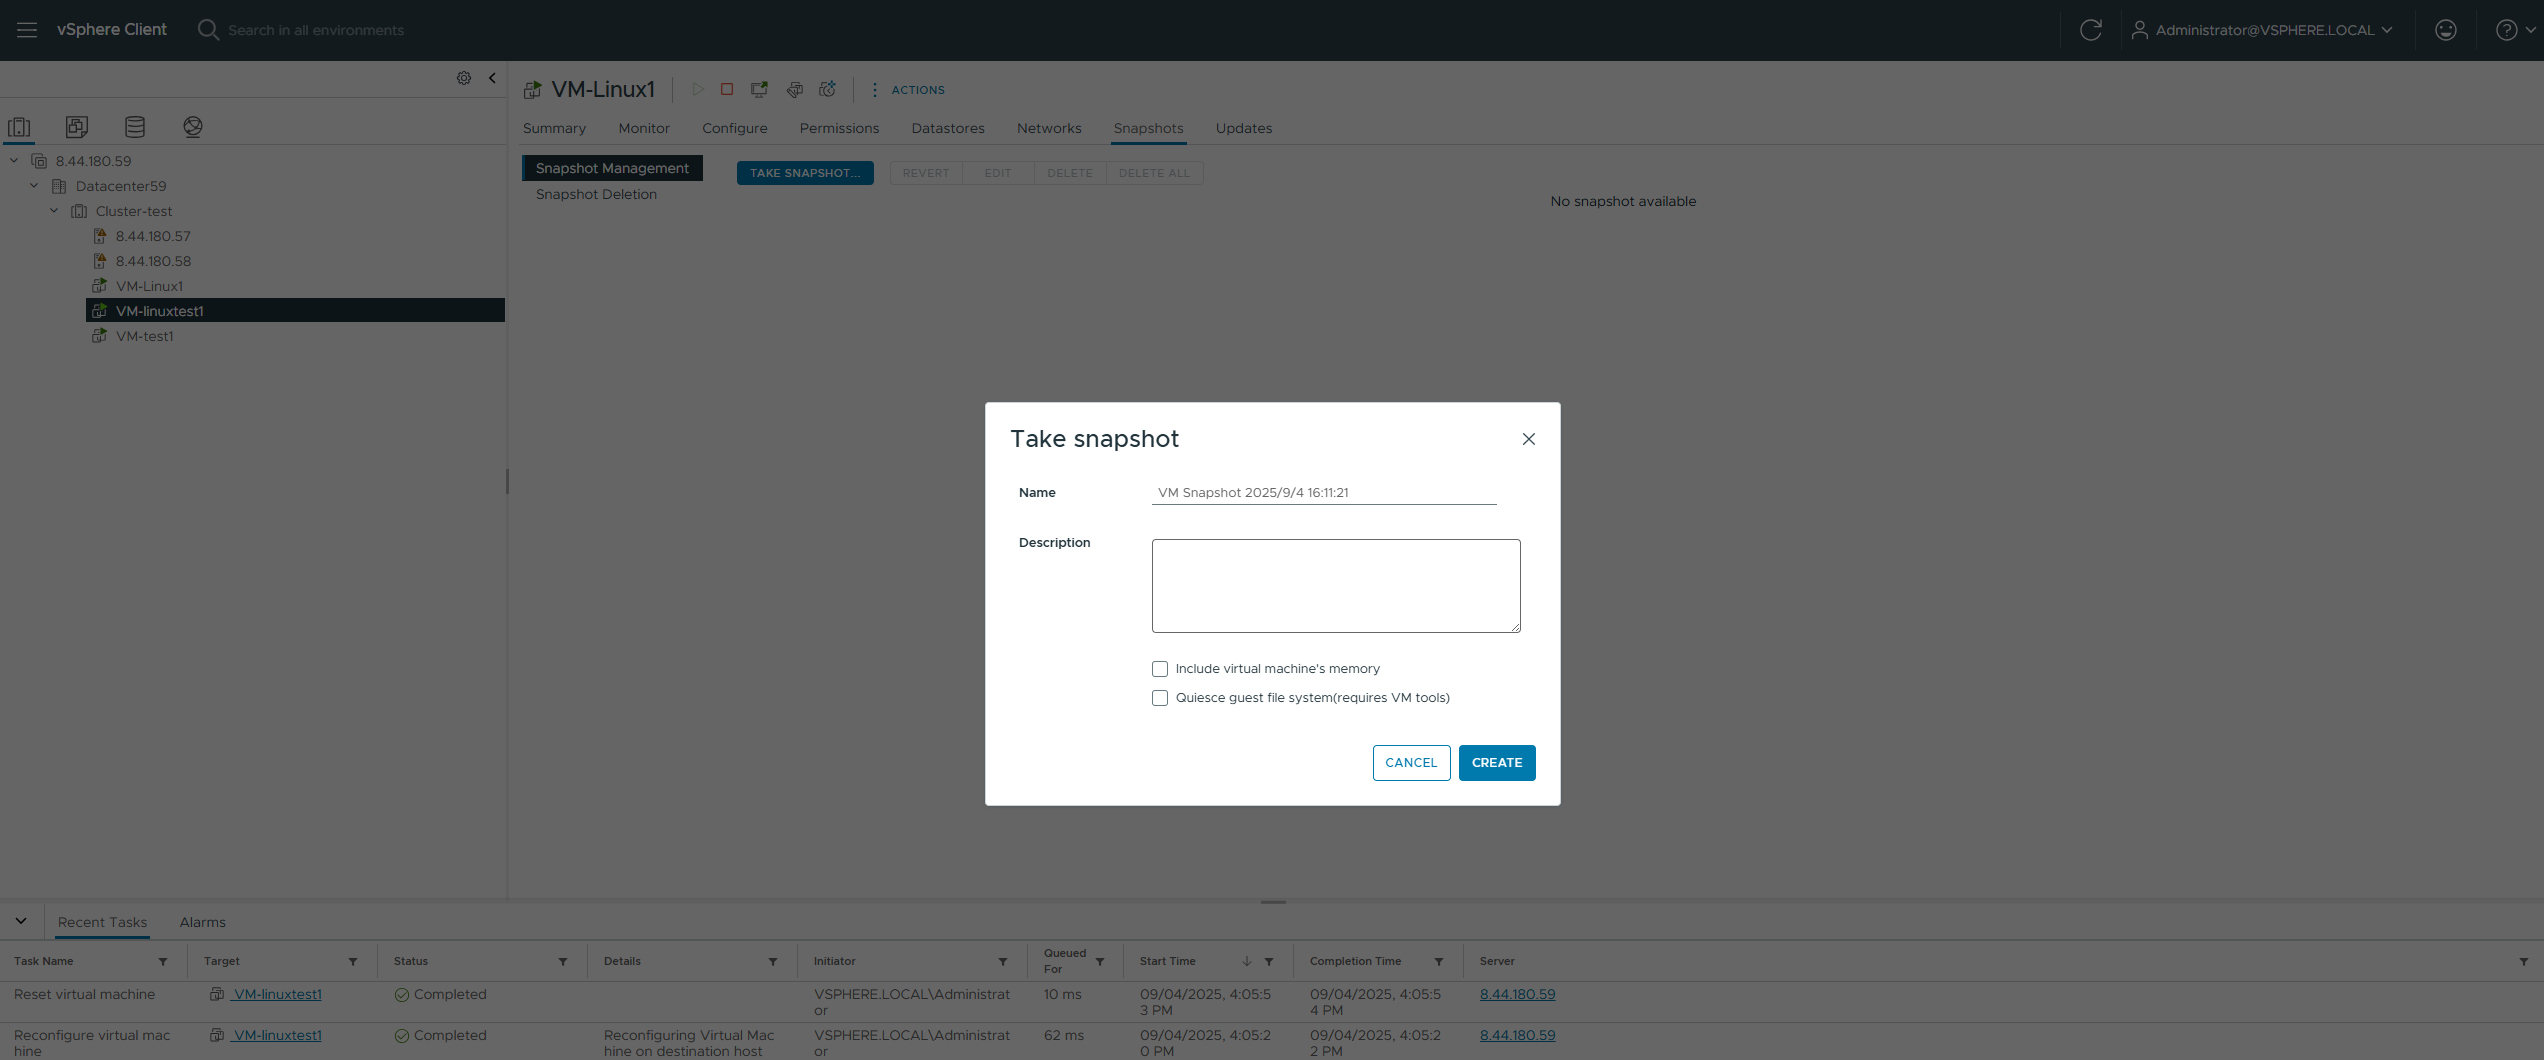
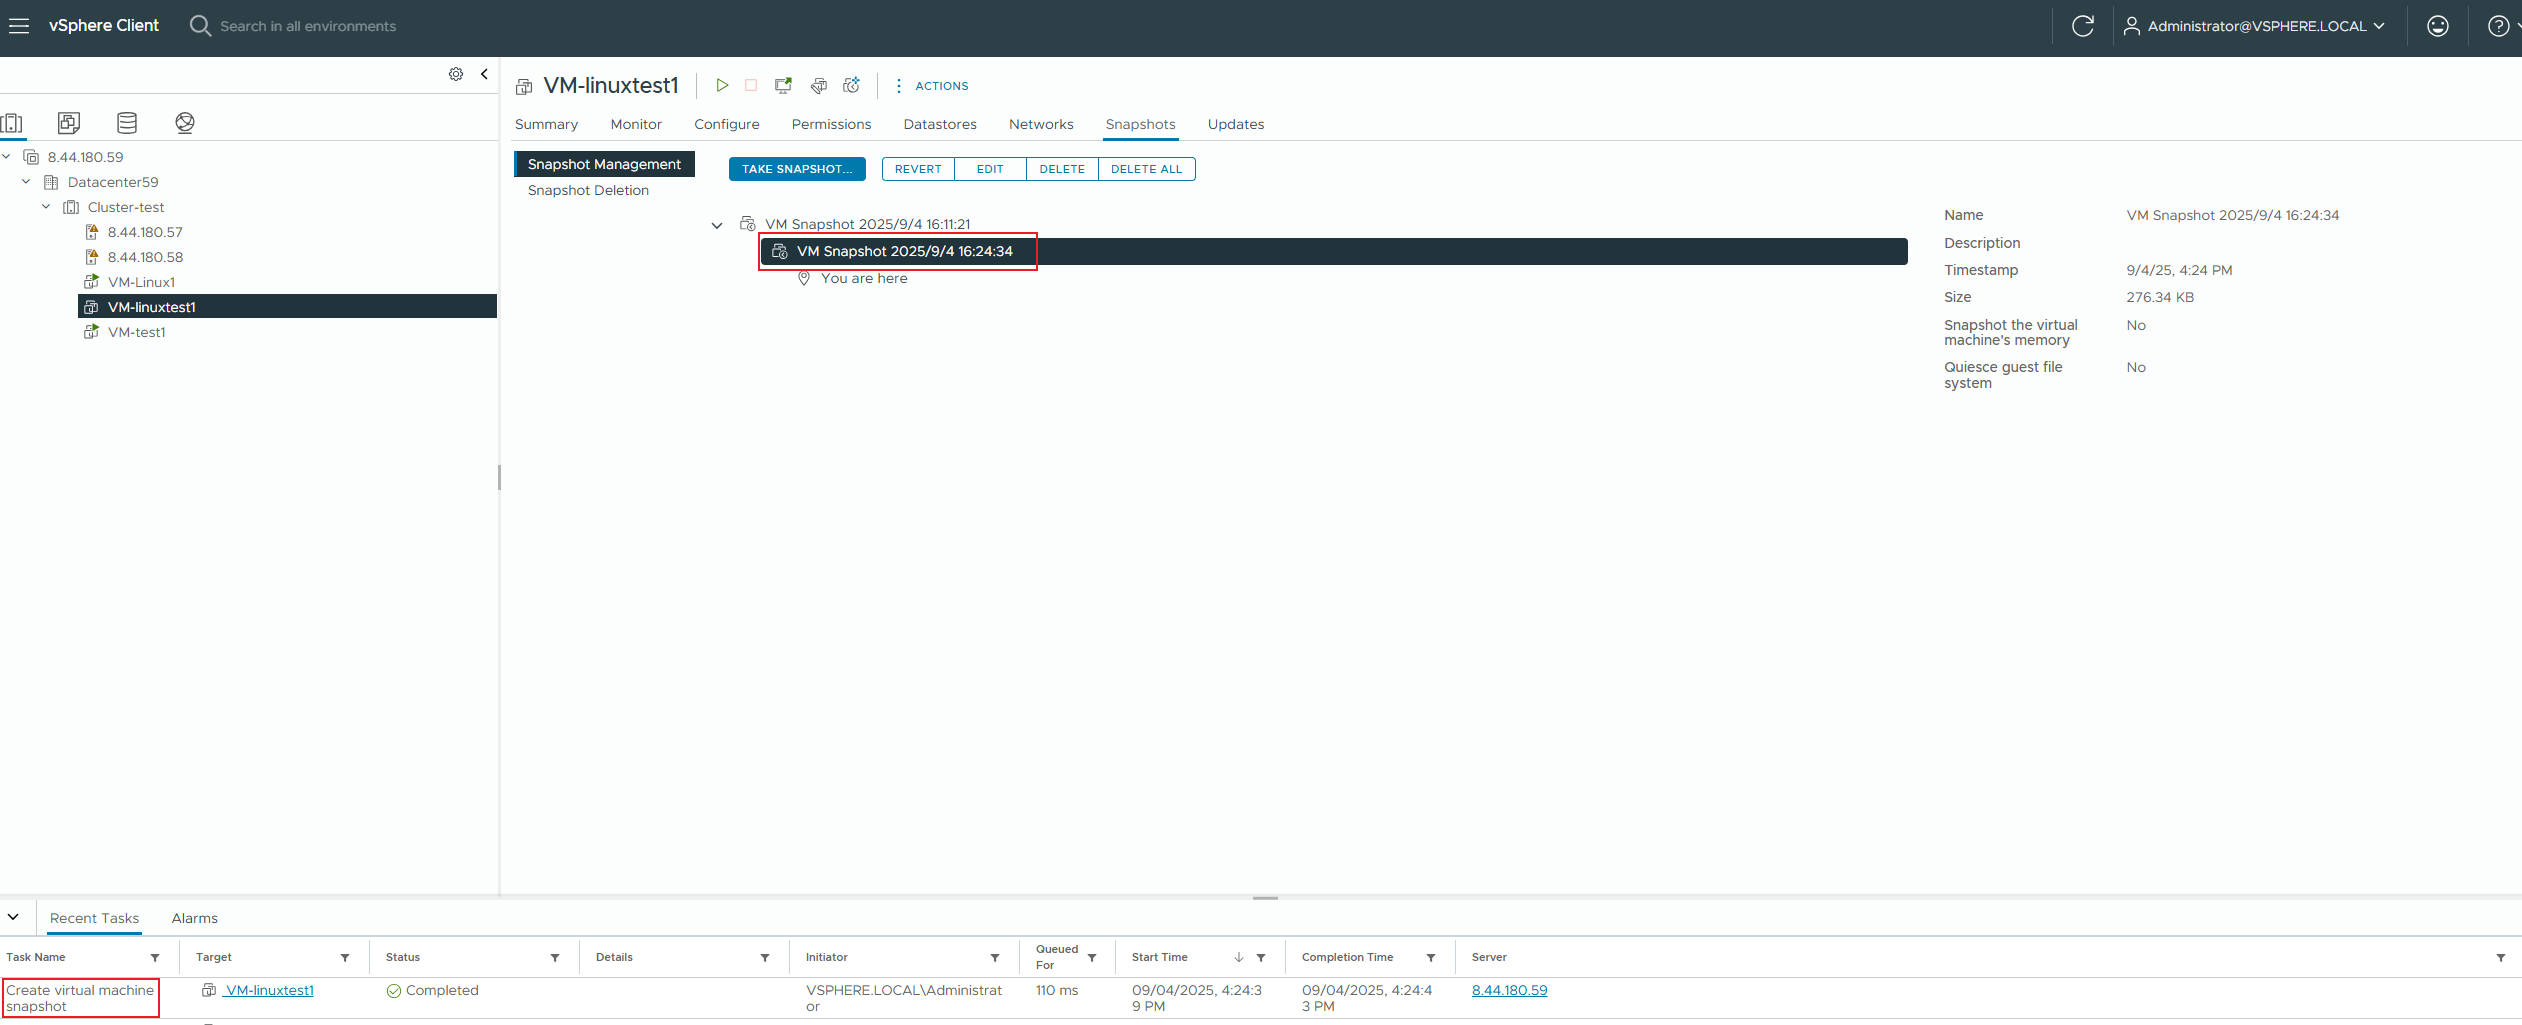
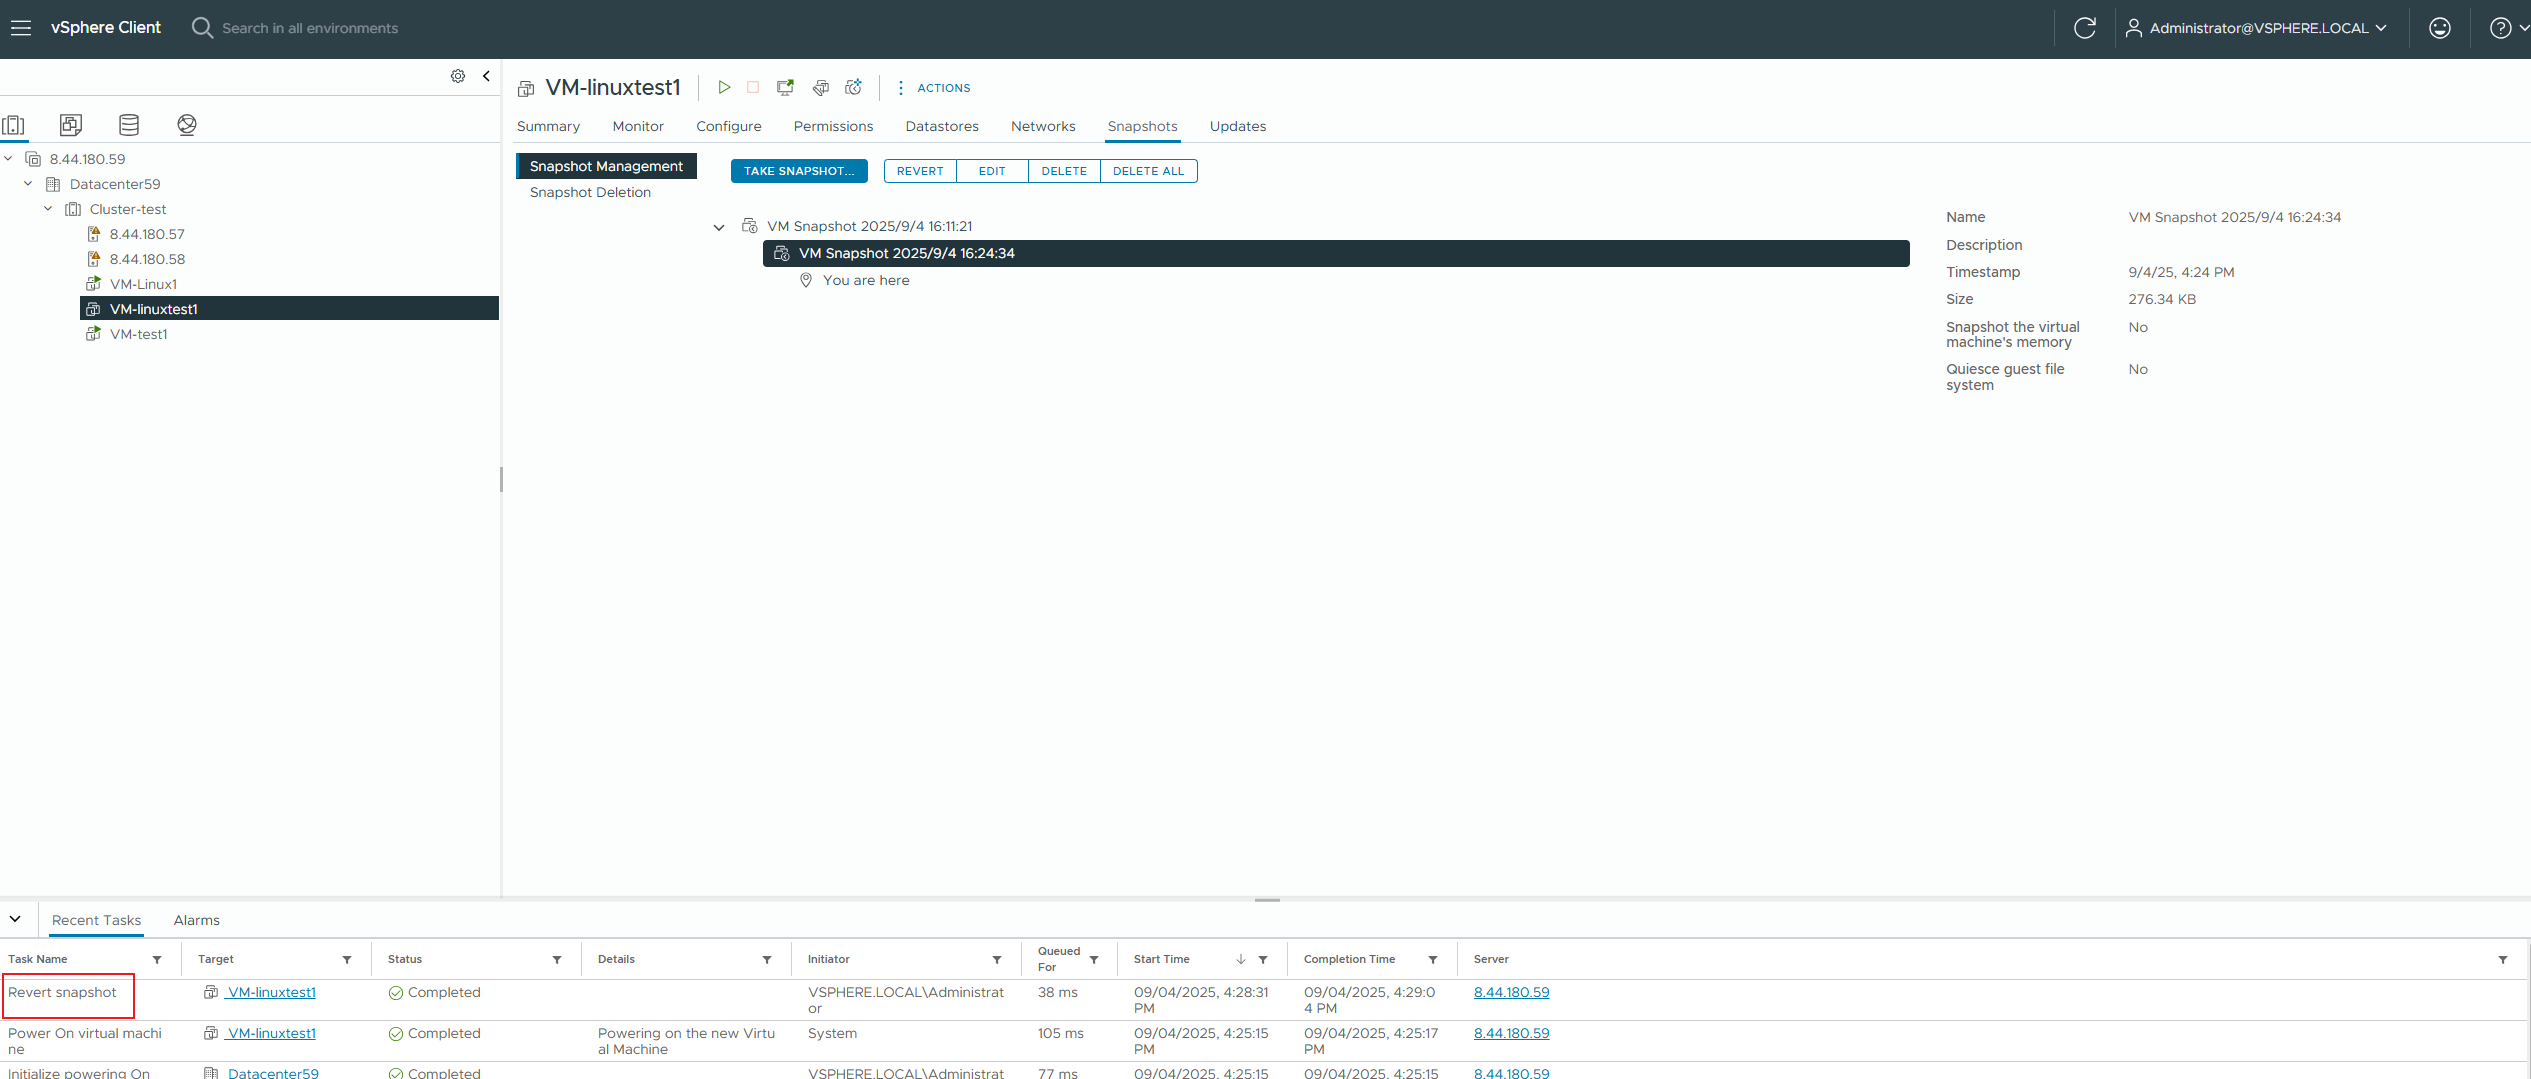
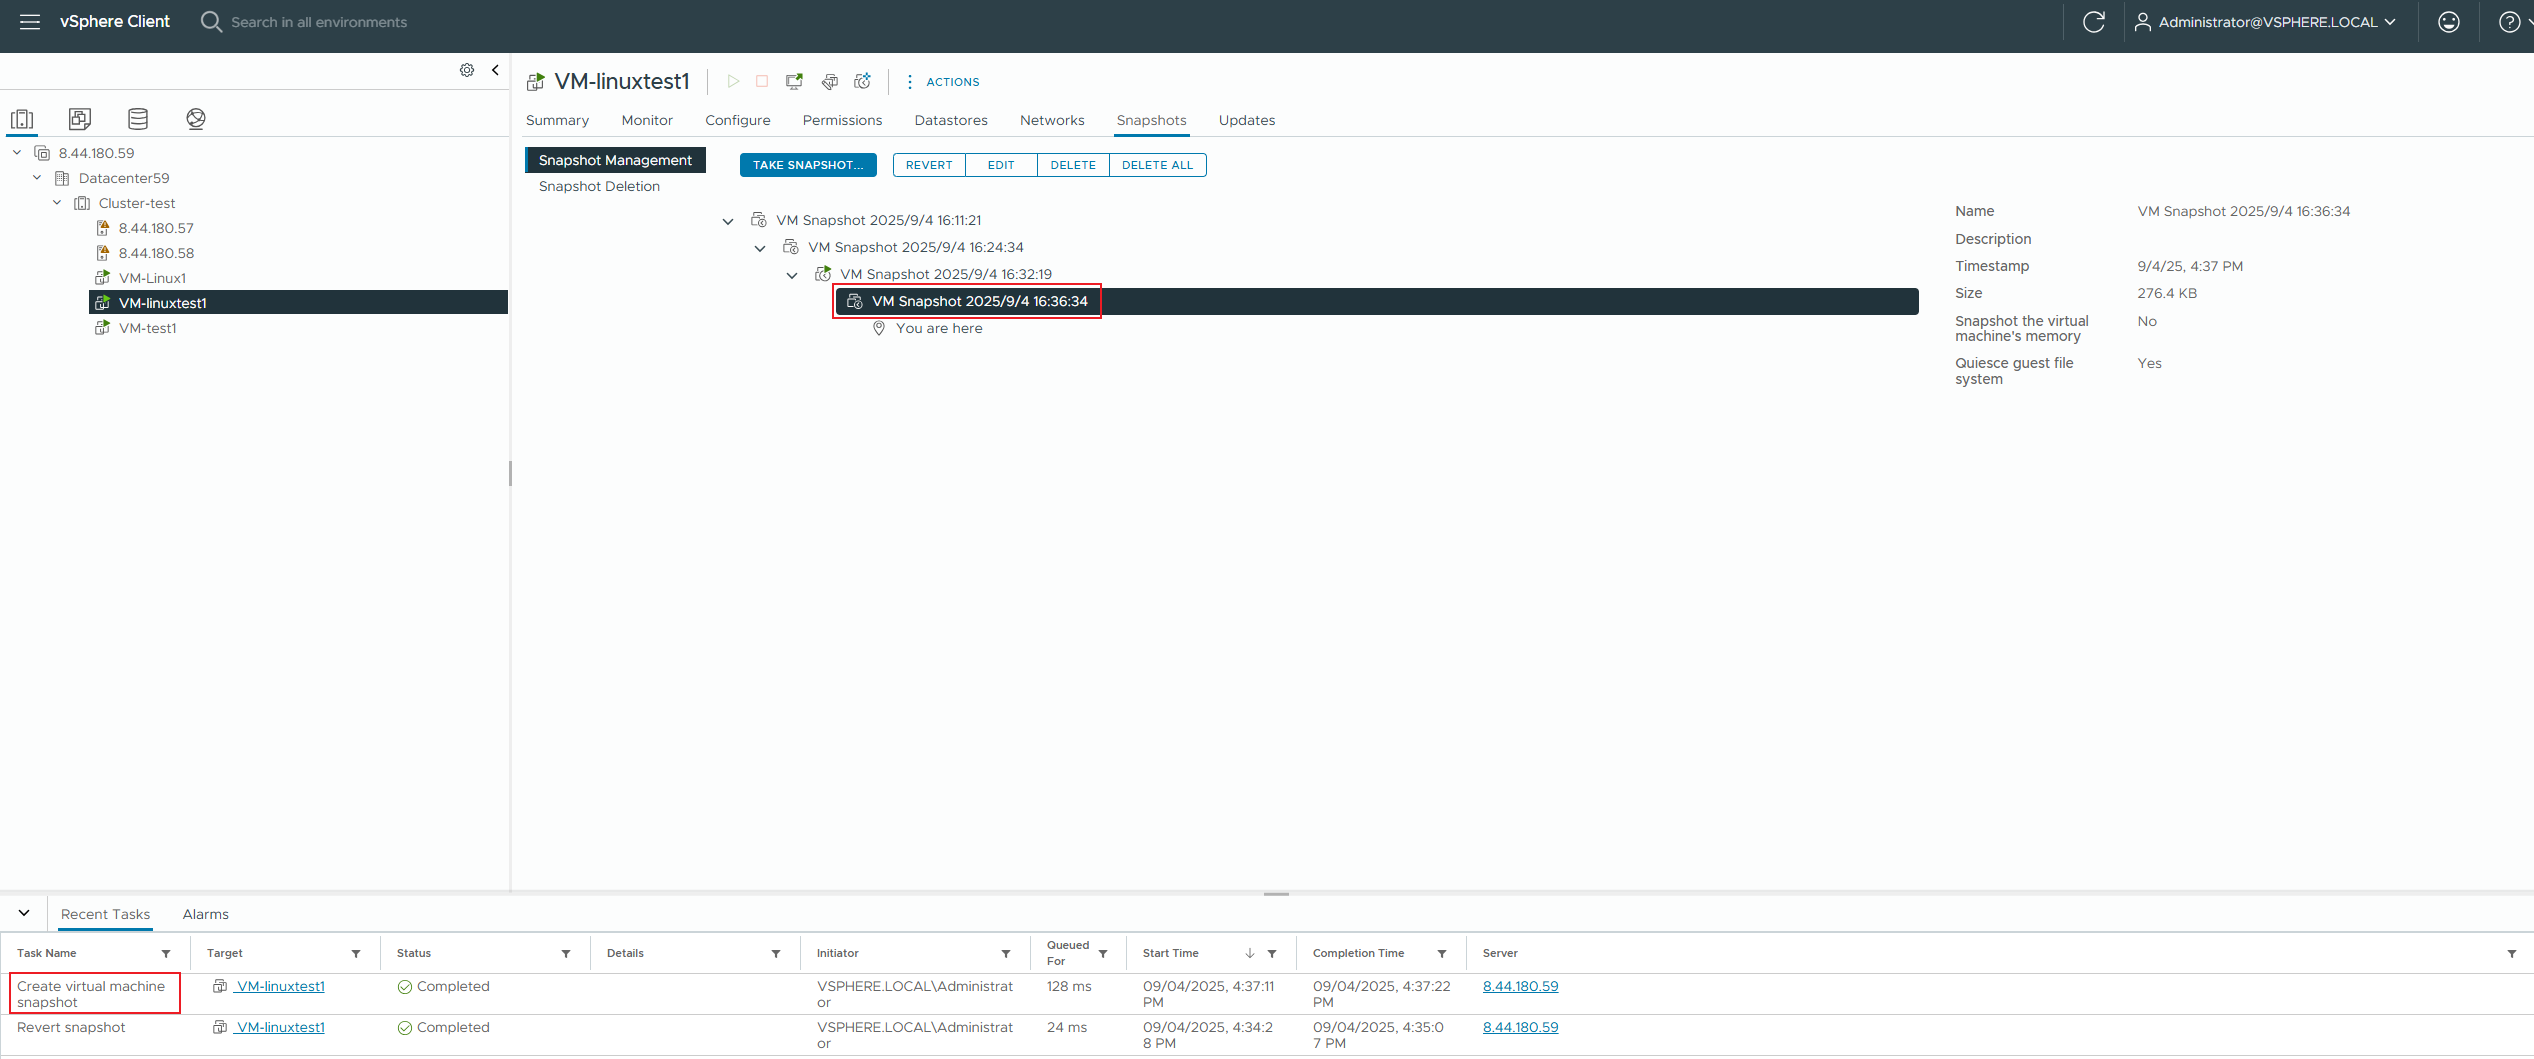
Test Procedure | 1. Clone a virtual machine from the VVOL_TEMPLATE to the vVols Datastore using a virtual machine template, and install VMware Tools on the virtual machine. 2. Add a new 200GB thick-provisioned disk to the virtual machine, power on the virtual machine, and use vdbench to issue an 8K 7:3 100% random workload to the newly added disk. 3. In the virtual machine’s operating system, vi a file named tmp.txt, create a regular snapshot of the virtual machine, and observe the impact on performance. 4. Delete the tmp.txt file, use vdbench to write 100M of data to ensure sufficient rollback time to observe the array, shut down the virtual machine’s operating system, and rollback the virtual machine snapshot. 5. Power on the virtual machine and check if the tmp.txt file exists. 6. In the virtual machine’s operating system, vi a file named tmp.txt, shut down and offline create a regular snapshot of the virtual machine, and observe the impact on performance. 7. Power on the virtual machine, delete the tmp.txt file, use vdbench to write 100M of data to ensure sufficient rollback time to observe the array, shut down the virtual machine’s operating system, and rollback the virtual machine snapshot. 8. Power on the virtual machine and check if the tmp.txt file exists. 9. Create a memory snapshot of the virtual machine and observe the impact on performance. 10. Delete the tmp.txt file, use vdbench to write 100M of data to ensure sufficient rollback time to observe the array, rollback the virtual machine snapshot online, and check if the tmp.txt file exists. 11. Create a silent snapshot of the virtual machine and observe the impact on performance. 12. Delete the tmp.txt file, use vdbench to write 100M of data to ensure sufficient rollback time to observe the array, rollback the virtual machine snapshot online, and check if the tmp.txt file exists. 13. Delete all snapshots generated by the virtual machine. |
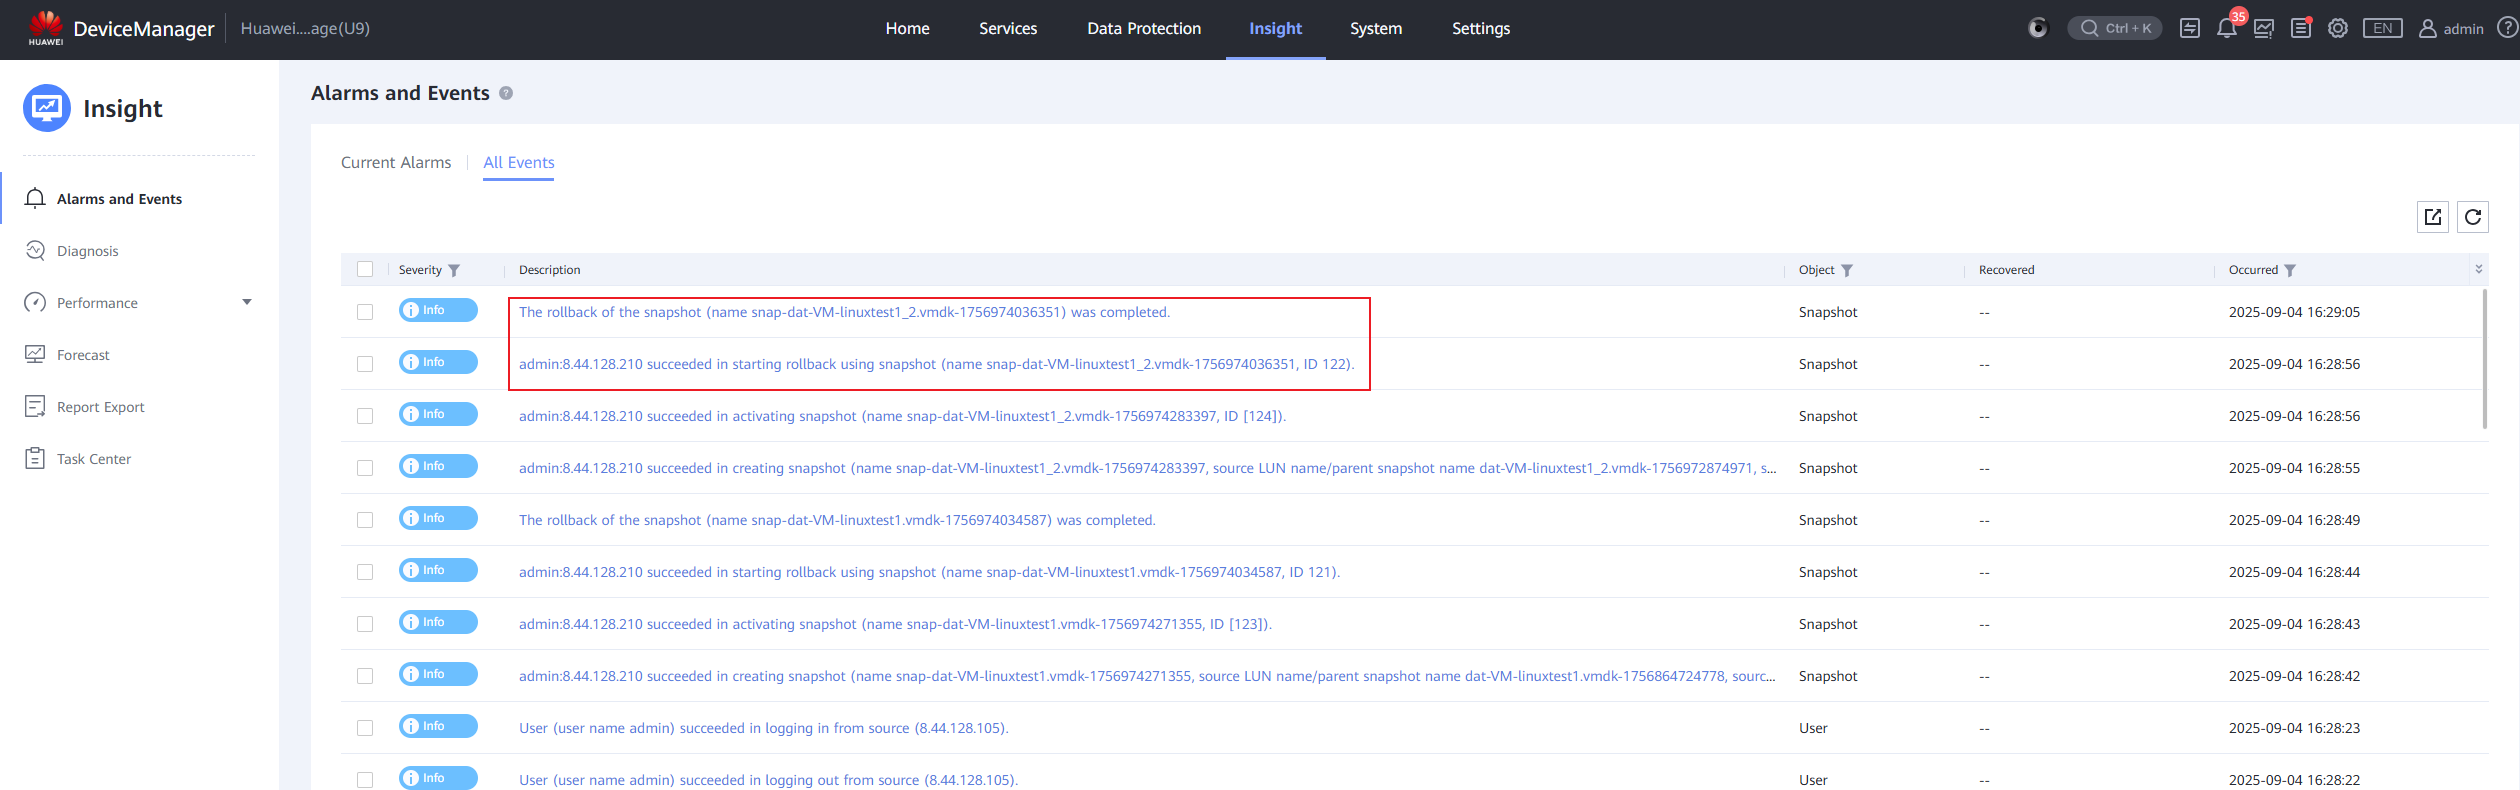
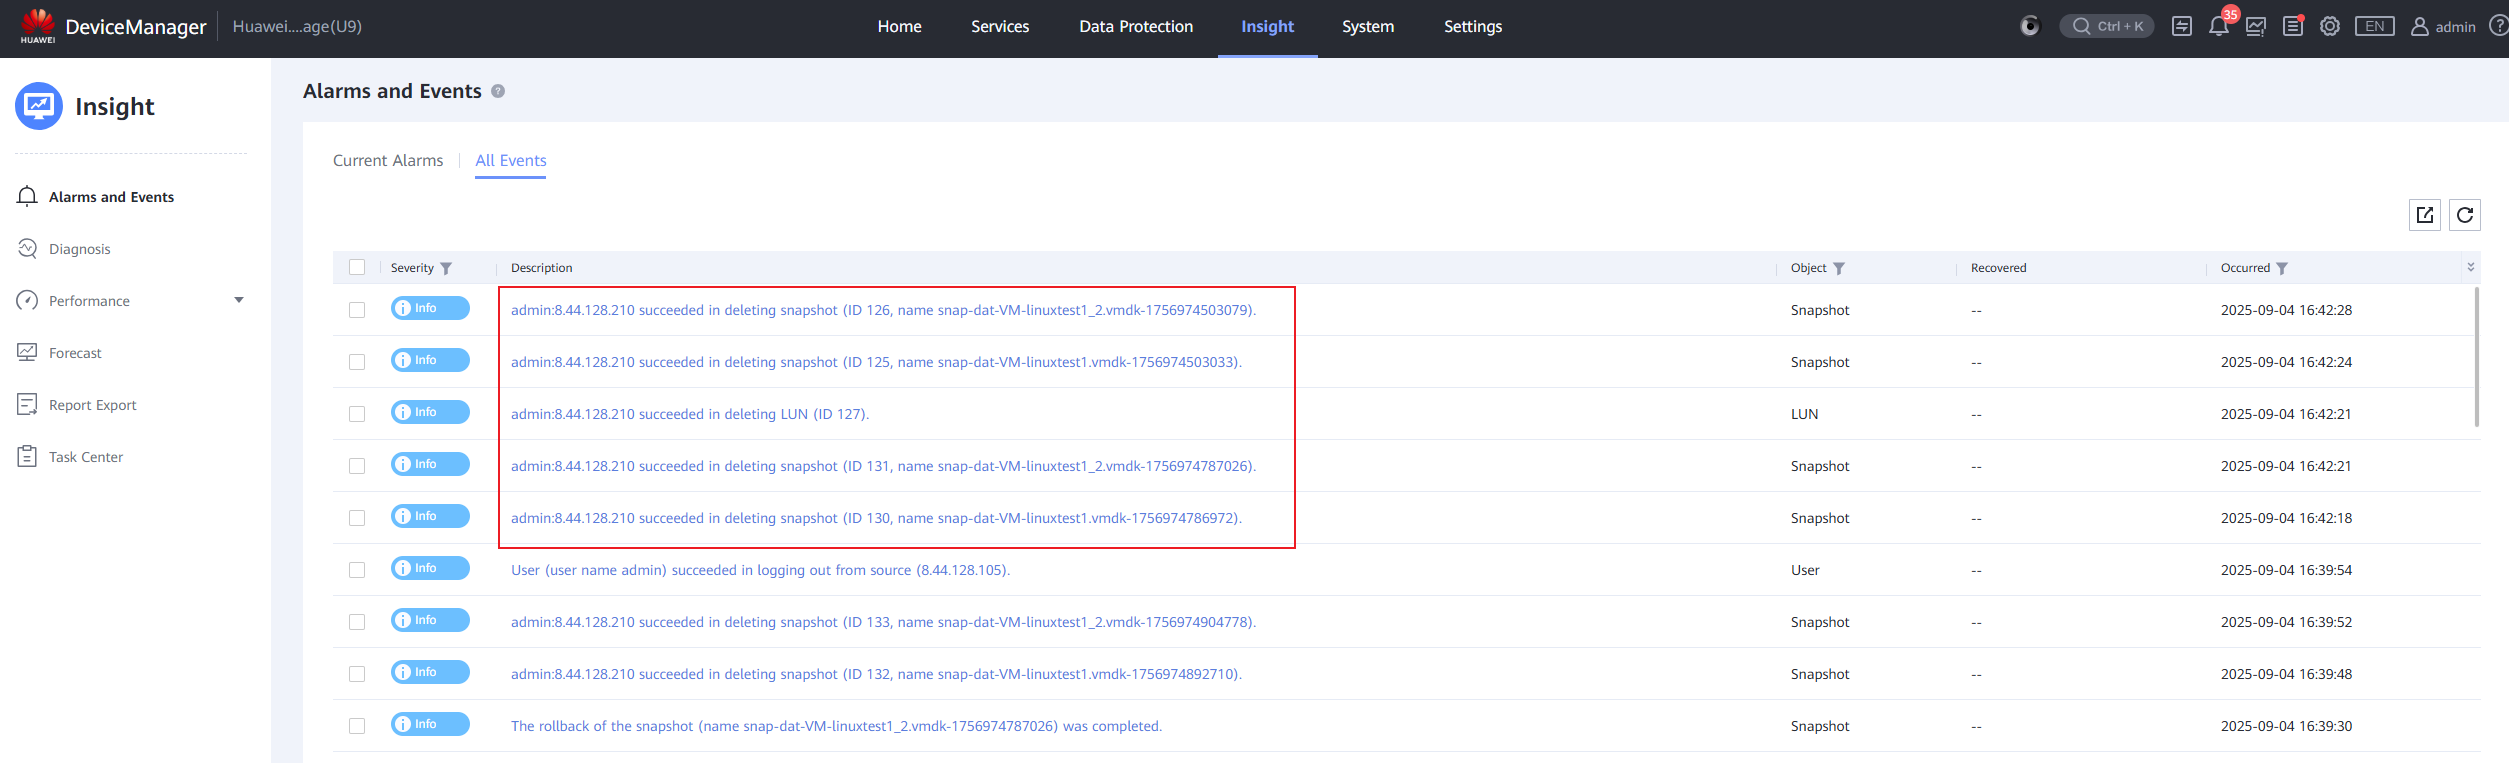
Expected Result | 1. Step 2: The disk was successfully added, the VVol LUN was successfully created, and the business deployment proceeded normally. 2. Step 3: The virtual machine snapshot was successfully created, the VVol LUN snapshot was successfully created, and the virtual machine business was unaffected. 3. Step 4: The power was successfully turned off, the virtual machine snapshot was successfully rolled back, and the array side displayed that the rollback was complete. 4. Step 5: The power was successfully turned on, and the virtual machine contained tmp.txt. 5. Step 6: The virtual machine snapshot was successfully created, the VVol LUN snapshot was successfully created, and the virtual machine business was unaffected. 6. Step 7: The power was successfully turned off, the virtual machine snapshot was successfully rolled back, and the array side displayed that the rollback was complete. 7. Step 8: The power was successfully turned on, and the virtual machine contained tmp.txt. 8. Step 9: The virtual machine memory snapshot was successfully created, the MEM VVol LUN was successfully created, the VVol LUN snapshot was successfully created, and the virtual machine business was unaffected. 9. Step 10: The virtual machine snapshot was successfully rolled back, the virtual machine contained tmp.txt, and the array side displayed that the rollback was complete. 10. Step 11: The virtual machine silent snapshot was successfully created, the MEM VVol LUN was successfully created, the VVol LUN snapshot was successfully created, and the virtual machine business was unaffected. 11. Step 12: The virtual machine snapshot was successfully rolled back, the virtual machine contained tmp.txt, and the array side displayed that the rollback was complete. 12. Step 13: The virtual machine snapshot was successfully deleted, the VVol LUN snapshot and MEM VVol LUN were successfully deleted. |
Test Record |
 3. In the virtual machine’s operating system, vi a file named tmp.txt, create a regular snapshot of the virtual machine, and observe the impact on performance. 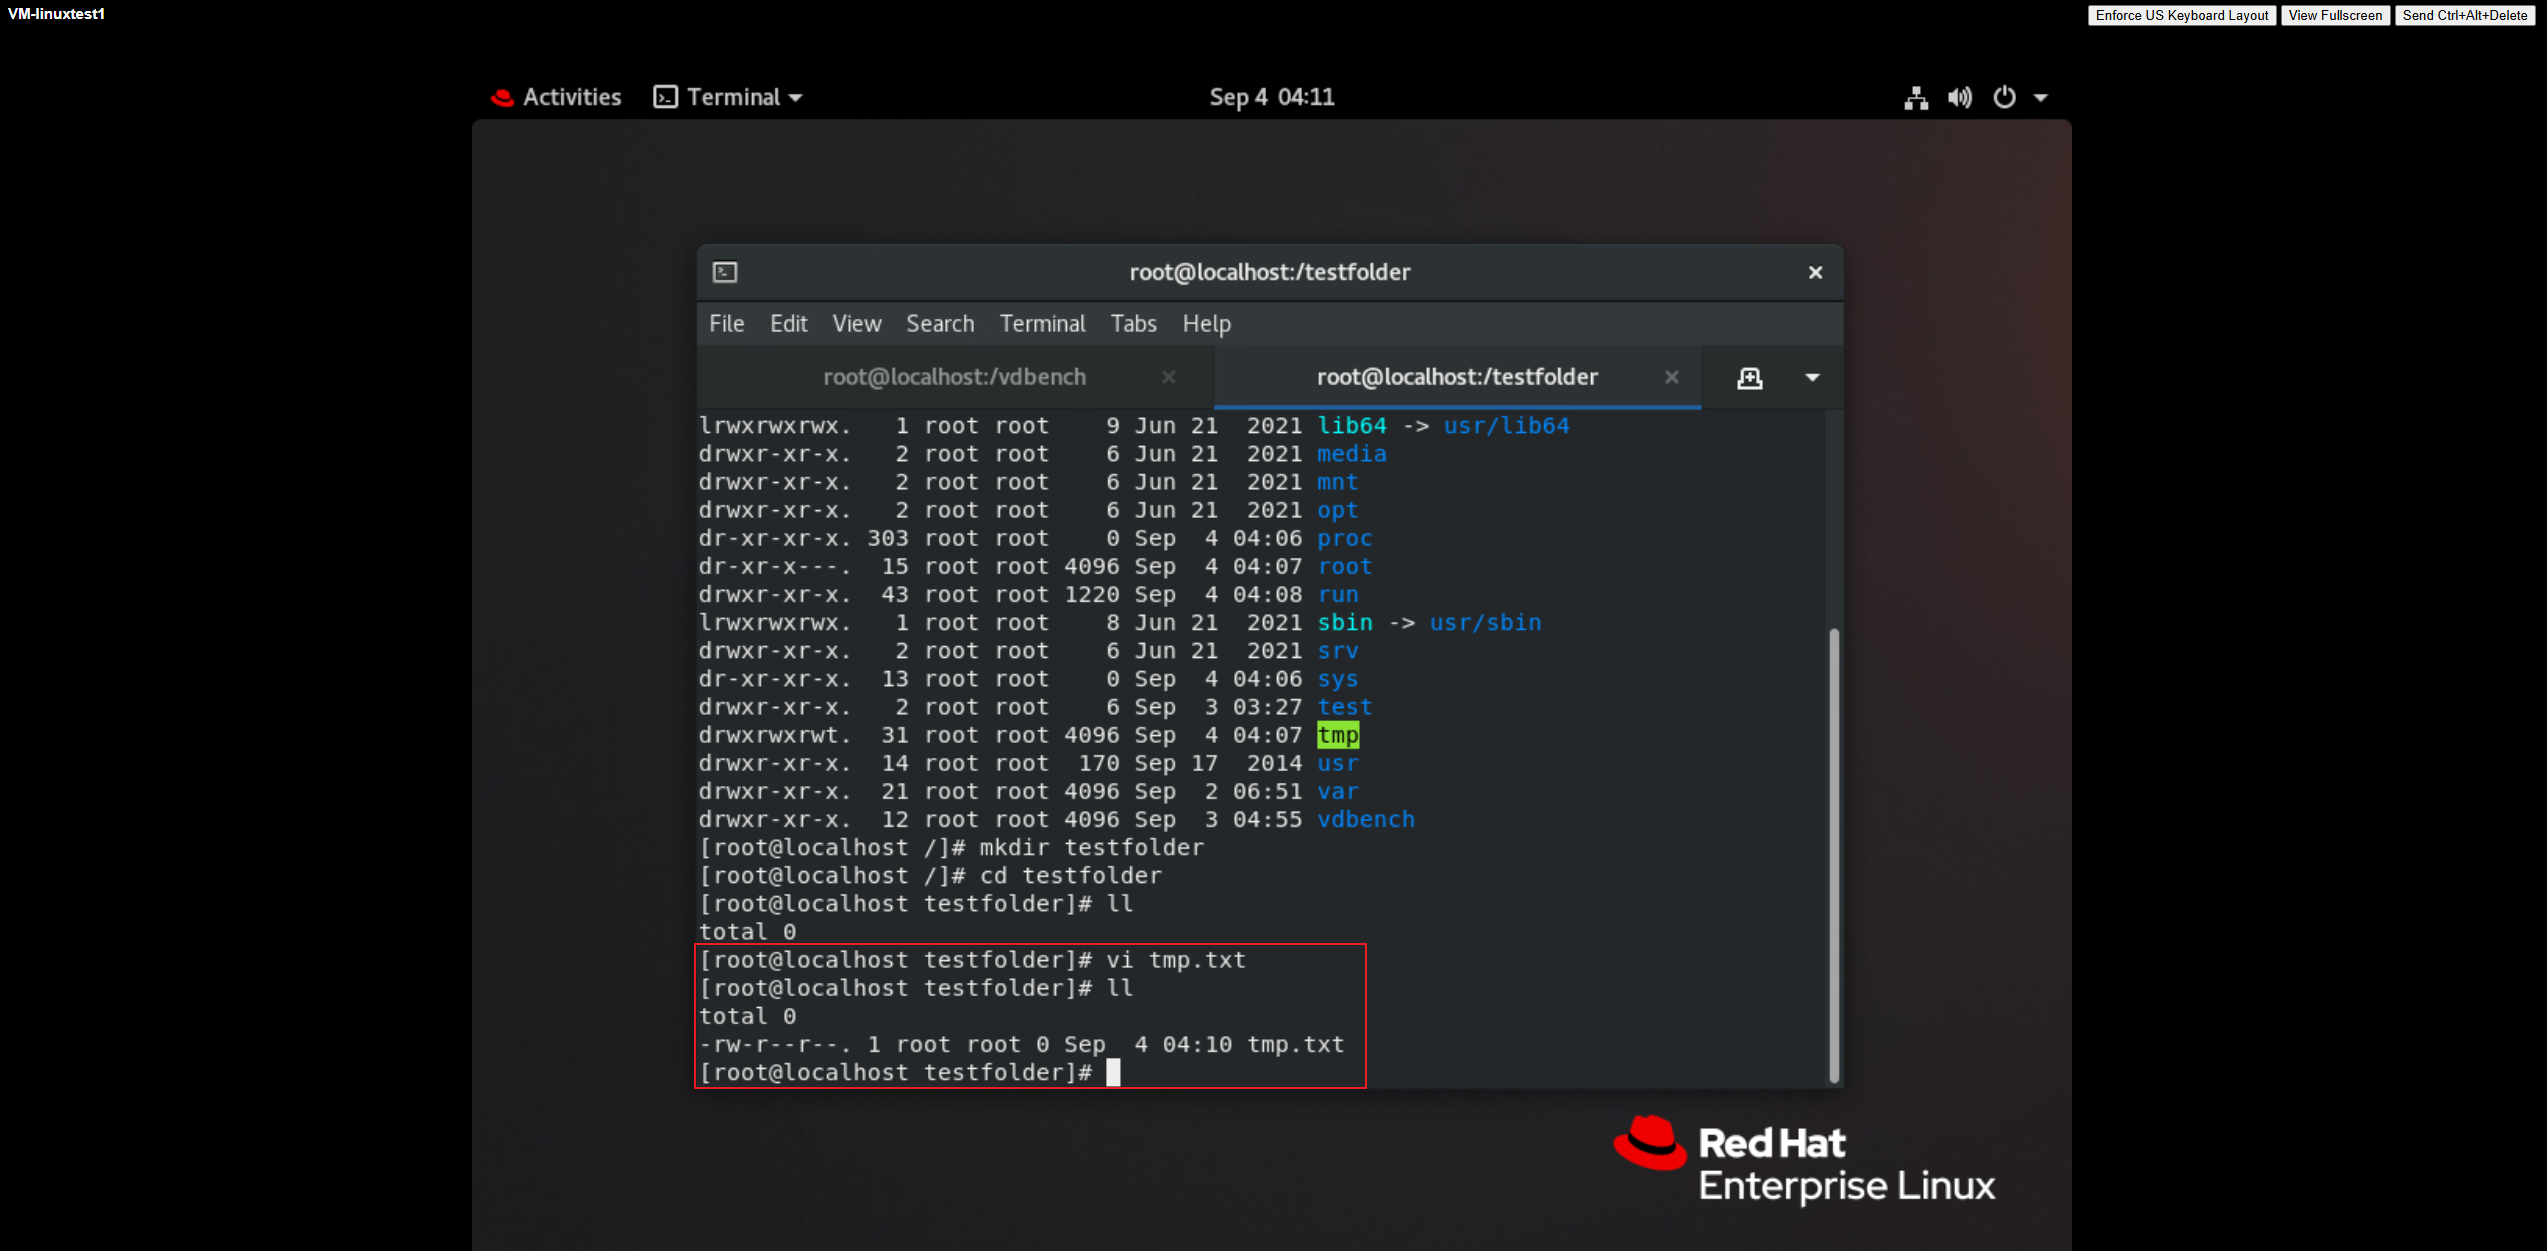
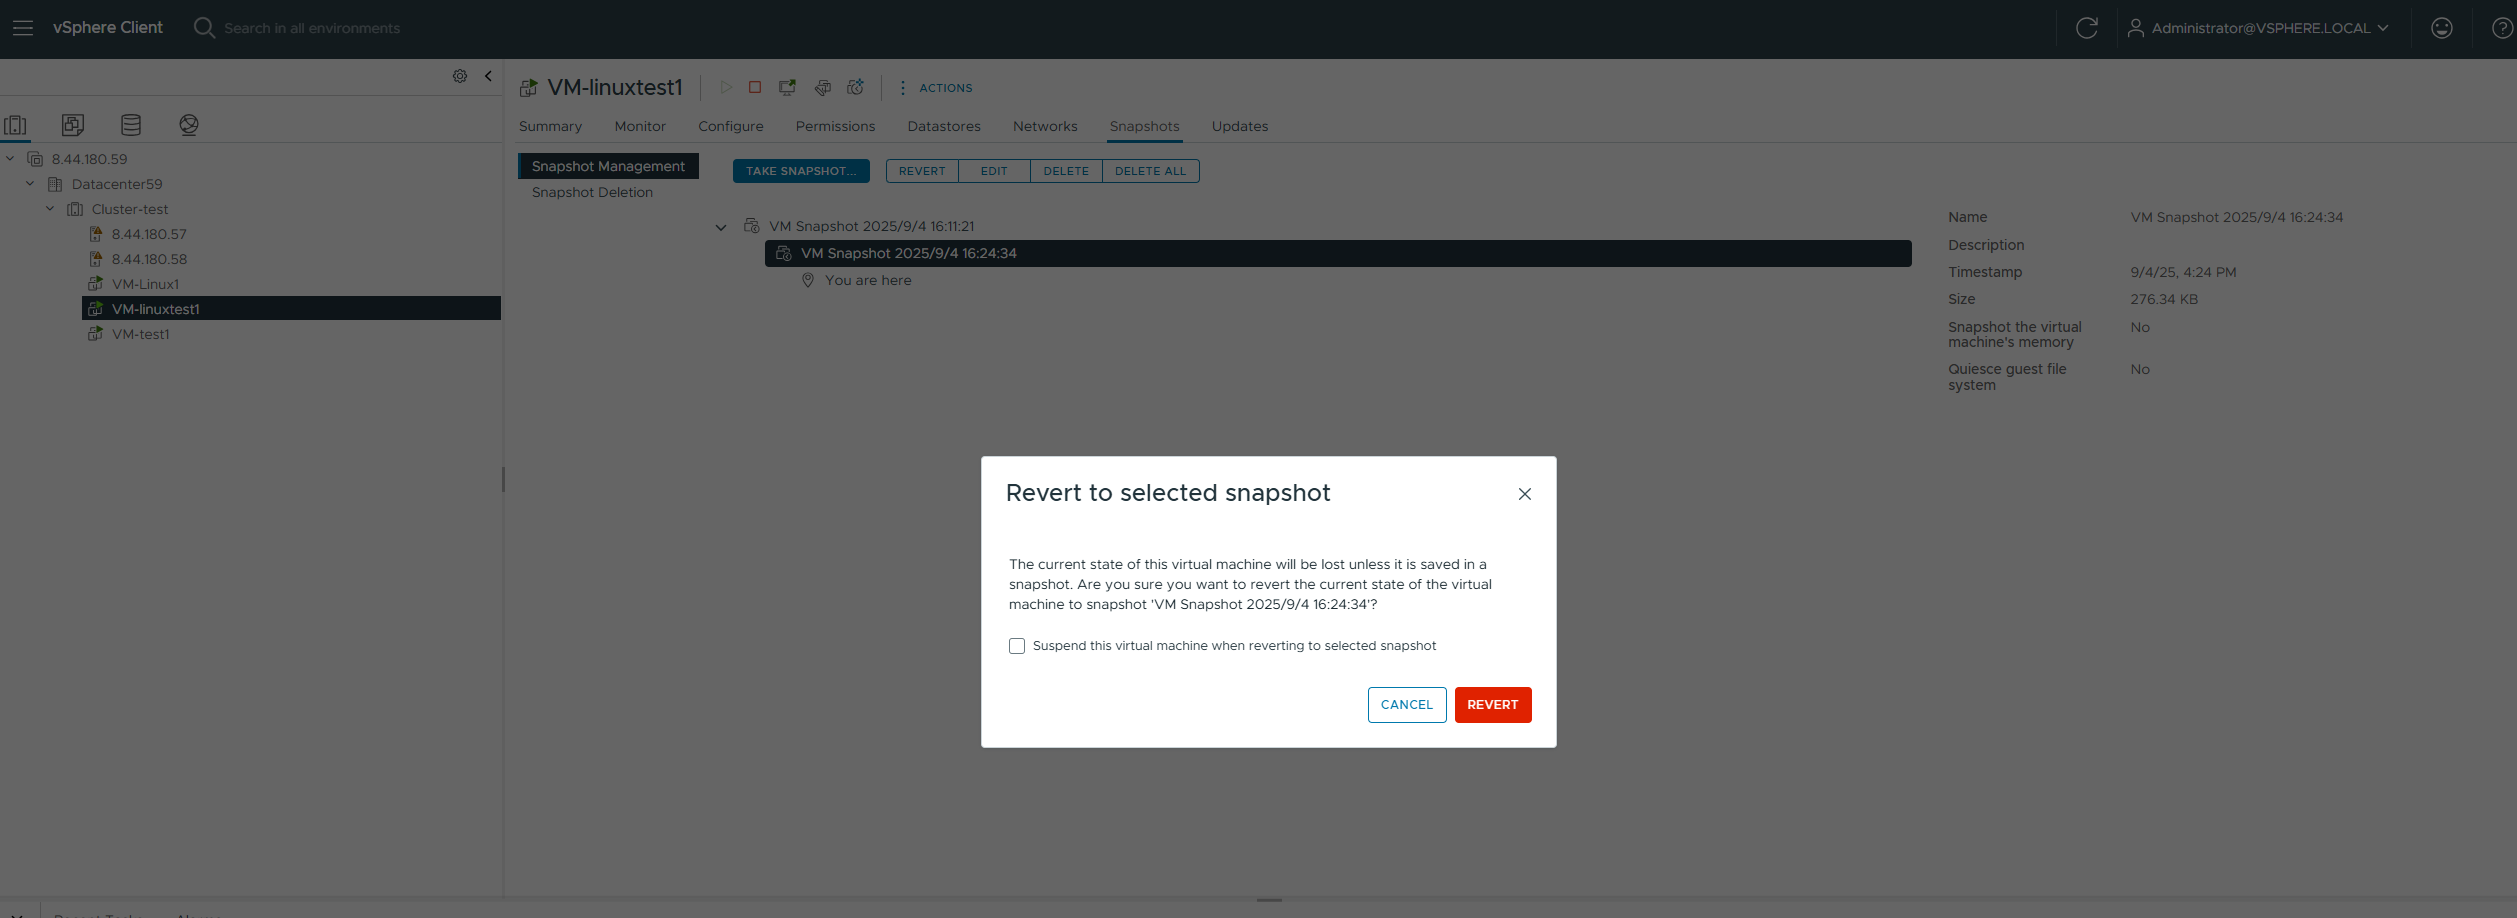
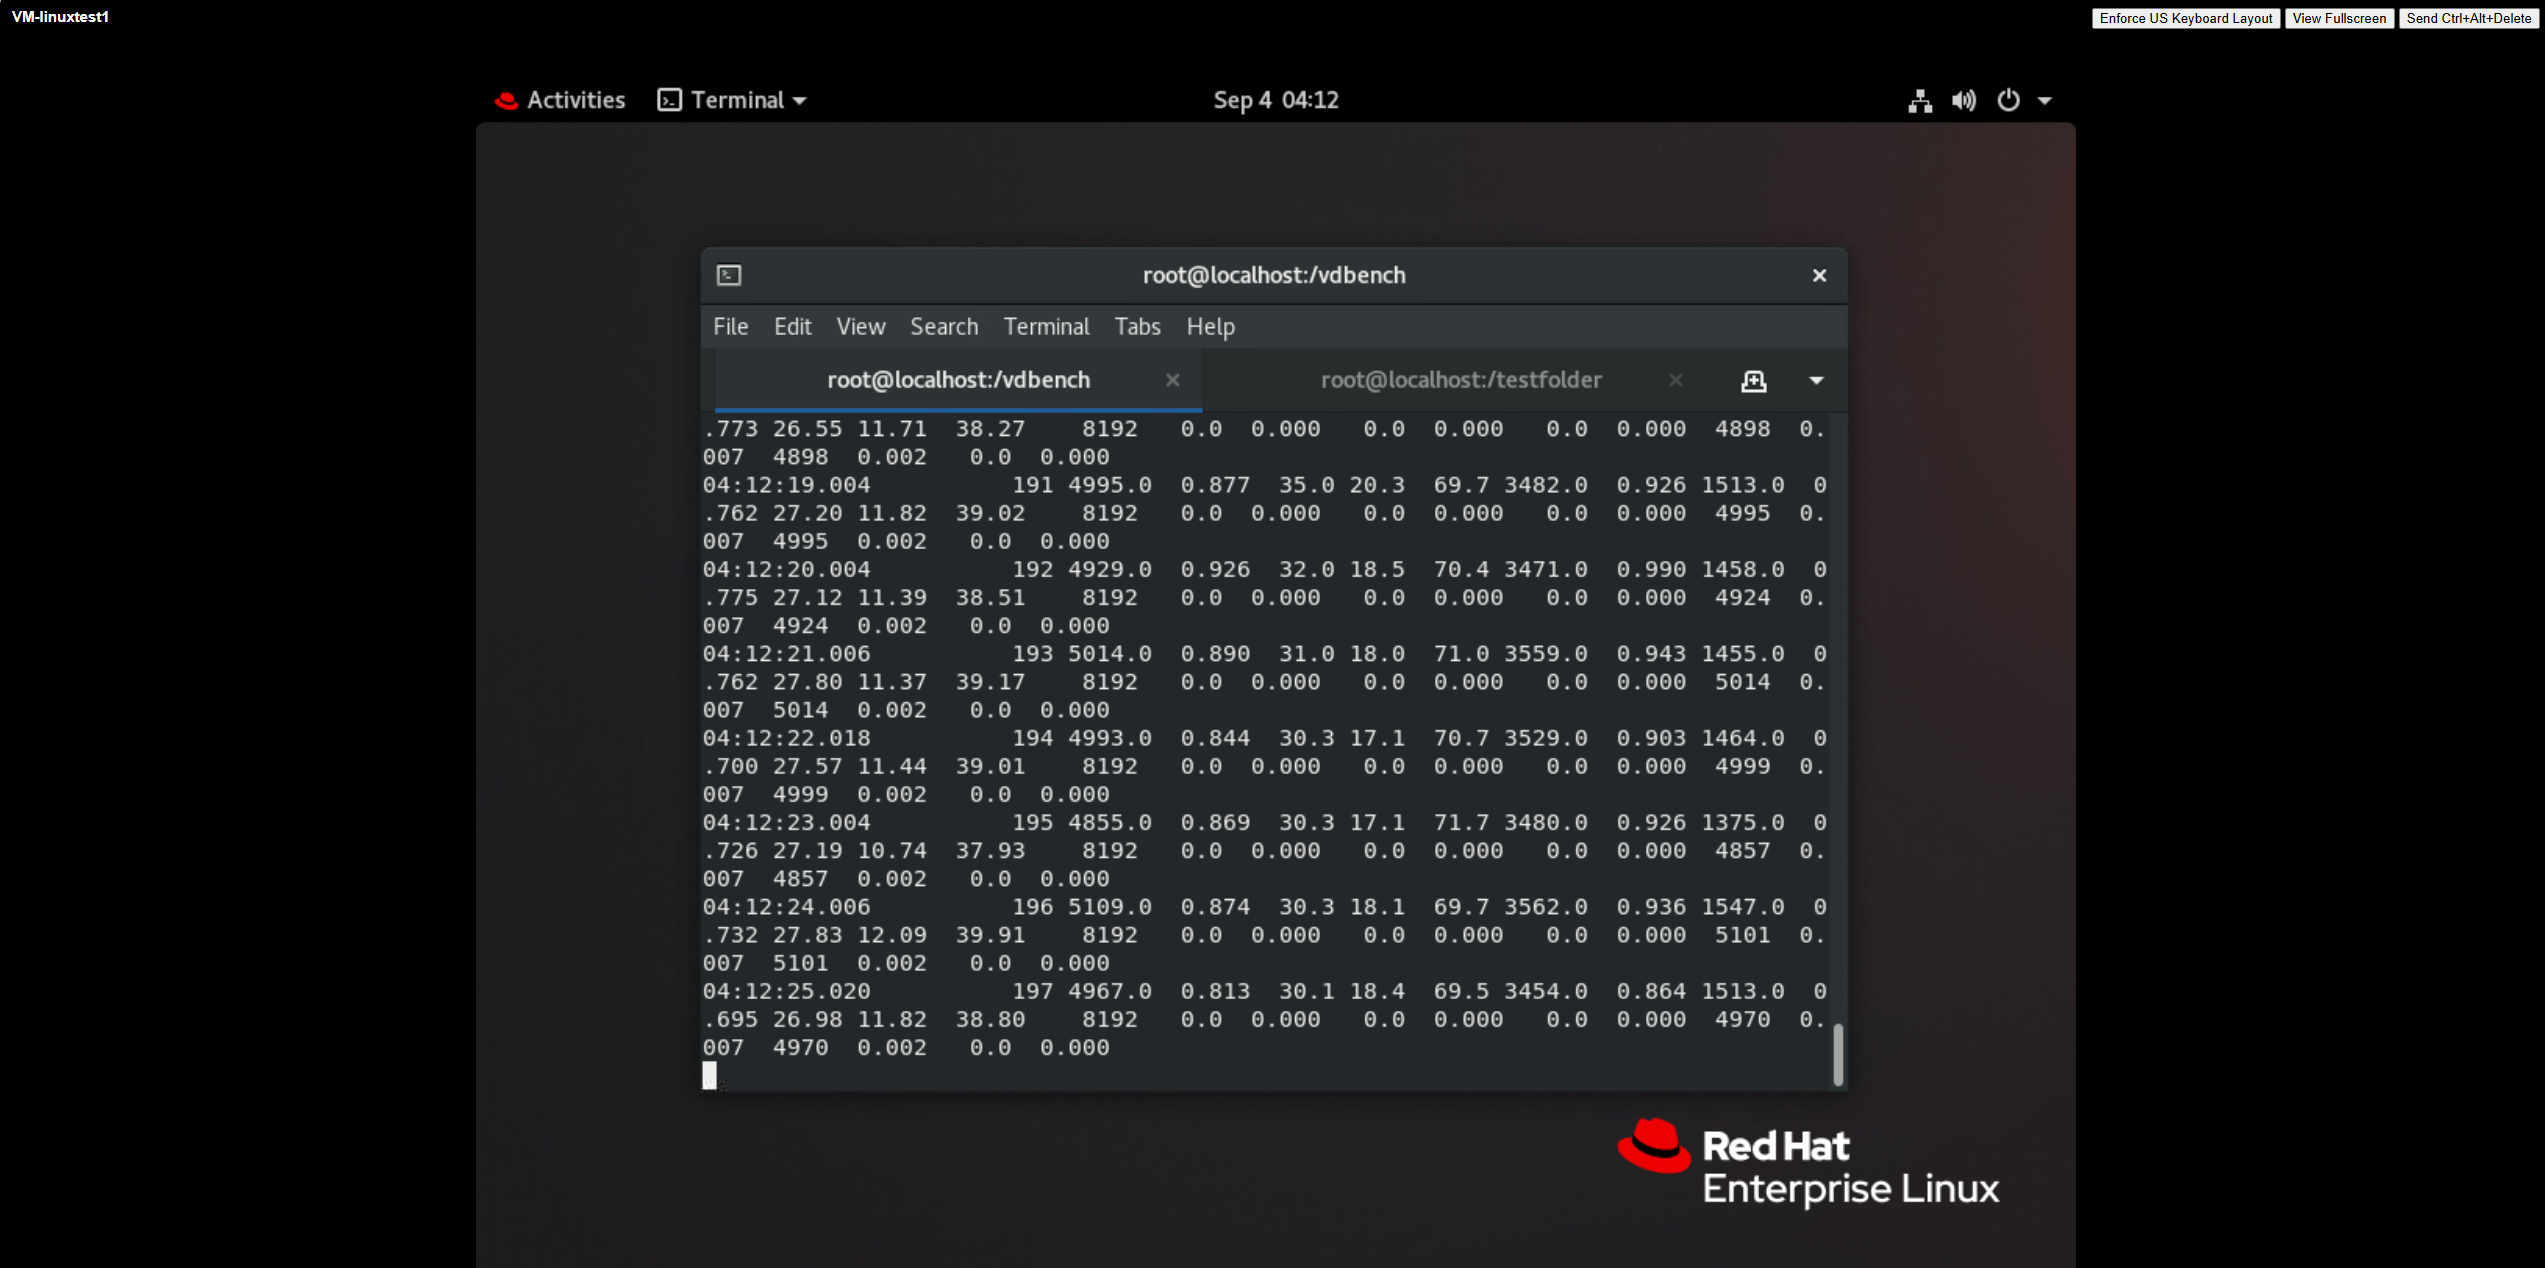 4. Delete the tmp.txt file, use vdbench to write 100M of data to ensure sufficient rollback time to observe the array, shut down the virtual machine’s operating system, and rollback the virtual machine snapshot. 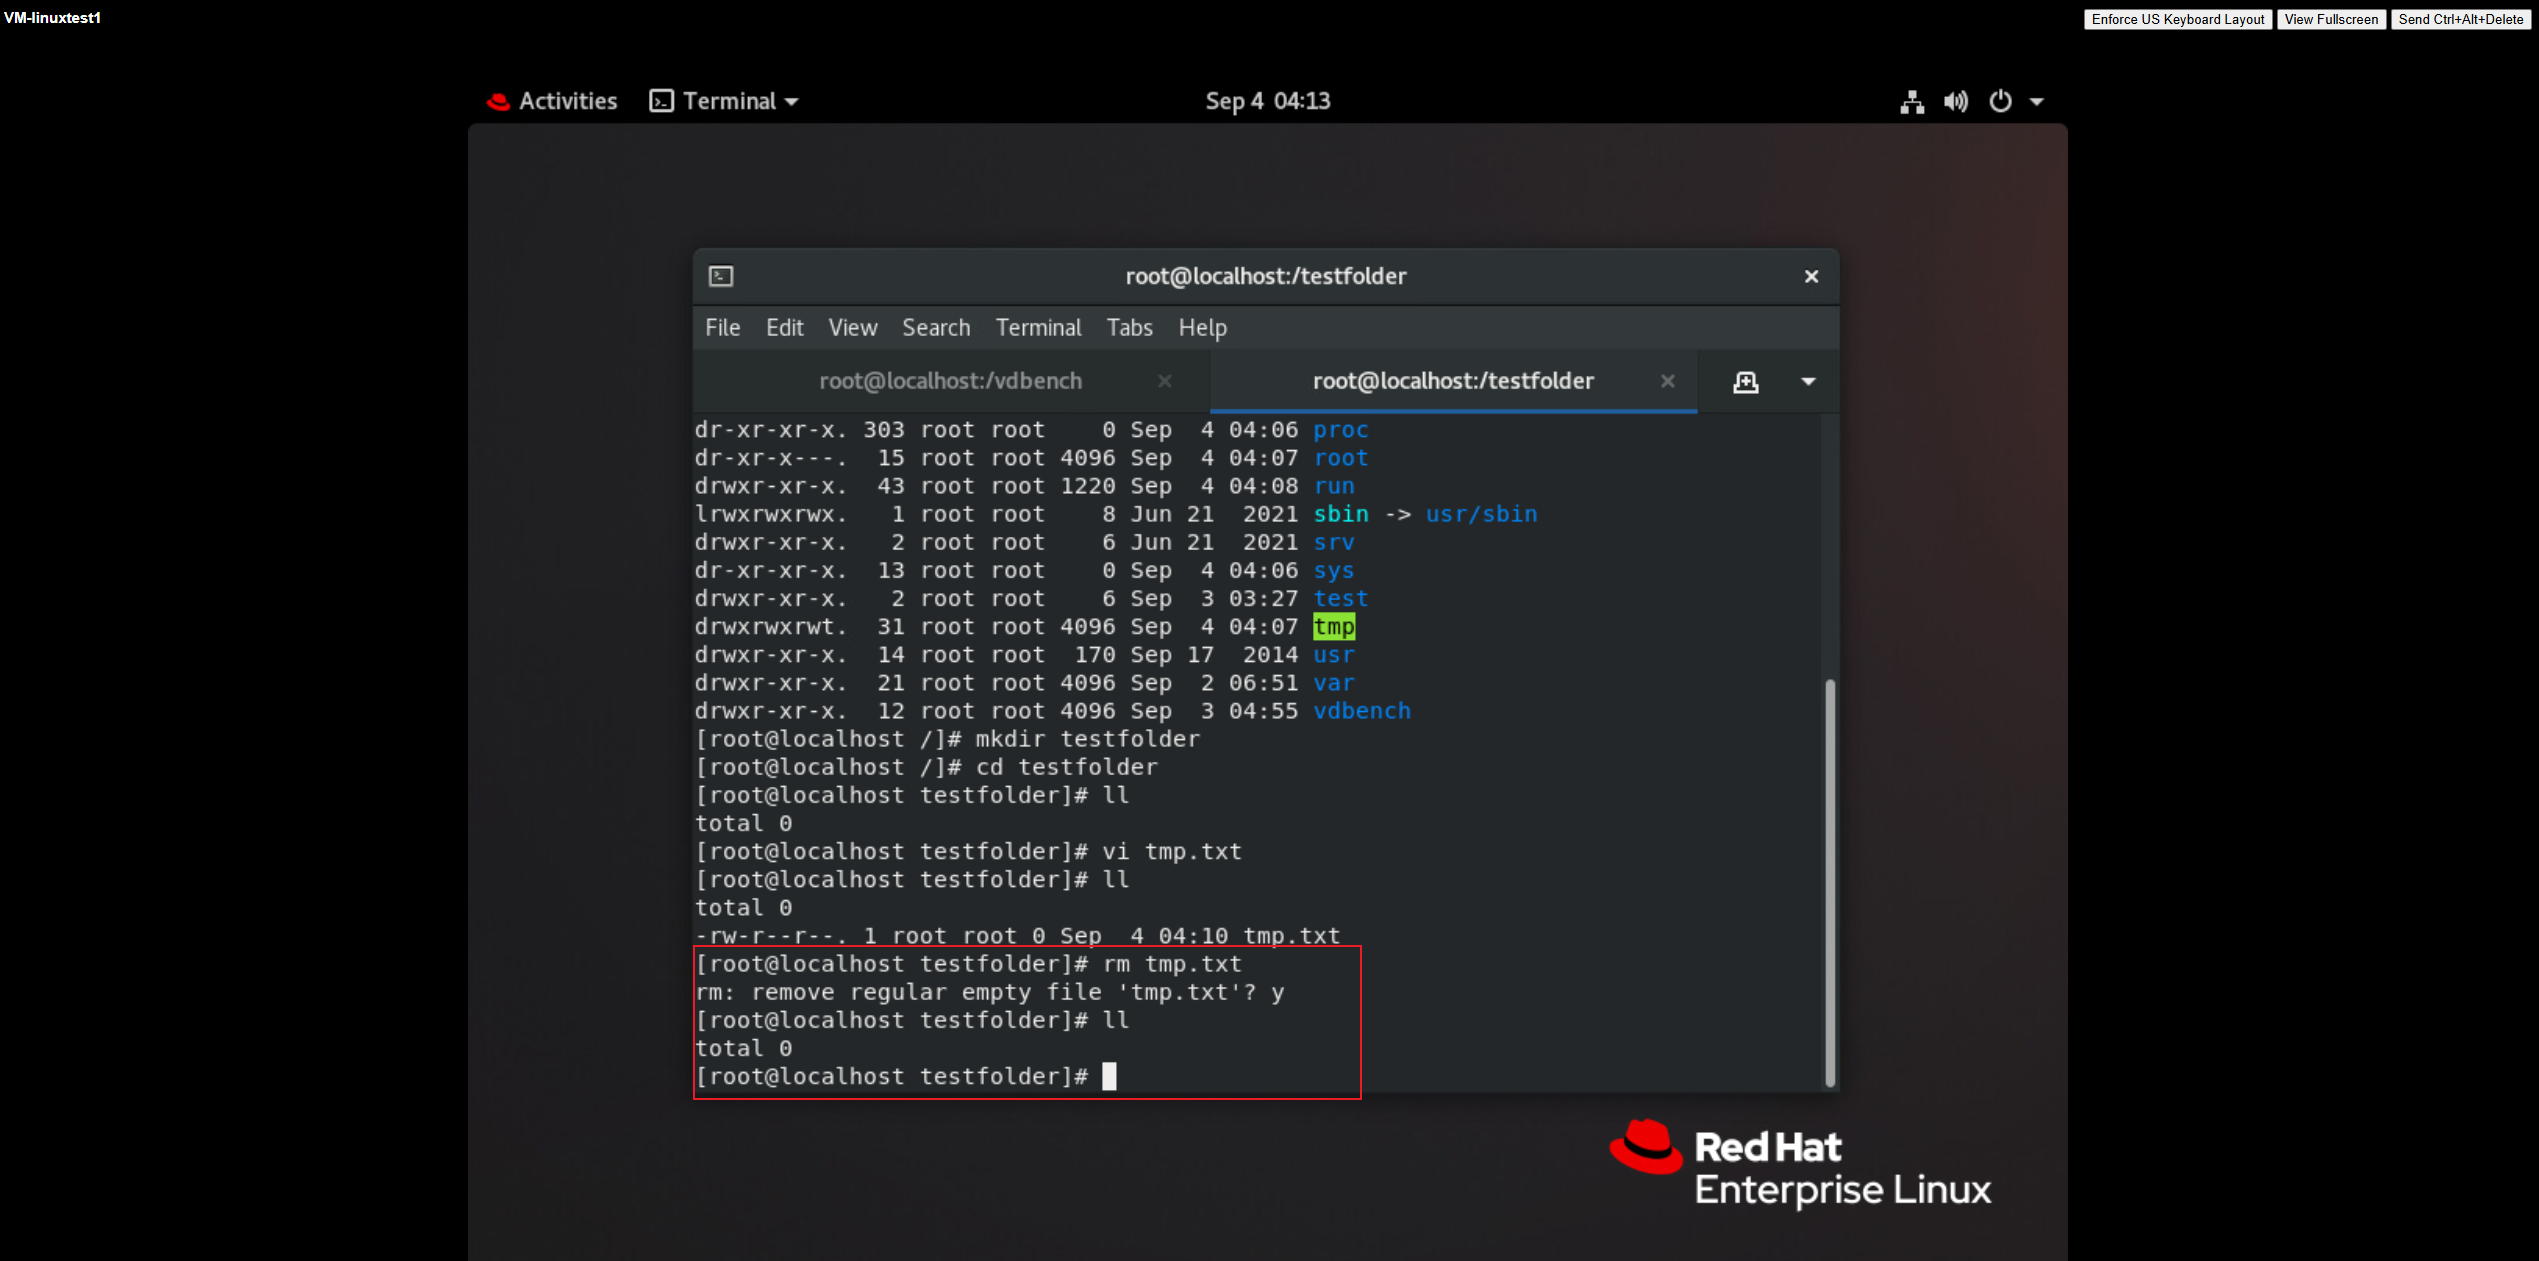
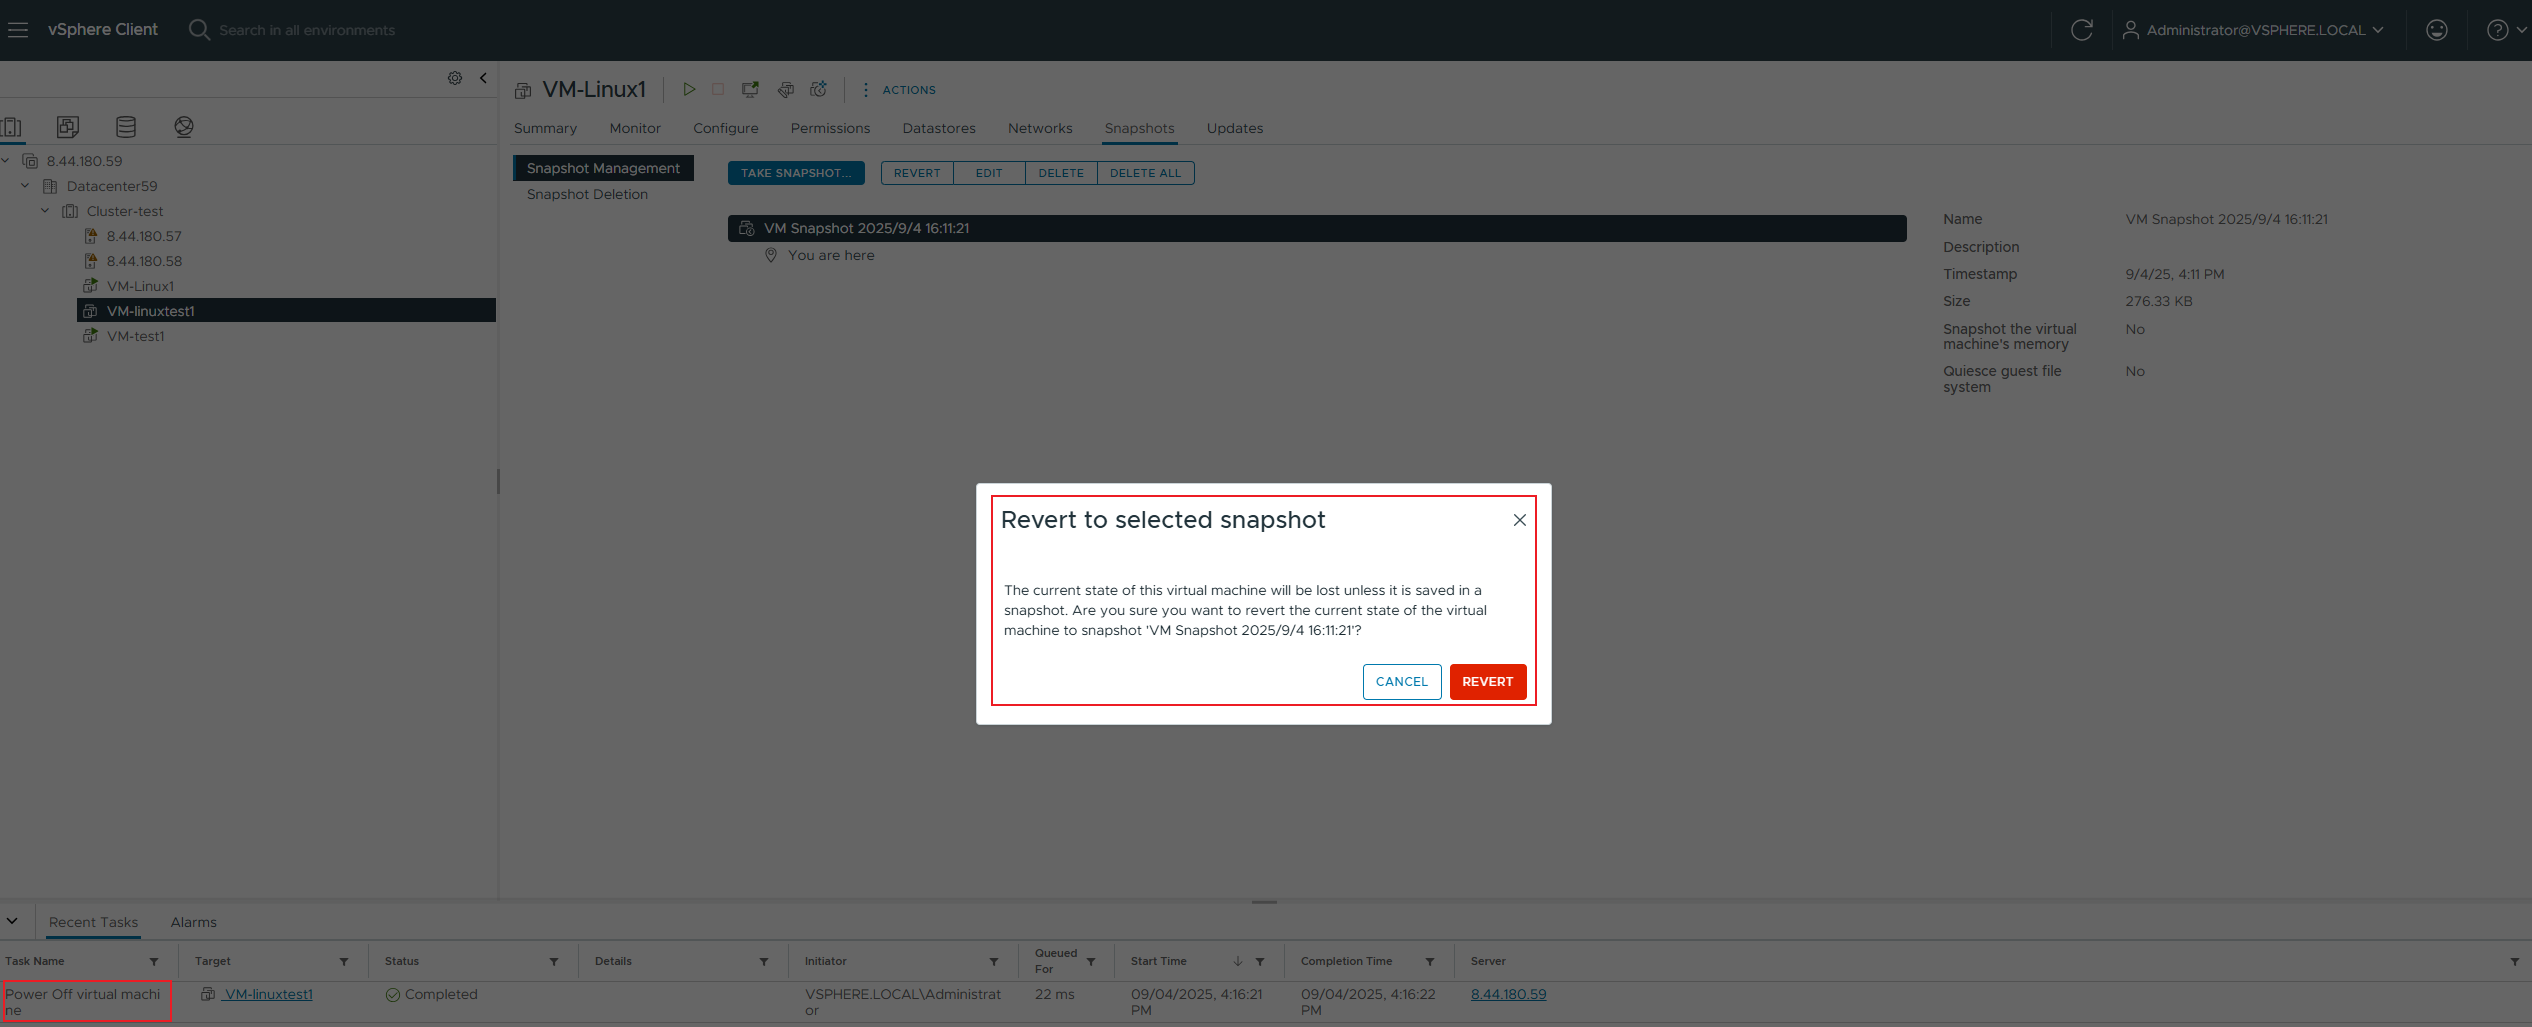
 5. Power on the virtual machine and check if the tmp.txt file exists. 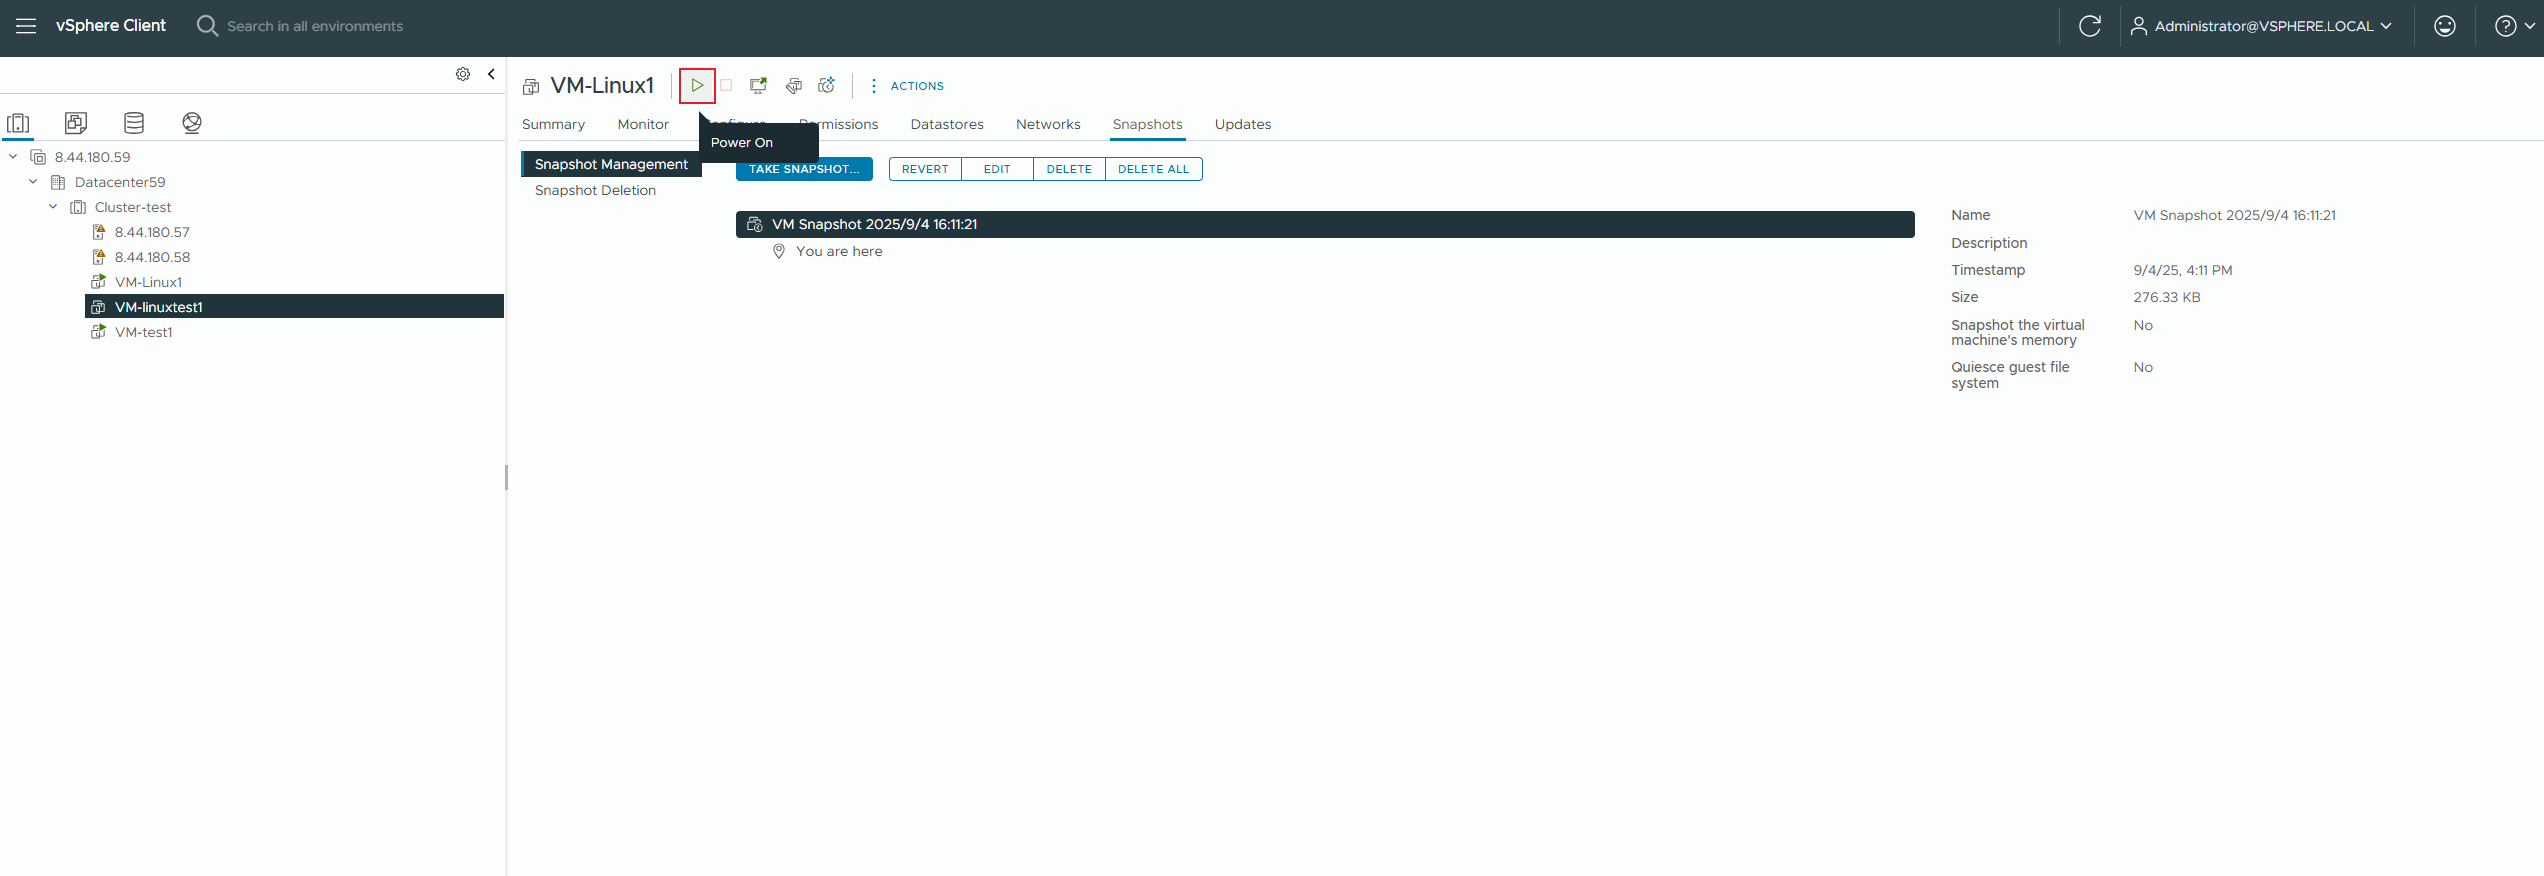
 6. In the virtual machine’s operating system, vi a file named tmp.txt, shut down and offline create a regular snapshot of the virtual machine, and observe the impact on performance. 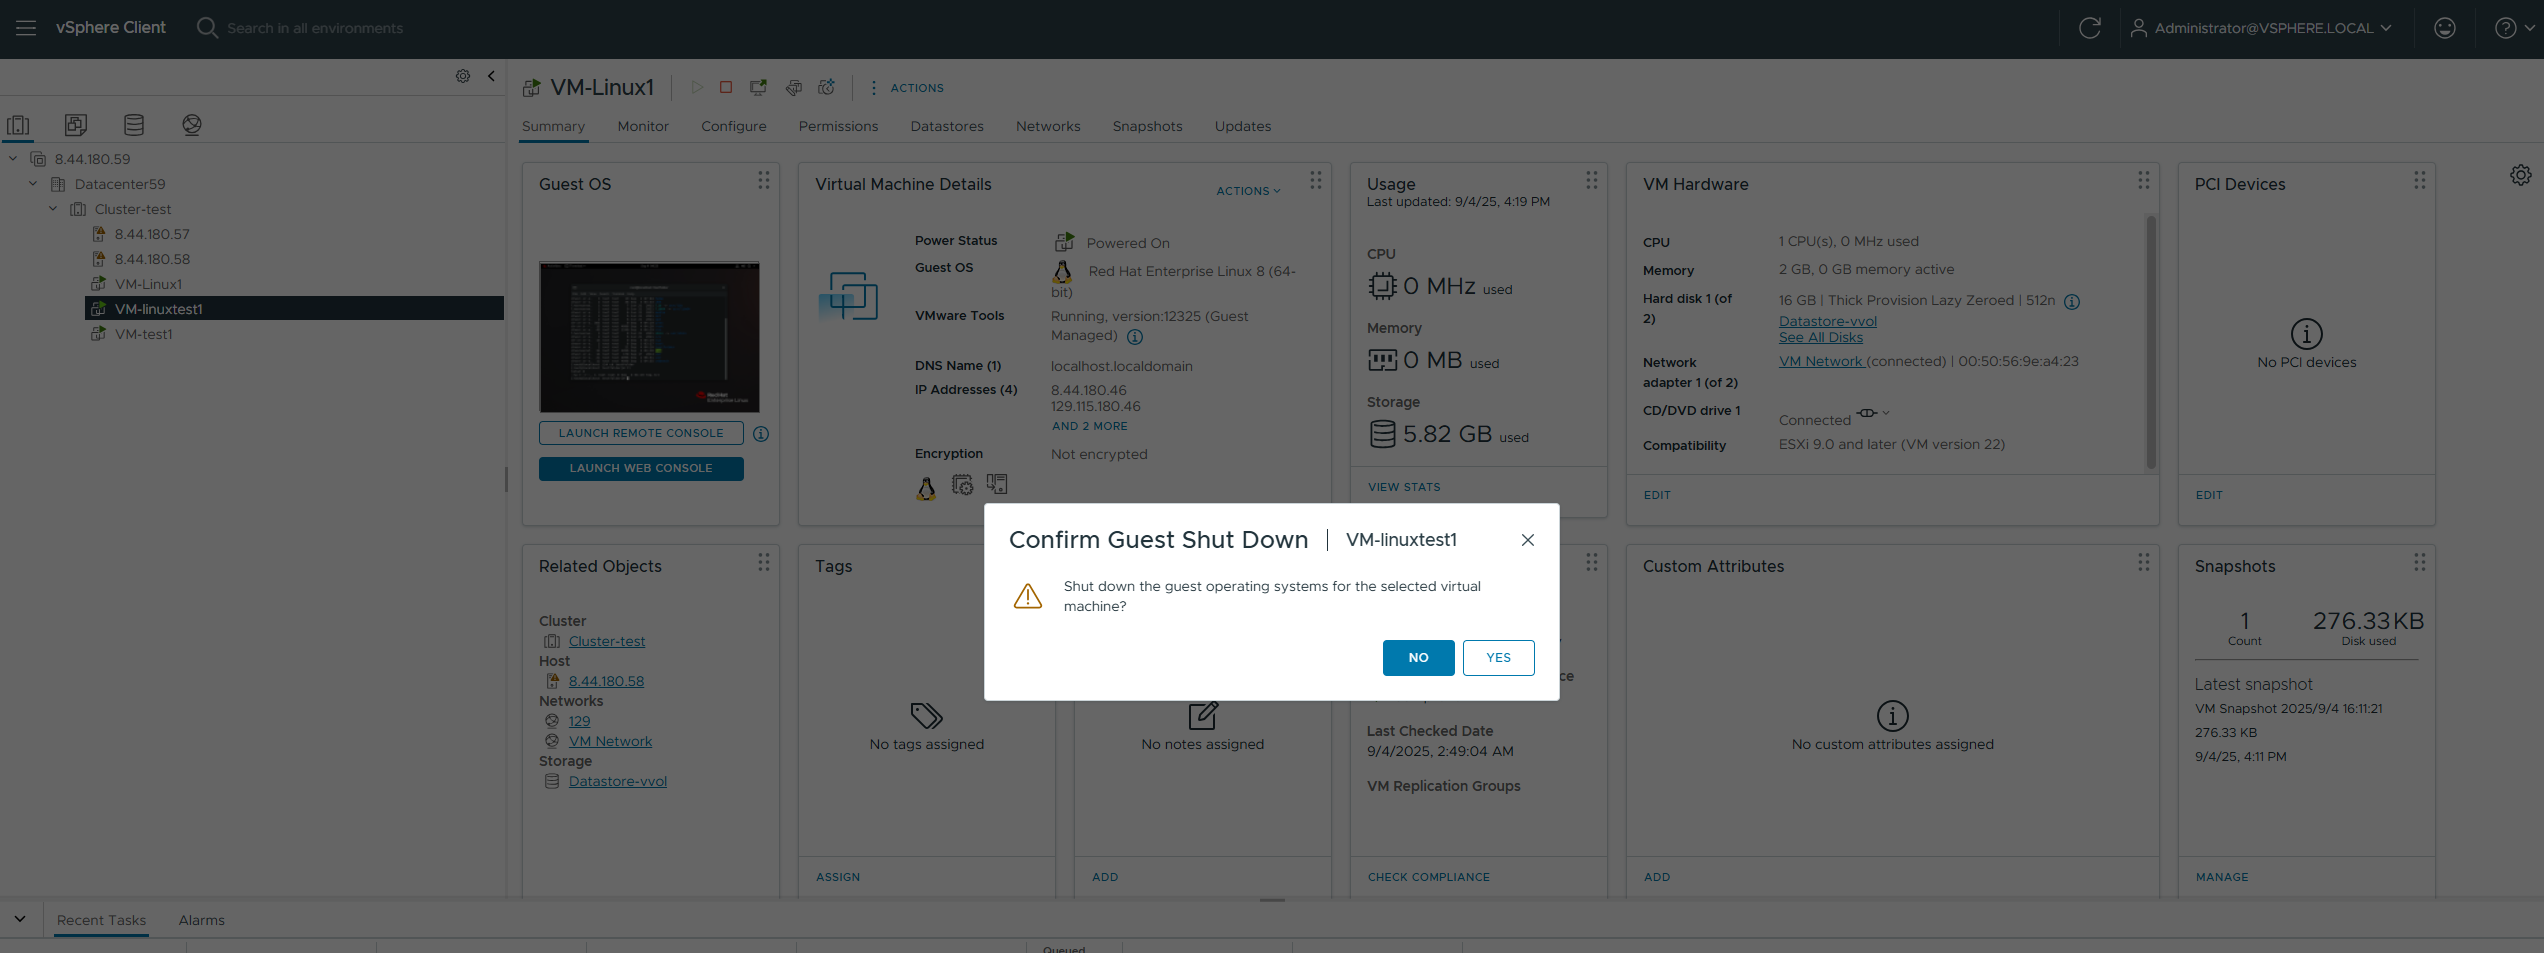
7. Power on the virtual machine, delete the tmp.txt file, use vdbench to write 100M of data to ensure sufficient rollback time to observe the array, shut down the virtual machine’s operating system, and rollback the virtual machine snapshot. 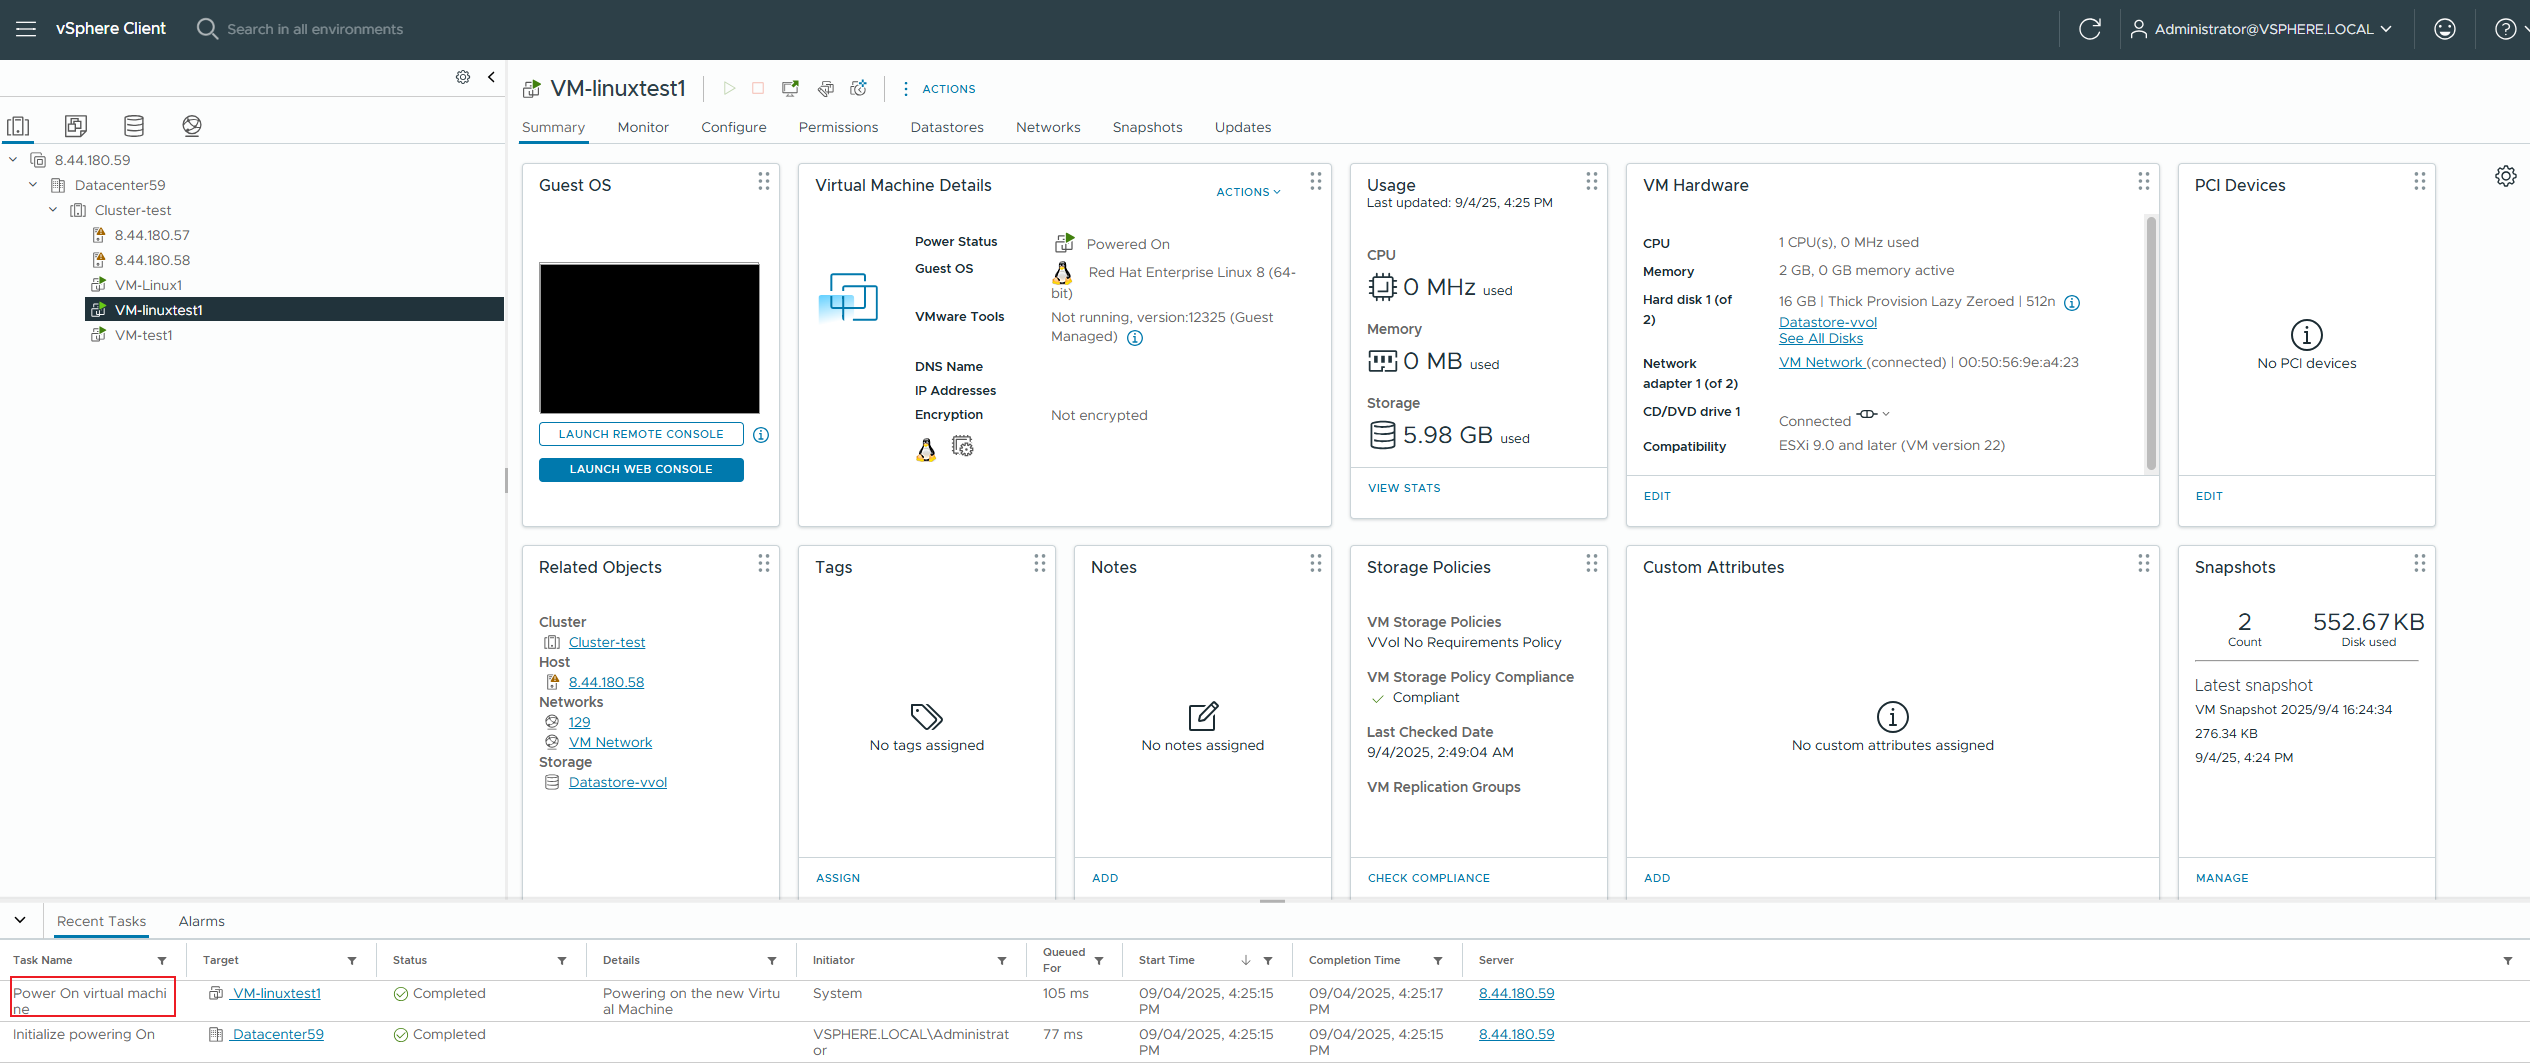
 8. Power on the virtual machine and check if the tmp.txt file exists. 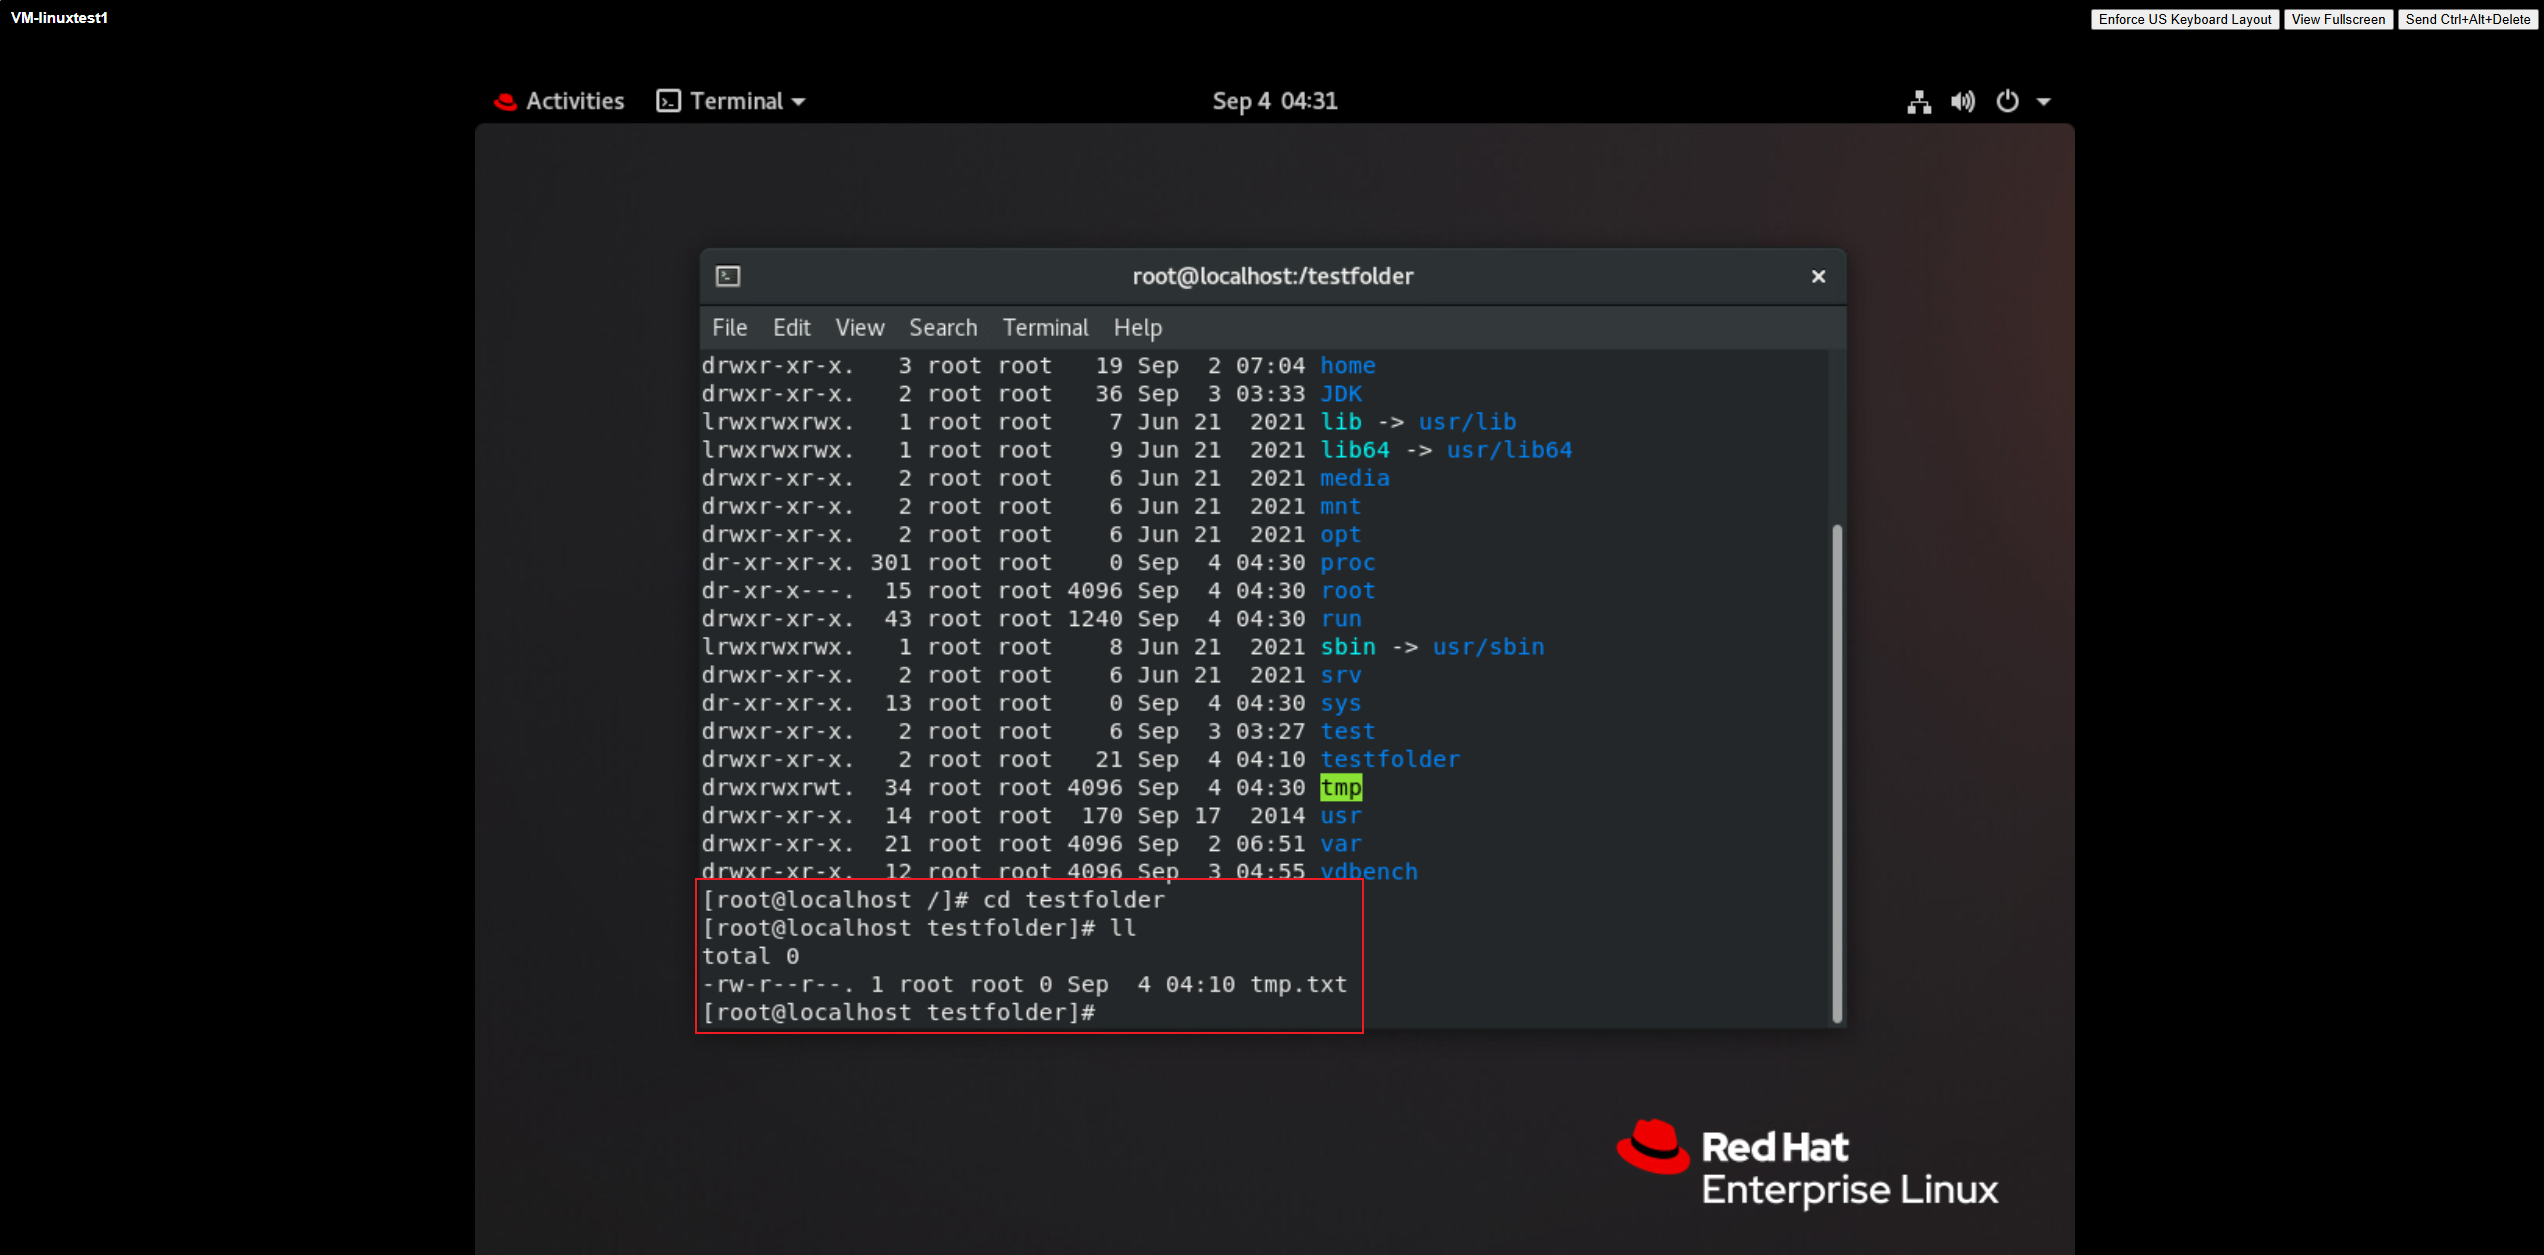 9. Create a memory snapshot of the virtual machine and observe the impact on performance. 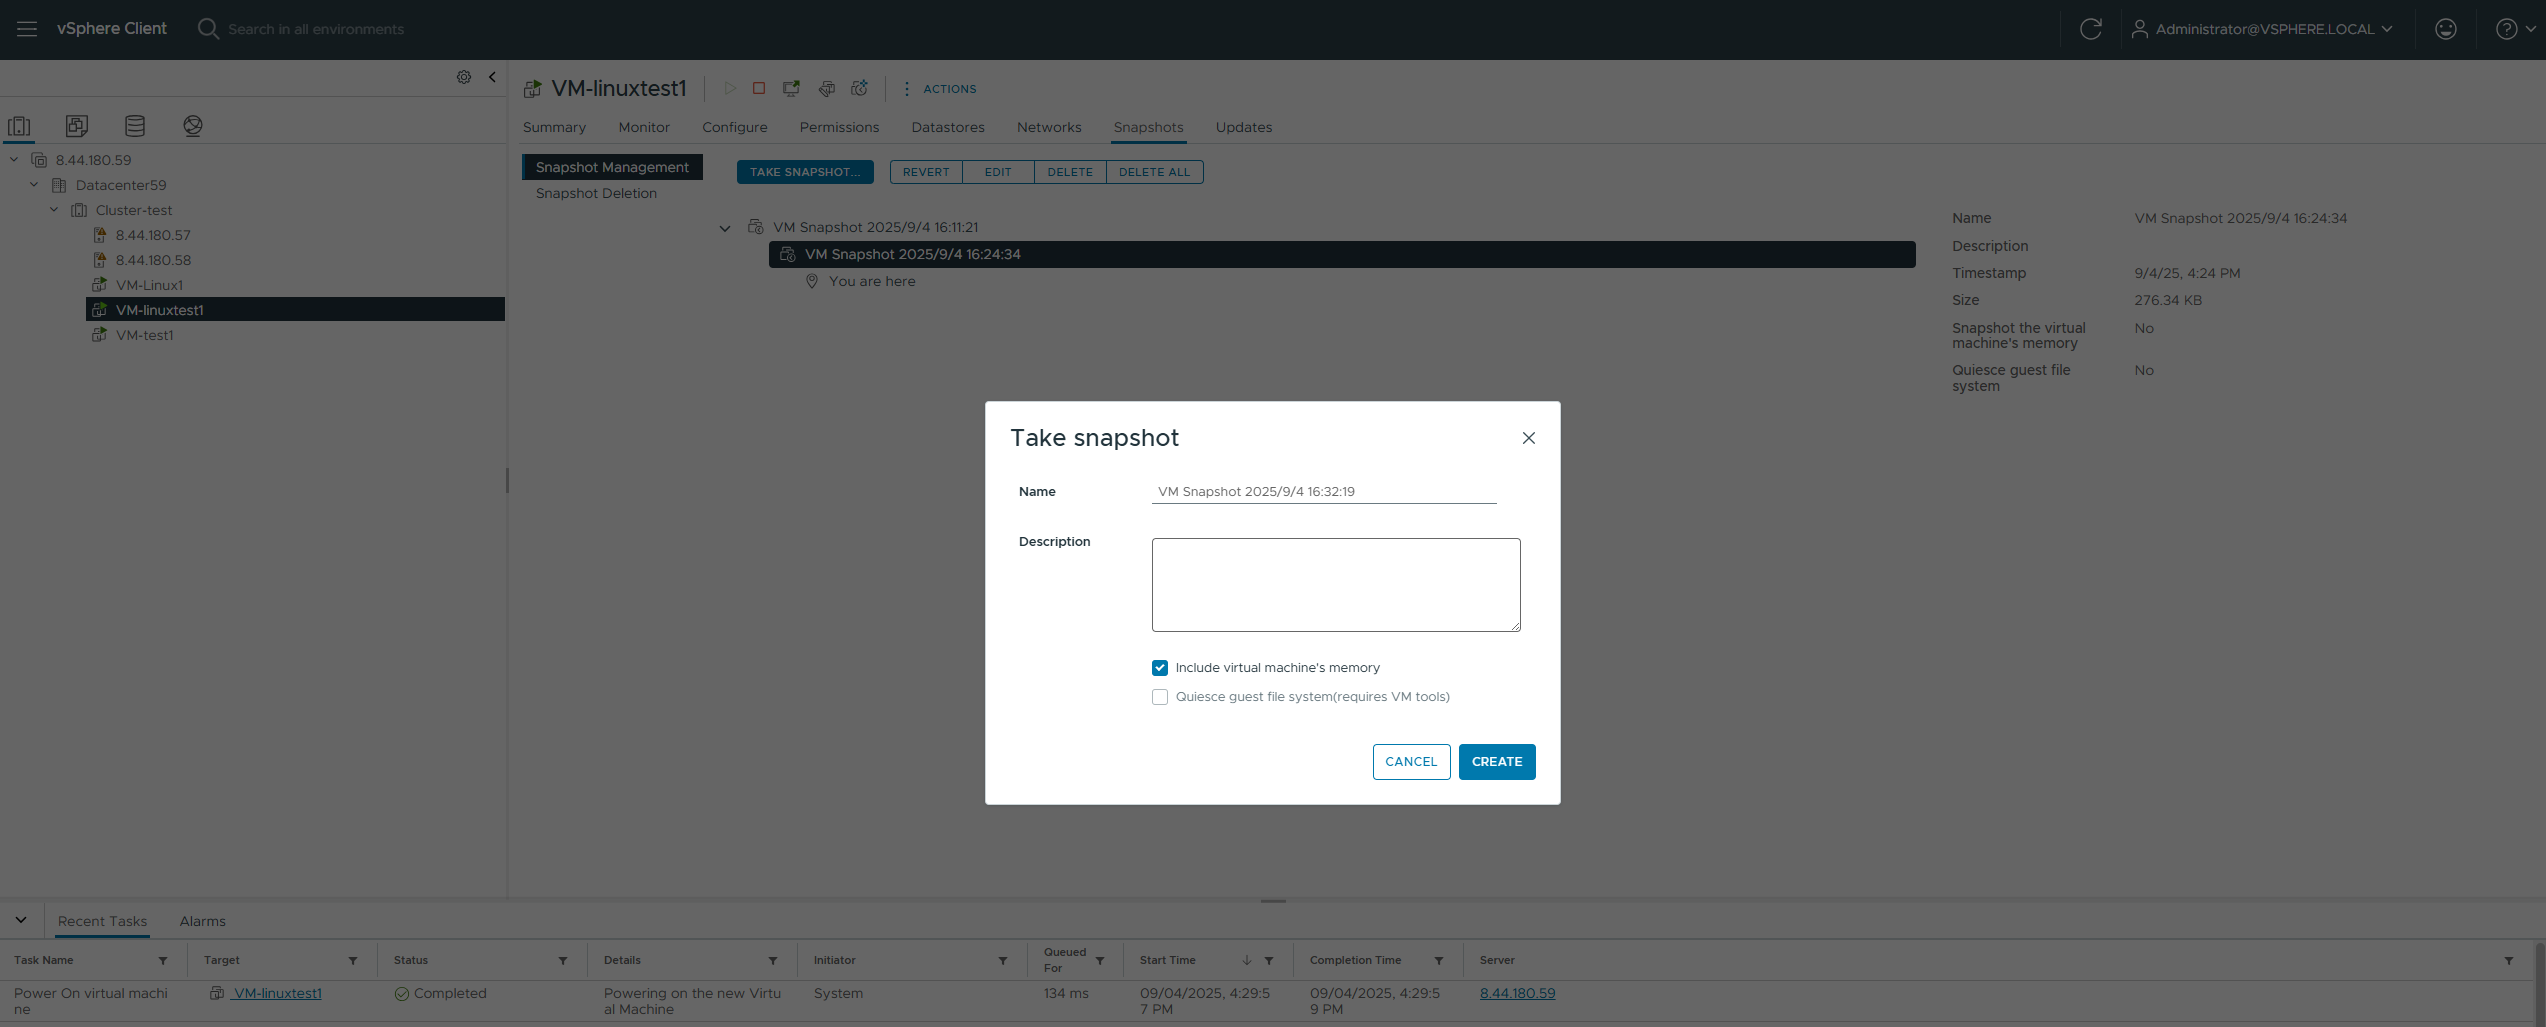 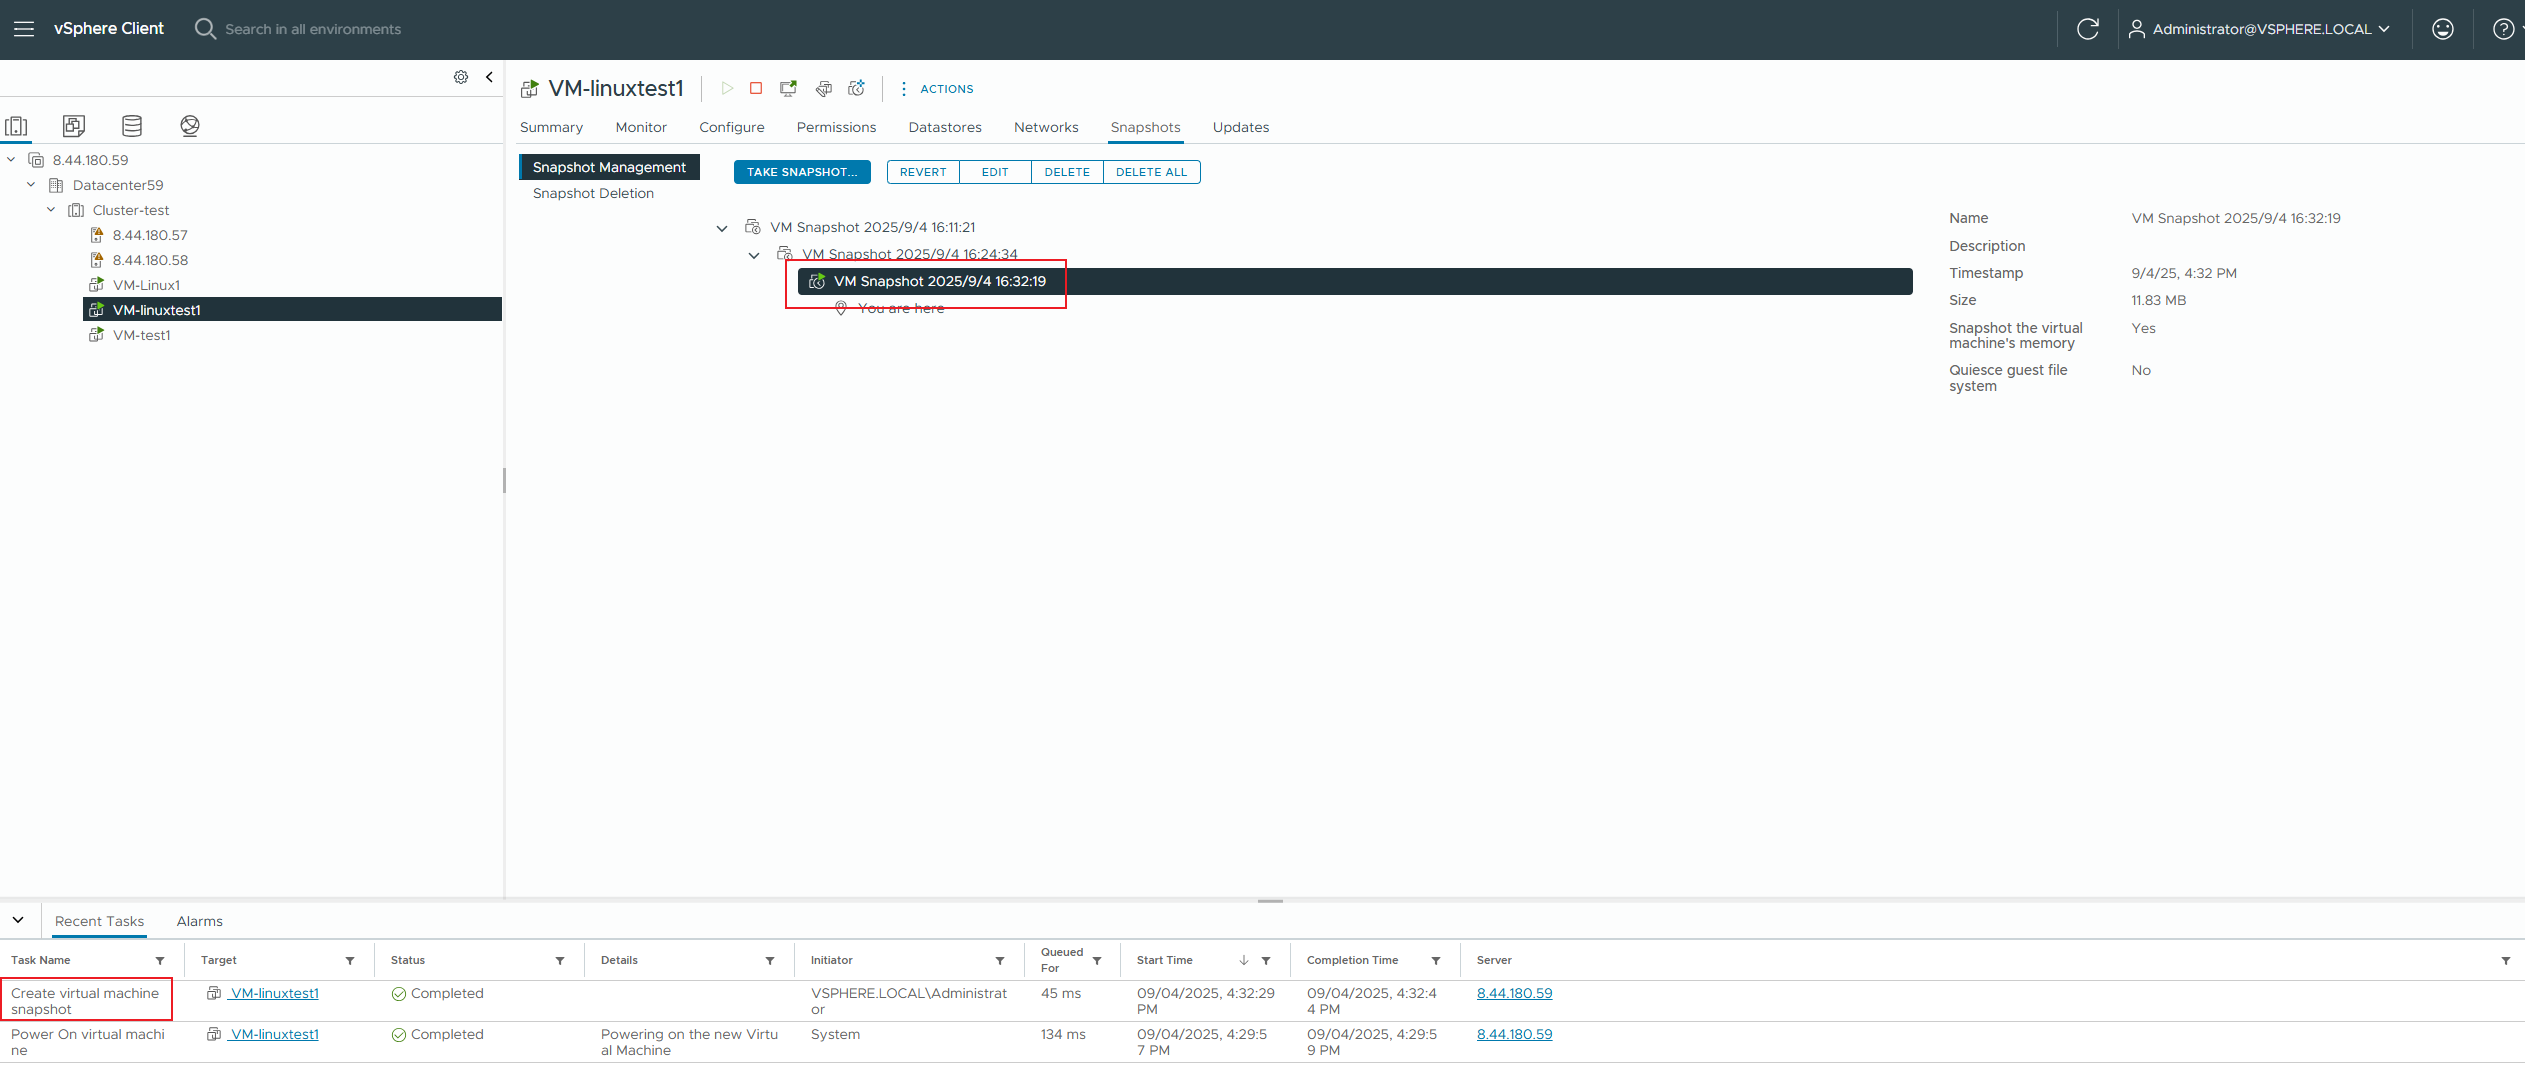 10. Delete the tmp.txt file, use vdbench to write 100M of data to ensure sufficient rollback time to observe the array, rollback the virtual machine snapshot online, and check if the tmp.txt file exists. 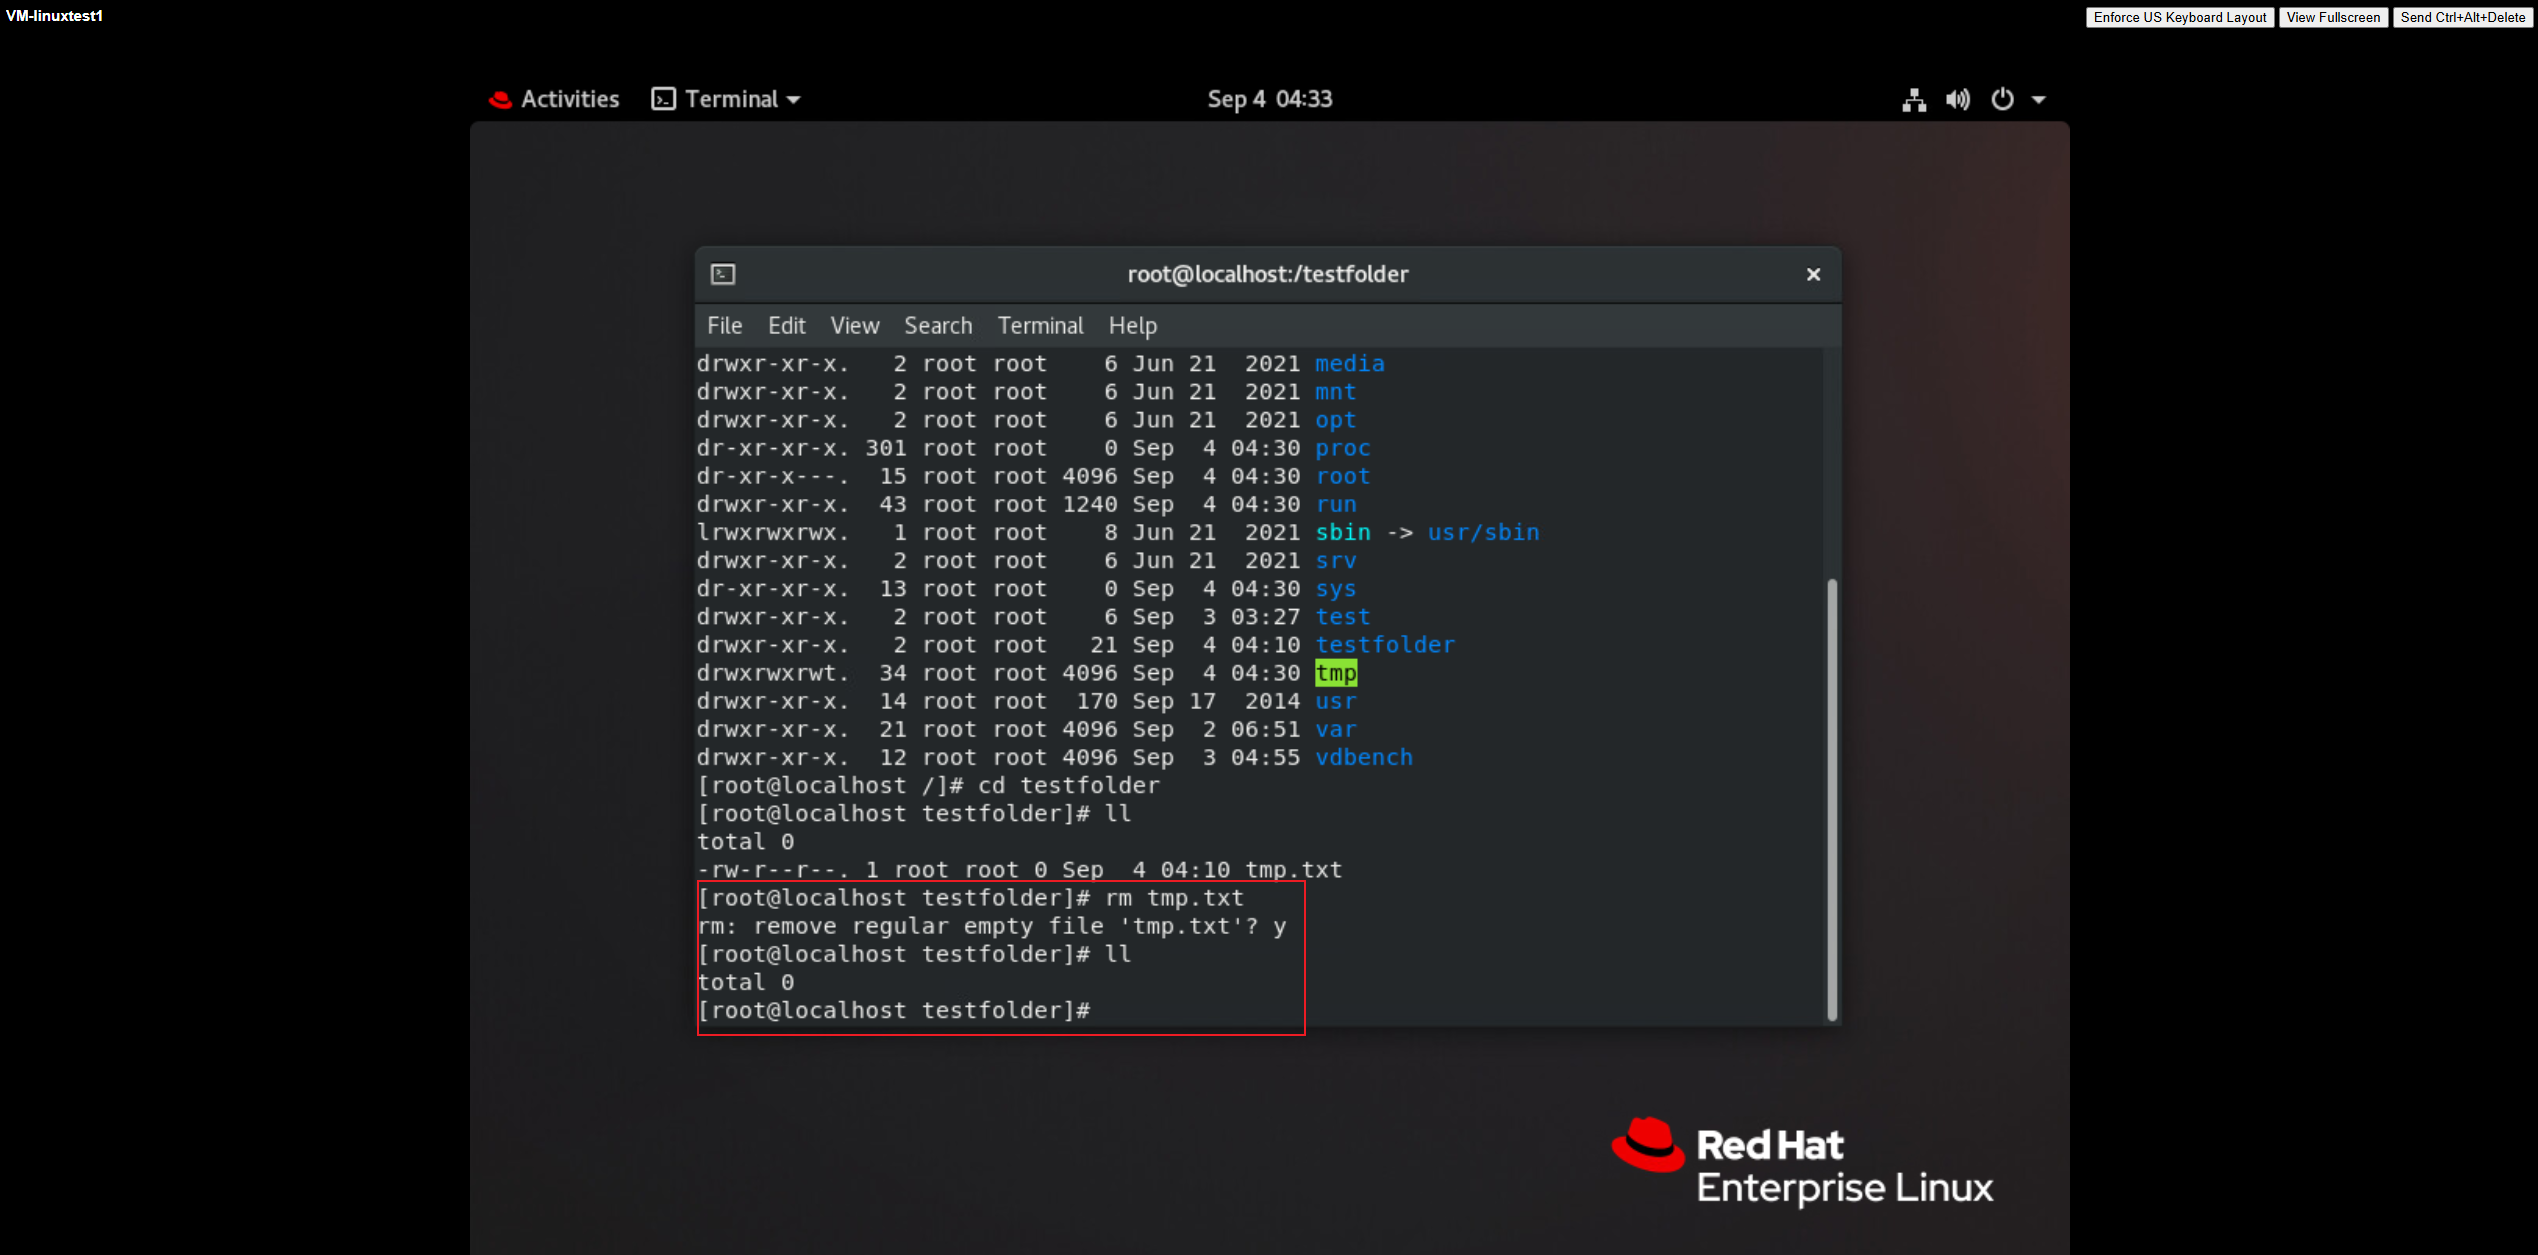
 11. Create a silent snapshot of the virtual machine and observe the impact on performance. 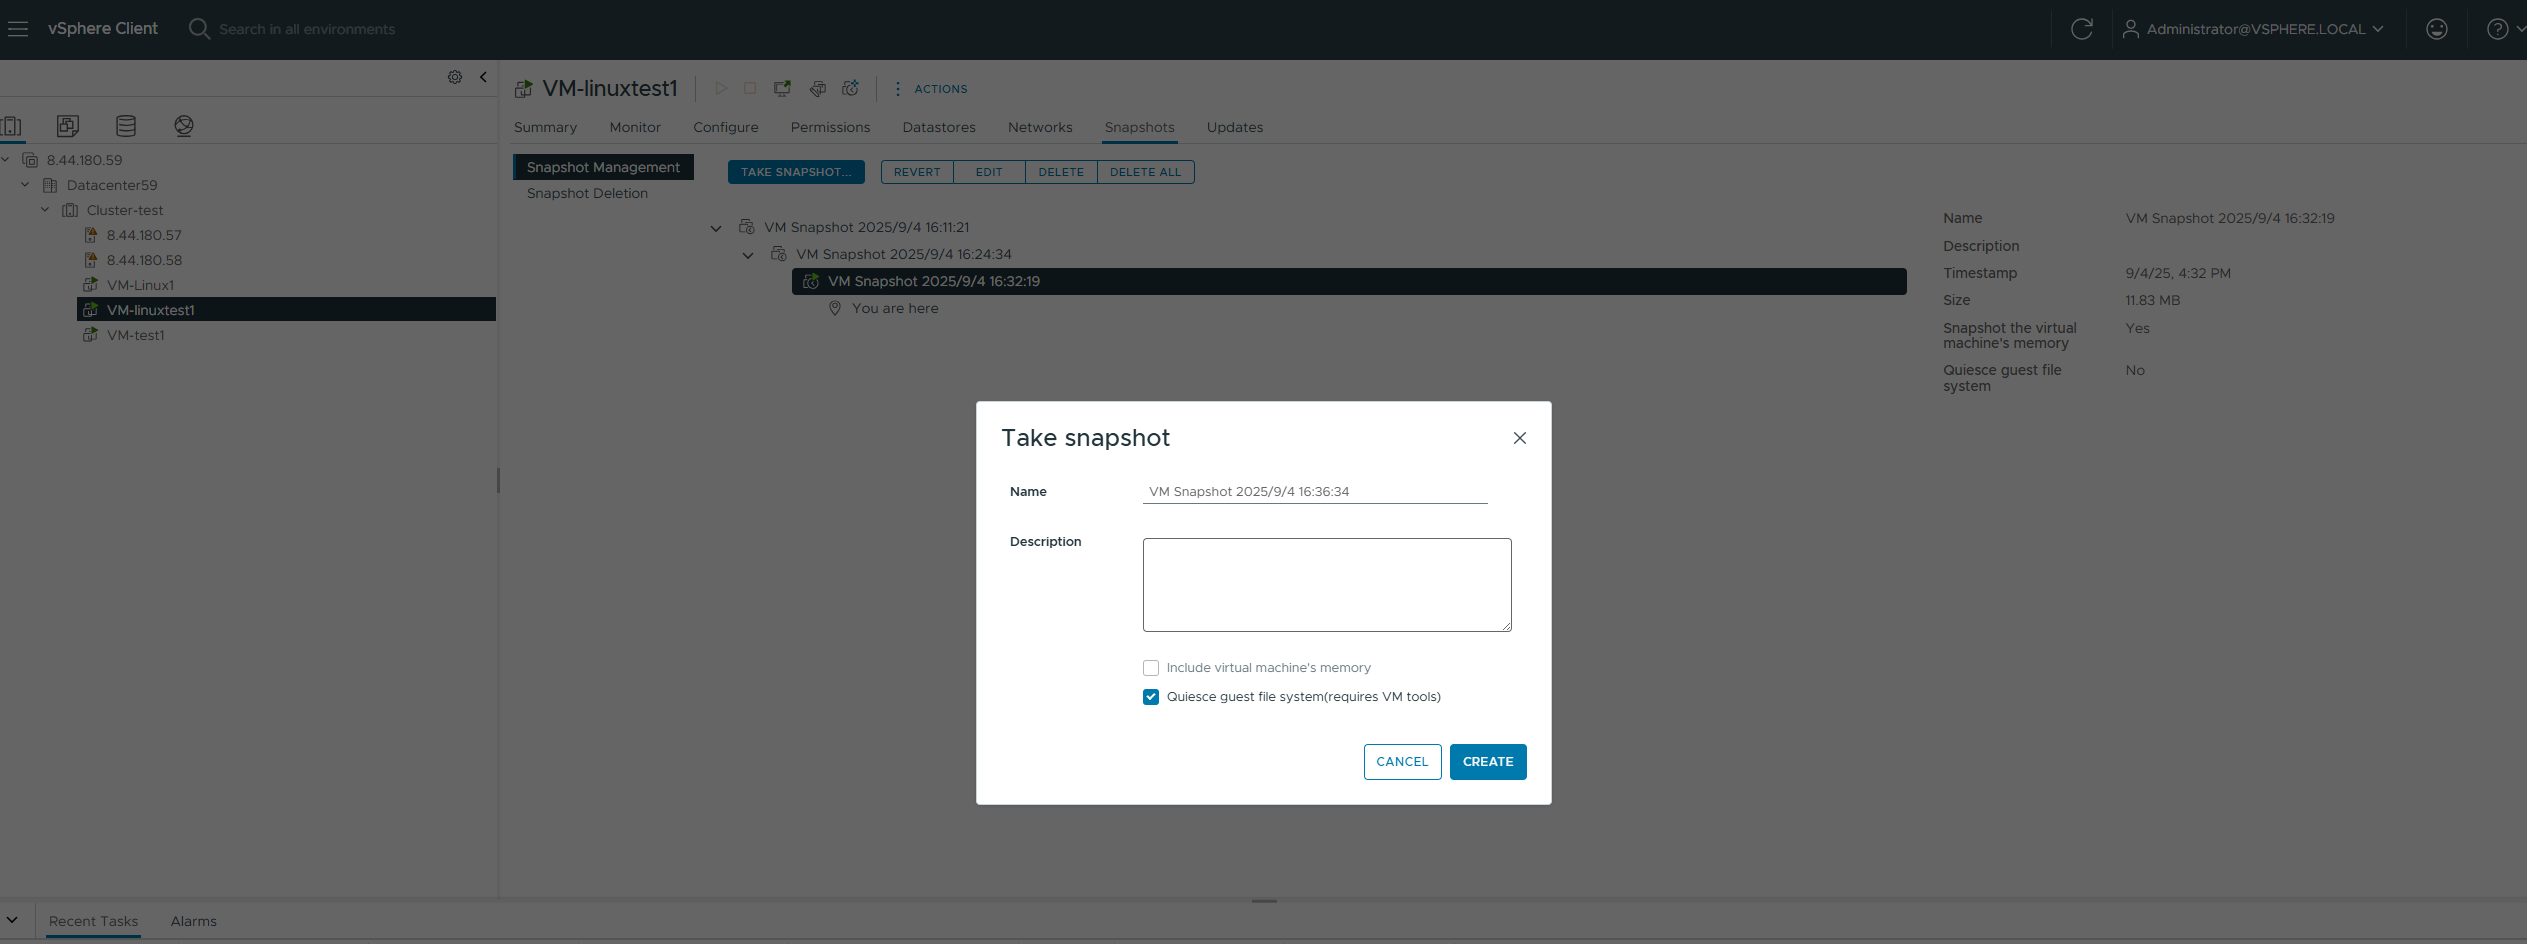
12. Delete the tmp.txt file, use vdbench to write 100M of data to ensure sufficient rollback time to observe the array, rollback the virtual machine snapshot online, and check if the tmp.txt file exists. 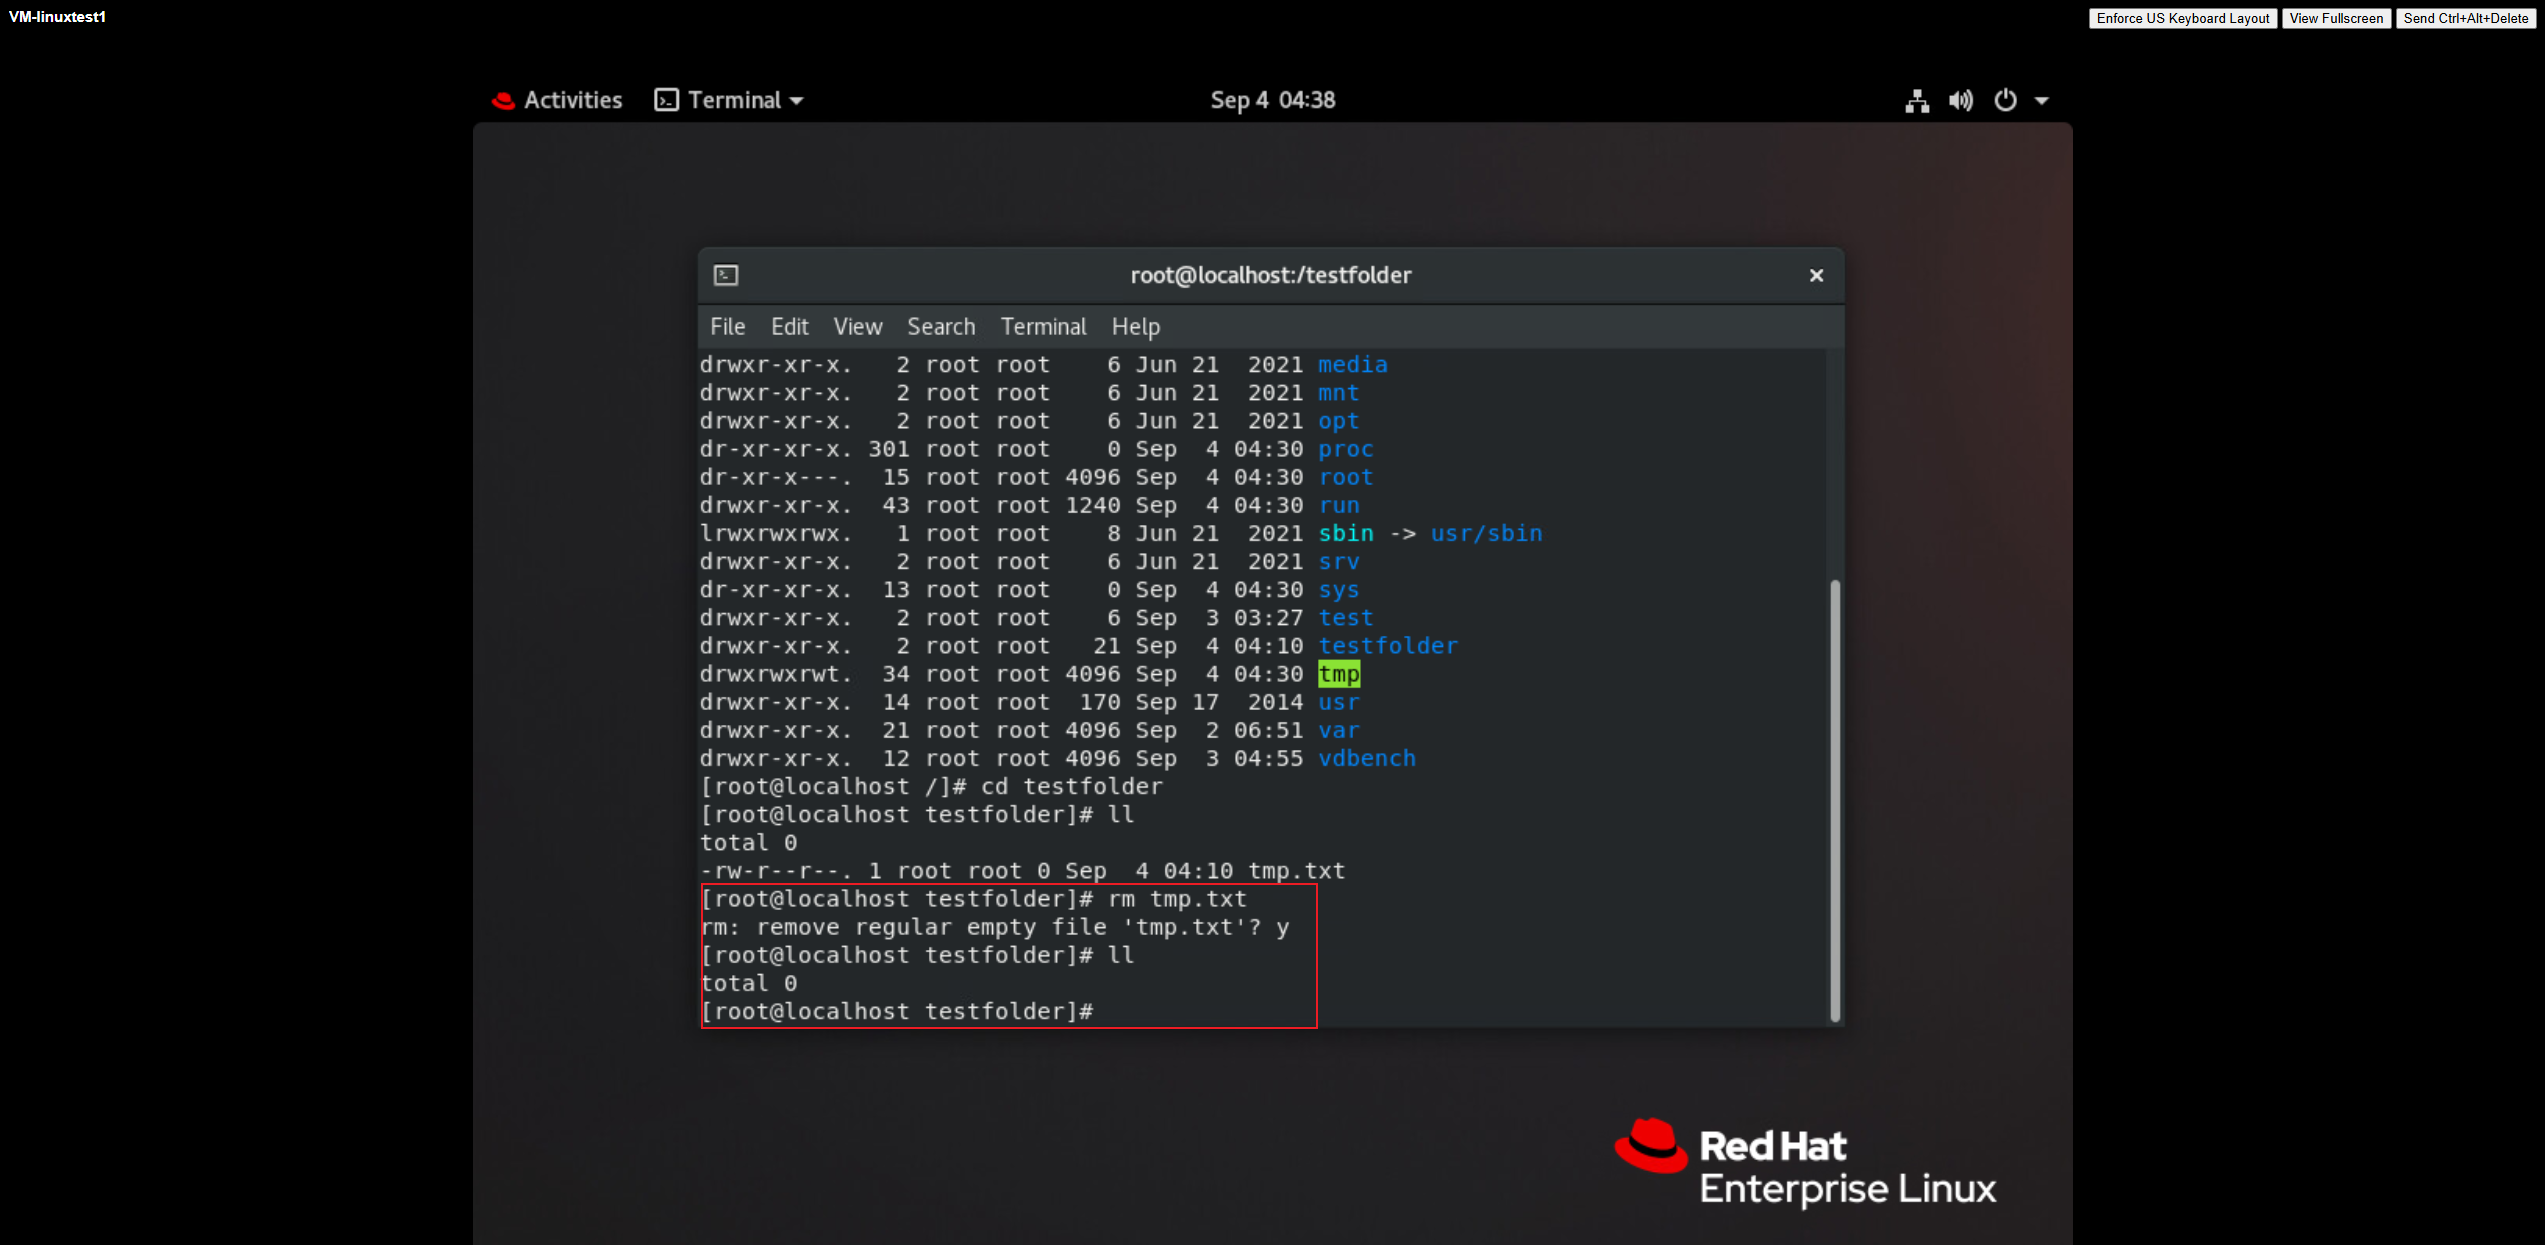
 13. Delete all snapshots generated by the virtual machine. 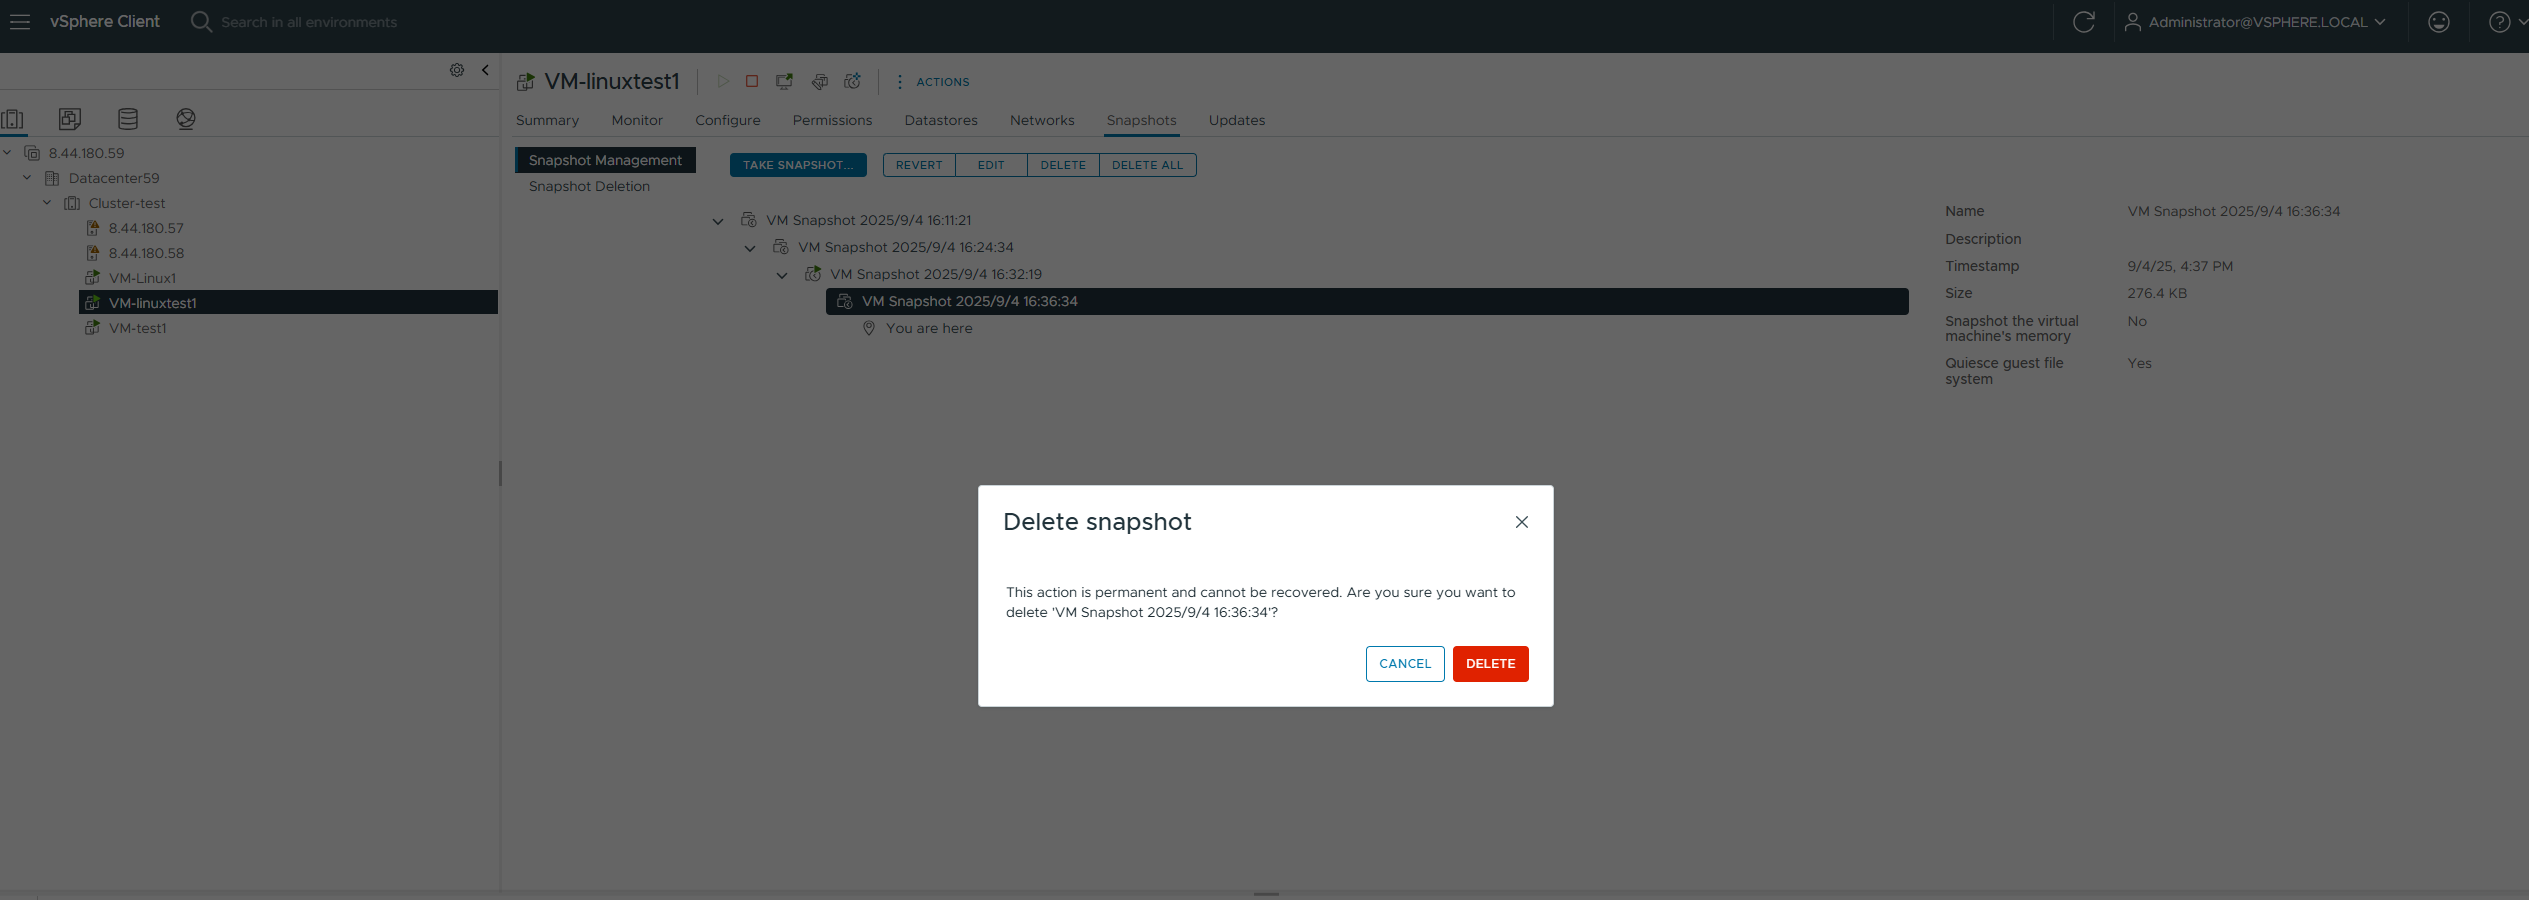 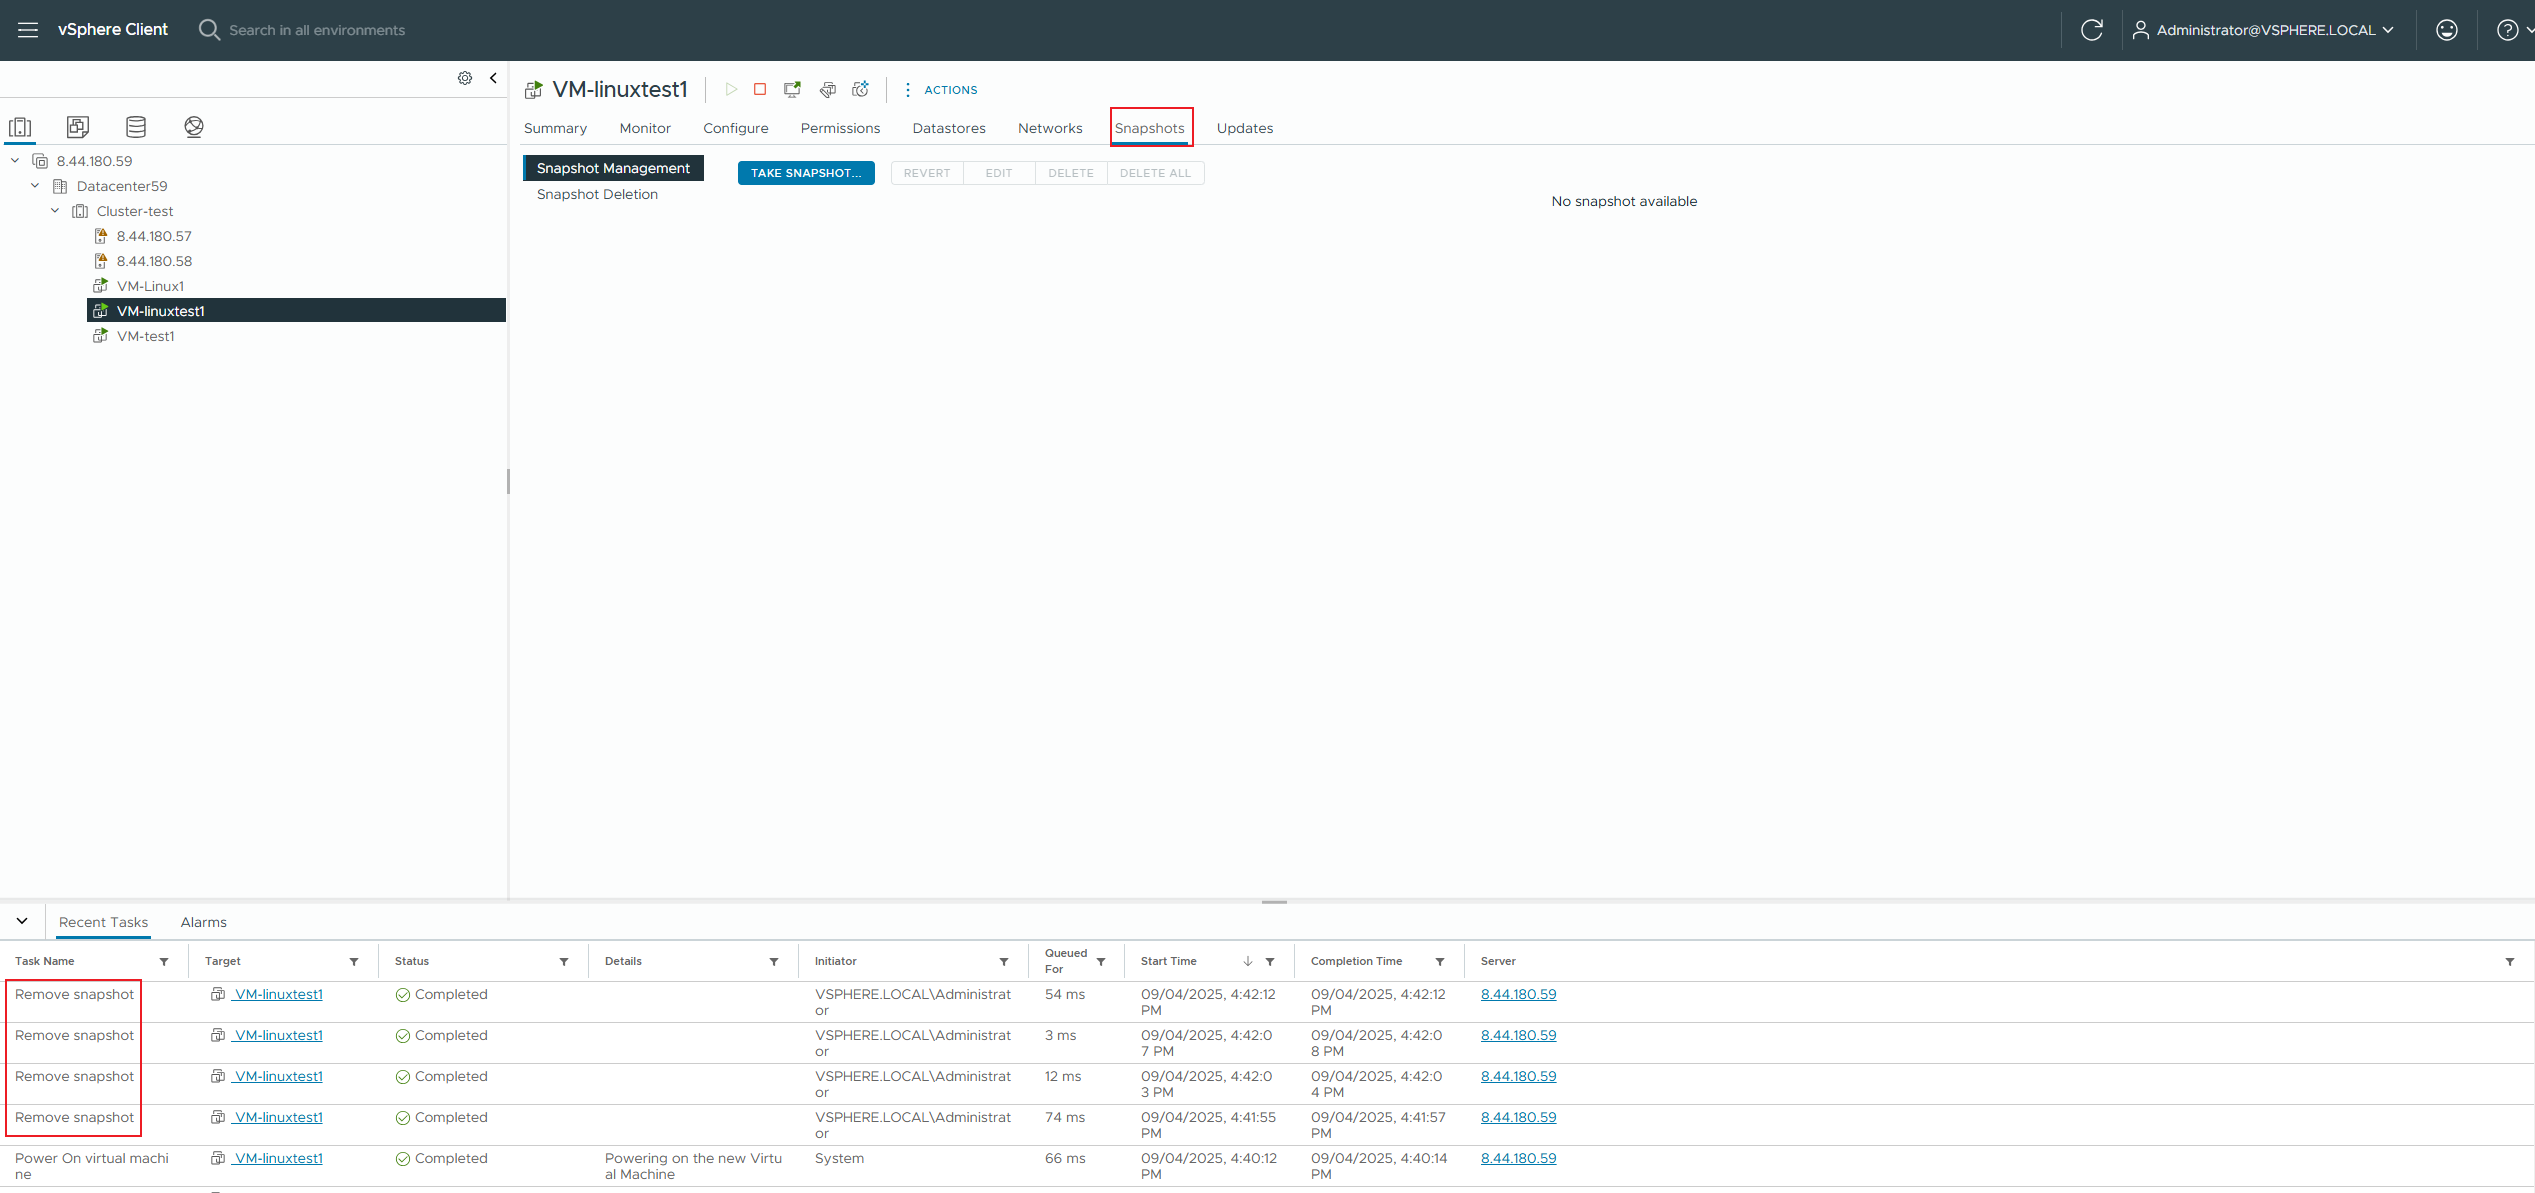
 |
Test Conclusion | PASS |
2.10 Add Disk Expansion for VVOL Virtual Machine
Test Purpose | Check whether disks are successfully added to the vVol VM for capacity expansion. (Protocol: FC) |
Test Networking | Storage and VMware ESXi Compatibility Test Networking |
Prerequisites | 1. The VASA Provider has been installed and configured. 2. The VASA Provider has been registered with vCenter and initial configuration is complete. 3. The host, storage, and networking have been completed. |
Test Procedure | 1. Clone a virtual machine from the VVOL_TEMPLATE to the vVols Datastore using the virtual machine template. 2. Add a new 200GB thin disk to the virtual machine, power on the virtual machine, and use vdbench to issue an 8K 7:3 100% random workload to the newly added disk. |
Expected Result | 1. Step 2: The disk was successfully added, the VVol LUN was successfully created, the expansion was achieved, and the virtual machine successfully performed normal business operations. |
Test Record | 1. Clone a virtual machine from the VVOL_TEMPLATE to the VVOL Datastore using the virtual machine template. 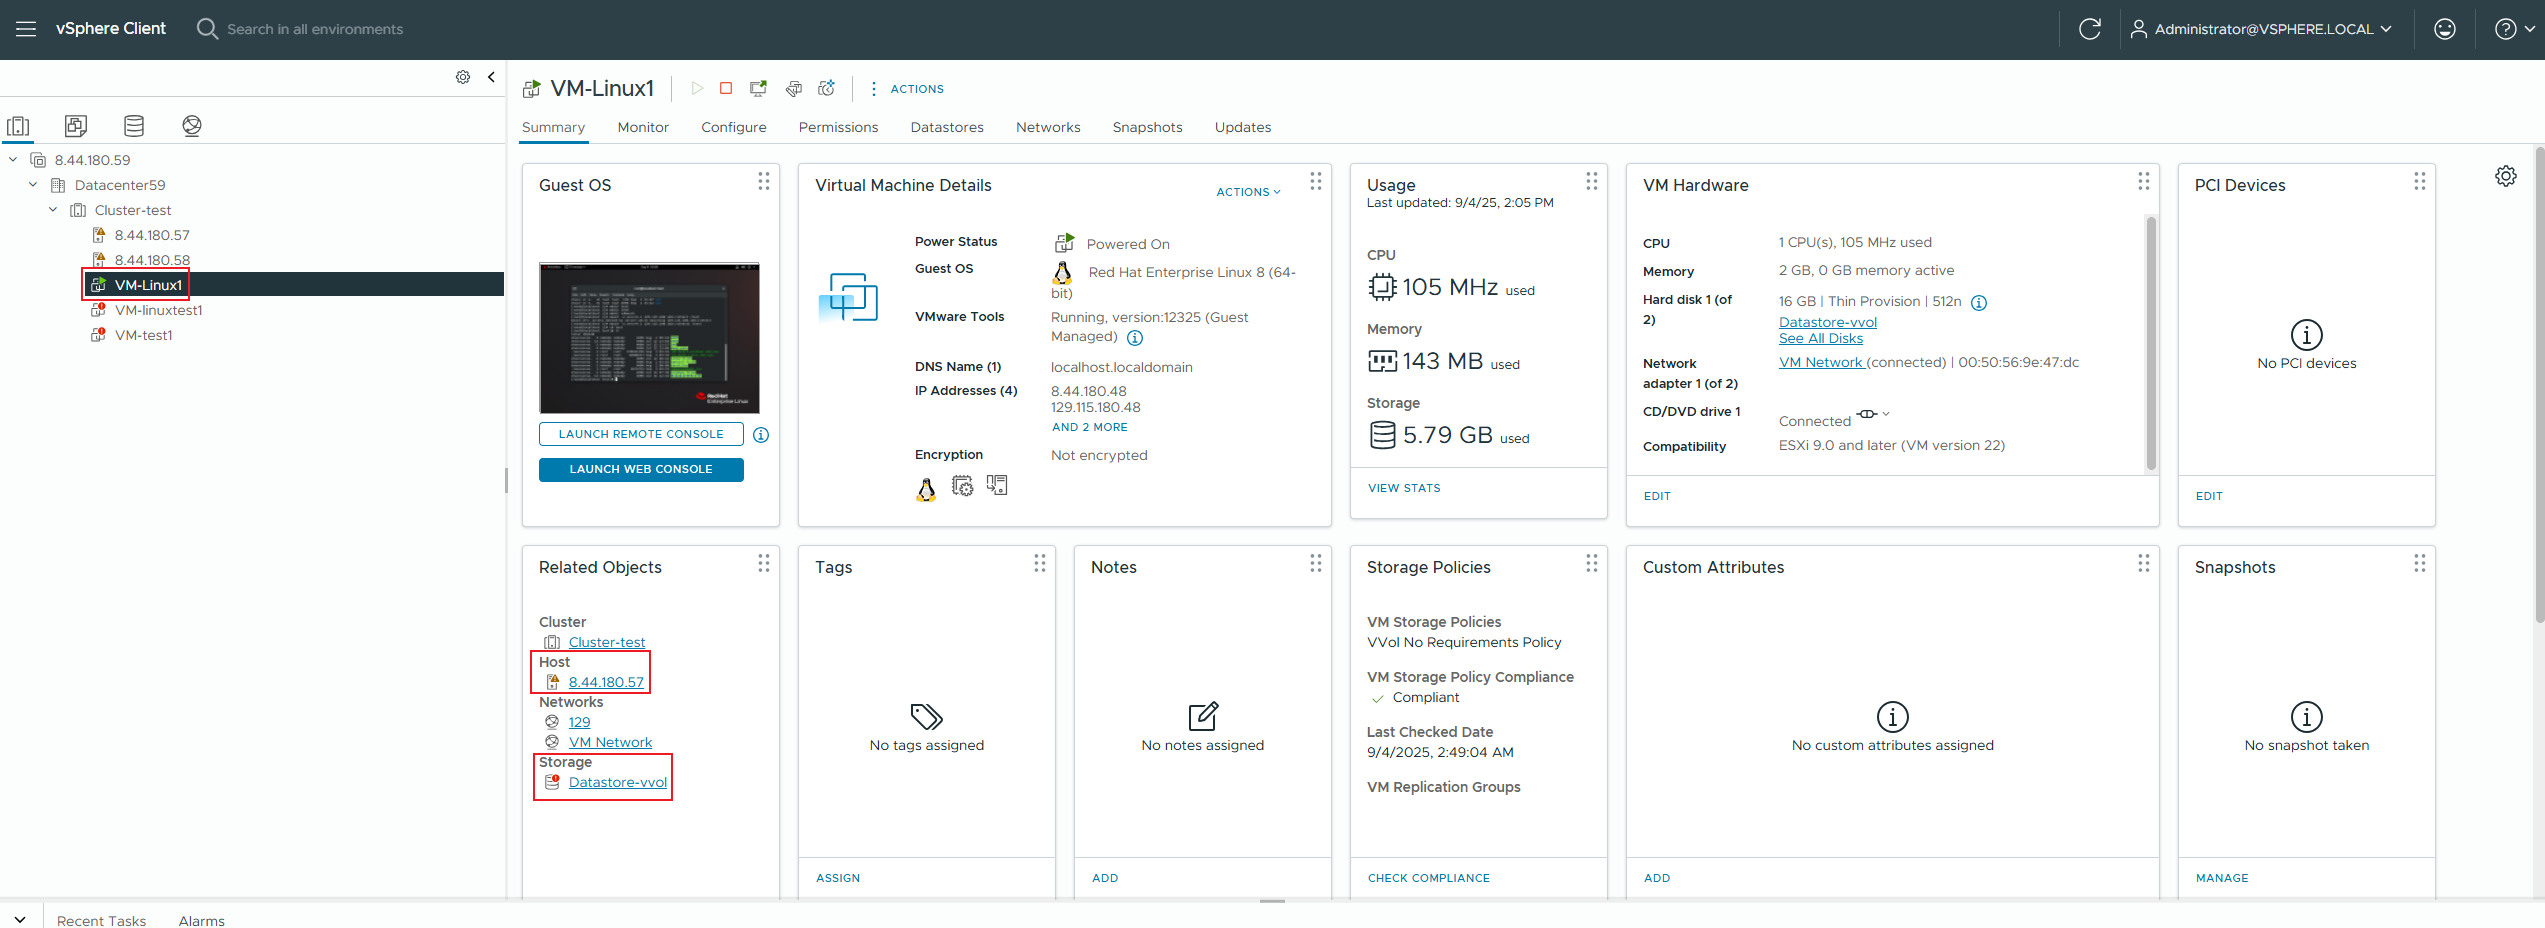
2. Add a new 200GB thin disk to the virtual machine, power on the virtual machine, and use vdbench to issue an 8K 7:3 100% random workload to the newly added disk. 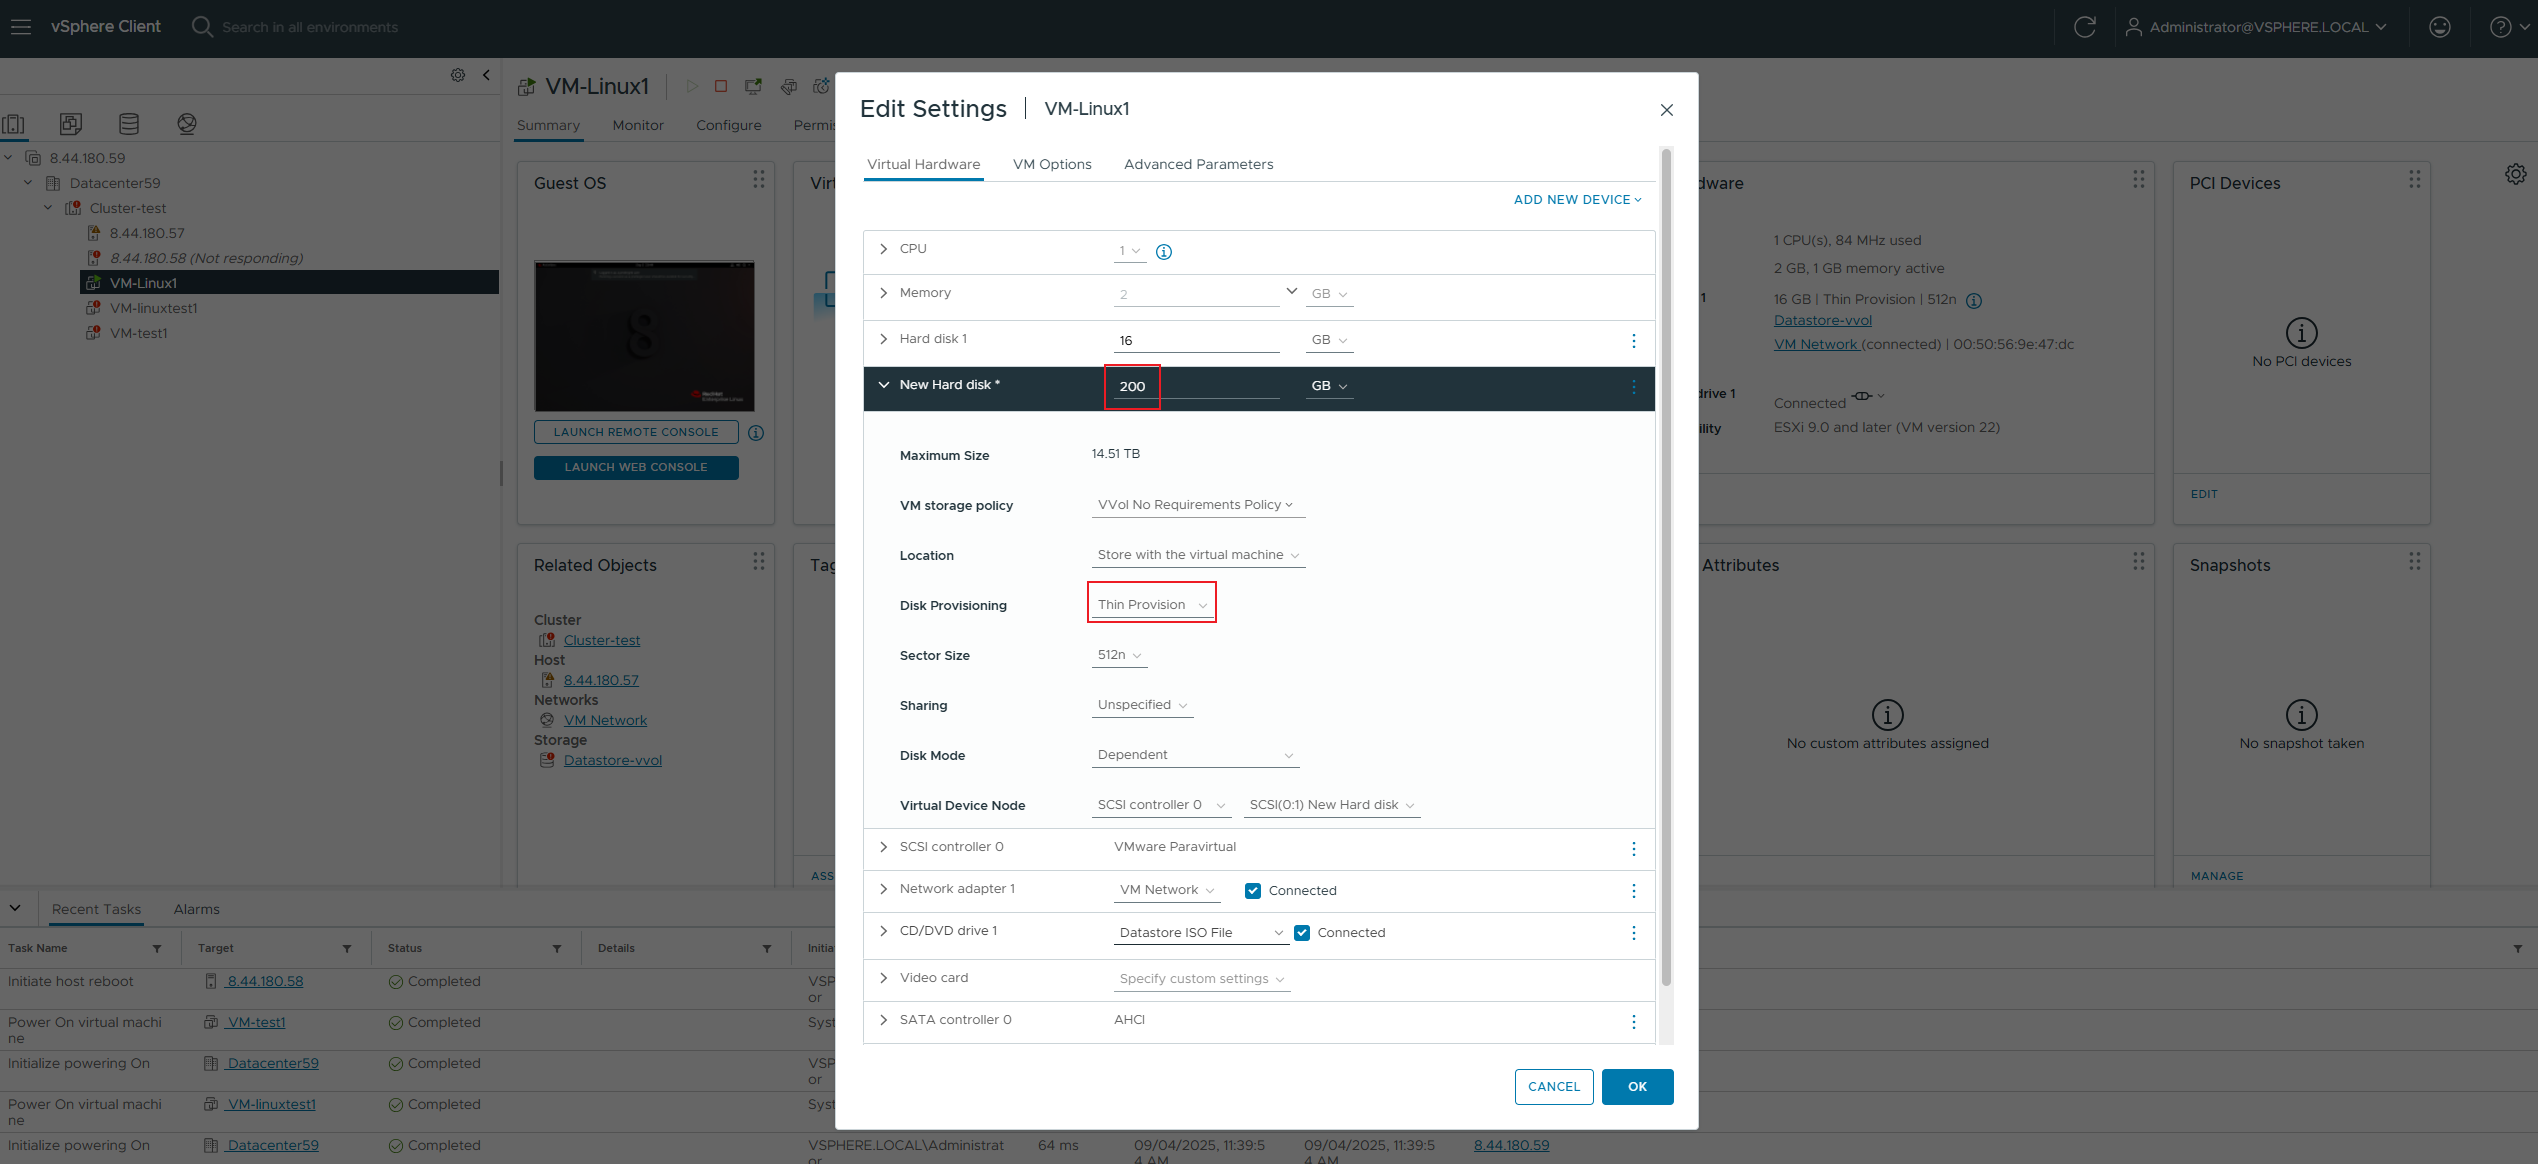

|
Test Conclusion | PASS |
3. Reliability Test
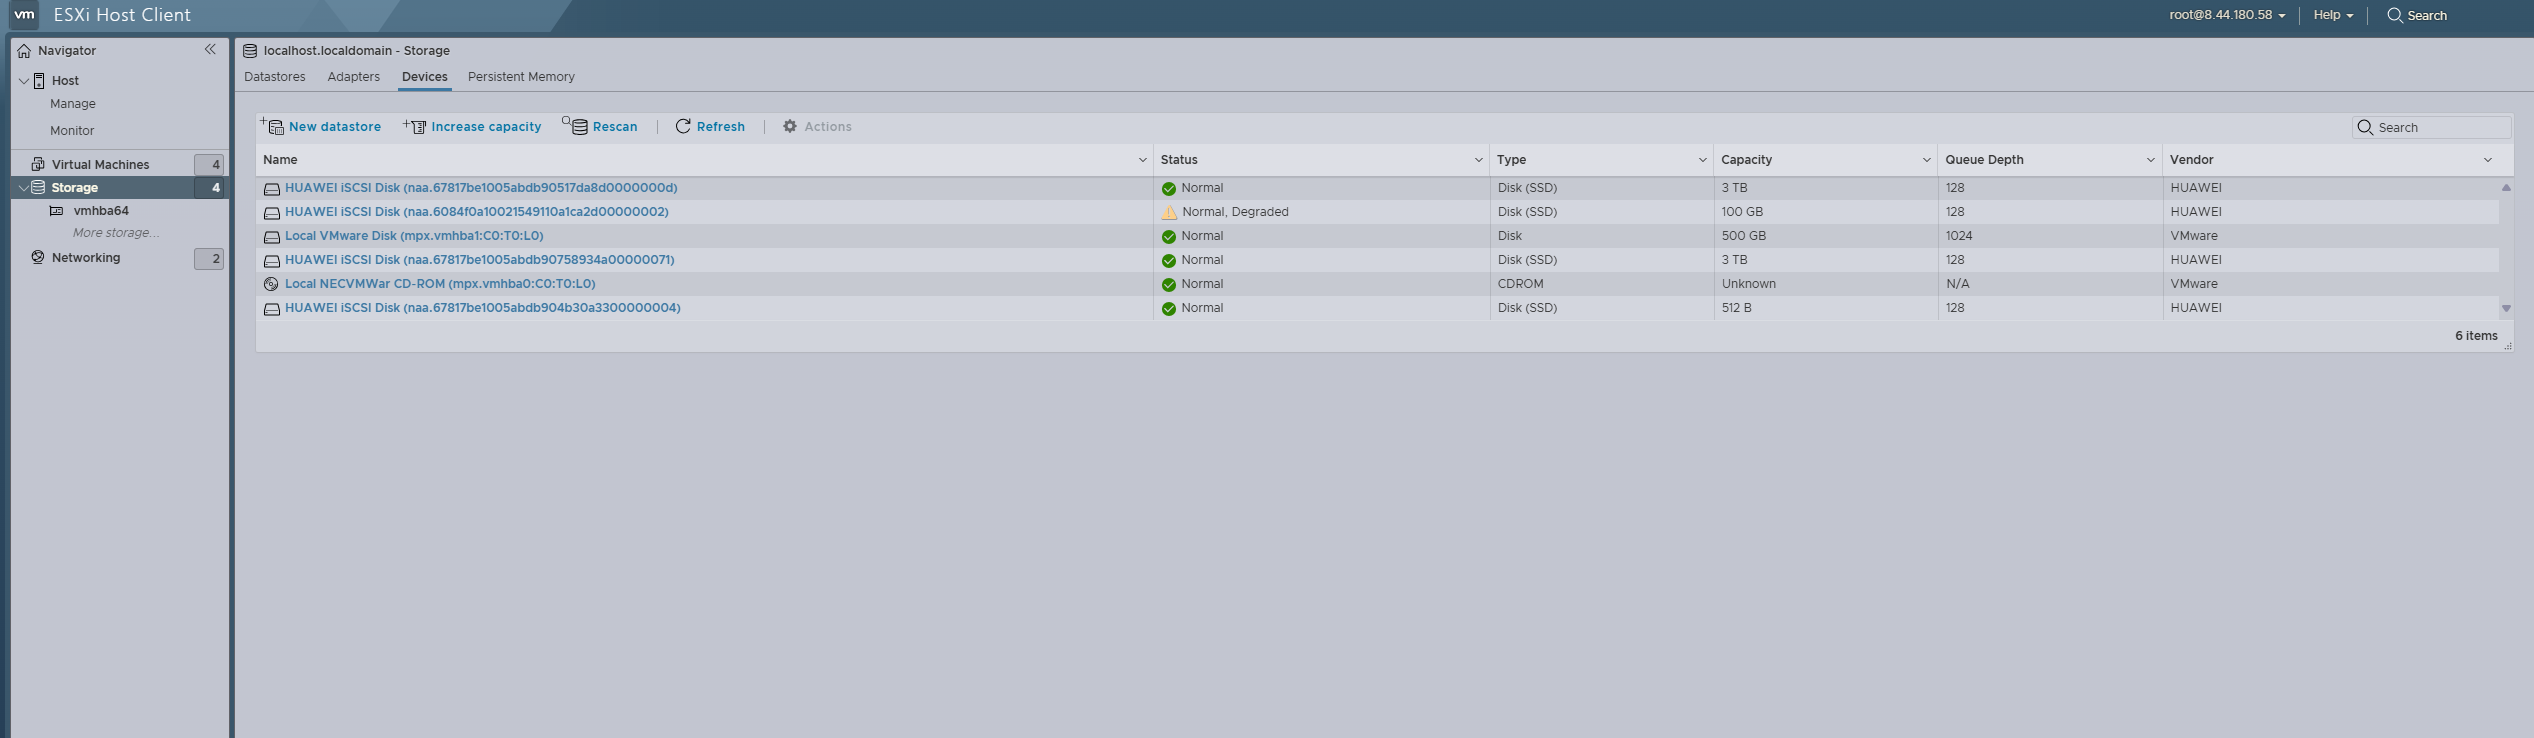
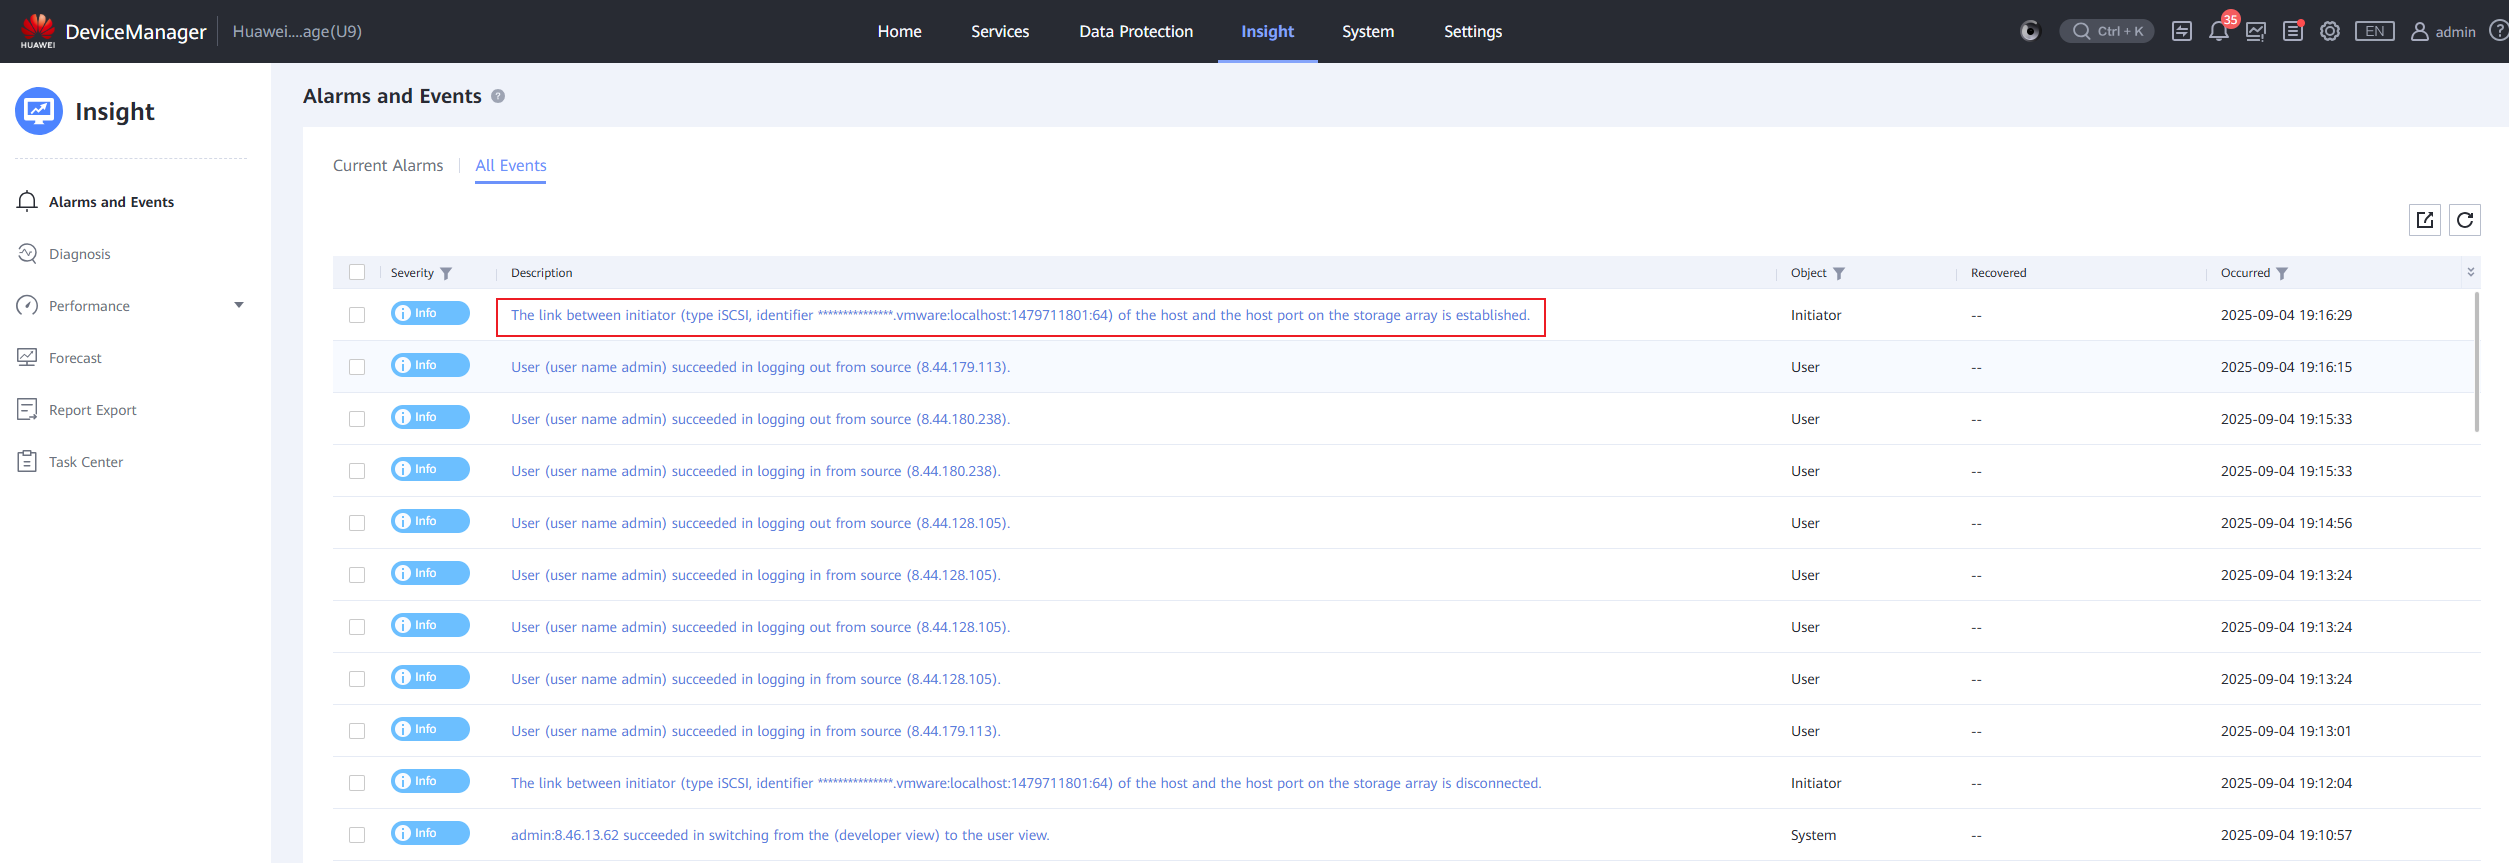
3.1 A single link between a storage device and a host is faulty.
Test Purpose | Can the service operate normally when there is a single link failure between storage and the host? (Protocol: FC) |
Test Networking | Storage and VMware ESXi Compatibility Test Networking |
Prerequisites | 1. The VASA Provider has been installed and configured. 2. The VASA Provider has been registered with vCenter and initial configuration is complete. 3. The host, storage, and networking have been completed. |
Test Procedure | 1. Create 2-4 virtual machines in the vVols Datastore, with each virtual machine having 1*50GB OS disk and >1*200GB DATA disk. 2. Configure each virtual machine to use vdbench to issue 8k 7:3 IO, with a total IO volume of approximately 100,000 IOPS (or sequential large IO, 1M sequential write, bandwidth 2G). 3. Simulate a single link failure between the storage and the host. 4. Restore the link. |
Expected Result | 1. Steps 3 and 4: The virtual machine reads and writes normally, and the number of paths meets expectations. |
Test Record |

 2. Configure each virtual machine to use vdbench to issue 8k 7:3 IO, with a total IO volume of approximately 100,000 IOPS (or sequential large IO, 1M sequential write, bandwidth 2G). 
 3. Simulate a single link failure between the storage and the host. 
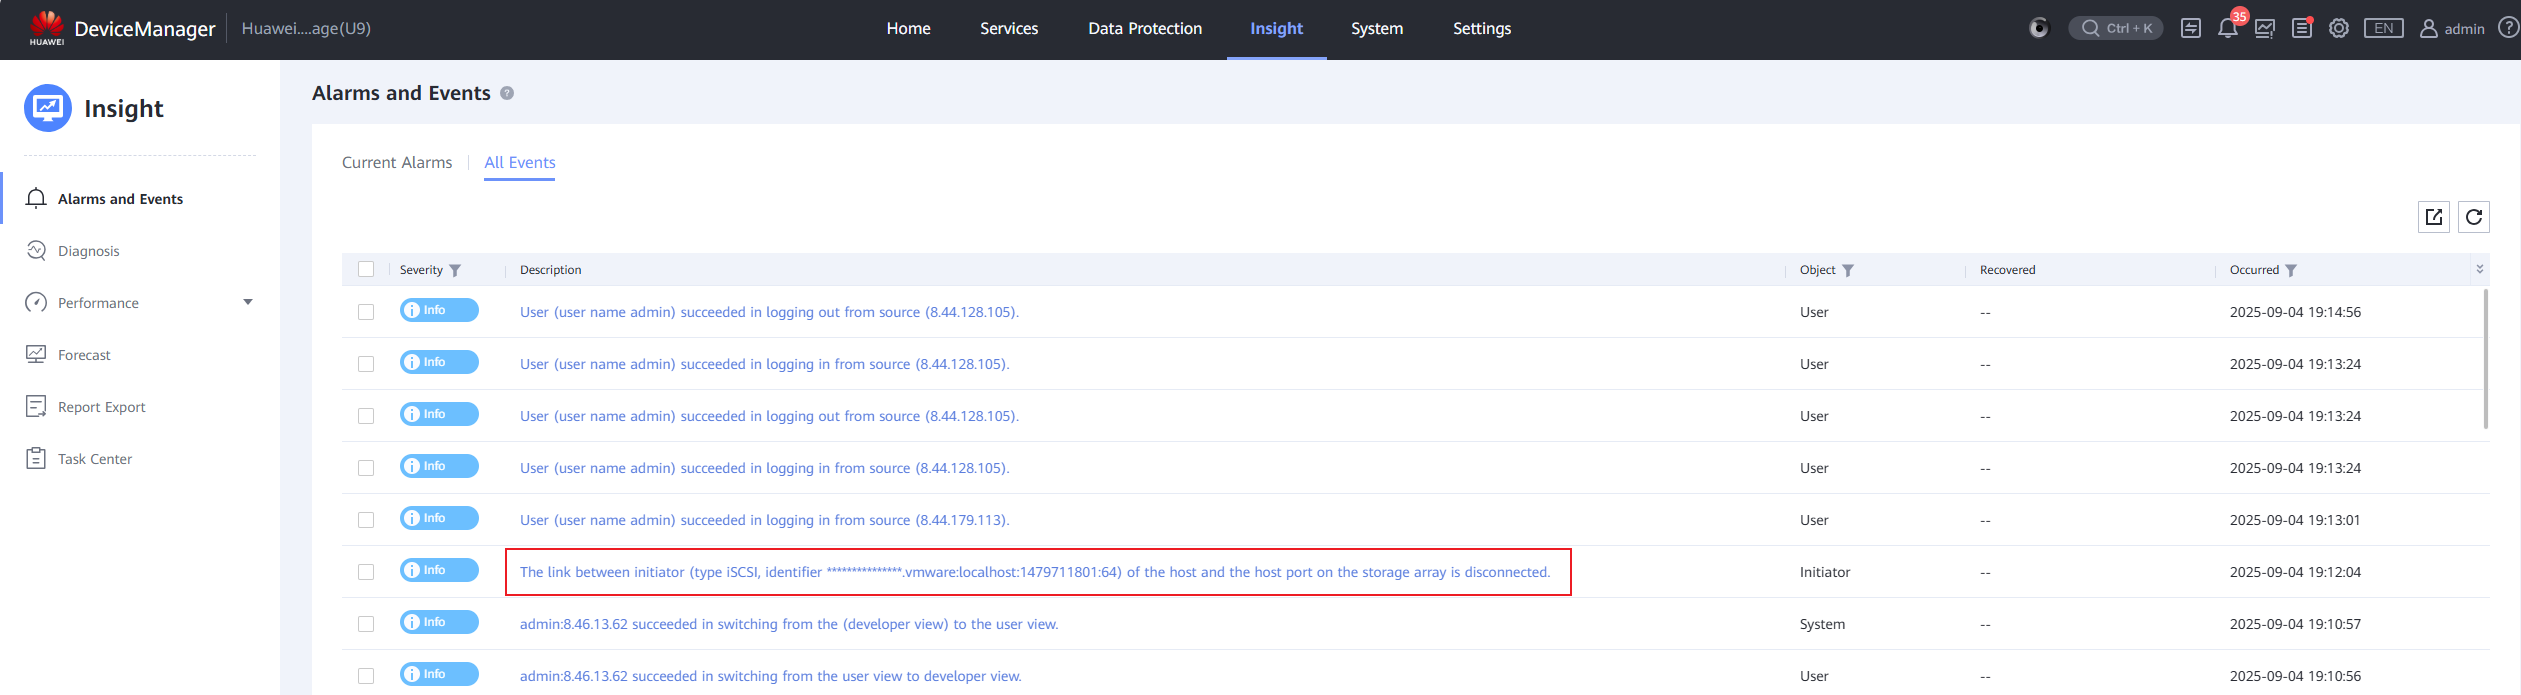
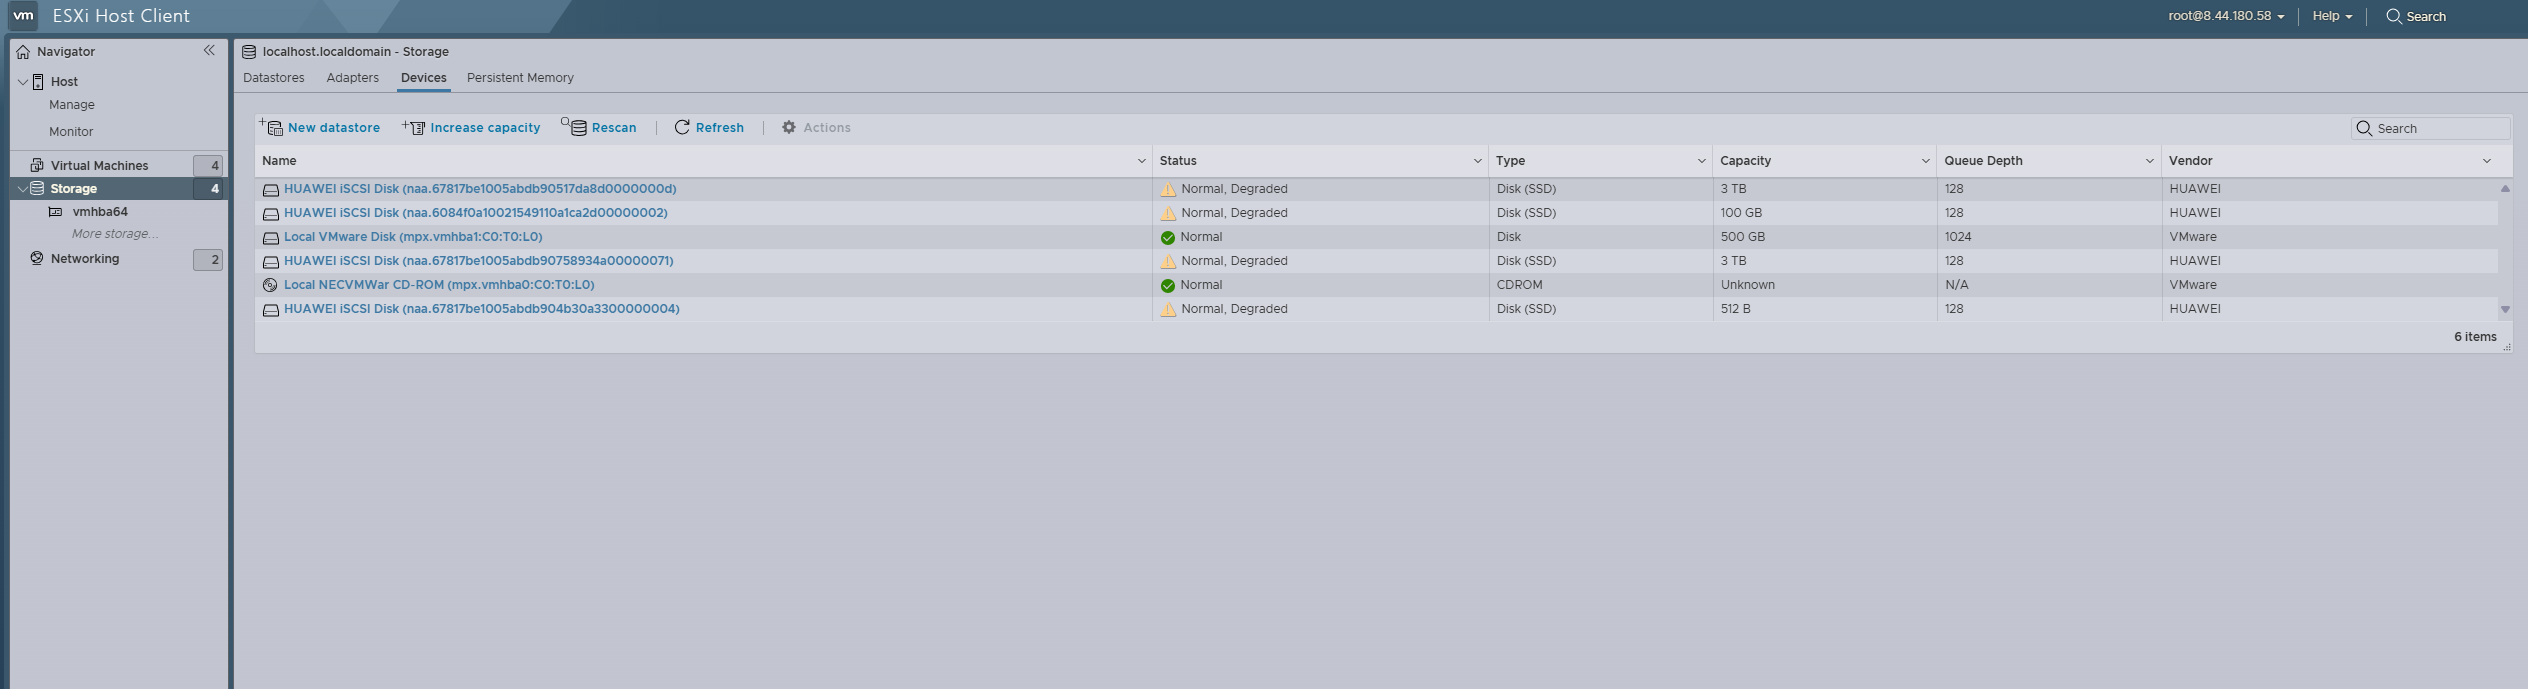
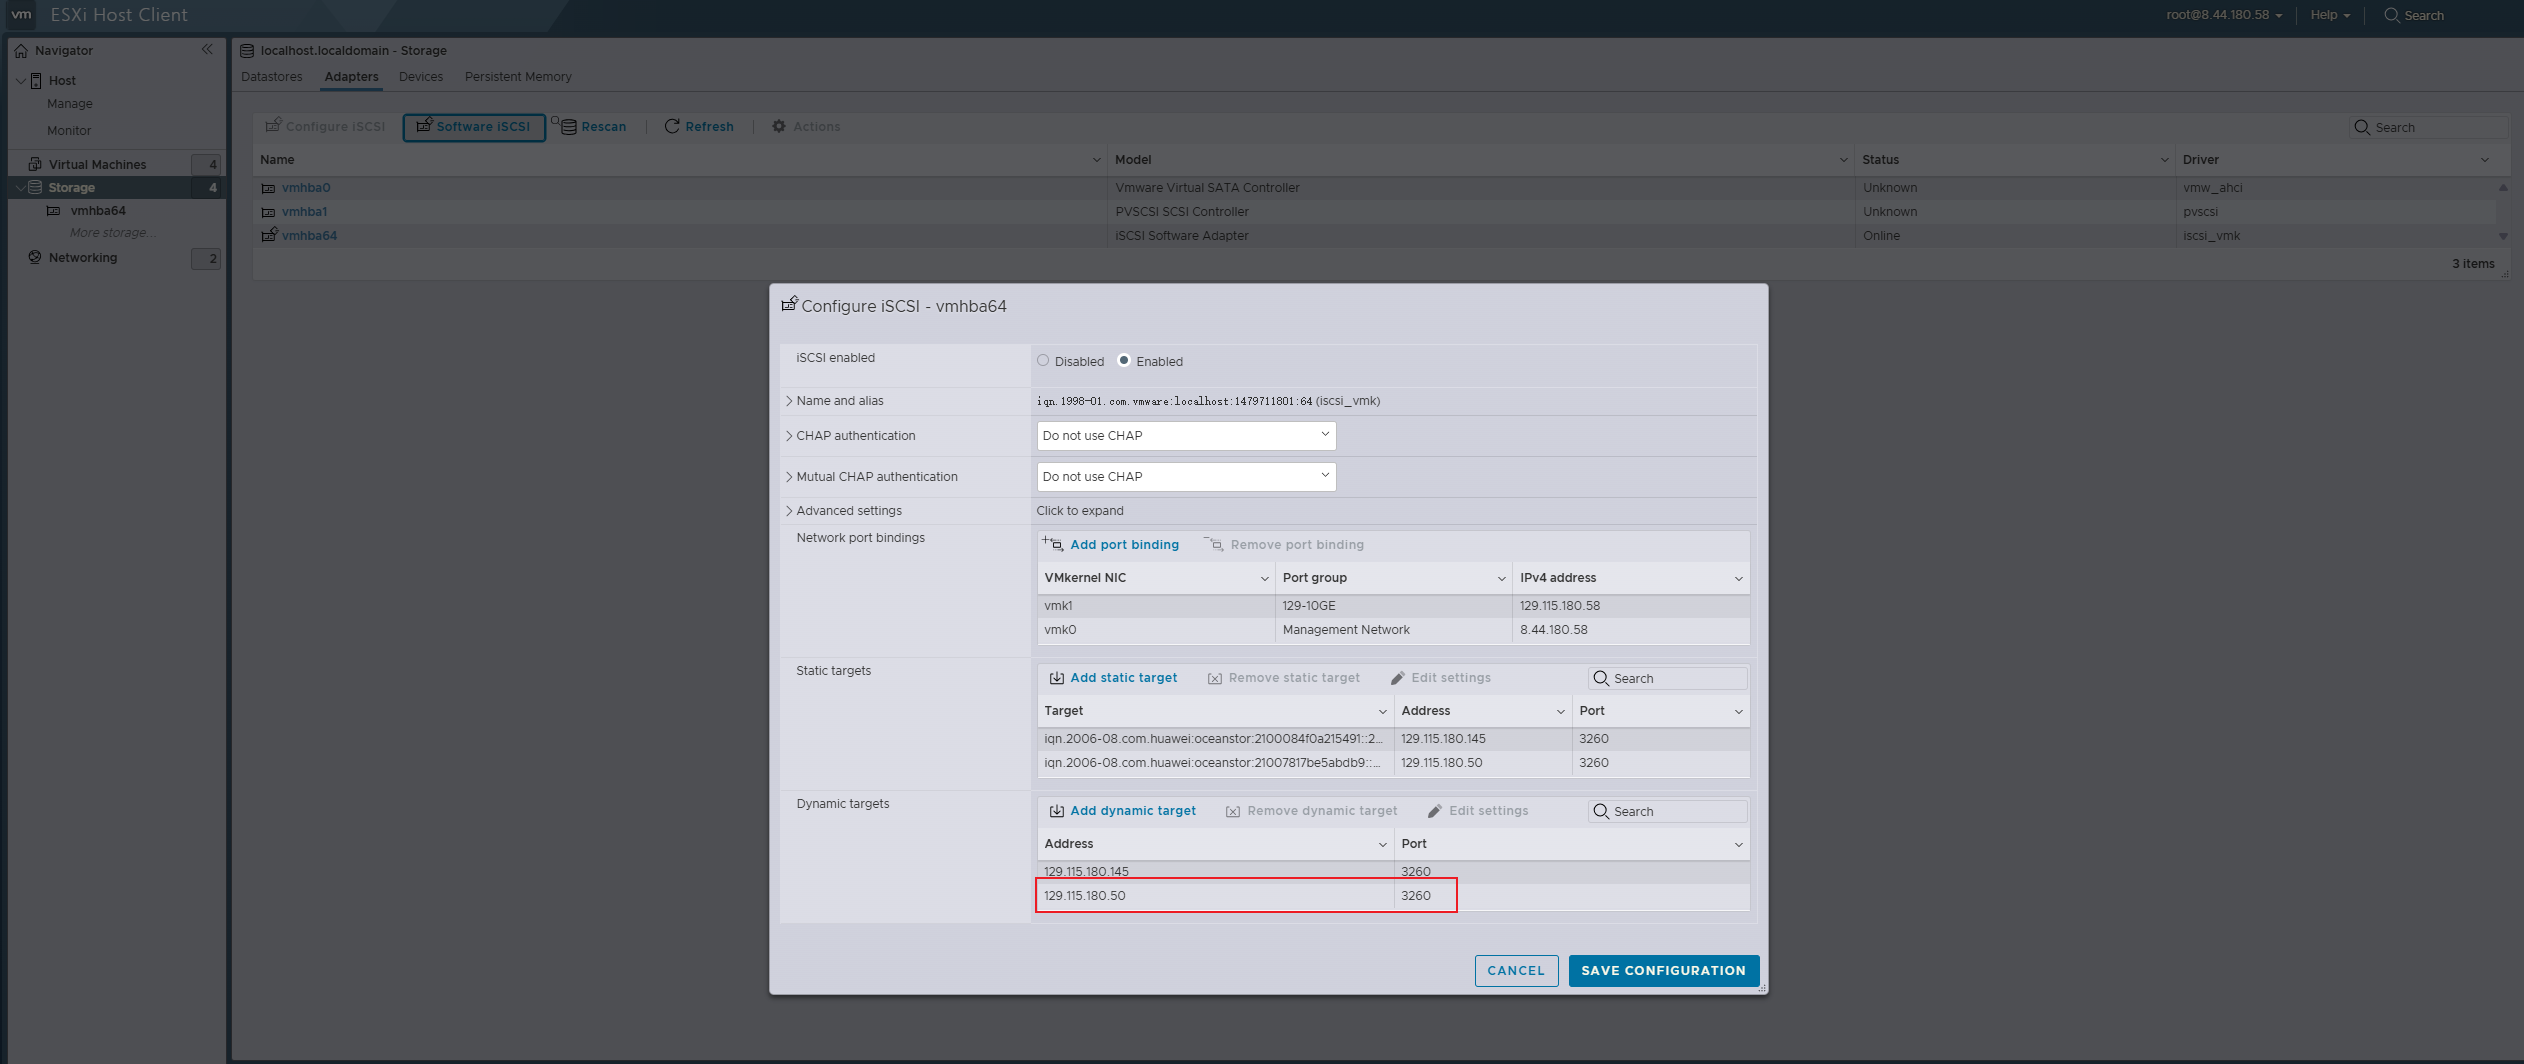
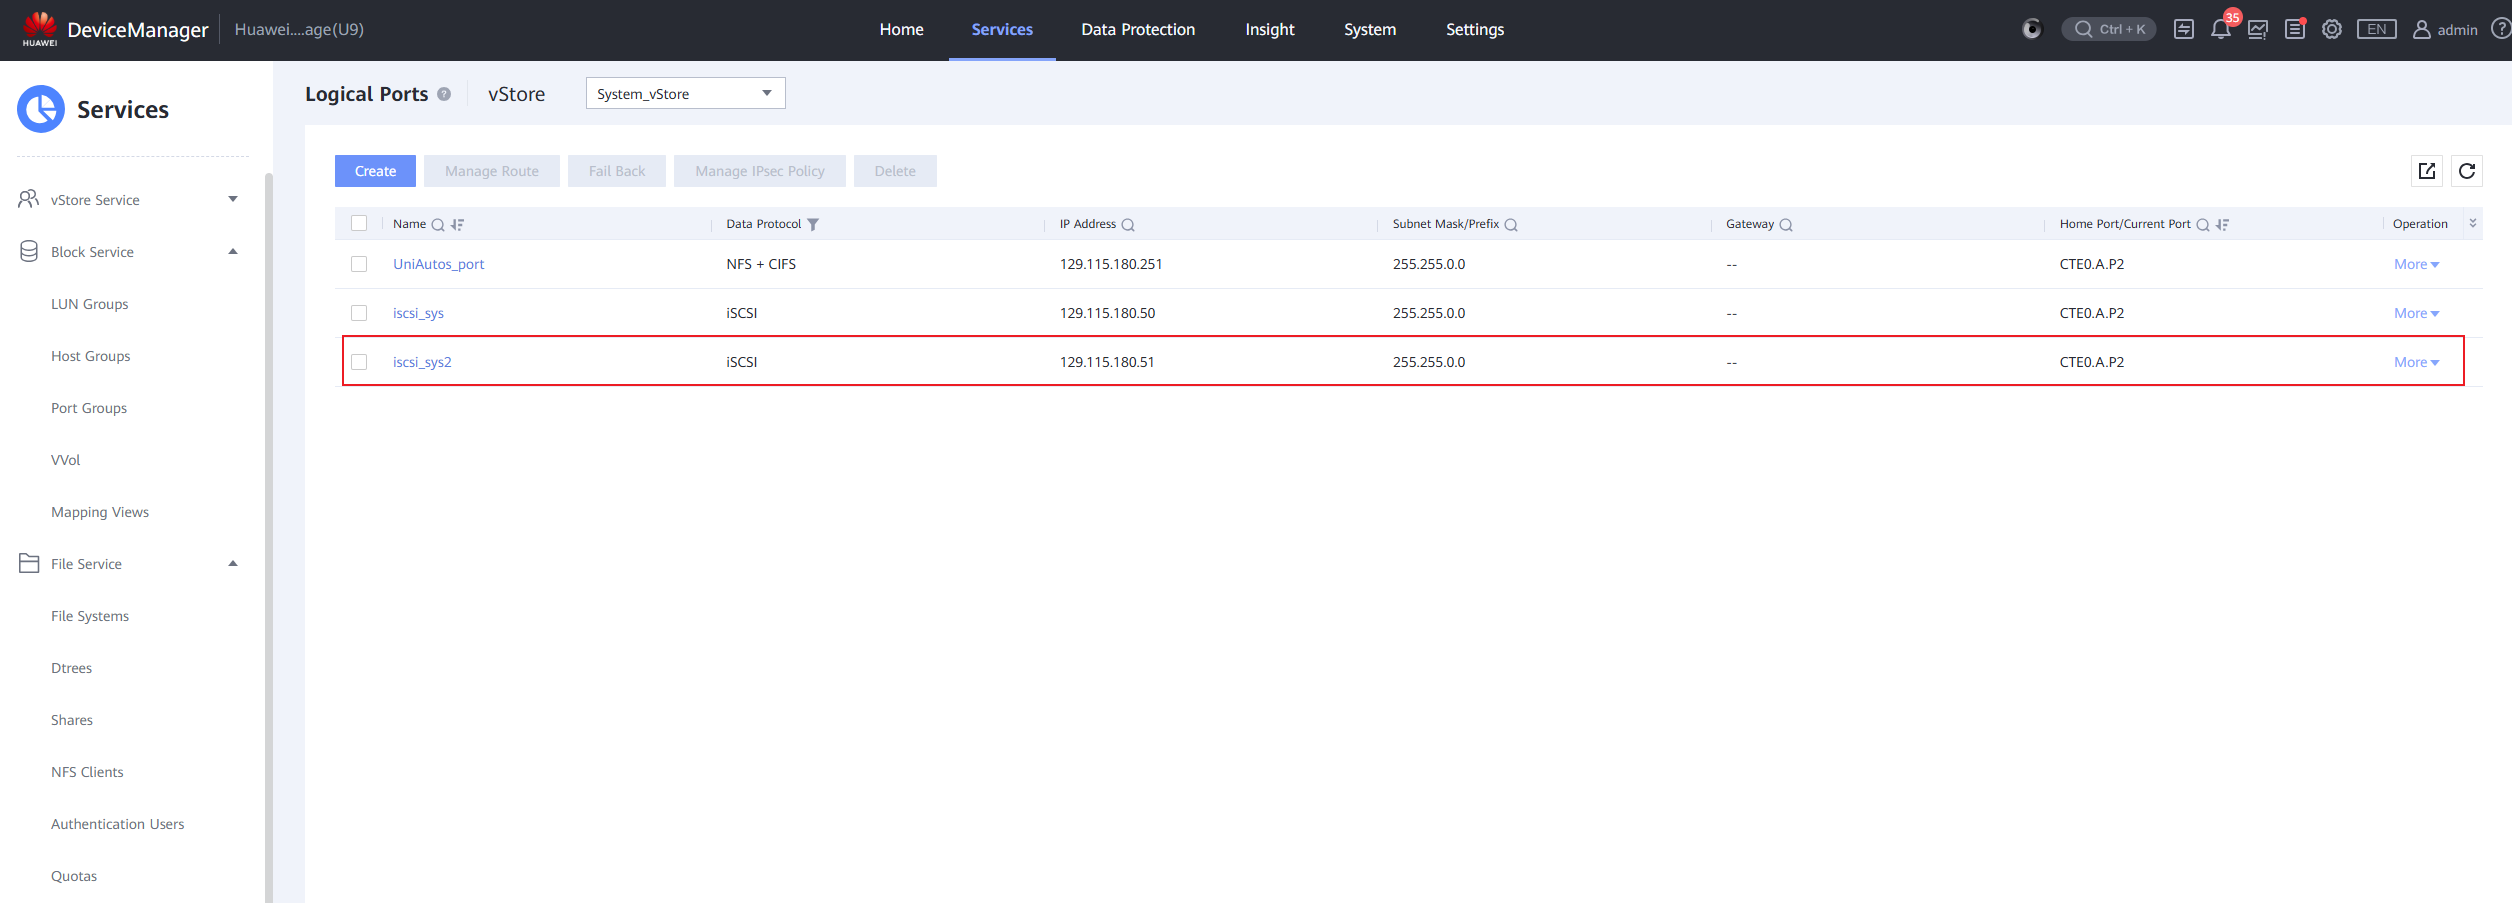
 4. Restore the link. 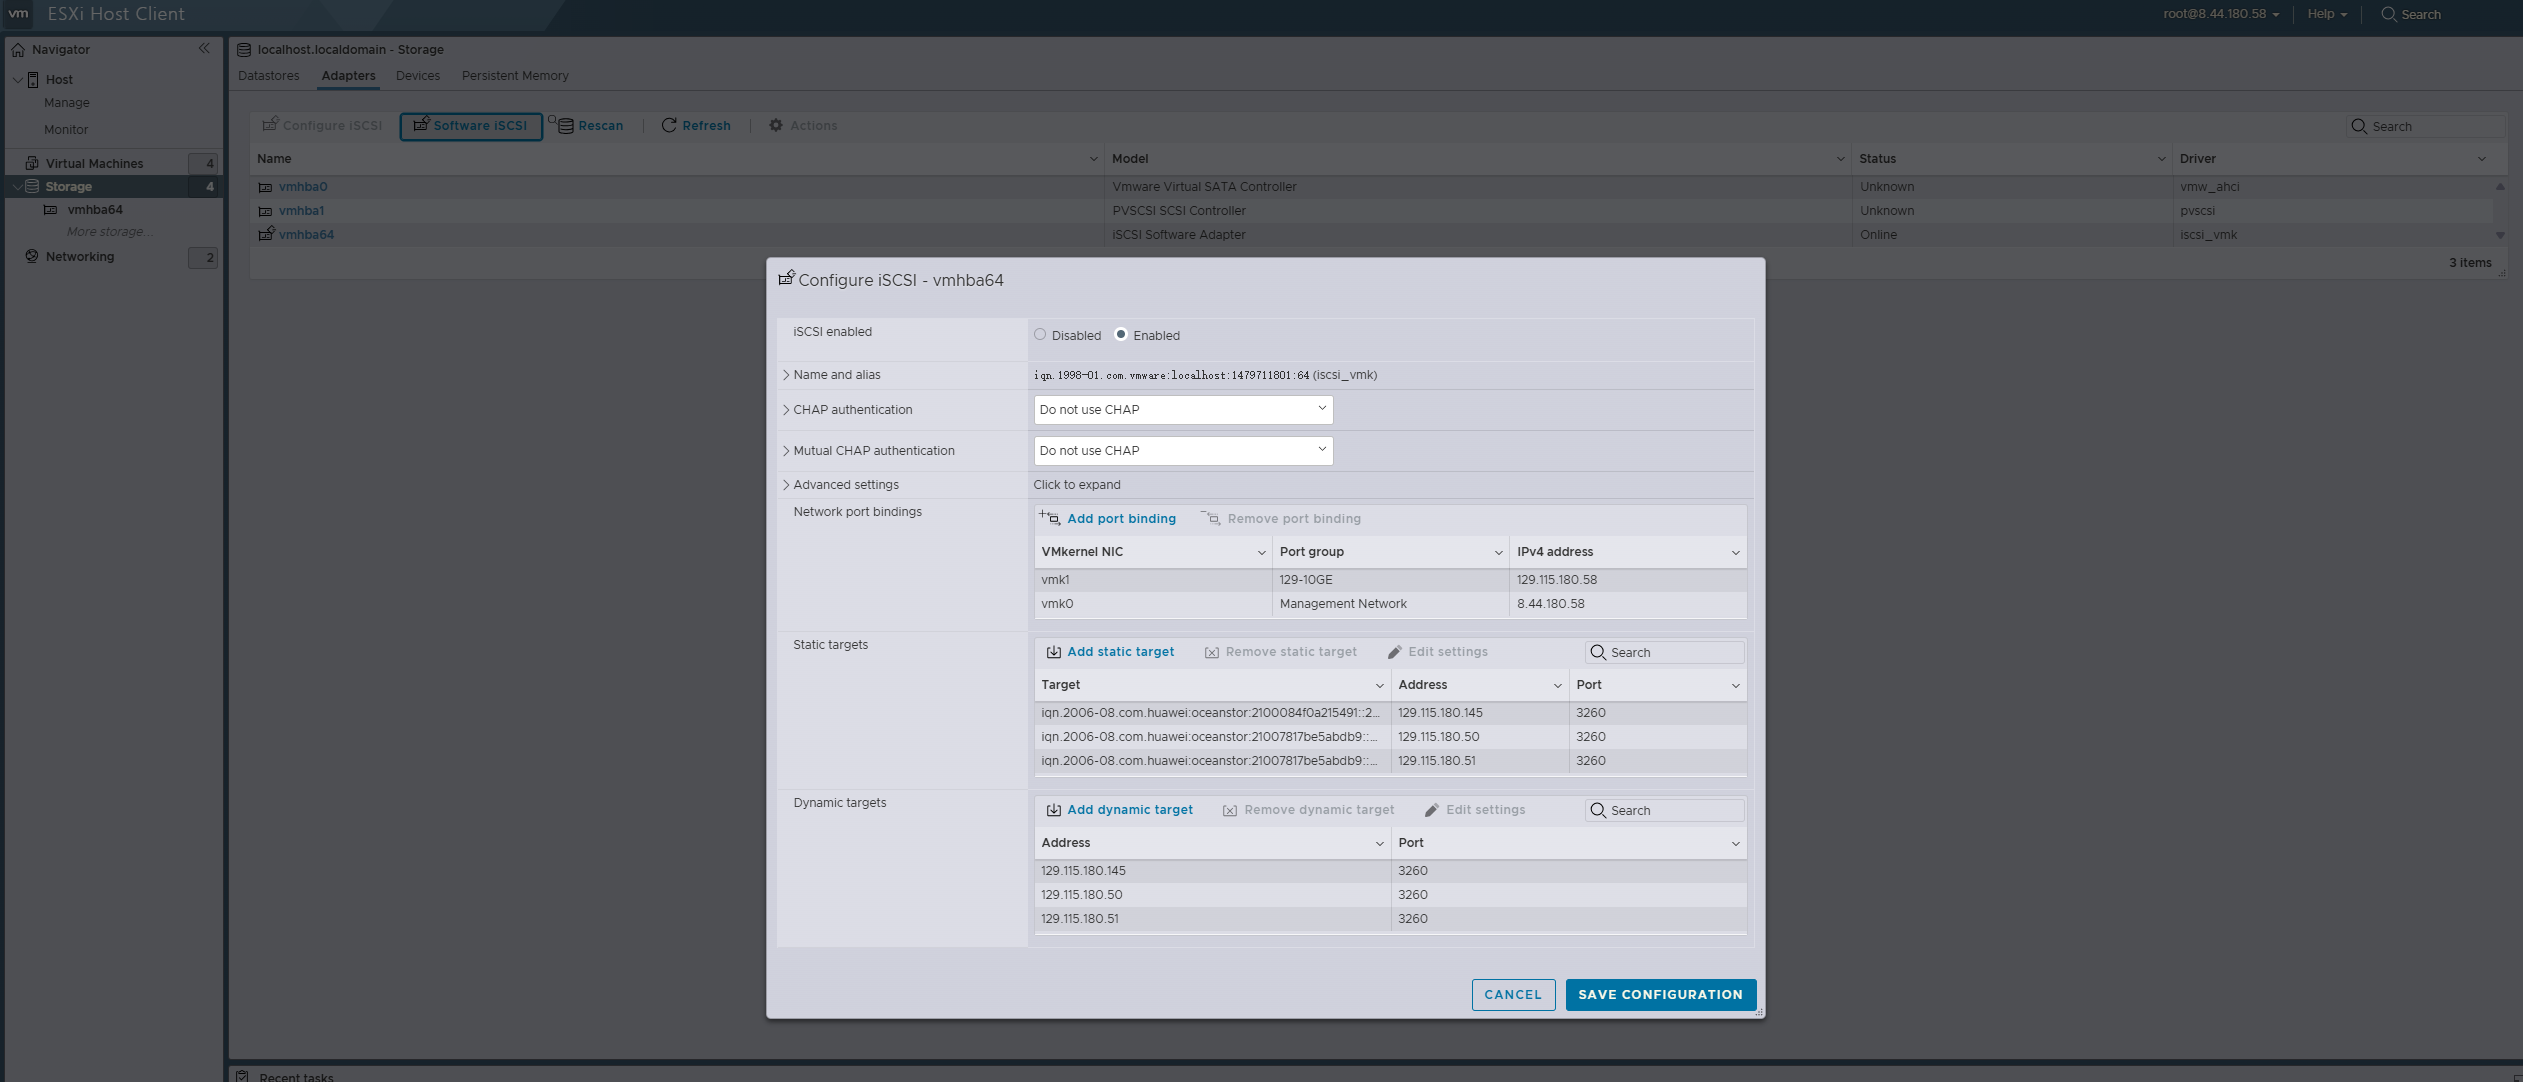

 |
Test Conclusion | PASS |
3.2 Storage Array Faults
Test Purpose | After installing the VASA Provider, does the vVols Datastore recover to normal after the storage array is powered back on following a failure. (Protocol: FC) |
Test Networking | Storage and VMware ESXi Compatibility Test Networking |
Prerequisites | 1. The VASA Provider has been installed and configured. 2. The VASA Provider has been registered with vCenter and initial configuration is complete. 3. The host, storage, and networking have been completed. |
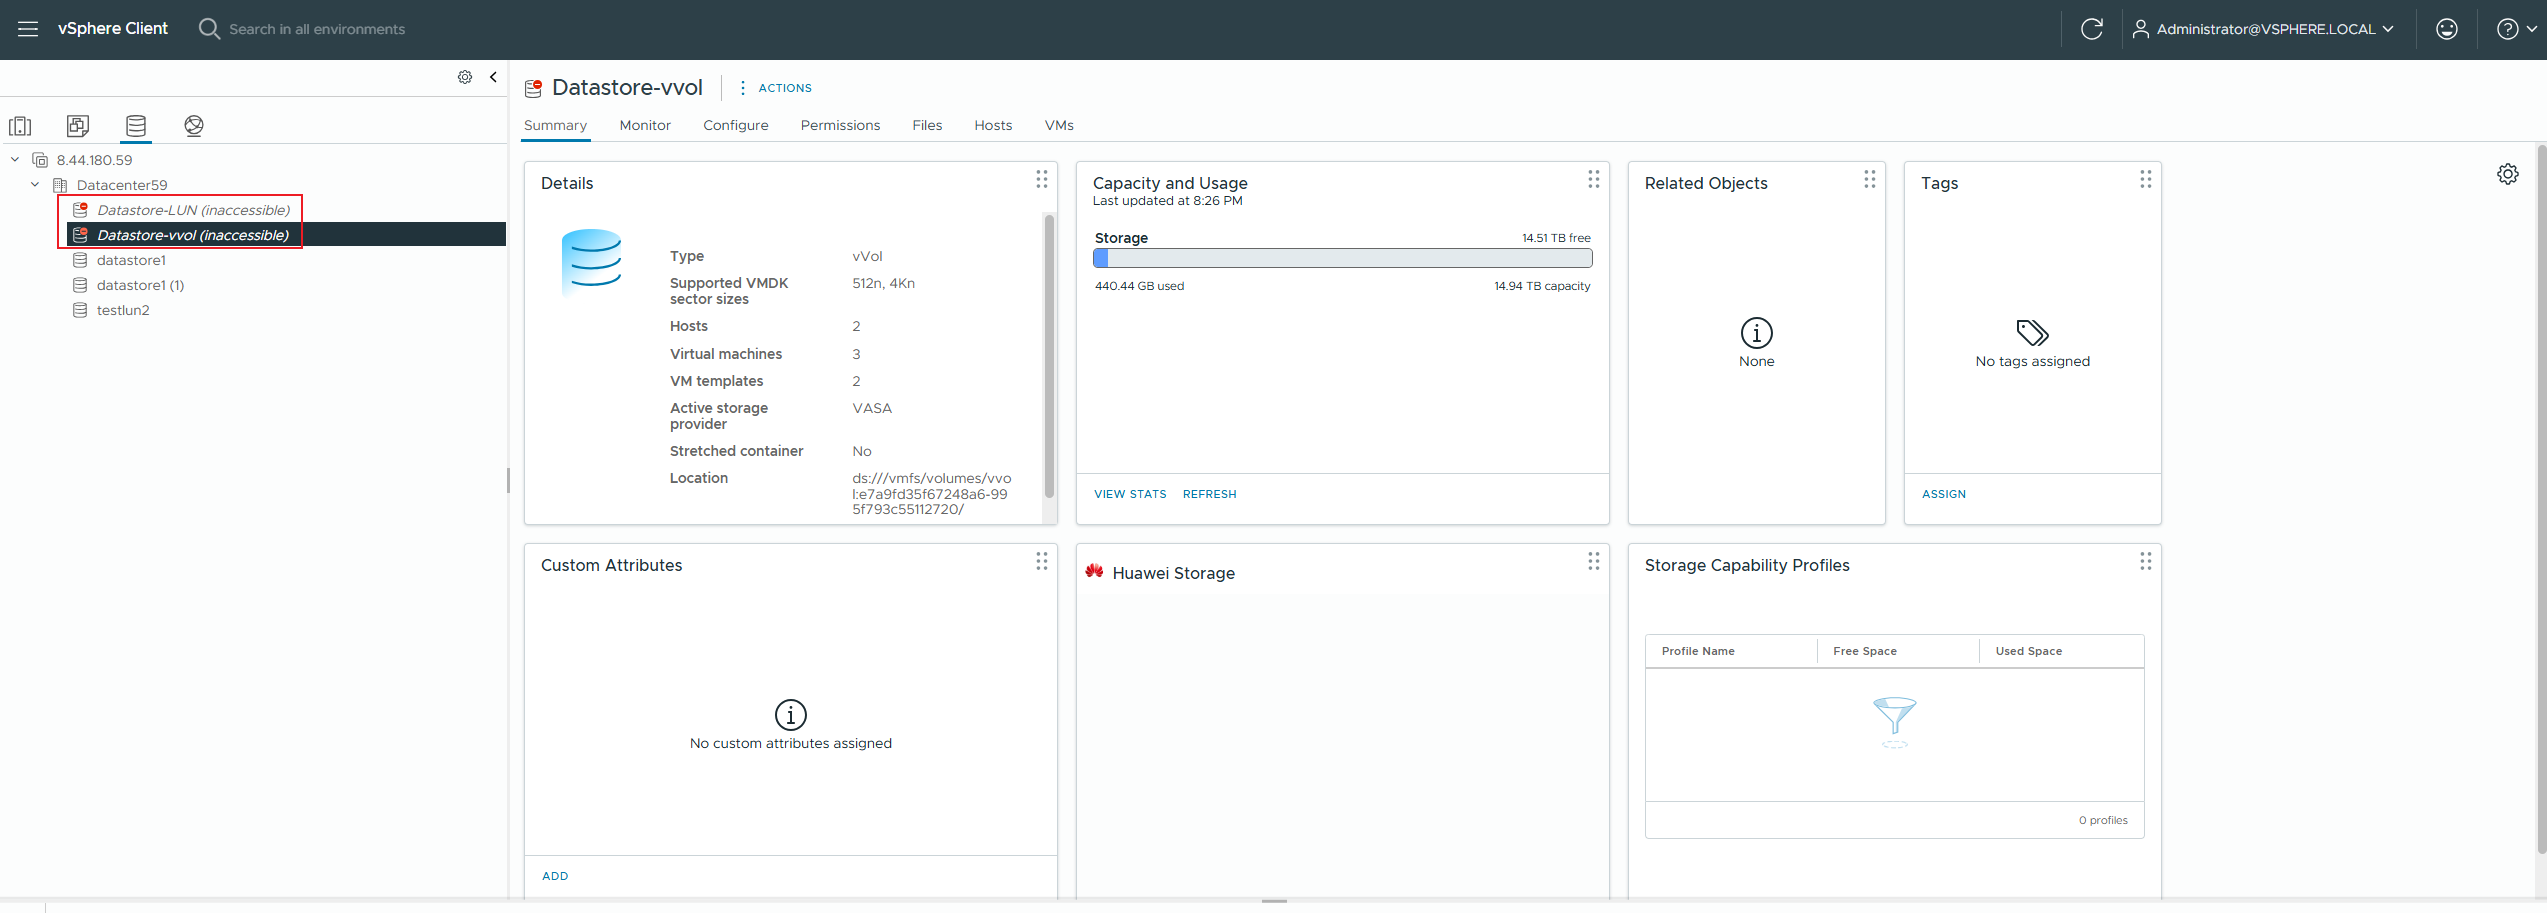
Test Procedure | 1. Create 2 to 4 virtual machines in the vVols Datastore, with each virtual machine having 1 * 50GB OS disk and >1 * 200GB DATA disk. 2. Configure each virtual machine to use vdbench to issue 8k 7:3 IO, with a total IO volume of approximately 100,000 IOPS (or sequential large IO, 1M sequential write, bandwidth 2G). 3. Power down the storage array, then power it back up. |
Expected Result | 1. Step 3: The vVols Datastore has returned to normal, and virtual machine read and write operations are functioning properly. |
Test Record |

 2. Configure each virtual machine to use vdbench to issue 8k 7:3 IO, with a total IO volume of approximately 100,000 IOPS (or sequential large IO, 1M sequential write, bandwidth 2G). 

|
Test Conclusion | PASS |
3.3 Controller app_data process self-healing
Test Purpose | Observe the self-healing status of the app_data process in the controller. (Protocol: FC) |
Test Networking | Storage and VMware ESXi Compatibility Test Networking |
Prerequisites | 1. The VASA Provider has been installed and configured. 2. The VASA Provider has been registered with vCenter and initial configuration is complete. 3. The host, storage, and networking have been completed. |
Test Procedure | 1. Create 2-4 virtual machines in the vVols Datastore, with each virtual machine having 1*50GB OS disk and >1*200GB DATA disk. 2. Configure each virtual machine to use vdbench to issue 8k 7:3 IO, with a total IO volume of approximately 100000 IOPS (or sequential large IO, 1M sequential write, bandwidth 2G). 3. Poll and inject a critical process failure in the controller (kill -9 app_data\cfg_app\devm), and check the vdbench business zero state of the virtual machine. |
Expected Result | 1. Step 3: The controller successfully restarts, vdbench IO resets to zero in less than 2 seconds, and the VVol LUN status is normal. |
Test Record |
 2. Configure each virtual machine to use vdbench to issue 8k 7:3 IO, with a total IO volume of approximately 100000 IOPS (or sequential large IO, 1M sequential write, bandwidth 2G). 
 3. Poll and inject a critical process failure in the controller (kill -9 app_data\cfg_app\devm), and check the vdbench business zero state of the virtual machine.  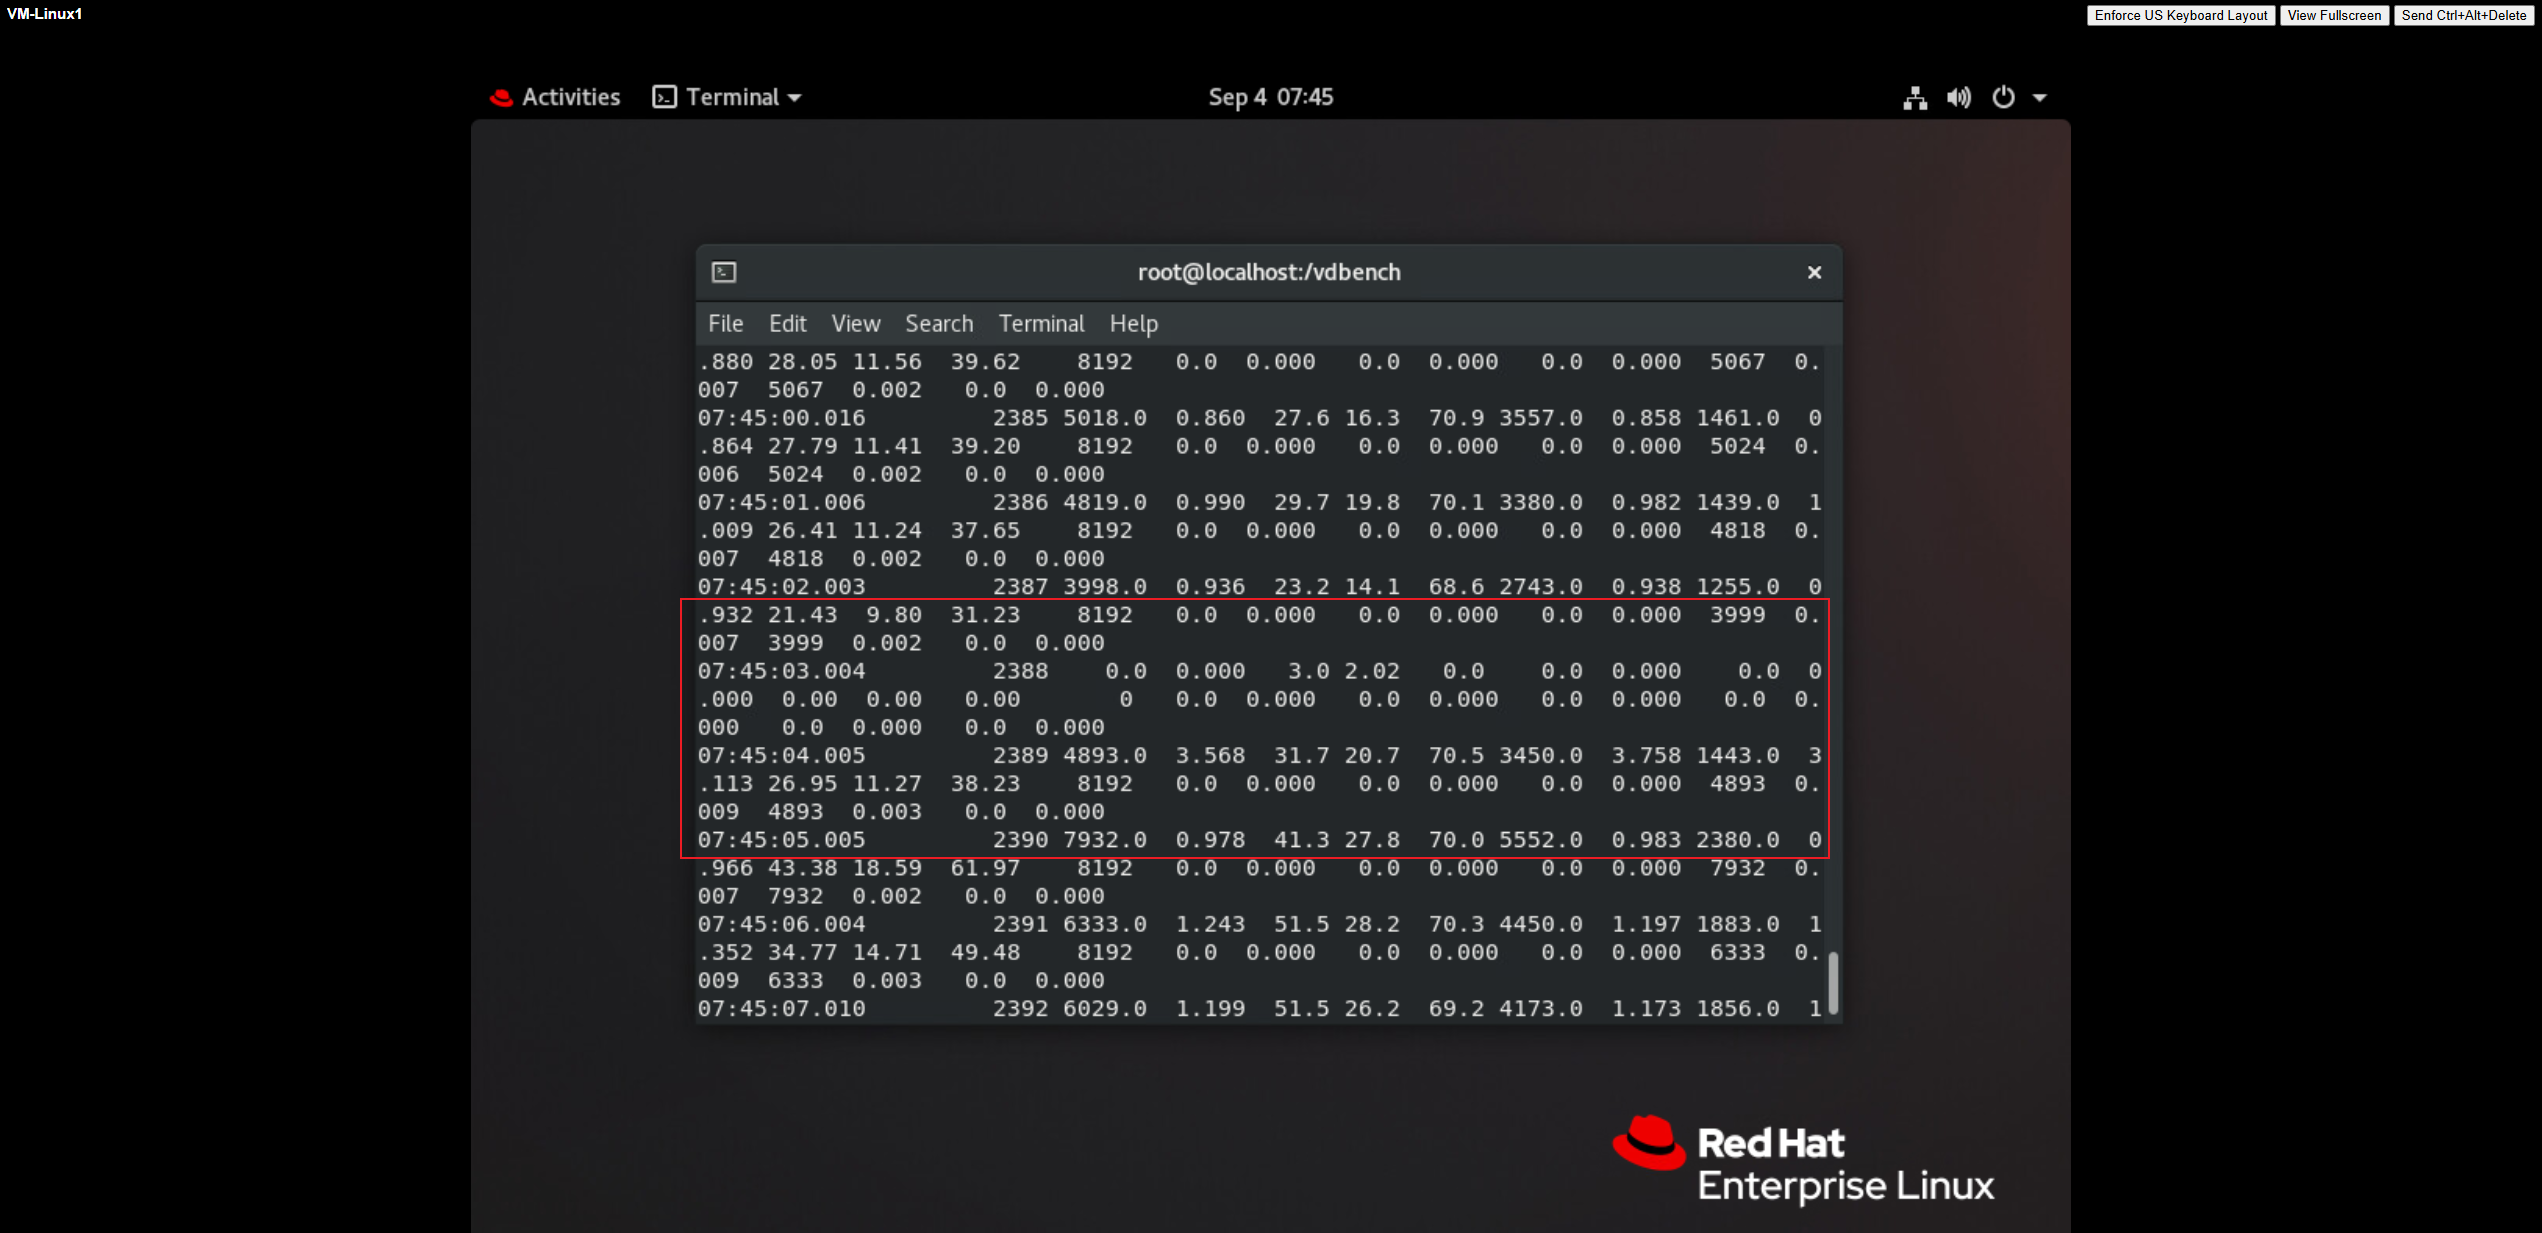 |
Test Conclusion | PASS |
3.4 Controller restart
Test Purpose | Has the controller restarted successfully? (Protocol: FC) |
Test Networking | Storage and VMware ESXi Compatibility Test Networking |
Prerequisites | 1. The VASA Provider has been installed and configured. 2. The VASA Provider has been registered with vCenter and initial configuration is complete. 3. The host, storage, and networking have been completed. |
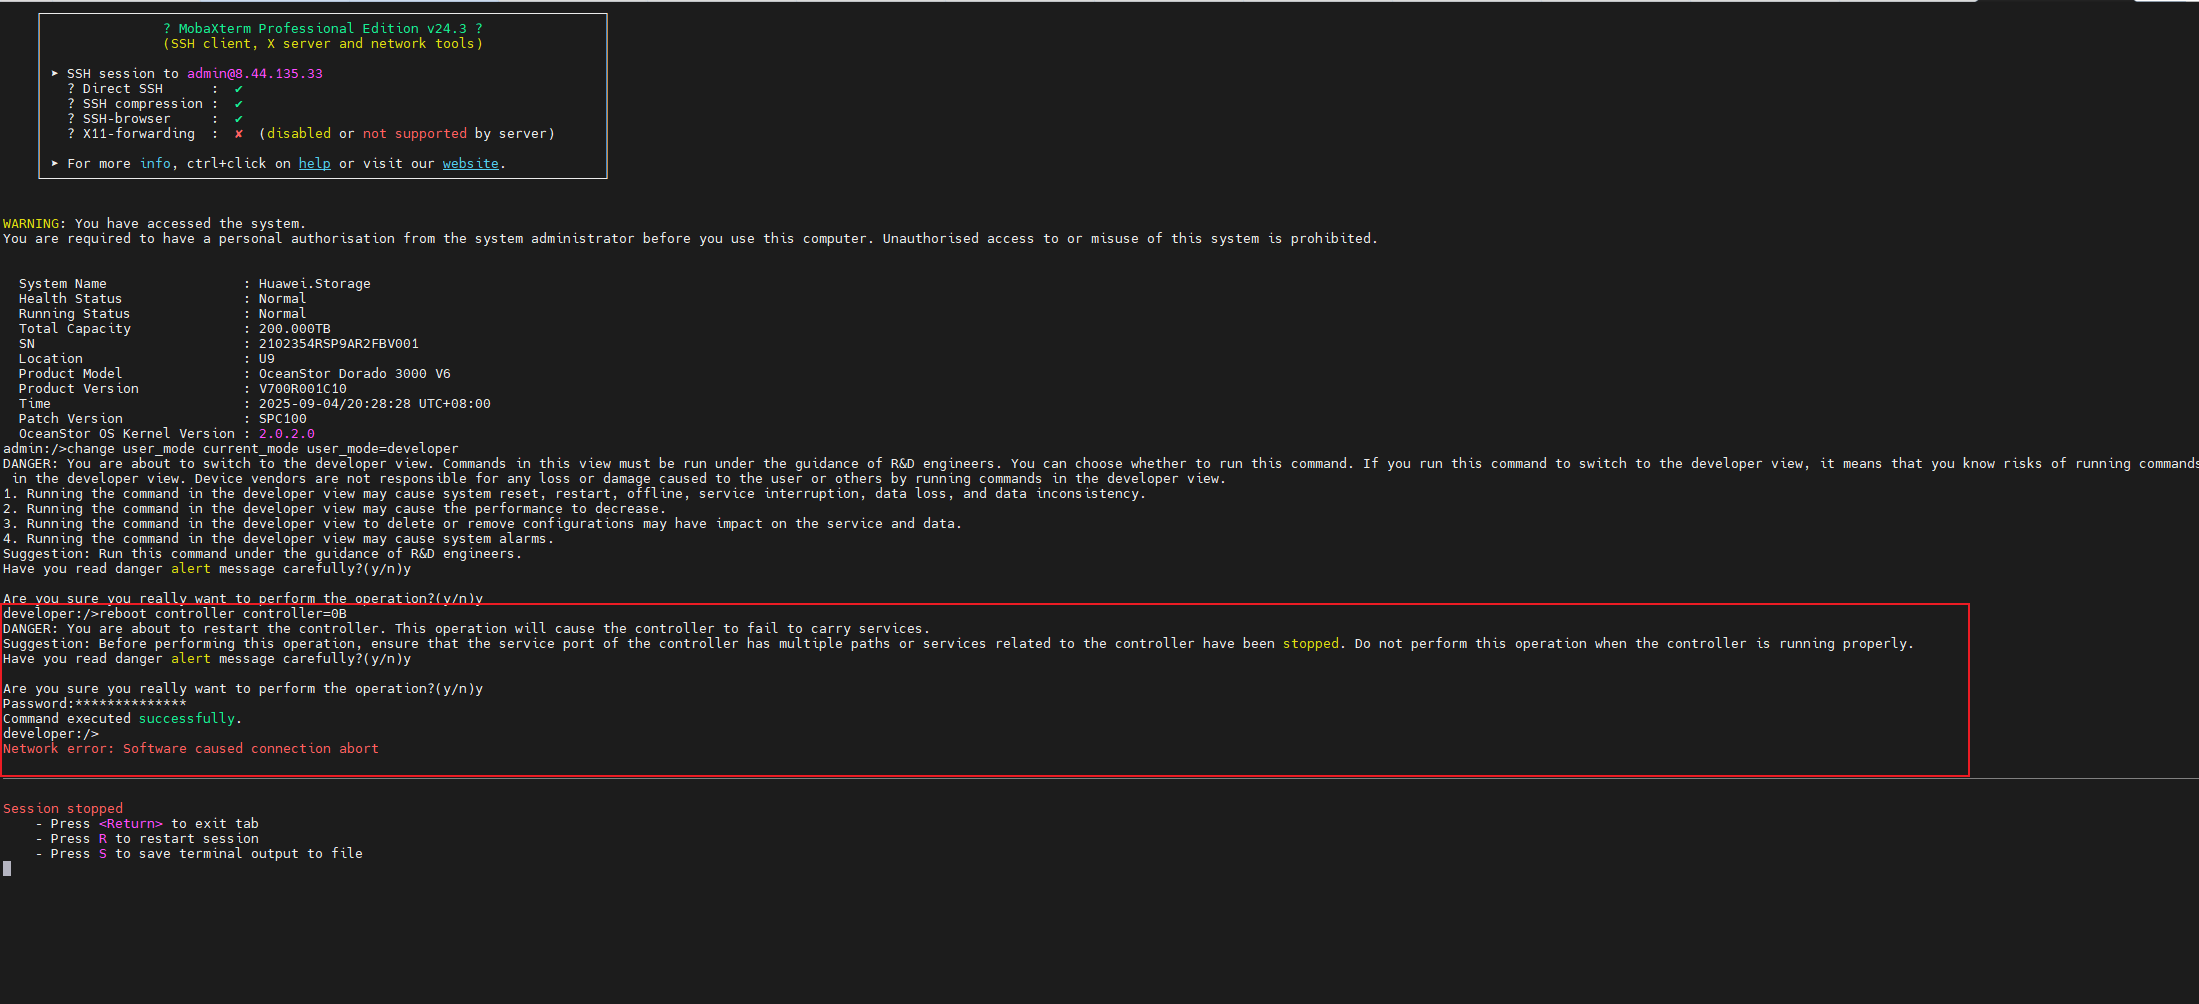
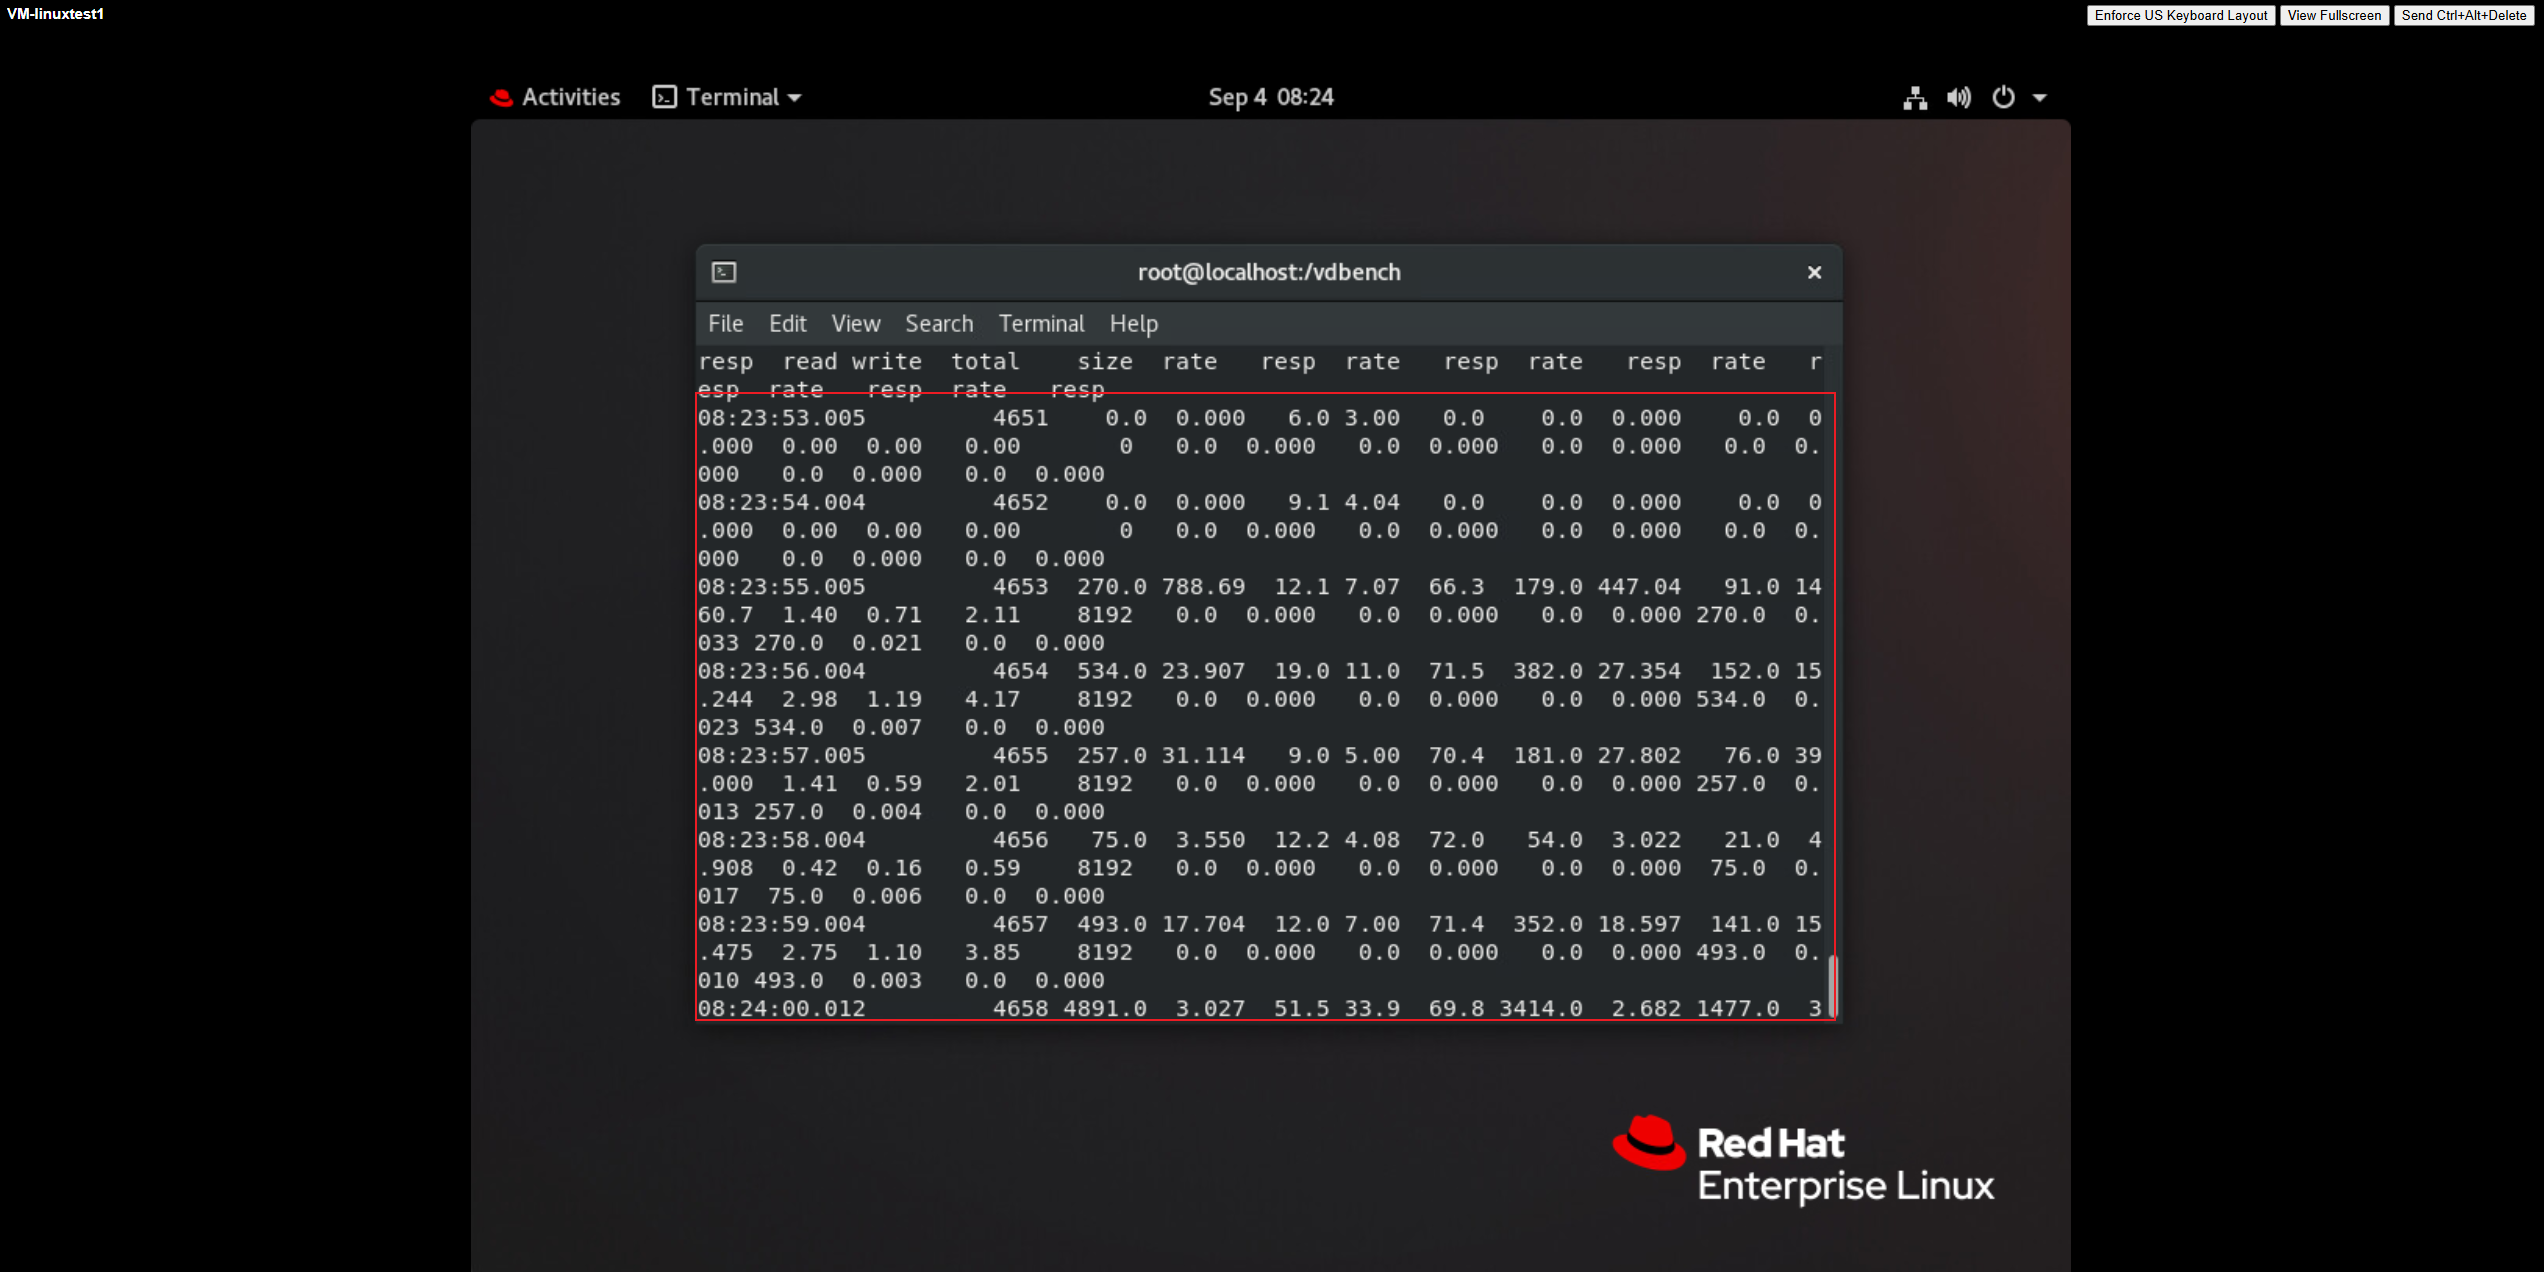
Test Procedure | 1. Create 2 to 4 virtual machines in the vVols Datastore, with each virtual machine having 1*50GB OS disk and >1*200GB DATA disk. 2. Configure vdbench on each virtual machine to issue 8k 7:3 IO, with a total IO volume of approximately 100,000 IOPS (or sequential large IO, 1M sequential write, bandwidth 2G). 3. Poll and restart the controller, wait for the controller to successfully restart and recover, and check the vdbench business zero state of the virtual machine. |
Expected Result | 1. Step 3: The controller successfully restarts, with each vdbench reset taking less than 2 seconds, and the VVol LUN status is normal. |
Test Record |

 2. Configure vdbench on each virtual machine to issue 8k 7:3 IO, with a total IO volume of approximately 100,000 IOPS (or sequential large IO, 1M sequential write, bandwidth 2G). 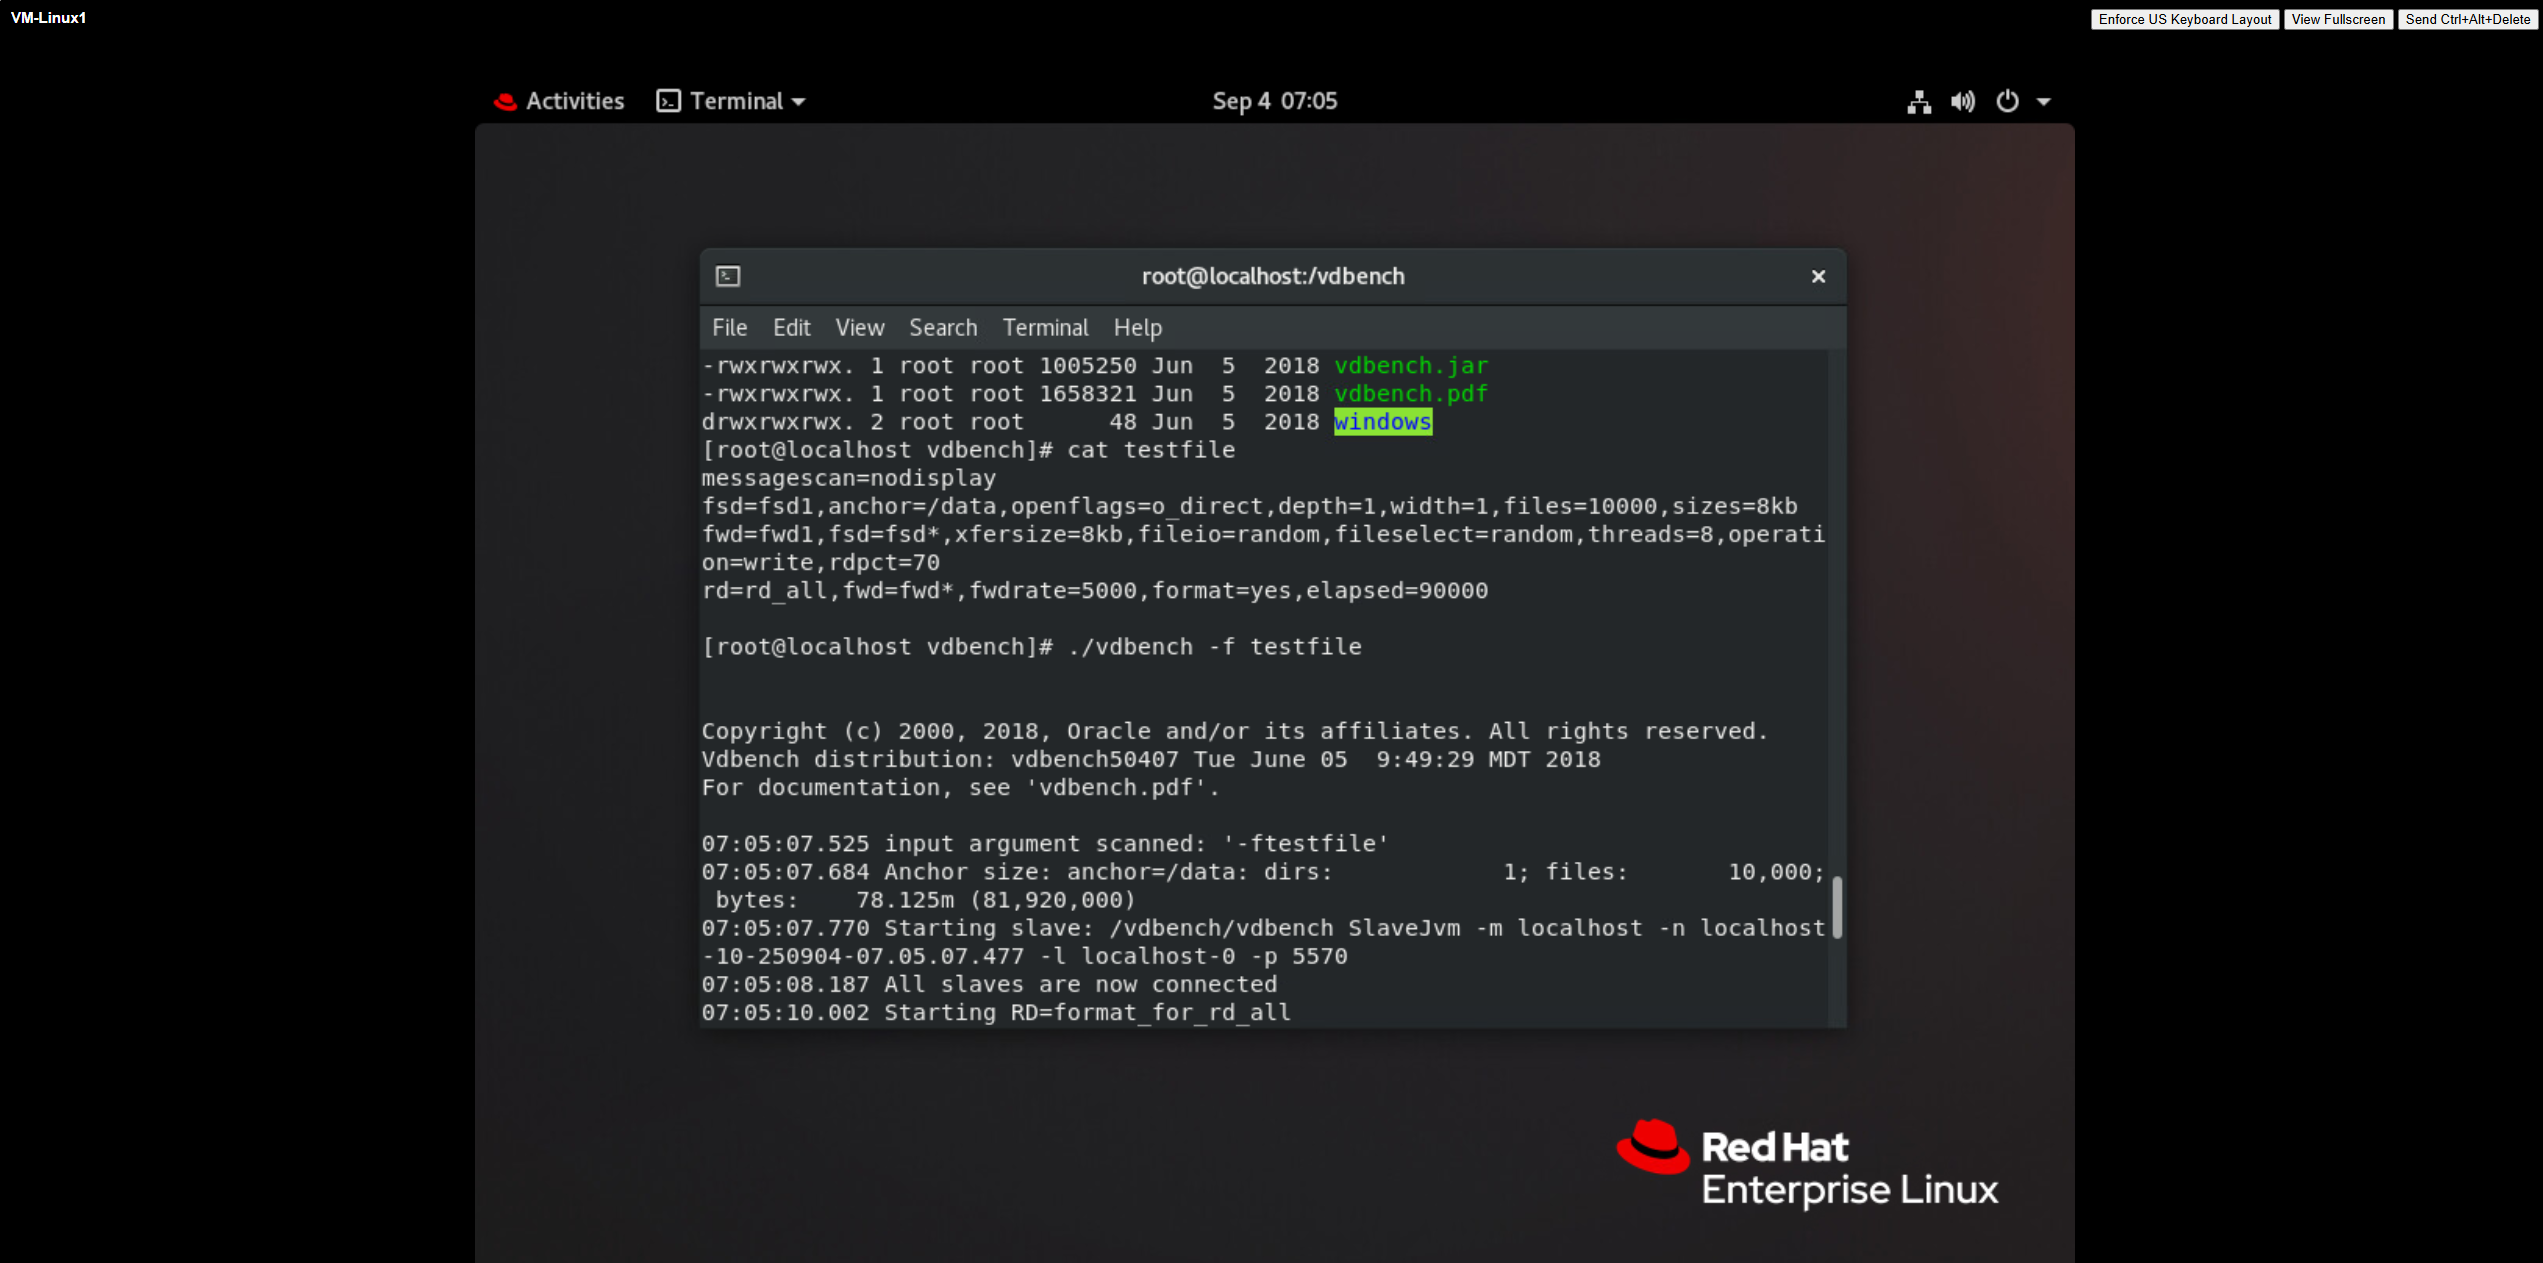
 3. Poll and restart the controller, wait for the controller to successfully restart and recover, and check the vdbench business zero state of the virtual machine. 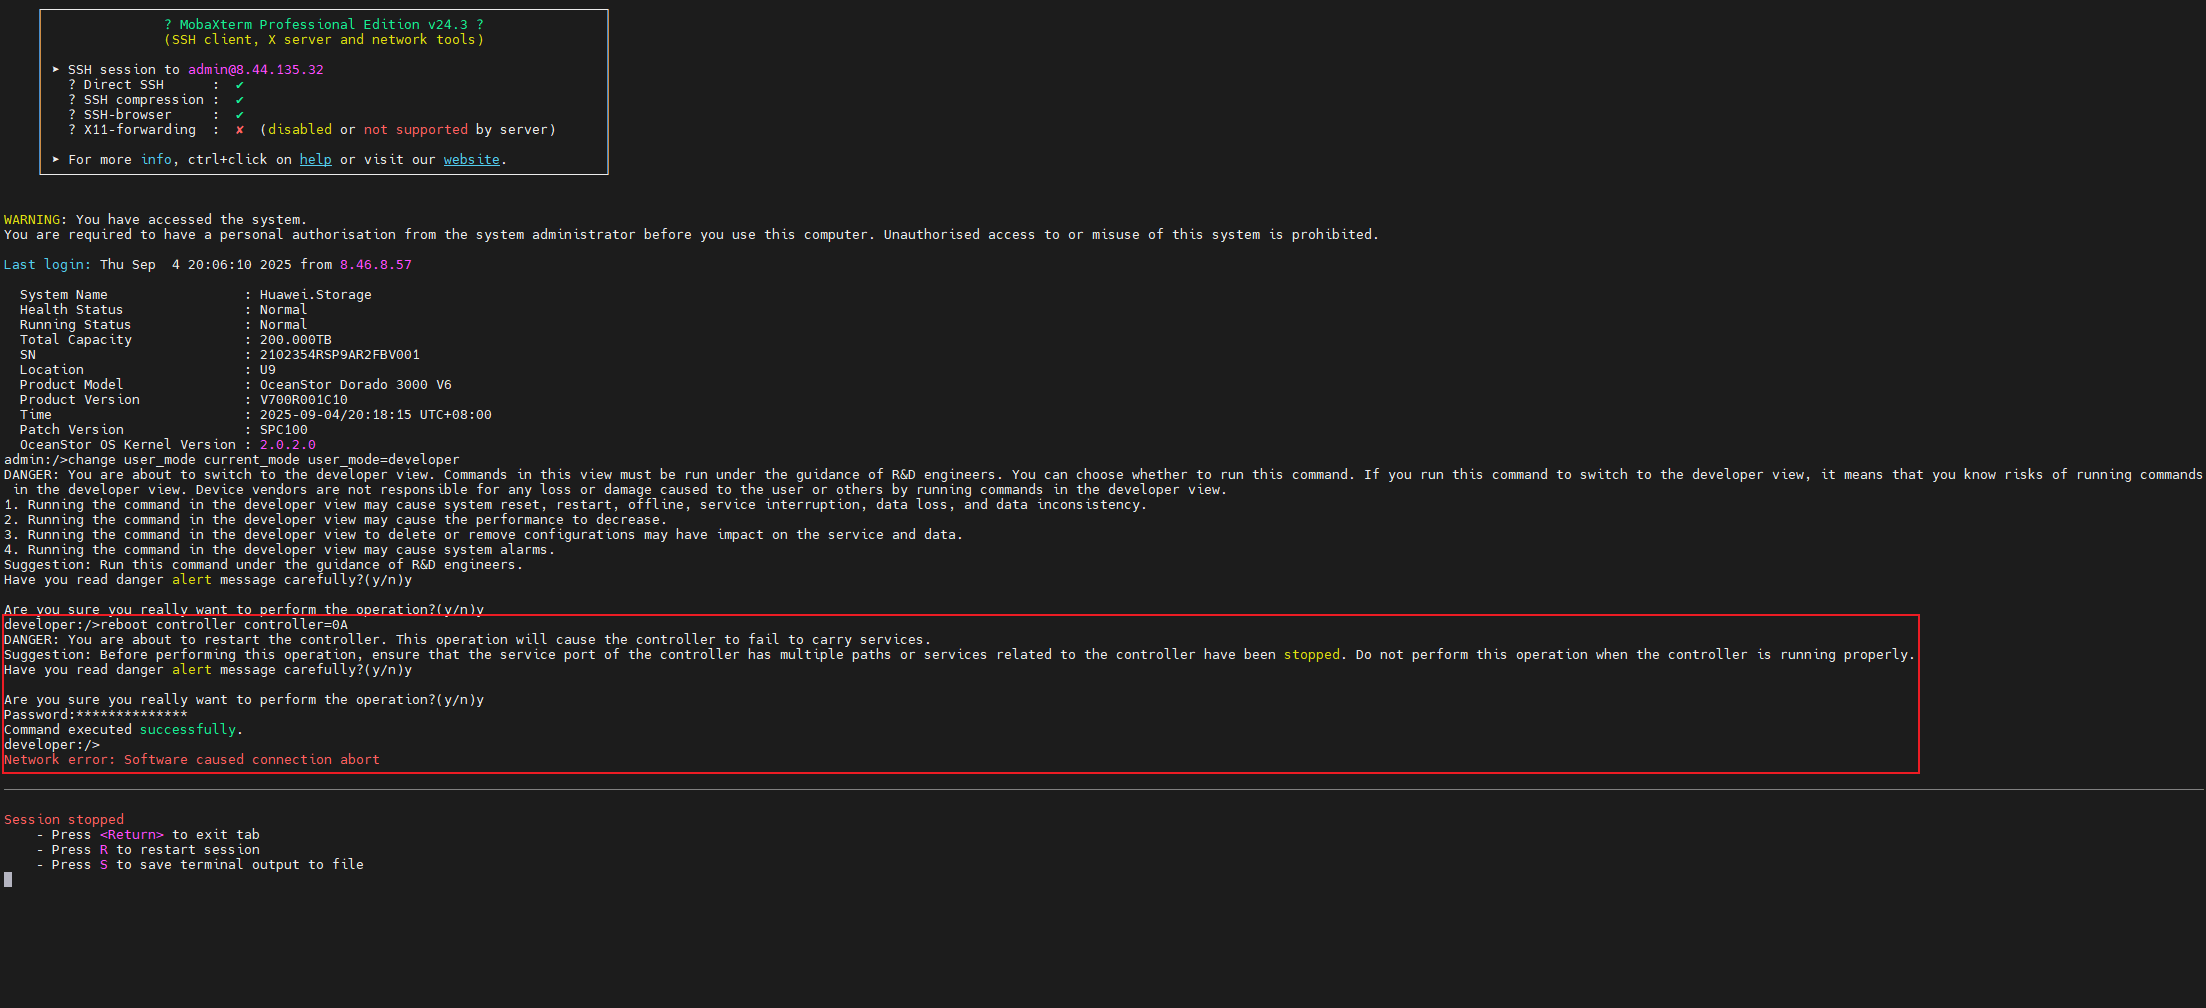
|
Test Conclusion | PASS |