Huawei OceanProtect Backup Storage and Veritas NetBackup

Executive Summary
Axians Global (“Axians”) assessed the interoperability of Veritas NetBackup software with Huawei OceanProtect Backup Storage. The goal of the assessment is to validate that Veritas NetBackup is interoperable with Huawei OceanProtect Backup Storage.
In the assessment, Axians has determined that Huawei OceanProtect Backup Storage support below OpenStorage functionalities: Auto Image Replication (A.I.R), Optimized Duplication (Opt_Dup) and Whole Image Copy Optimized Duplication (WI_Opt_Dup).
Also, Veritas NetBackup software backup, replication and restore jobs will function with Huawei OceanProtect Backup Storage for the following scenarios:
Test Scenario | Storage Involved | Protocol(s) Tested | Result |
Backup Media –NFS | OceanProtect Backup Storage | NFS | Passed |
Duplication within Master Domain | OST | Passed | |
Replication between Master Domains | Passed |
In this document, you will find details on the above test cases and the captured output. The procedures conducted in the tests are referenced from standard online documentation from Veritas NetBackup and Huawei.
1. Environment Configuration
1.1 Networking Diagram
Figure 1.1 Huawei OceanProtect Backup Storage Function Compatibility Test Networking 1
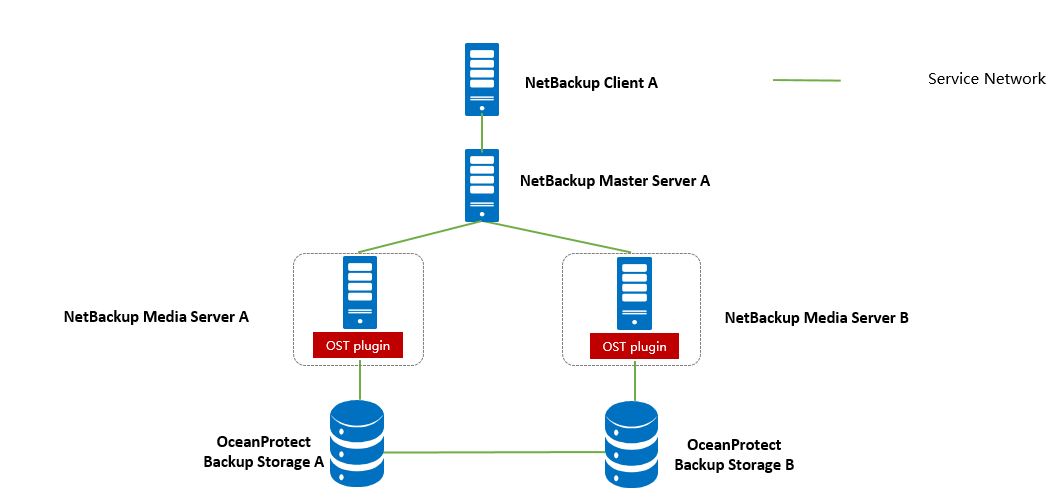
Note: This networking diagram is for reference only. For details about the connections between Huawei OceanProtect Backup Storage controller enclosures and application servers, between controller enclosures and disk enclosures, and between controller enclosures, see the Huawei OceanProtect Backup Storage product documentation.
Networking description:
- Deployment at the production end:
- Deploy one ESXi physical host, install the VMware VM software, create VMs, and install Linux operating system.
- The management network and service network are connected to the Veritas NetBackup software and Huawei OceanProtect Backup Storage through switches.
- Deploy the Veritas NetBackup software on each server (In this case, backup server A installed Master and Media server software. Backup server B installed Media server software.)
- All storage devices connect to the Veritas NetBackup through 10g Ethernet.
Figure 1.2 Huawei OceanProtect Backup Storage Function Compatibility Test Networking 2
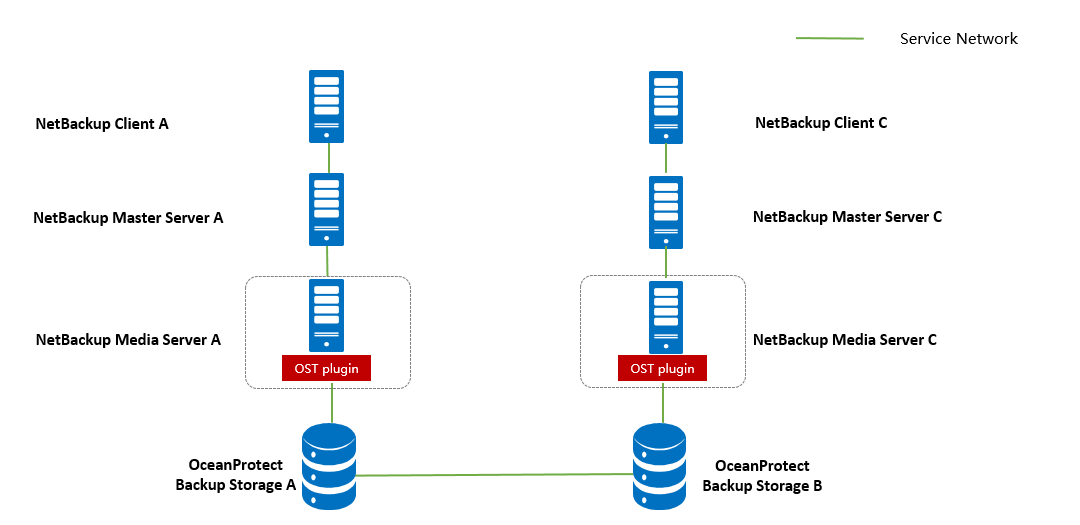
Note: This networking diagram is for reference only. For details about the connections between Huawei OceanProtect Backup Storage controller enclosures and application servers, between controller enclosures and disk enclosures, and between controller enclosures, see the Huawei OceanProtect Backup Storage product documentation.
Networking description:
- Deployment at the production end:
- Deploy one ESXi physical host, install the VMware VM software, create VMs, and install Linux operating system.
- The management network and service network are connected to the Veritas NetBackup software and Huawei OceanProtect Backup Storage through switches.
- Deploy the Veritas NetBackup software on each server (In this case, maser server, Media server and client software installed on one backup server.)
- All storage devices connect to the Veritas NetBackup through 10g Ethernet.
1.2 Hardware and Software Configuration
1.2.1 Storage Configuration
Table 1-2 Huawei storage configuration table
Name | Model & software version | Quantity |
OceanProtect Backup Storage | OceanProtect 1.3.0 | 2 |
1.2.2 Other Hardware Configuration
Table 1-3 Hardware Configuration
Name | description | Quantity | Usage |
VMWare ESXi Server | x86 server
| 1 | Install Linux operating system |
Veritas NetBackup Master+Media server | x86 server
| 2 | Deploys backup software to schedule backup tasks and transfer backup data. |
Veritas NetBackup Media server | x86 server
Network: 10GE vNIC | 1 | Deploys backup software to transfer backup data. |
Ethernet switch | Huawei 6855 10GE Network Switch | 1 | 10GE network switch on the OceanProtect Backup Storage backup service plane |
1.2.3 Test Software and Tools
Table 1-4 Test Software and Tool List
Software Name | description | Quantity |
VMware ESXi 7.0u2 | VMWare virtualization platform | 1 |
Veritas NetBackup 10.2 | Master server | 2 |
Media server | 3 | |
Red Hat Enterprise Linux 8.3 | Installing Linux Host | 3 |
OceanProtect_1.3.0_OSTPlugin_LinuxR.zip | OST plug-in software | 3 |
2. Test Preparation
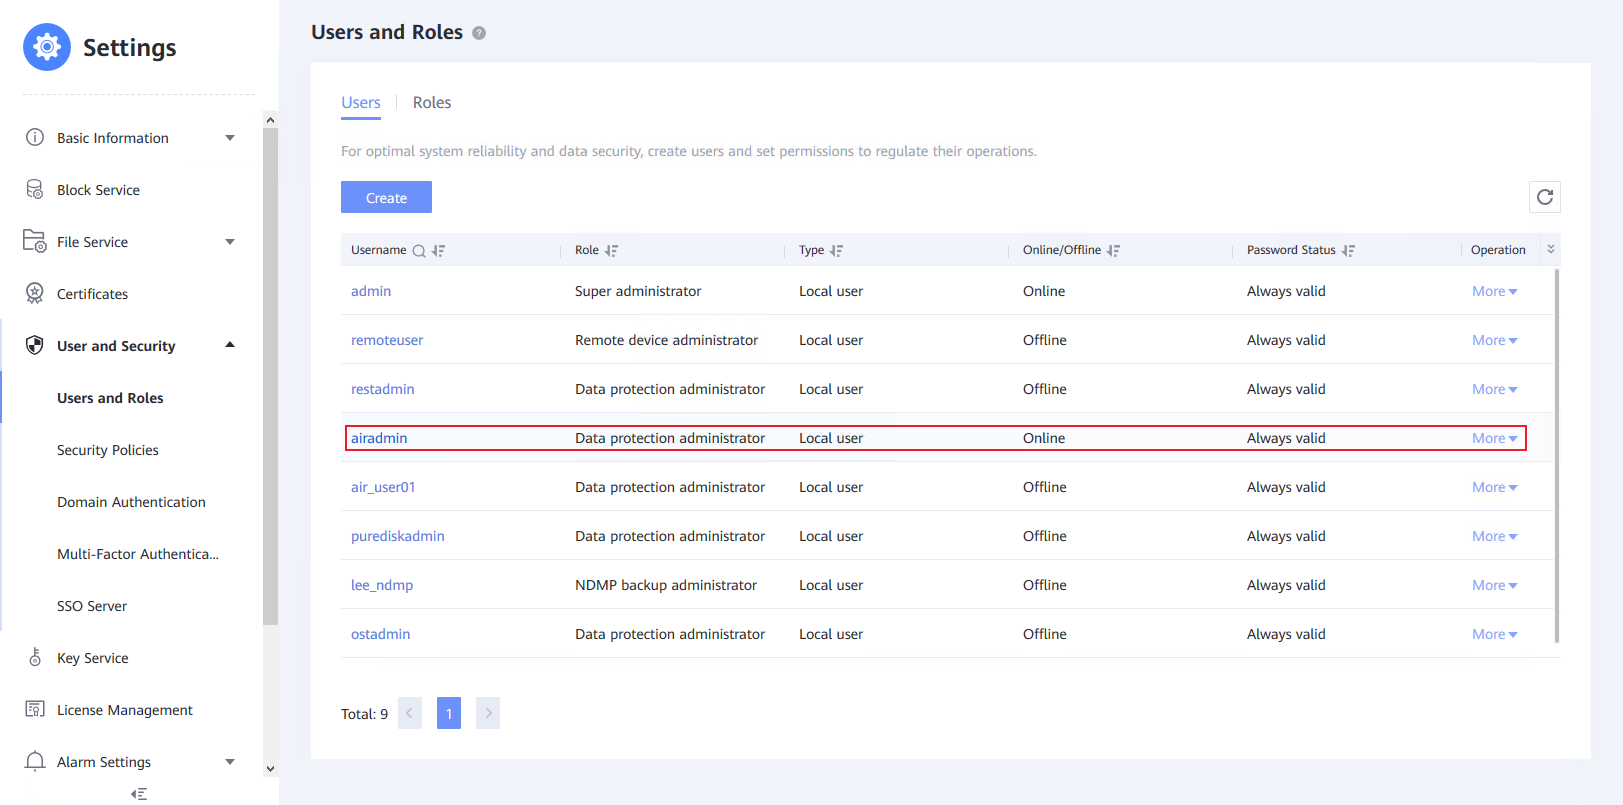
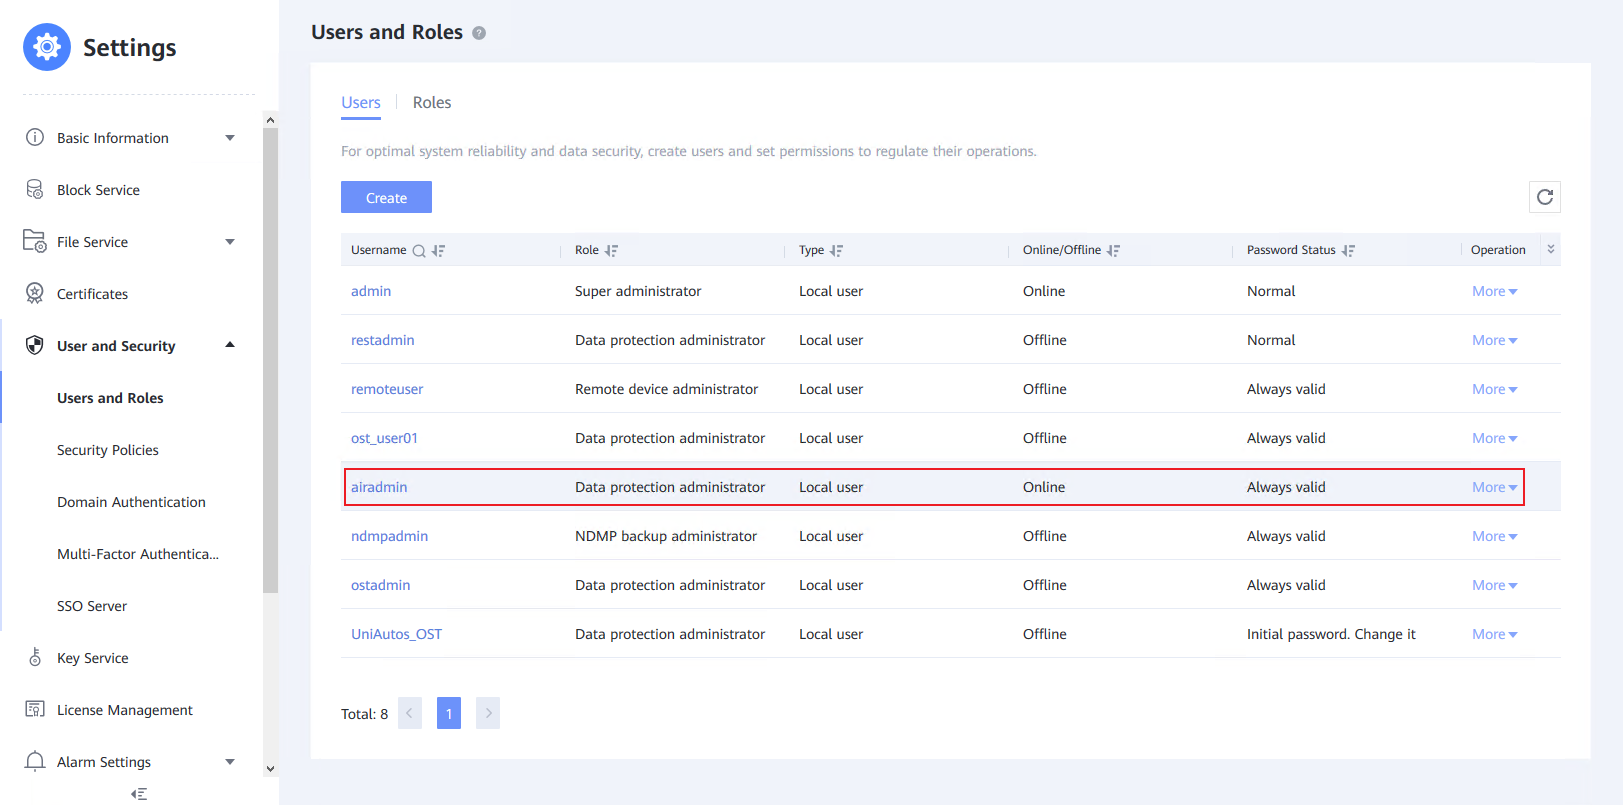
2.1 Create Users
On OceanProtect storage A
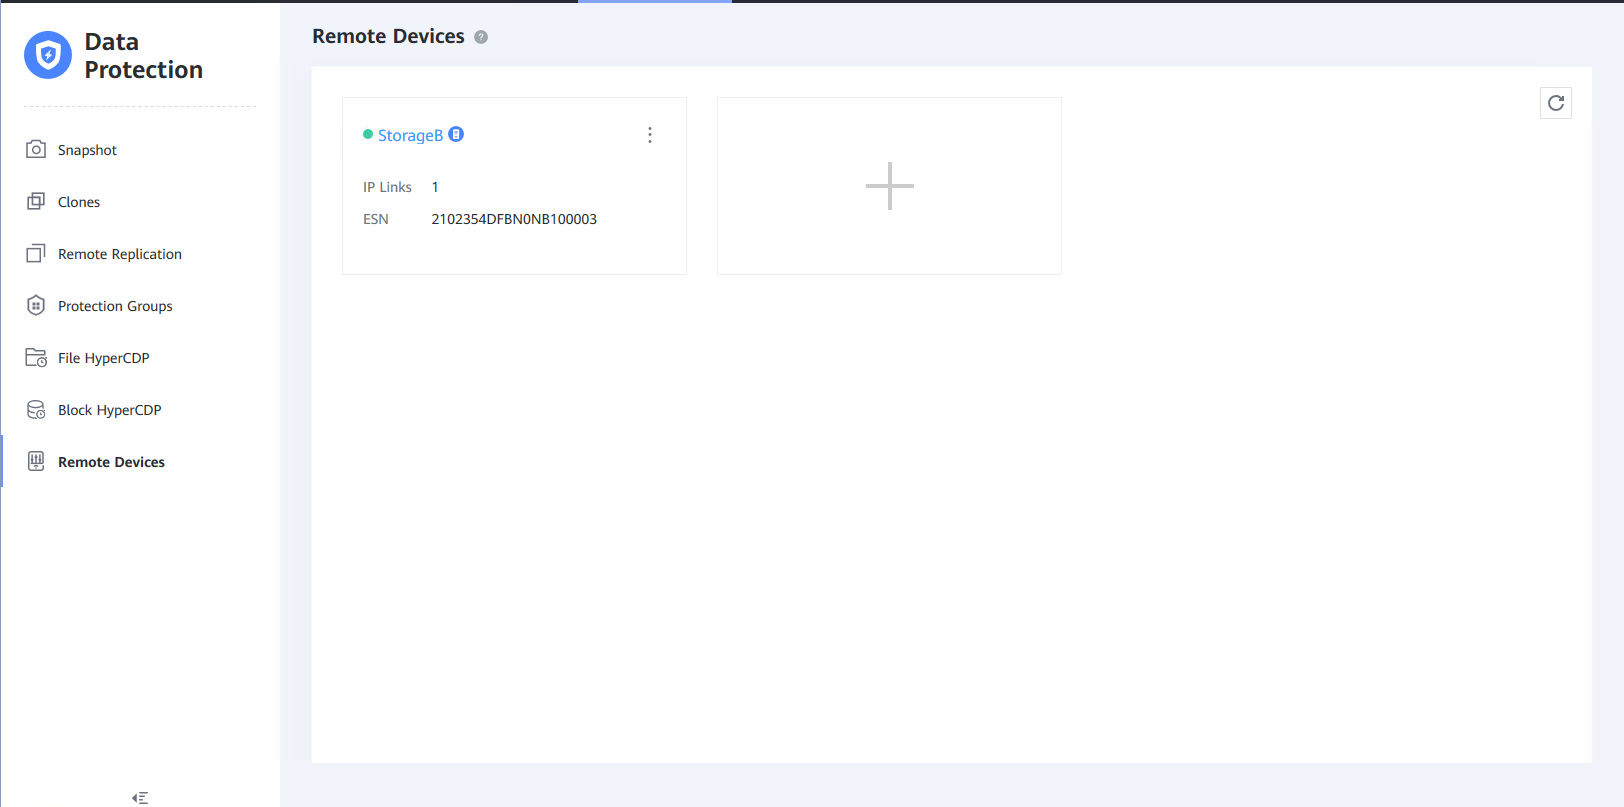
On OceanProtect storage B
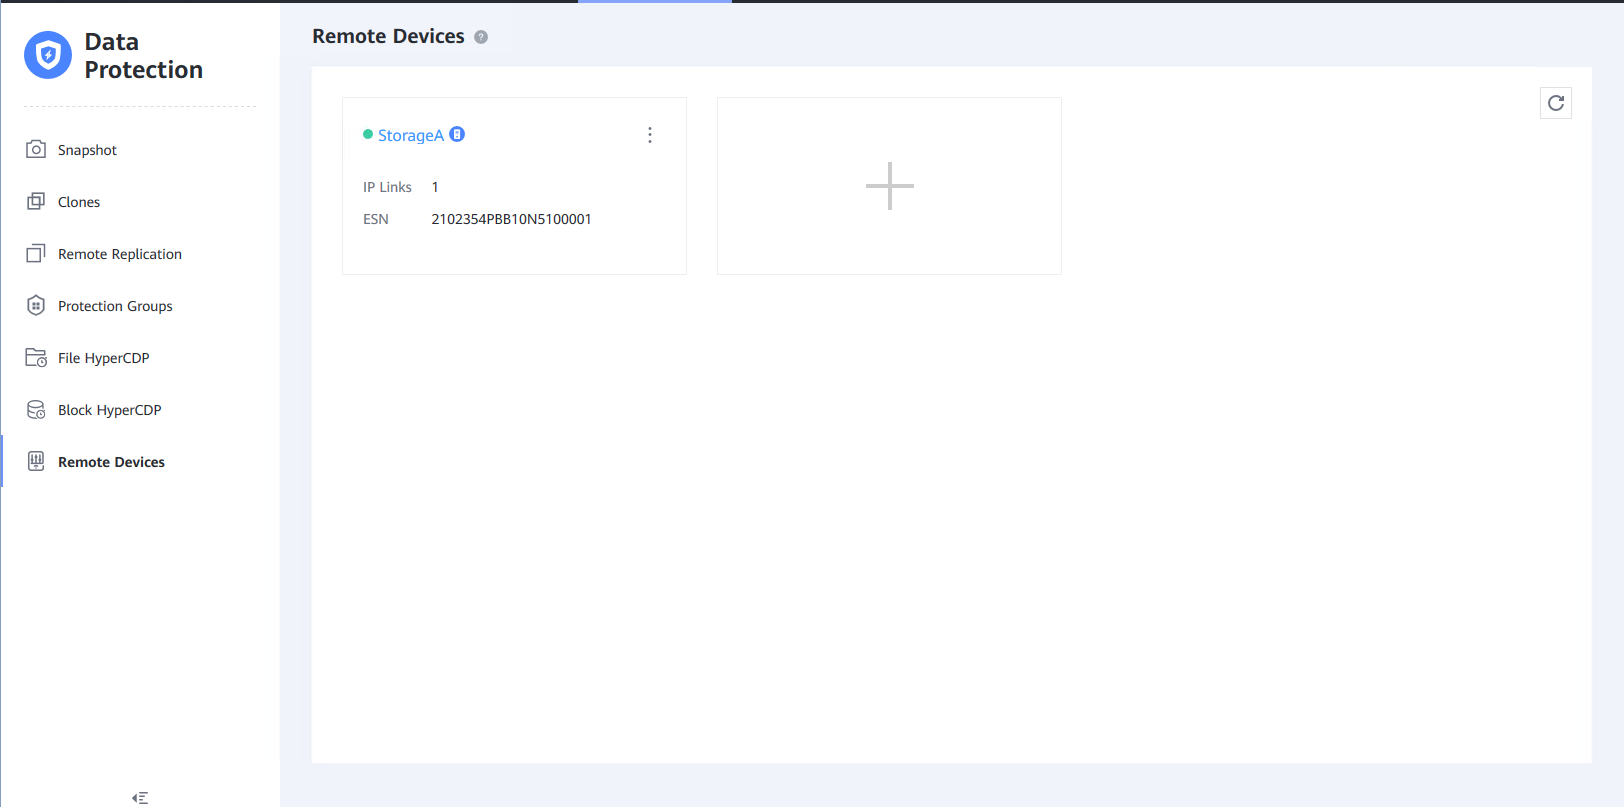
2.2 Create Remote Device
On OceanProtect storage A
On OceanProtect storage B
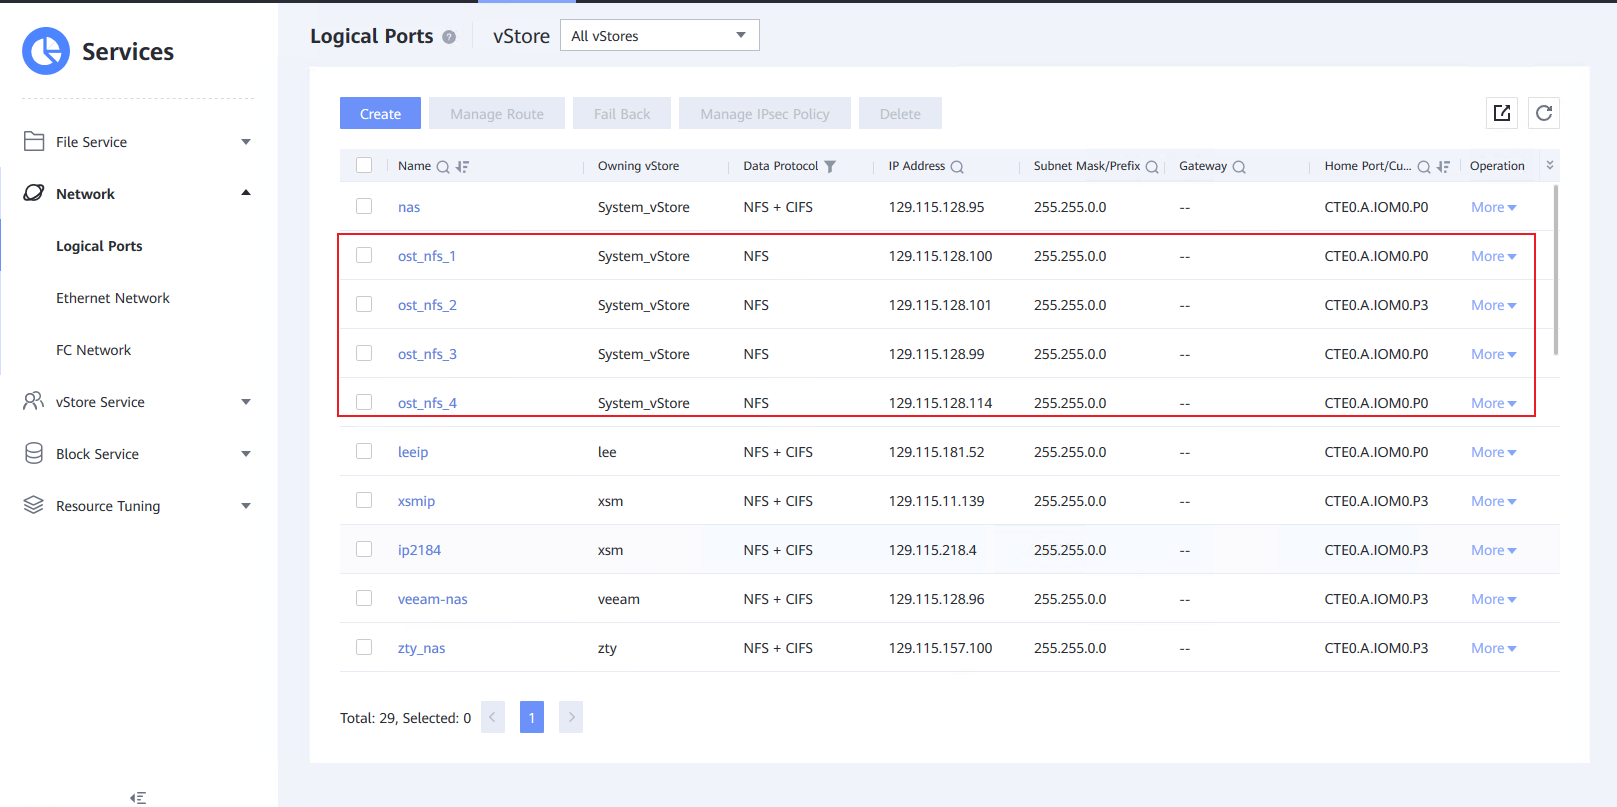
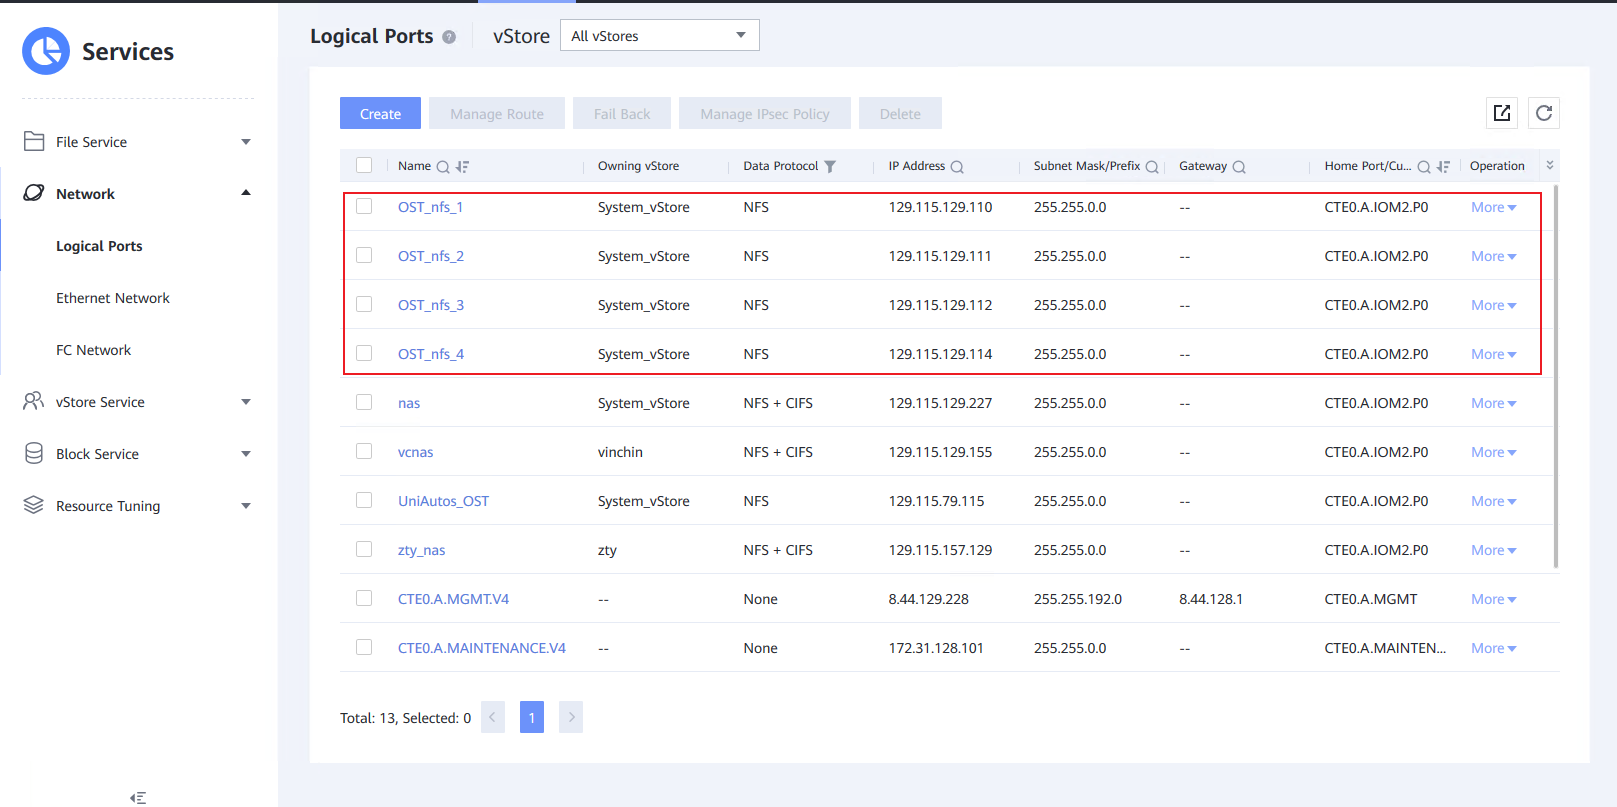
2.3 Create a Logical Port
On OceanProtect storage A
On OceanProtect storage B
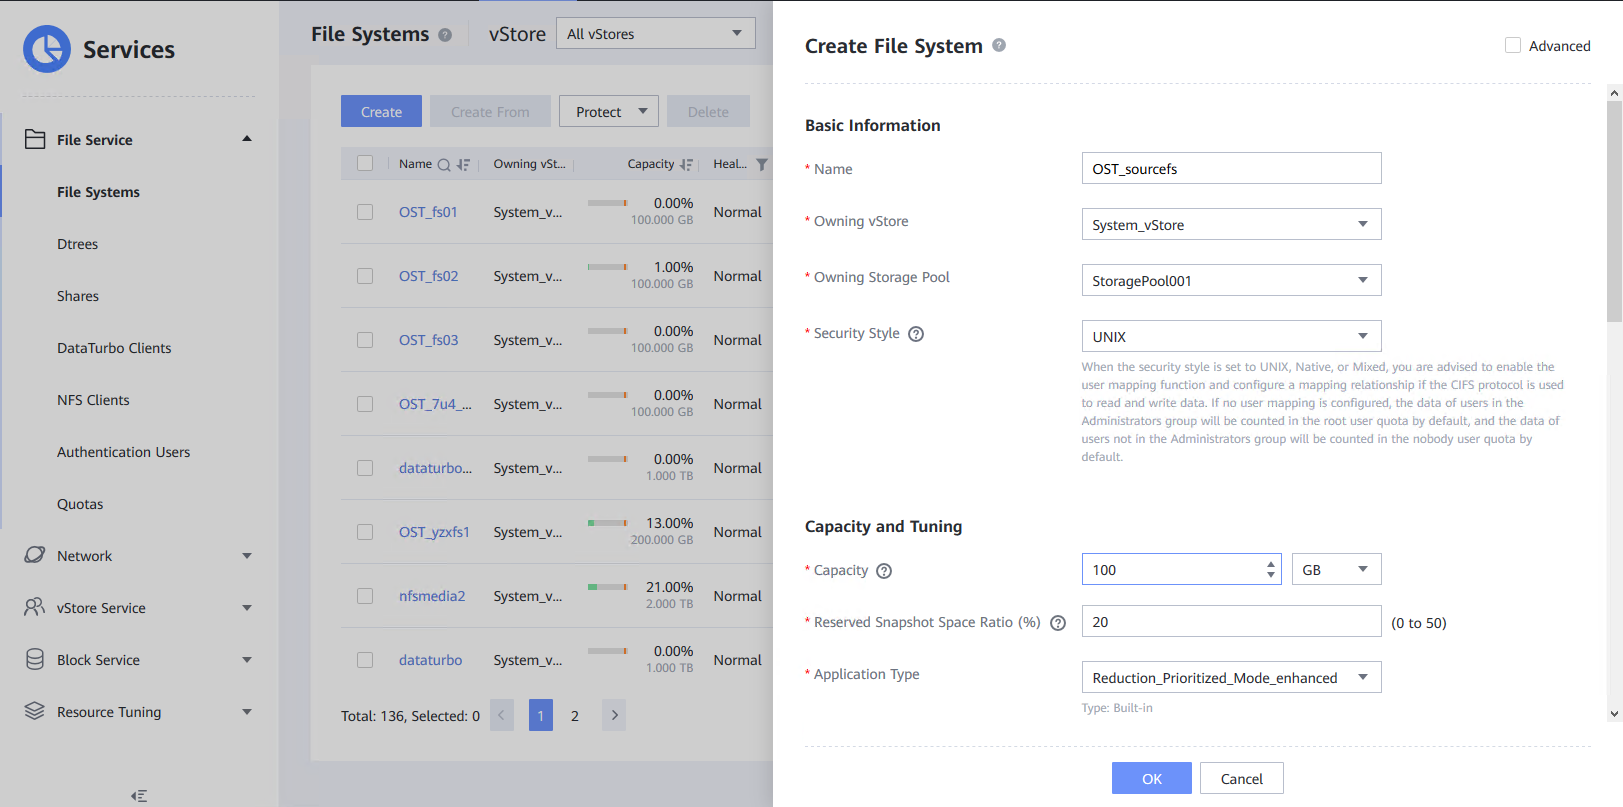
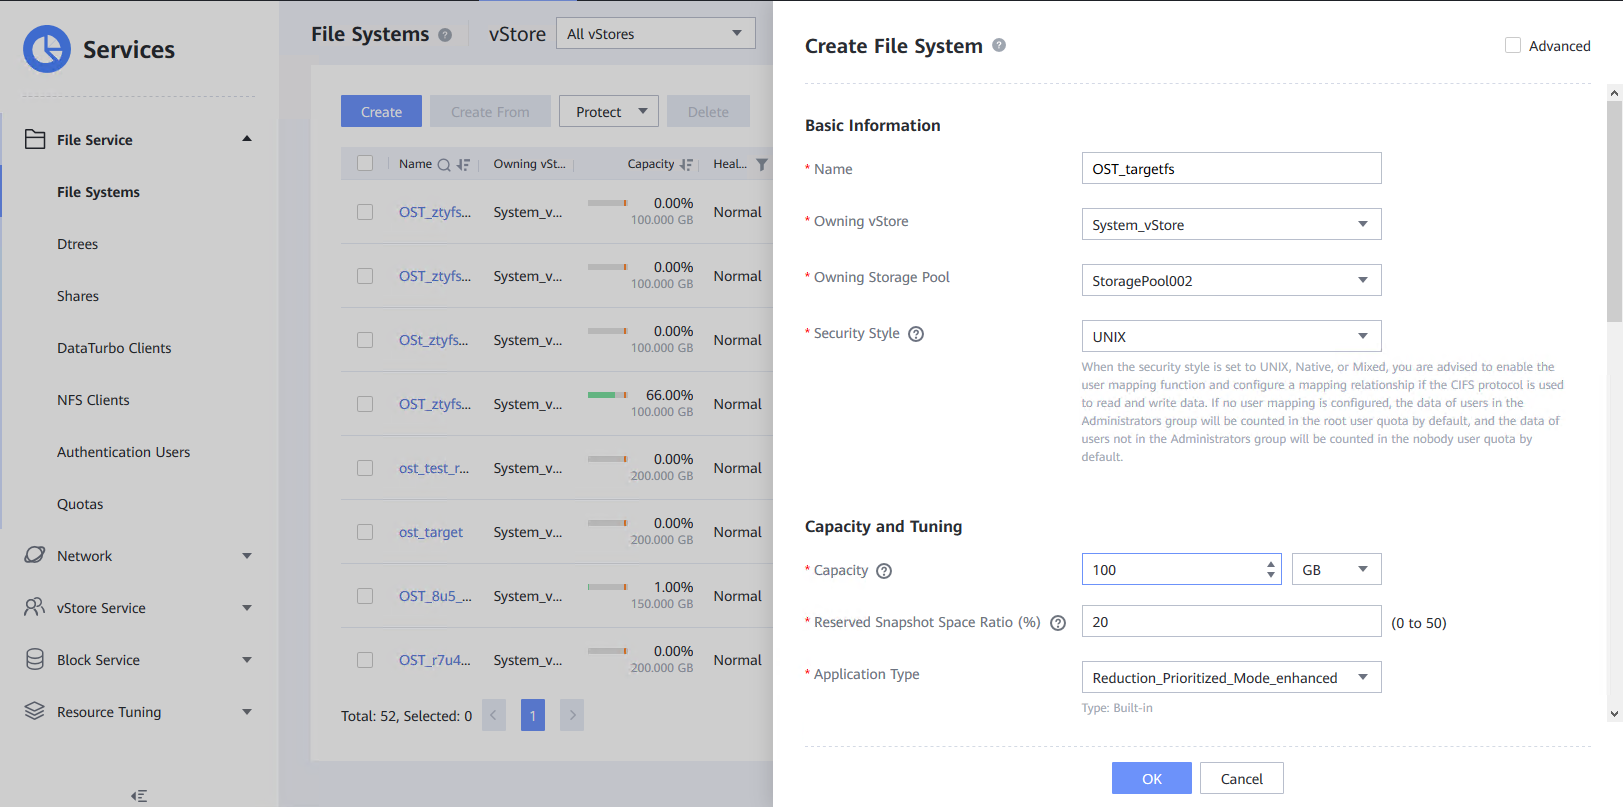
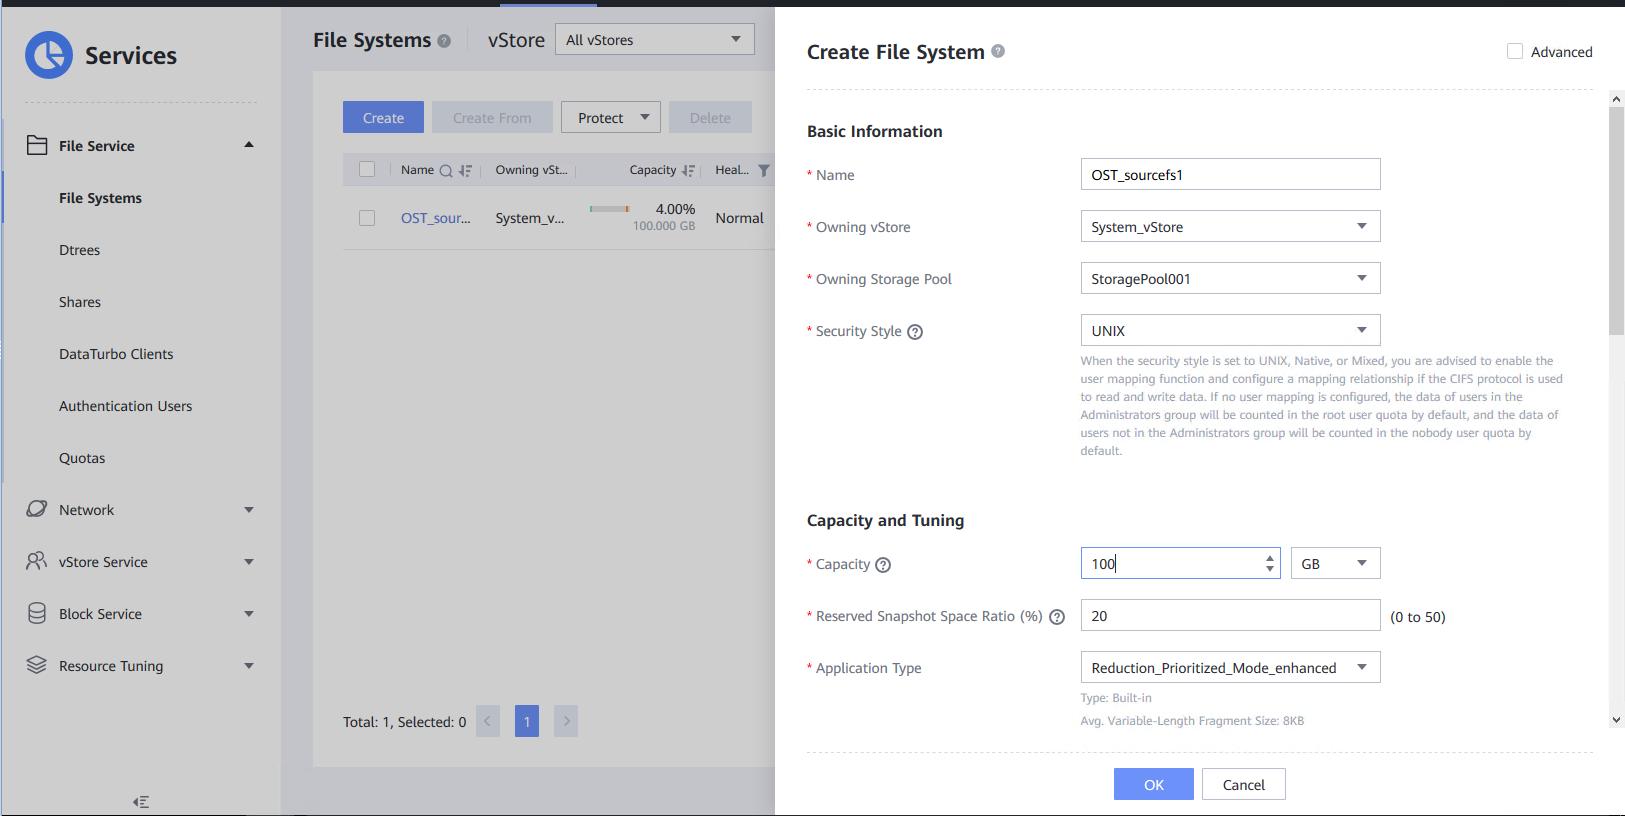
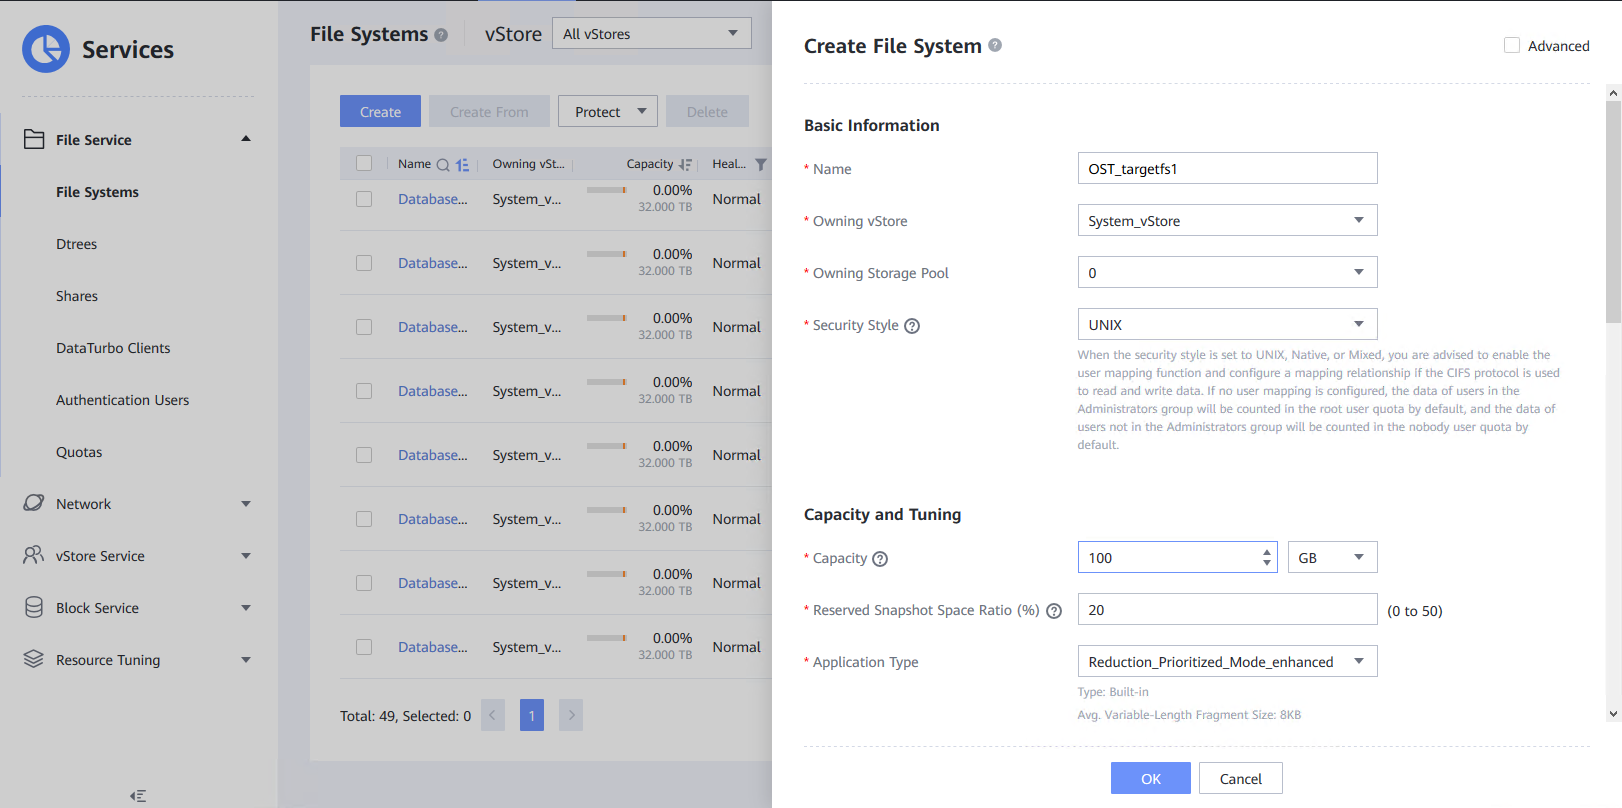
2.4 Create File Systems
For the same Master Domain test
On OceanProtect storage A
On OceanProtect storage B
For the different Master Domain test
On OceanProtect storage A
On OceanProtect storage B
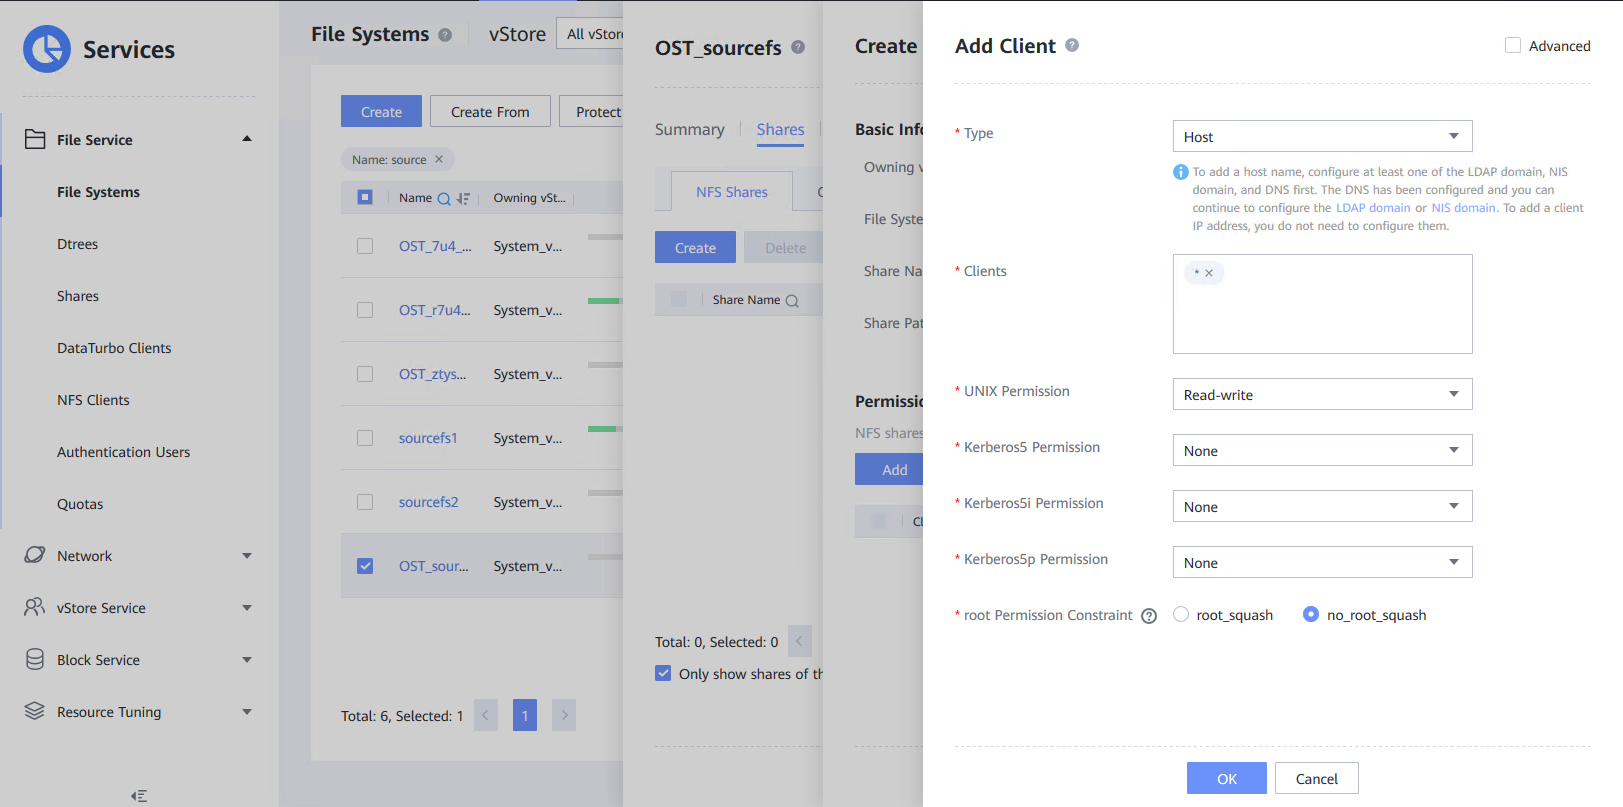
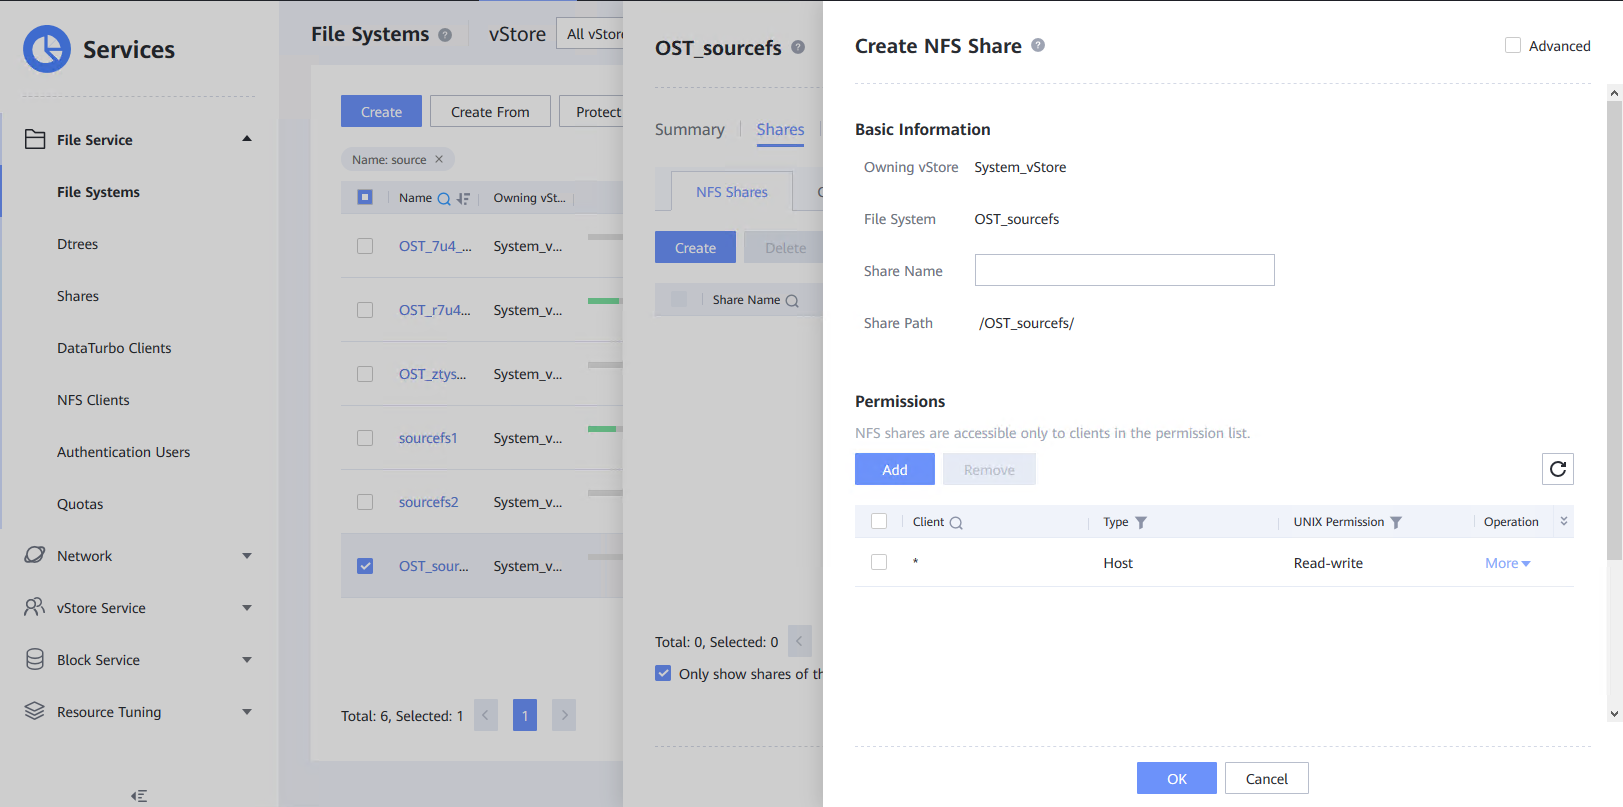
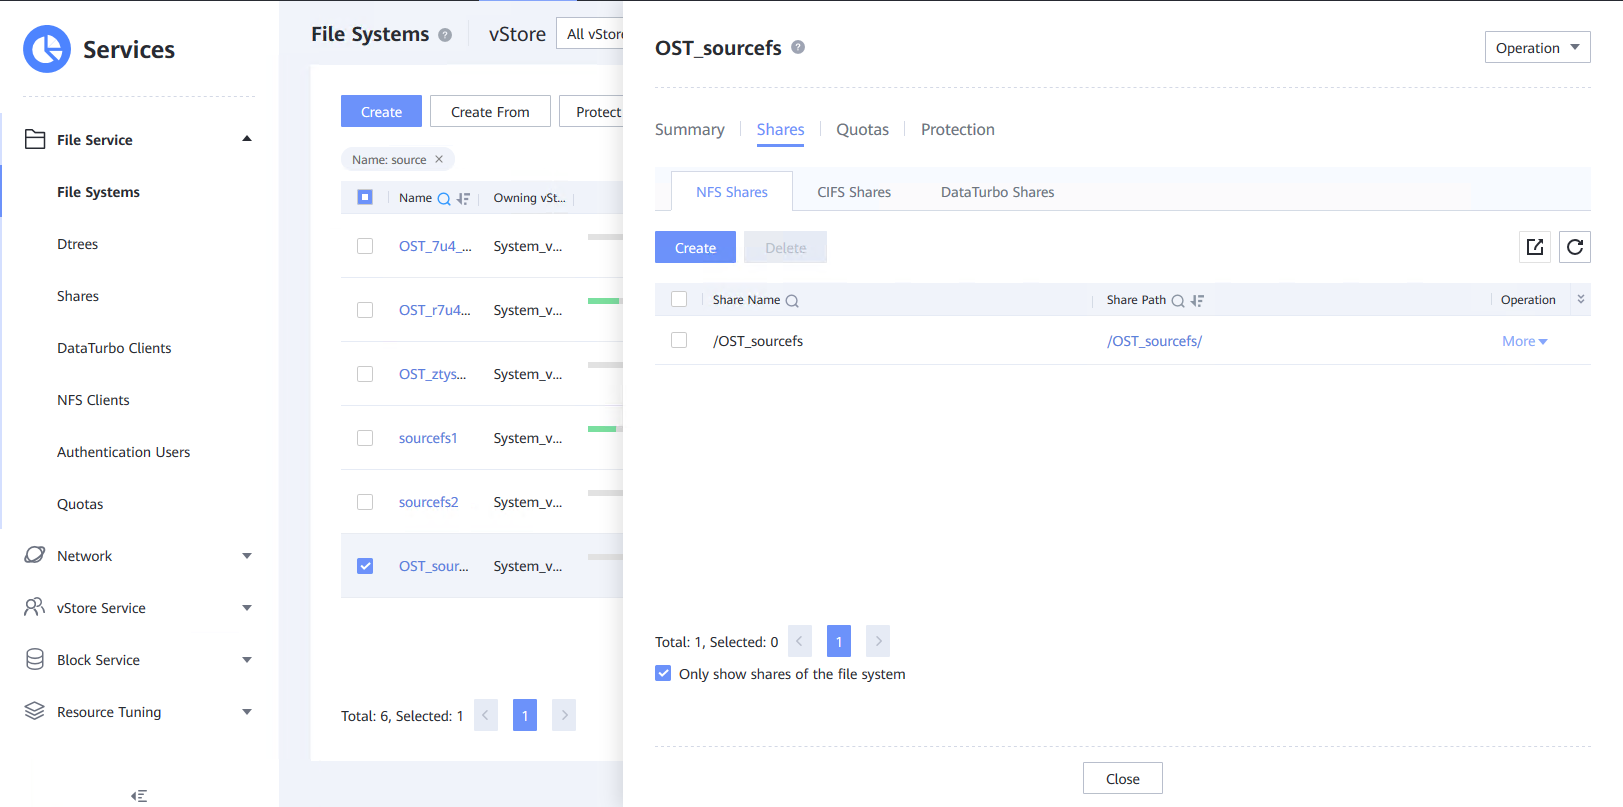
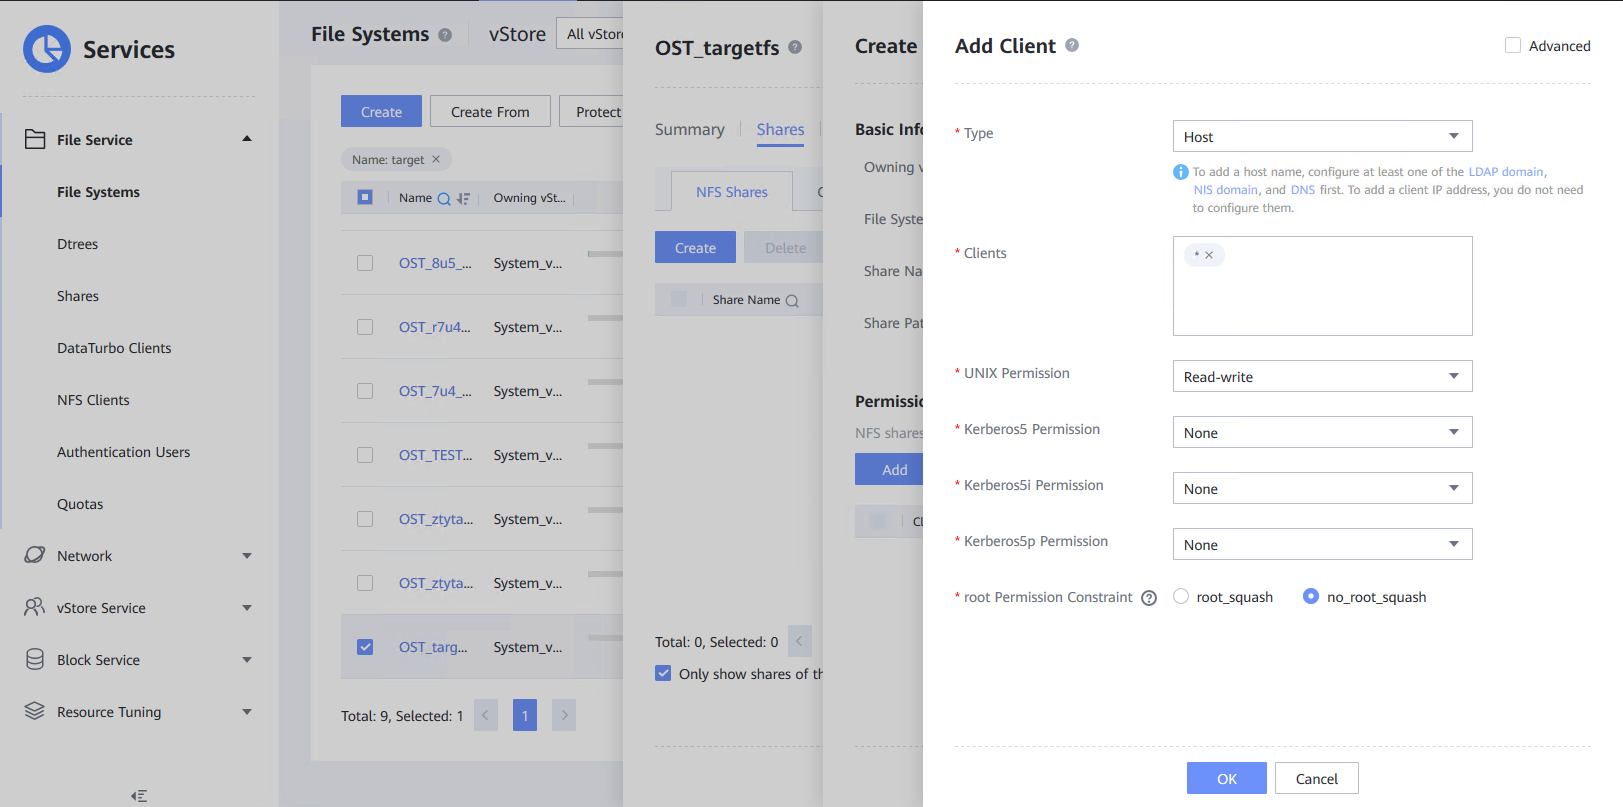
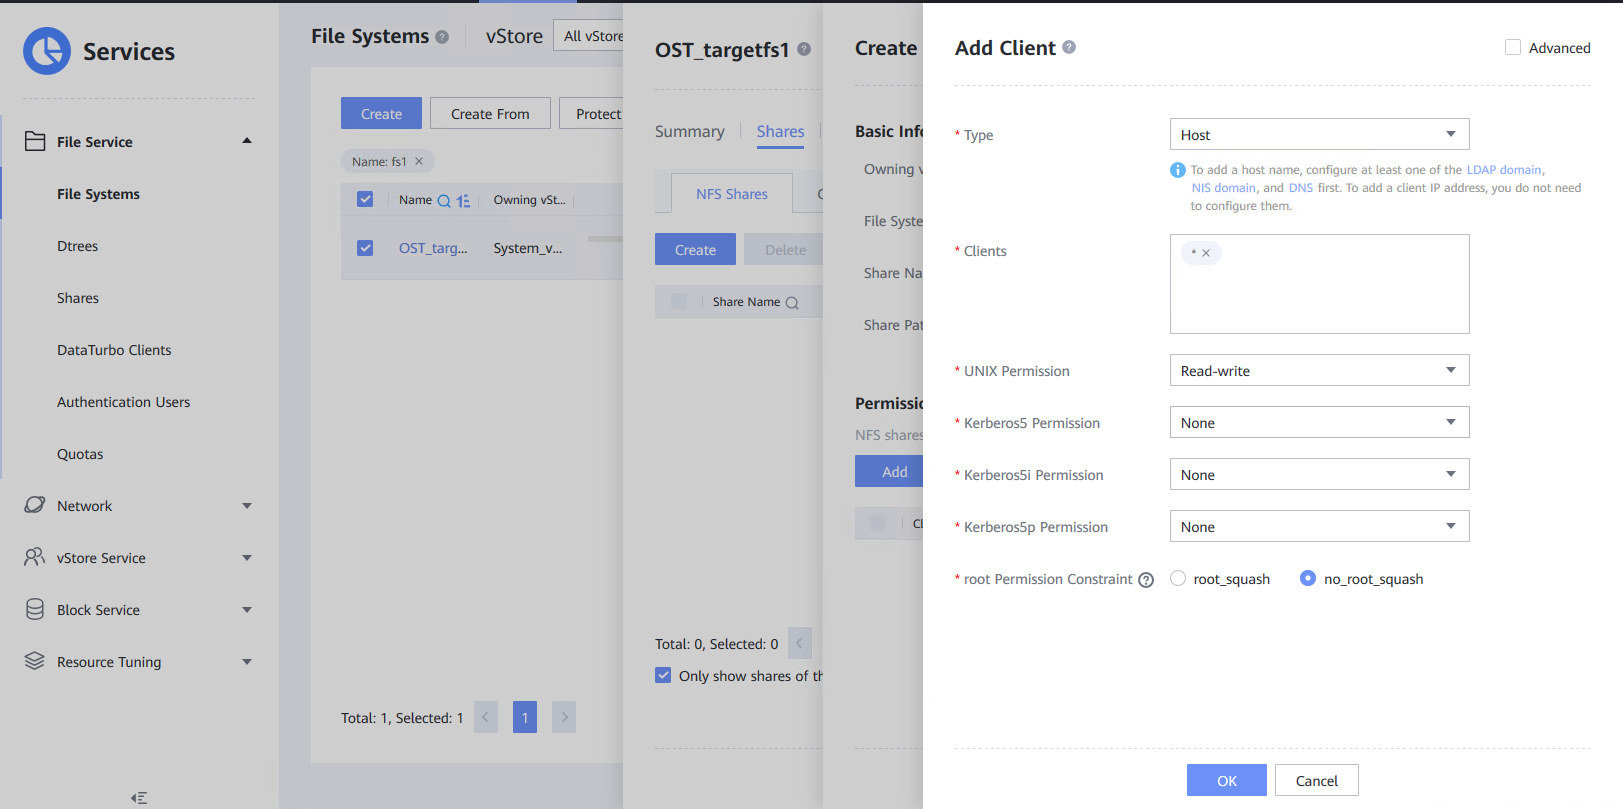
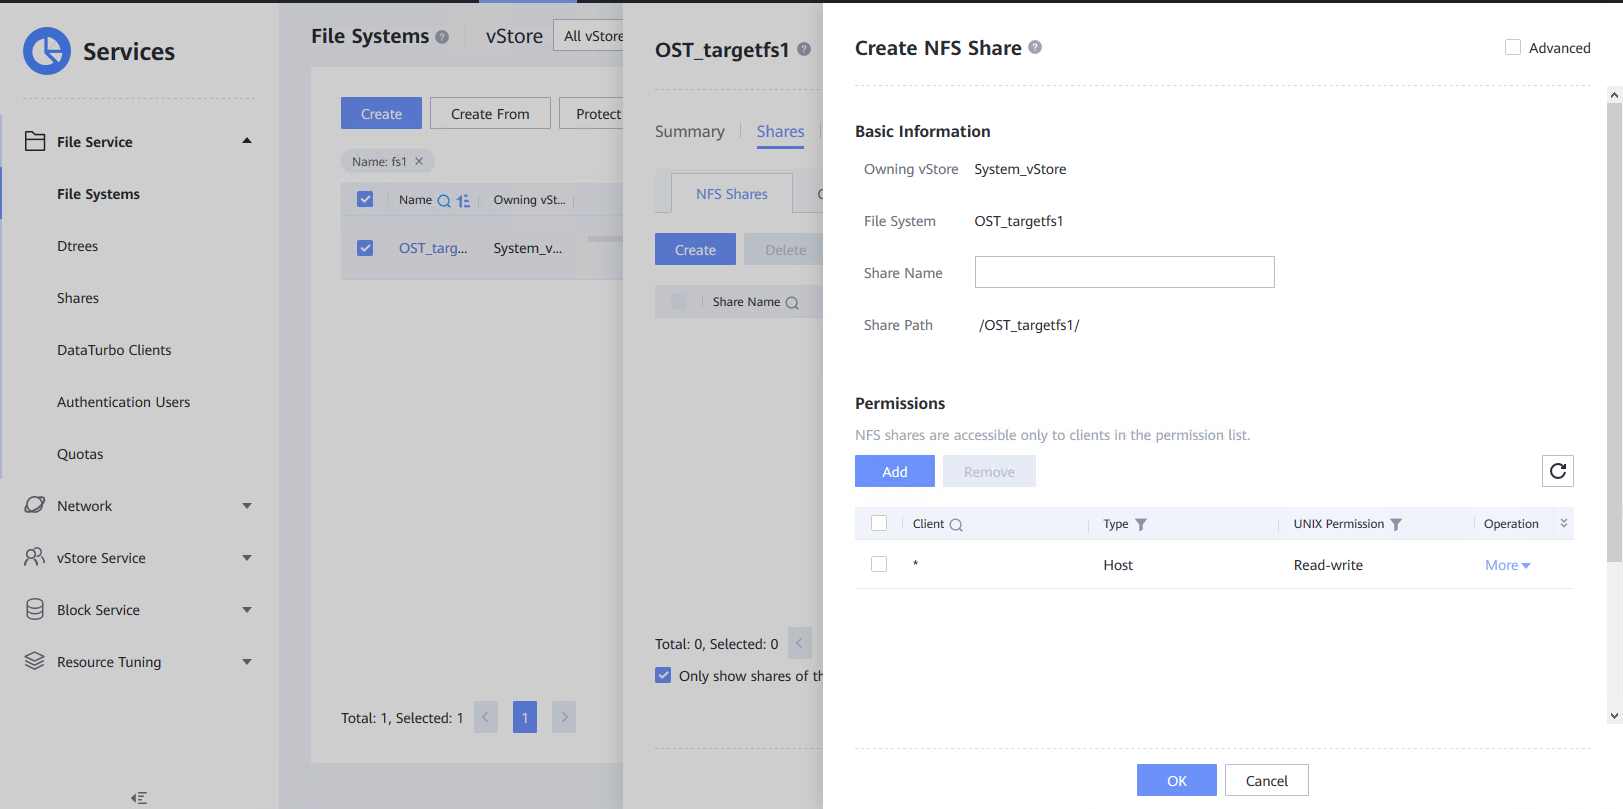
2.2 Create NFS Shares for File Systems
For the same Master Domain test
On OceanProtect storage A
On OceanProtect storage B
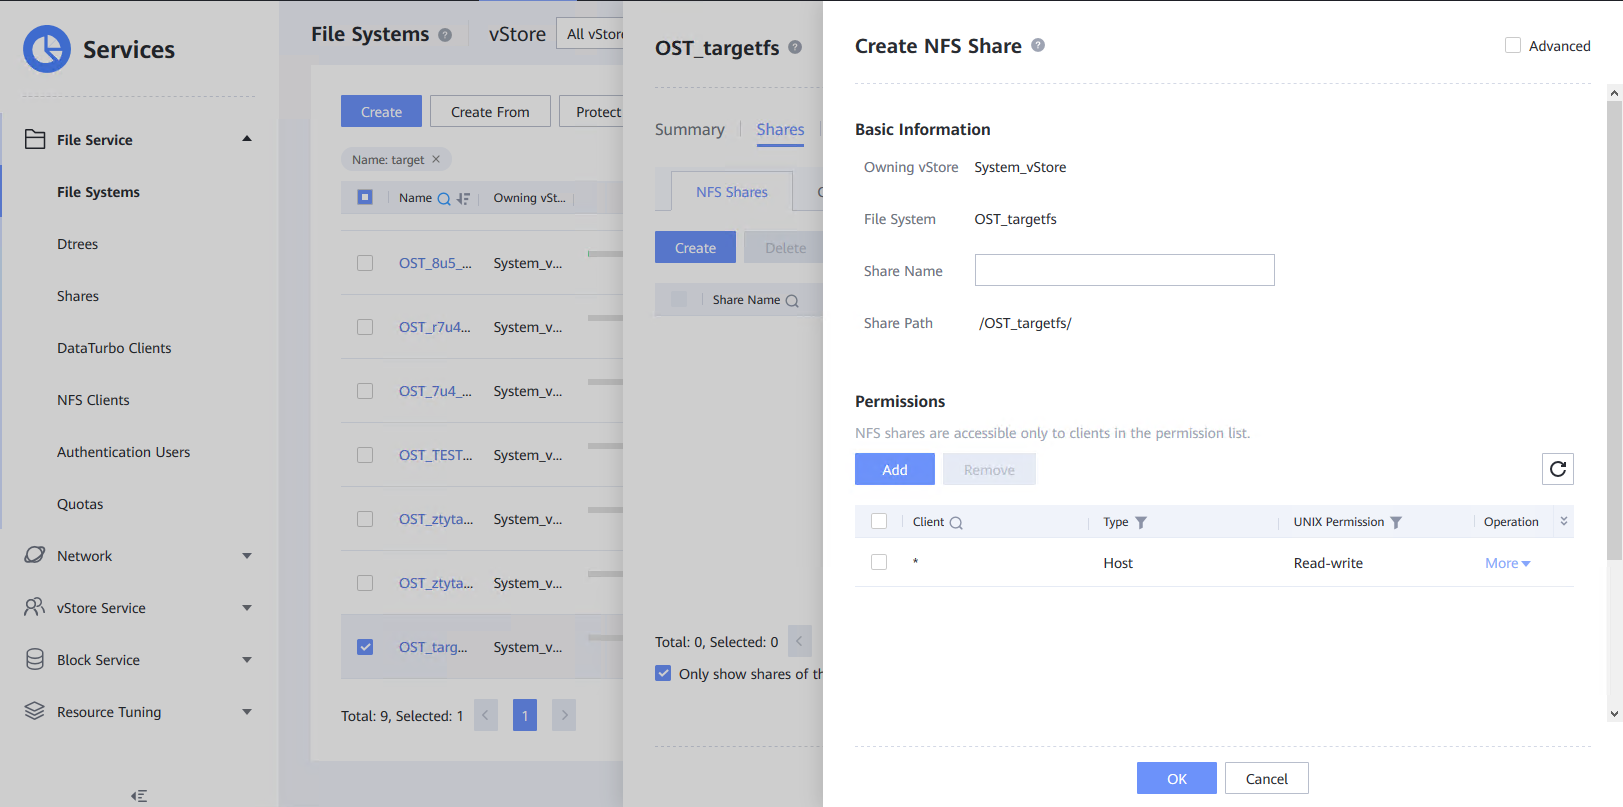
For the different Master Domain test
On OceanProtect storage A
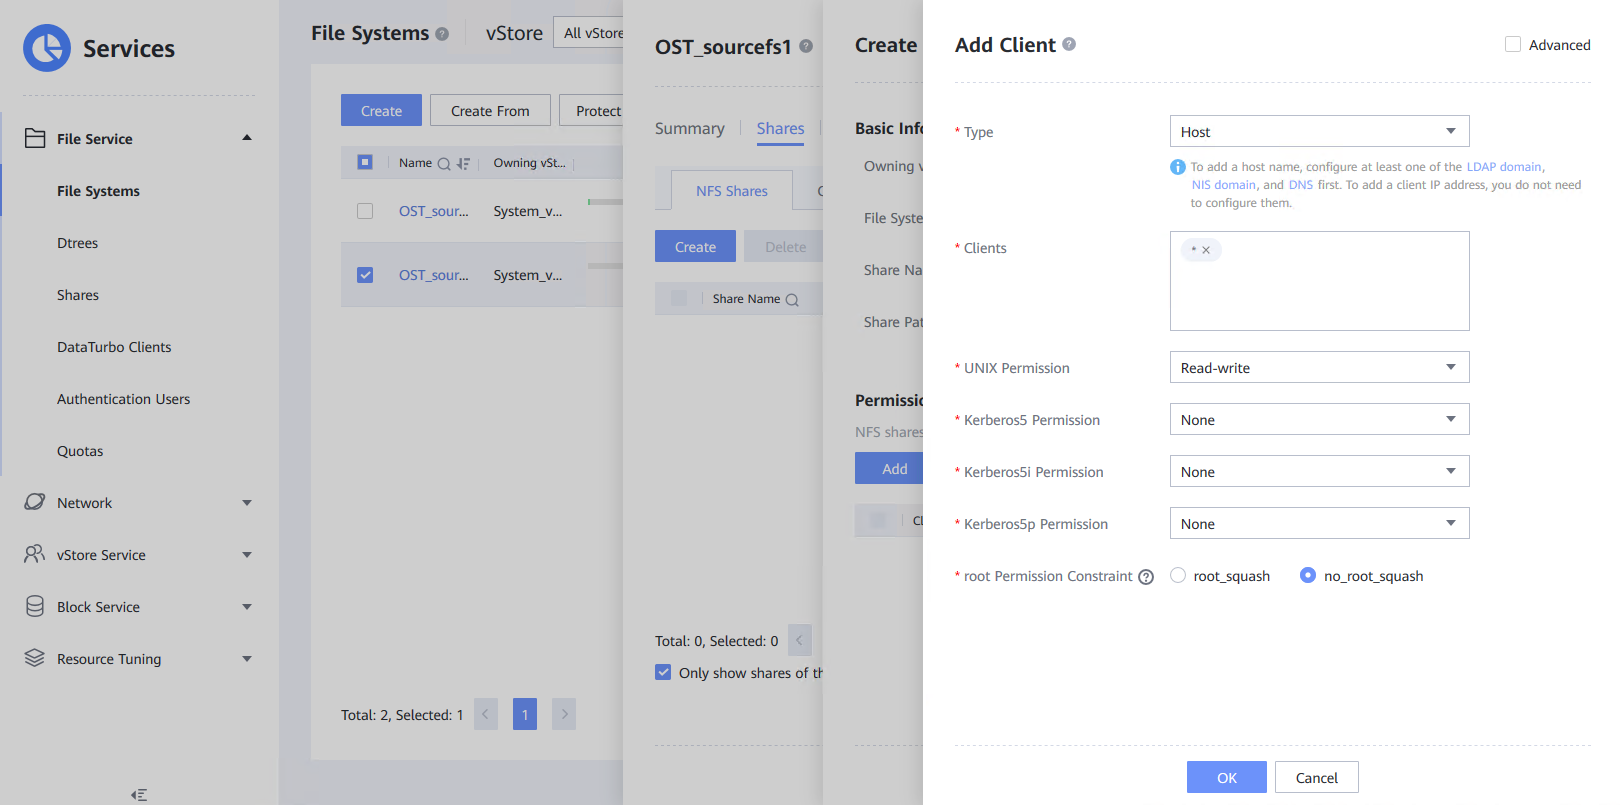
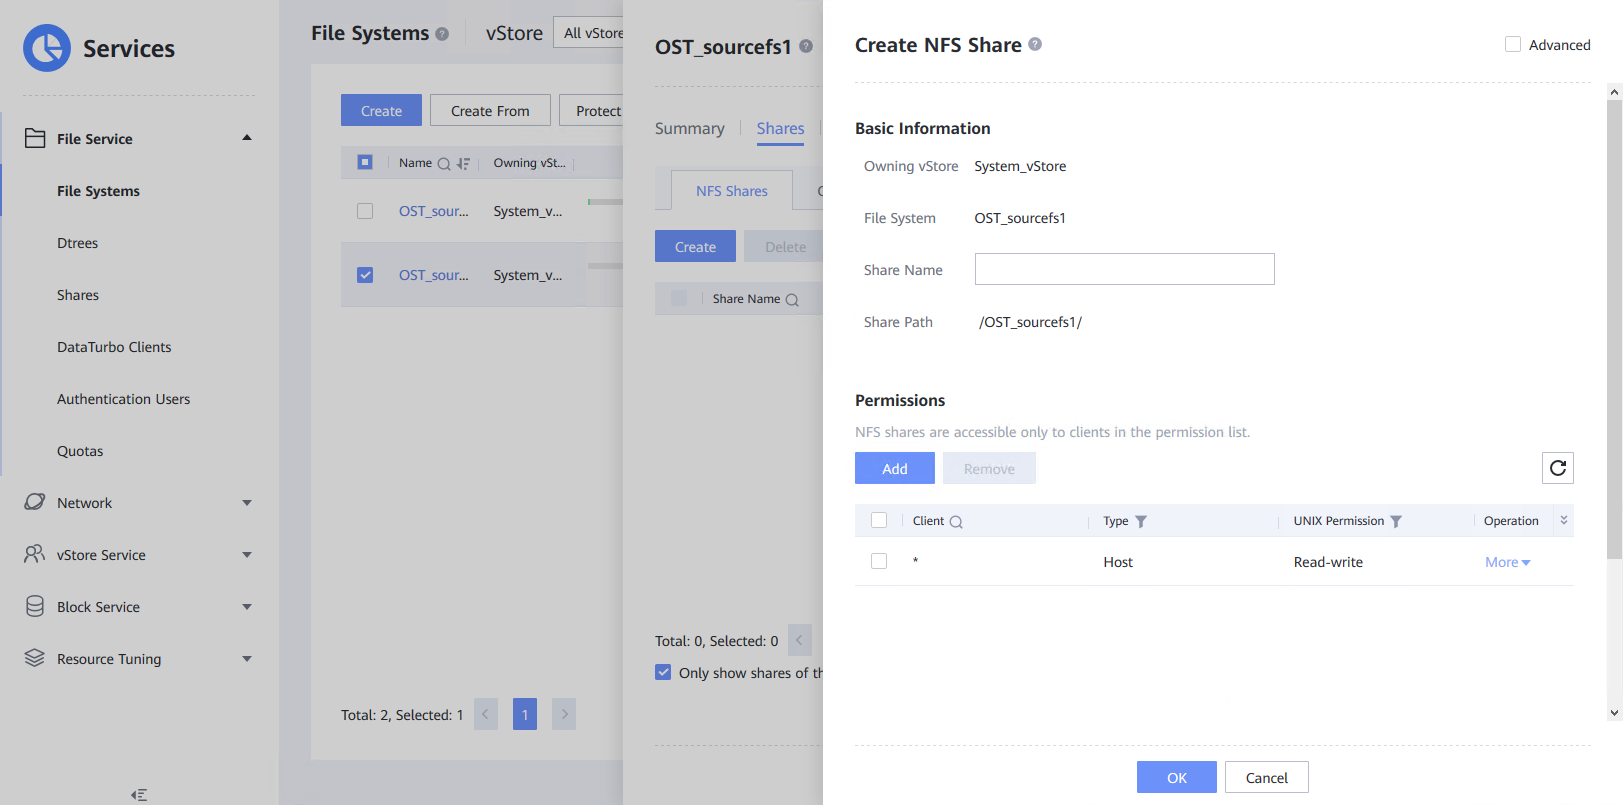
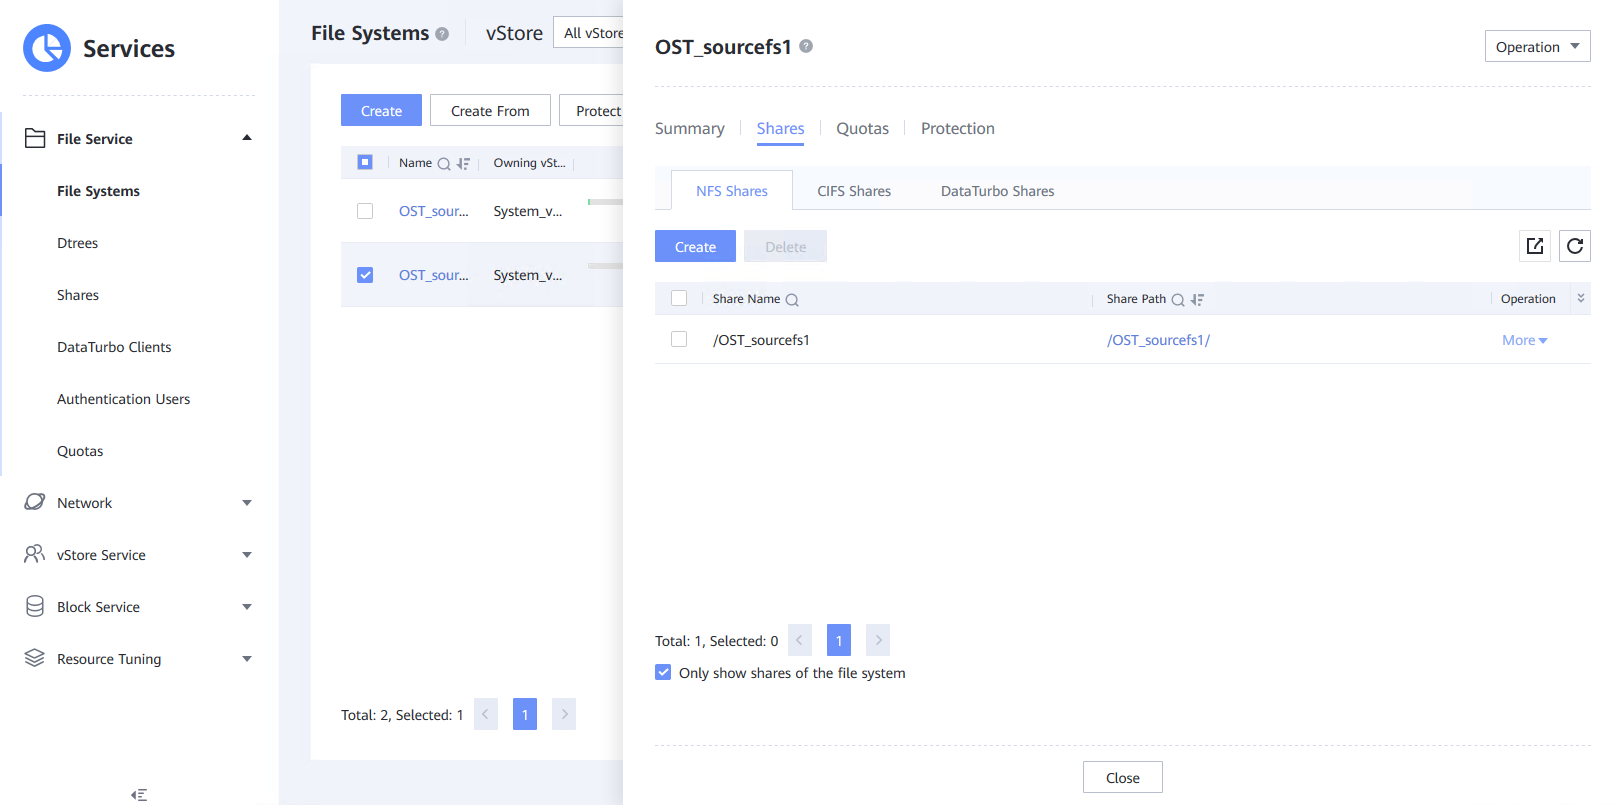
On OceanProtect storage B
2.3 Install OST plugin
On Media Server A
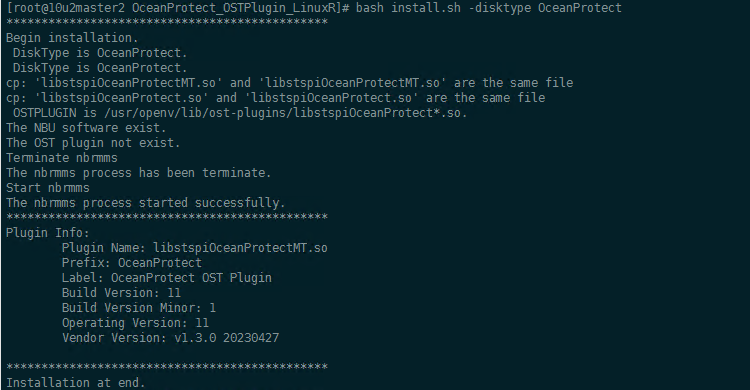
On Media Server C
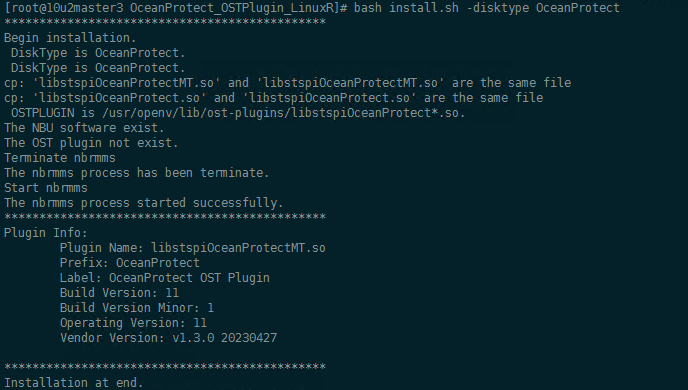
On Media Server B
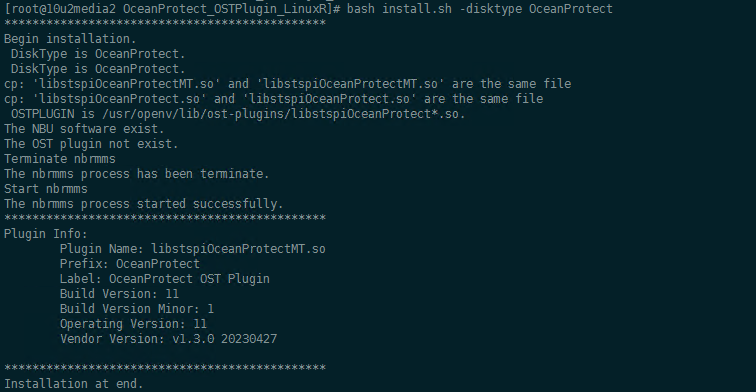
2.7 Configuring Multiple Links
For the same Master Domain test
On Media Server A:
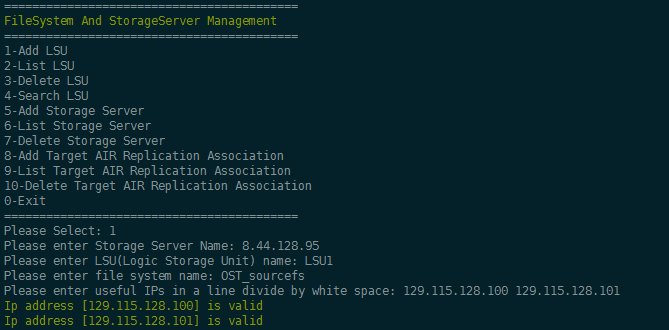
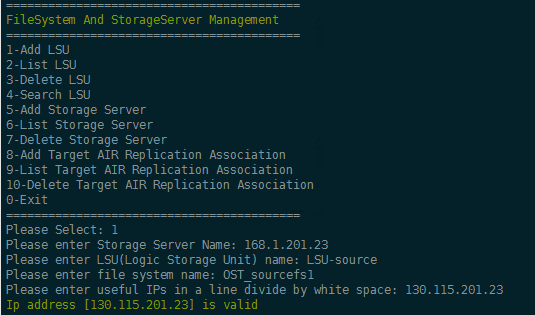
Run the following command: bash /opt/OceanProtect/scripts/config_filesystem_storage.sh.
Add source filesystem.
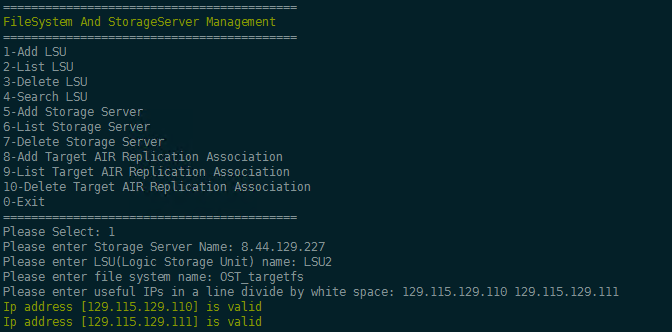
Add target filesystem.
On Media Server B
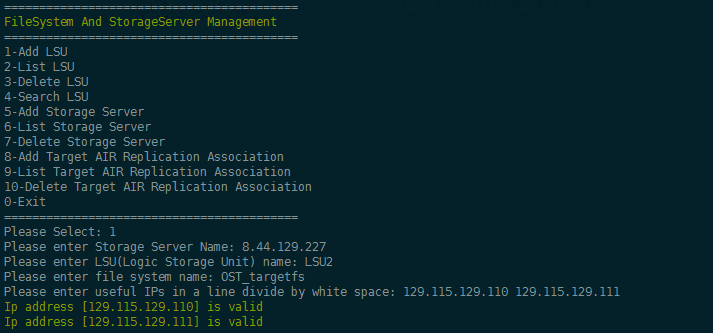
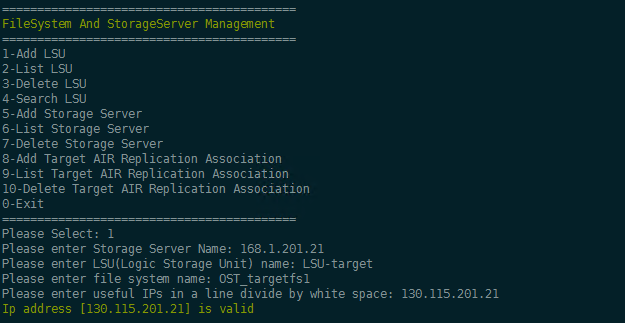
run the following command: bash /opt/OceanProtect/scripts/config_filesystem_storage.sh.
Add target filesystem.
For the different Master Domain test
On Media Server A
On Media Server C
3. OceanProtect Backup Storage Interconnection with Veritas NetBackup
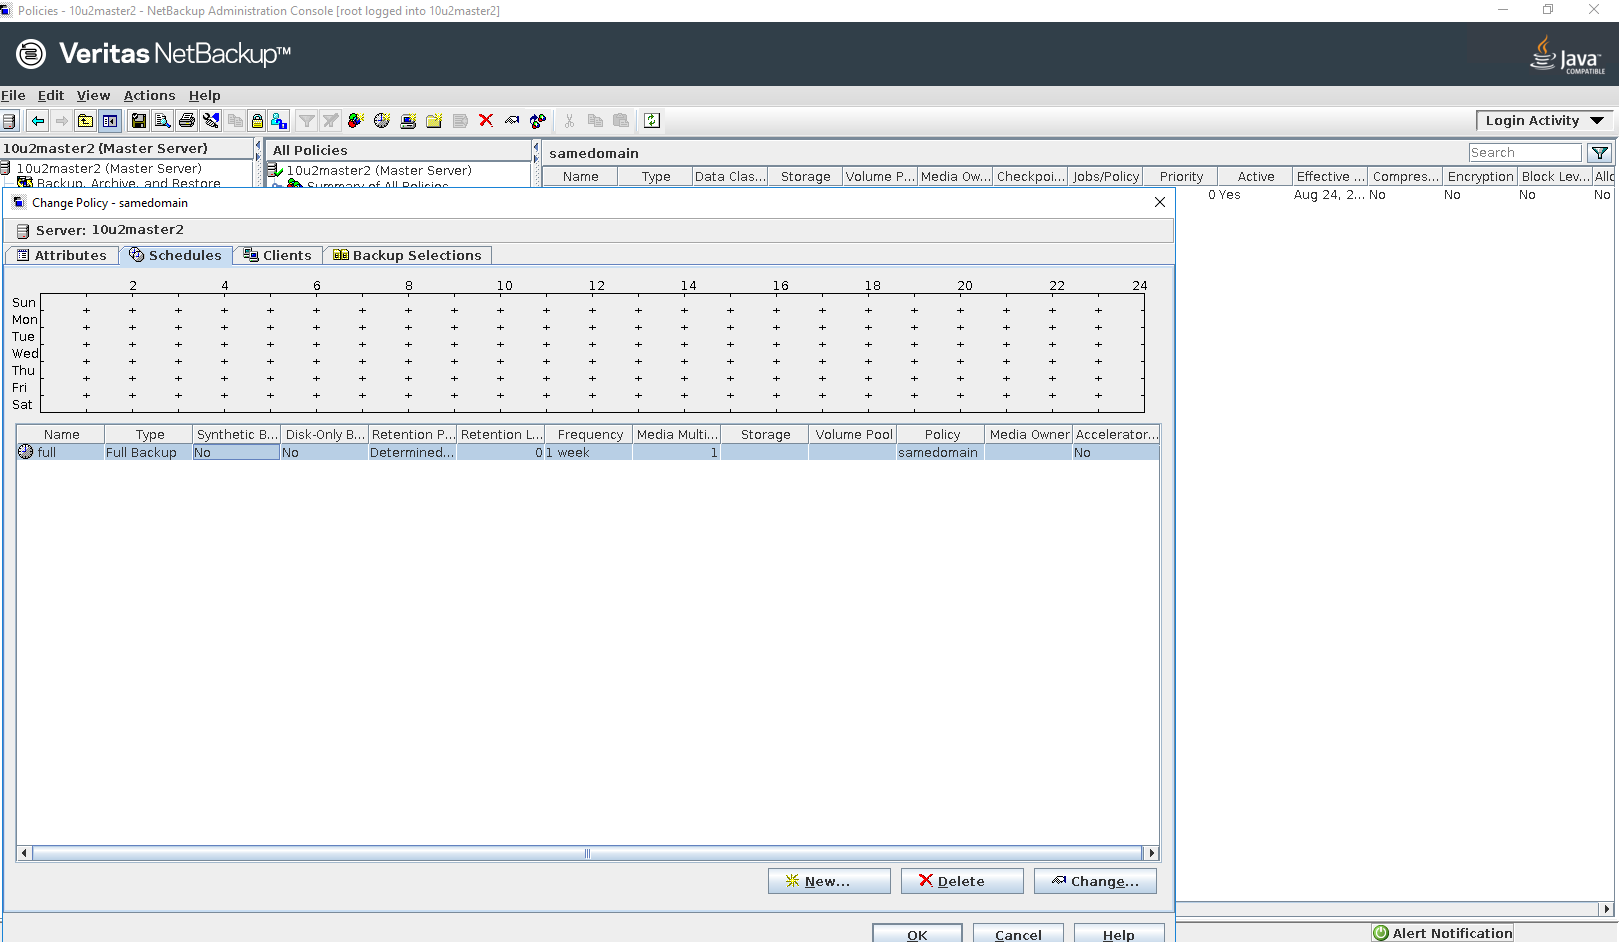
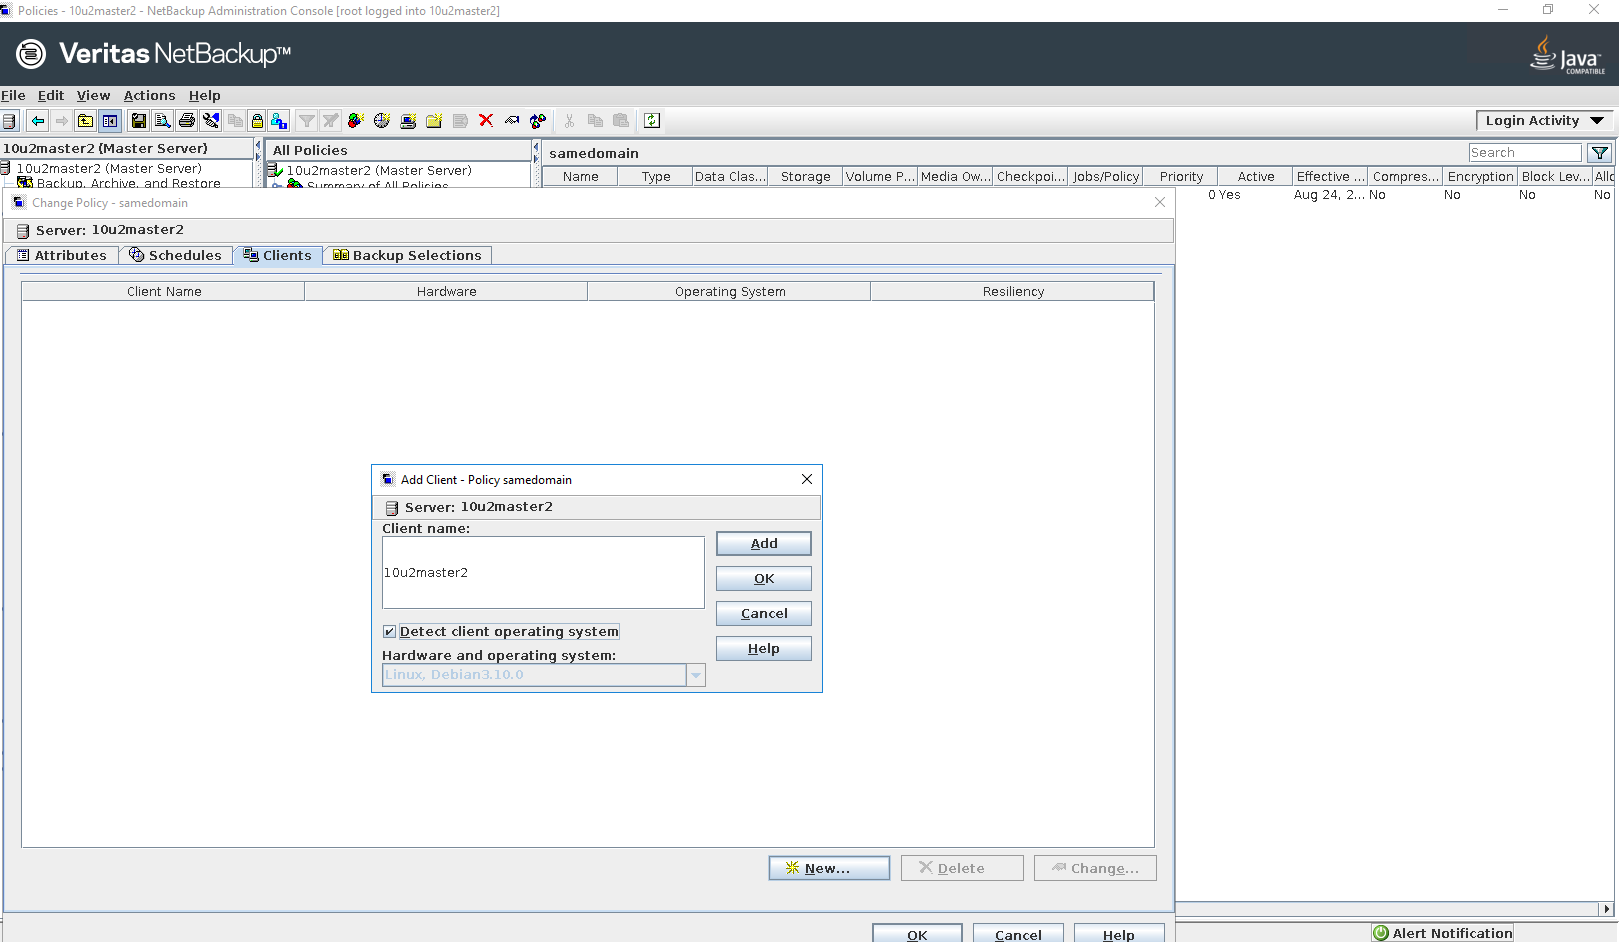
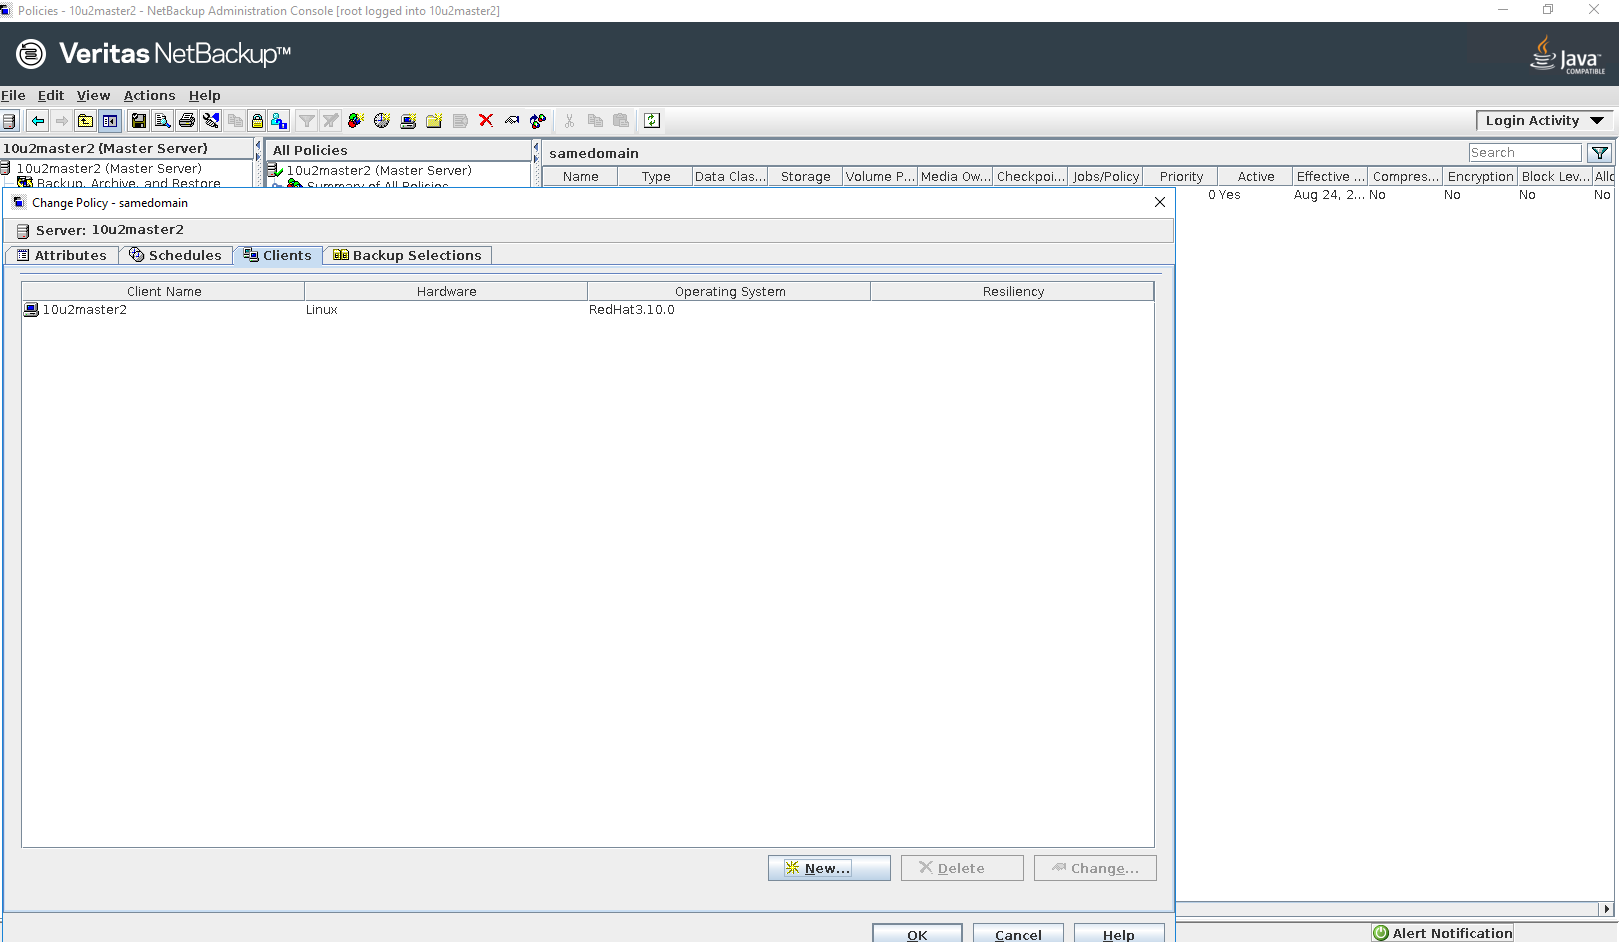
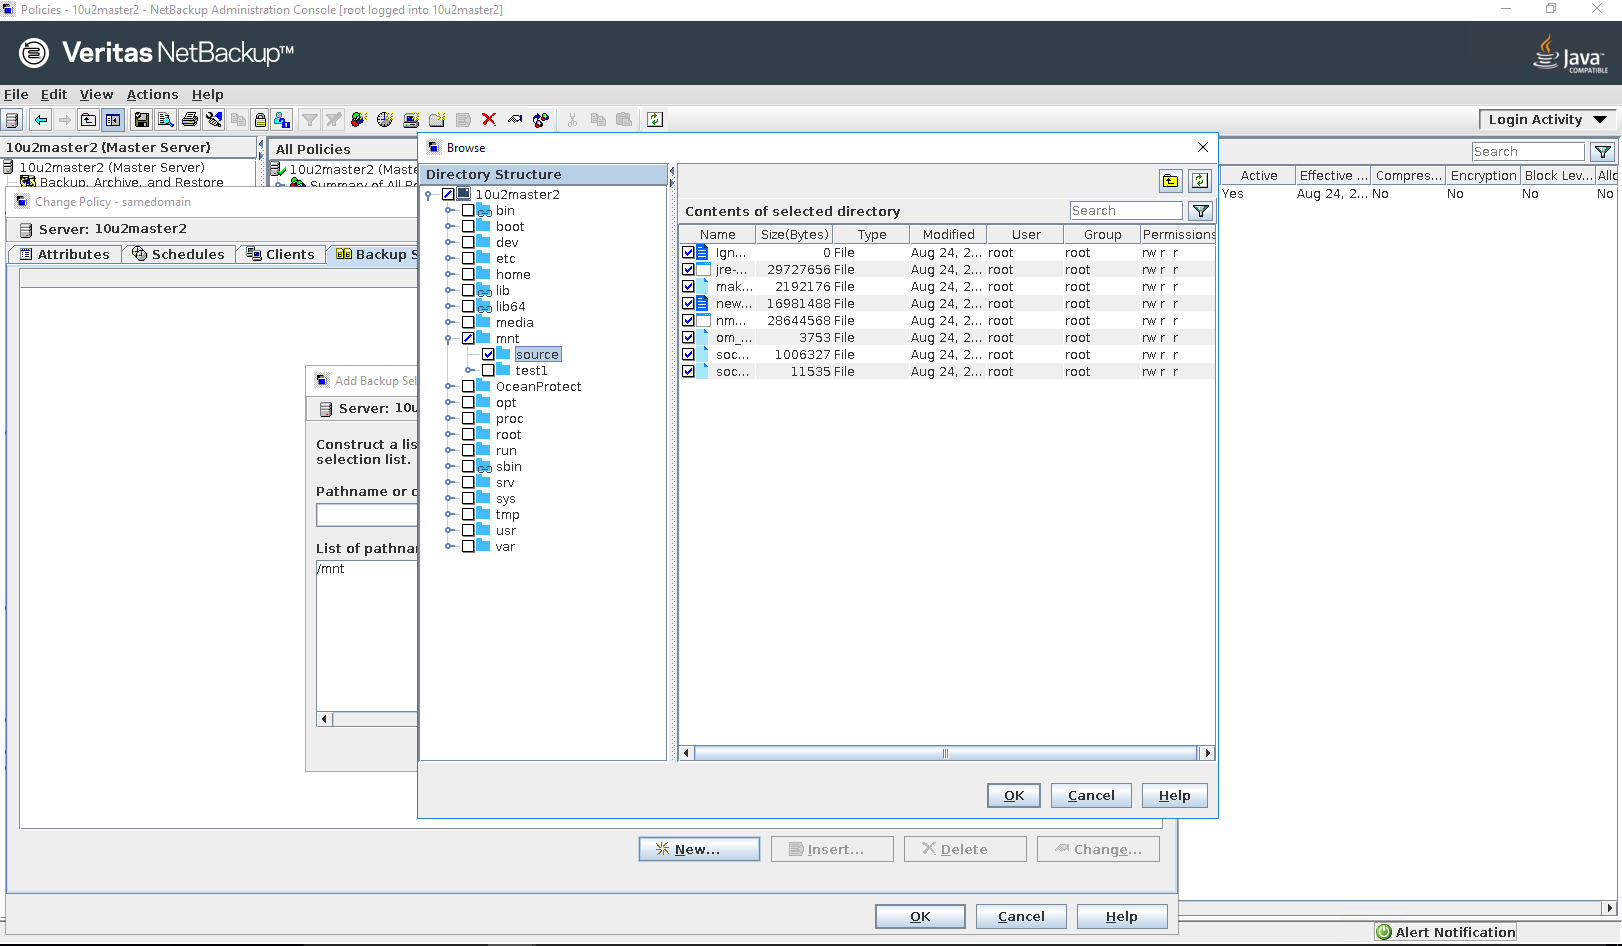
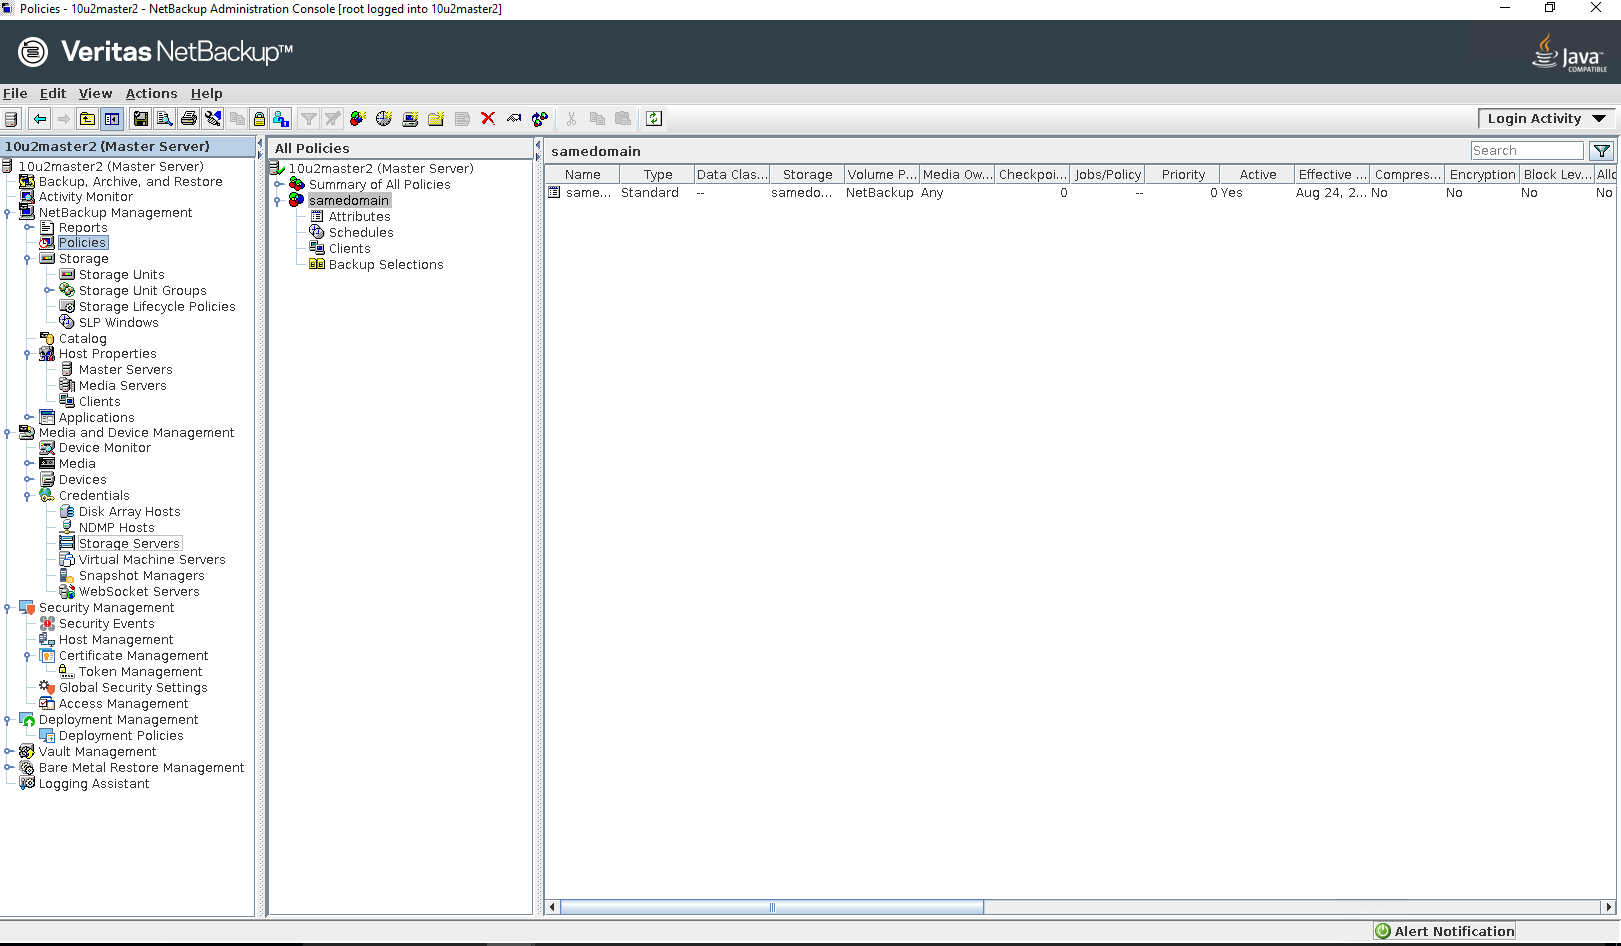
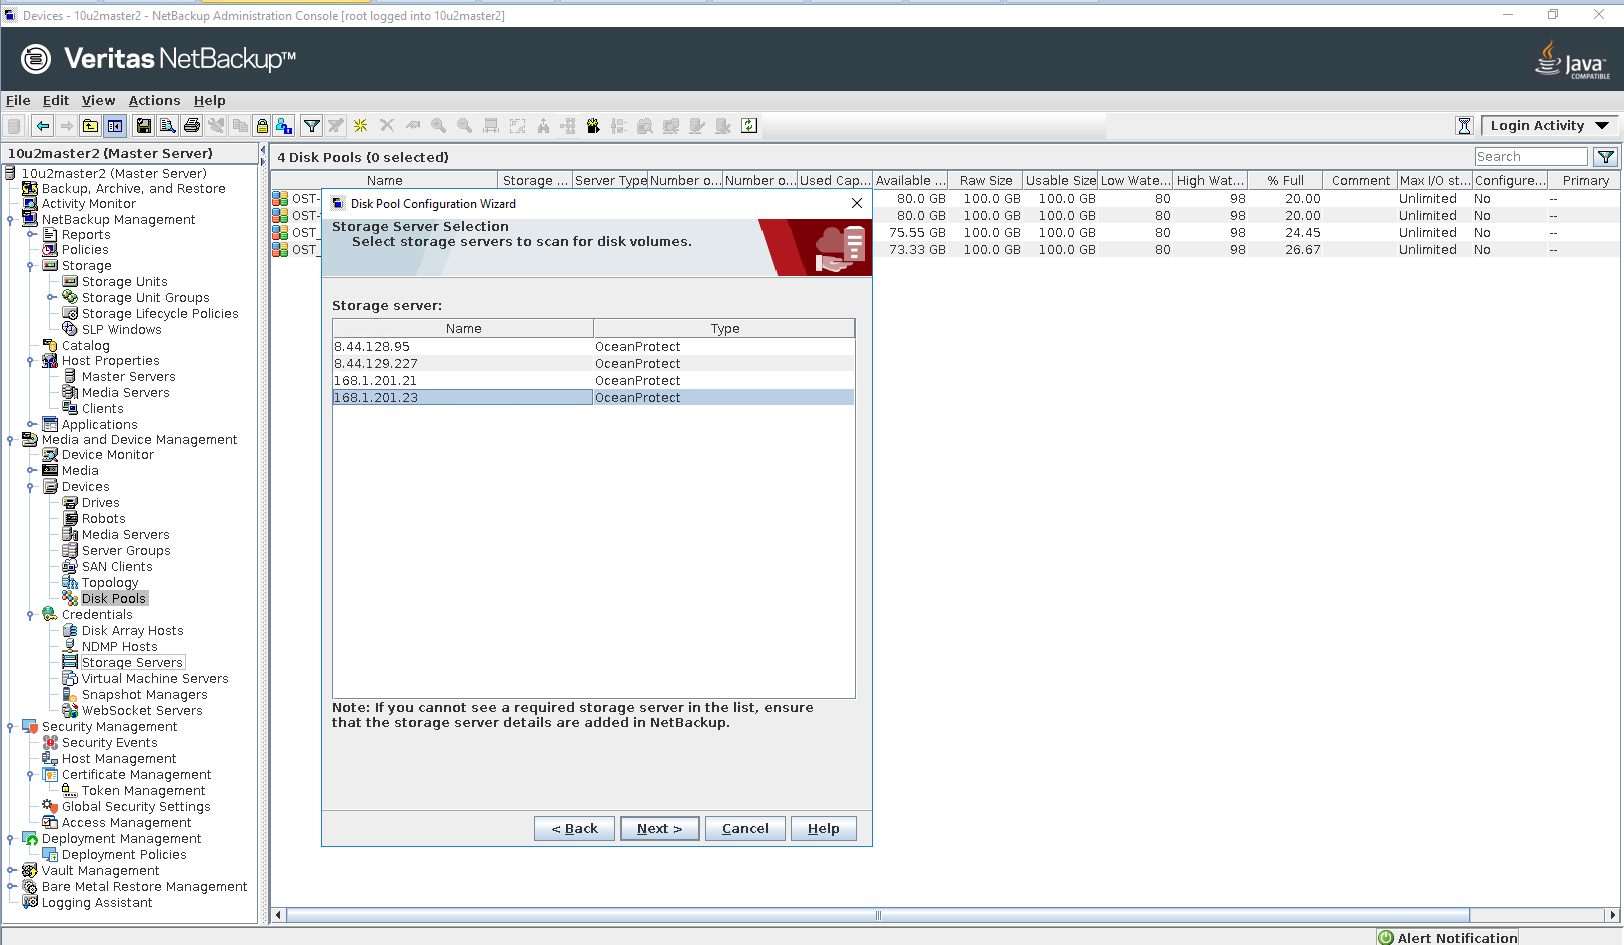
3.1 Add NFS Share and Backup Policy for the Same Master Domain
Test Purpose | Add NFS shares to the backup server as the backup Media and create backup policy |
Test Networking | Huawei OceanProtect Backup Storage Function Compatibility Test Networking 1 |
Prerequisites |
|
Test Procedure |
|
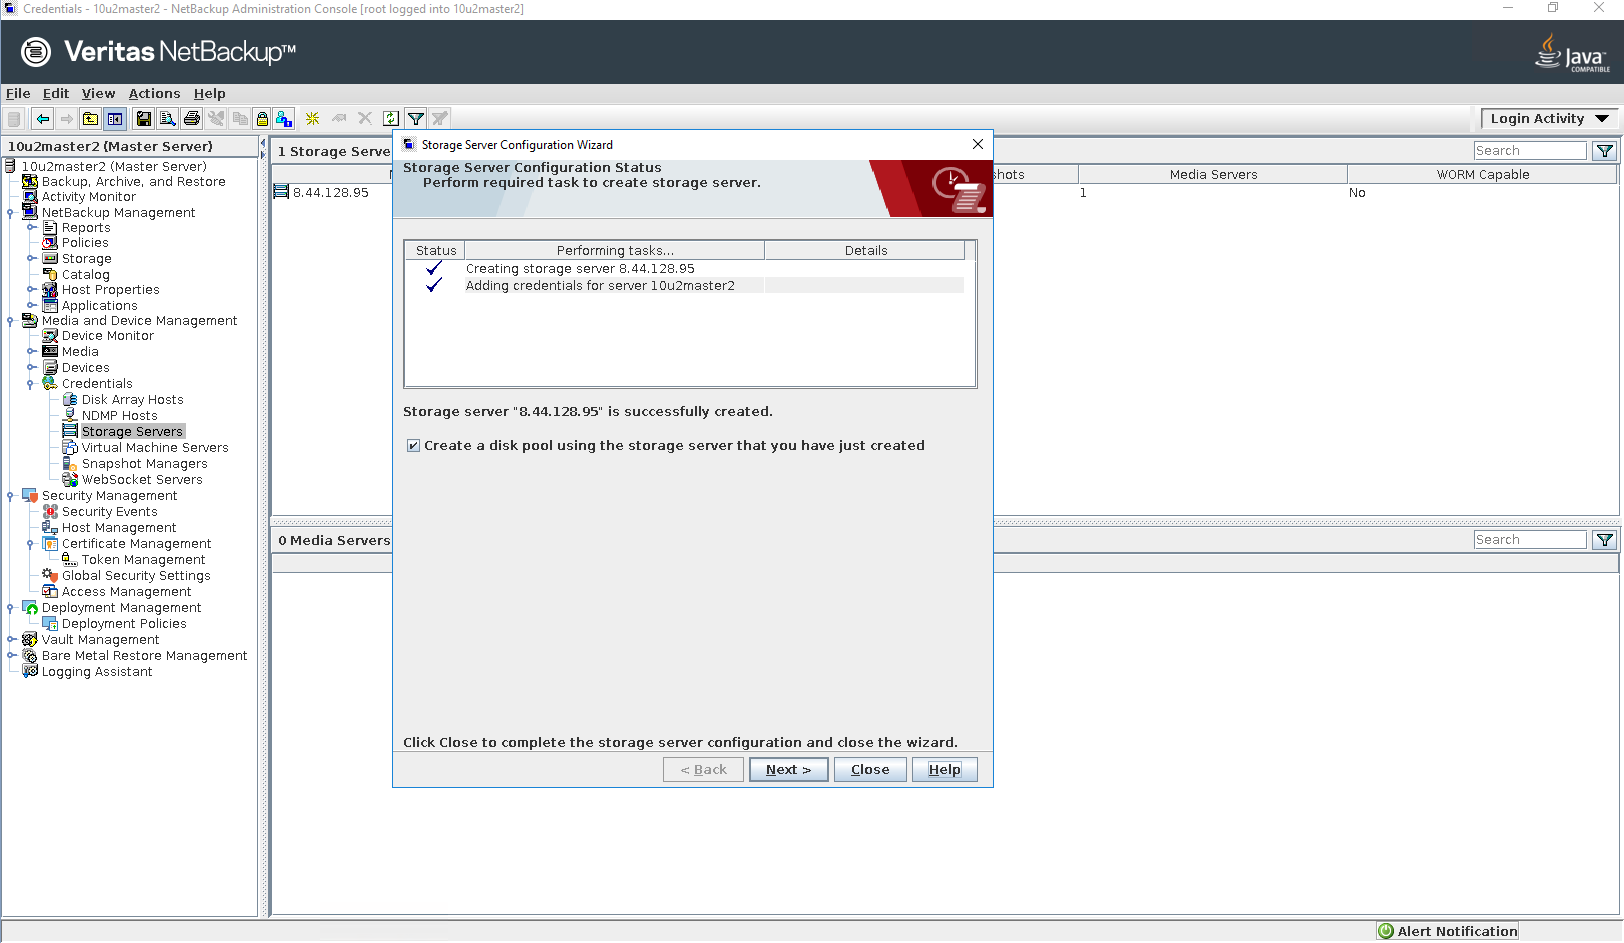
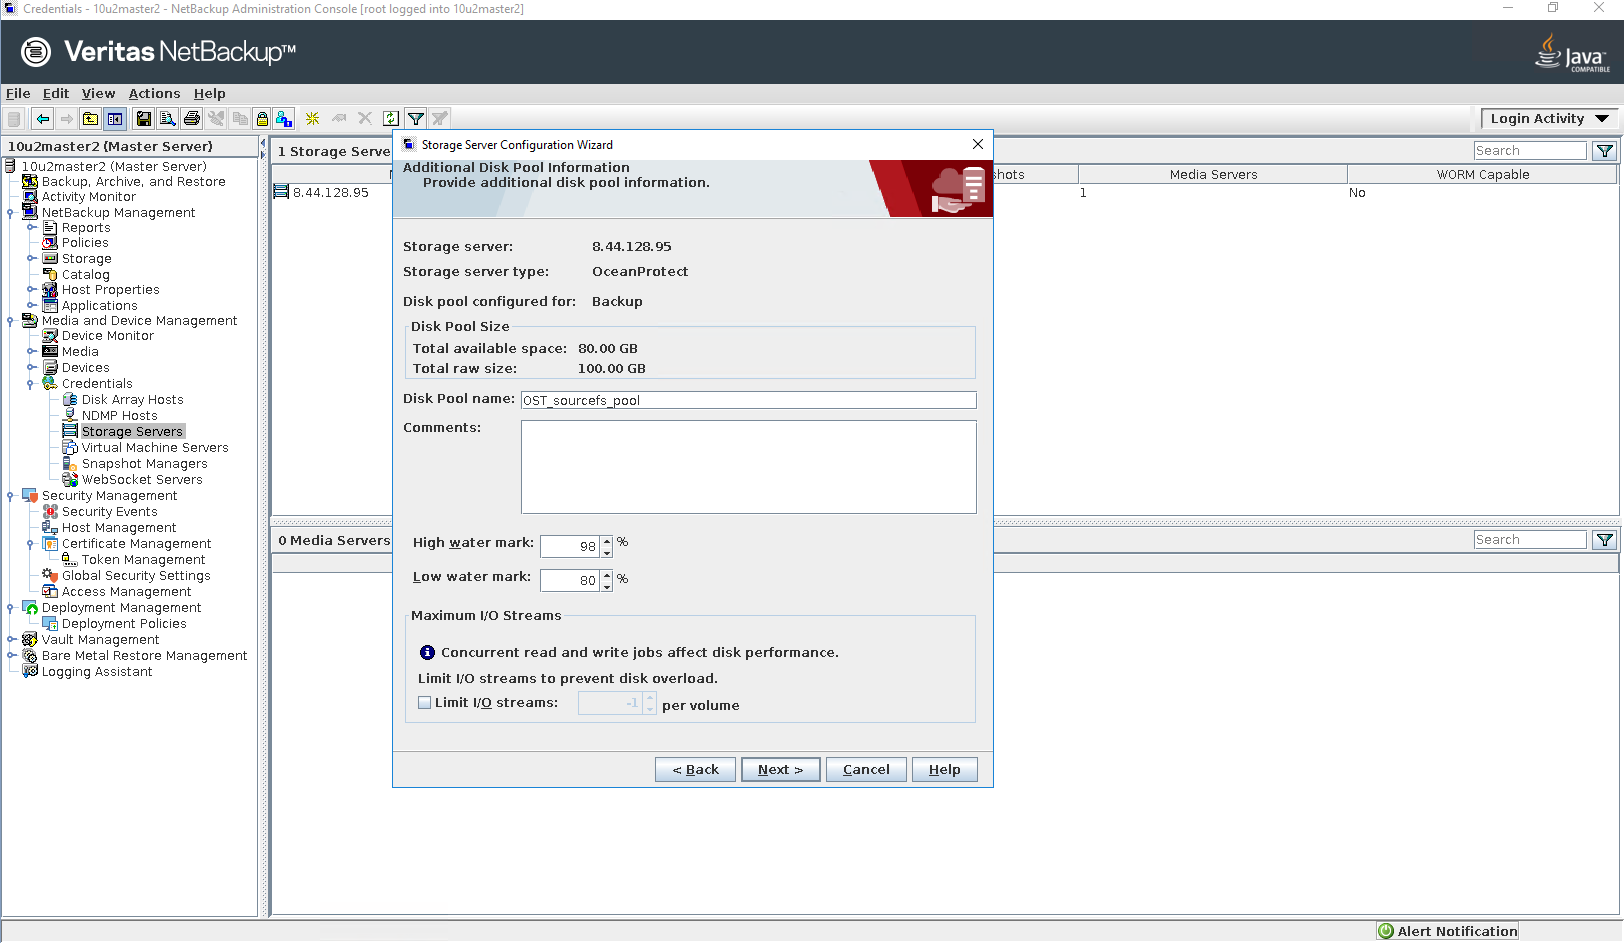
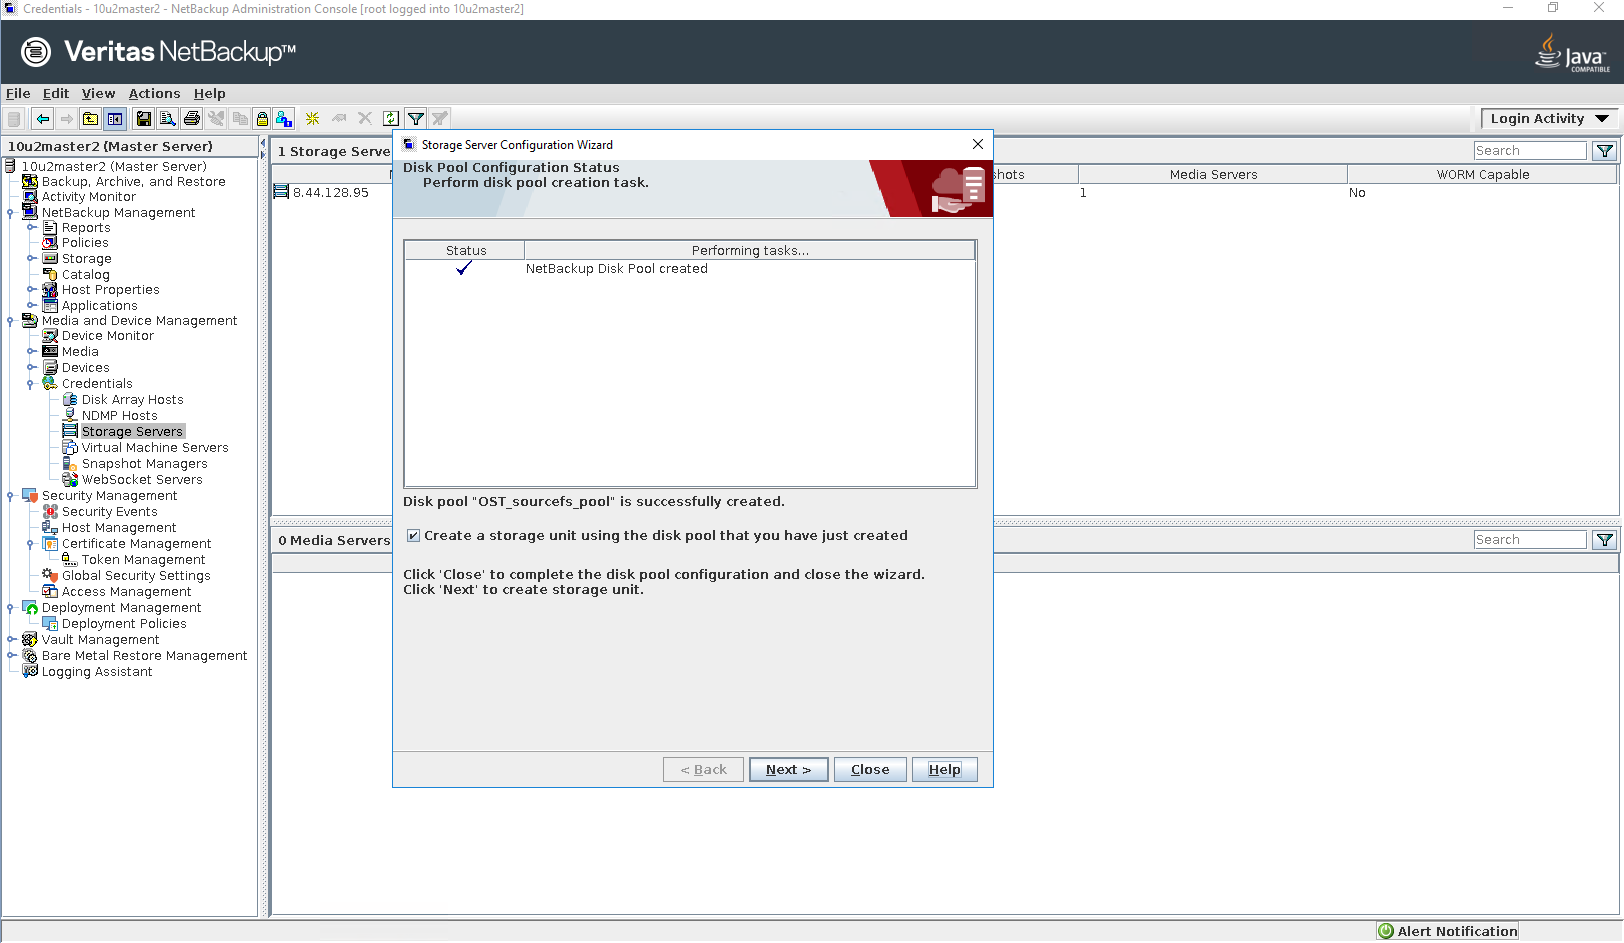
Expected Result | Step 1 Storage server is configured successfully. Step 2 Disk pool is configured successfully. Step 3 Storage unit is configured successfully. Step 4 Storage server,disk pool and storage unit are configured successfully. Step 5 Storage lifecycle policy is configured successfully. Step 6 Backup policy is configured successfully. |
Test Result | Passed Step 1 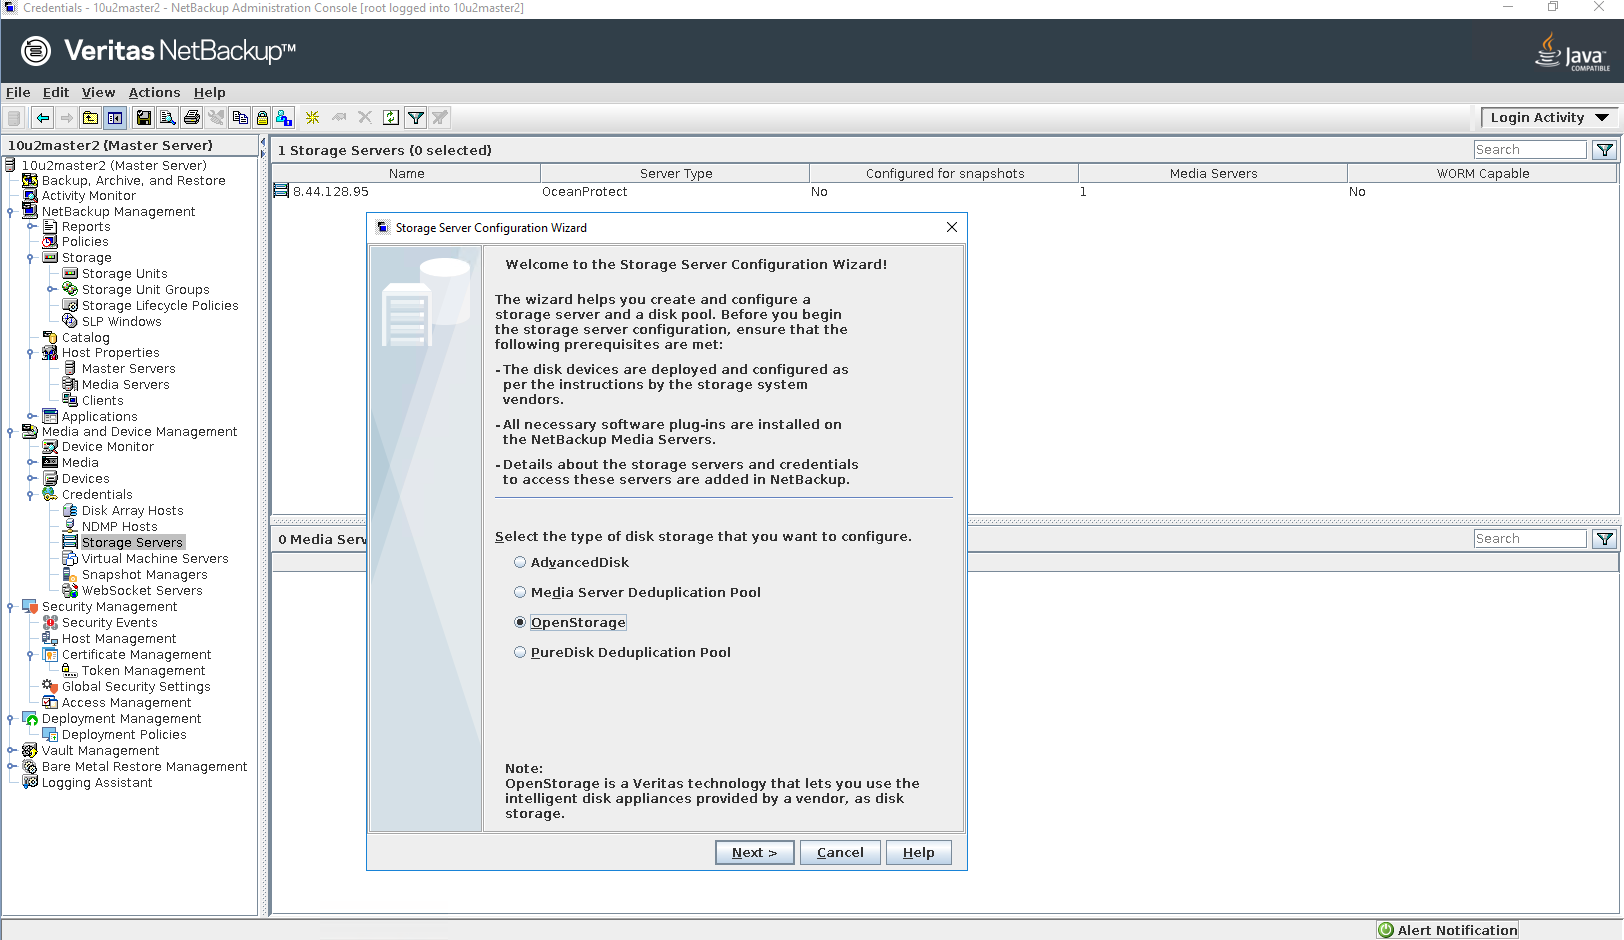
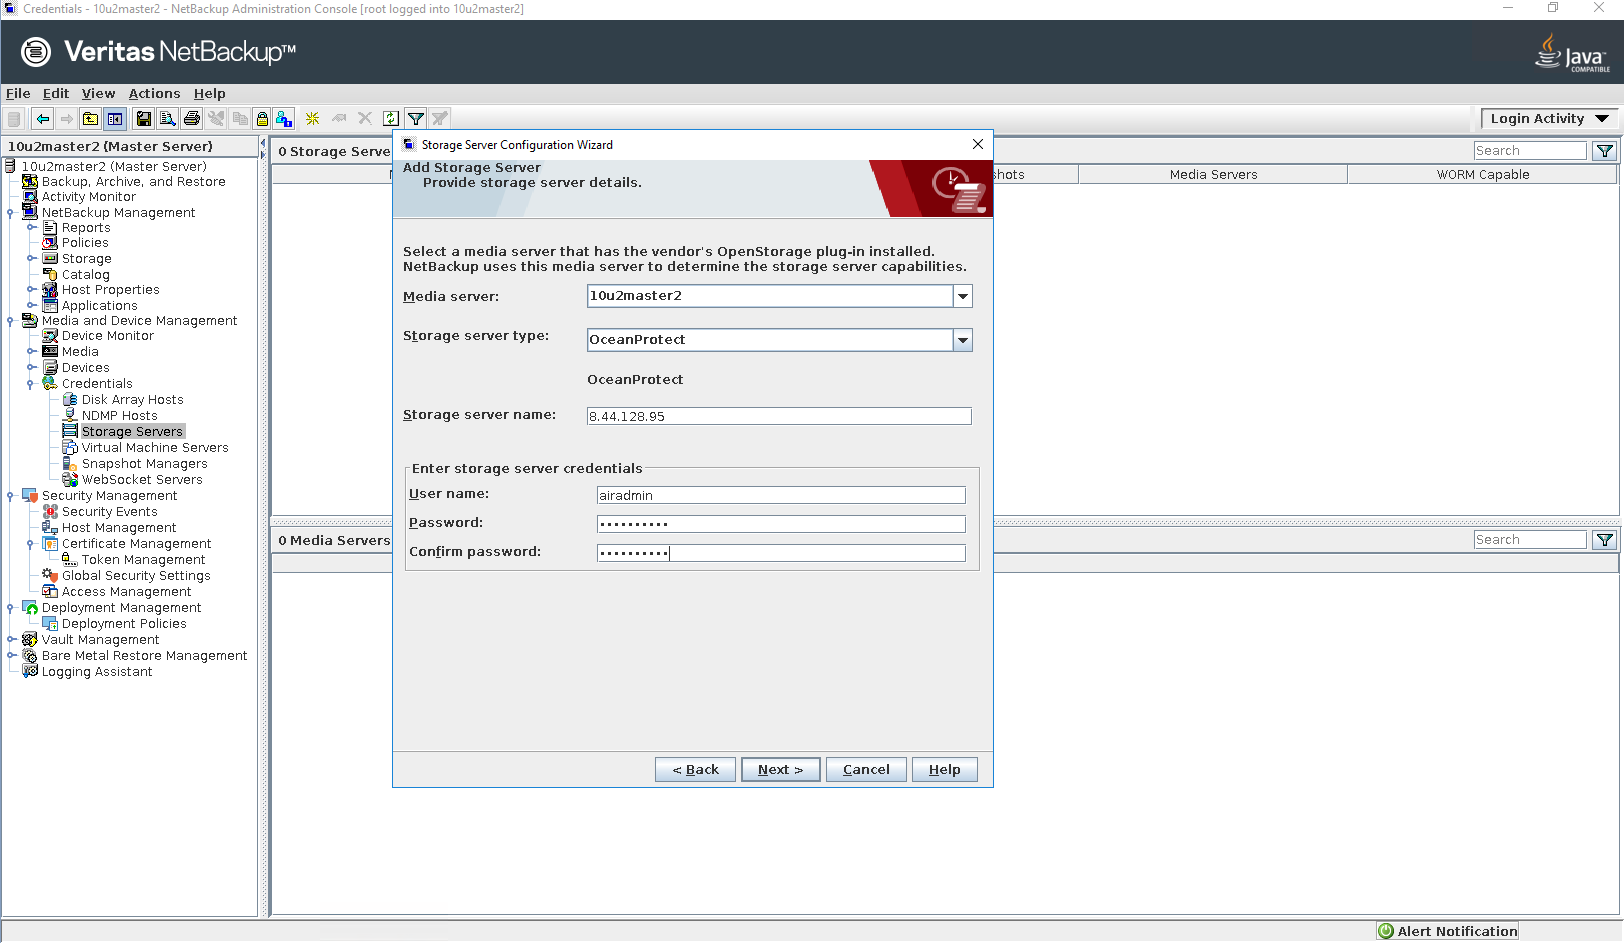
Step 2 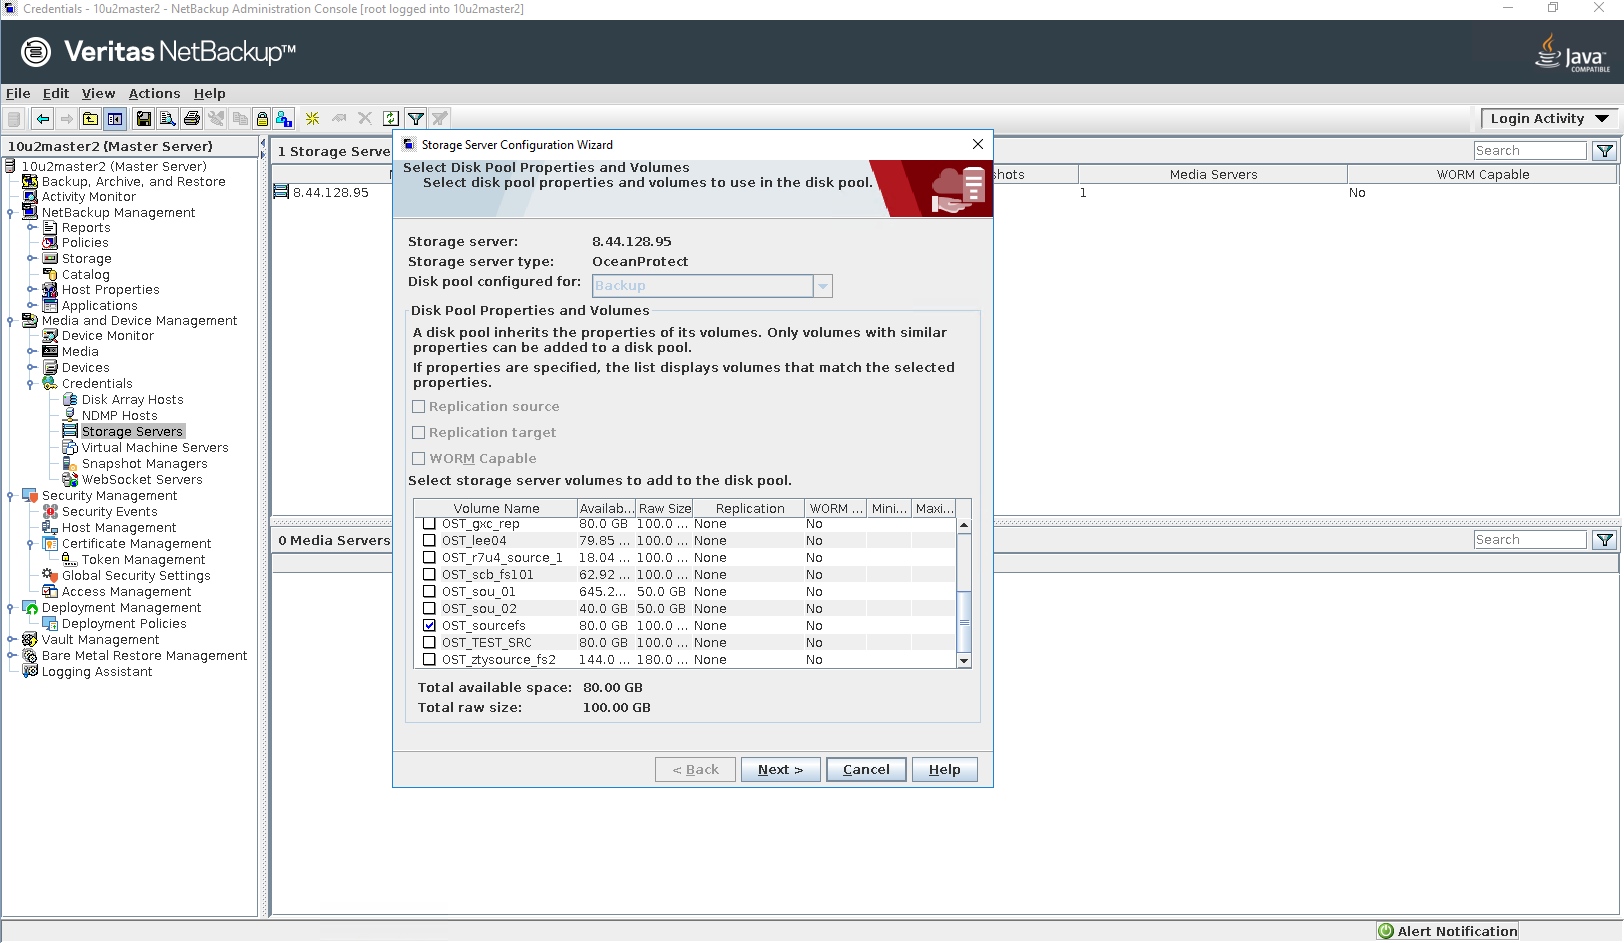
Step 3 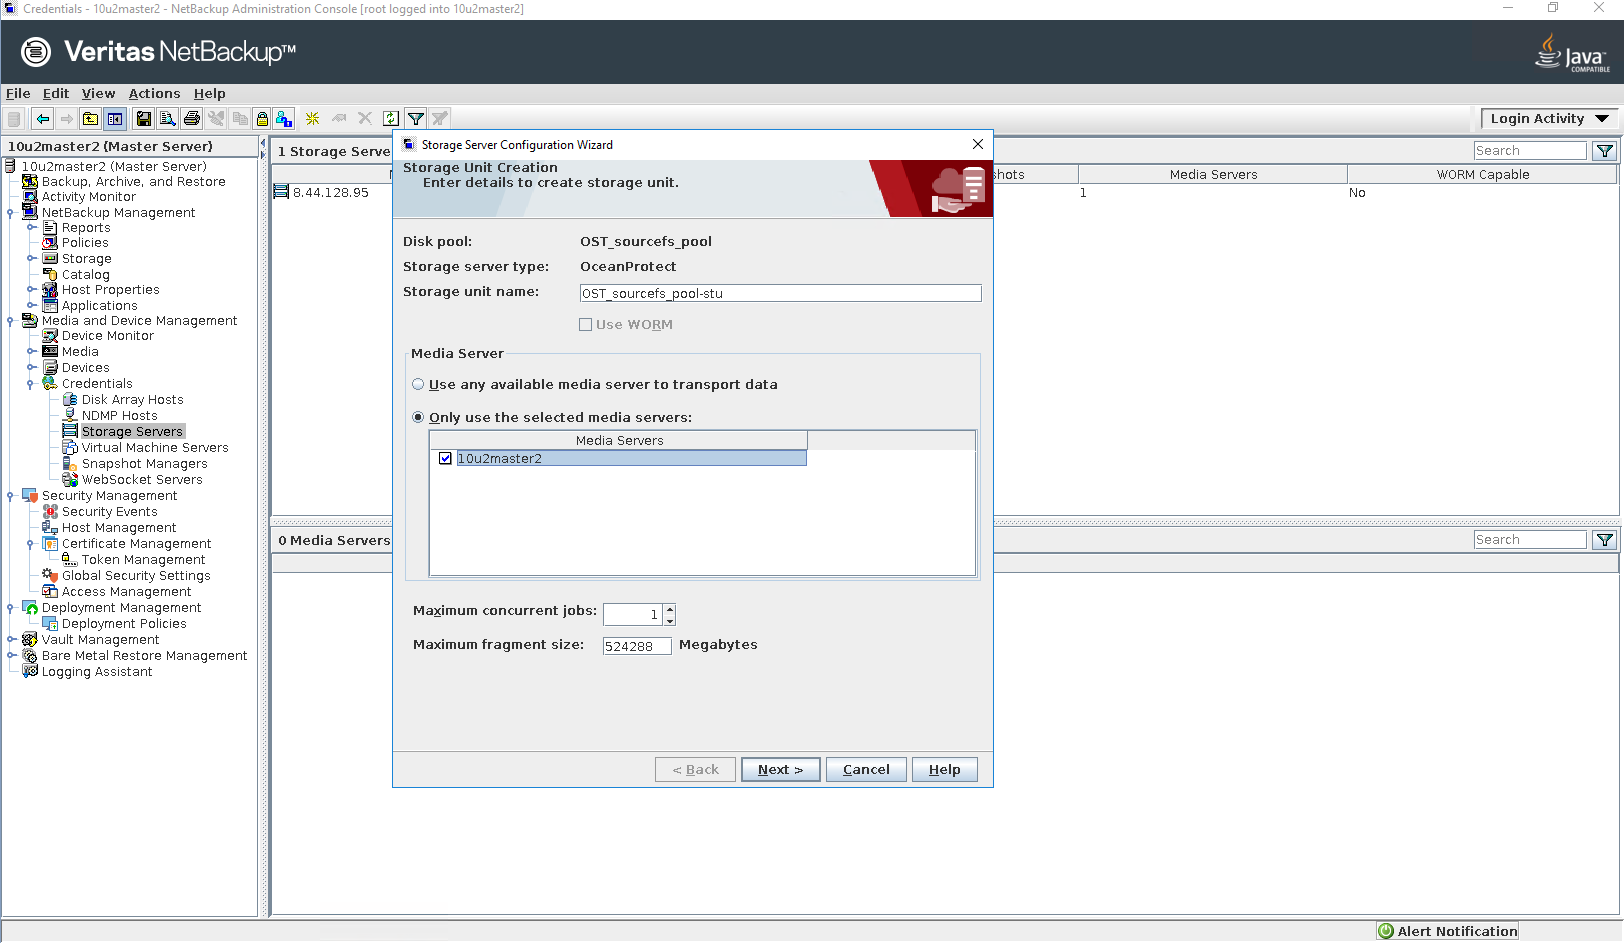
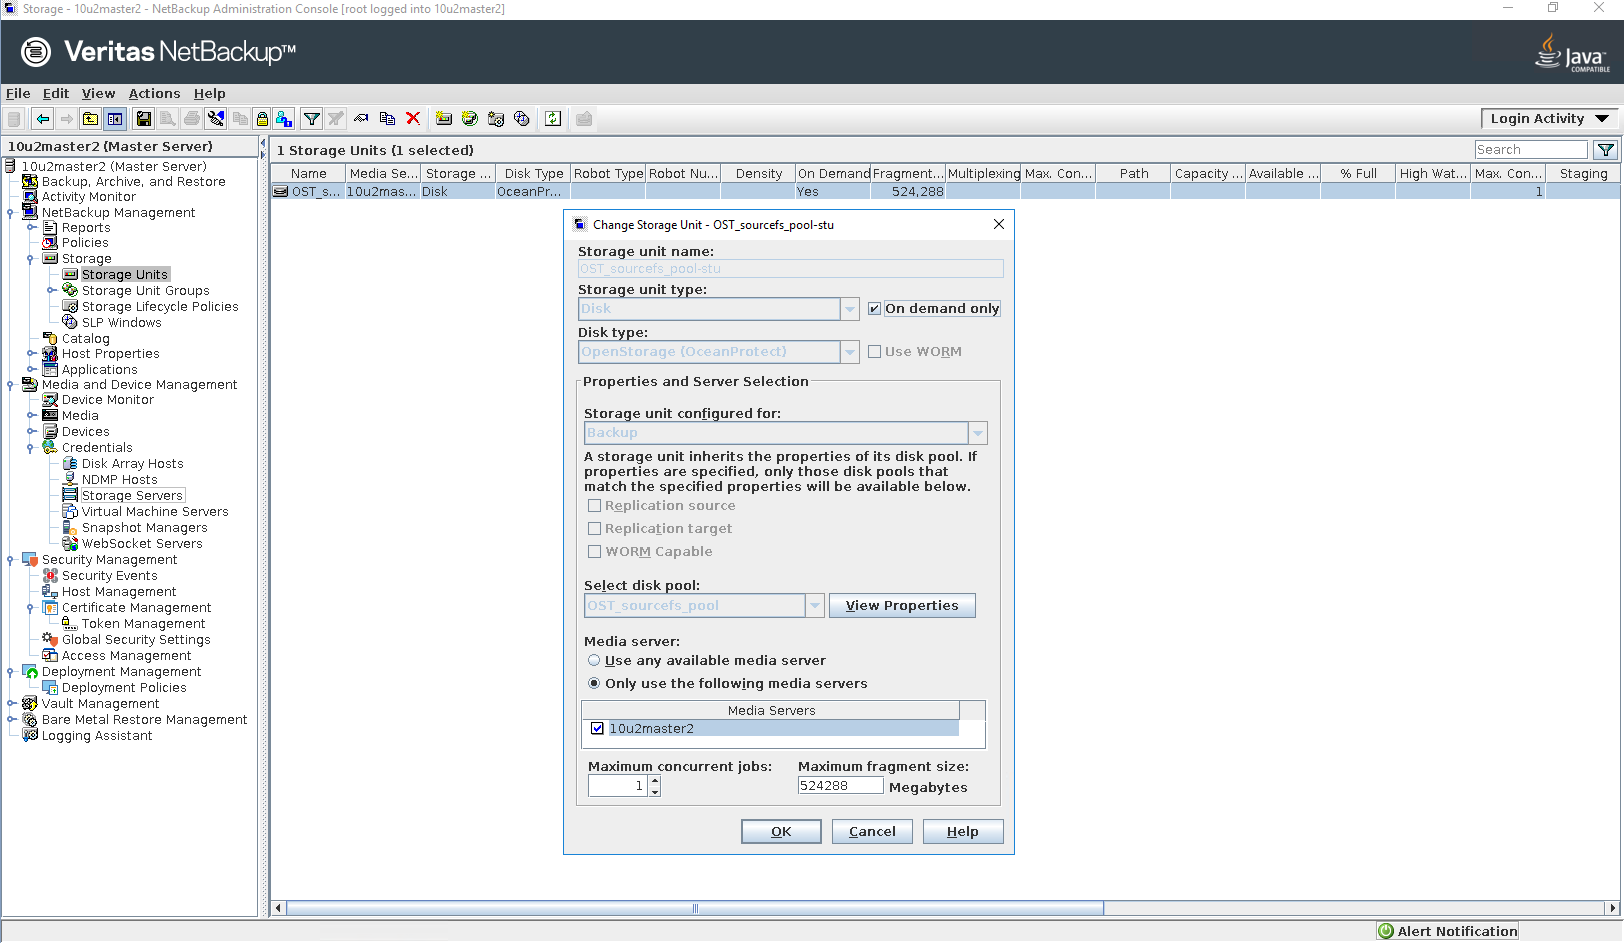
Step 4 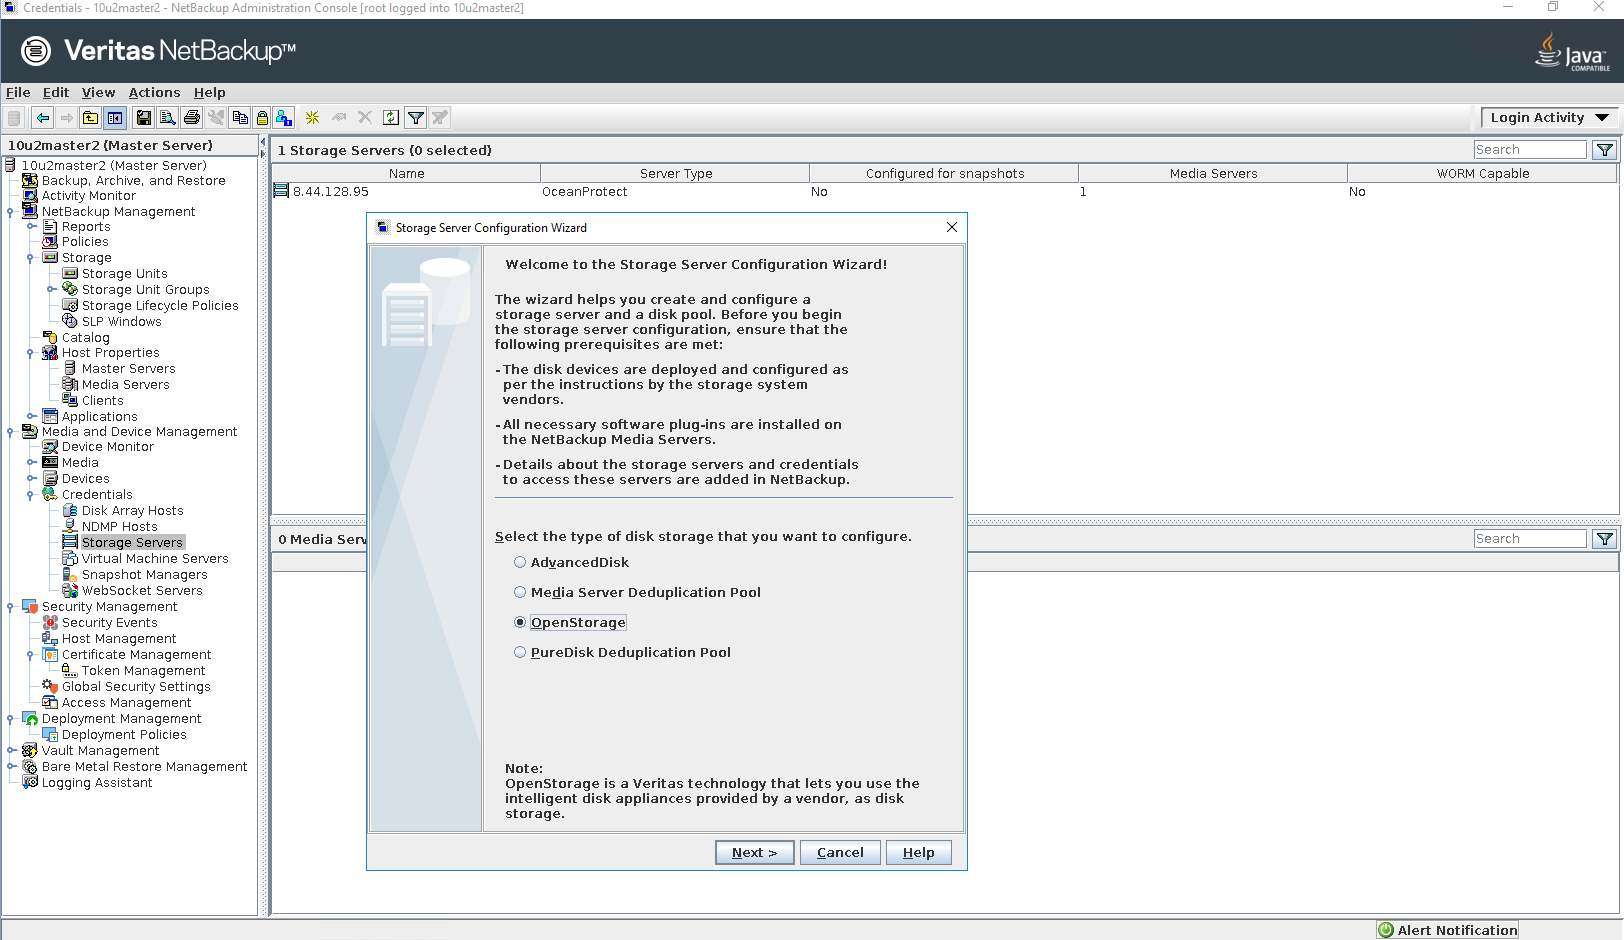
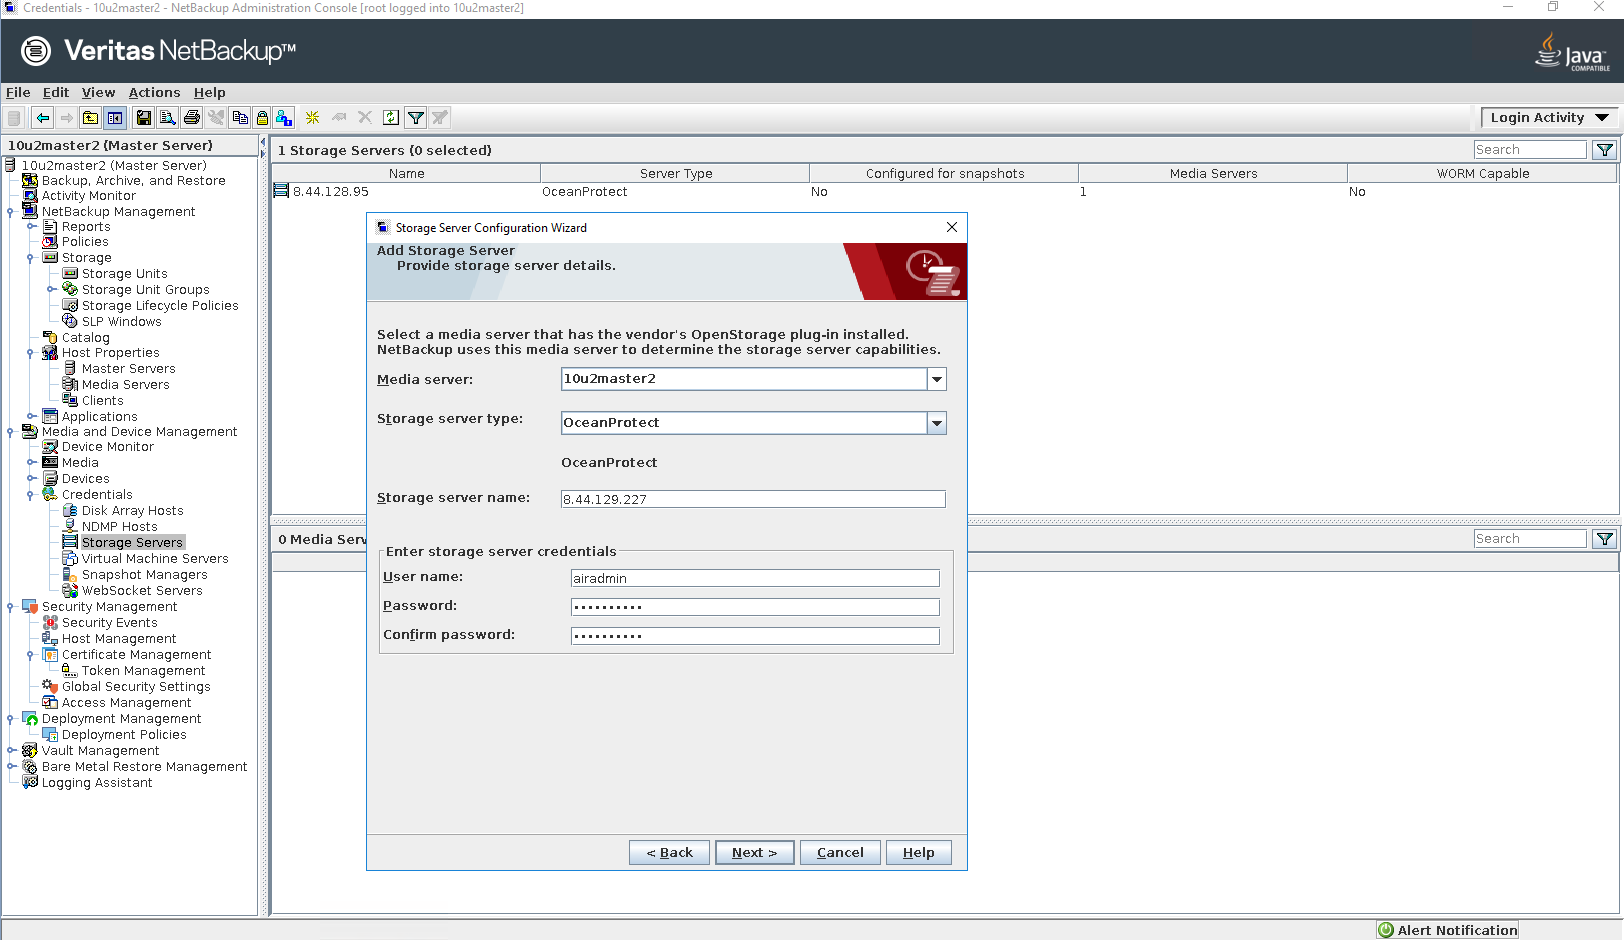
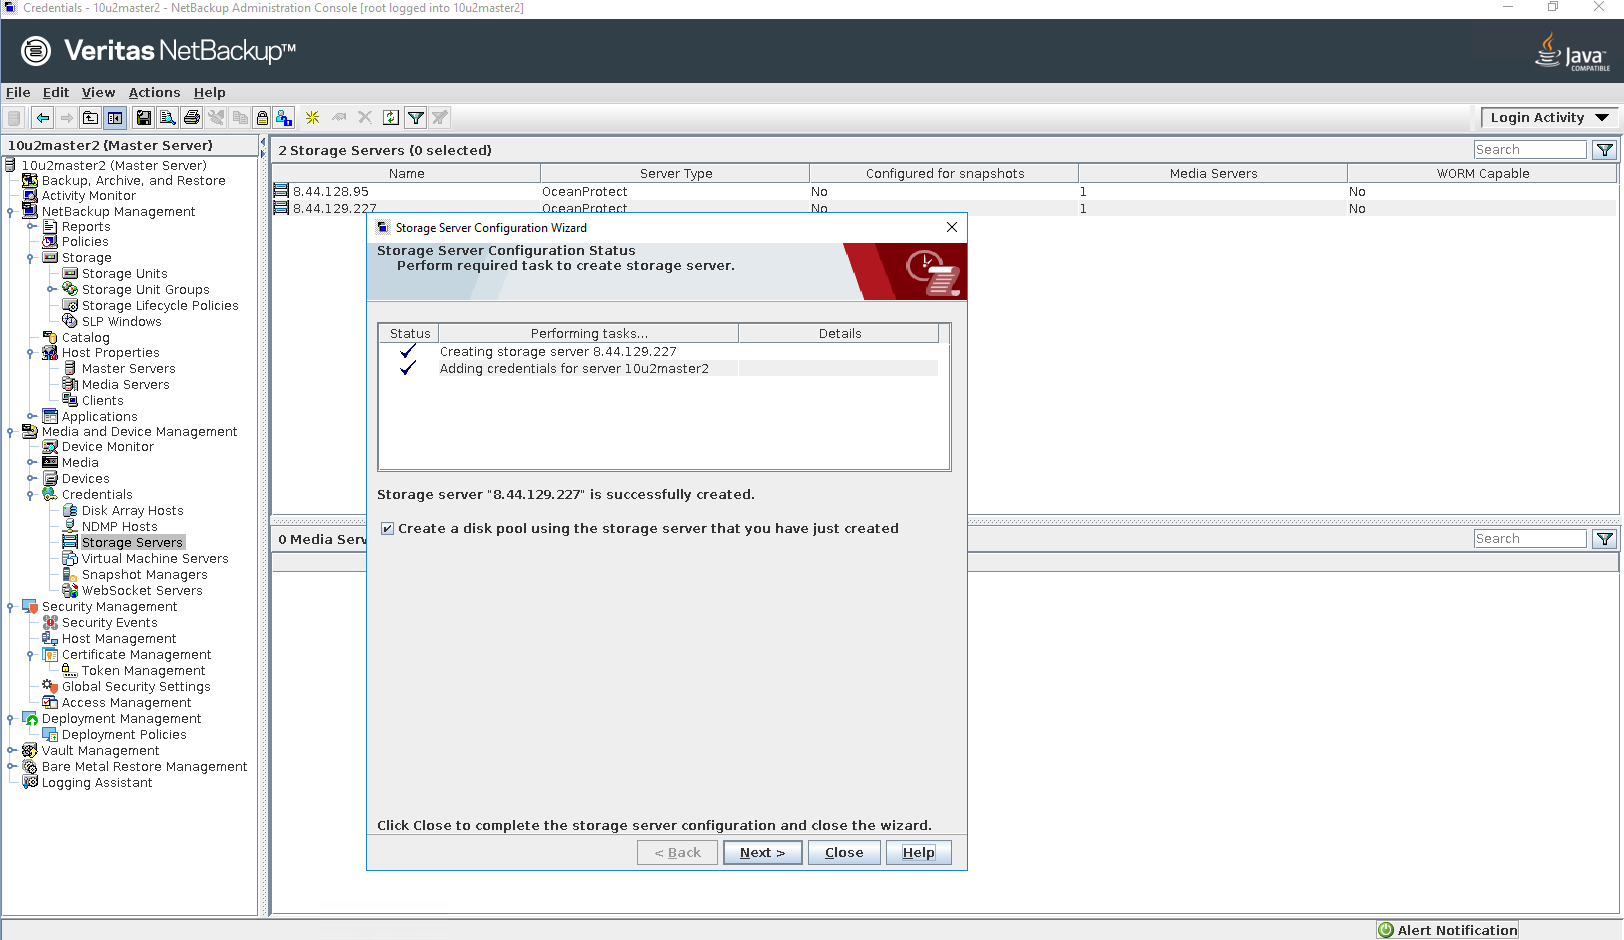
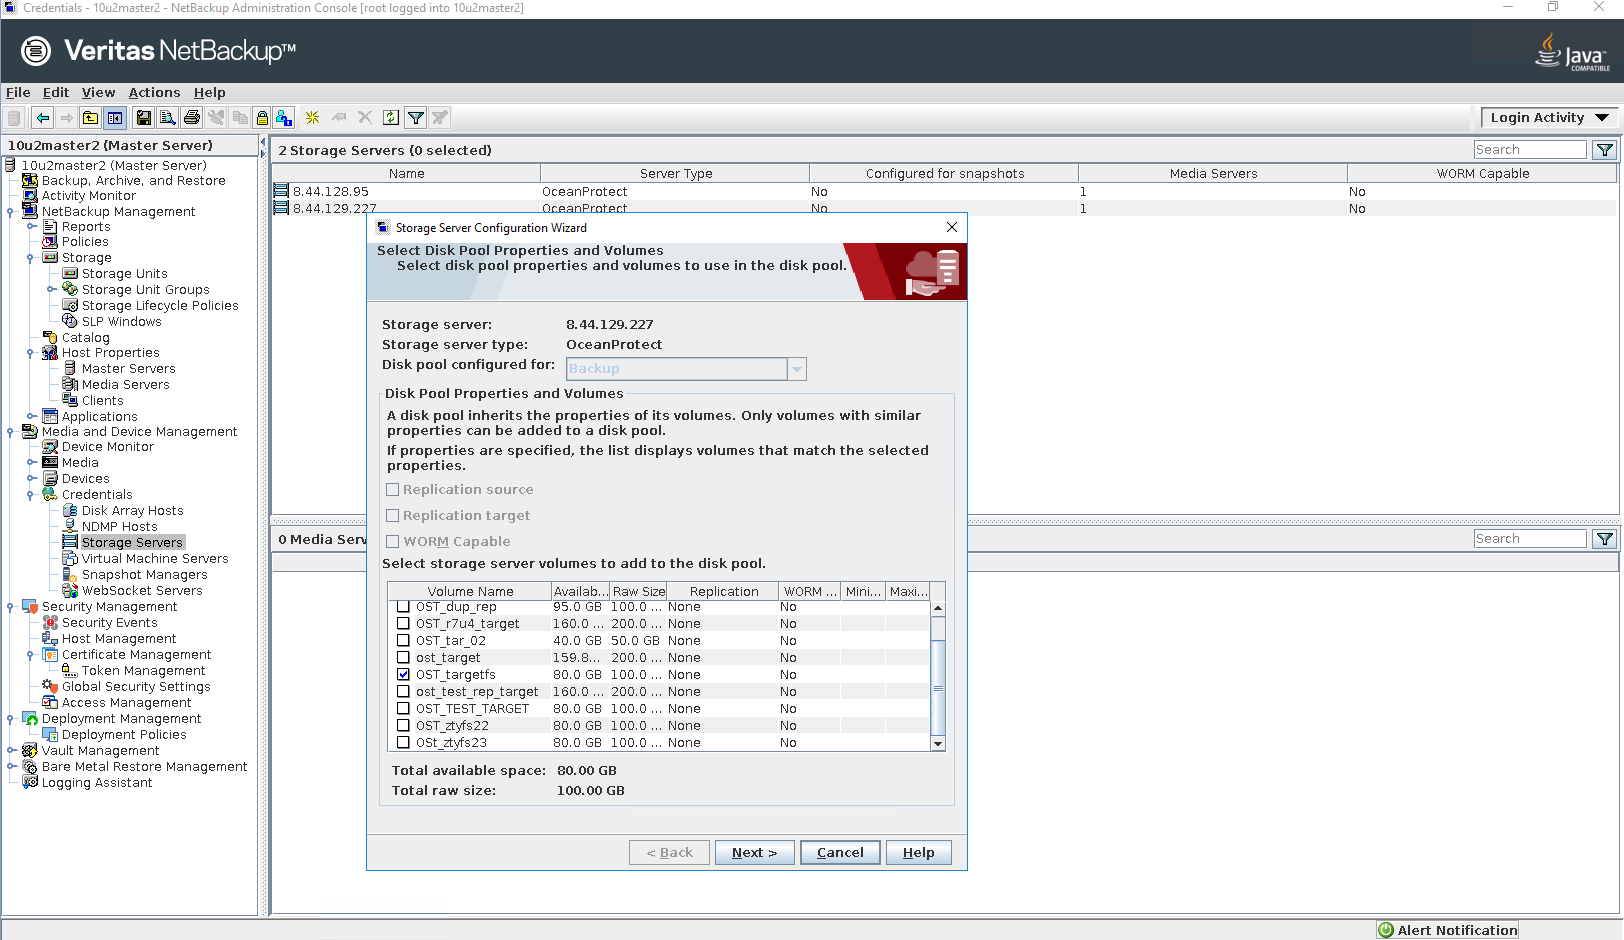
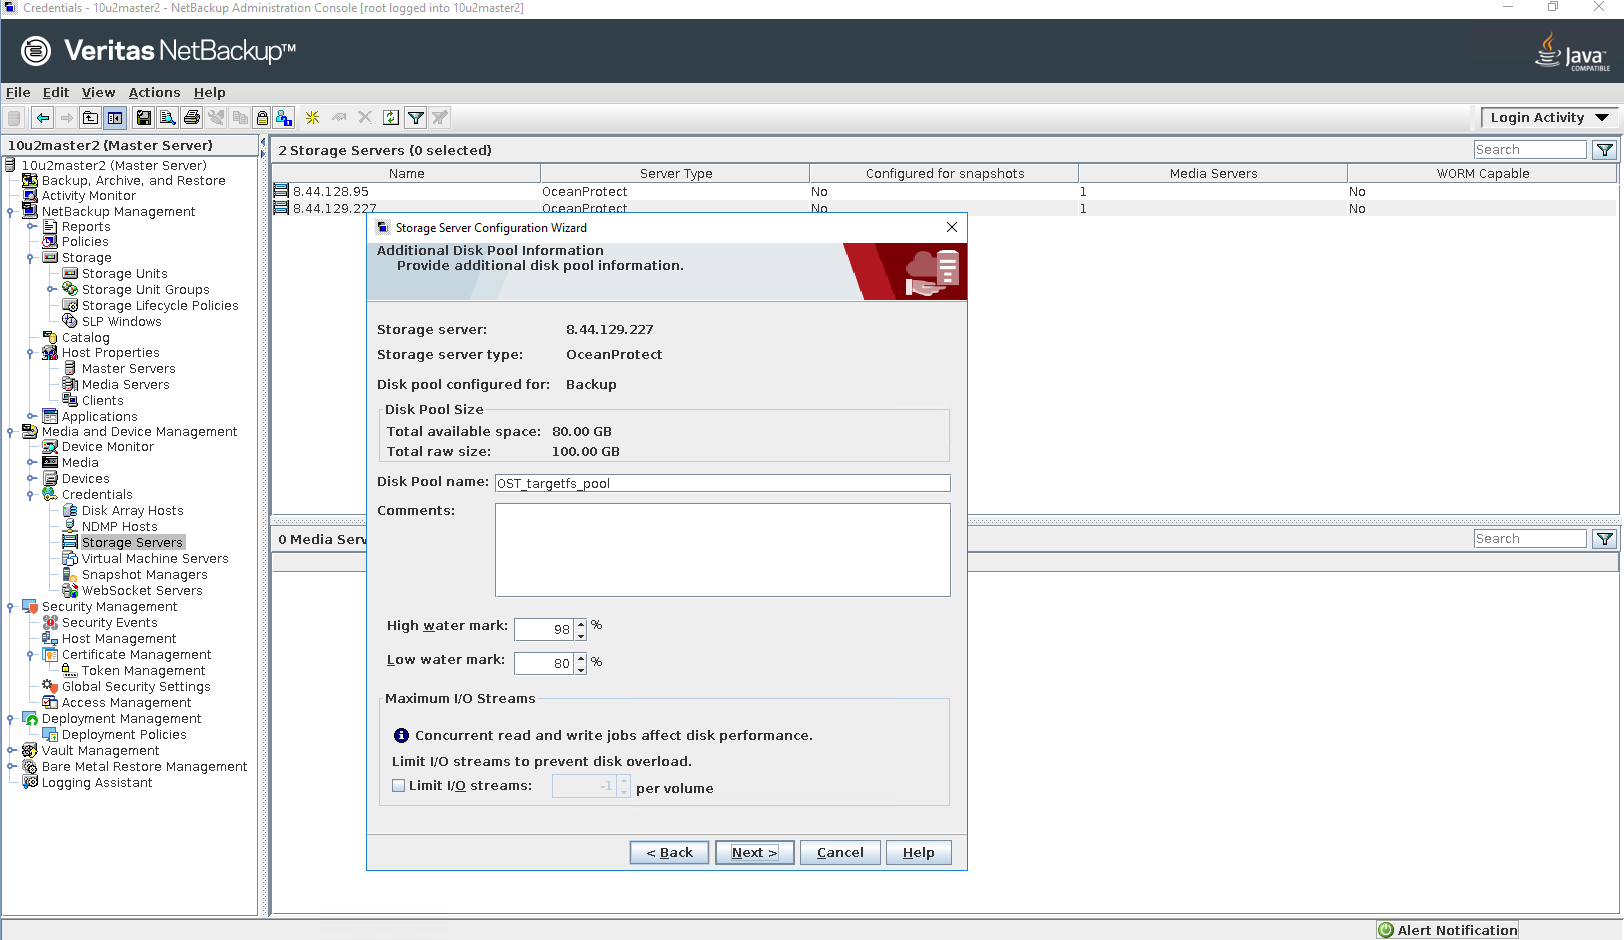
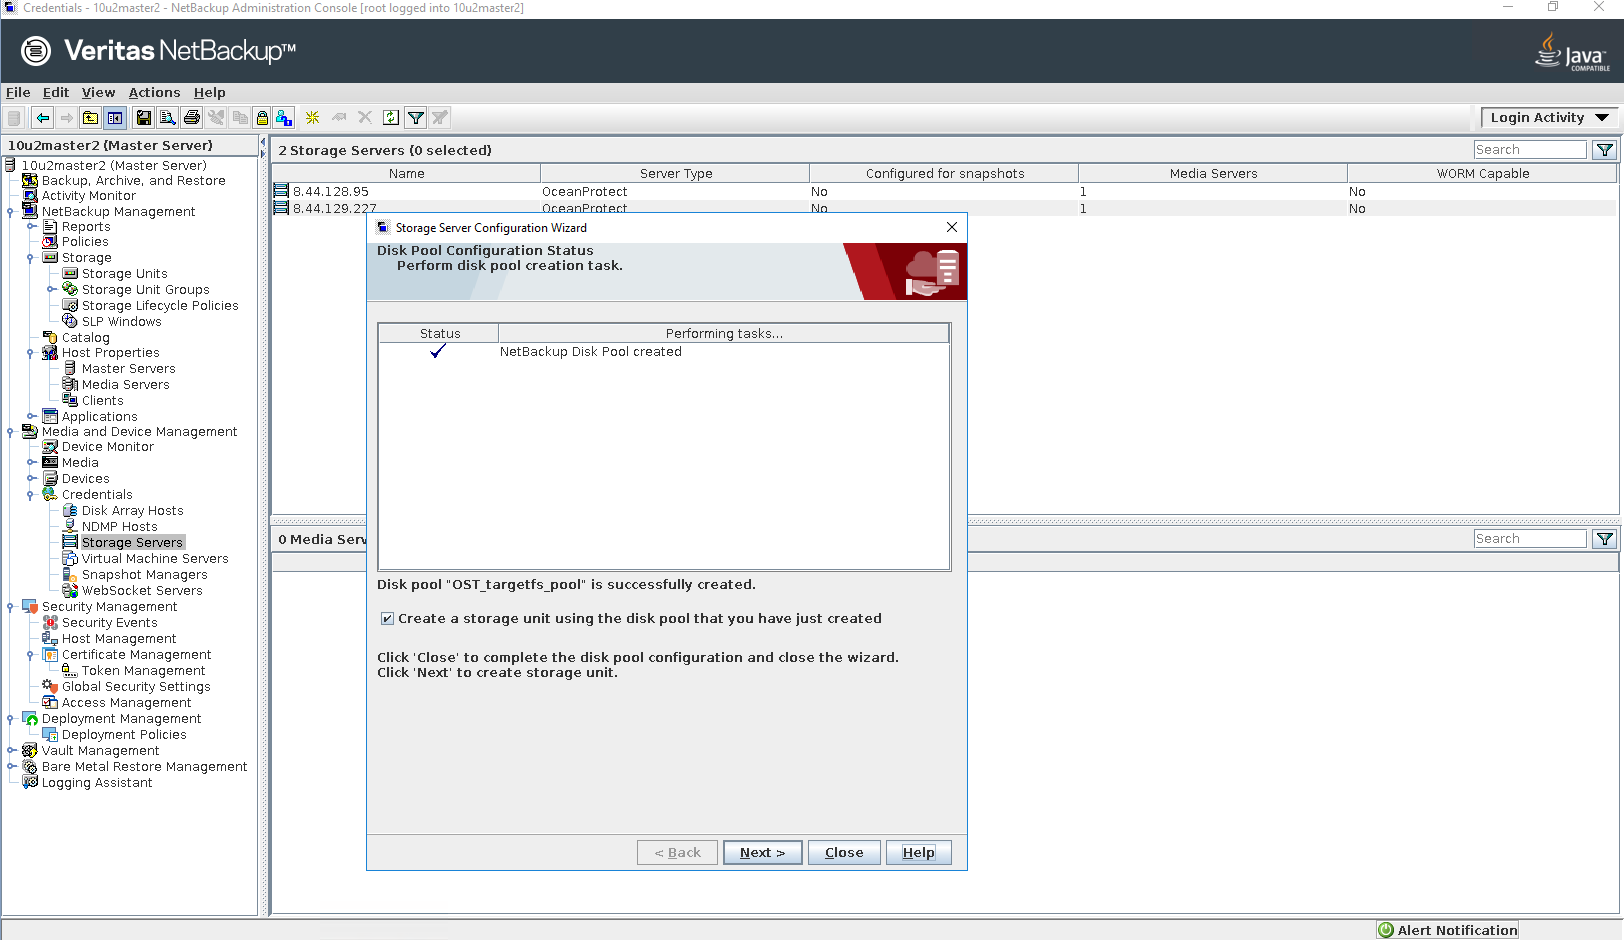
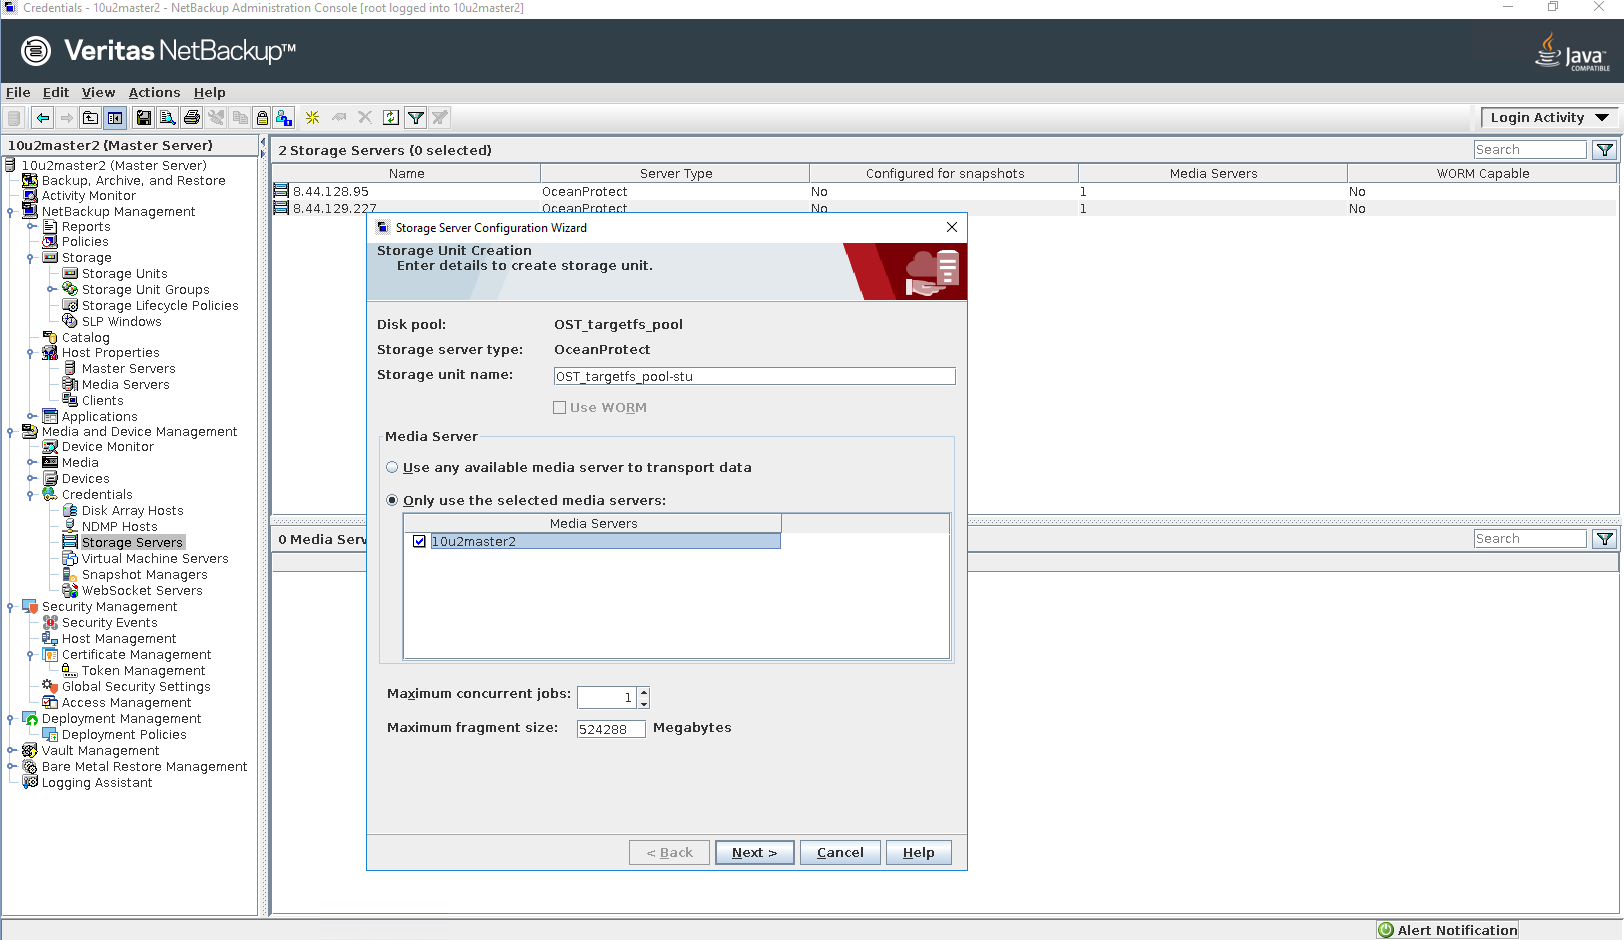
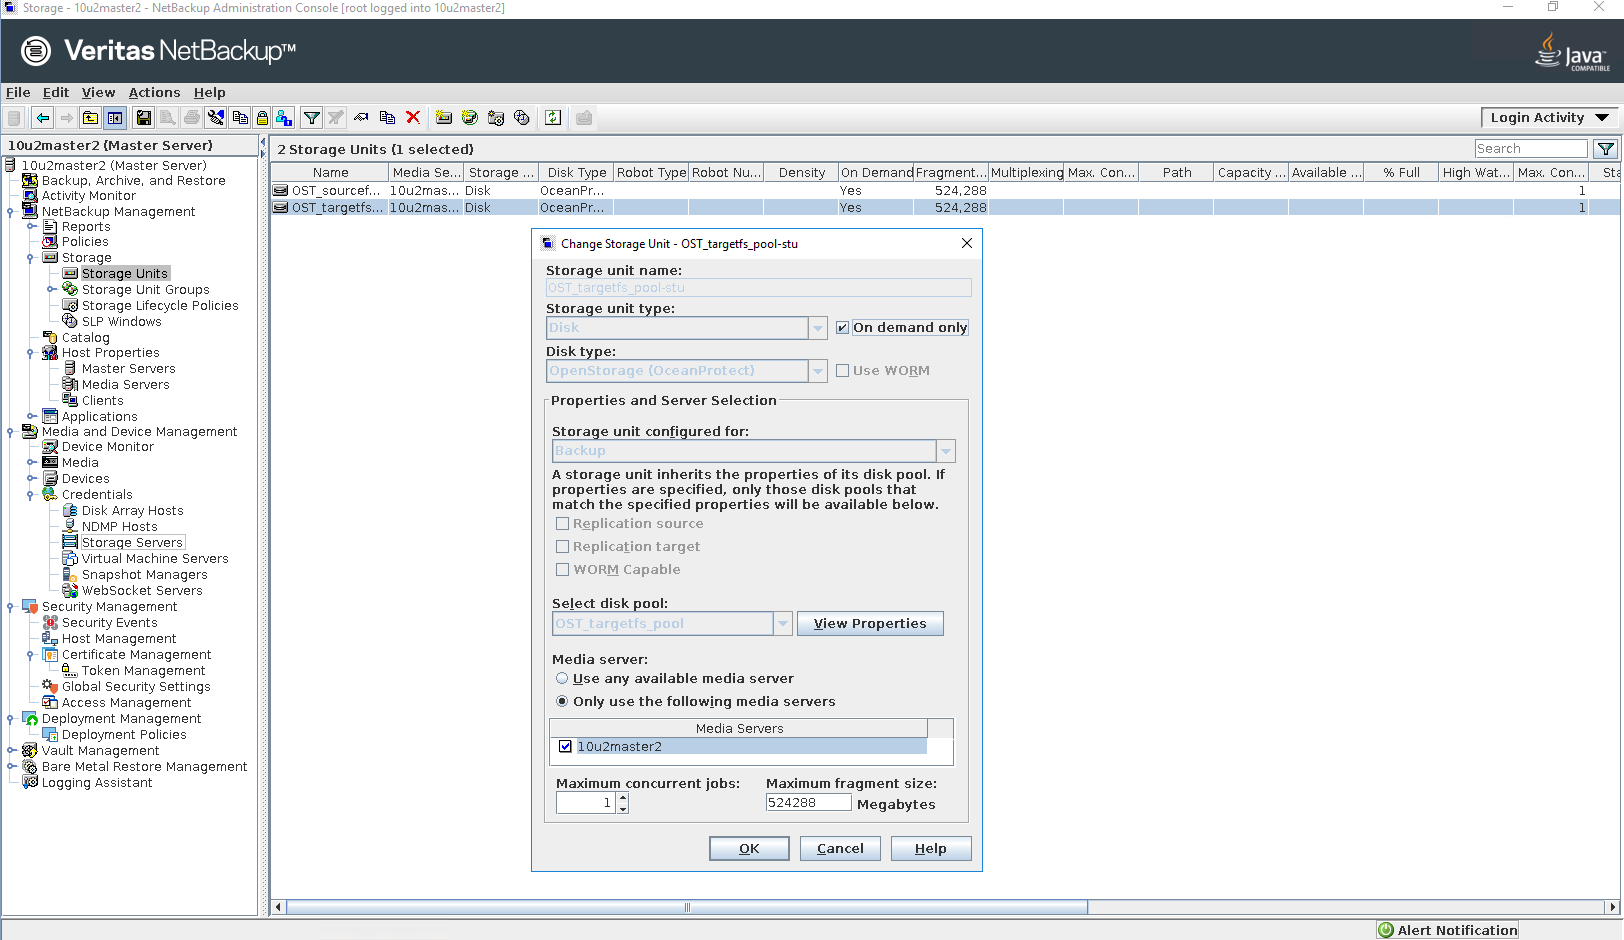
Step 5 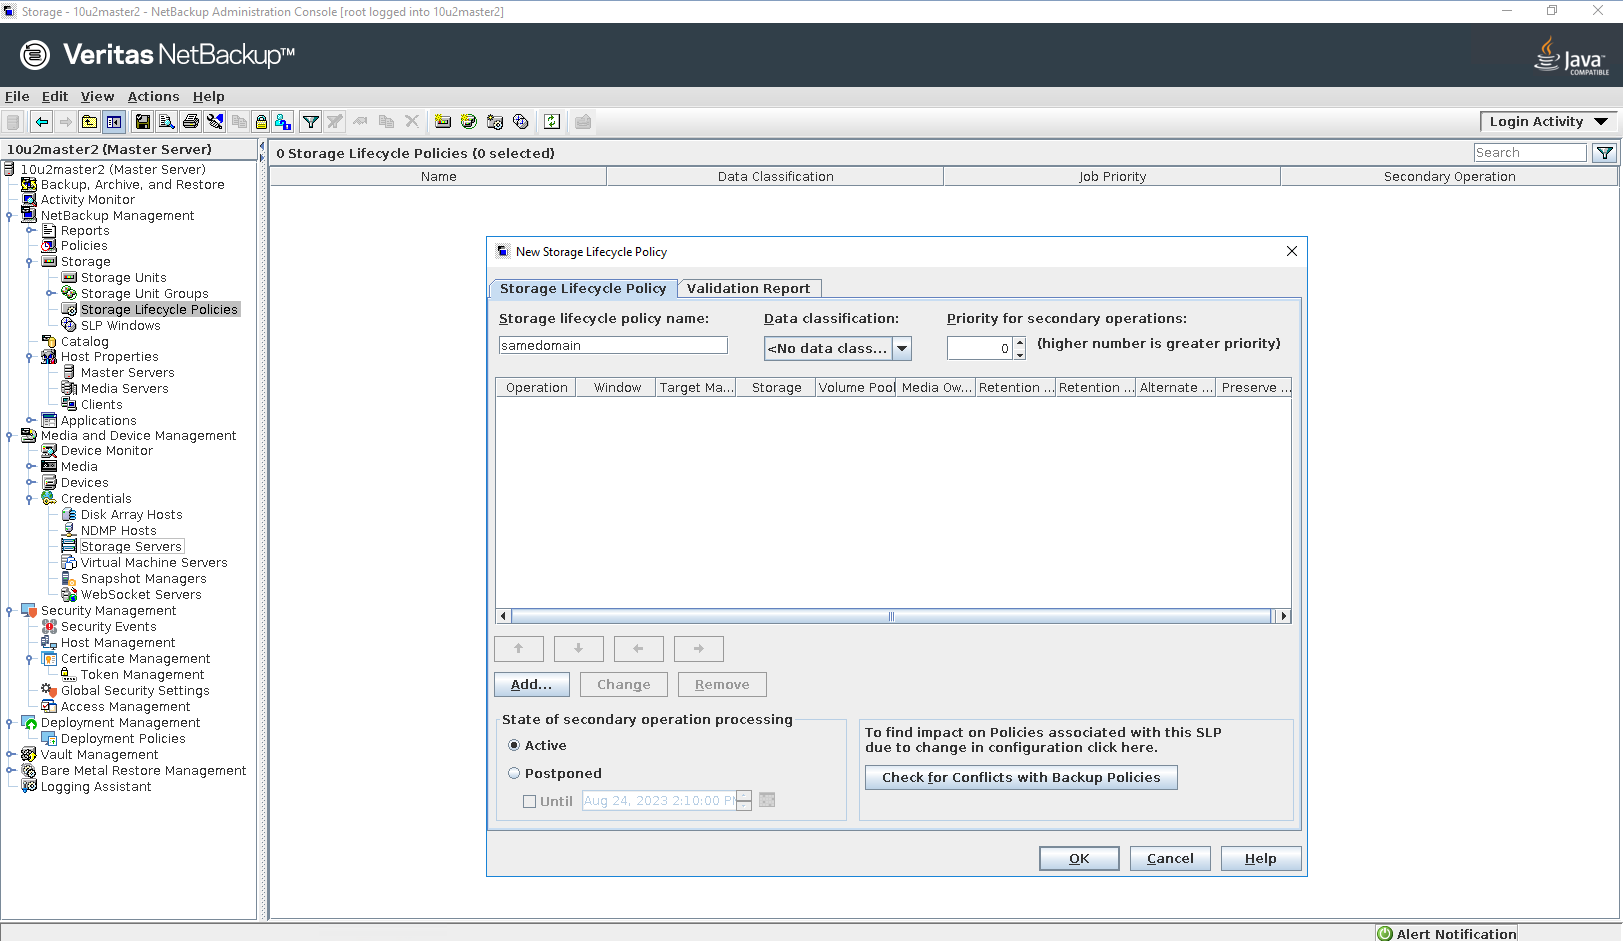
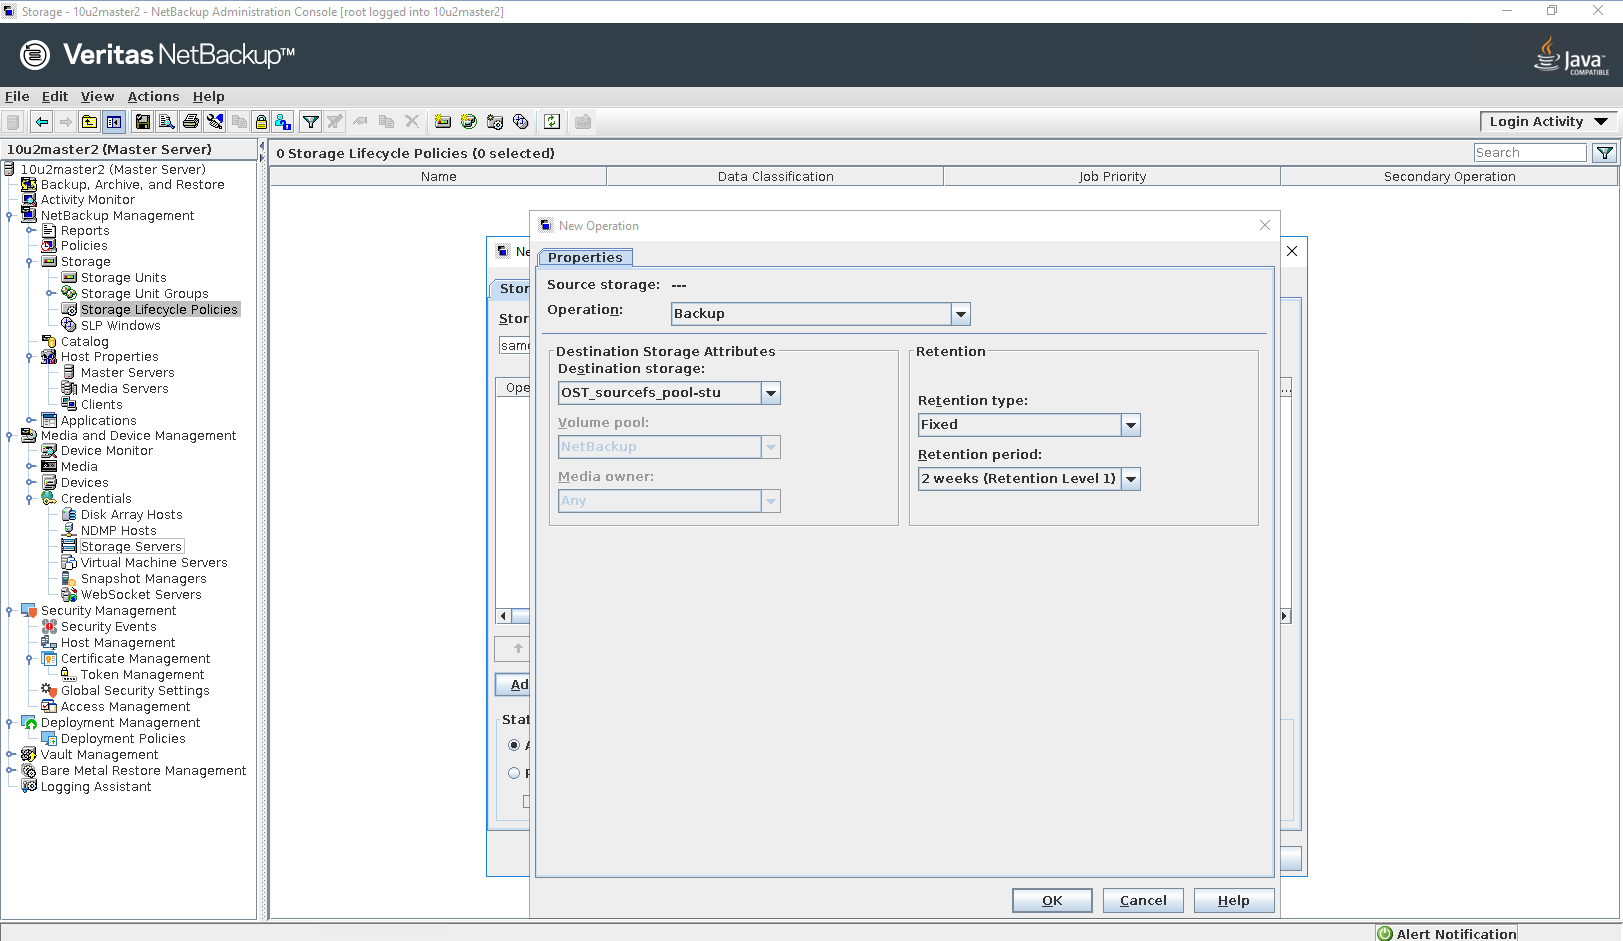
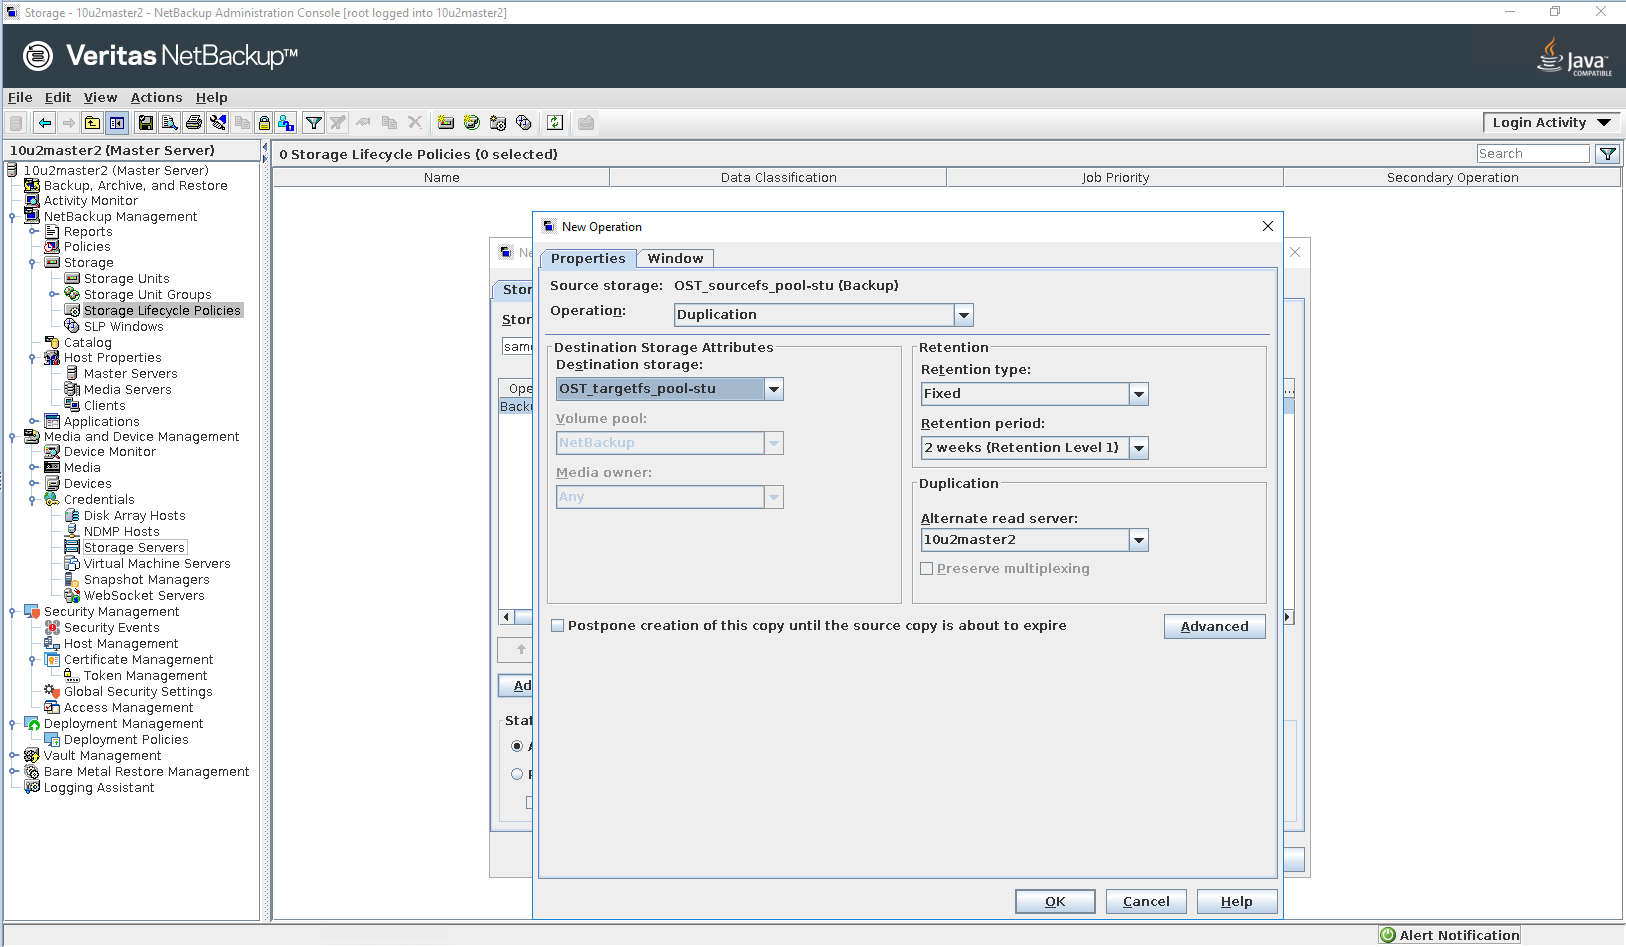
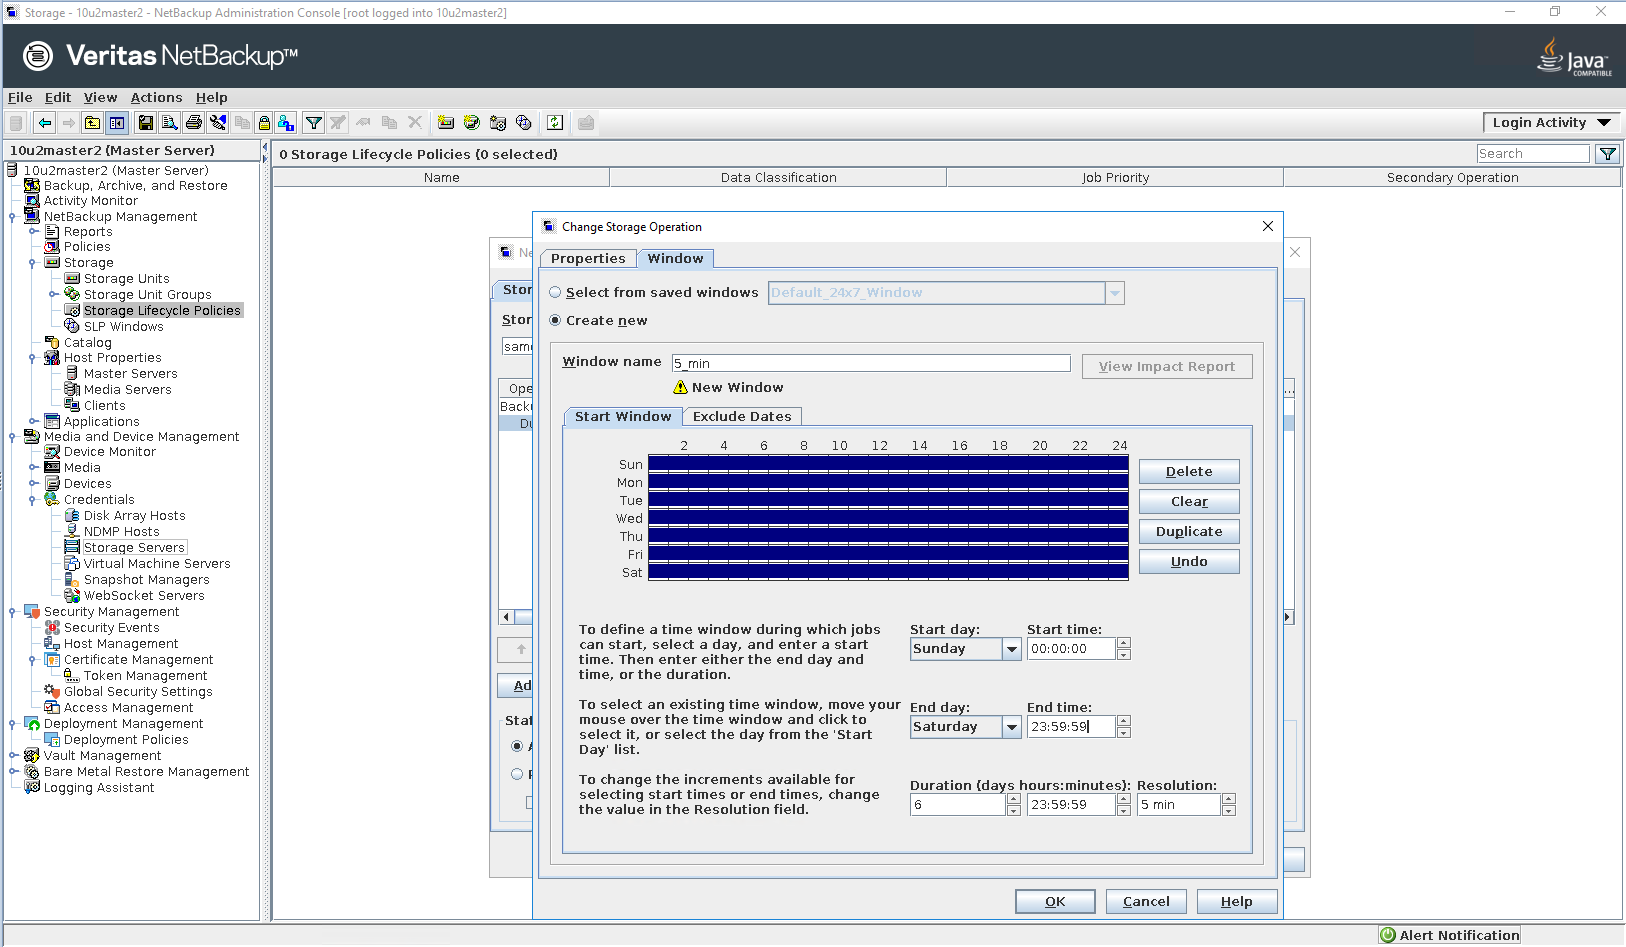
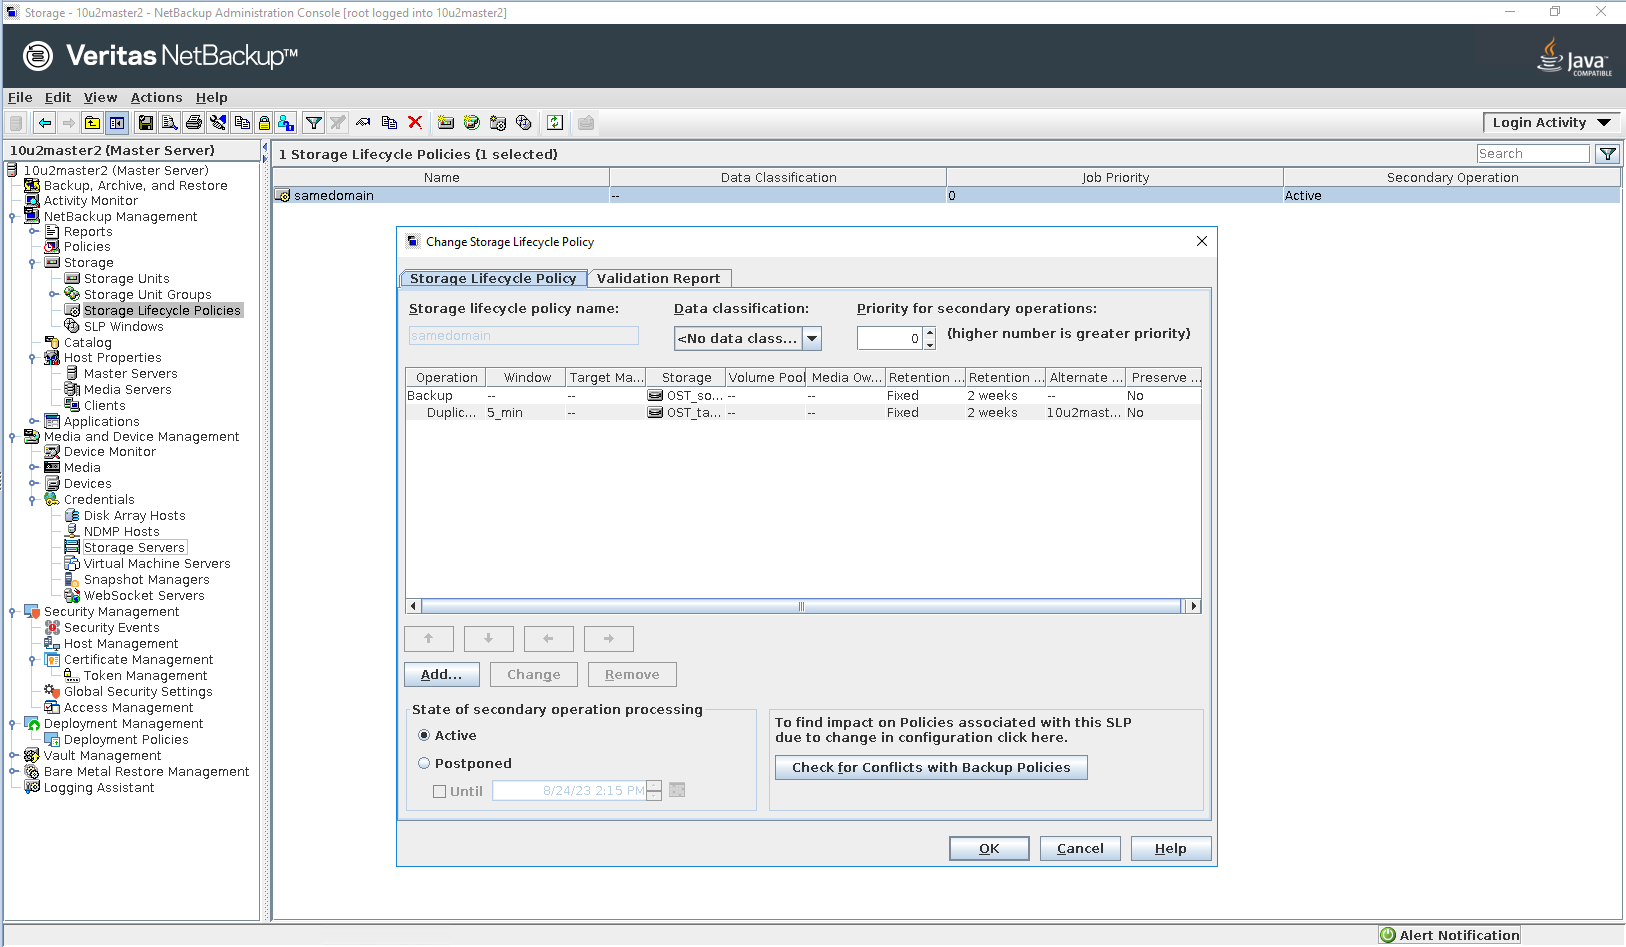
Step 6 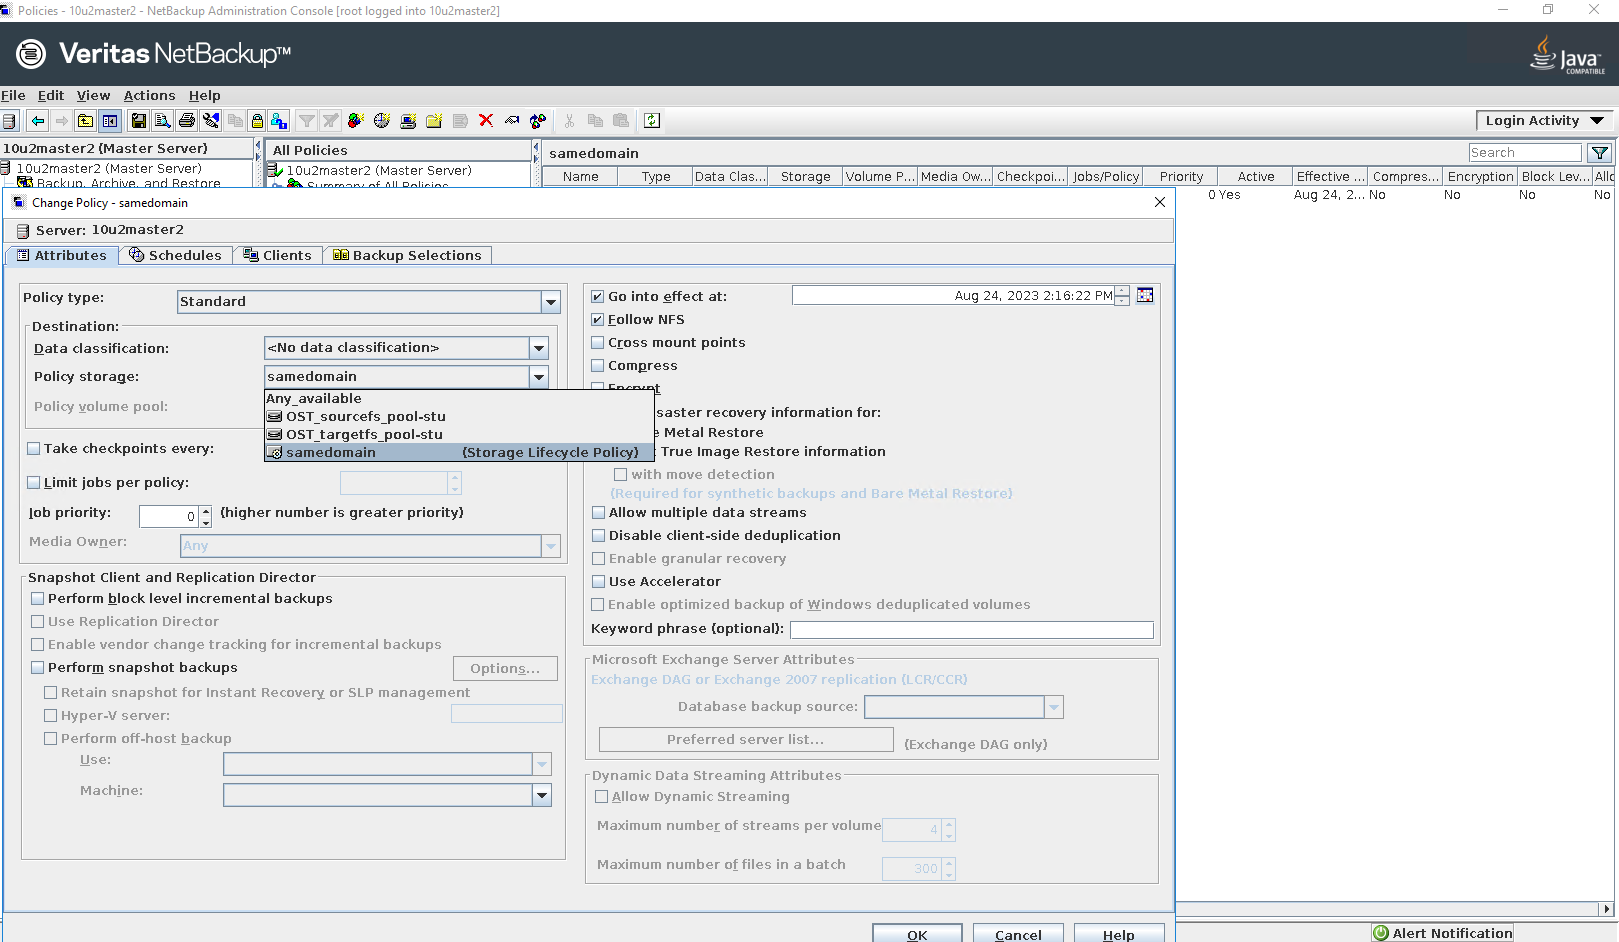
|
3.2 Duplication in the Same Master Domain
Test Purpose | Verify the Duplication job is working in the Same Master Domain |
Test Networking | Huawei OceanProtect Backup Storage Function Compatibility Test Networking 1 |
Prerequisites |
|
Test Procedure |
|
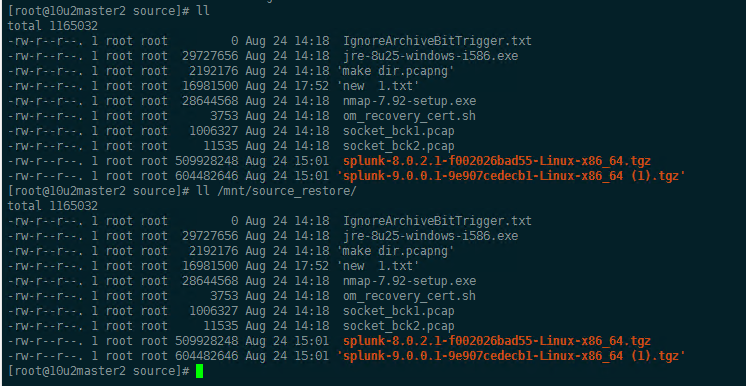
Expected Result | Step 2 Backup job finish successfully. Step 3 Duplication job finish successfully. Step 4 Restore job finish successfully and restored files are the same as original files. |
Test Result | Passed Step 1 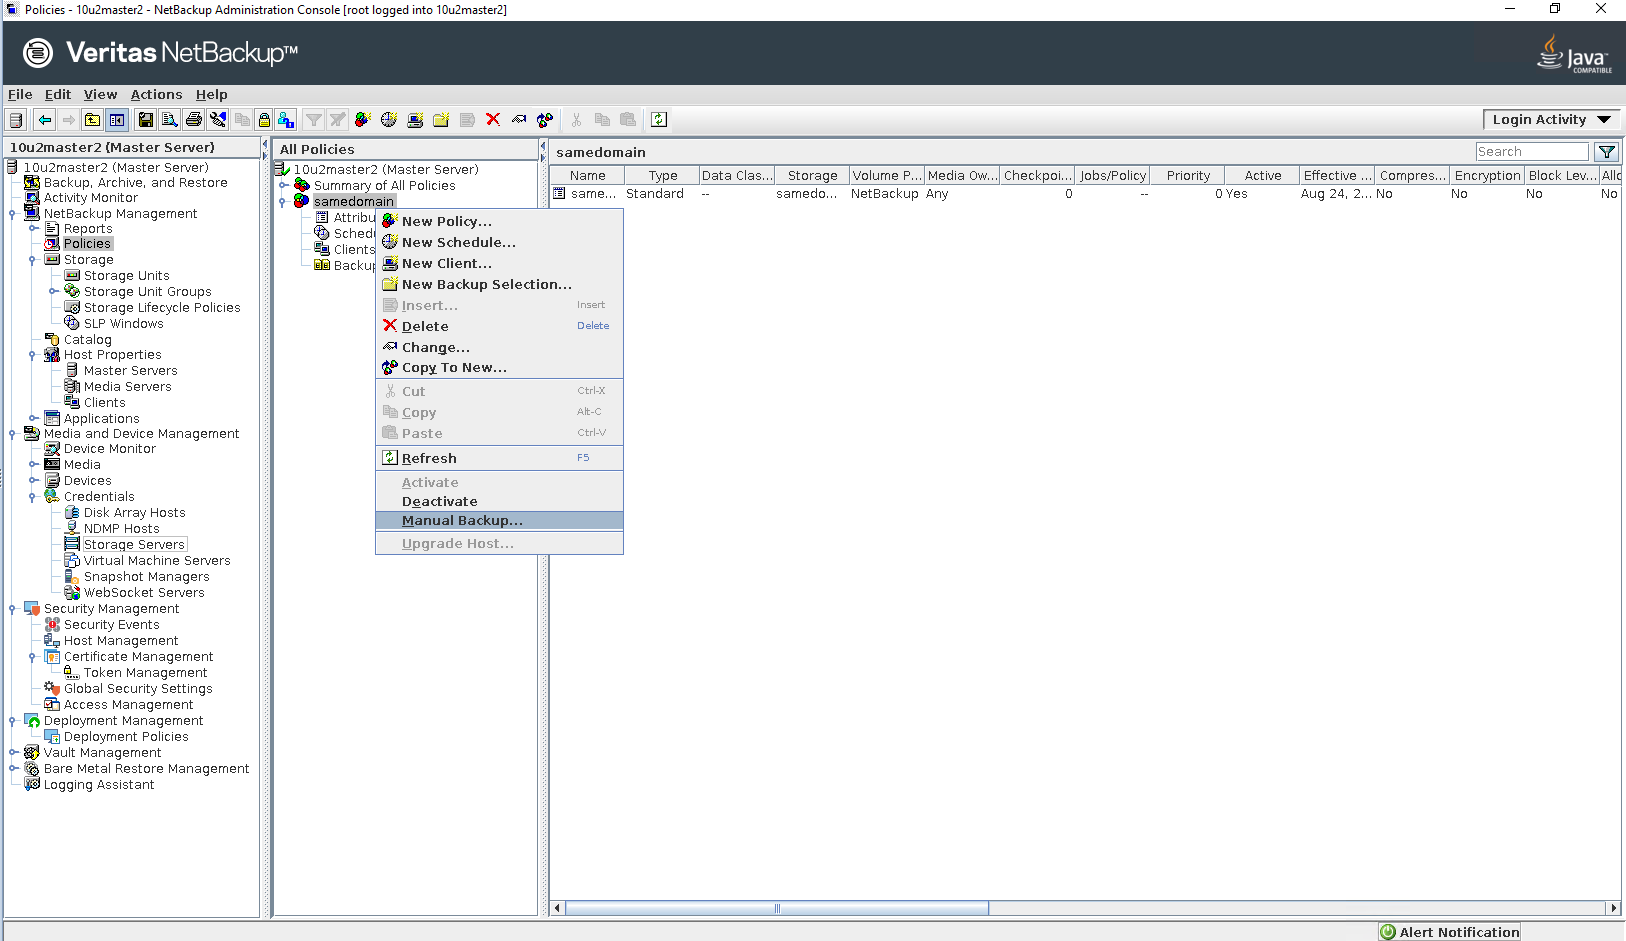
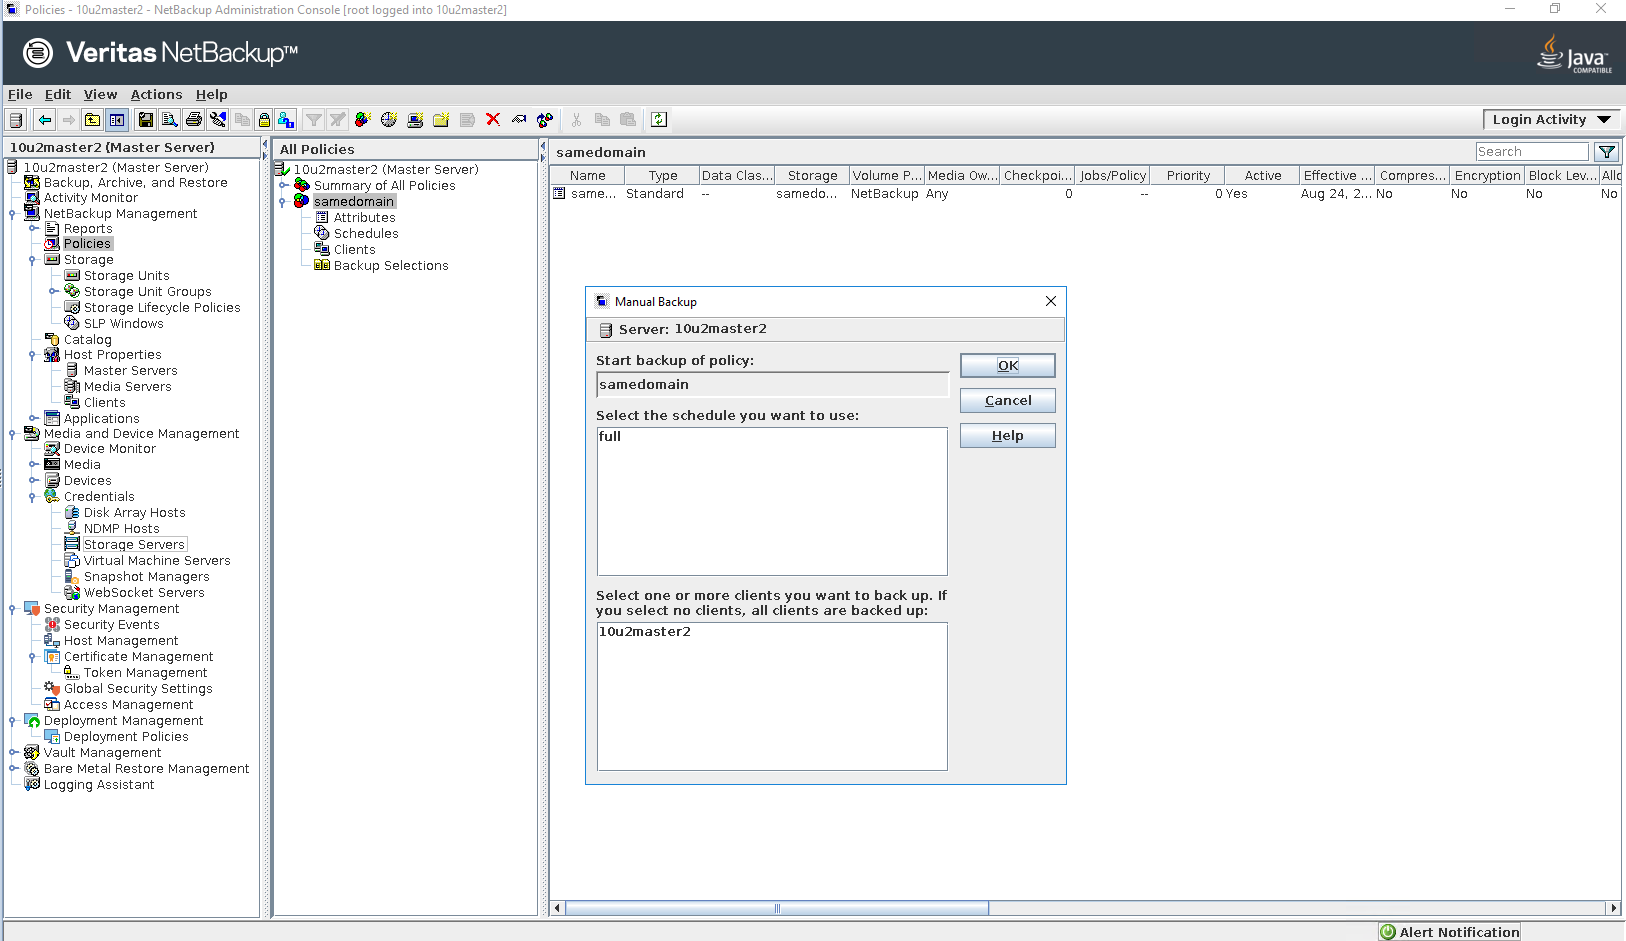
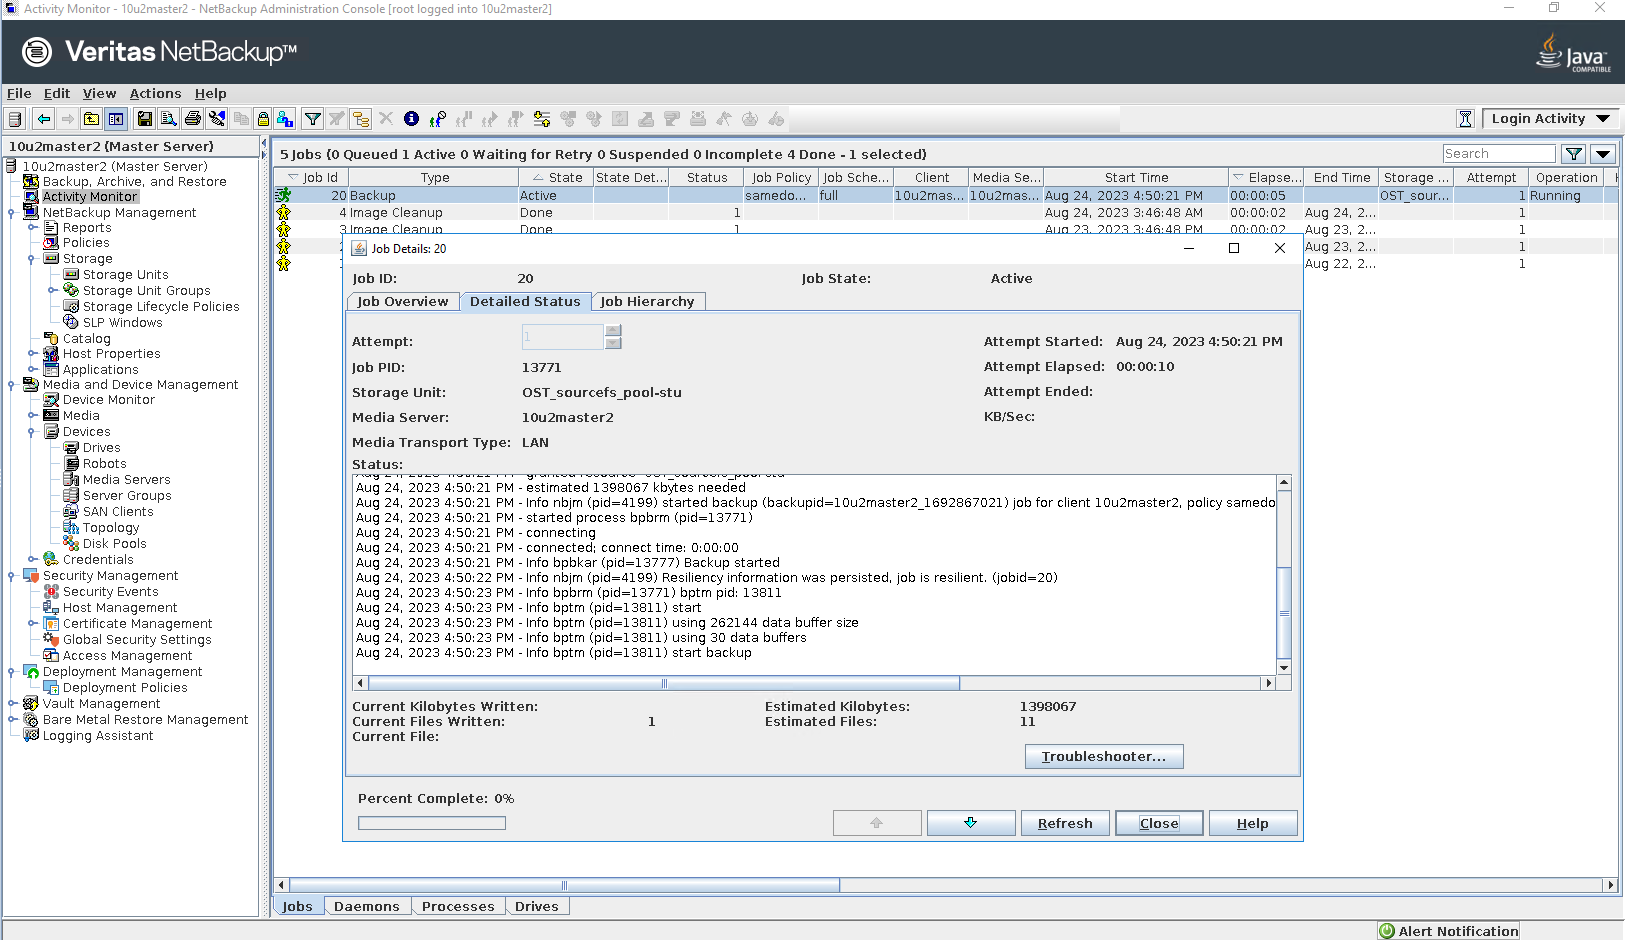
Step 2 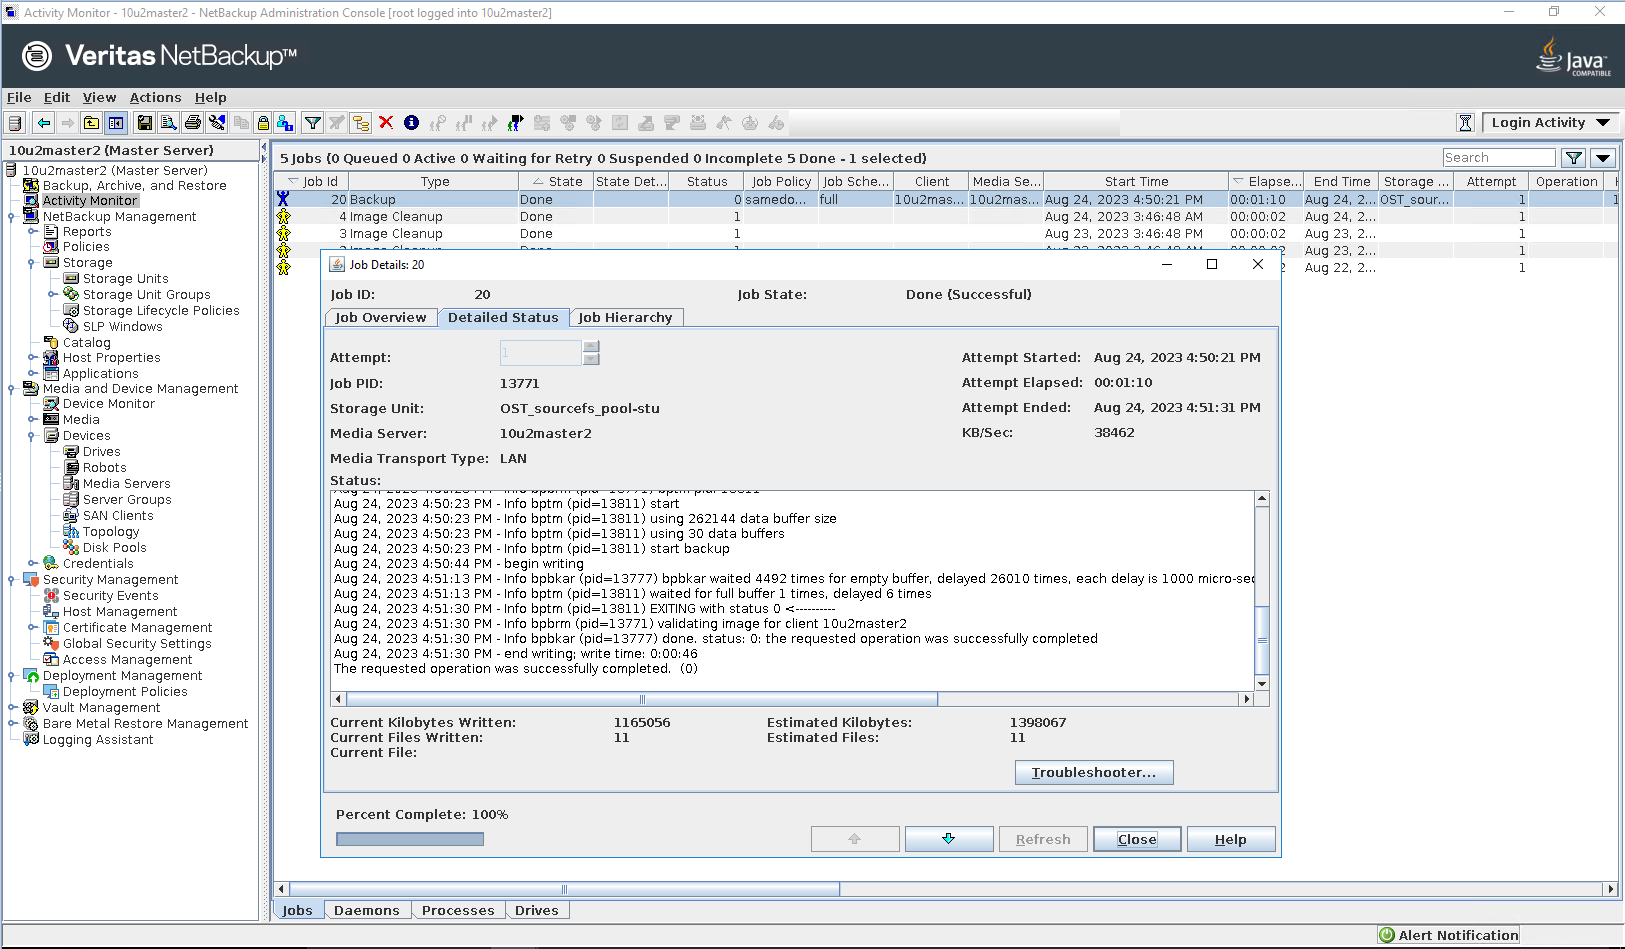
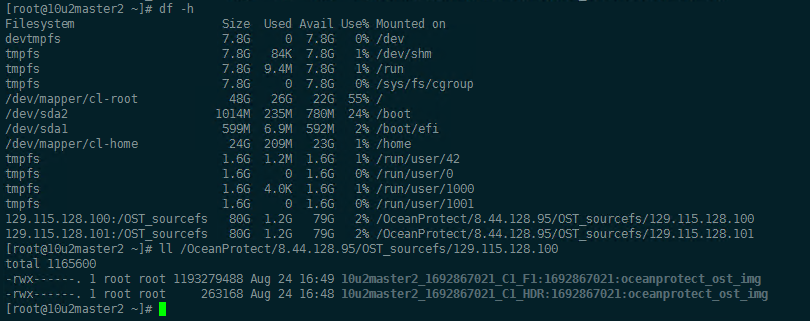
Step 3 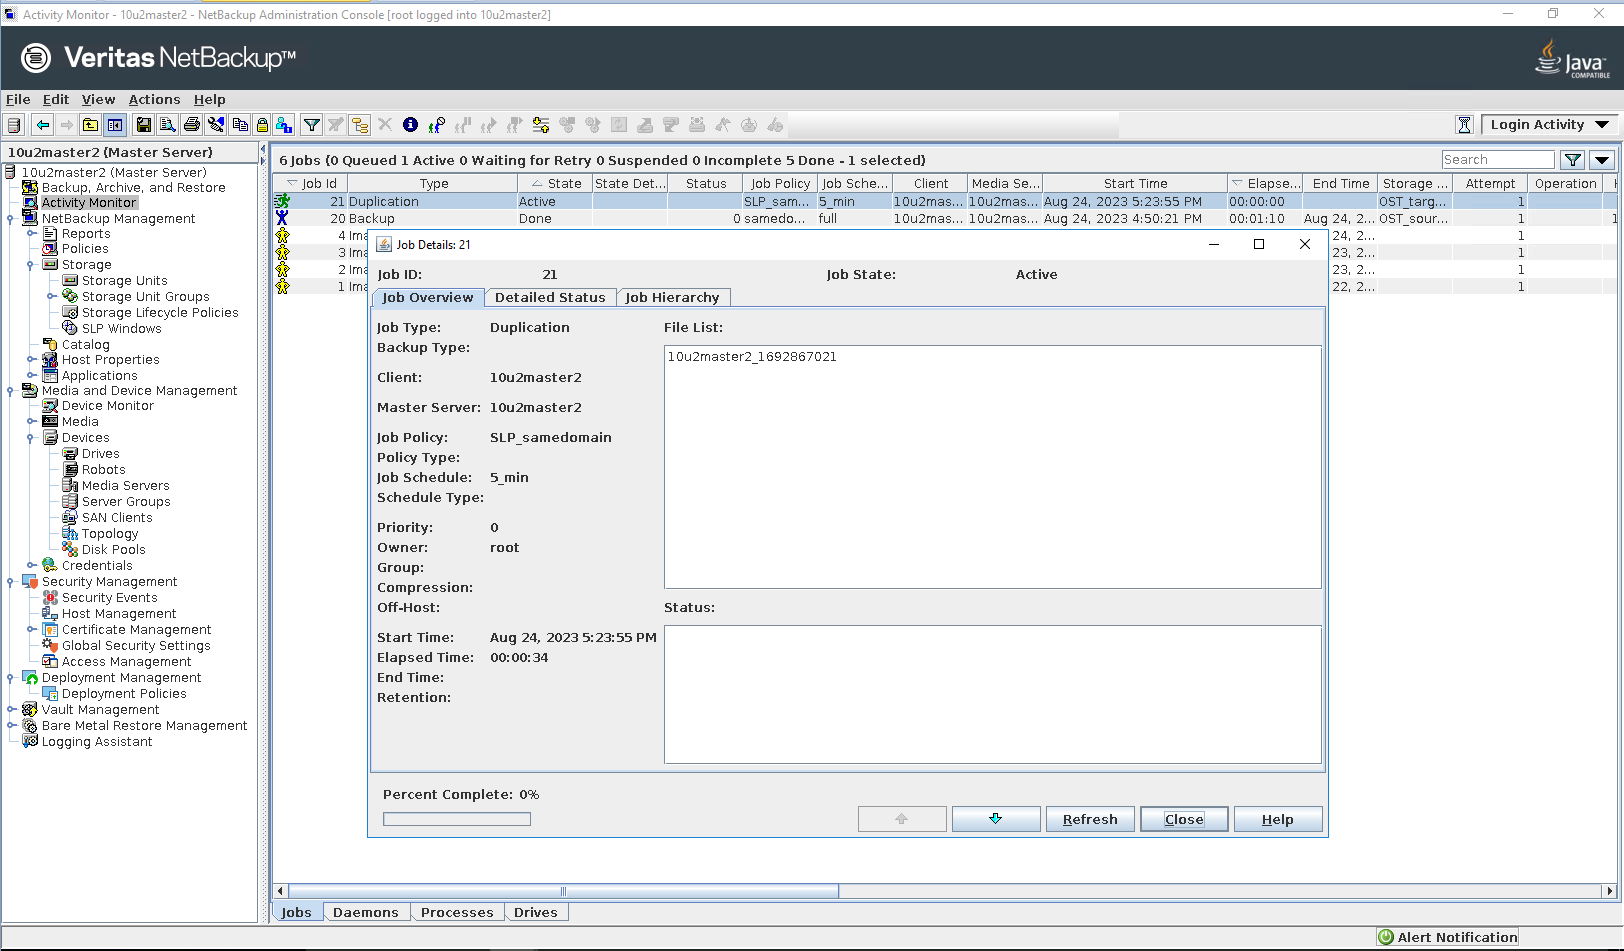
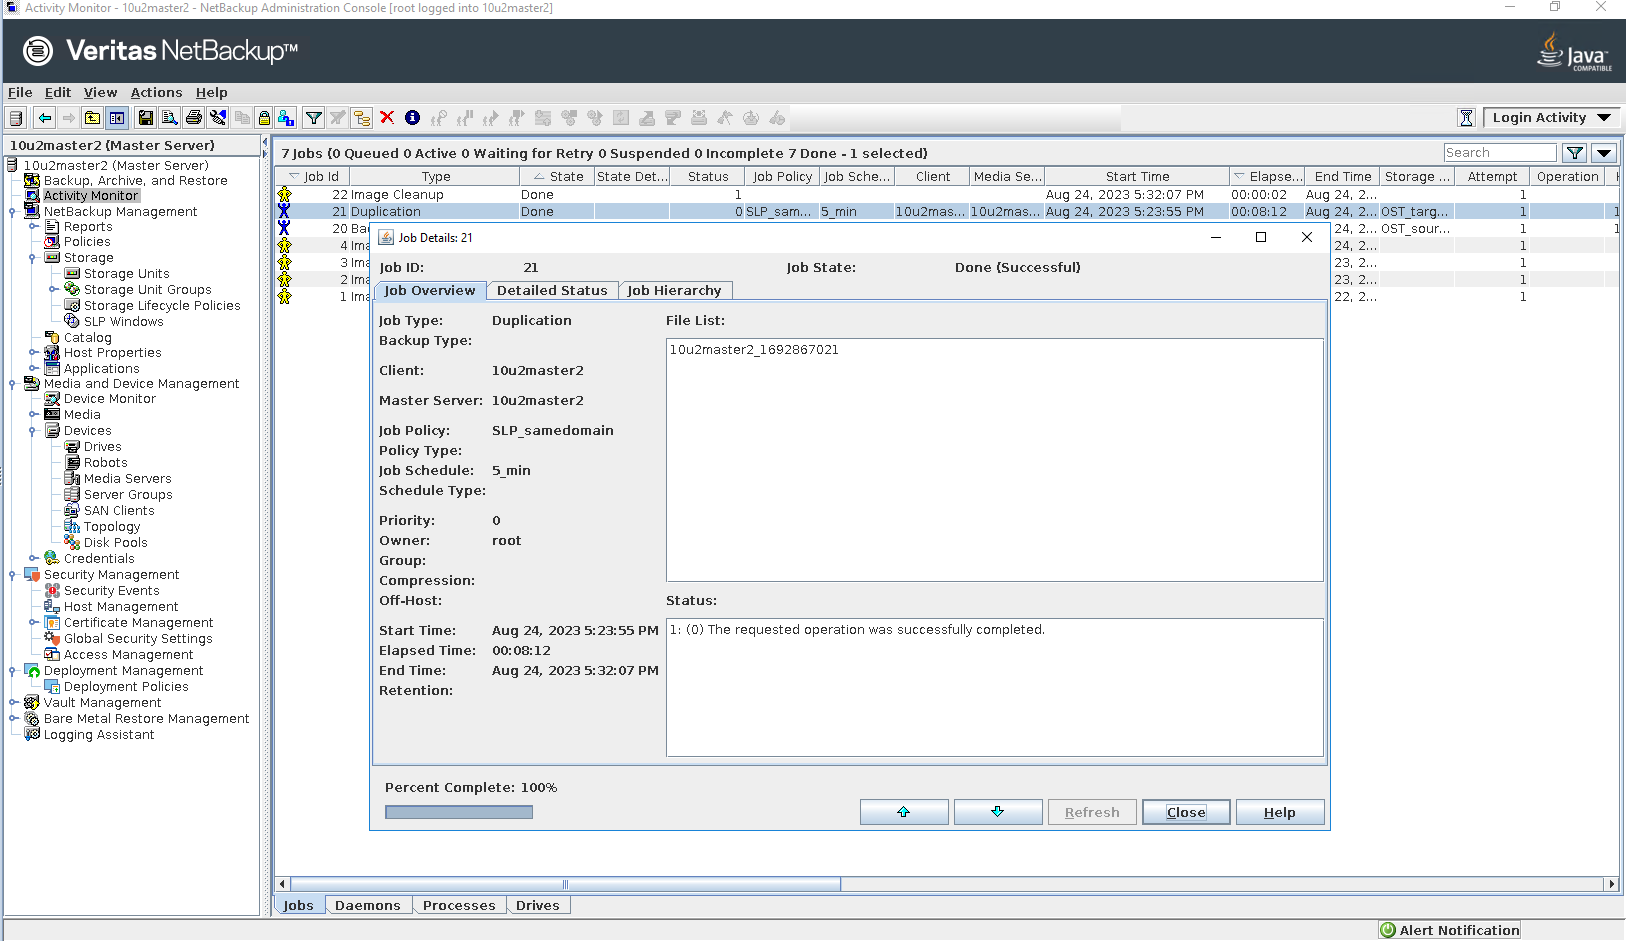 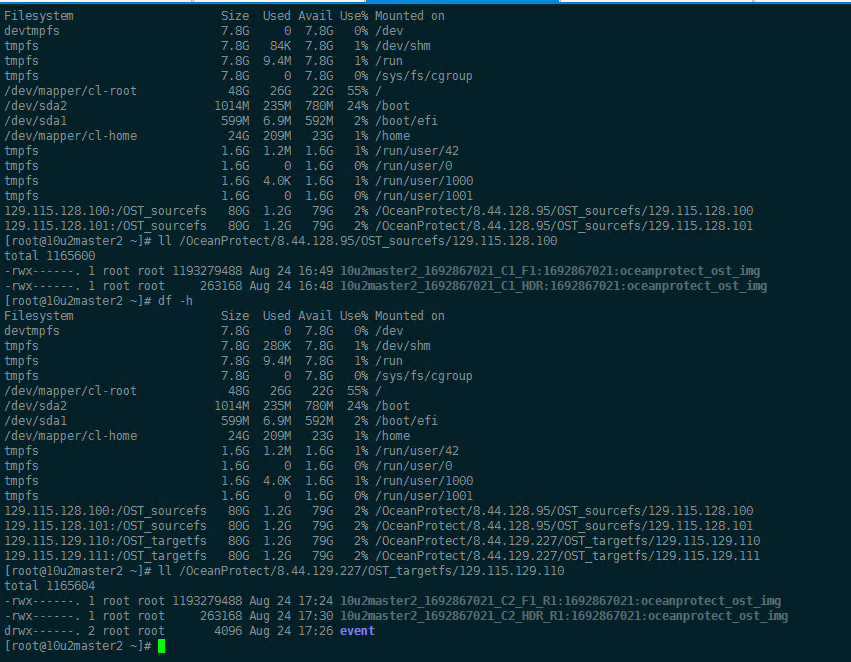
Step 4 Click Backup, Archive and Restore button 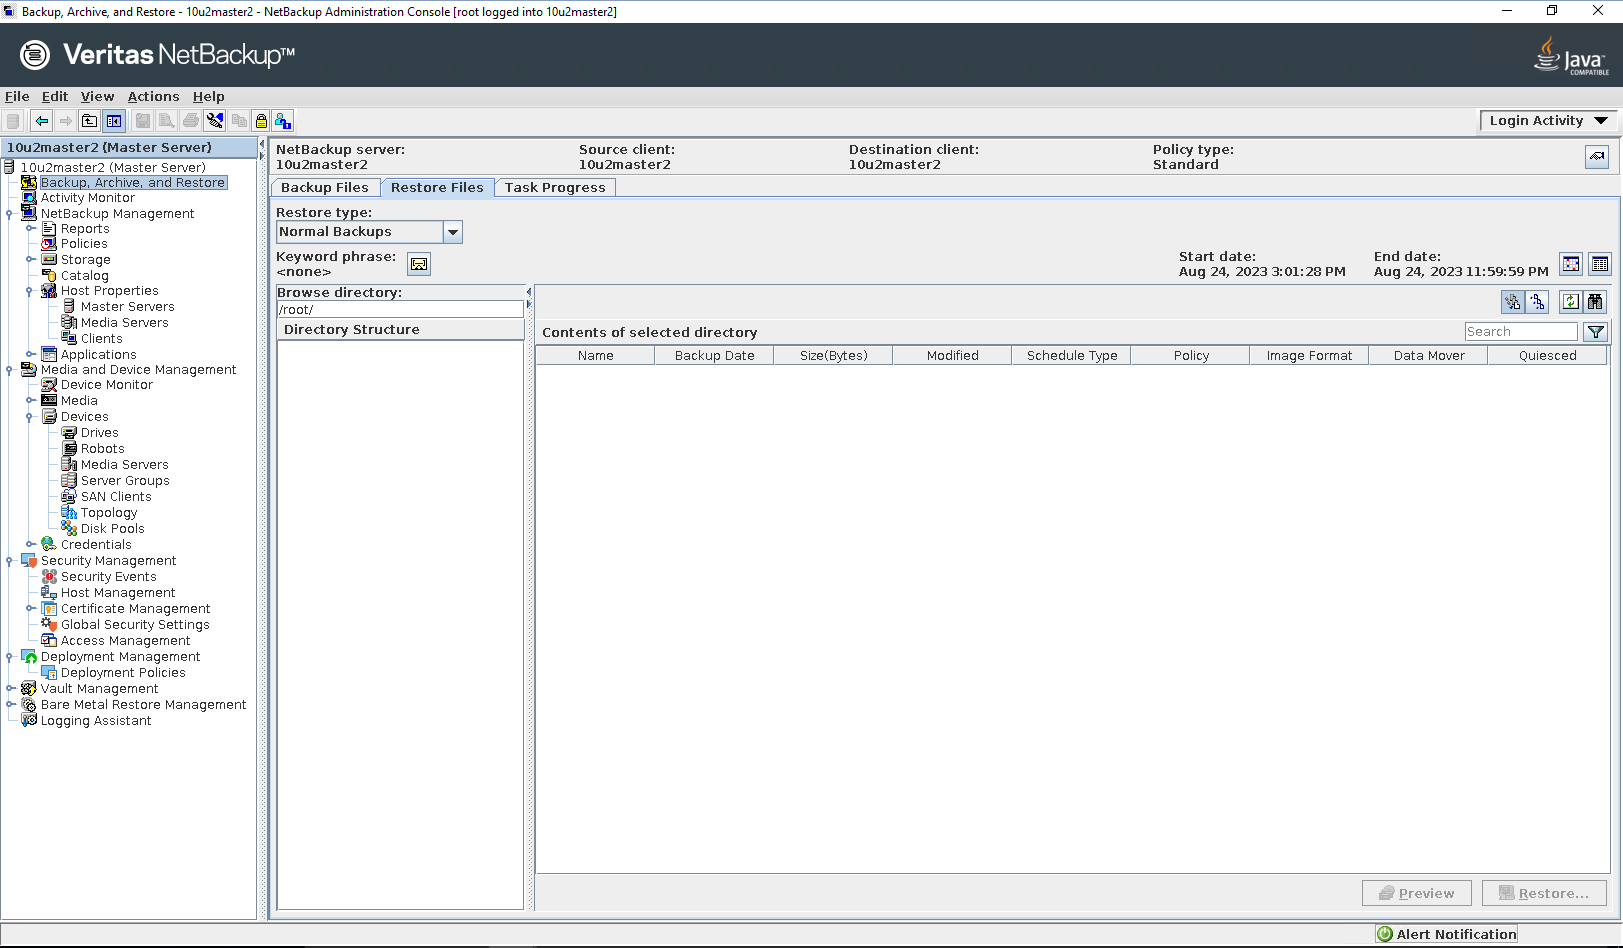
Select the source client and destination client 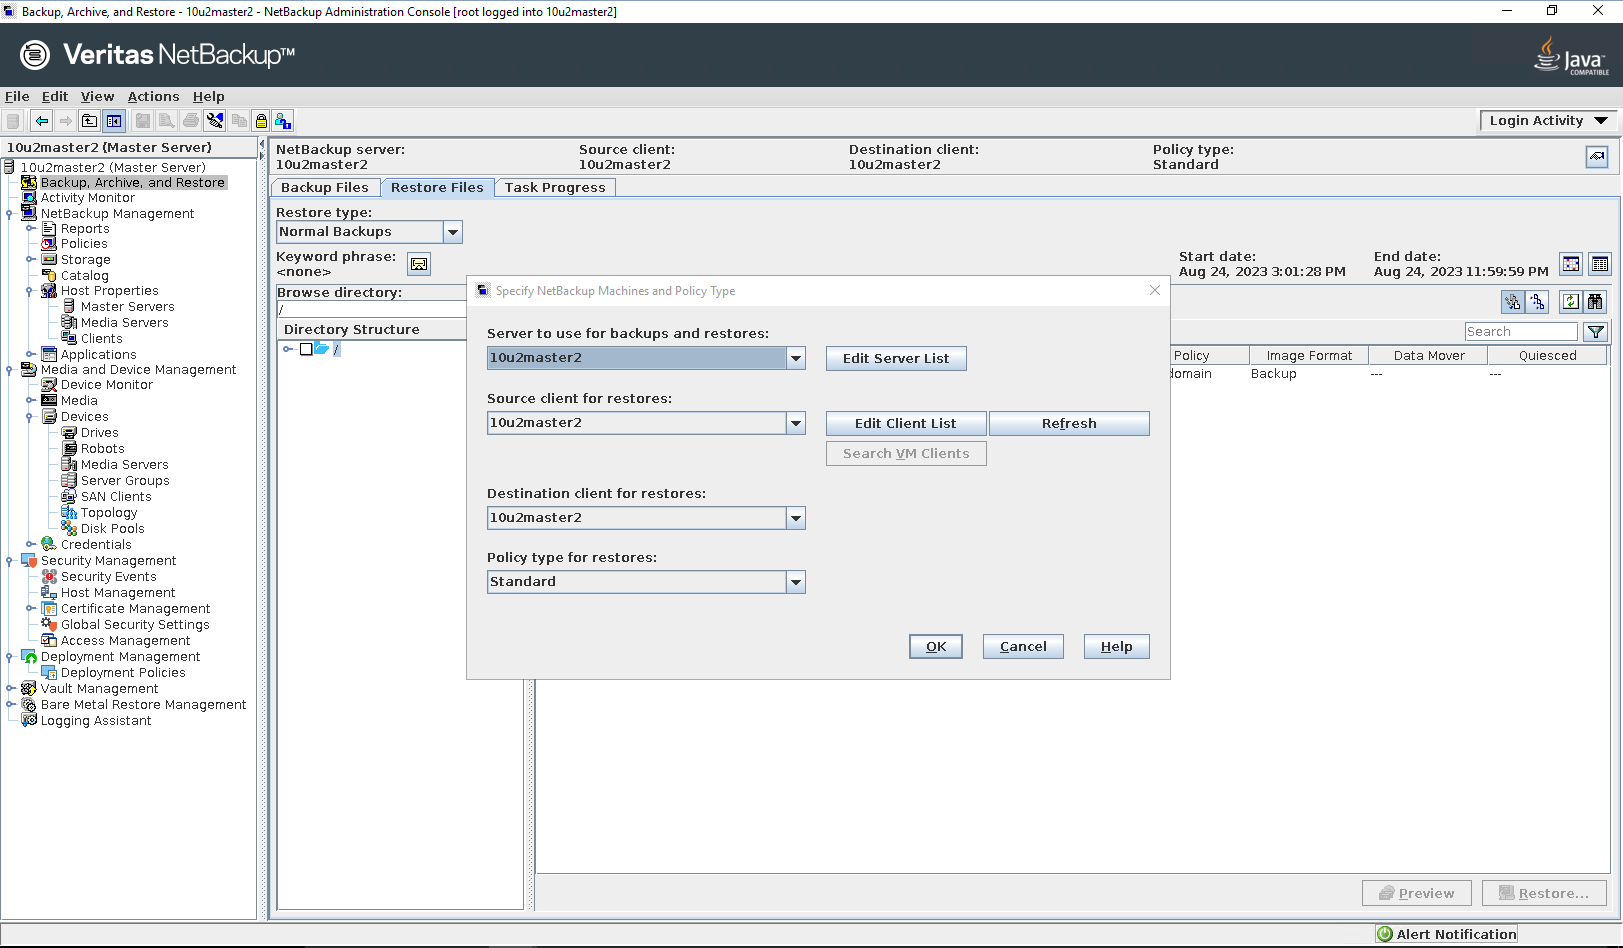
Select the files or folders to be restored 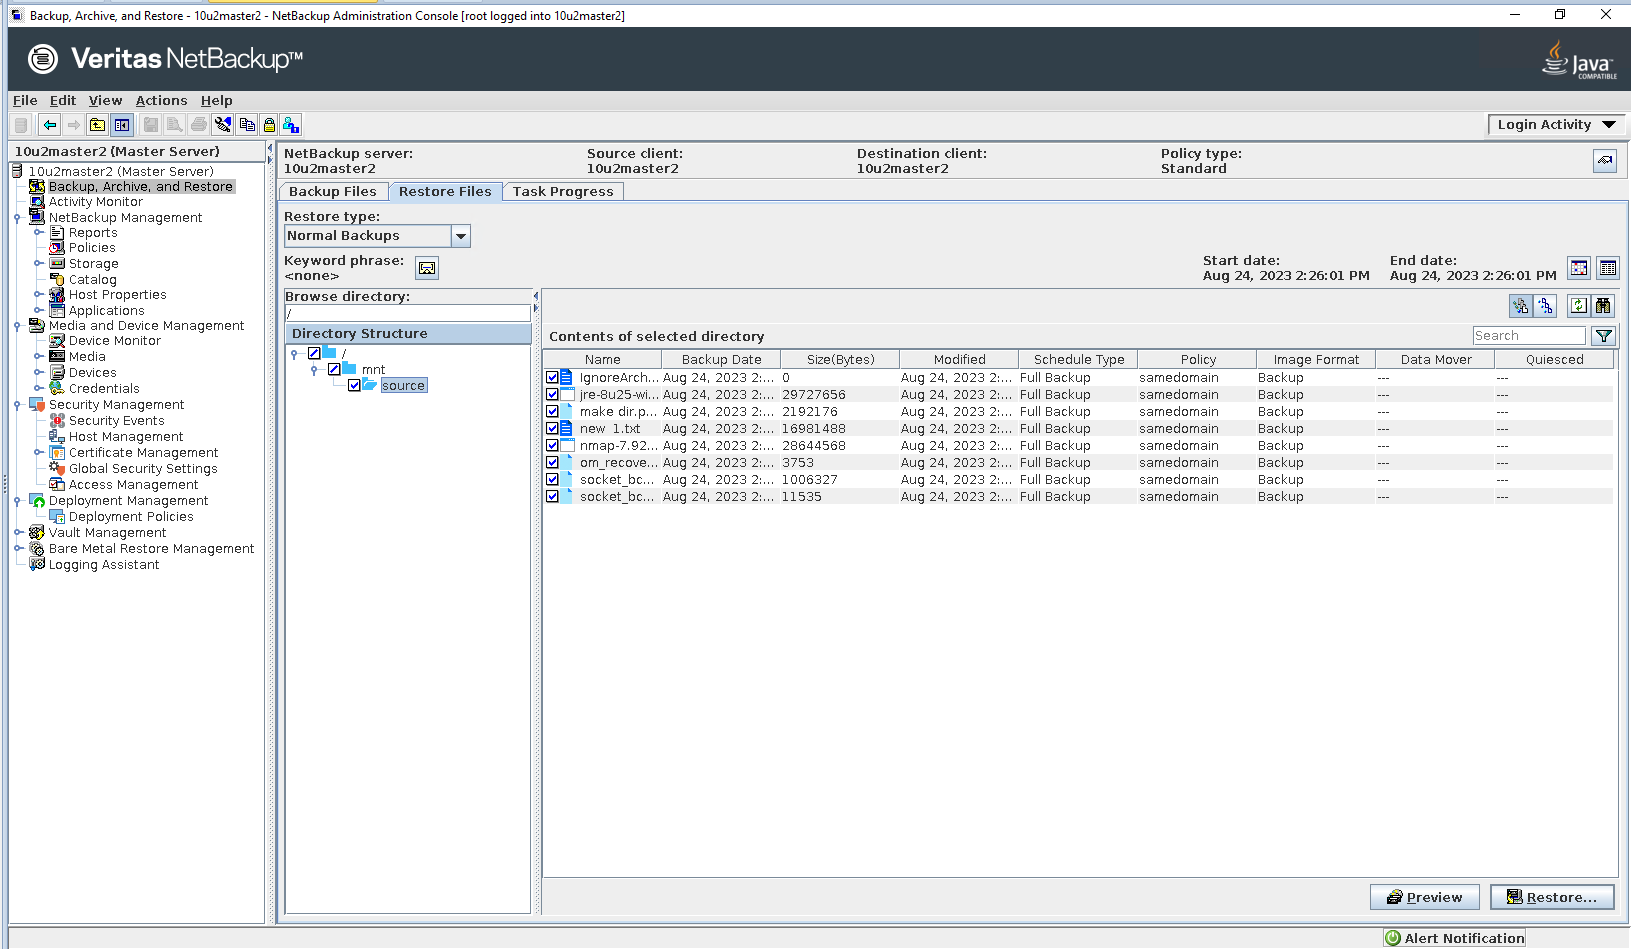
Select the destination 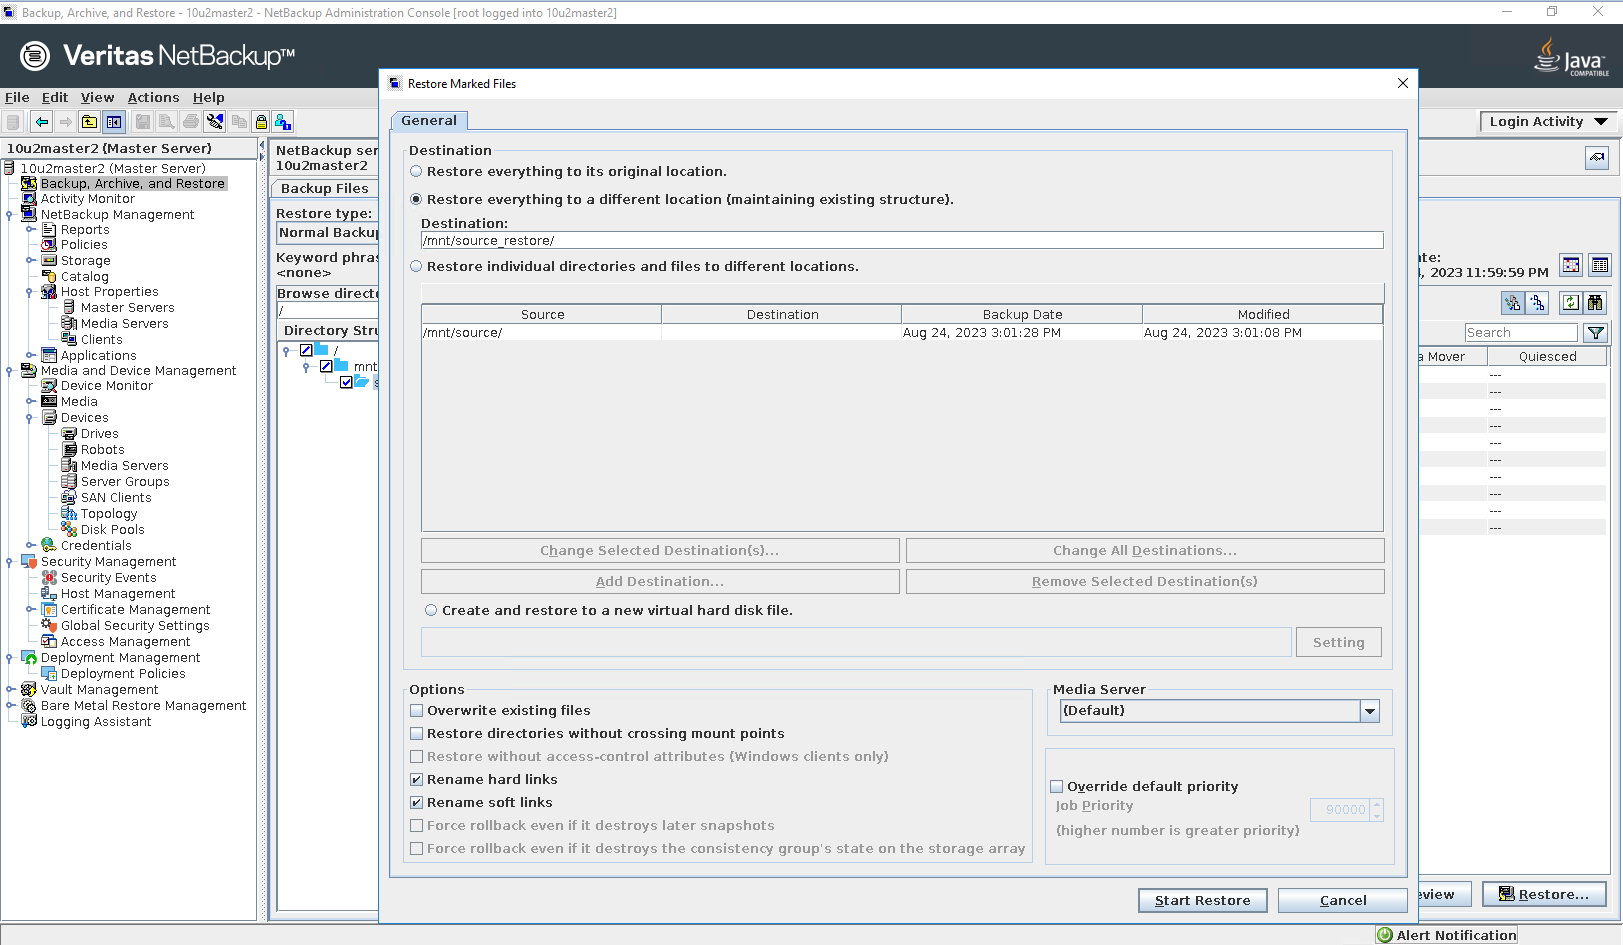
Start restore 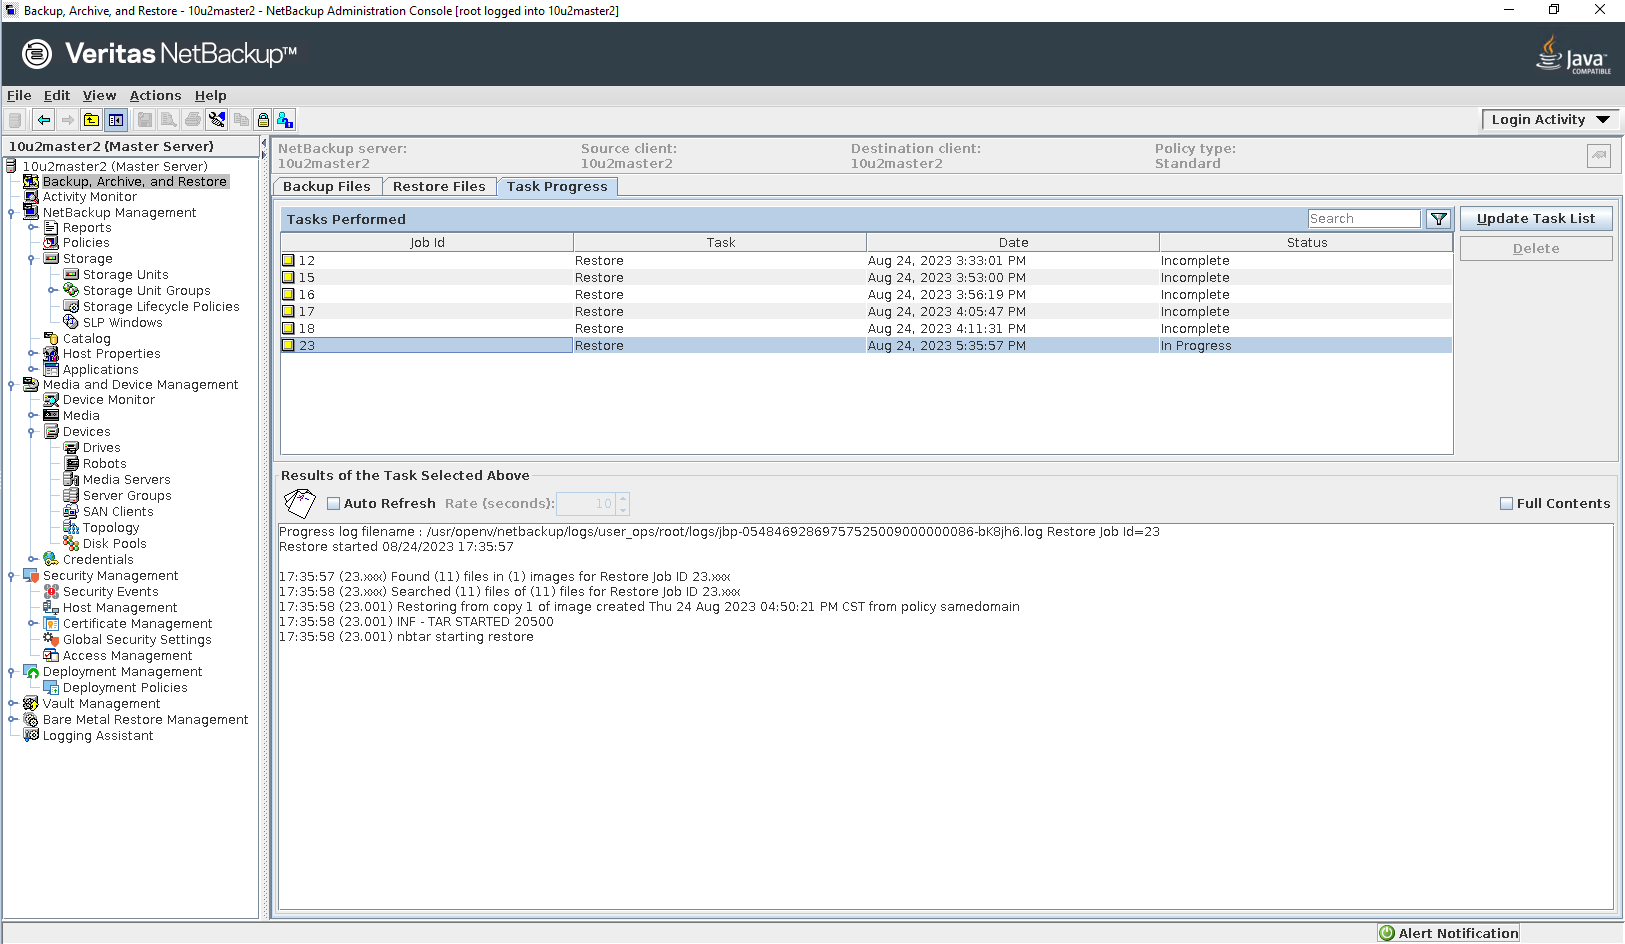
Step5 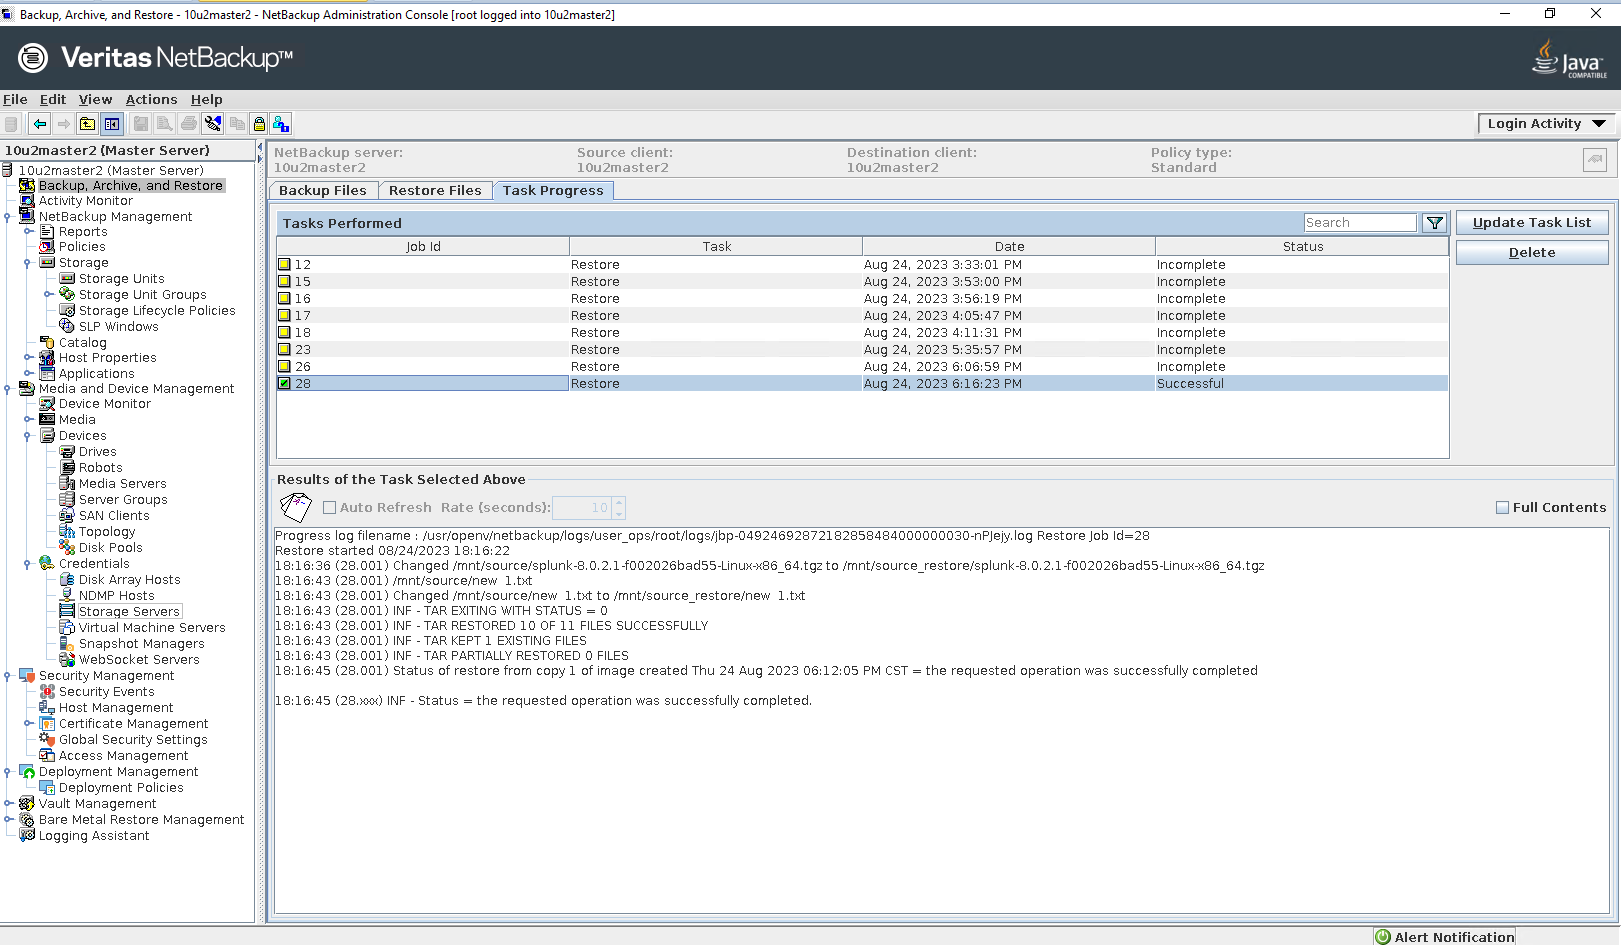
|
3.3 Duplication failed in the Same Master Domain
Test Purpose | Duplication failed in the same Master Domain, temporary data has been cleared automatically then perform secondary replication. |
Test Networking | Huawei OceanProtect Backup Storage Function Compatibility Test Networking 1 |
Prerequisites |
|
Test Procedure |
|
Expected Result | Step 2 Backup job finish successfully. Step 4 Duplication job failed. Step 5 Duplication job finish successfully. Step 7 Restore job finish successfully and restored files are the same as original files. |
Test Result | Passed Step 1 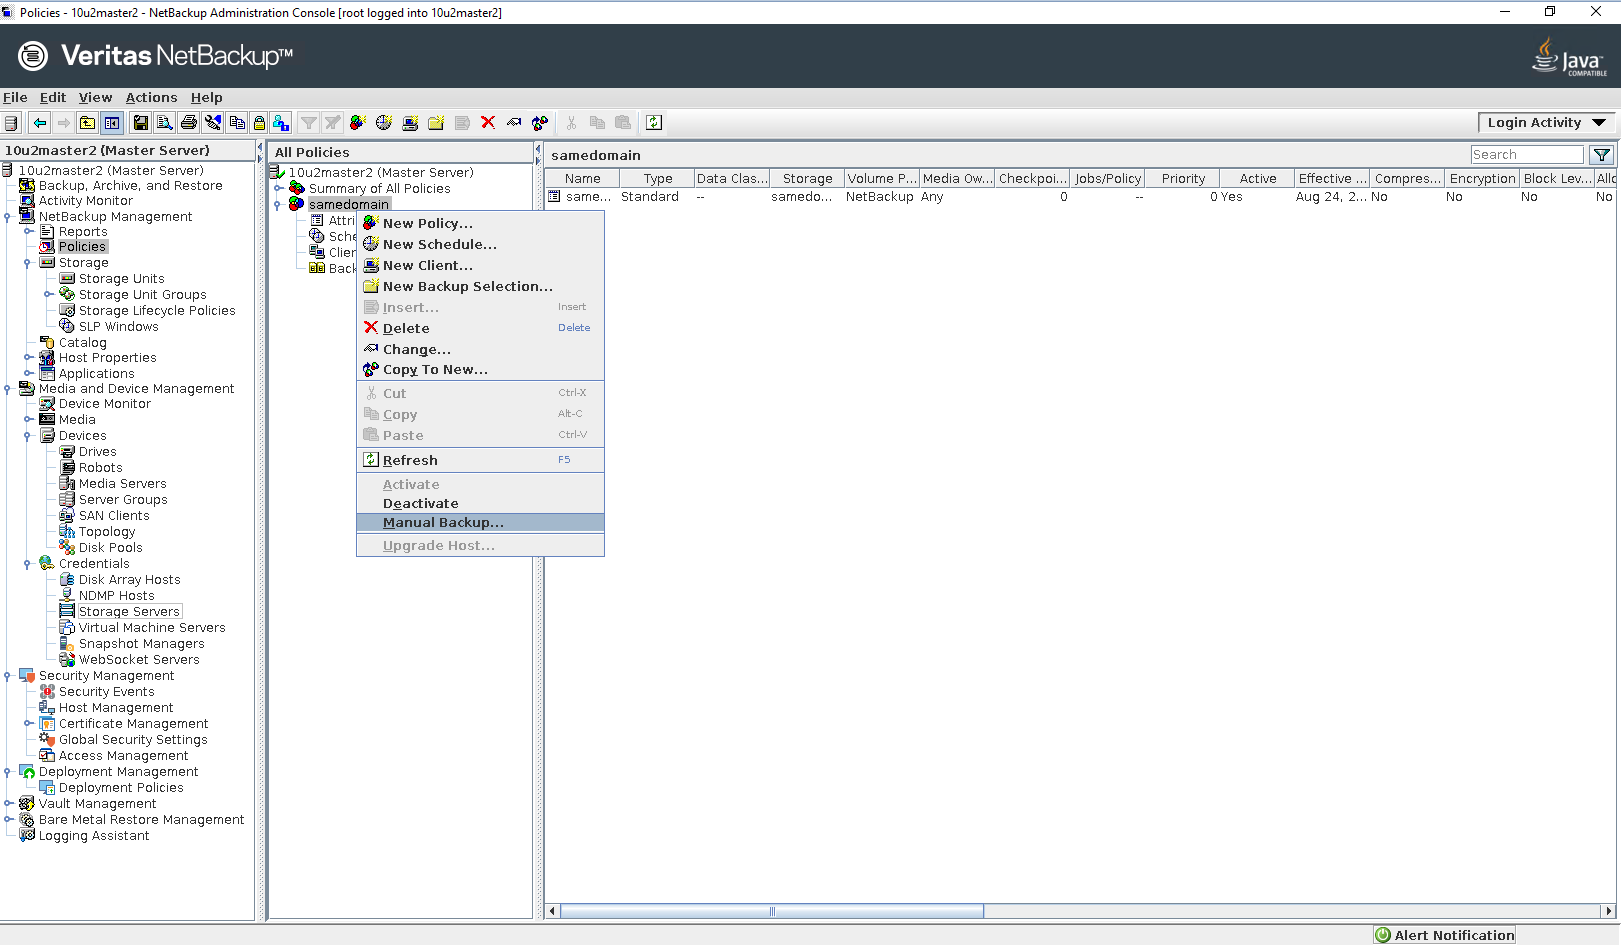
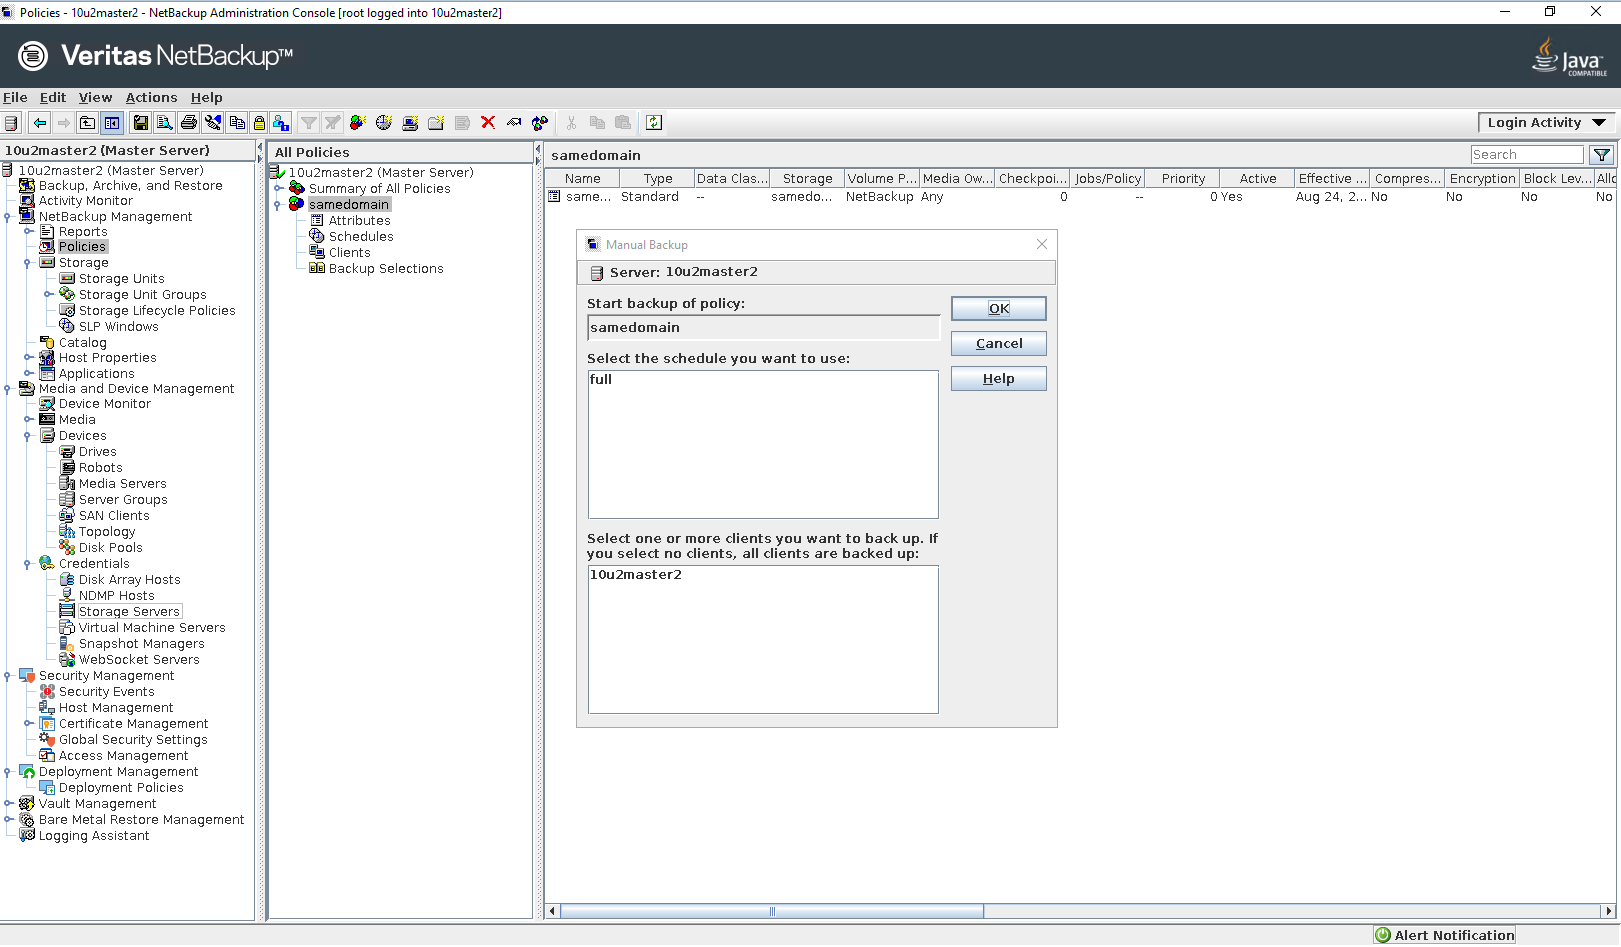
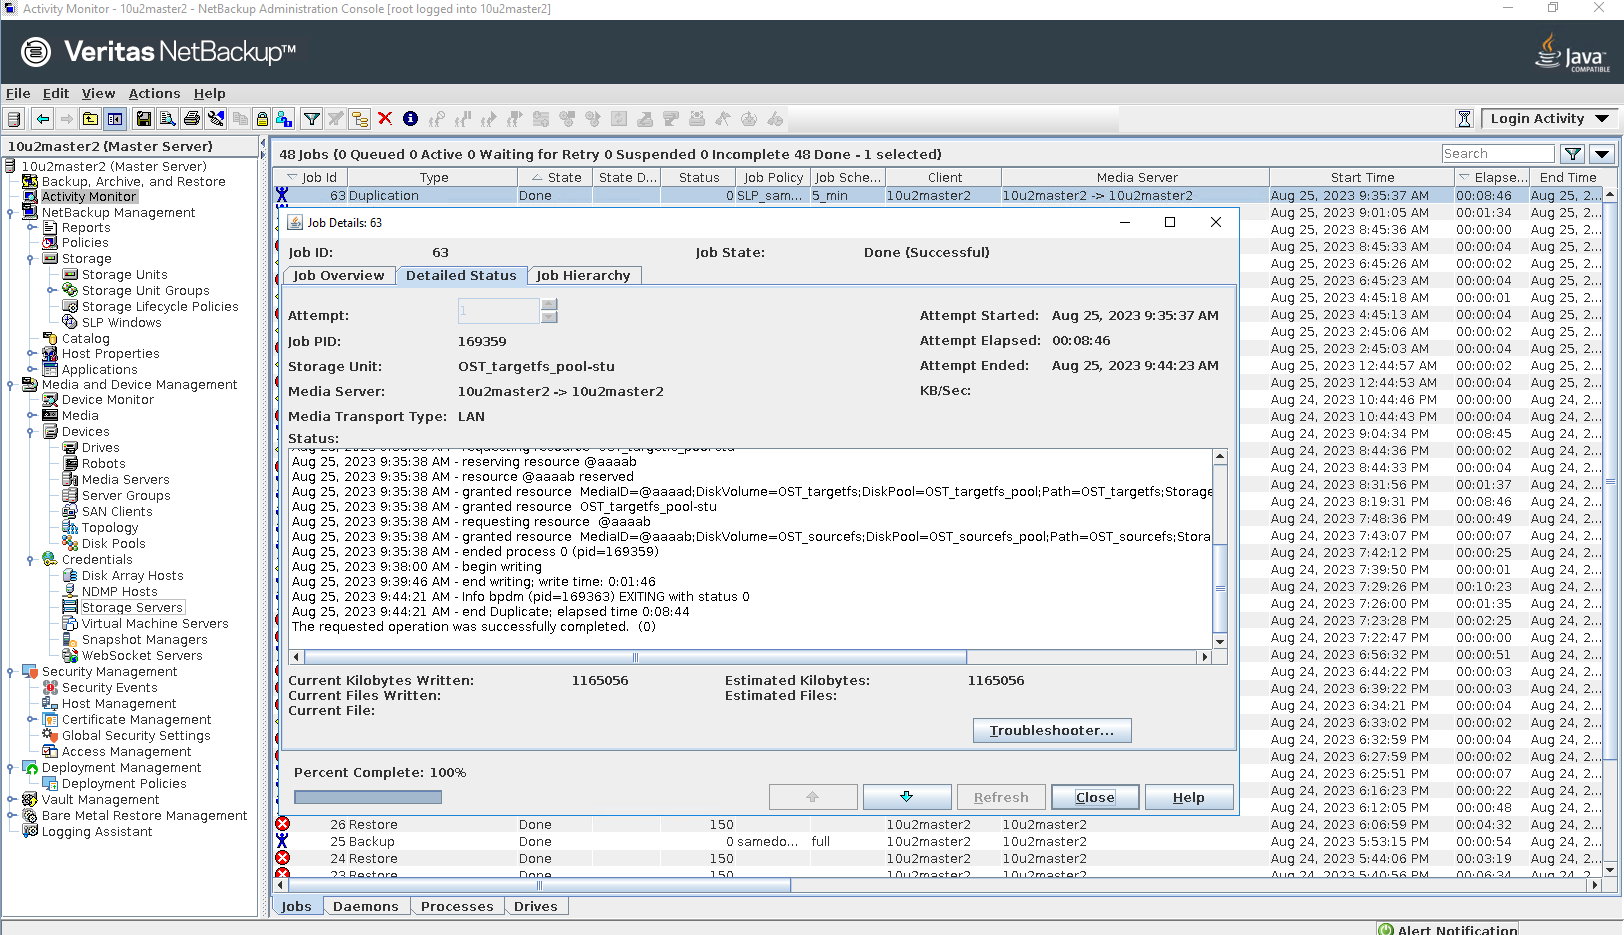
Step 2 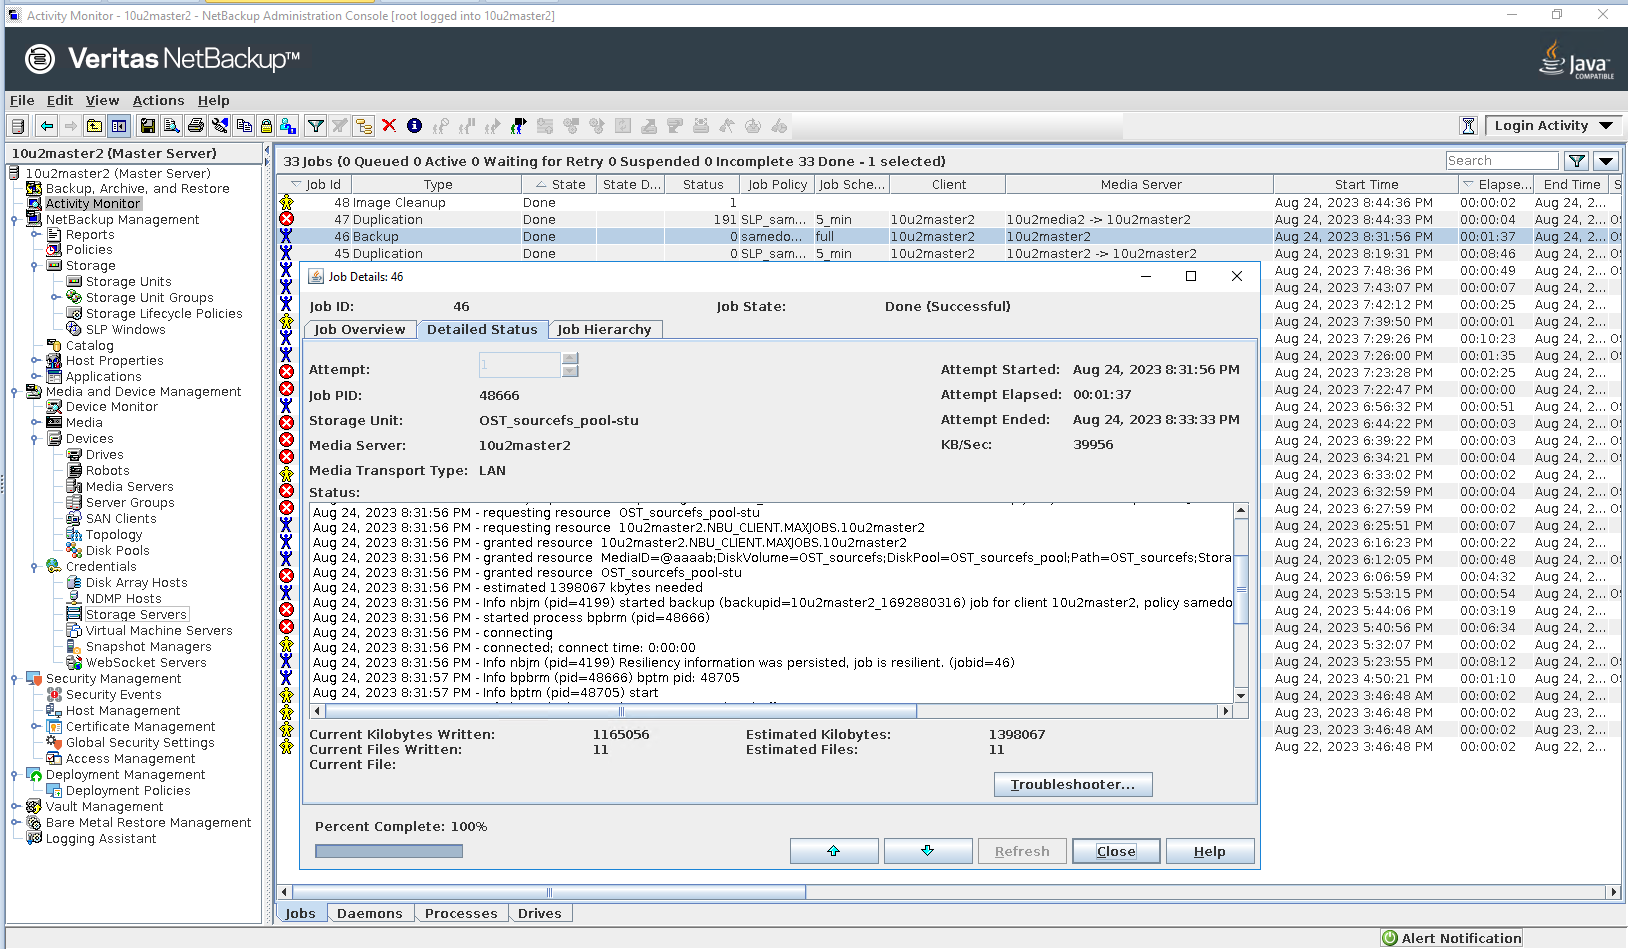
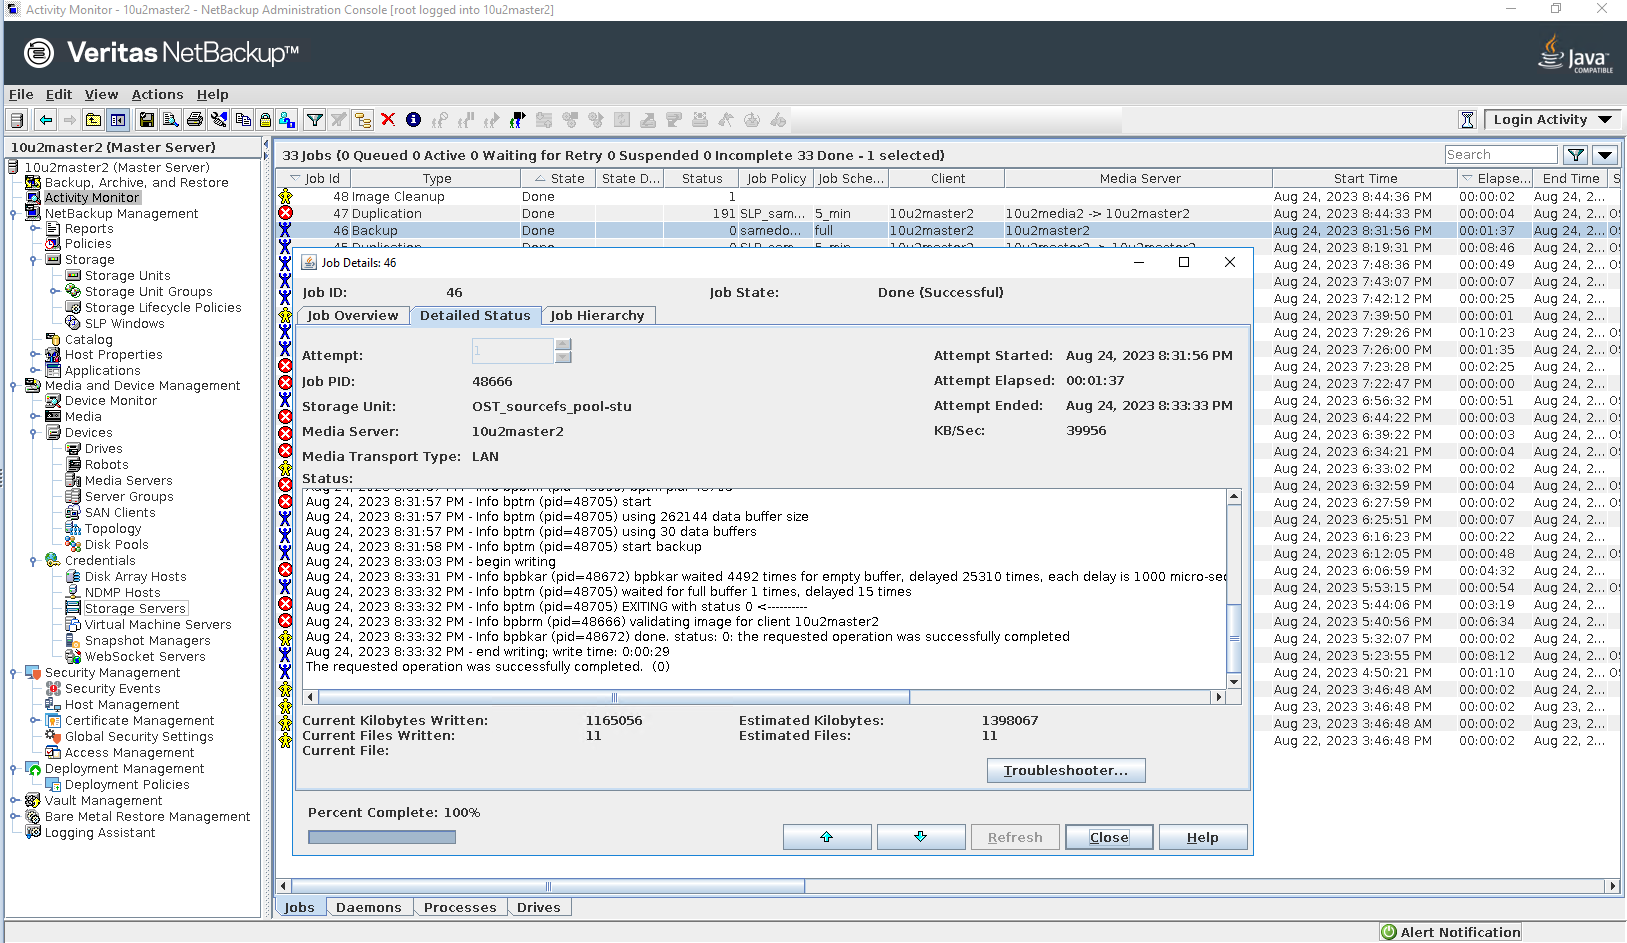
Step 4 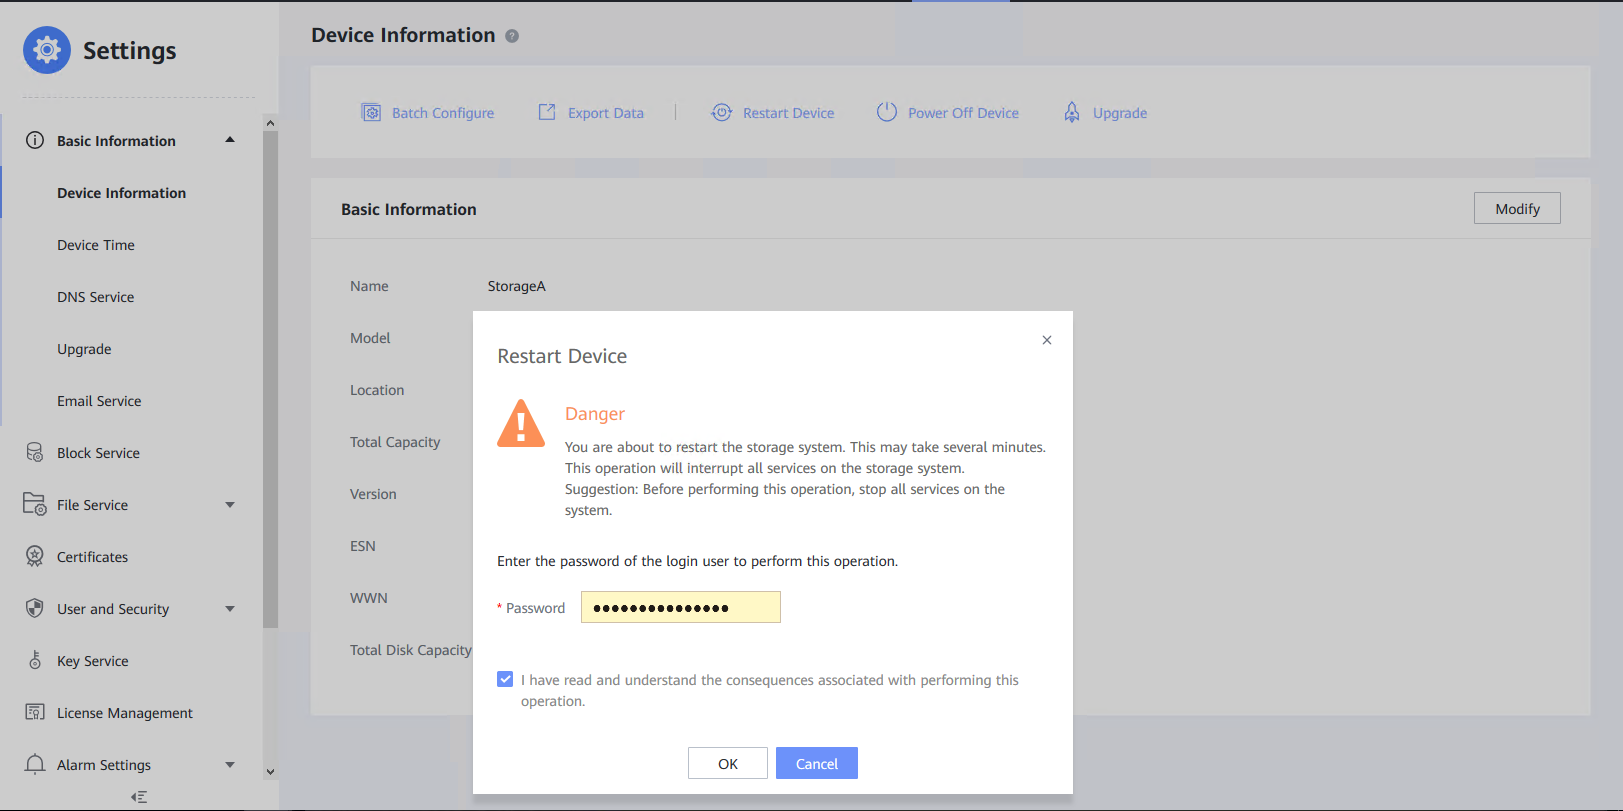
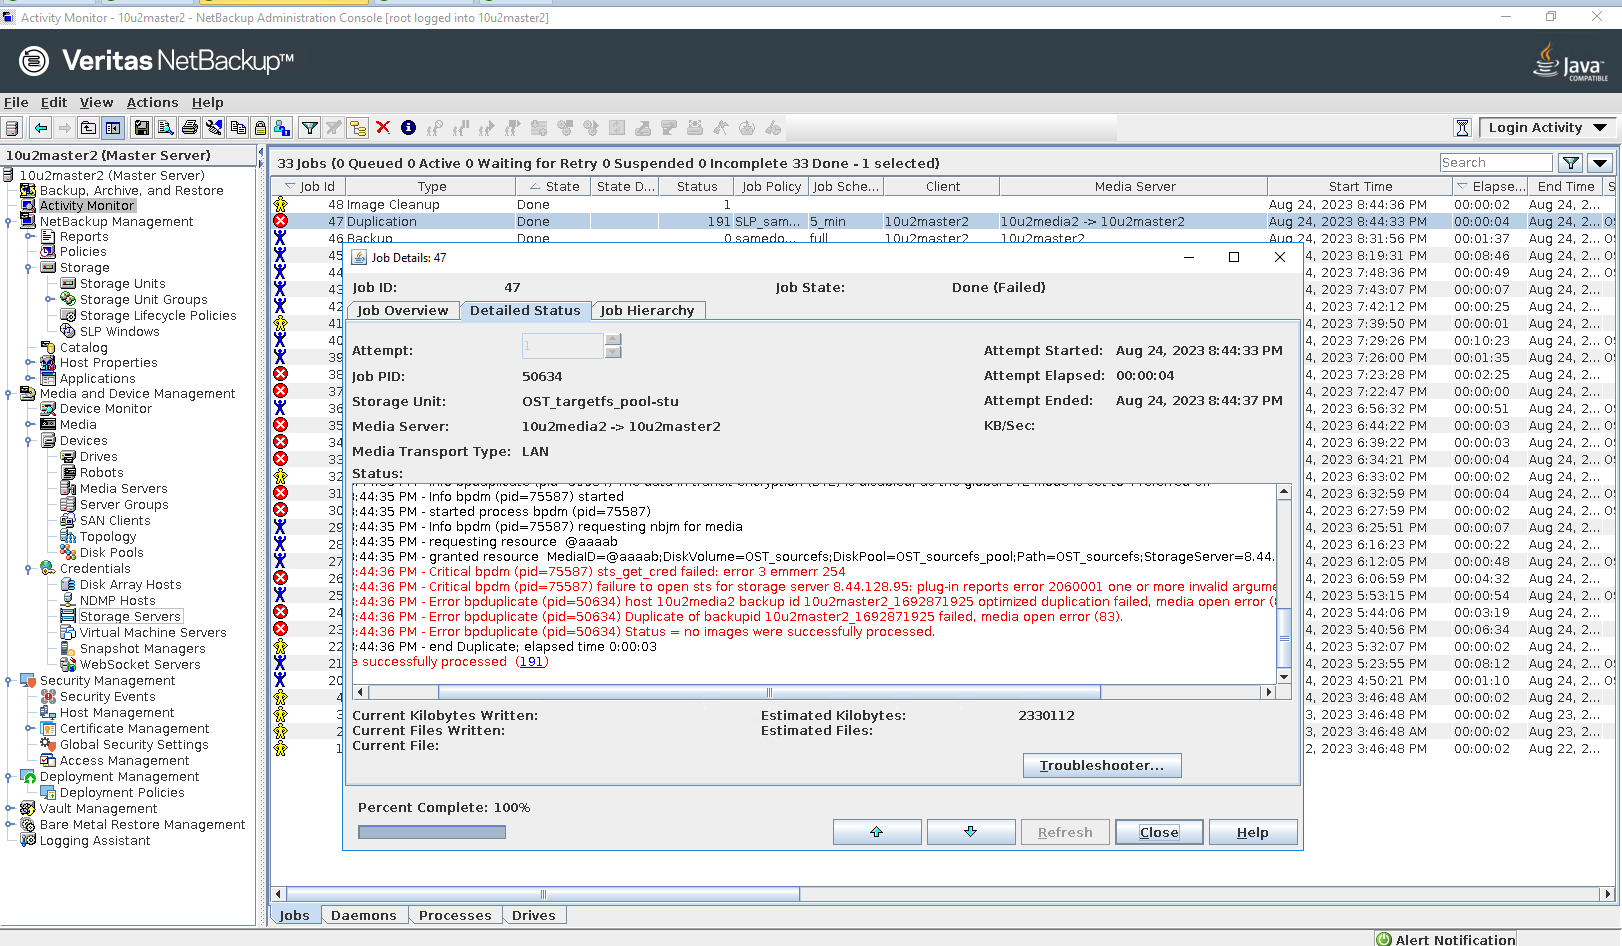

Step 5 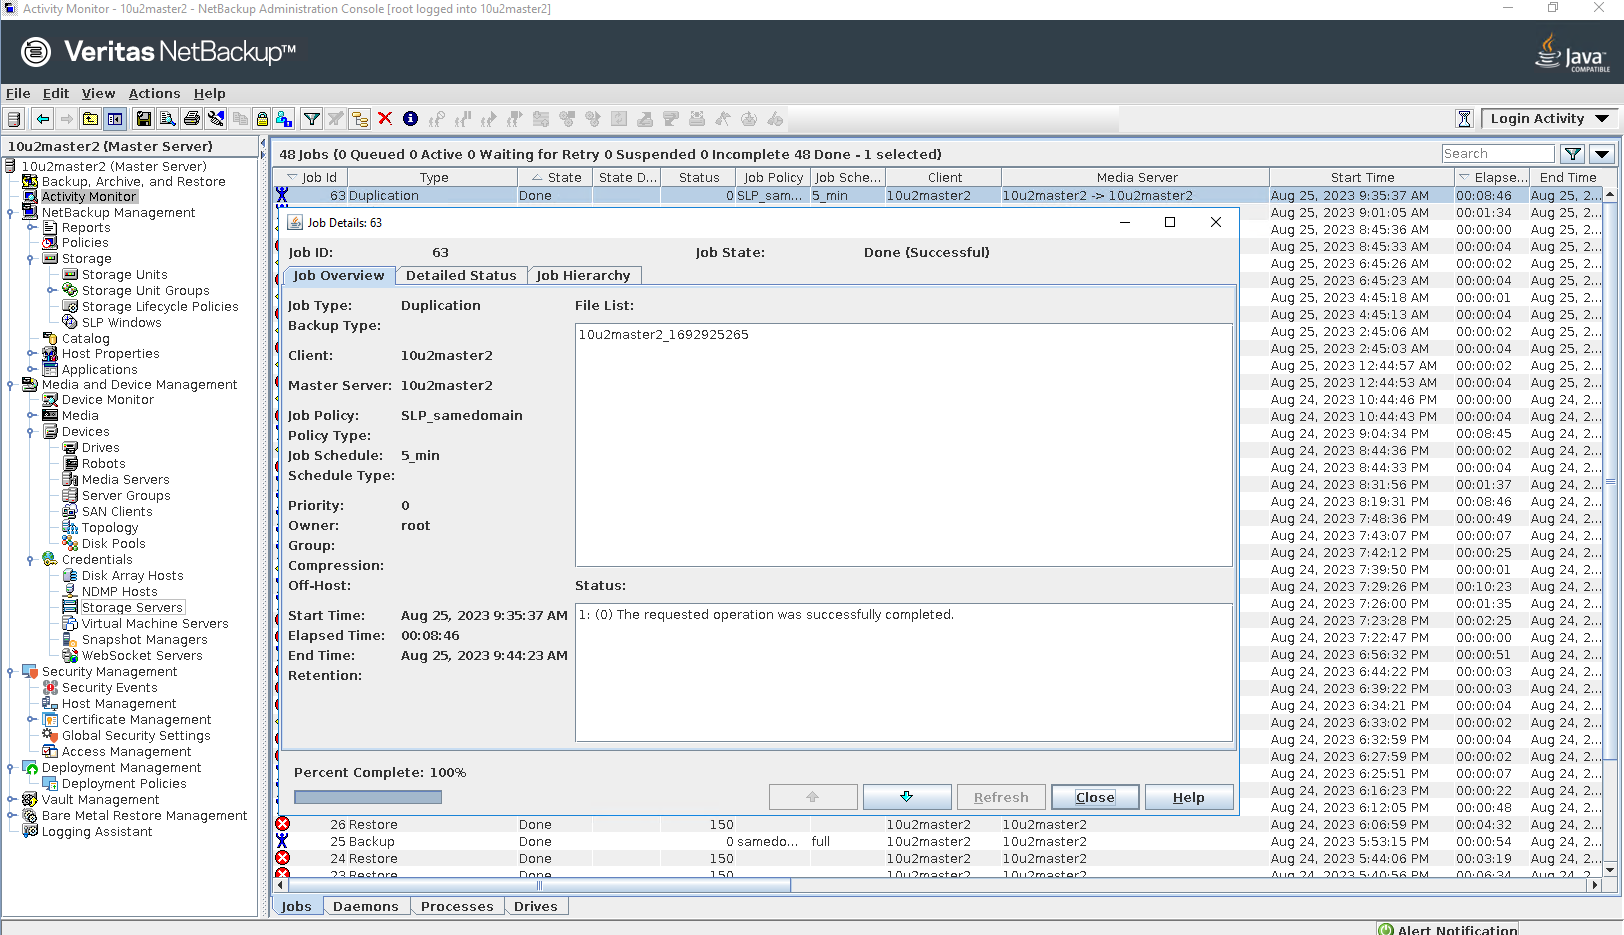
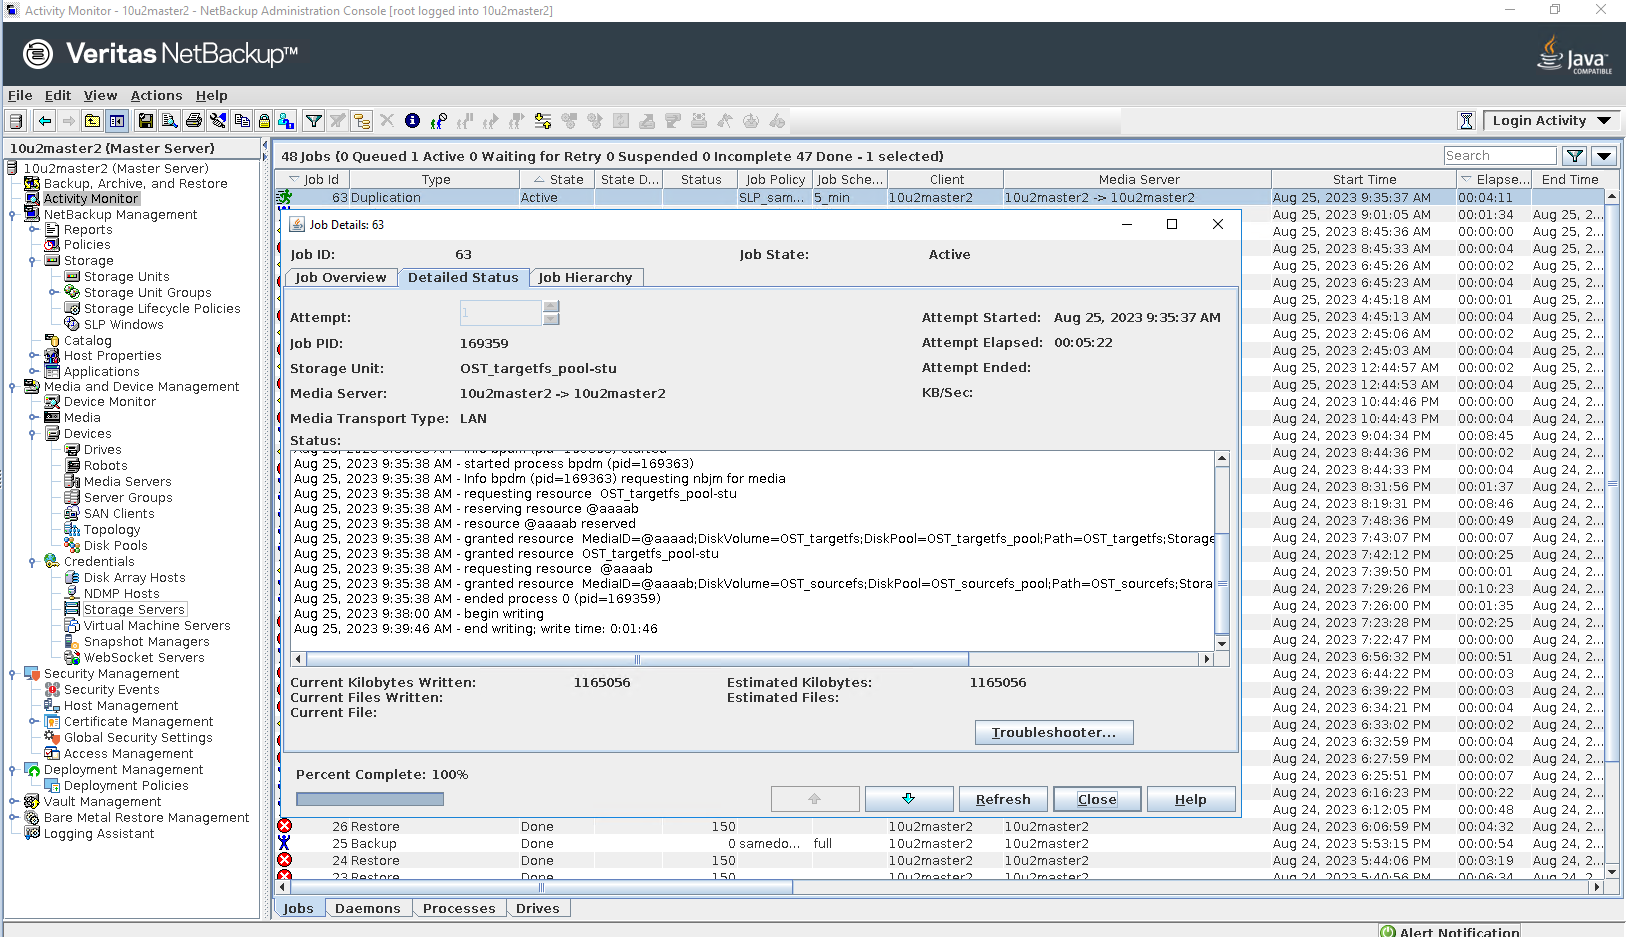 

Step 6 Click Backup, Archive and Restore button 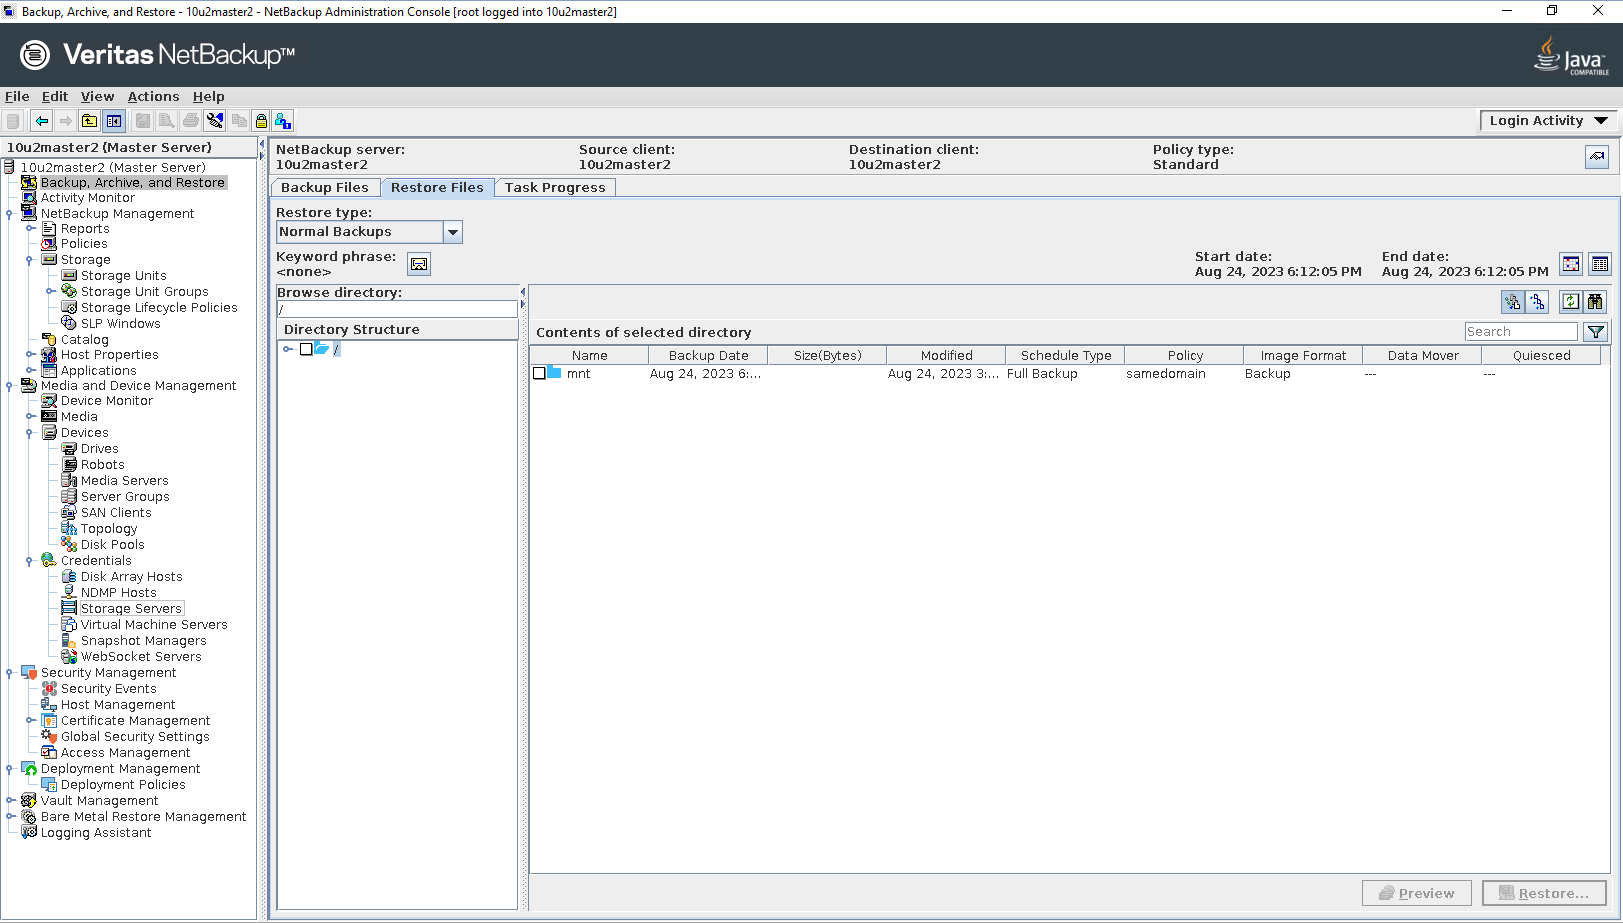
Select the source client and destination client 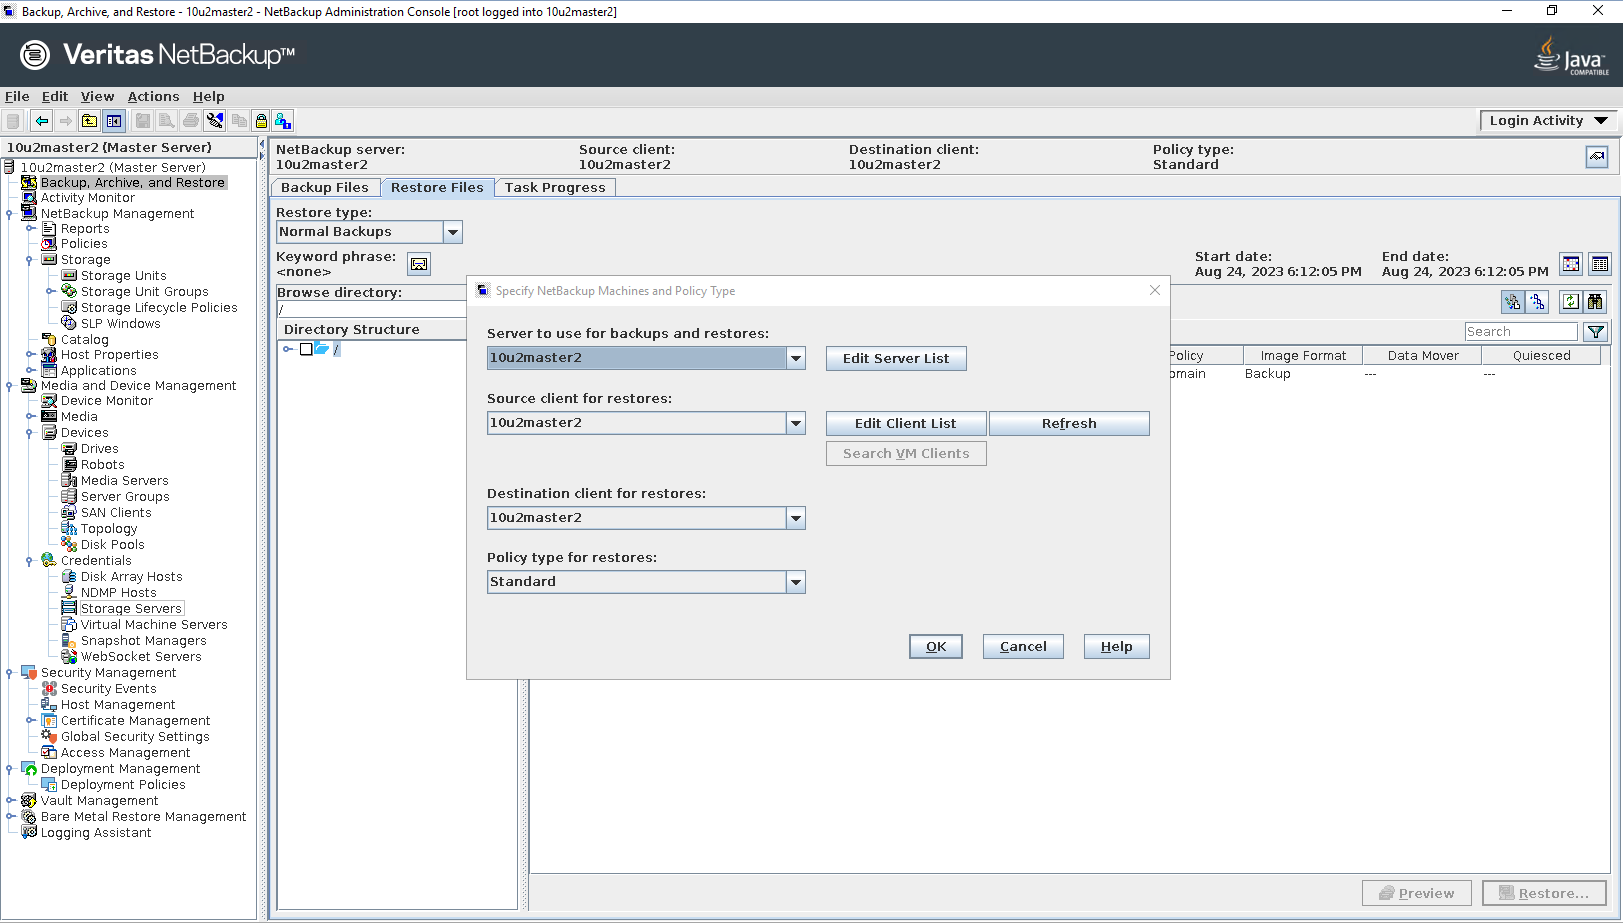
Select the files or folders to be restored 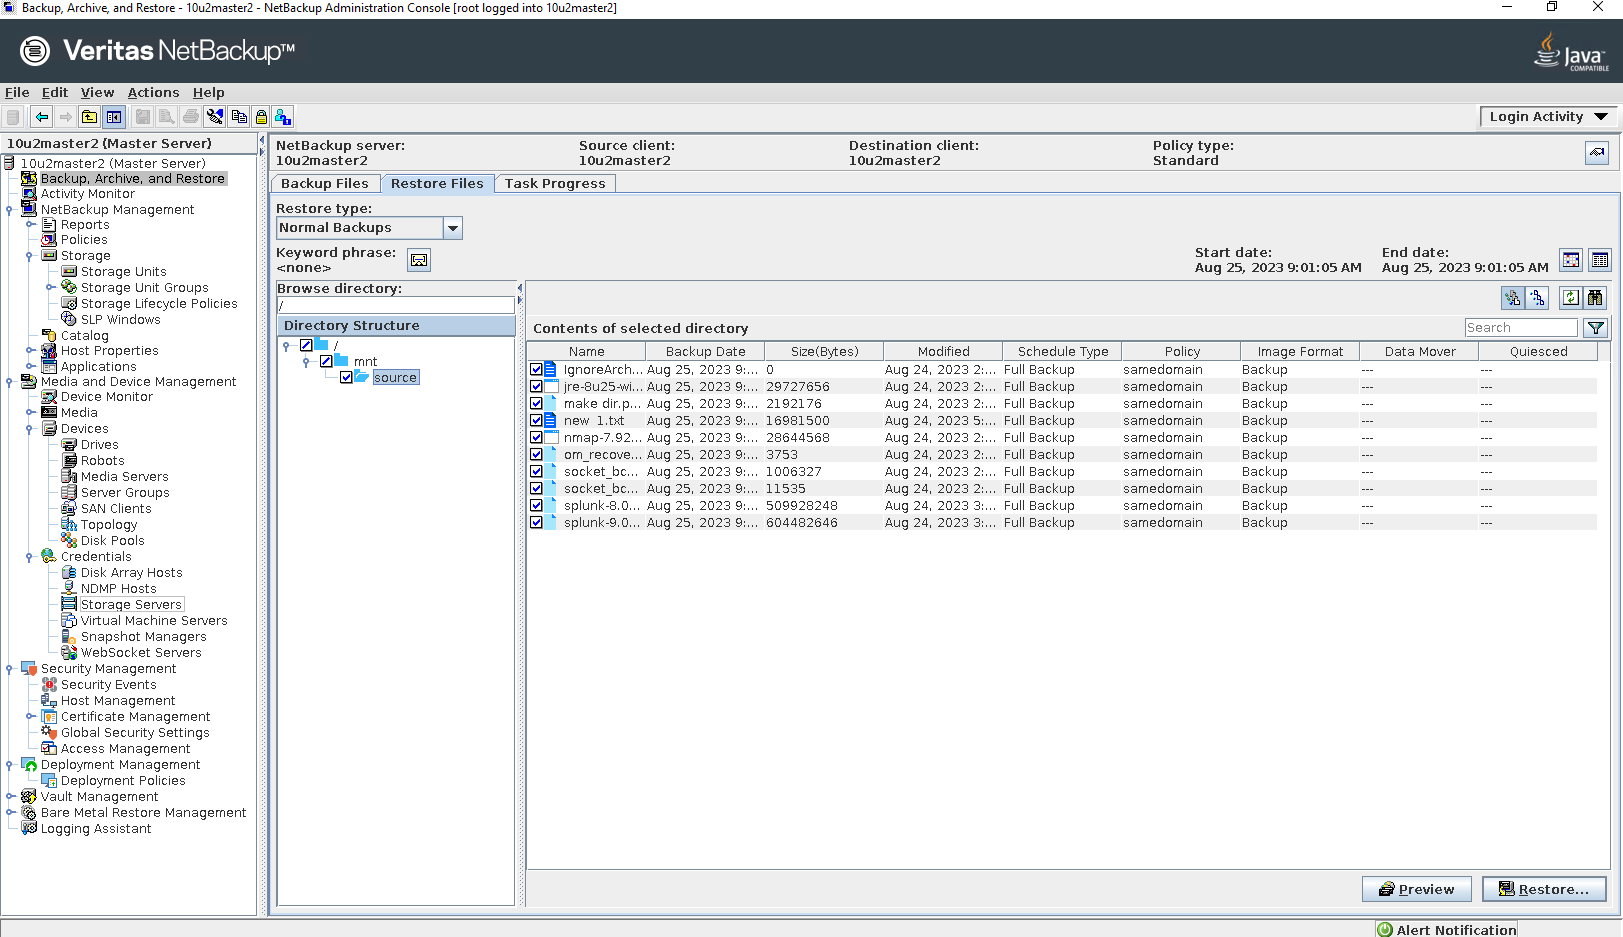
Select the destination 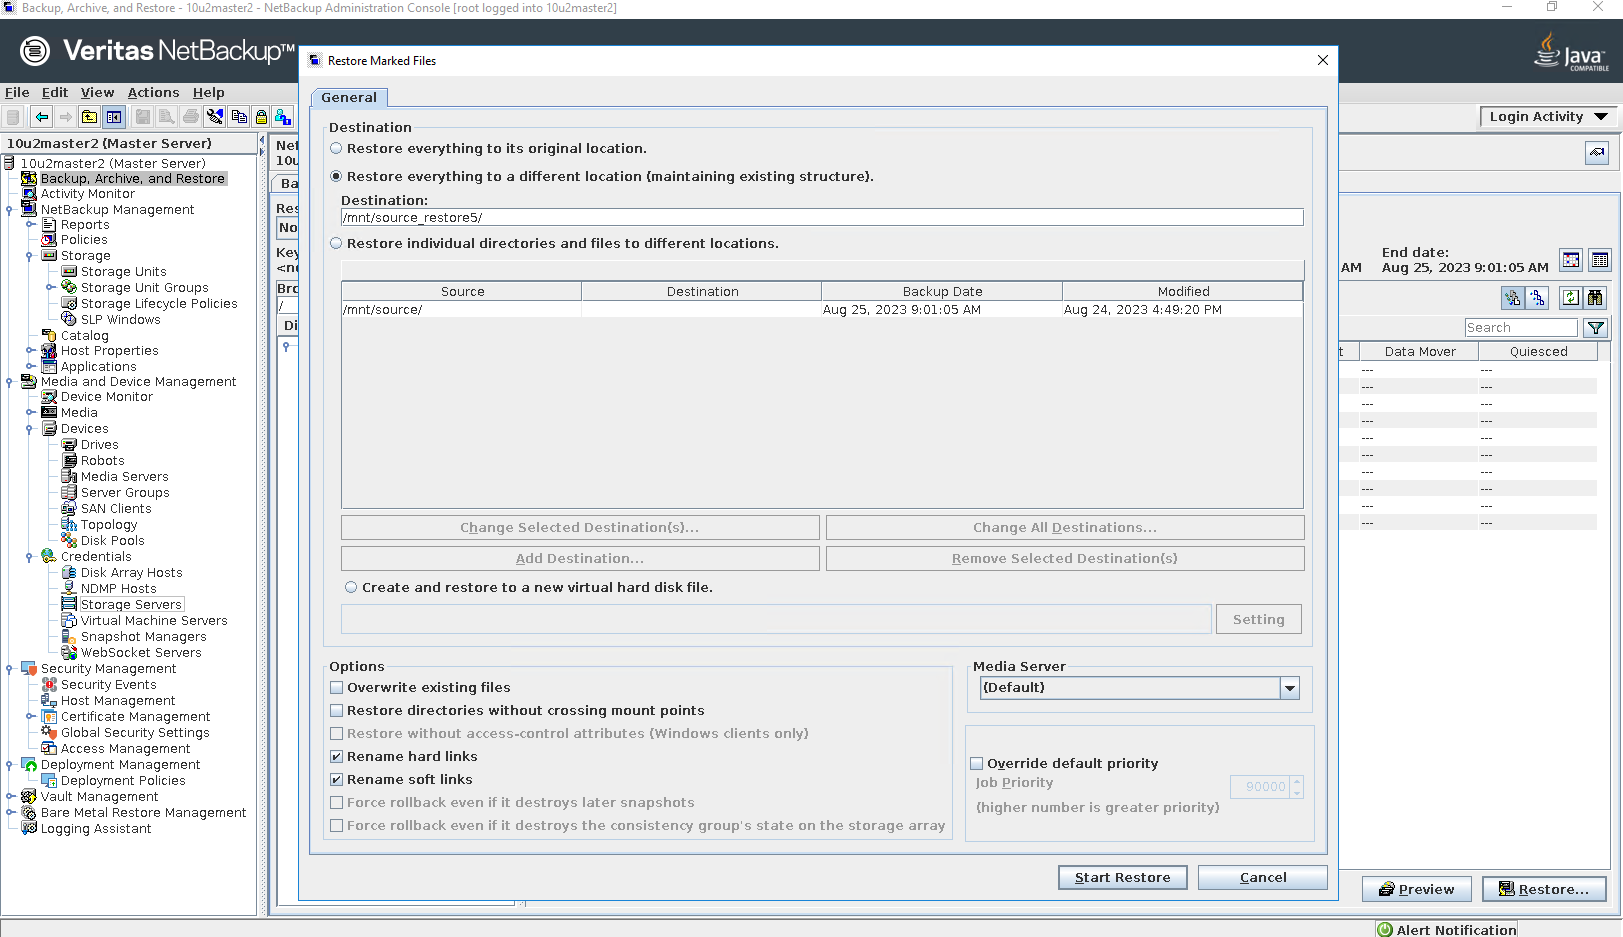
Start restore Step 7 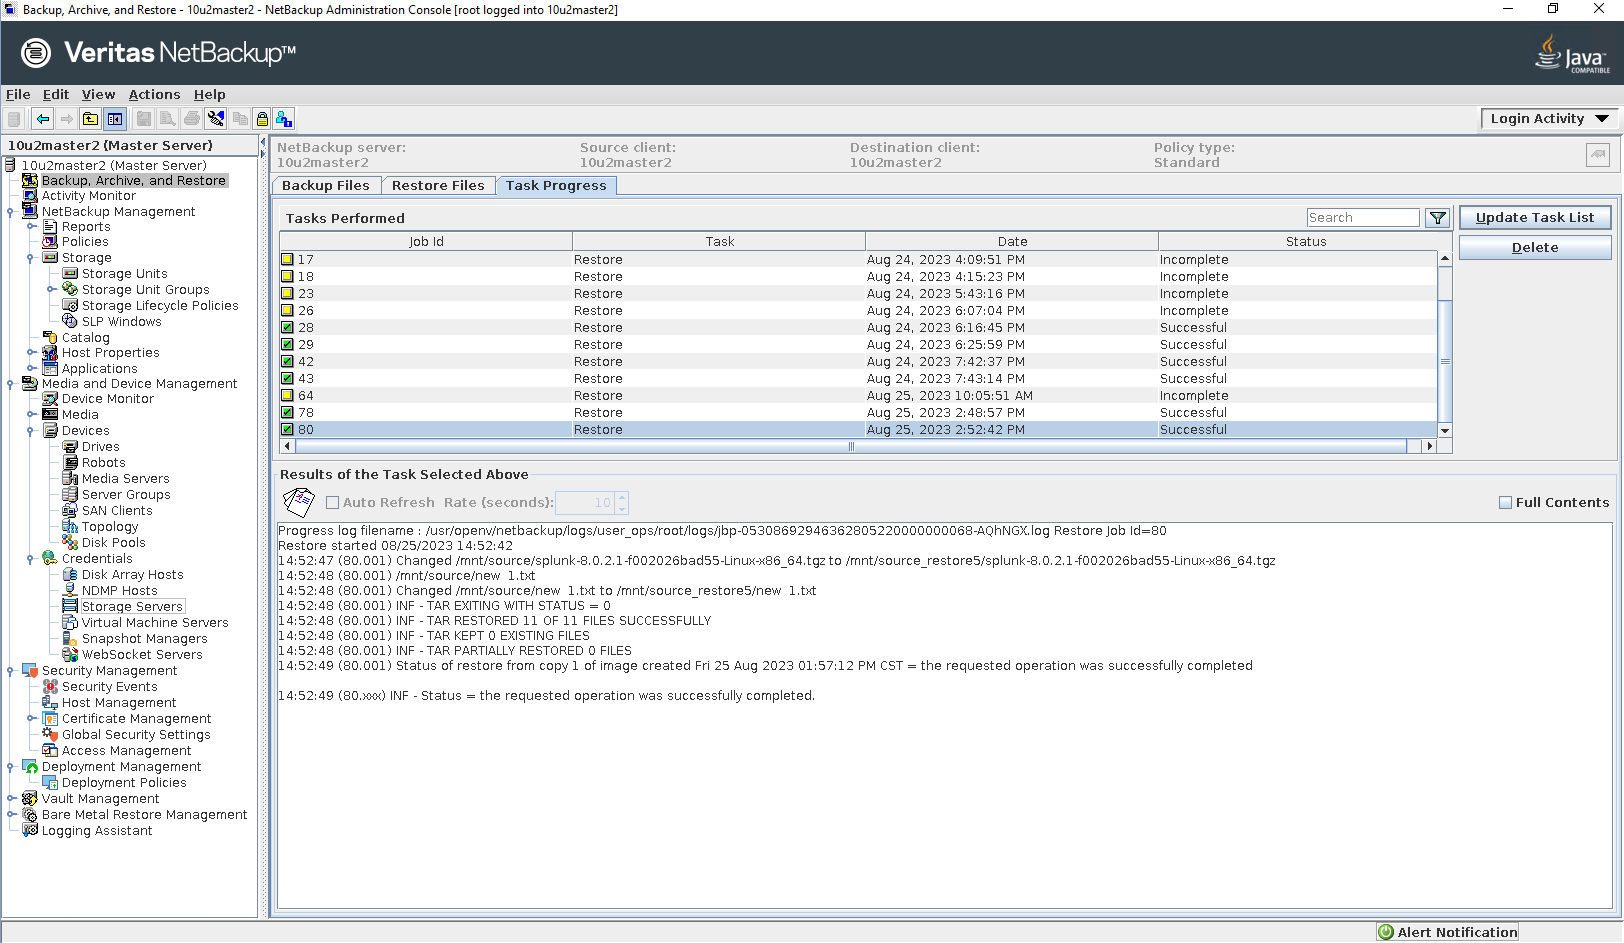
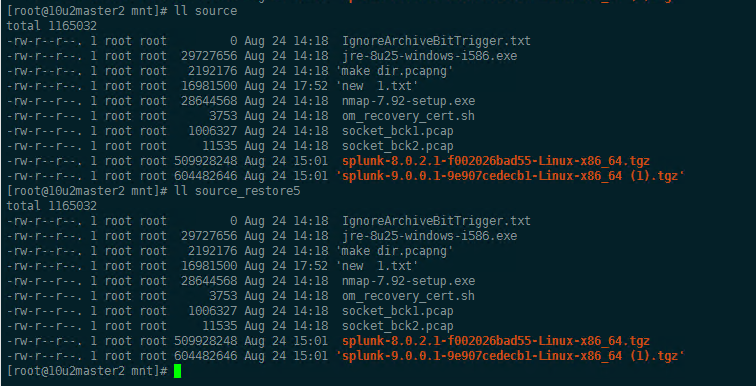
|
3.4 Add NFS Share and Backup Policy for the Different Master Domains
Test Purpose | Replication in the Different Master Domains |
Test Networking | Huawei OceanProtect Backup Storage Function Compatibility Test Networking 1 |
Prerequisites |
|
Test Procedure |
|
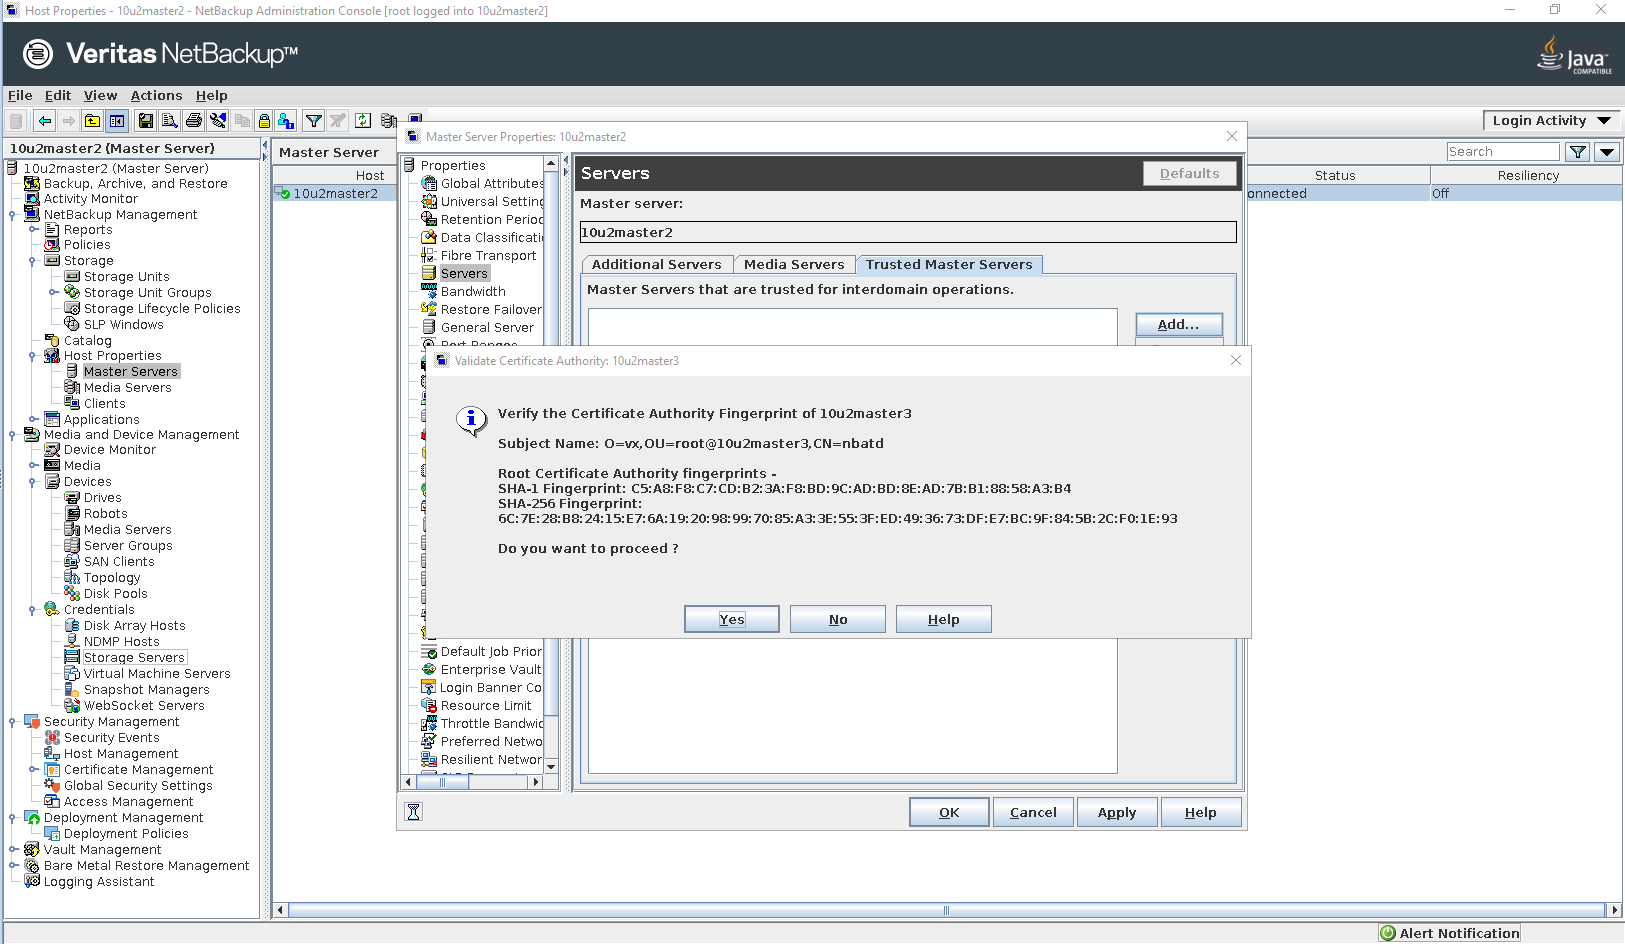
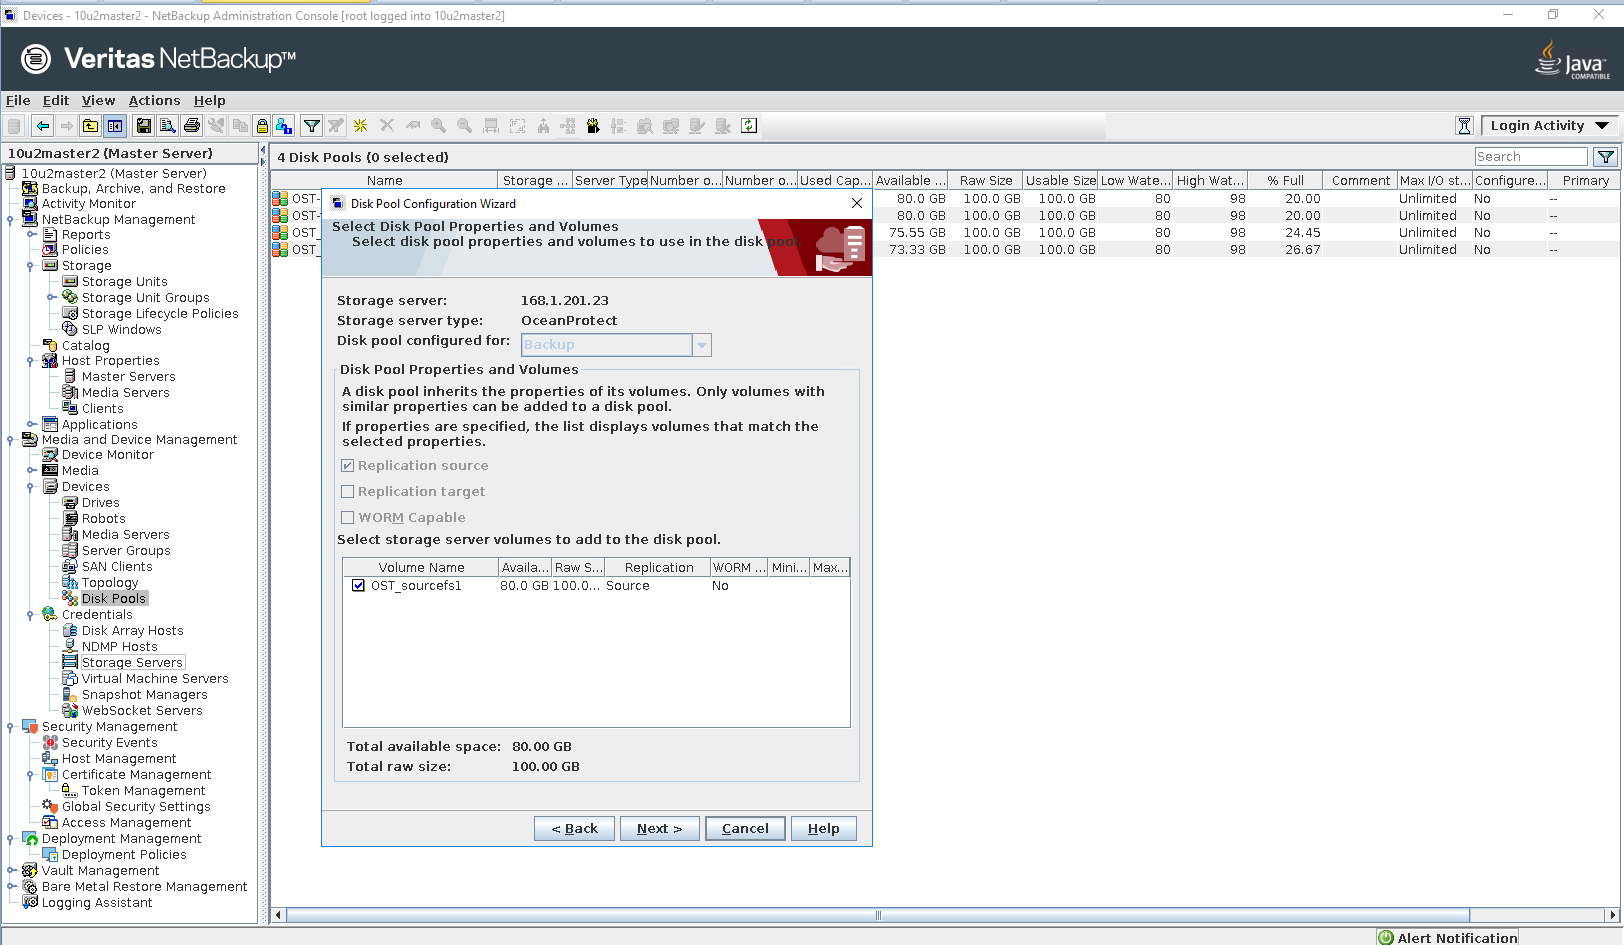
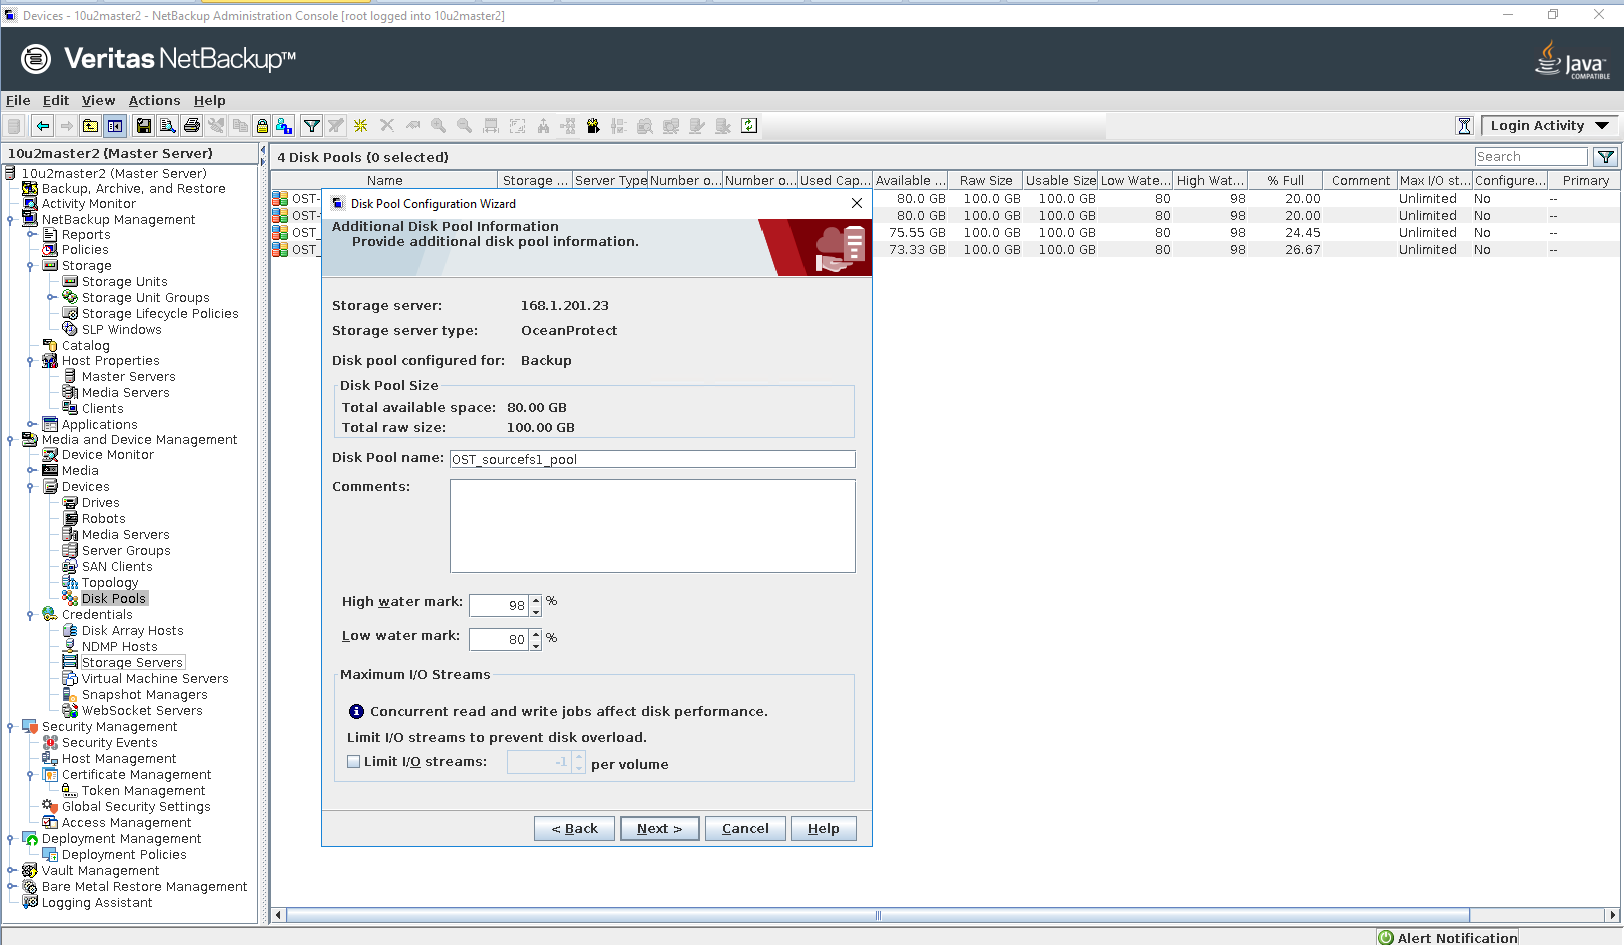
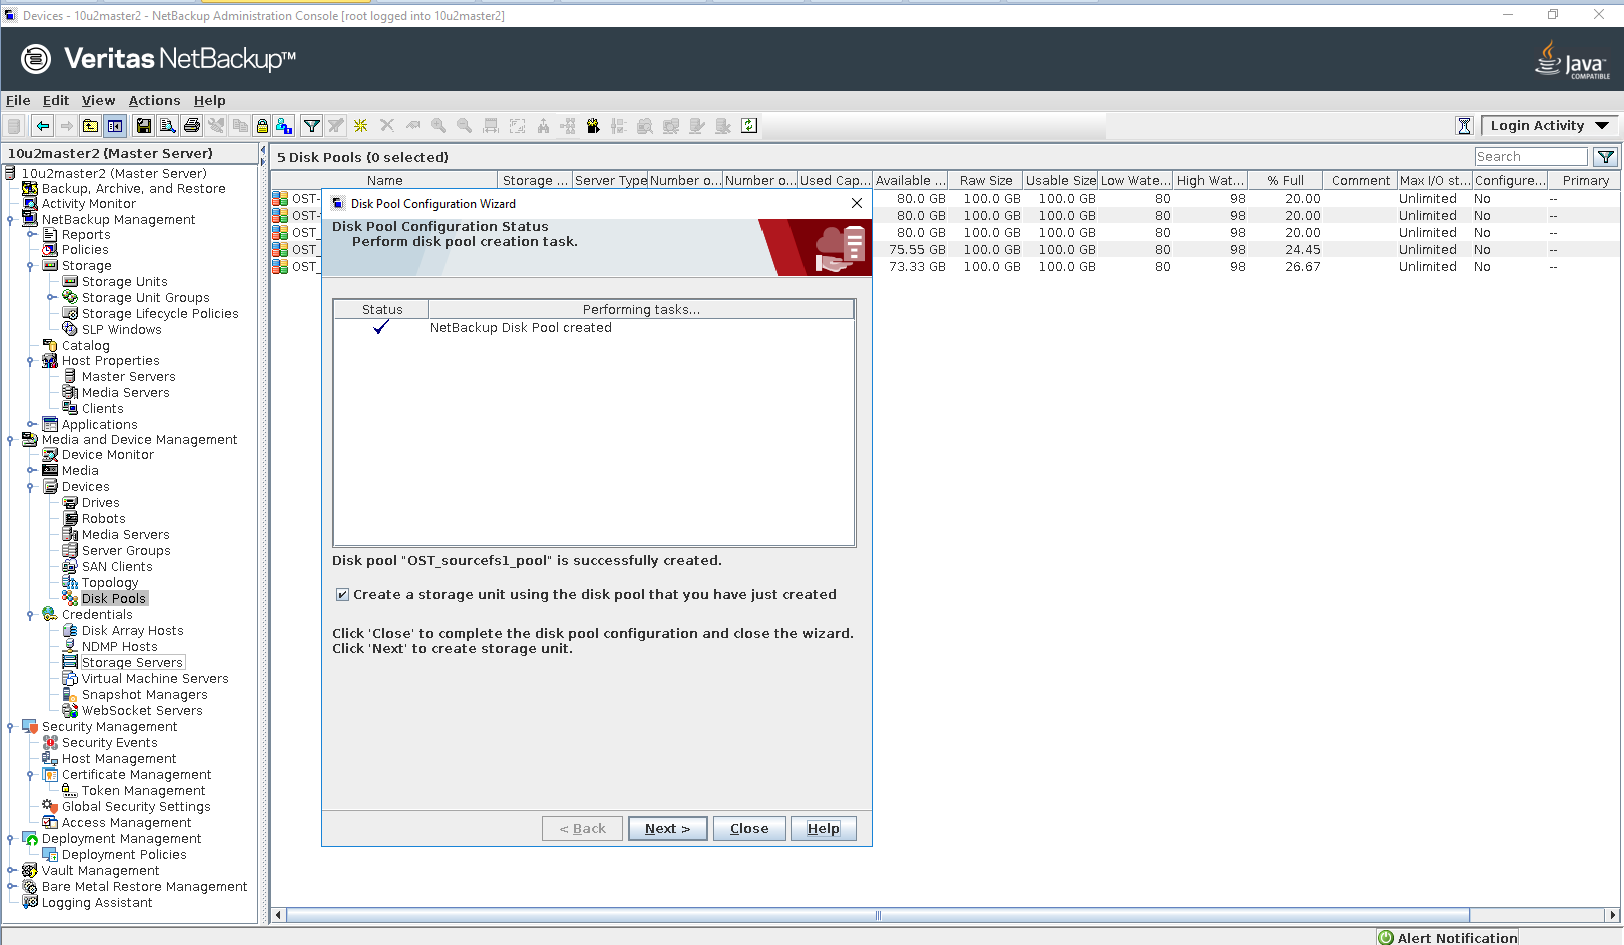
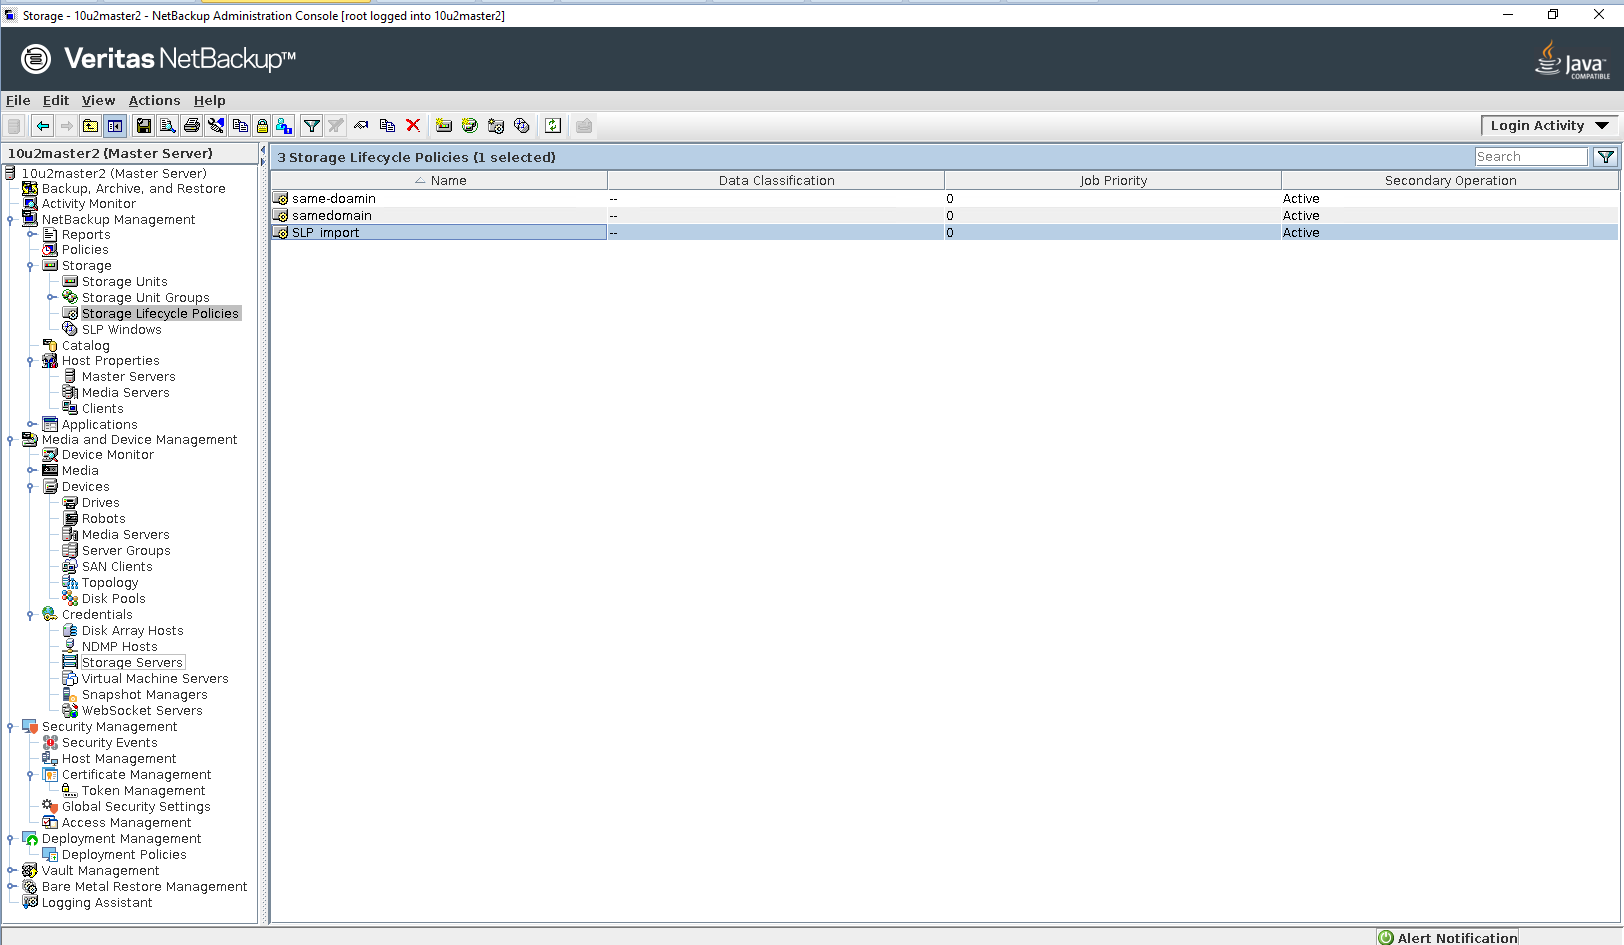
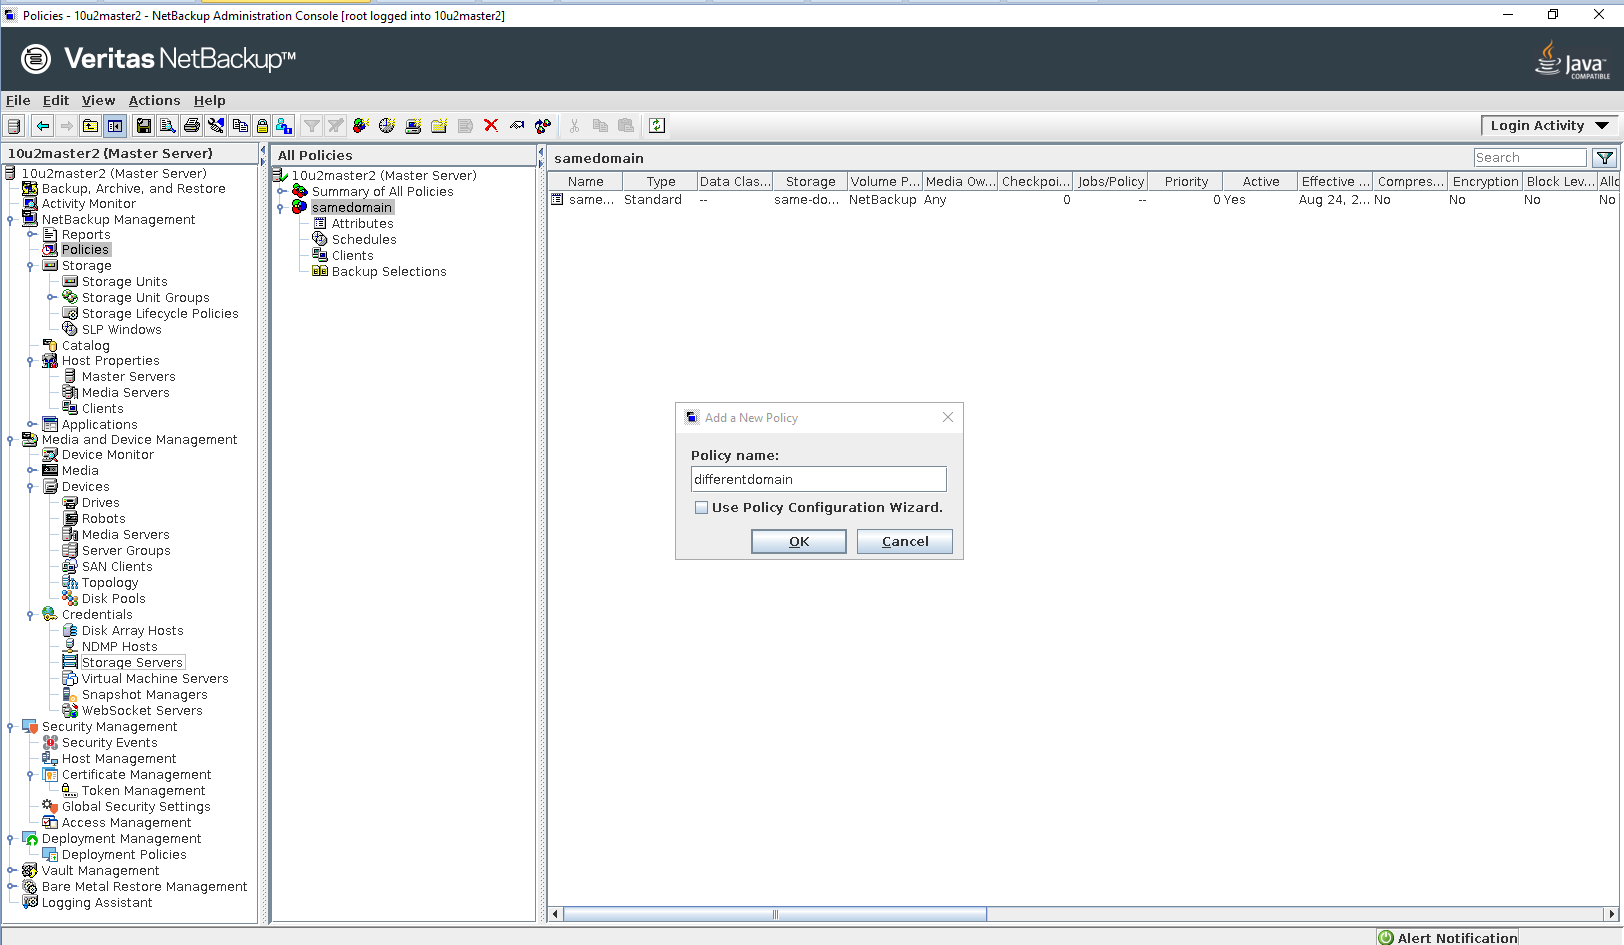
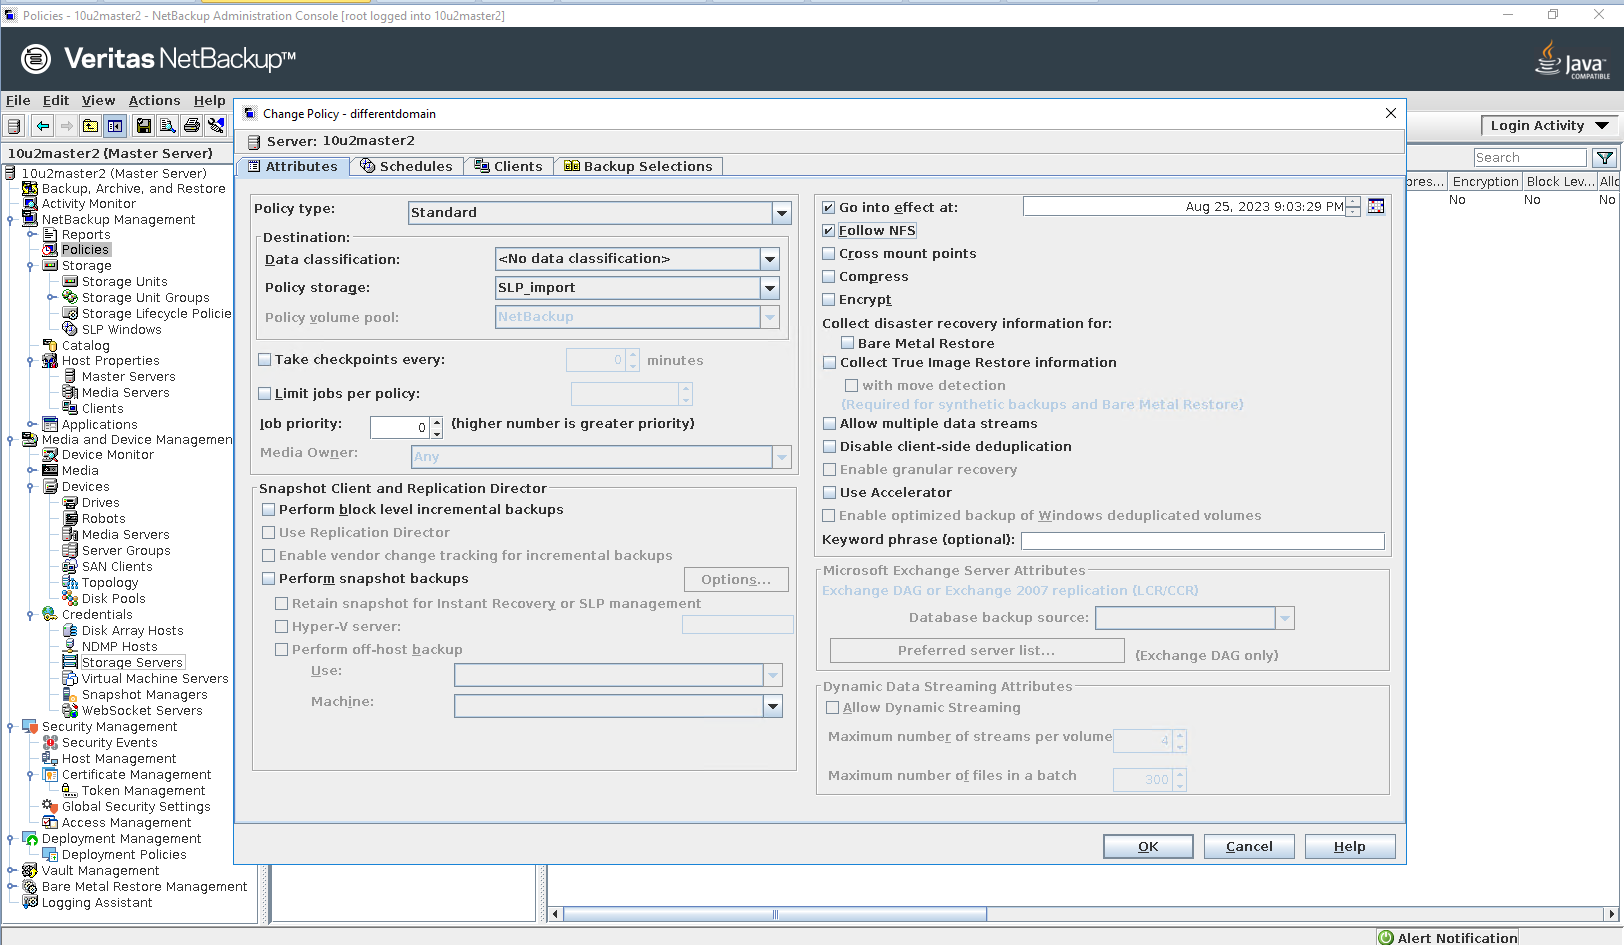
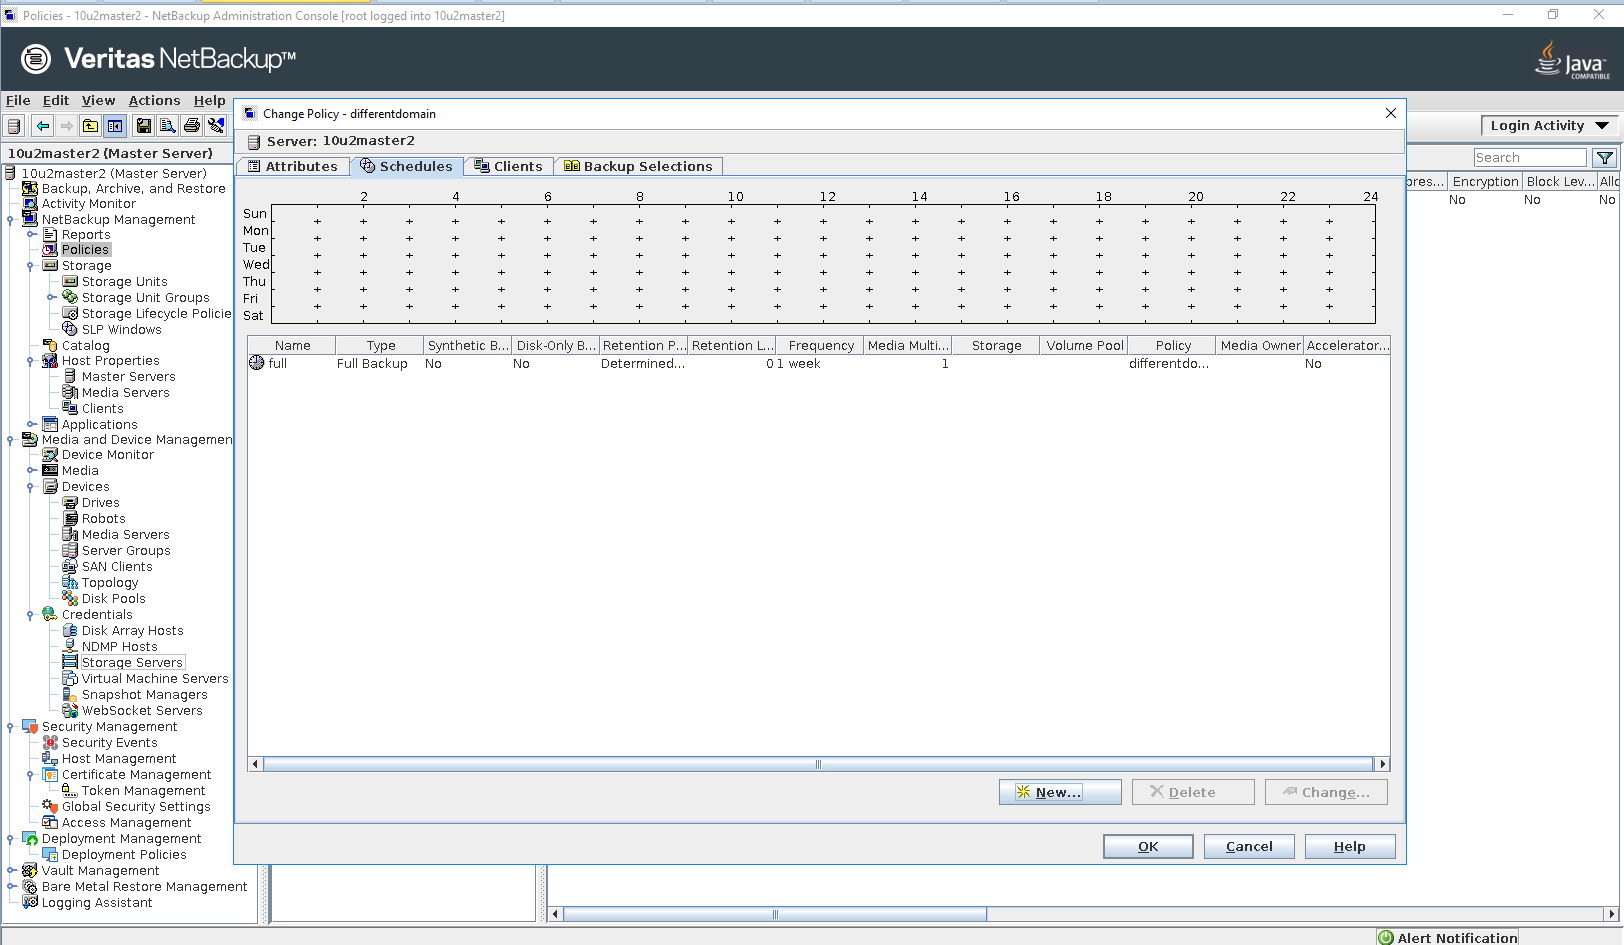
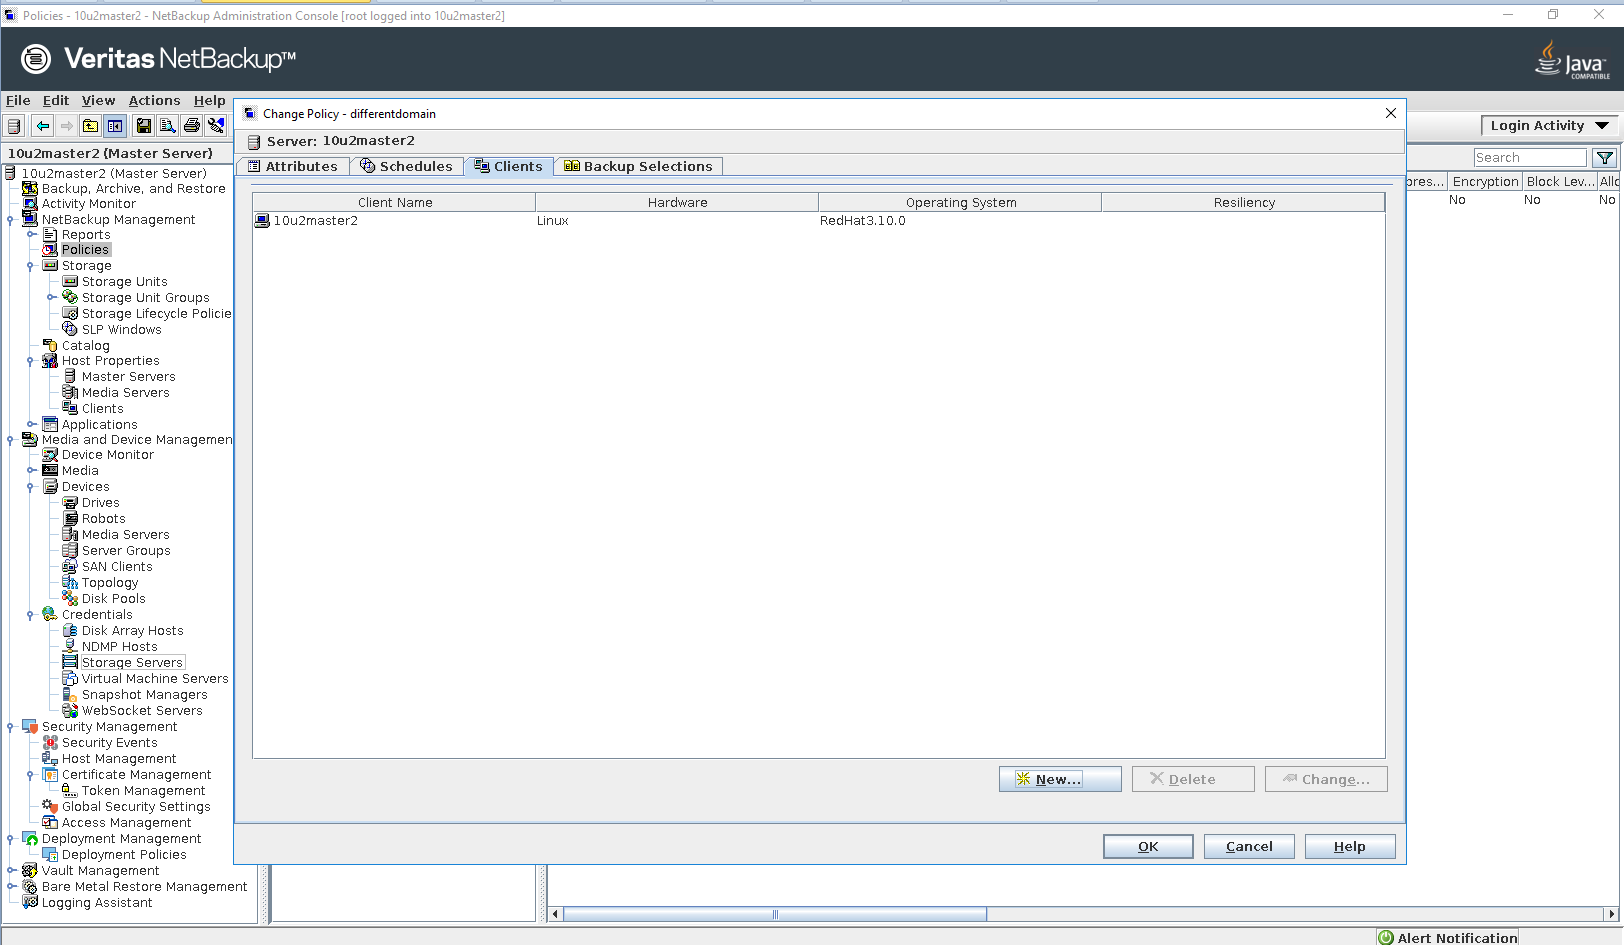
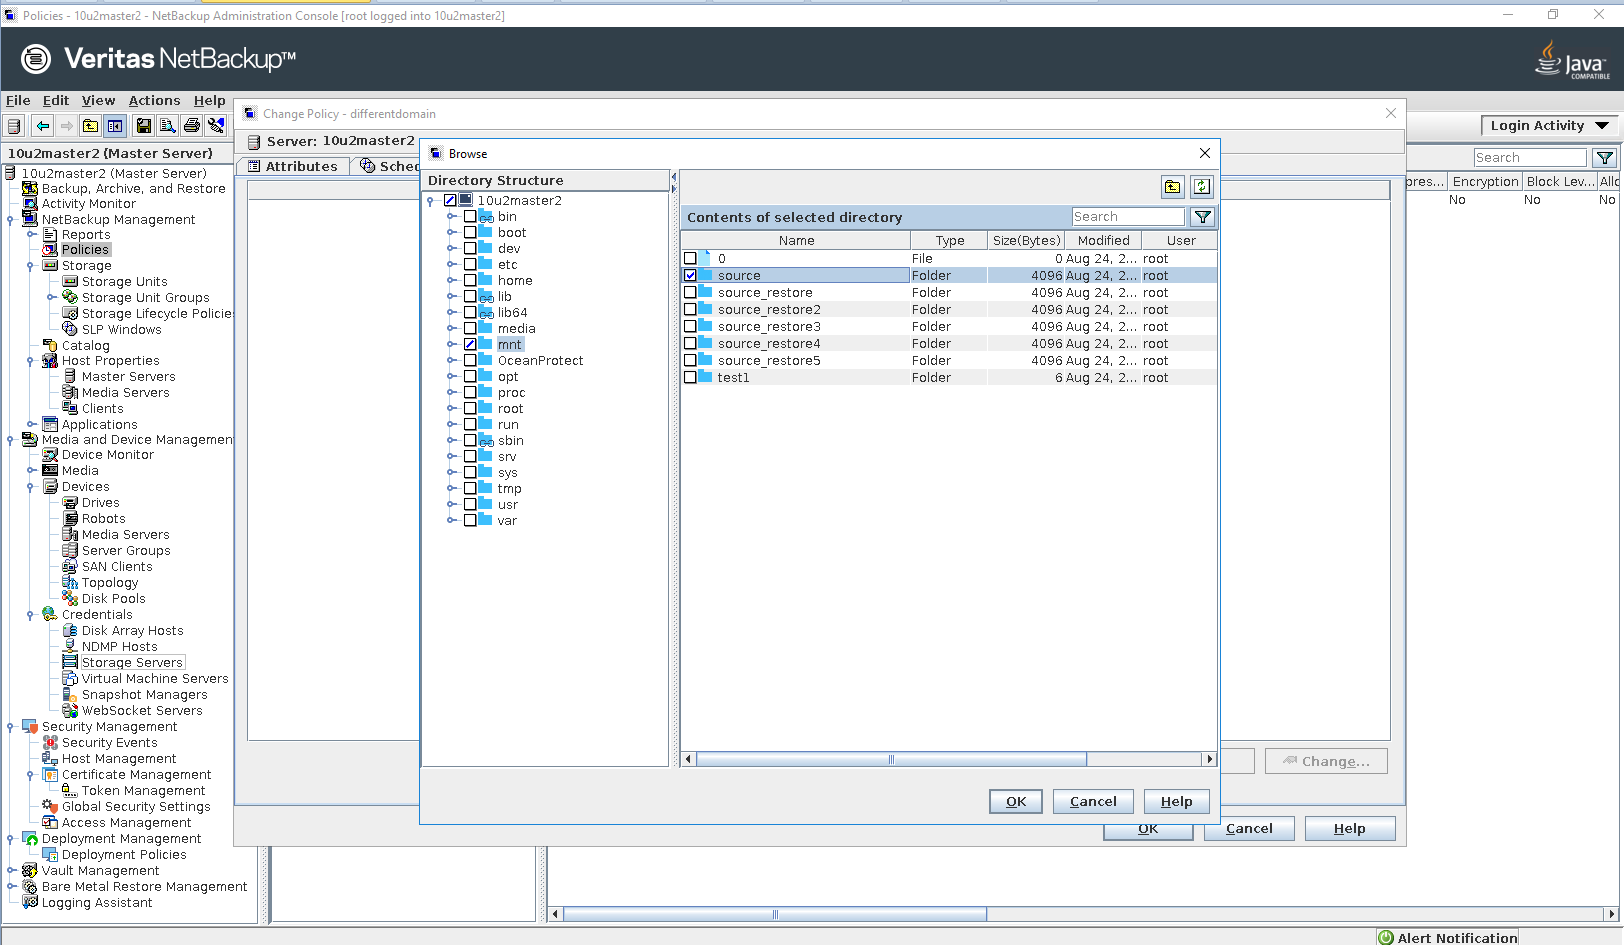
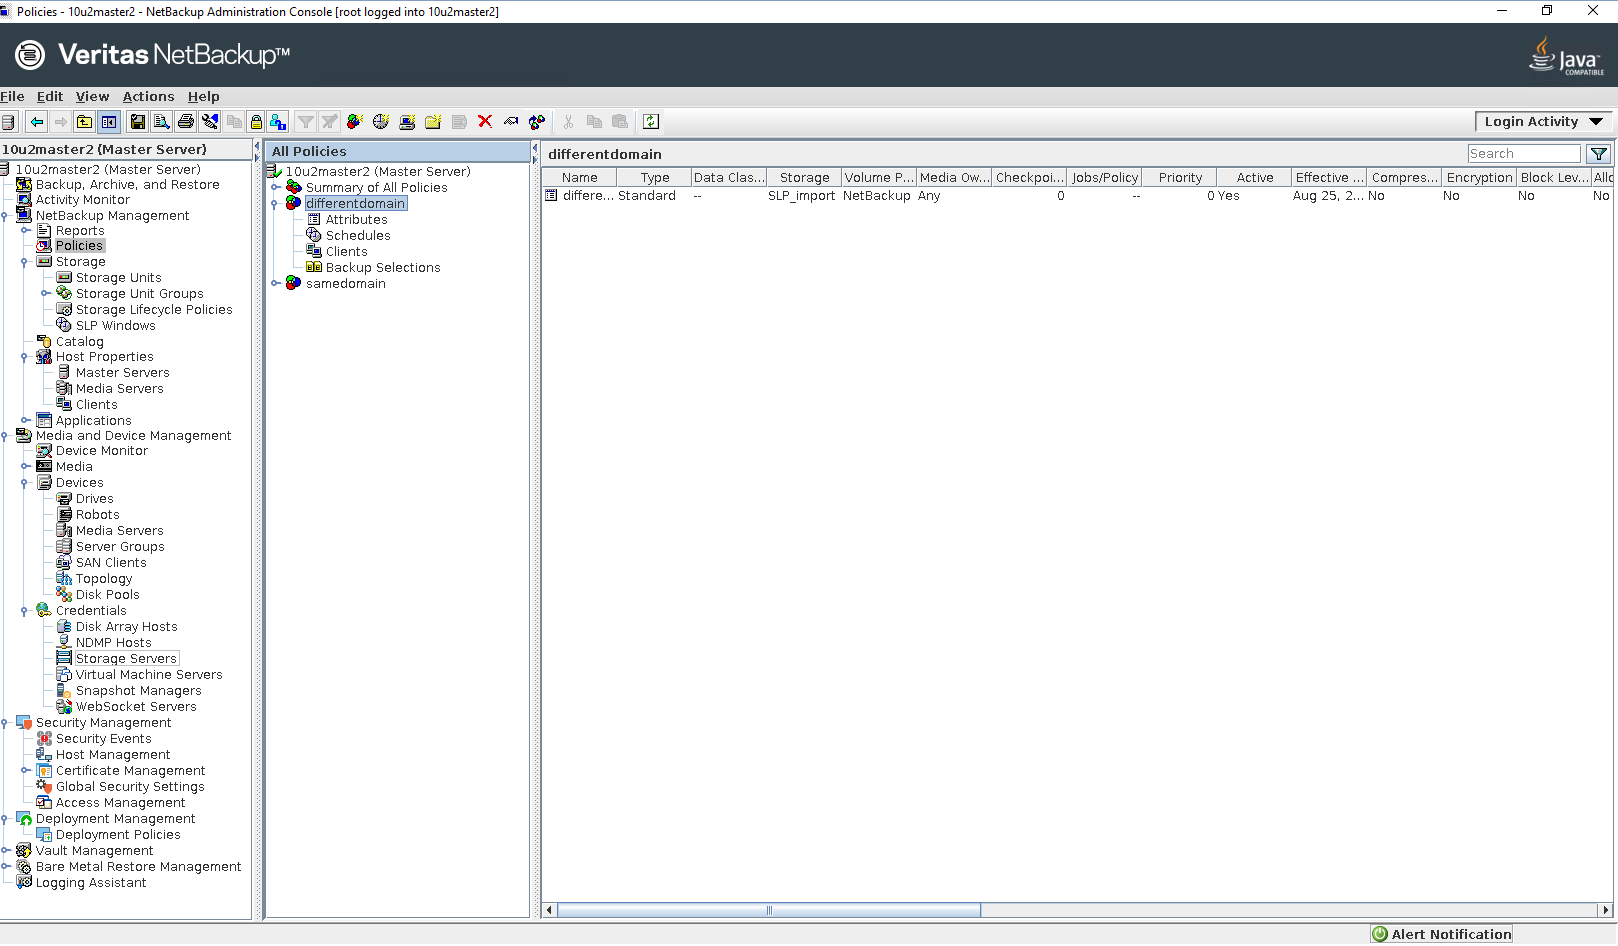
Expected Result | Step 1 Add trusted Master server is configured successfully. Step 2 File copy is configured successfully on storage B. Step 3 File copy is configured successfully on storage A. Step 4 Storage server is configured successfully. Step 5 Disk pool is configured successfully. Step 6 Storage unit is configured successfully. Step 7 Storage server, disk pool and storage unit are configured successfully. Step 8 Storage lifecycle policy is configured successfully on Master server C. Step 9 Storage lifecycle policy is configured successfully on Master server A. Step 10 Backup policy is configured successfully. |
Test Result | Passed Step 1 Add Trusted Master Server on Master server A 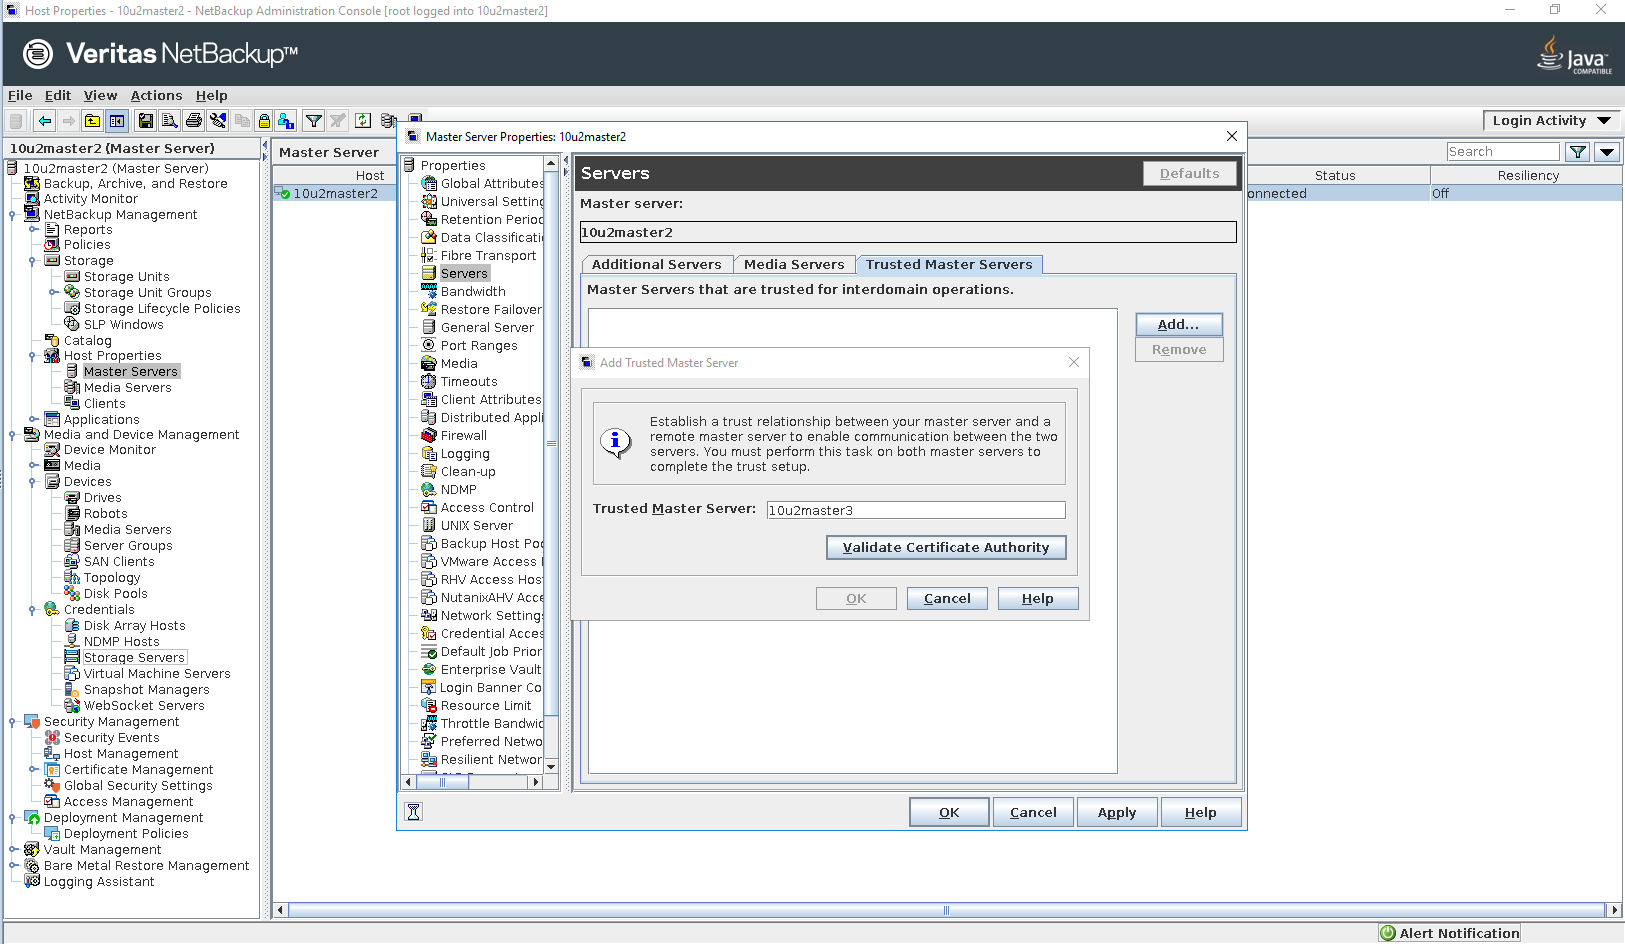
Create token on Master server C 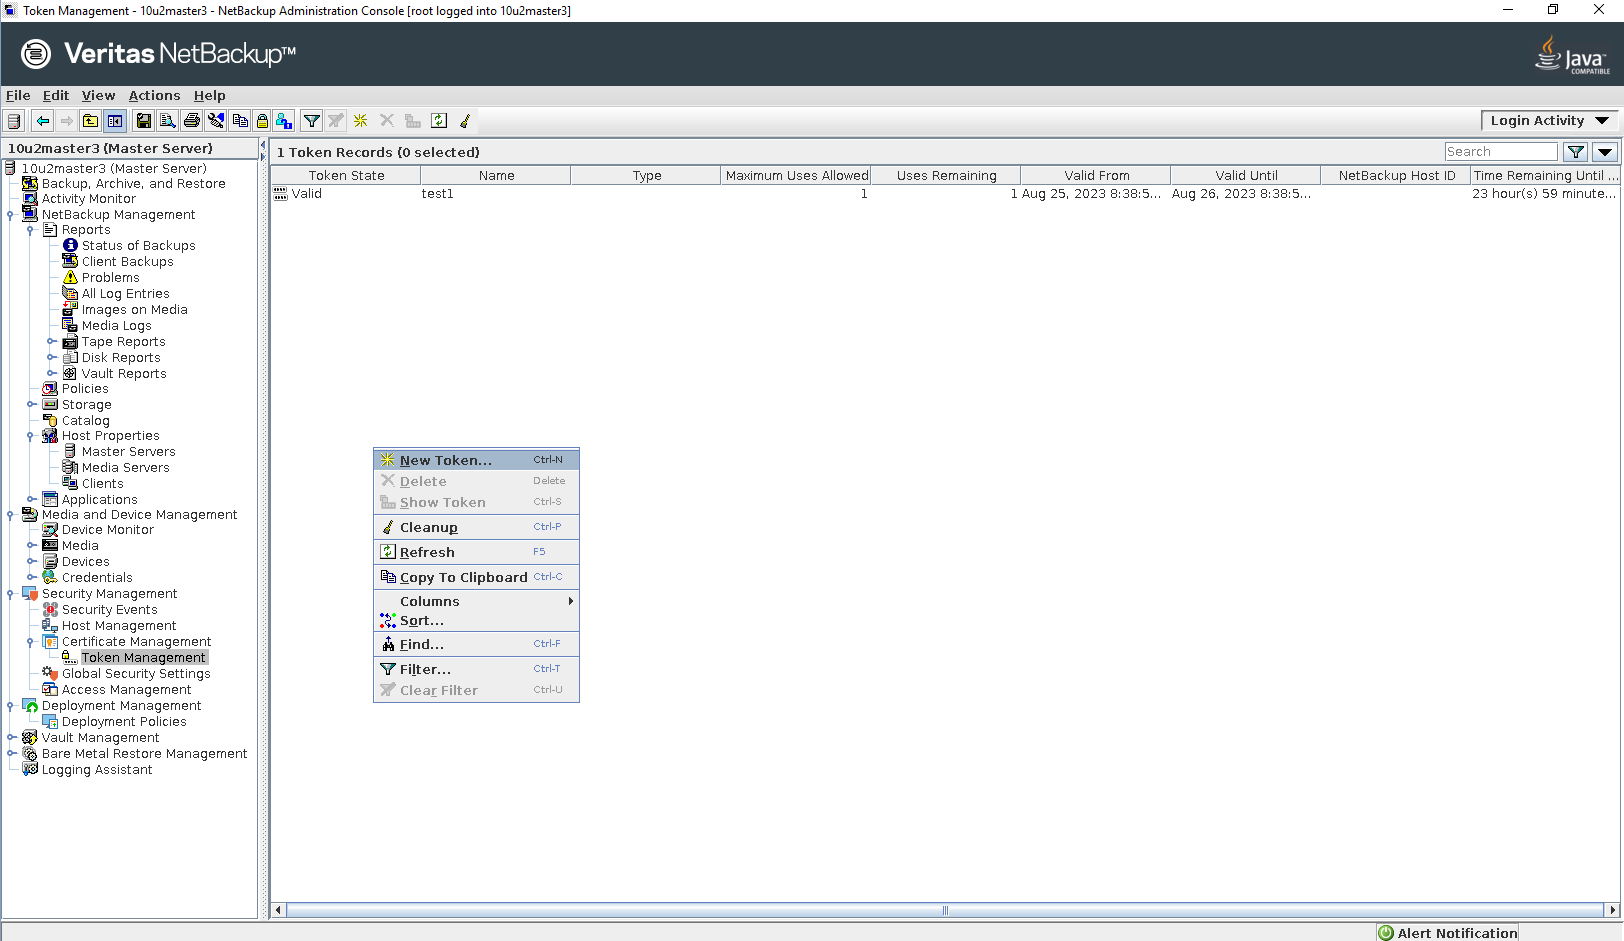
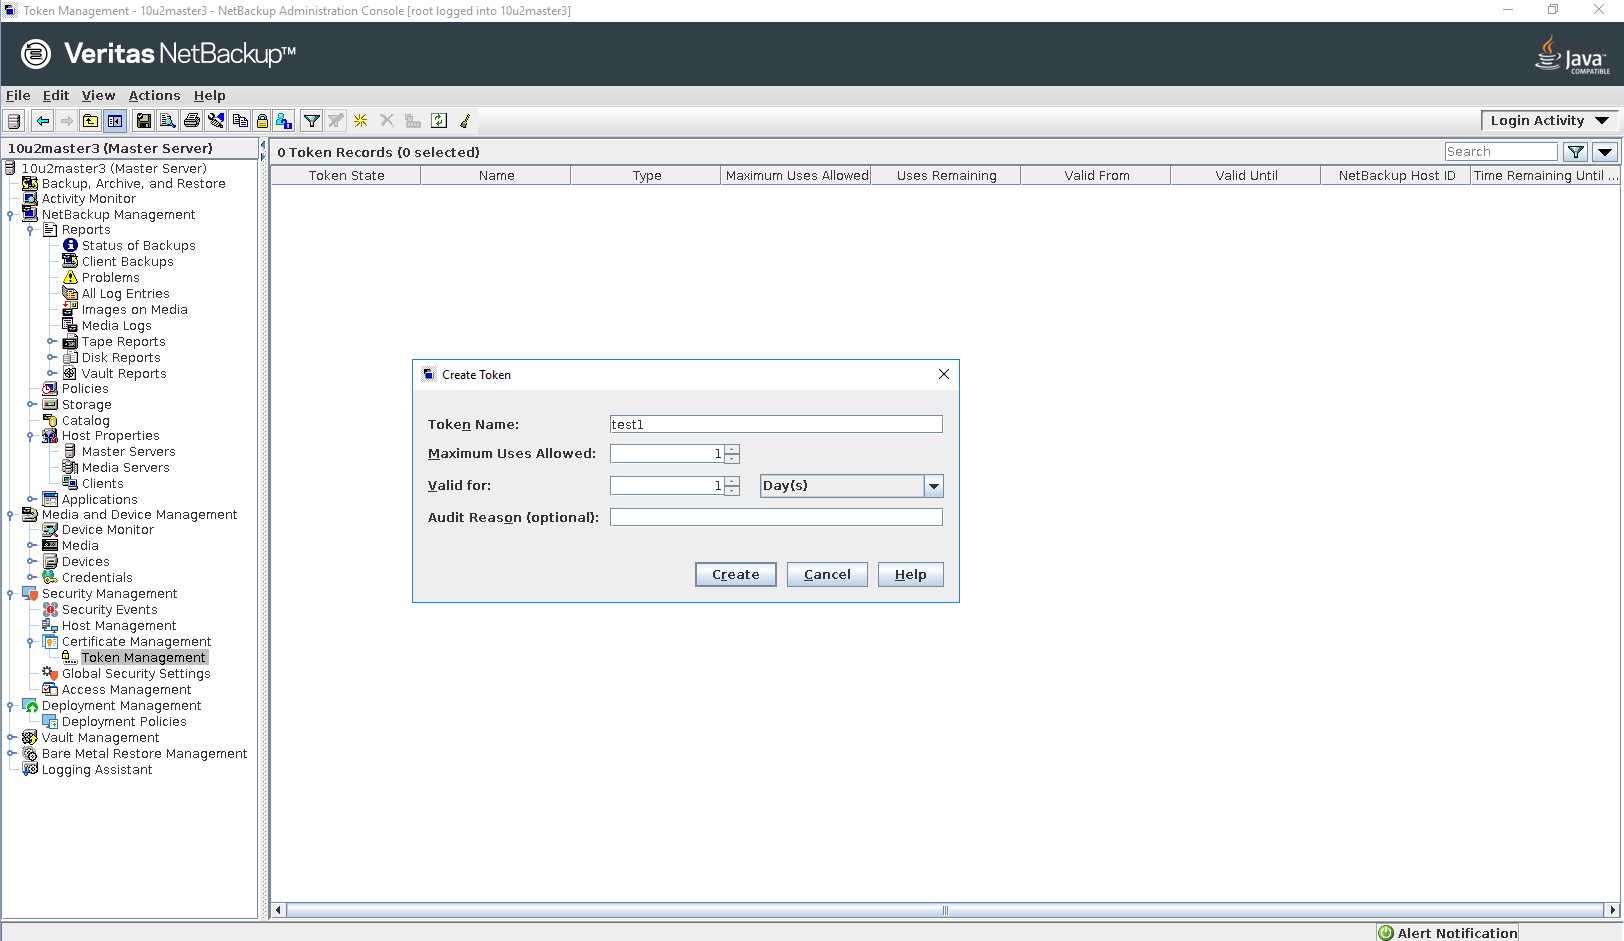 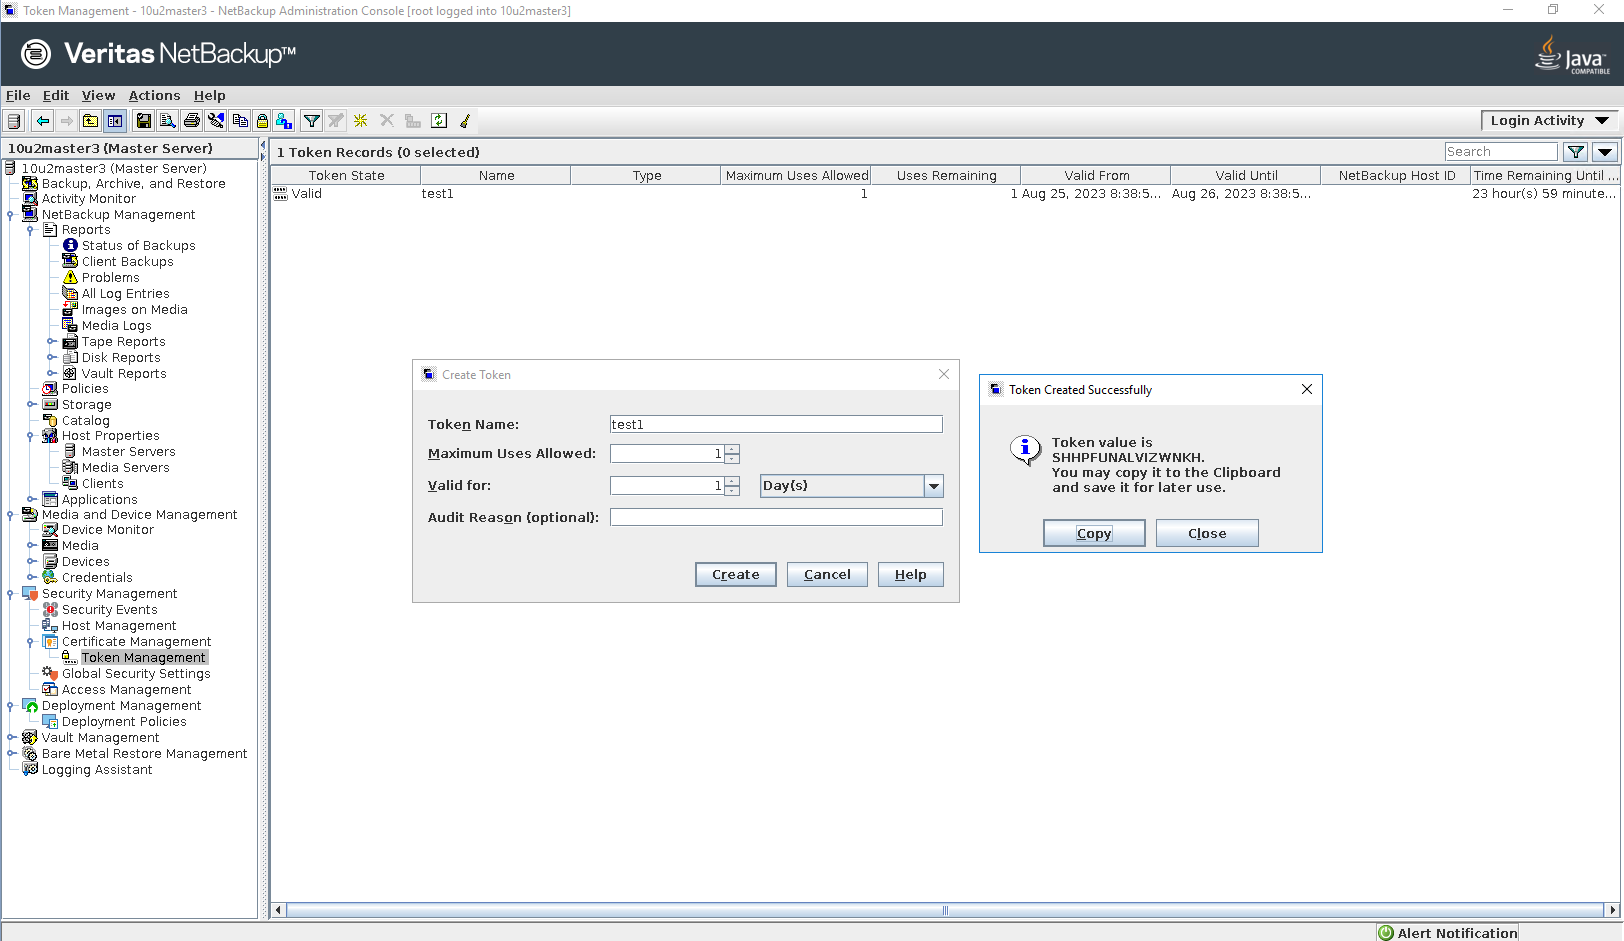
Add token on Master server A 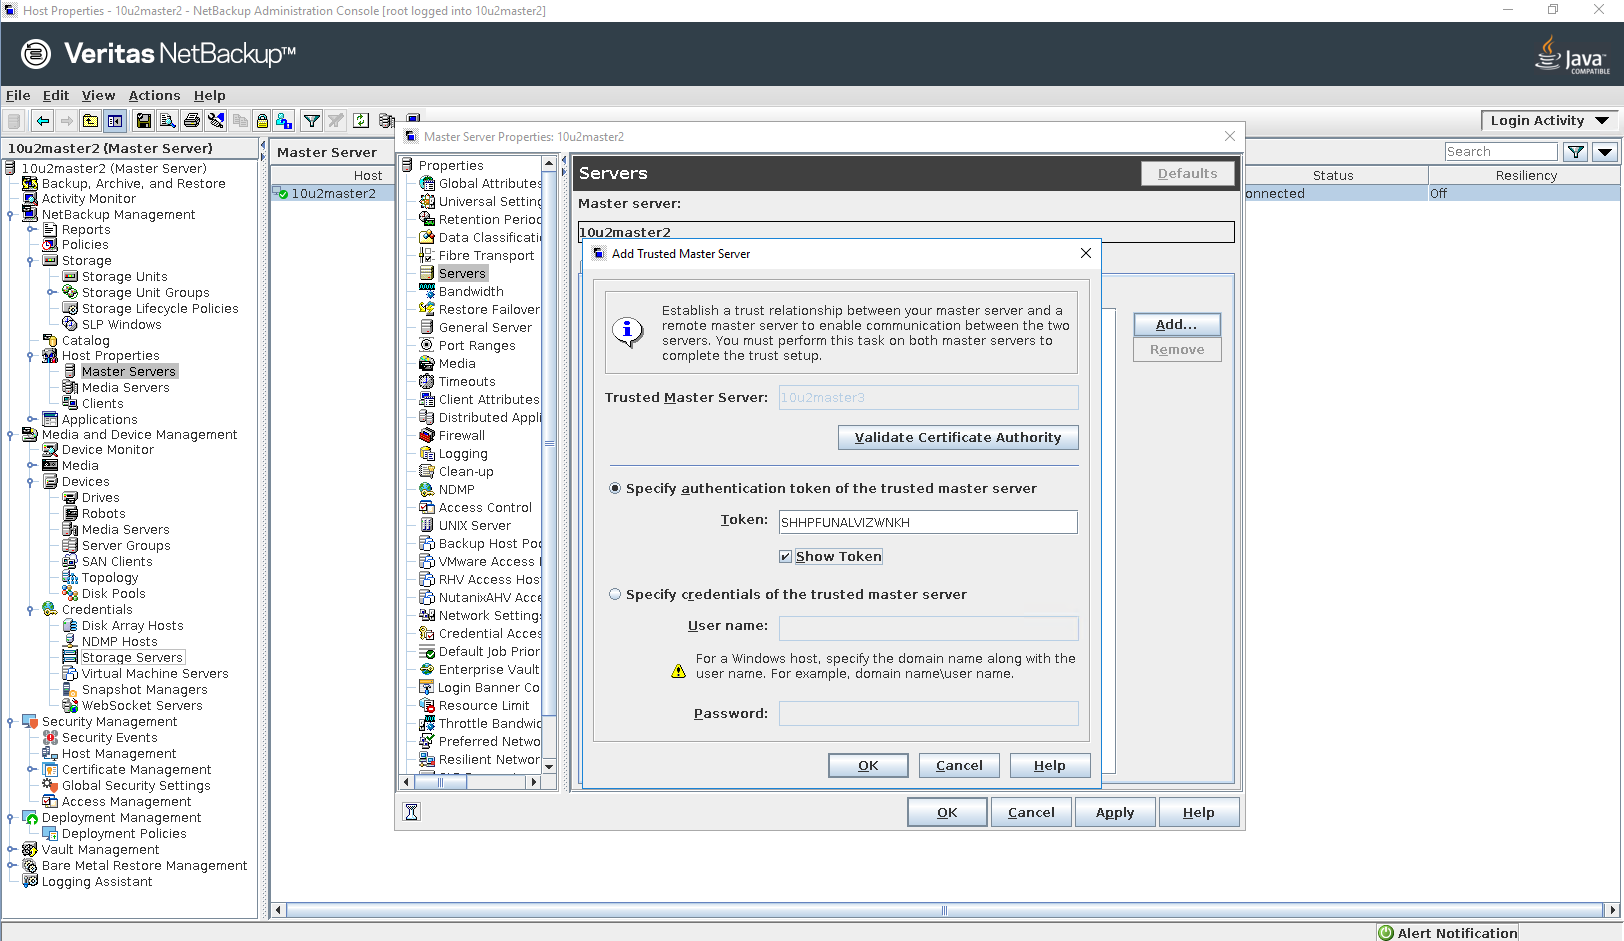 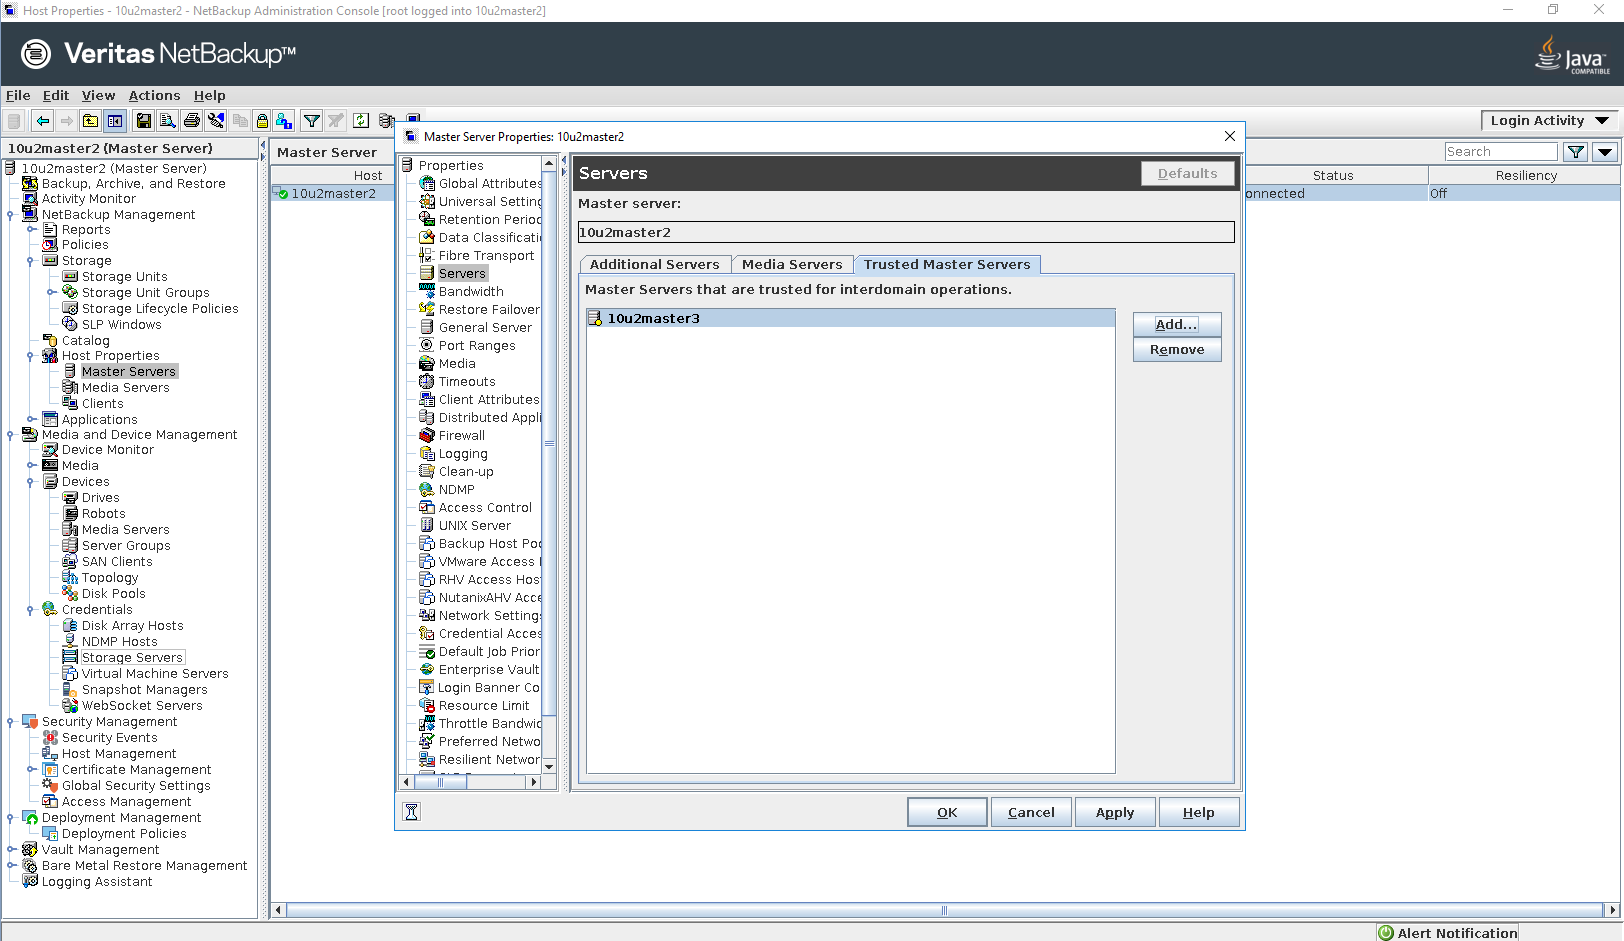
Add Trusted Master Server on Master server C 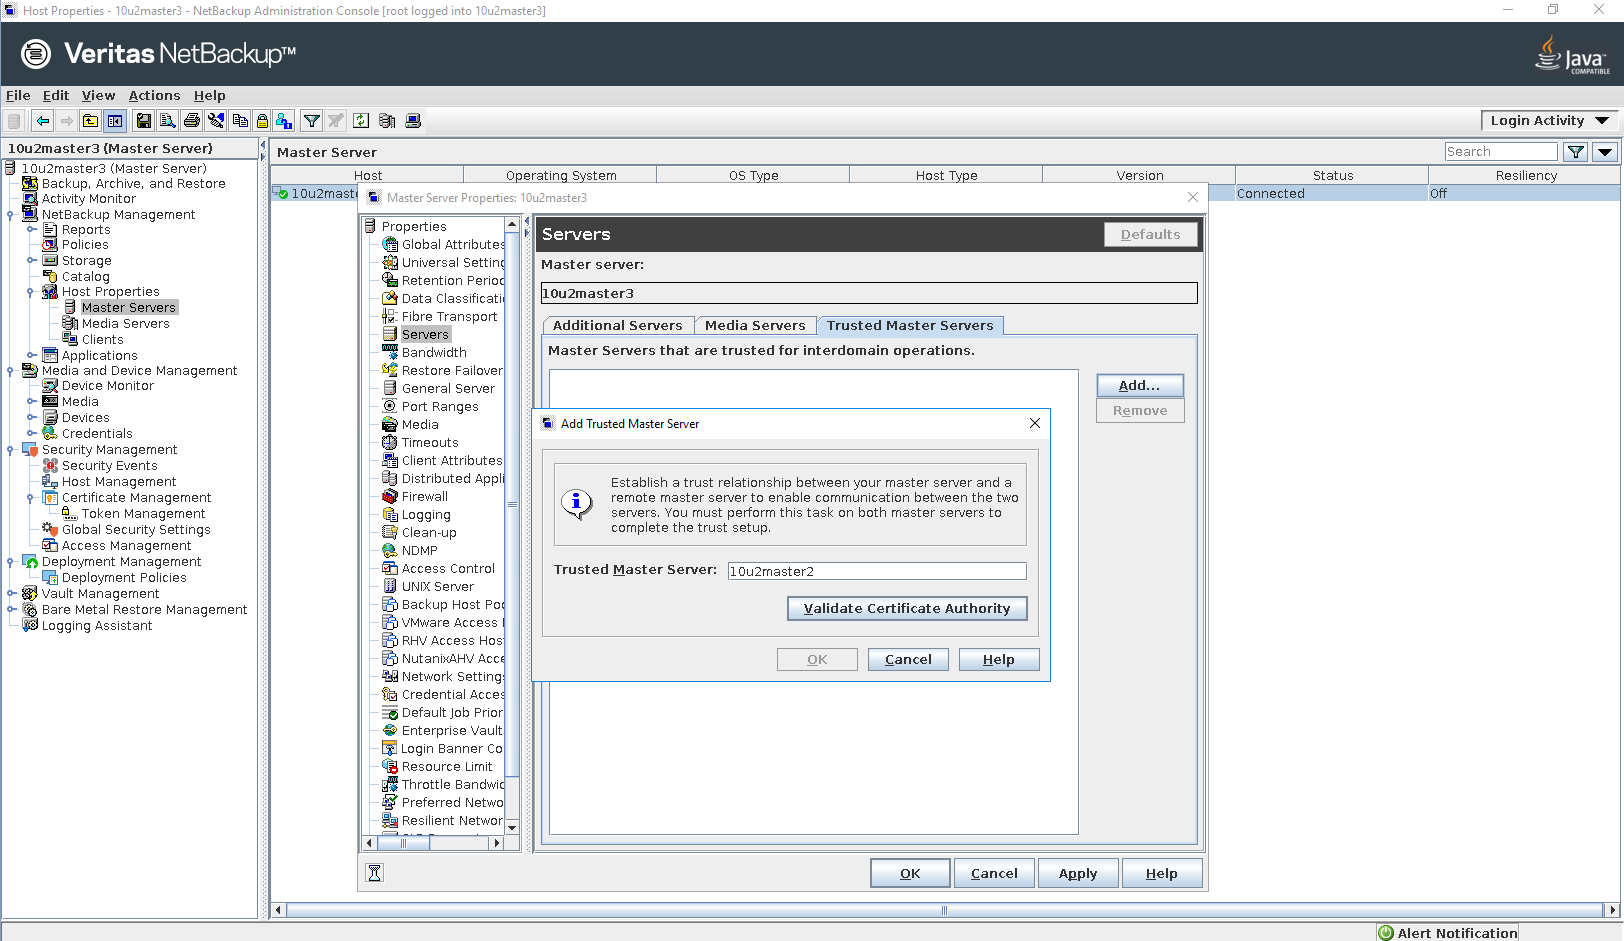
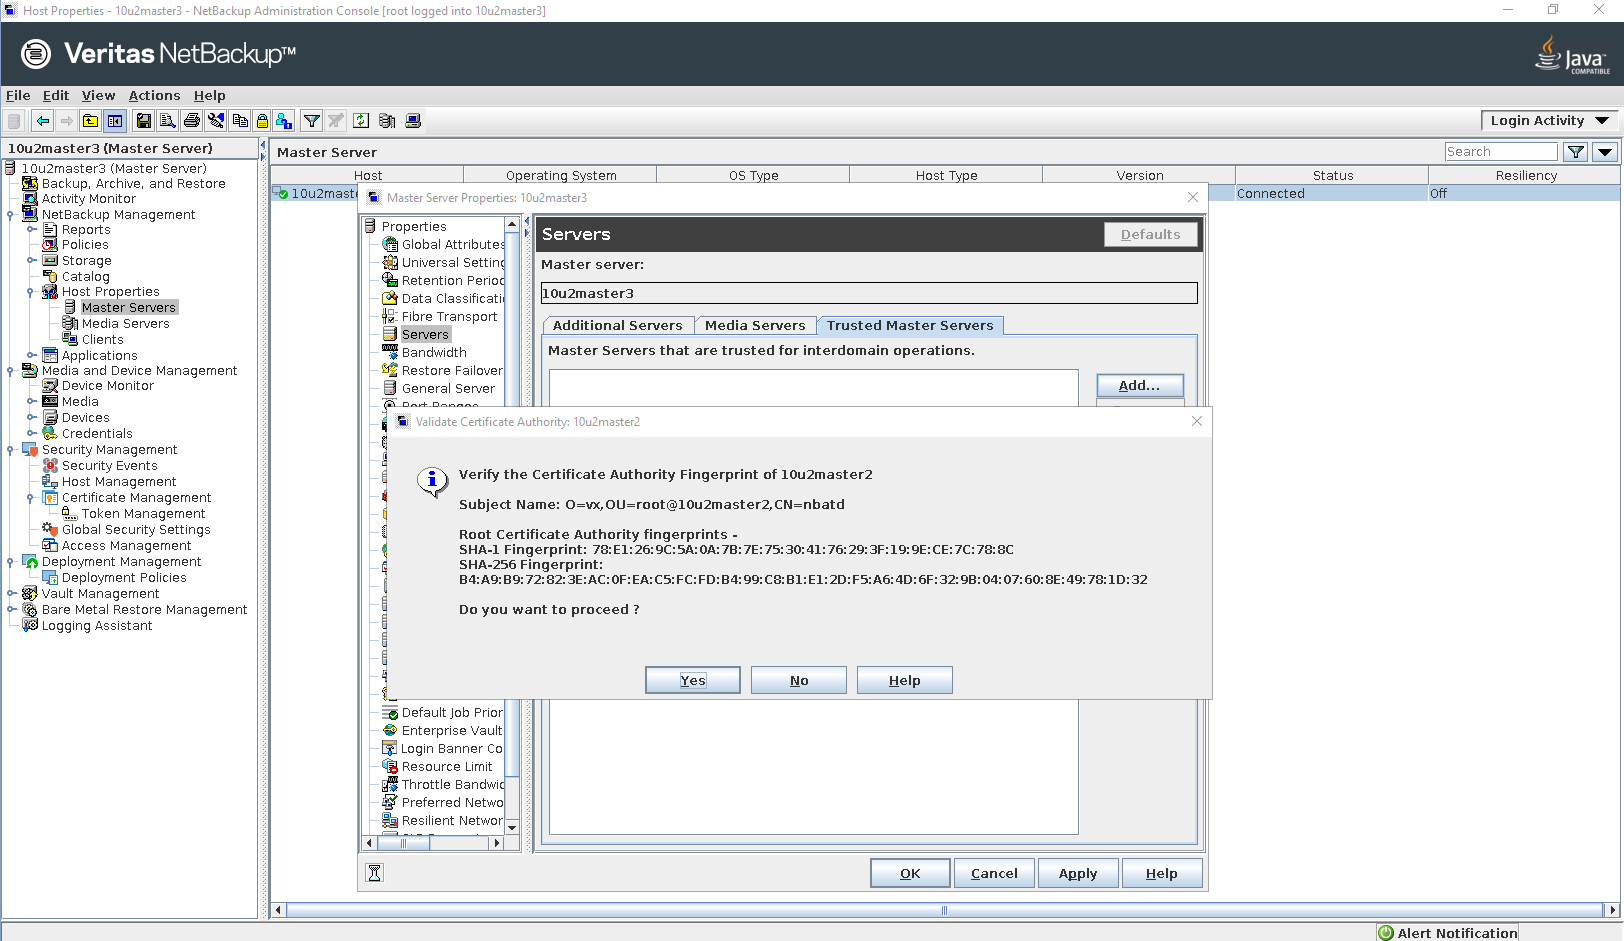
Create token on Master server A 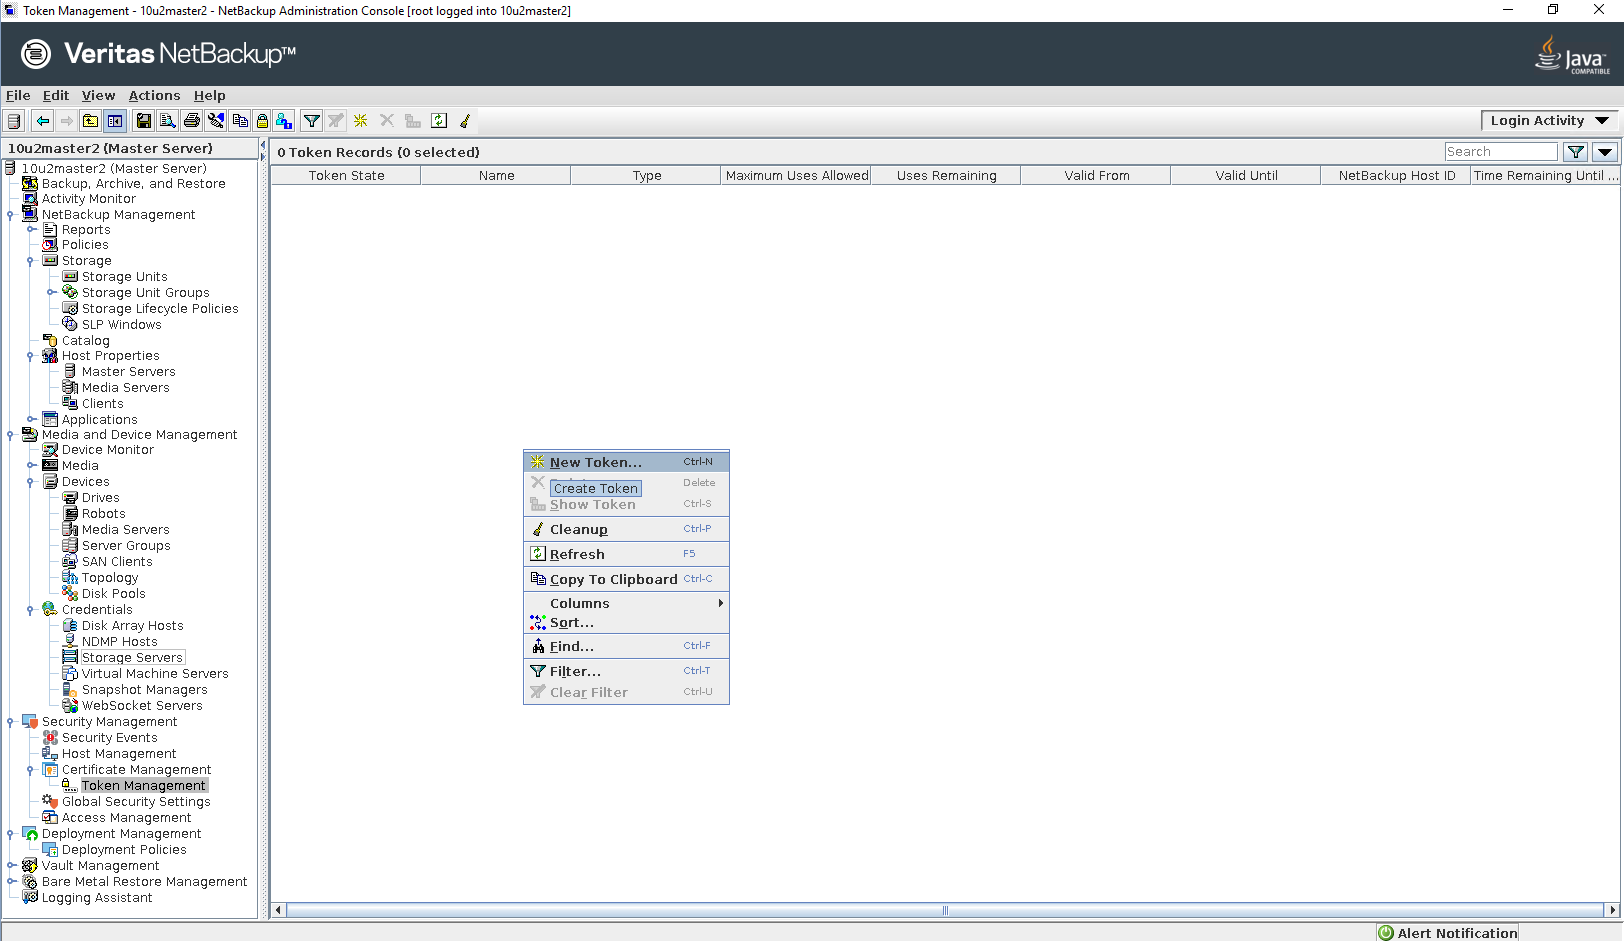
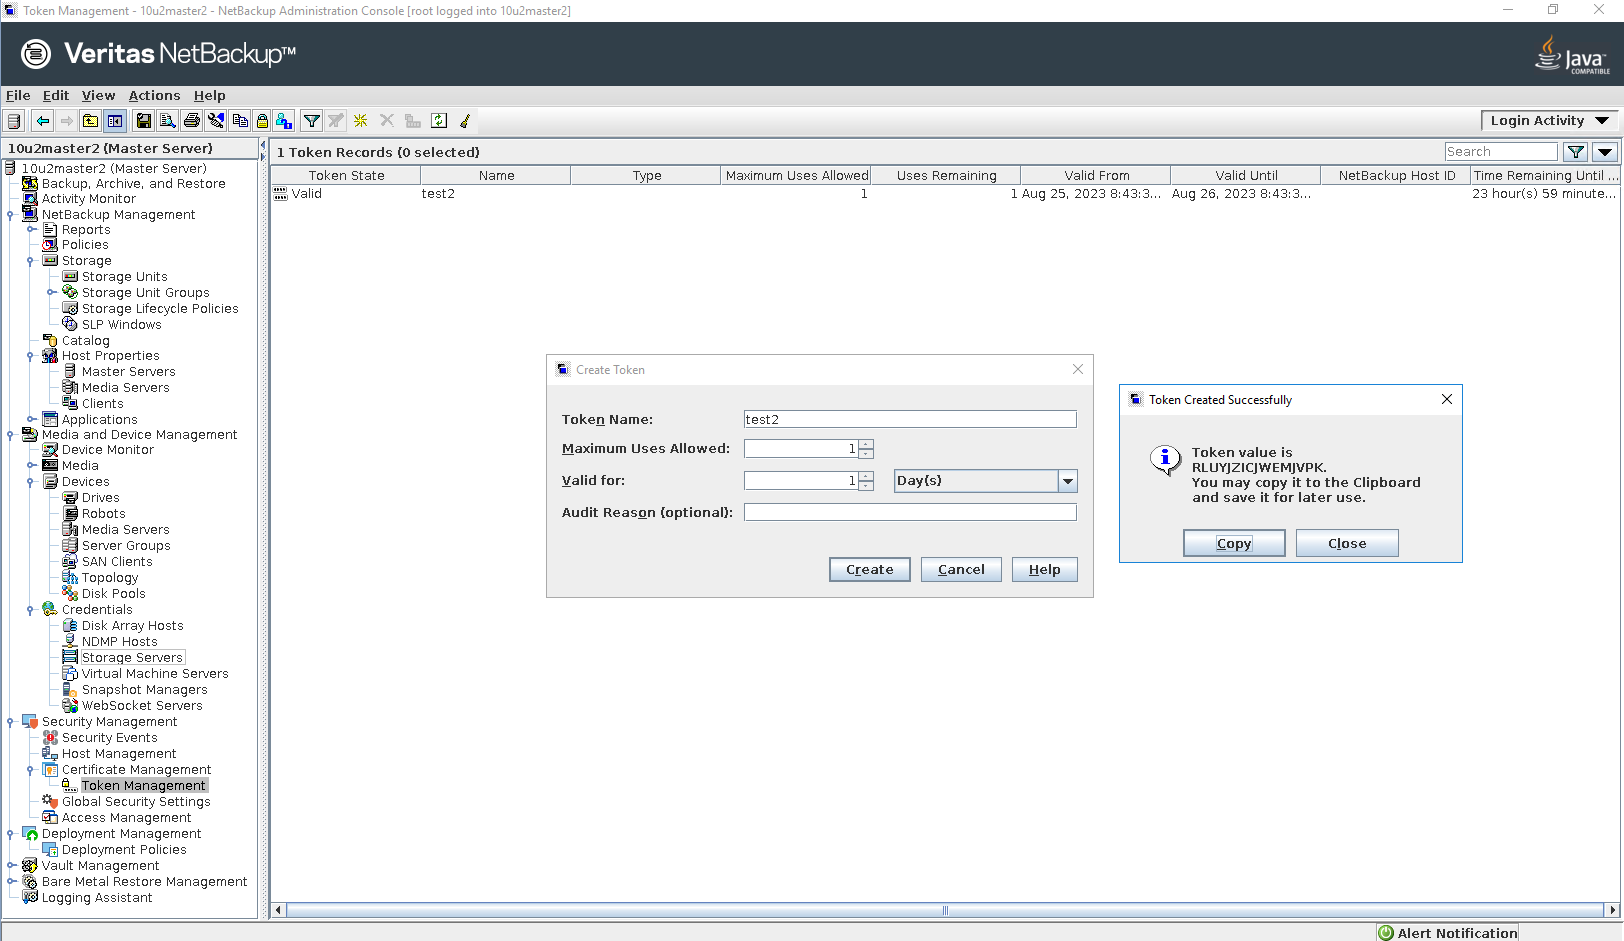
Add token on Master server C 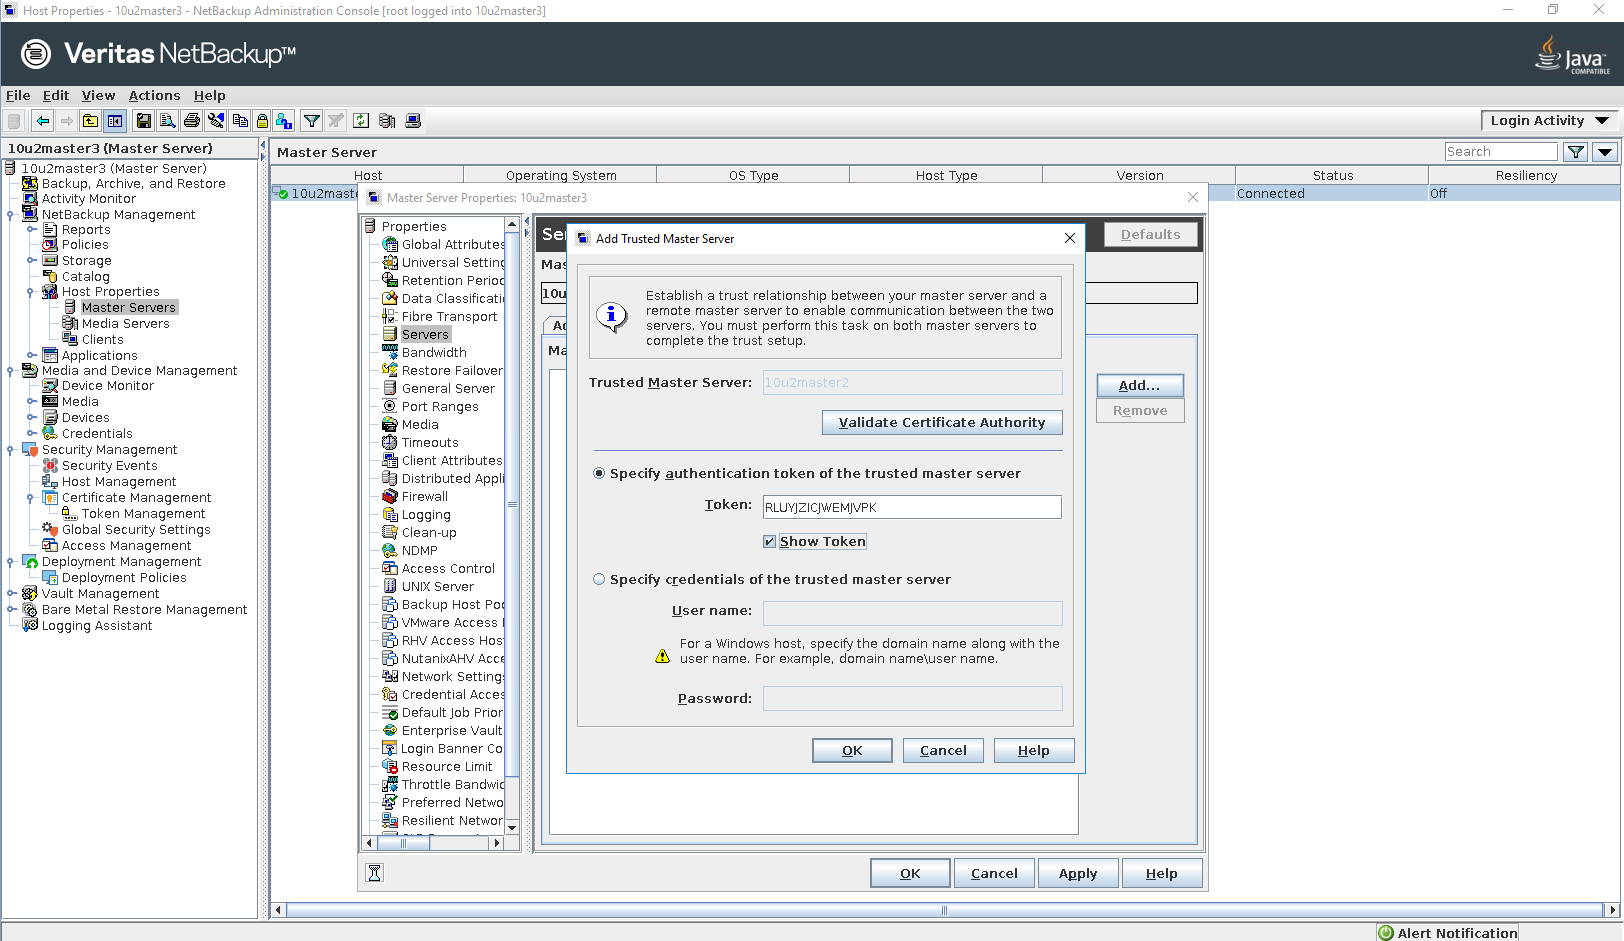
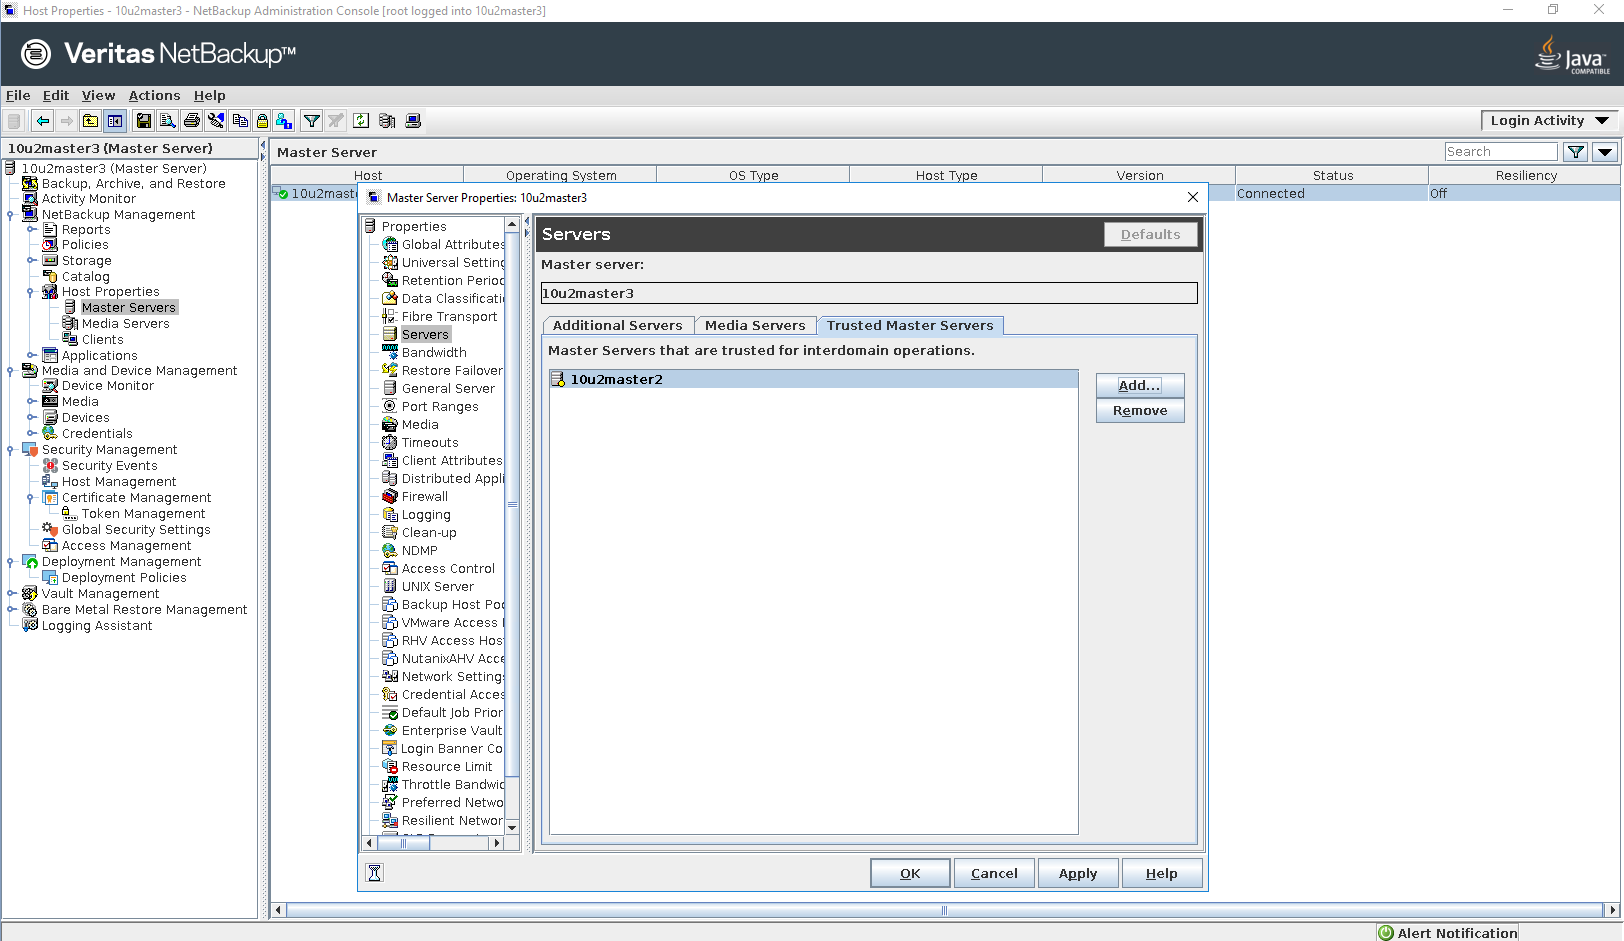
Step 2 
Step 3 
Step 4 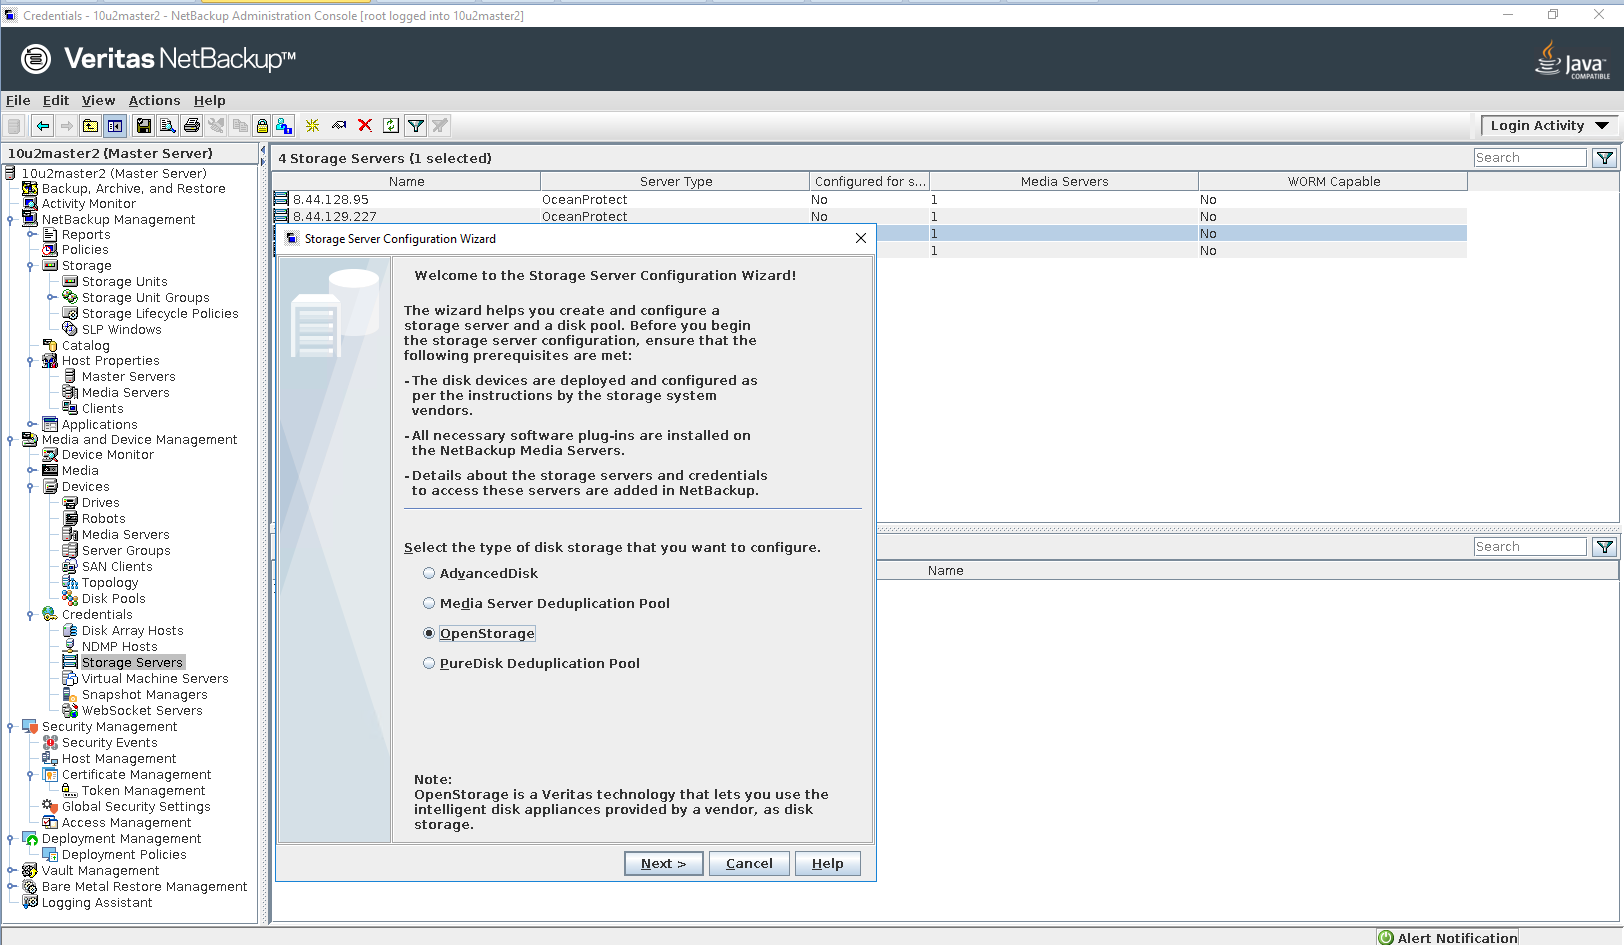
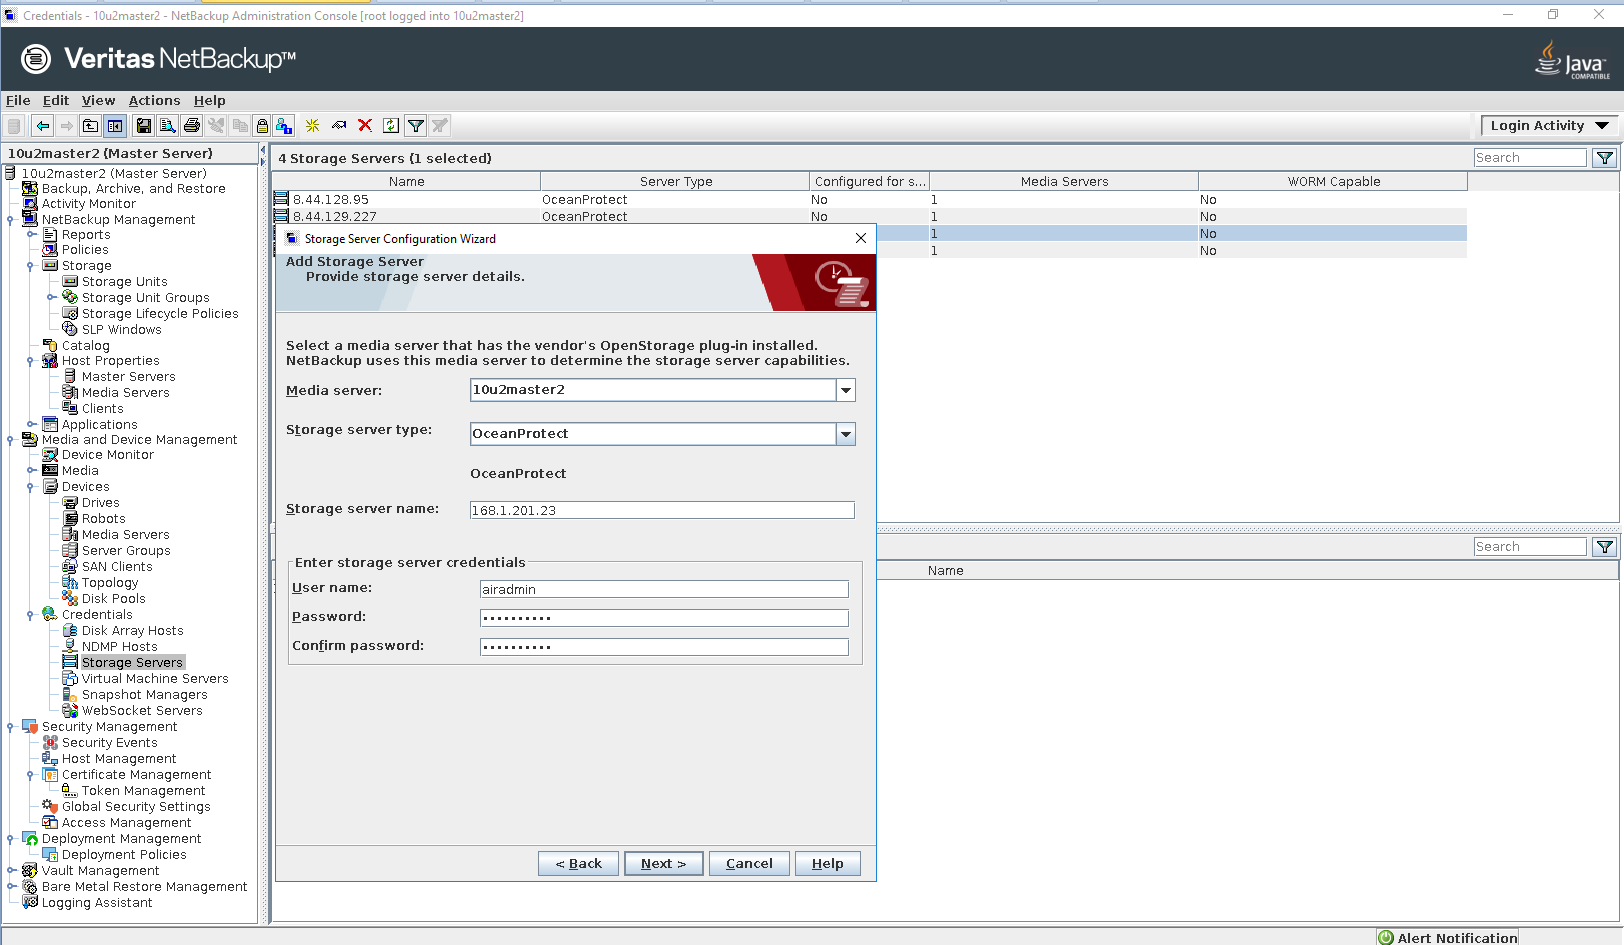
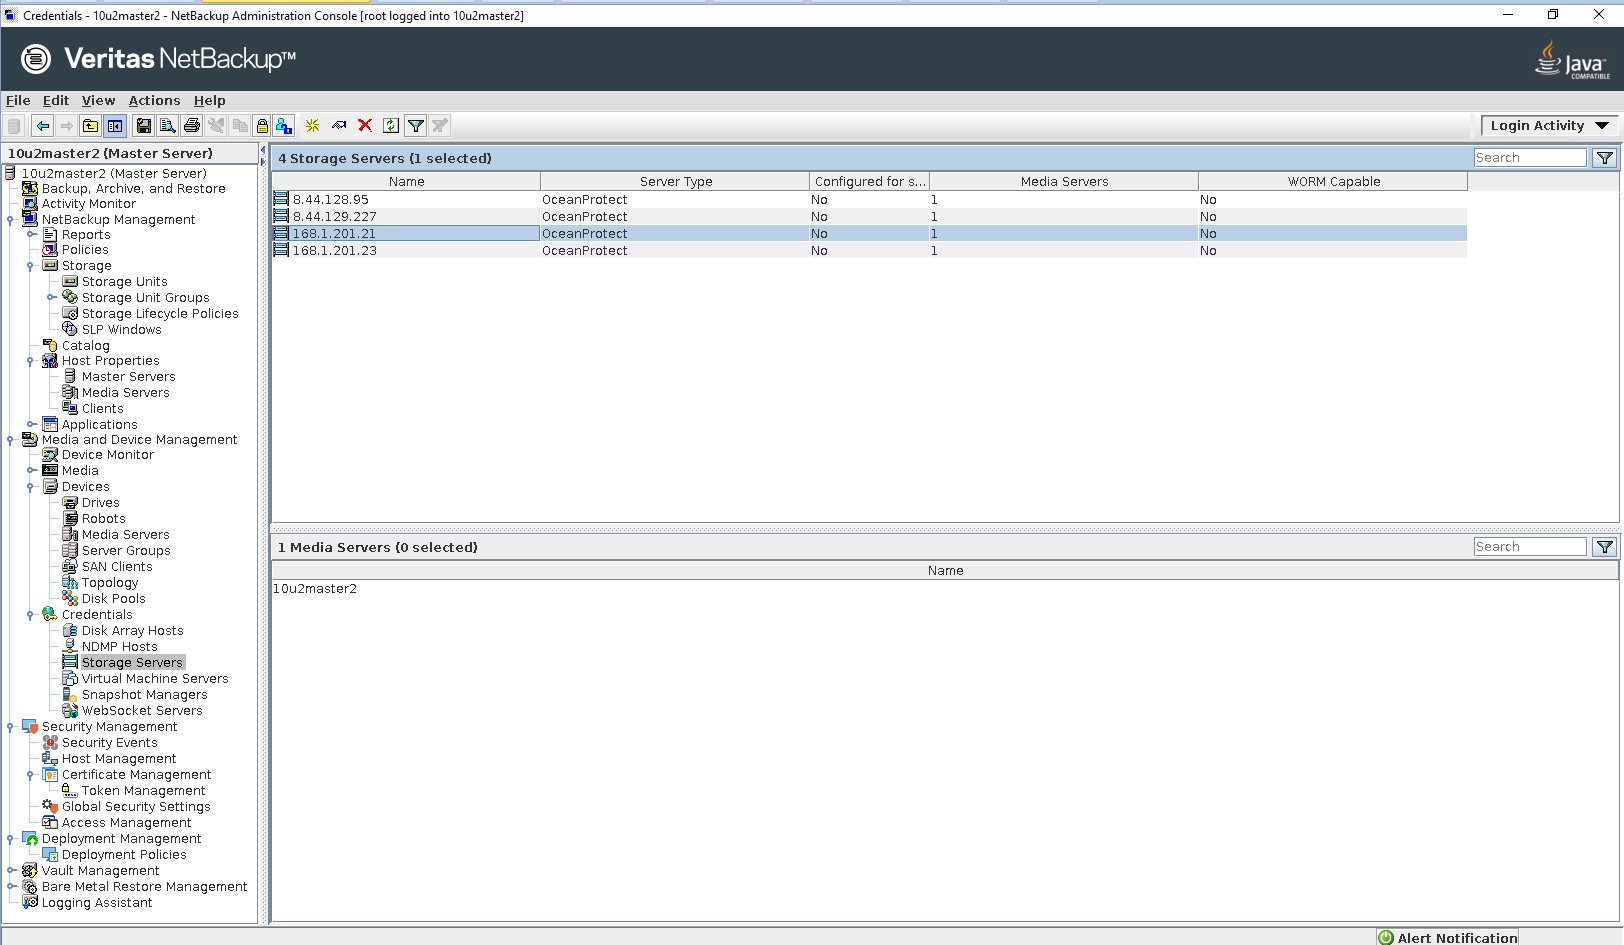
Step 5 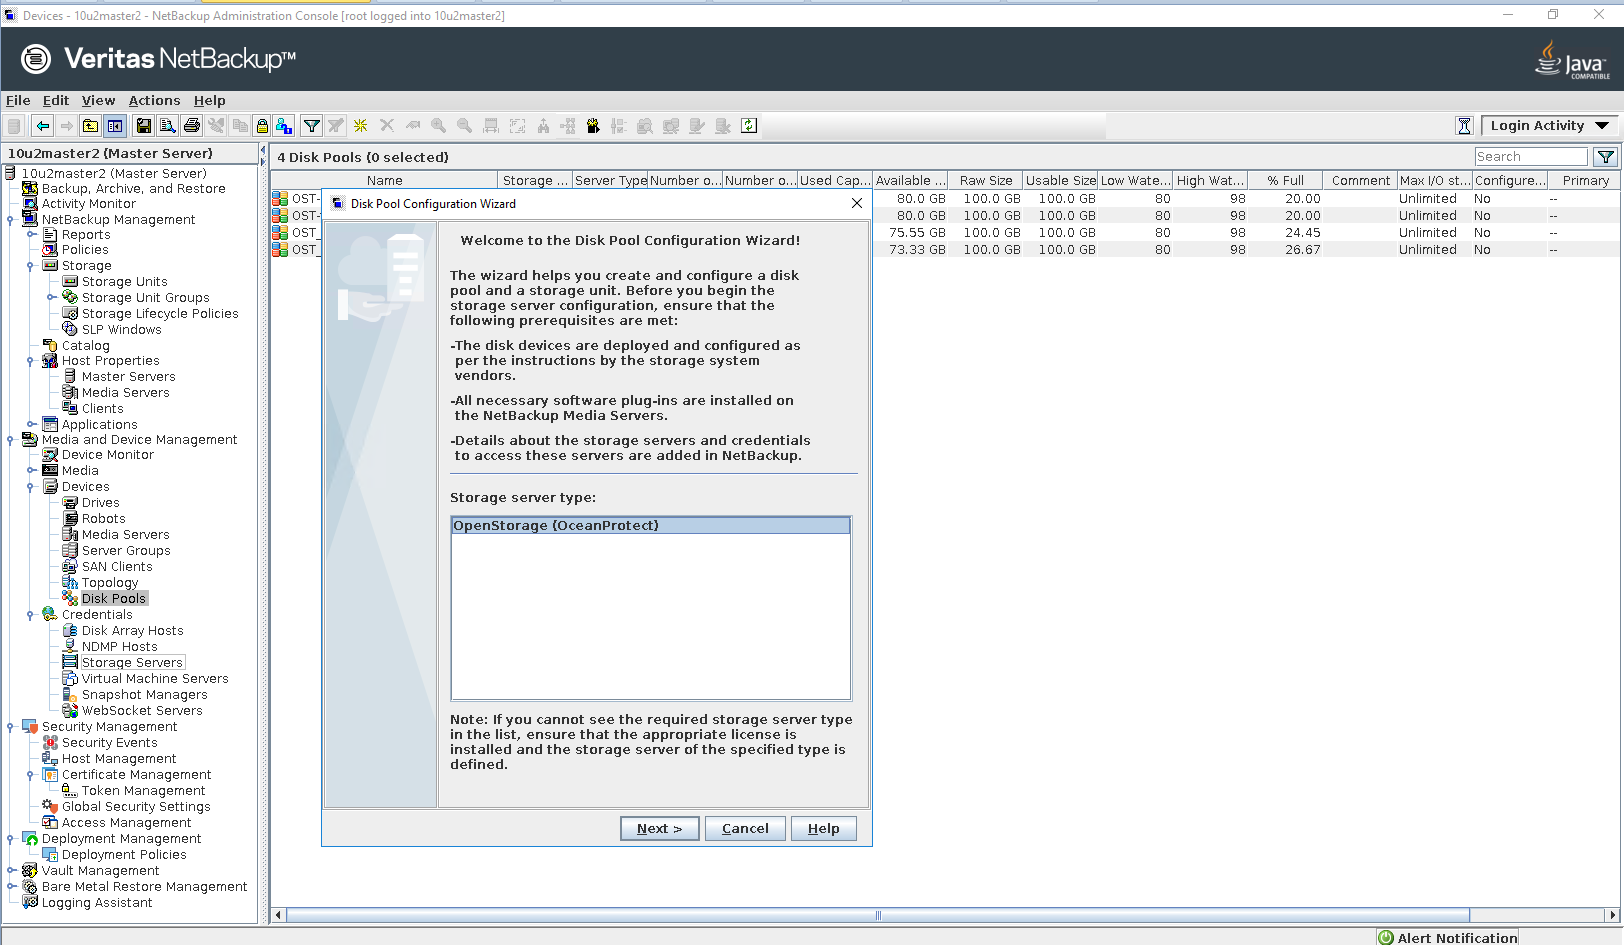
Step 6 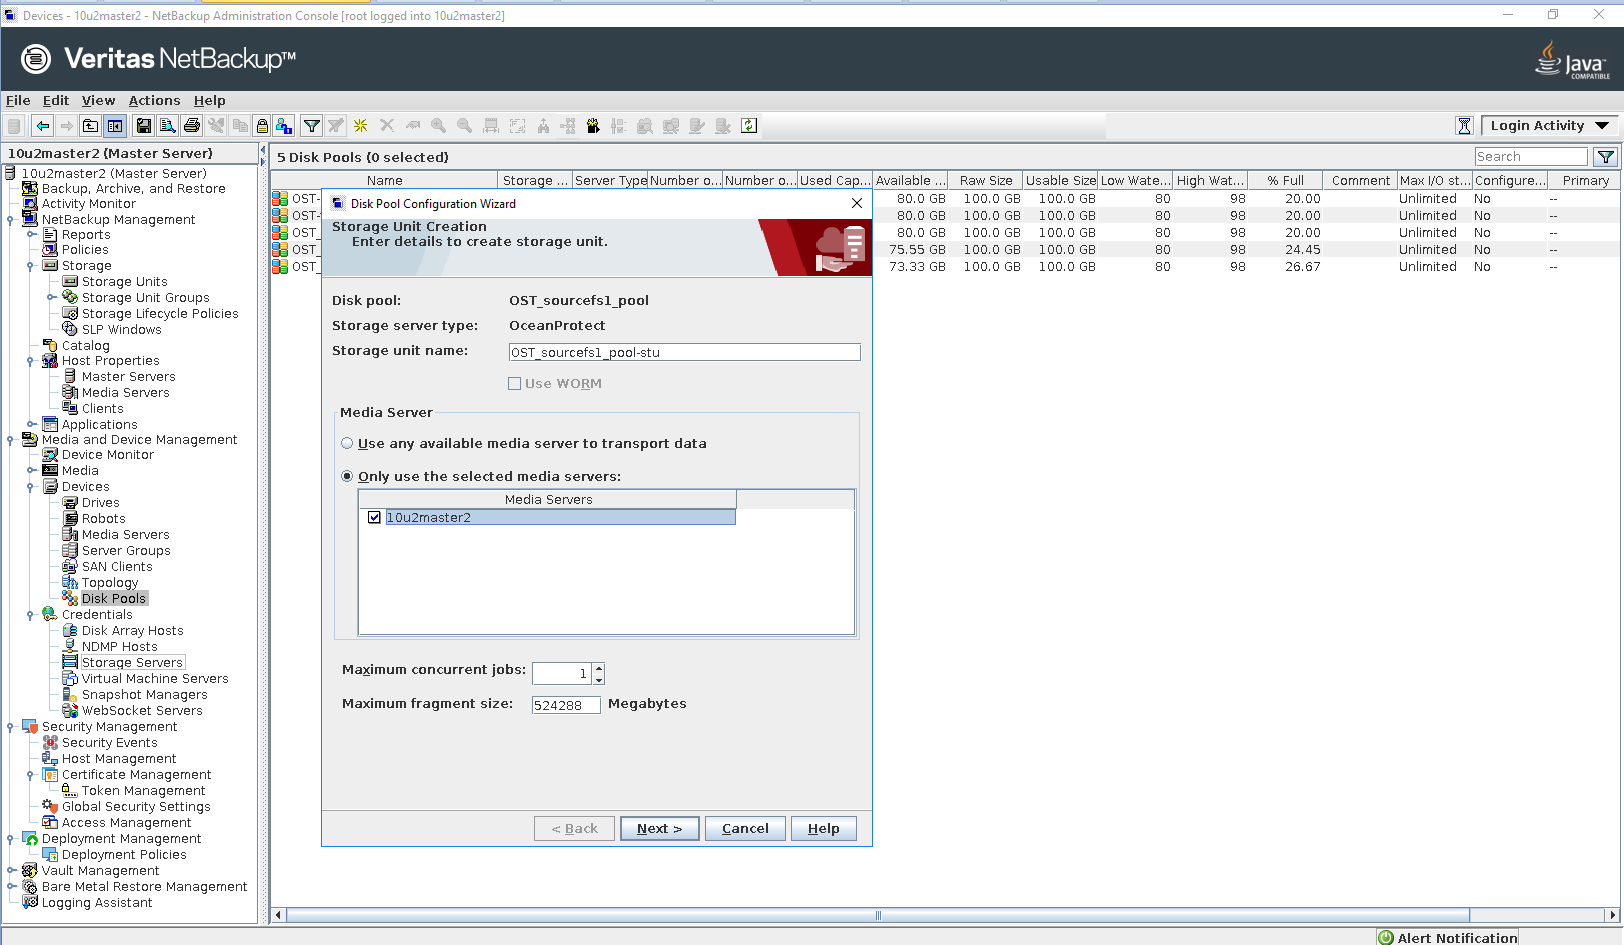
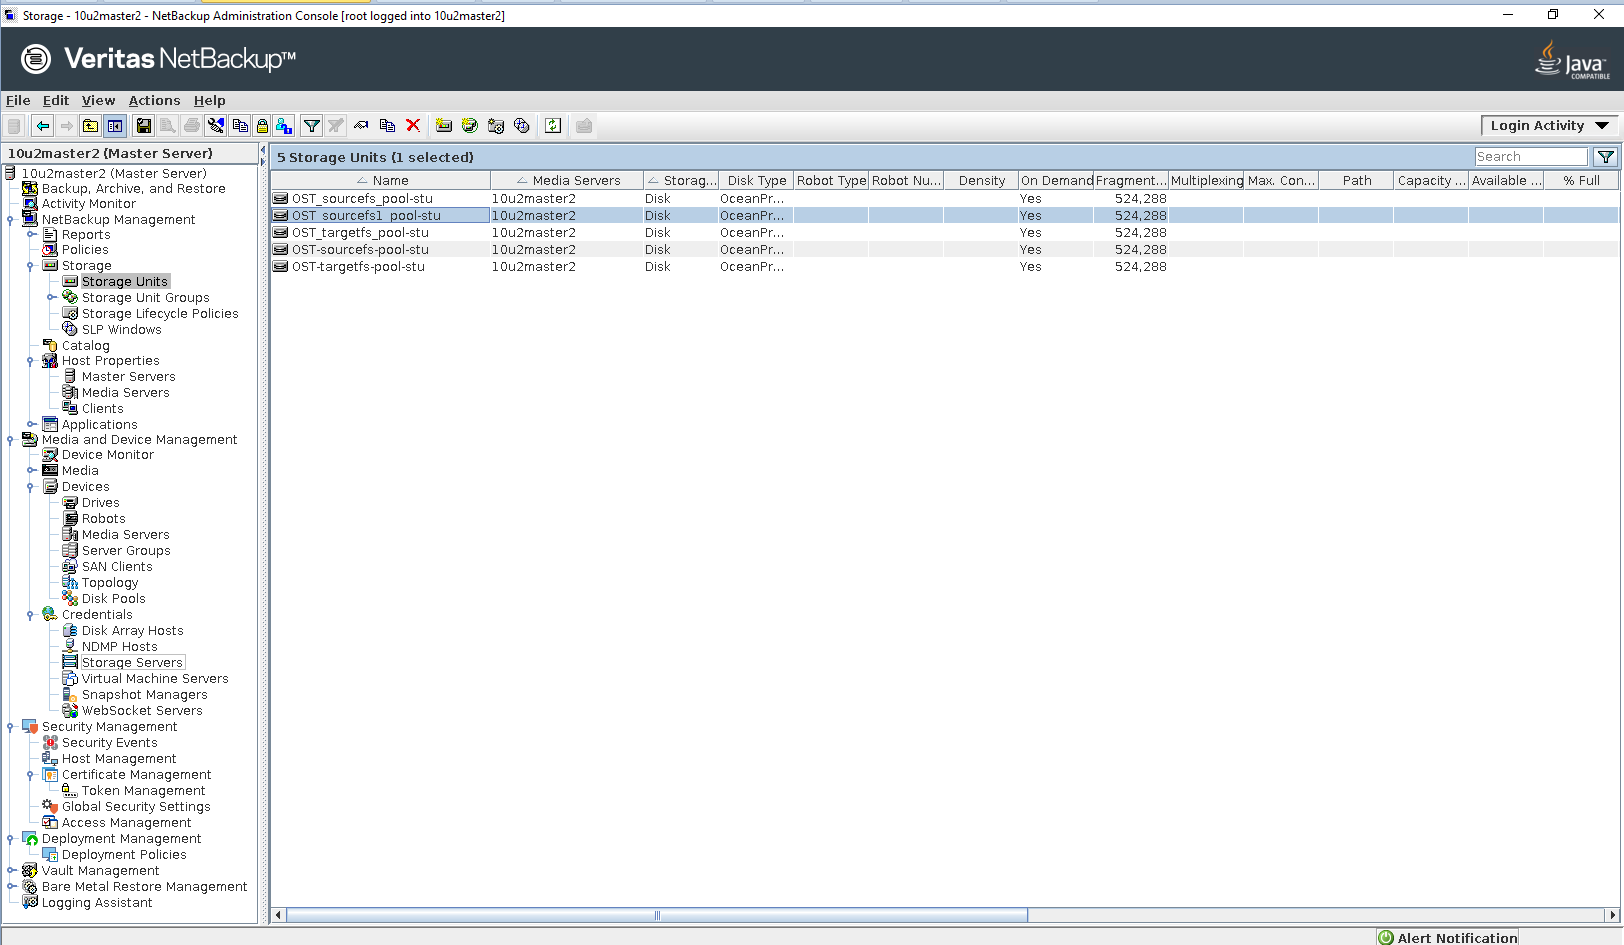
Step 7 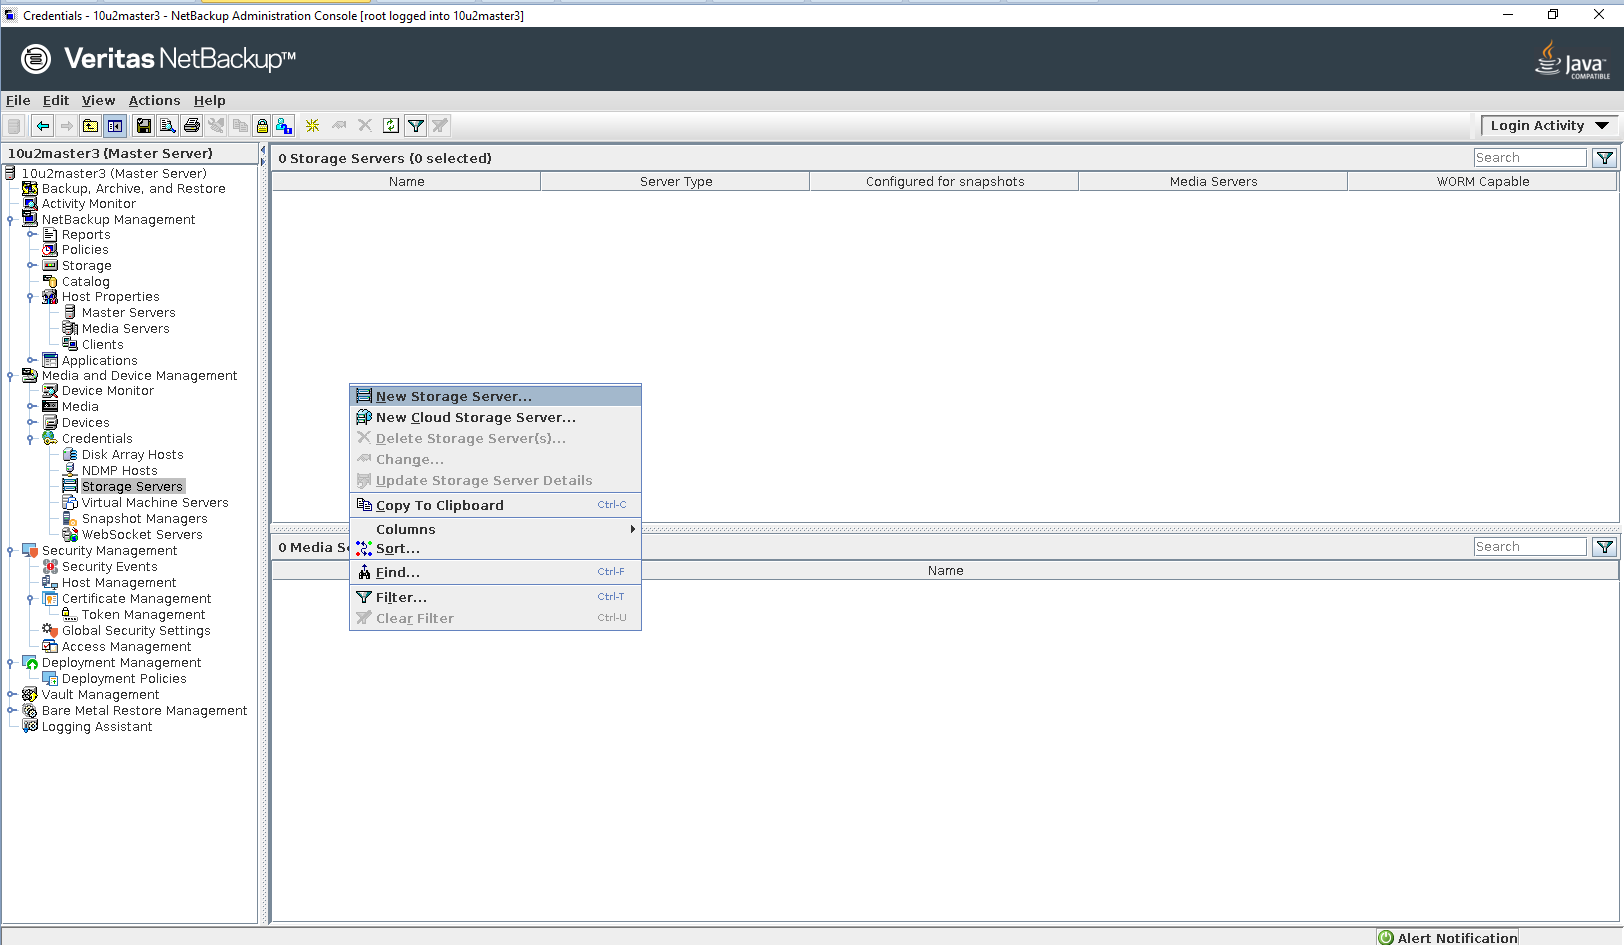
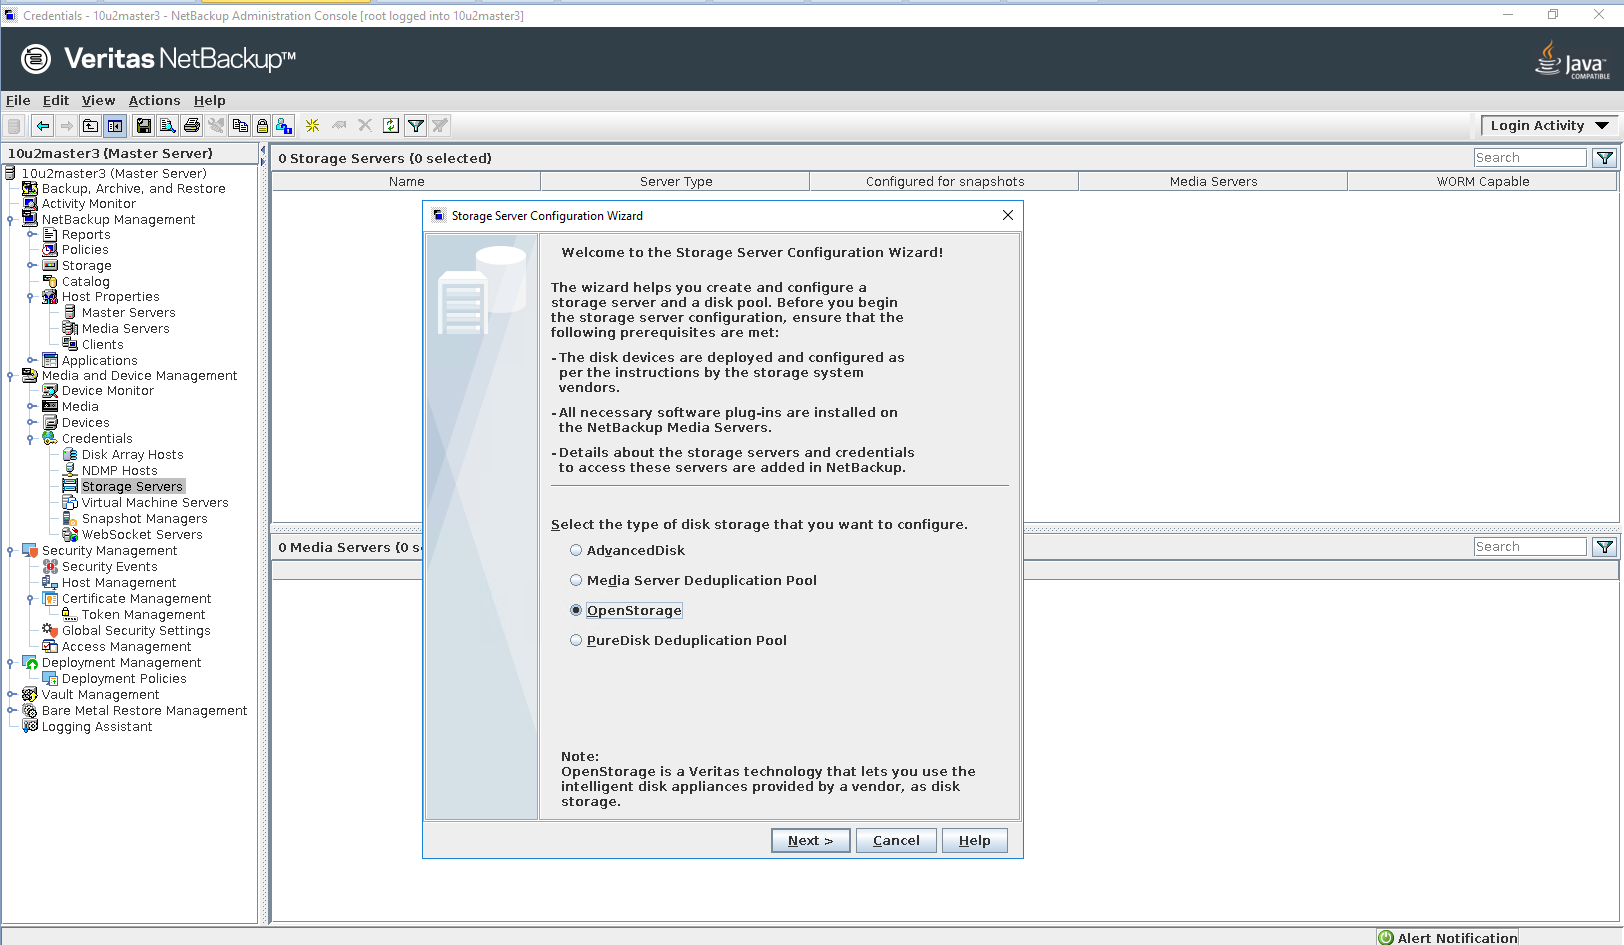 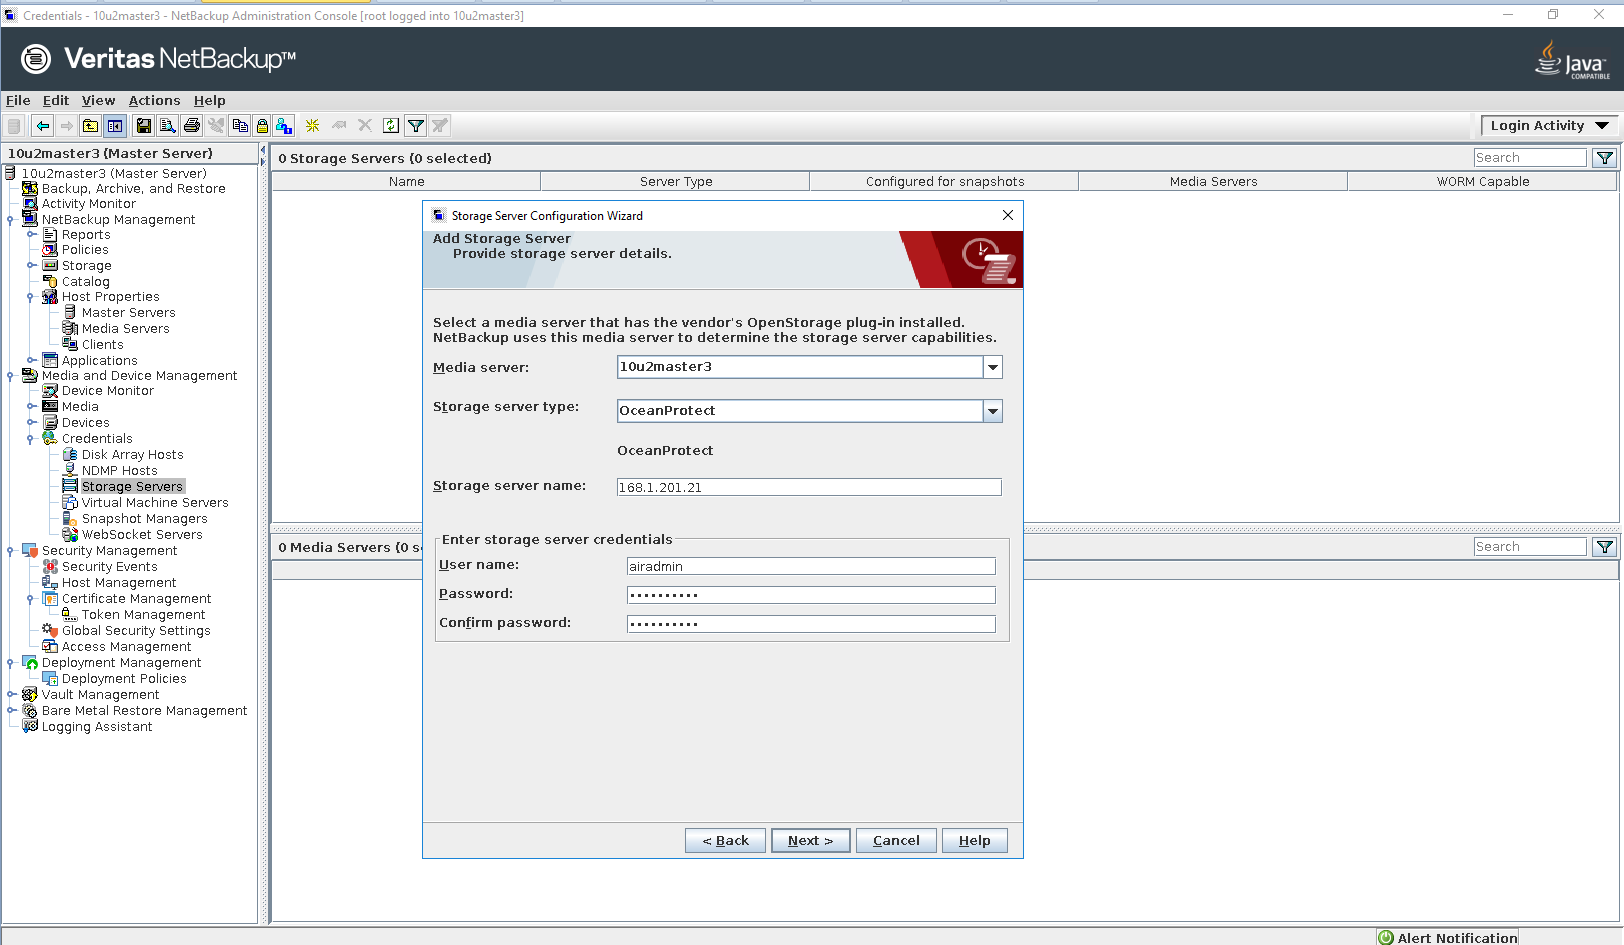 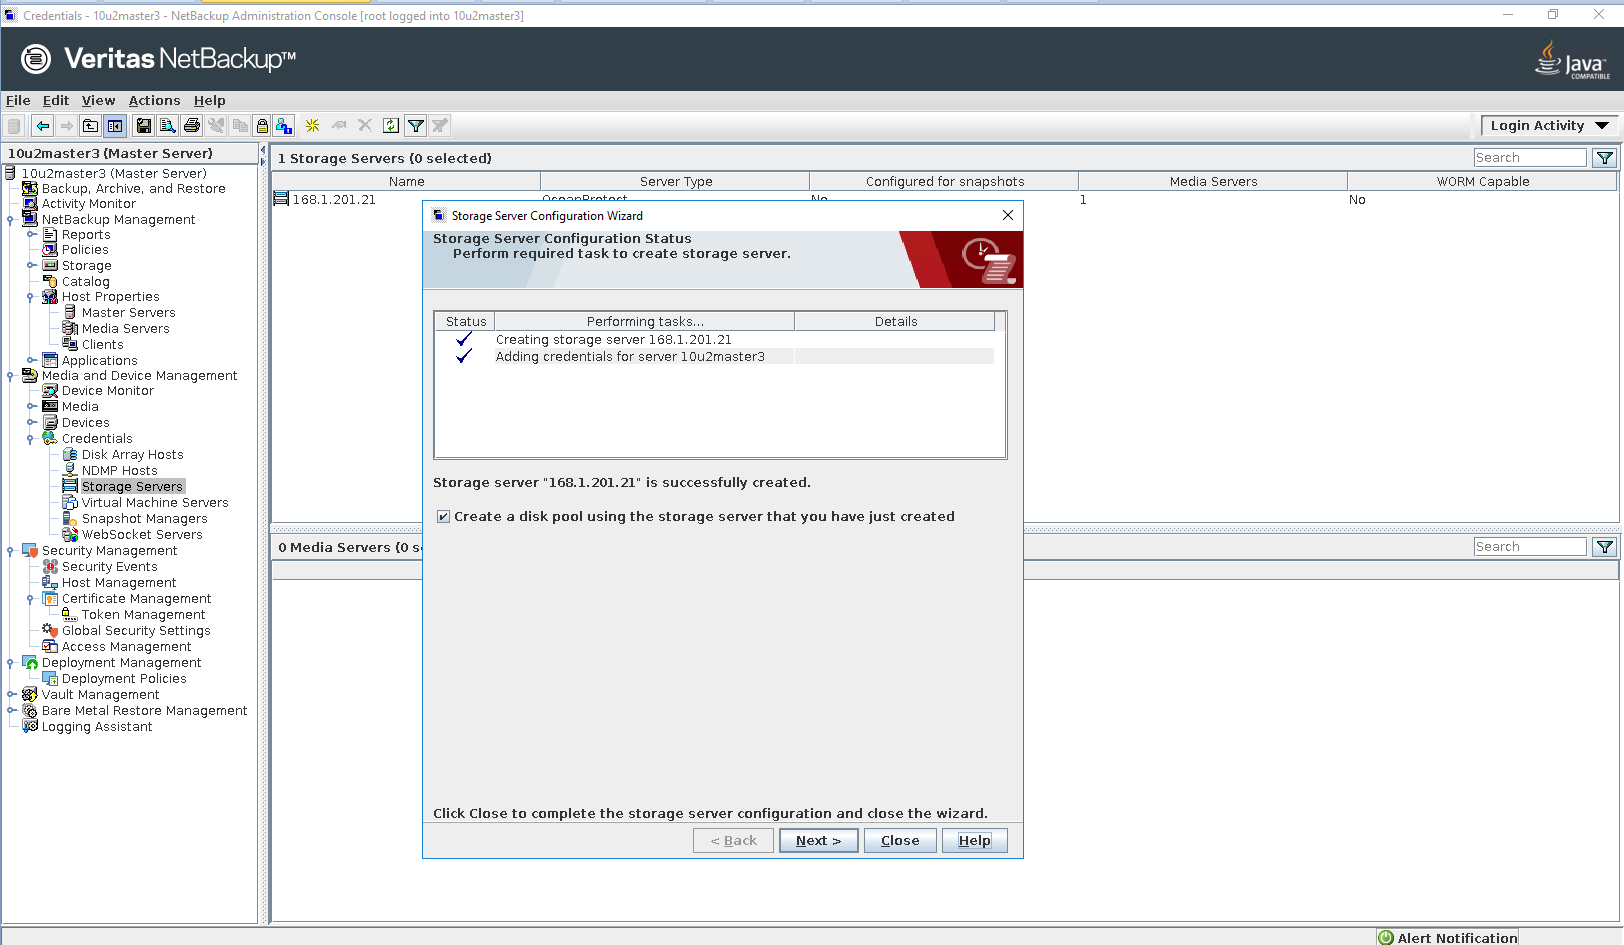 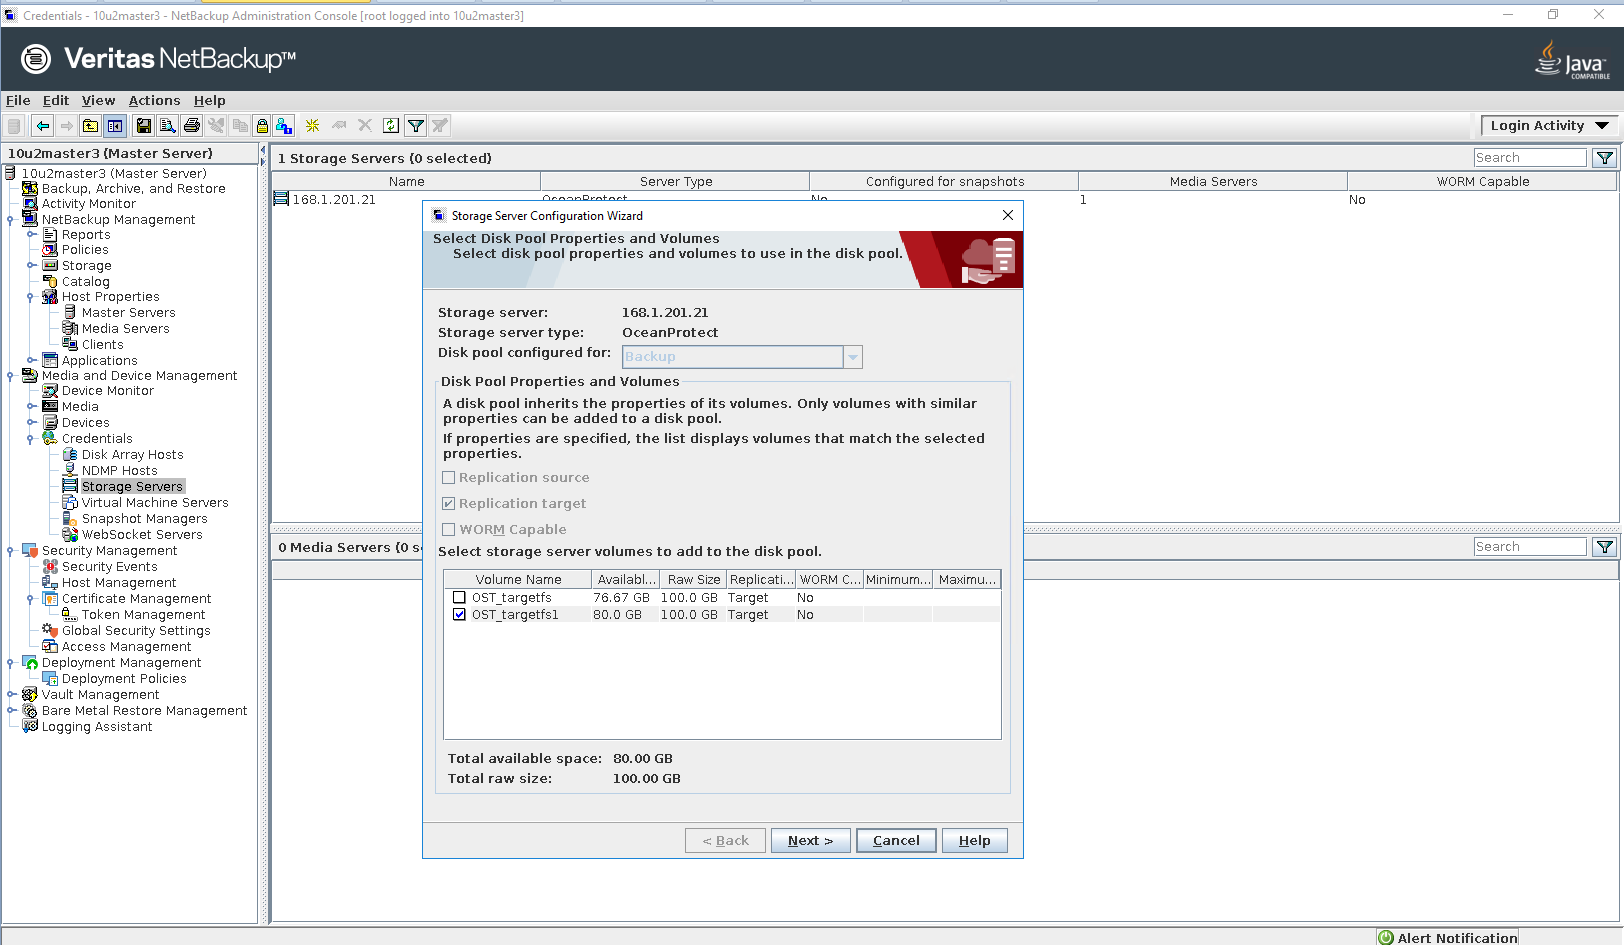 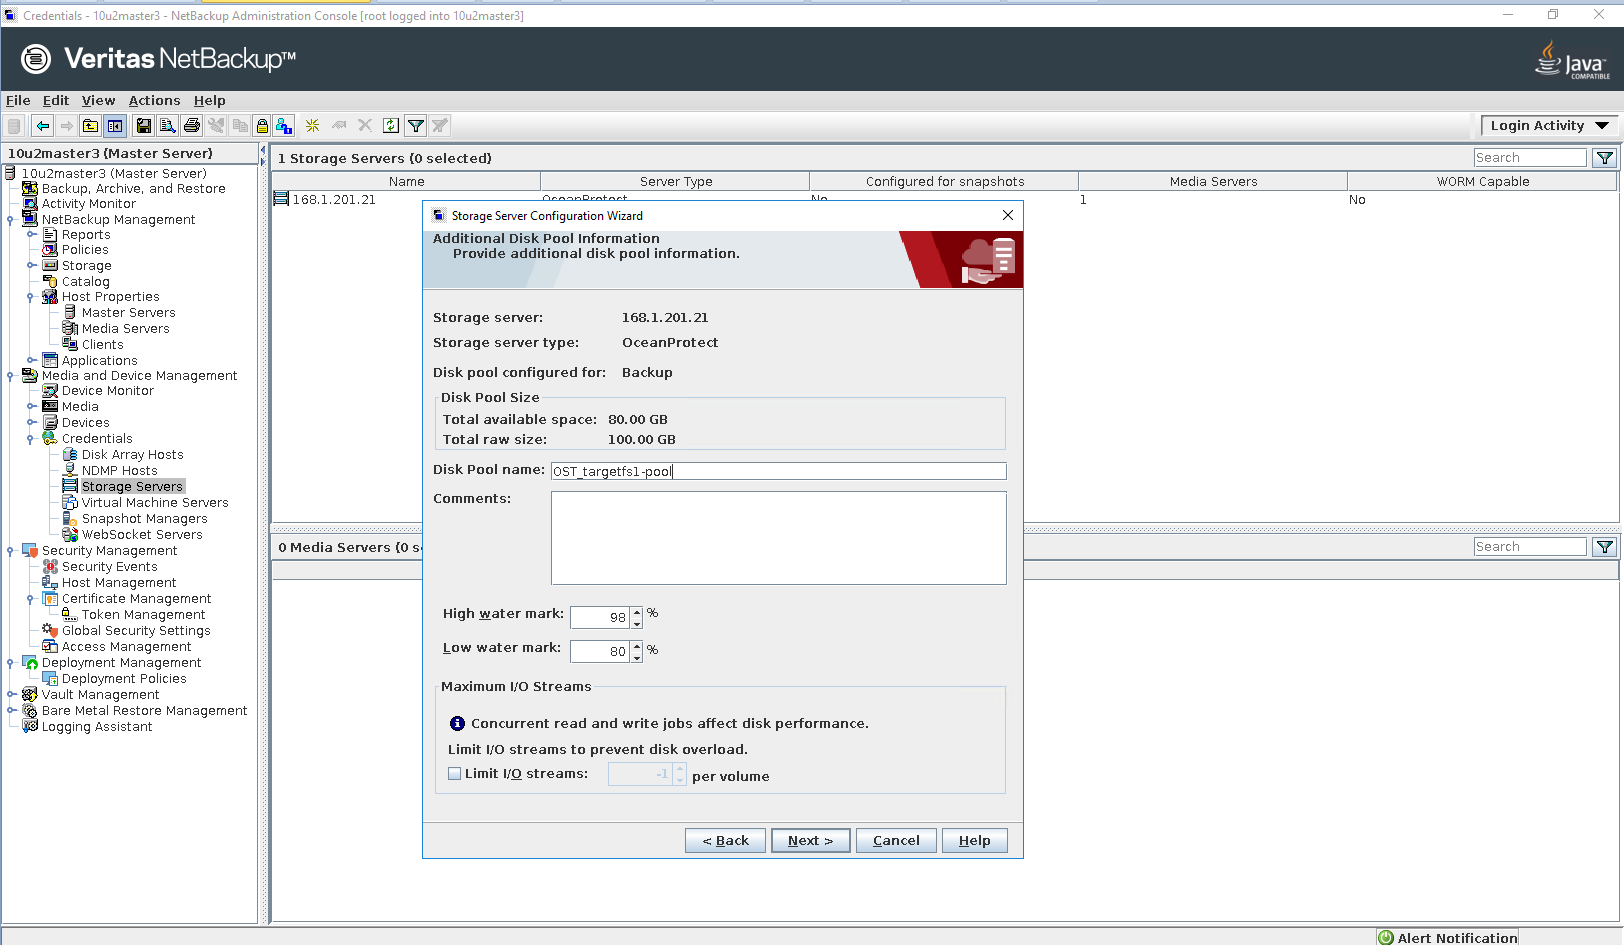 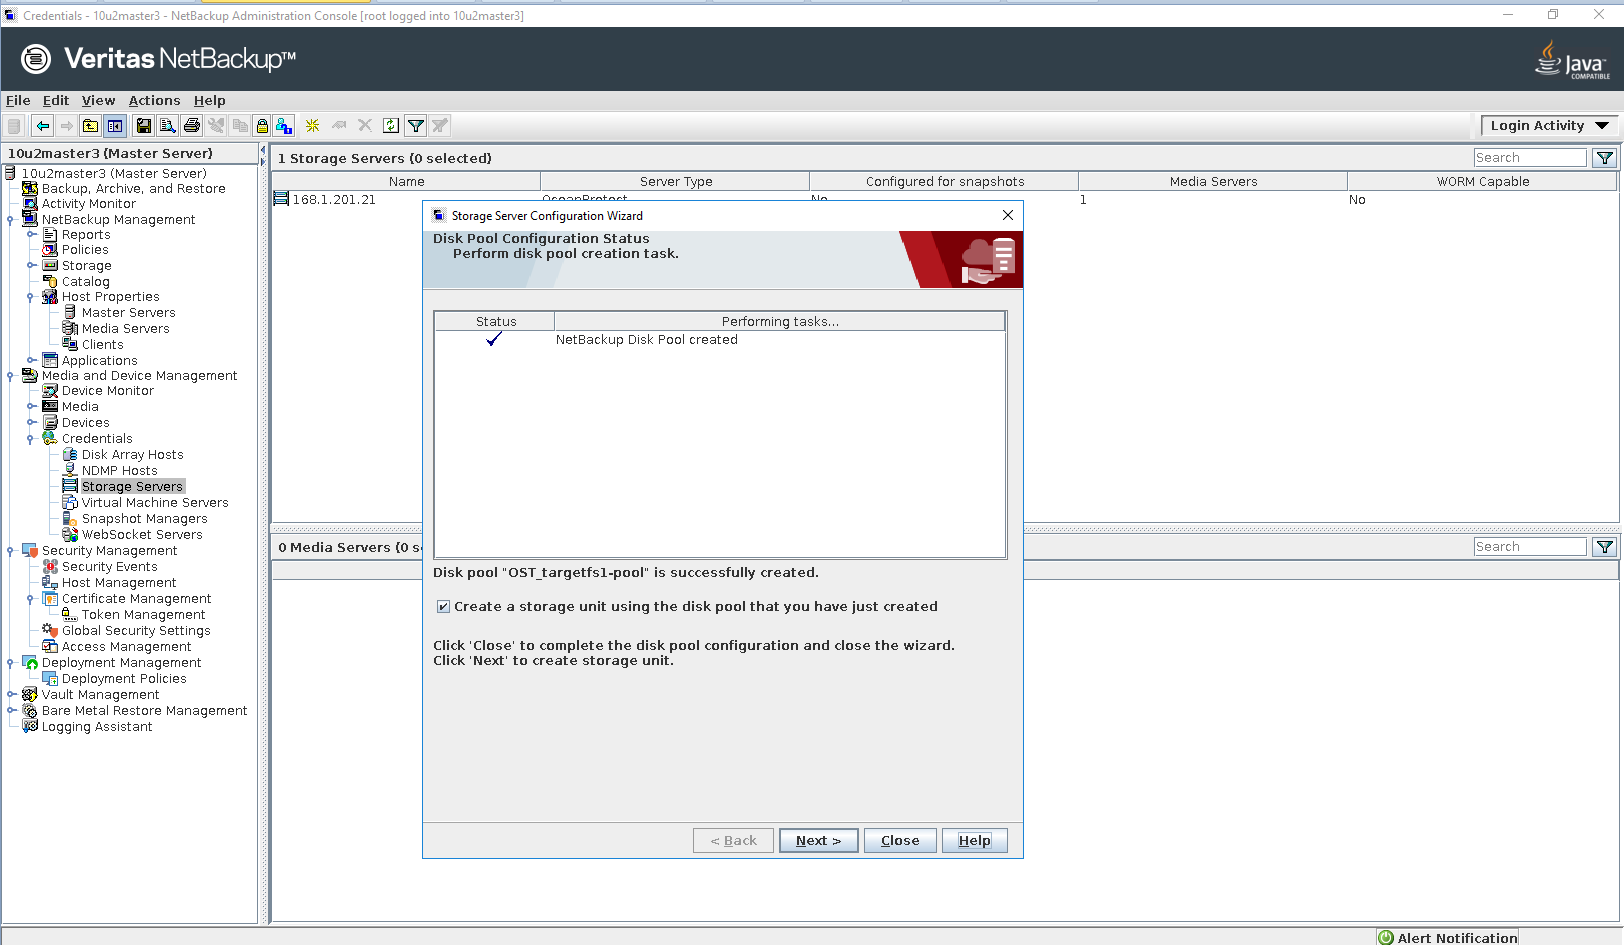 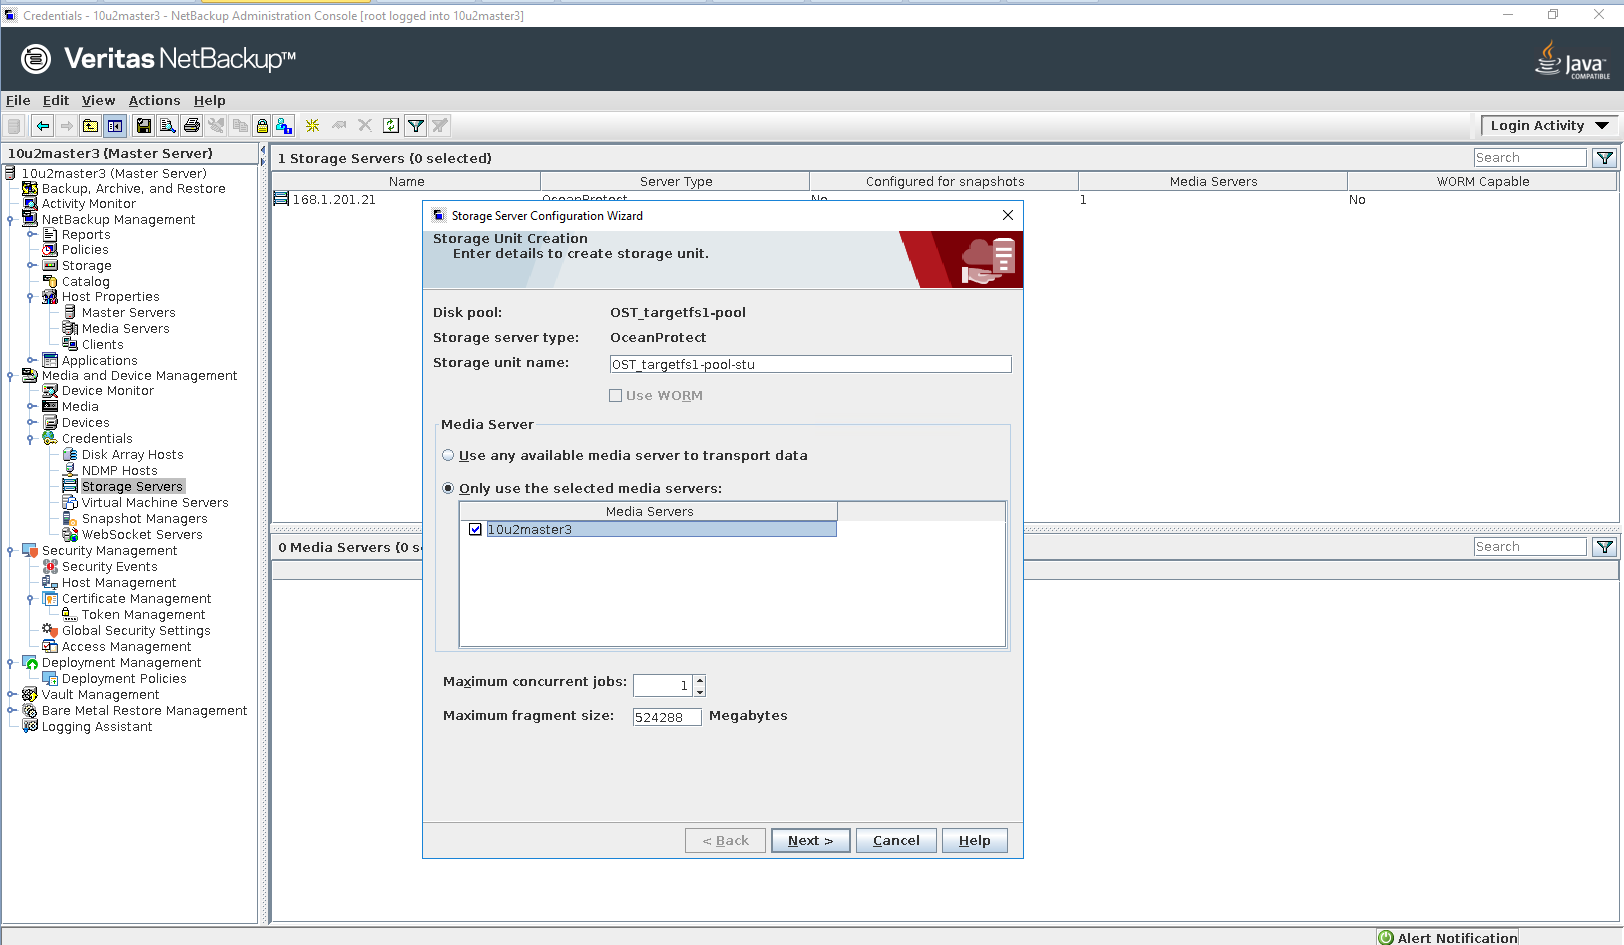 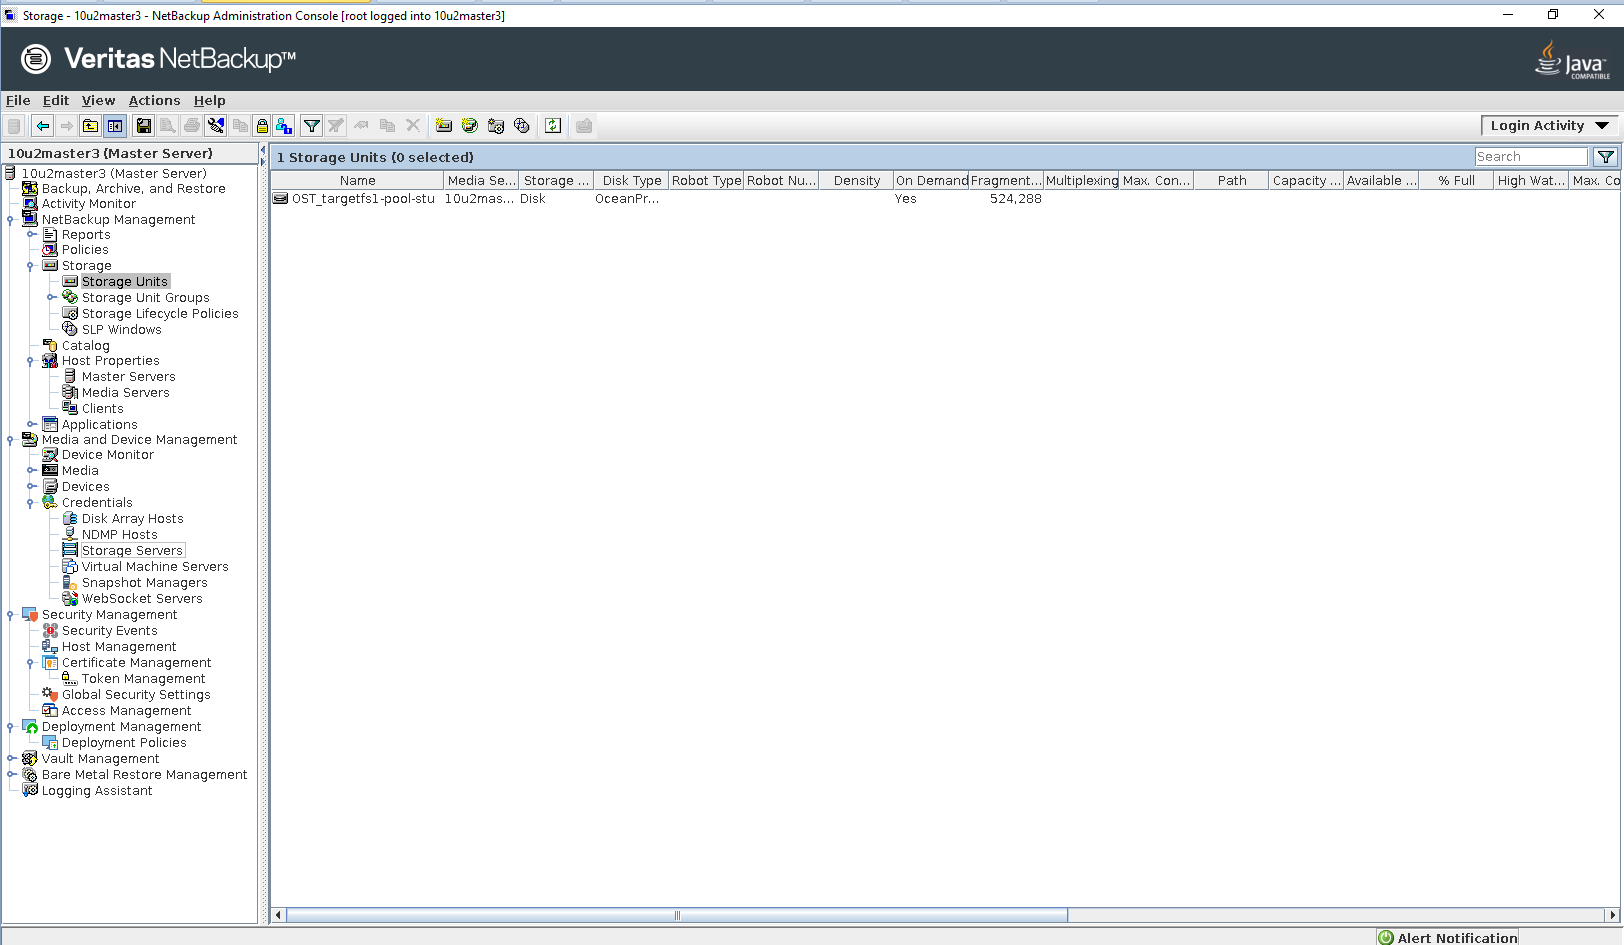
Step 8 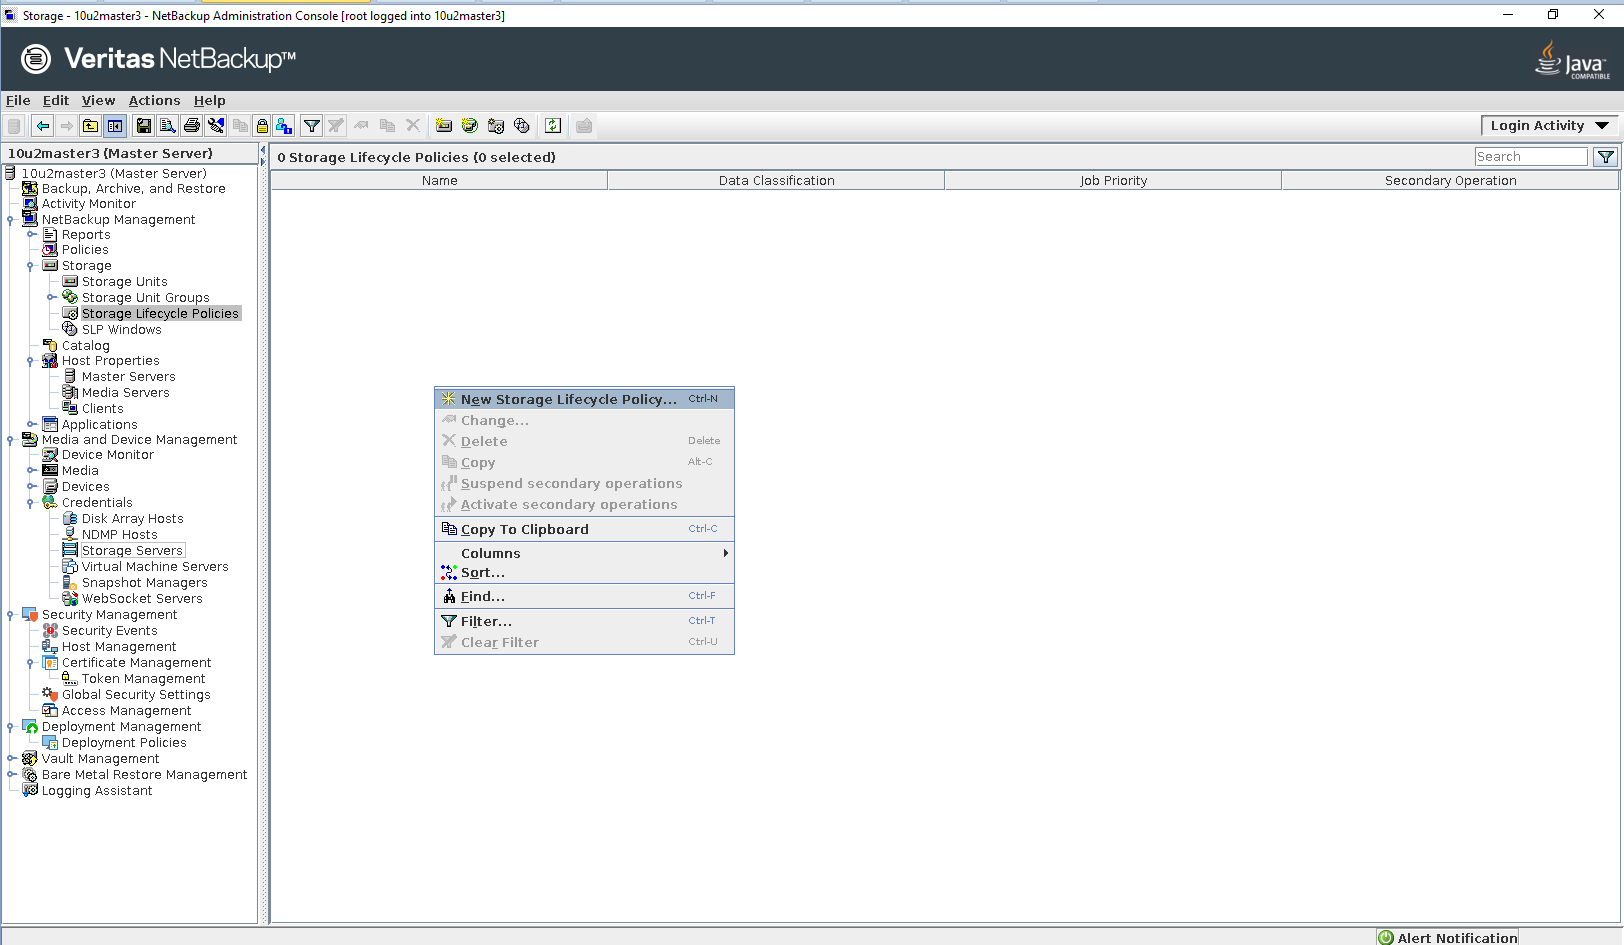
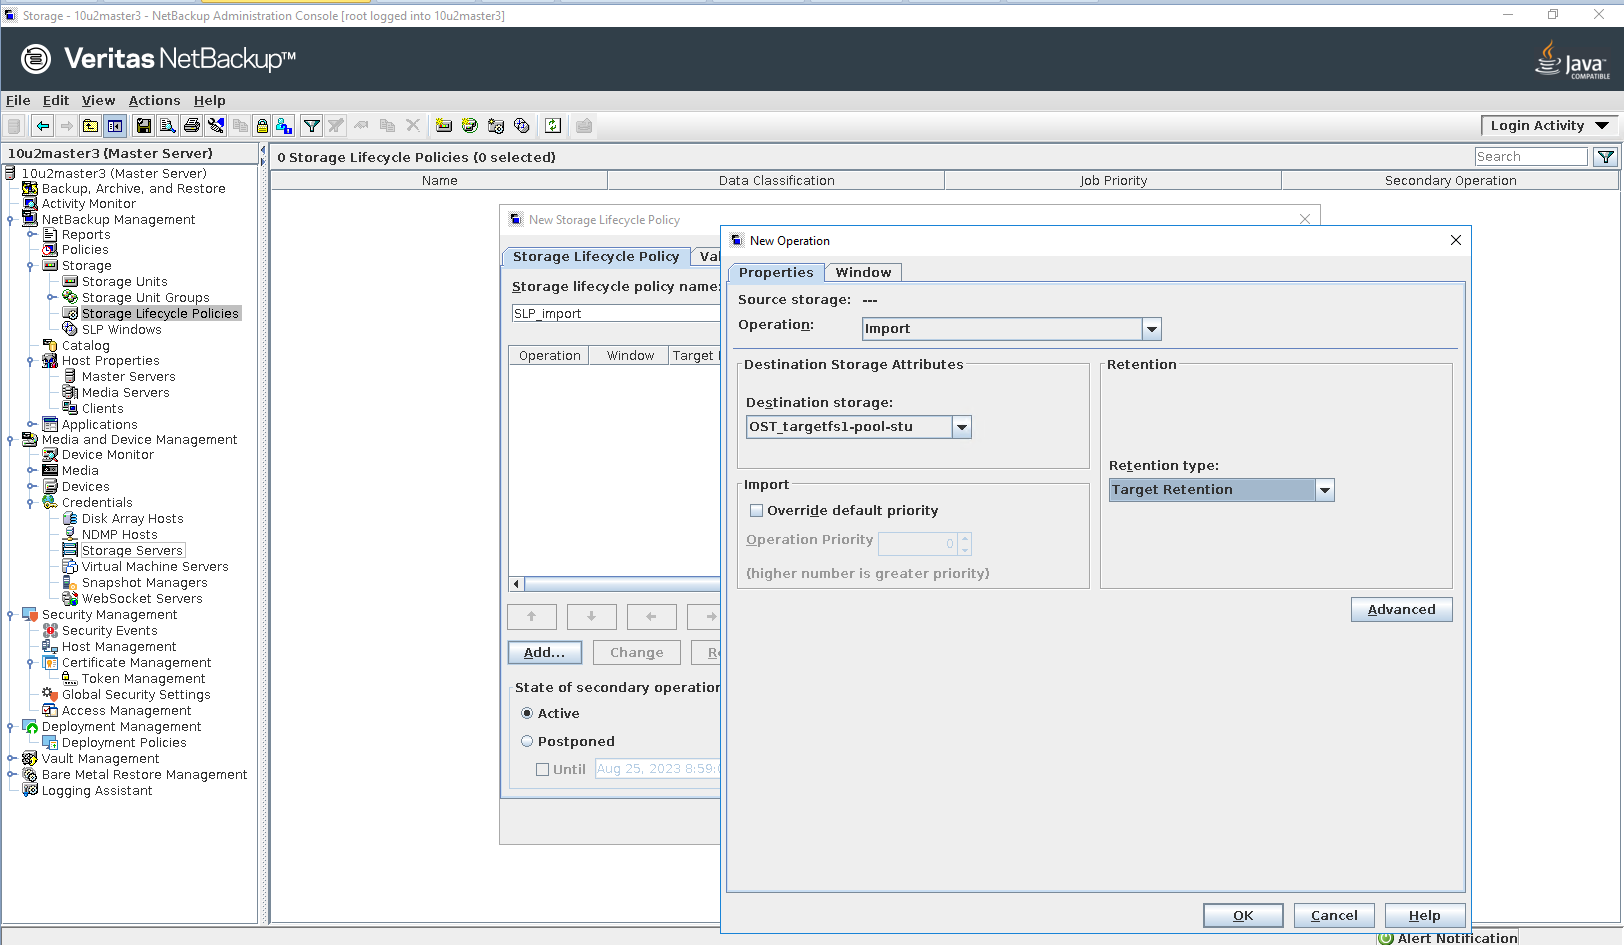 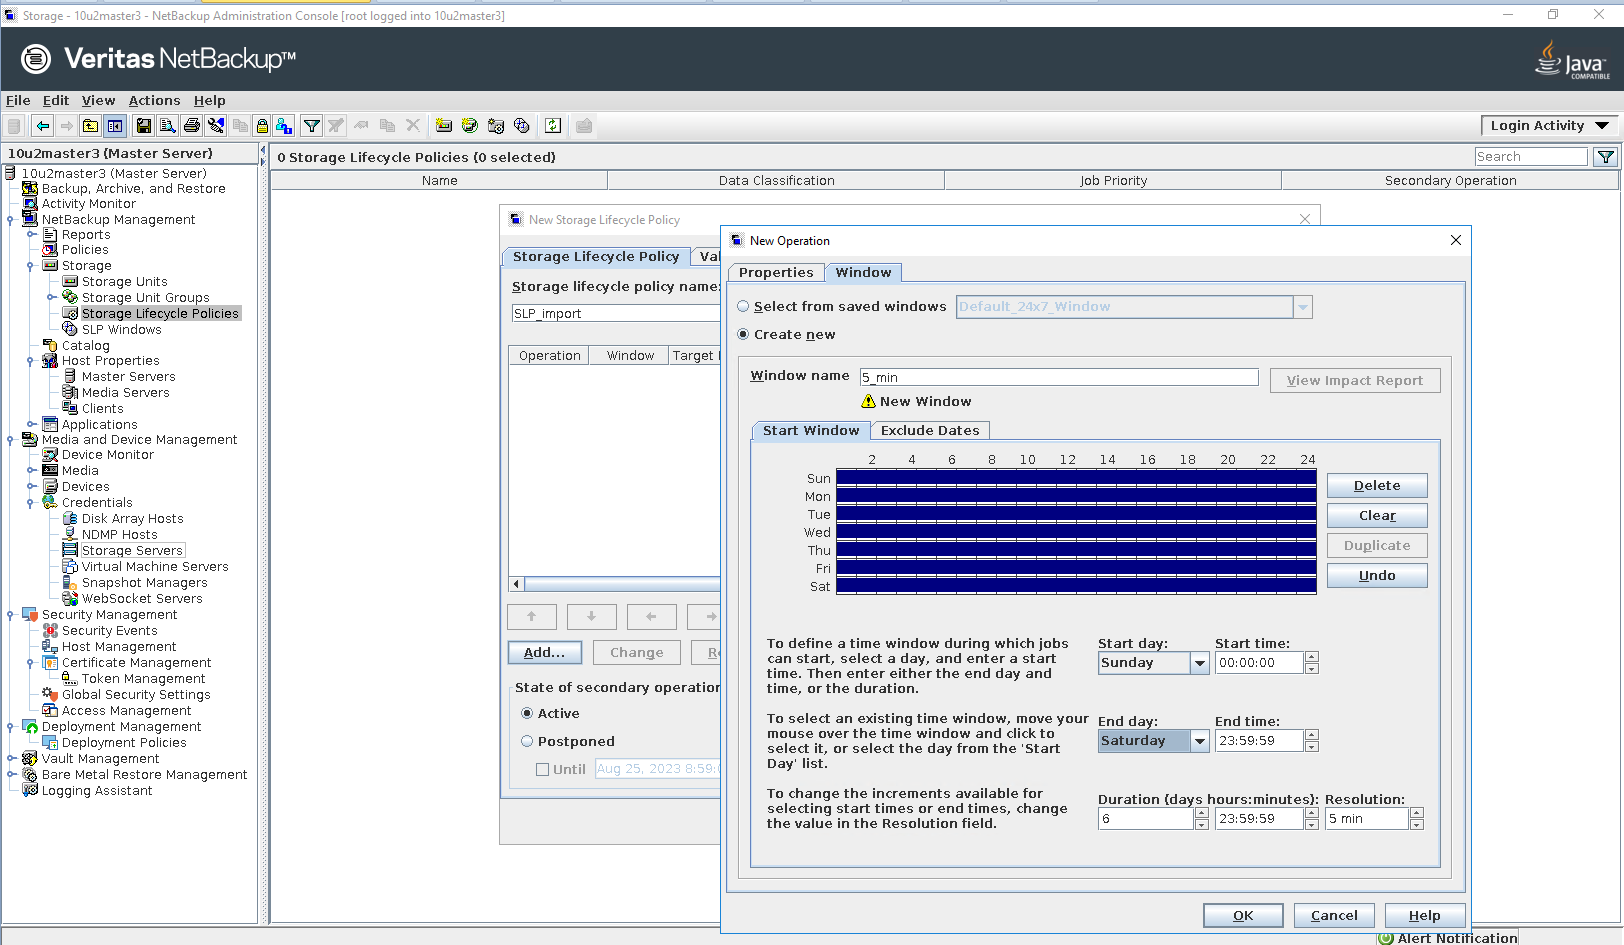
Step 9 
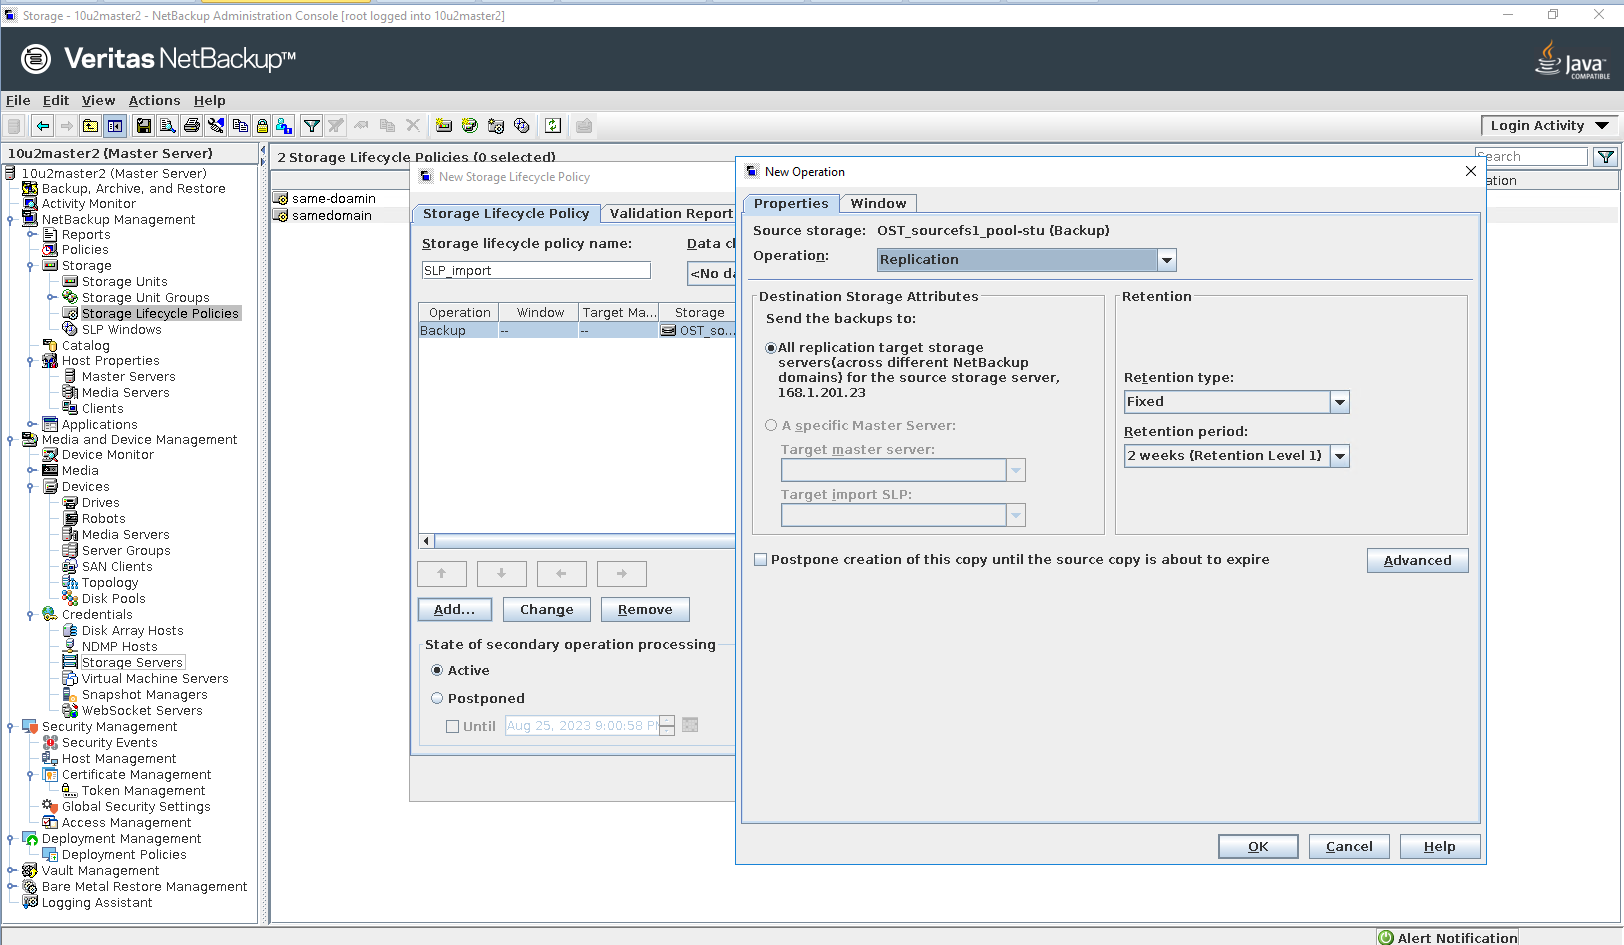 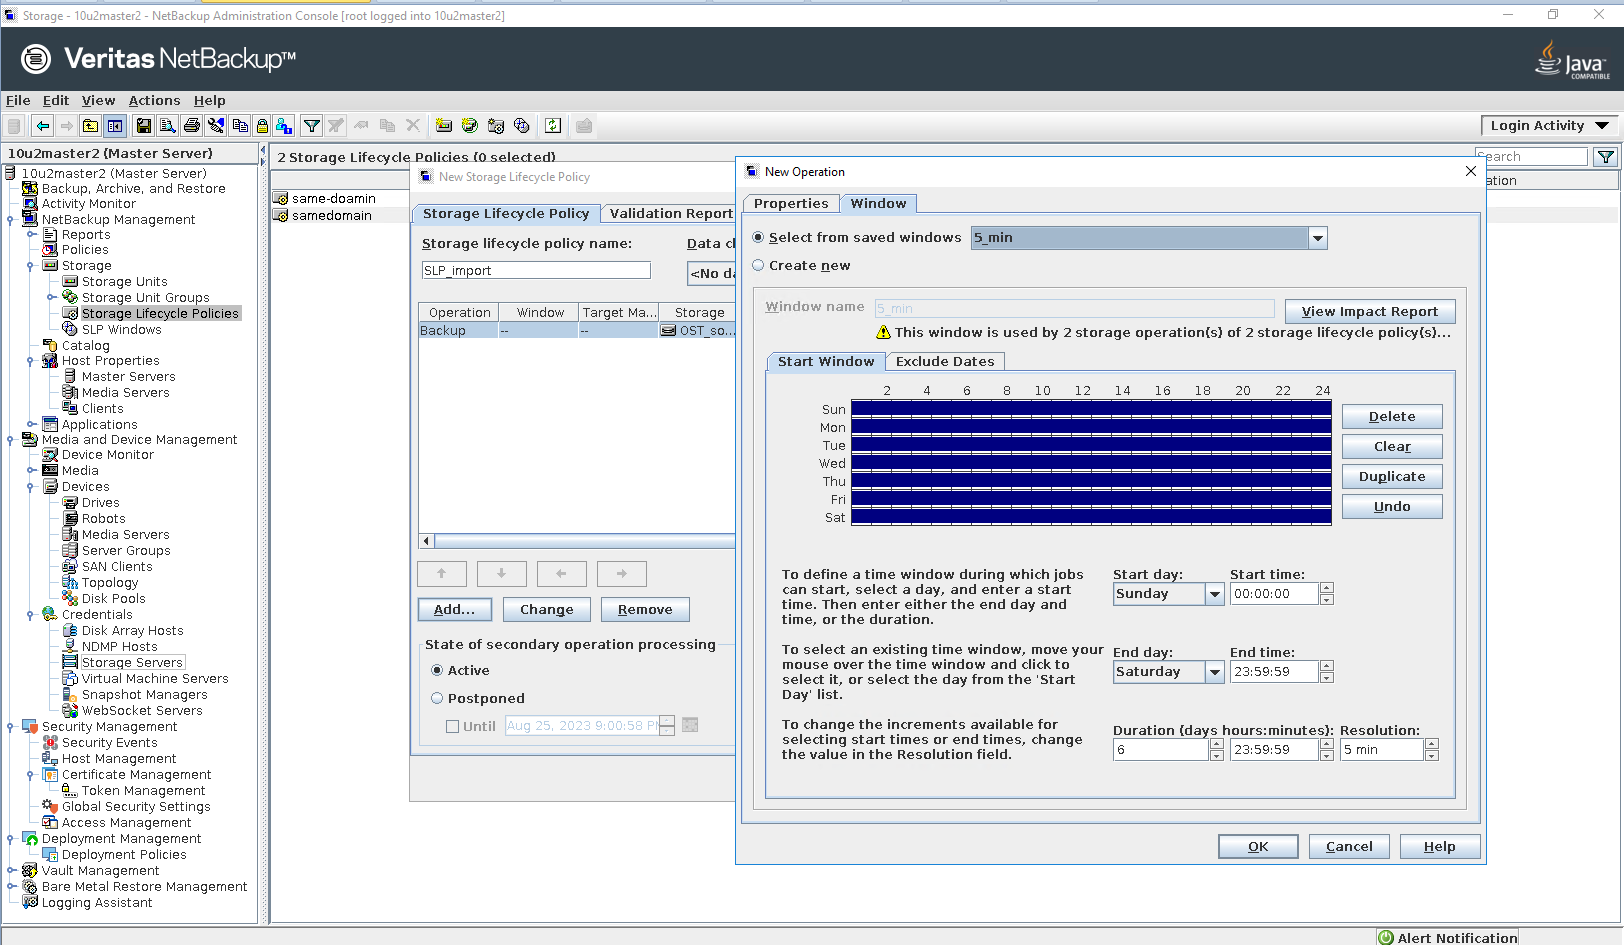 
Step 10 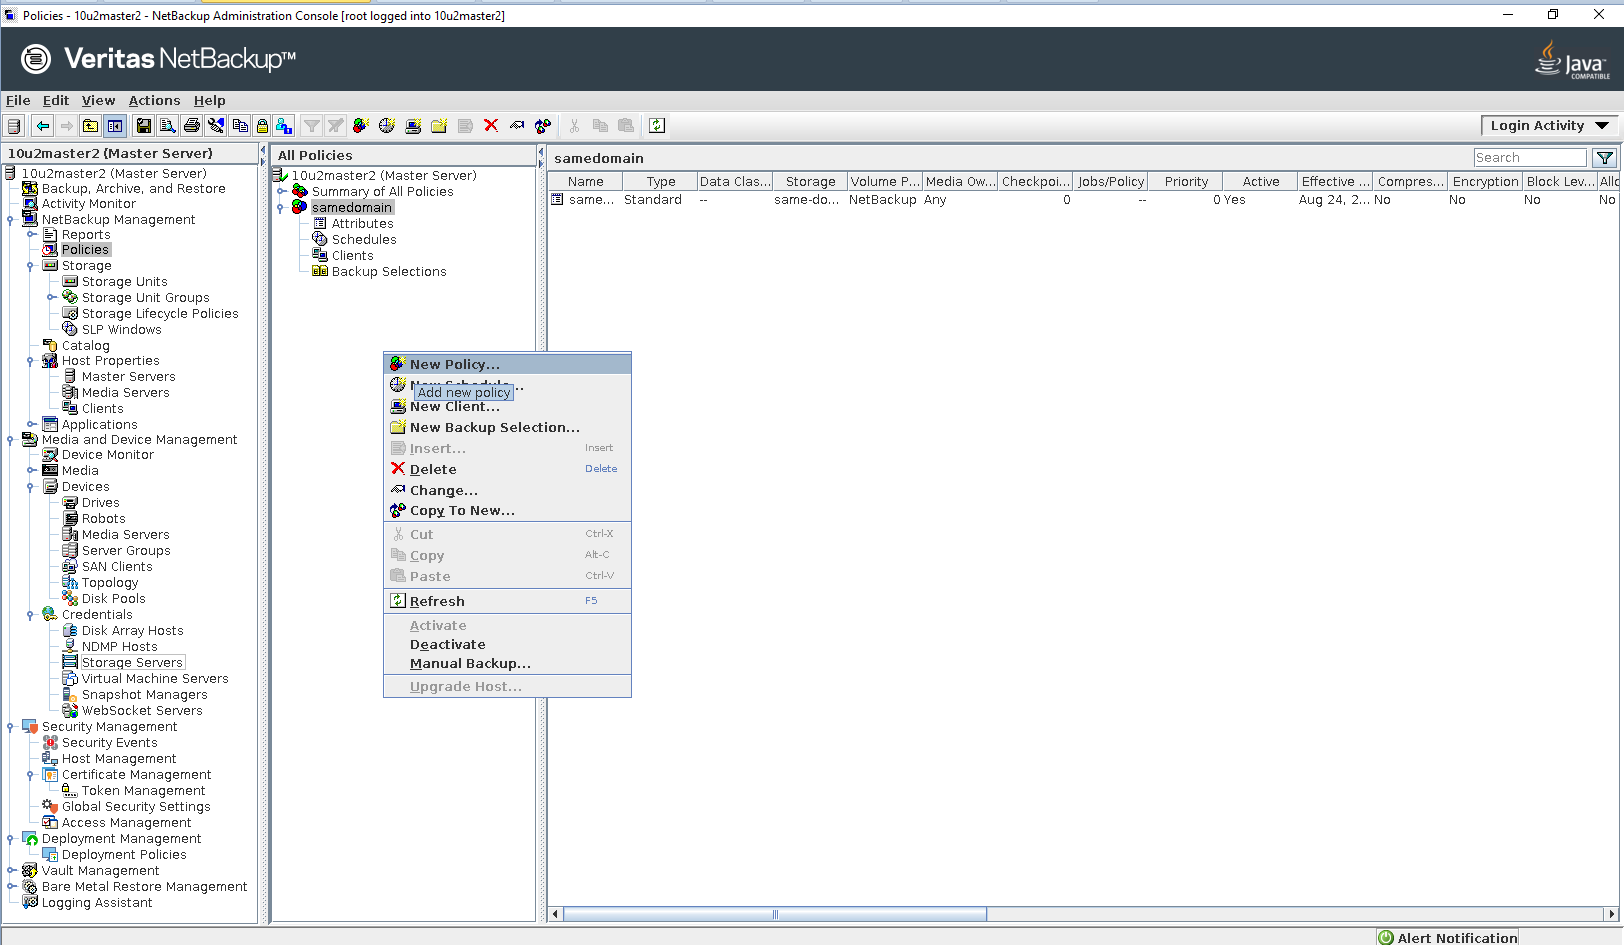
|
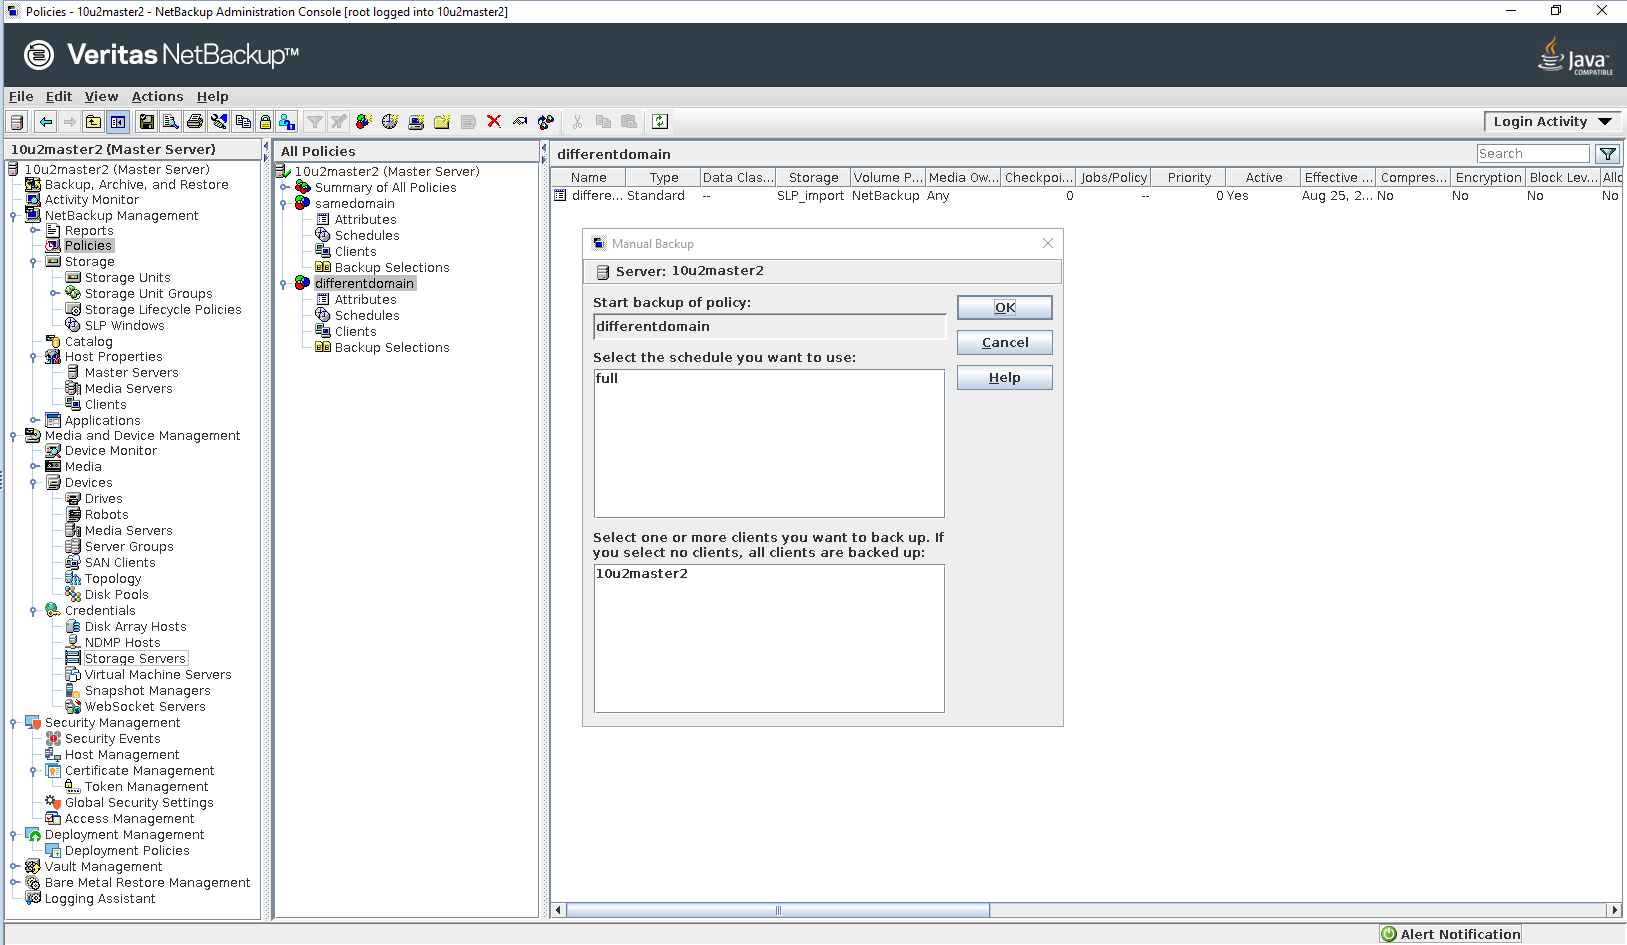
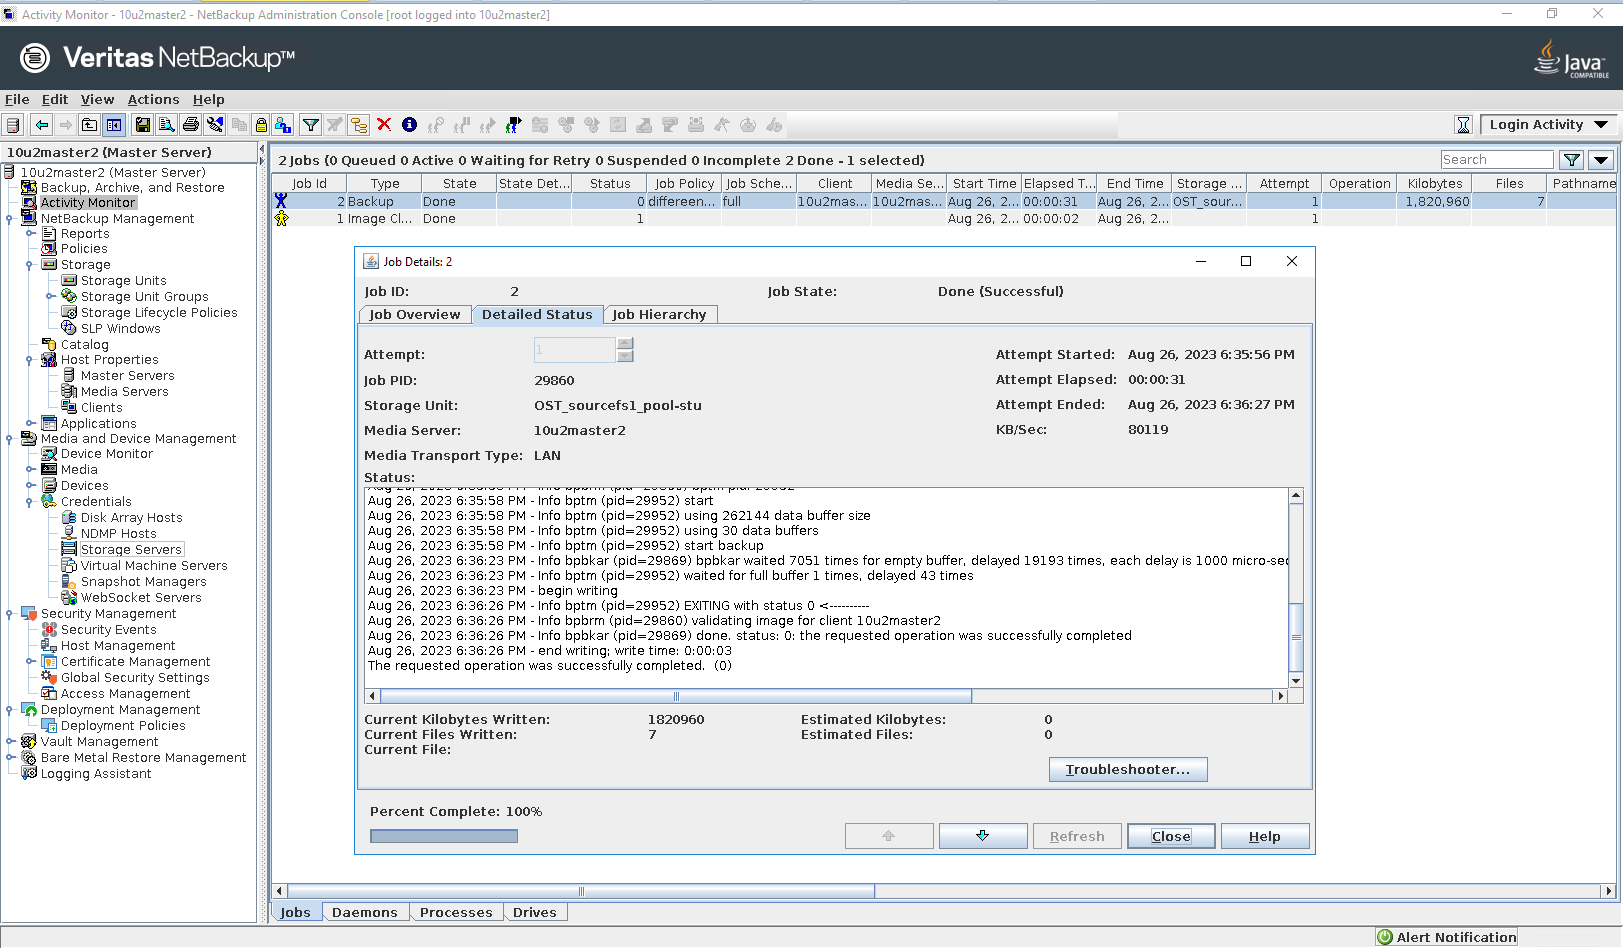
3.5 Replication in the Different Master Domains
Test Purpose | Verify the Replication job is working in the Different Master Domains |
Test Networking | Huawei OceanProtect Backup Storage Function Compatibility Test Networking 2 |
Prerequisites |
|
Test Procedure |
|
Expected Result | Step 2 Backup job finish successfully. Step 3 Replication job finish successfully. Step 4 Replication import job finish successfully. Step 6 Restore job finish successfully and restored files are the same as original files. |
Test Result | Passed Step 1 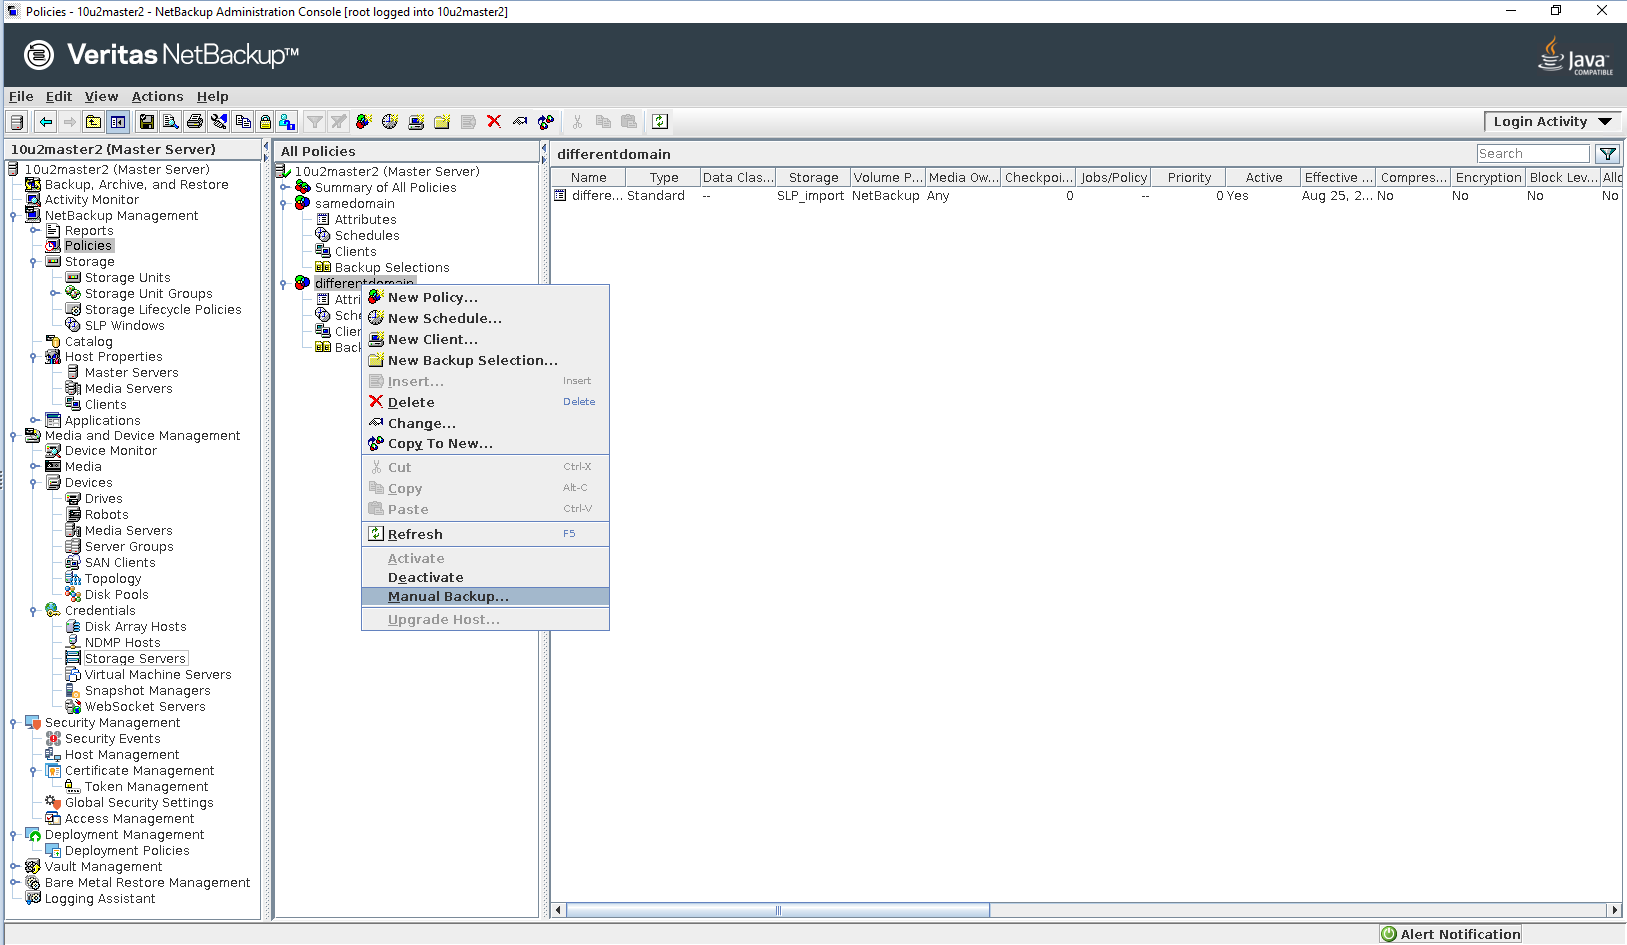
Step 2 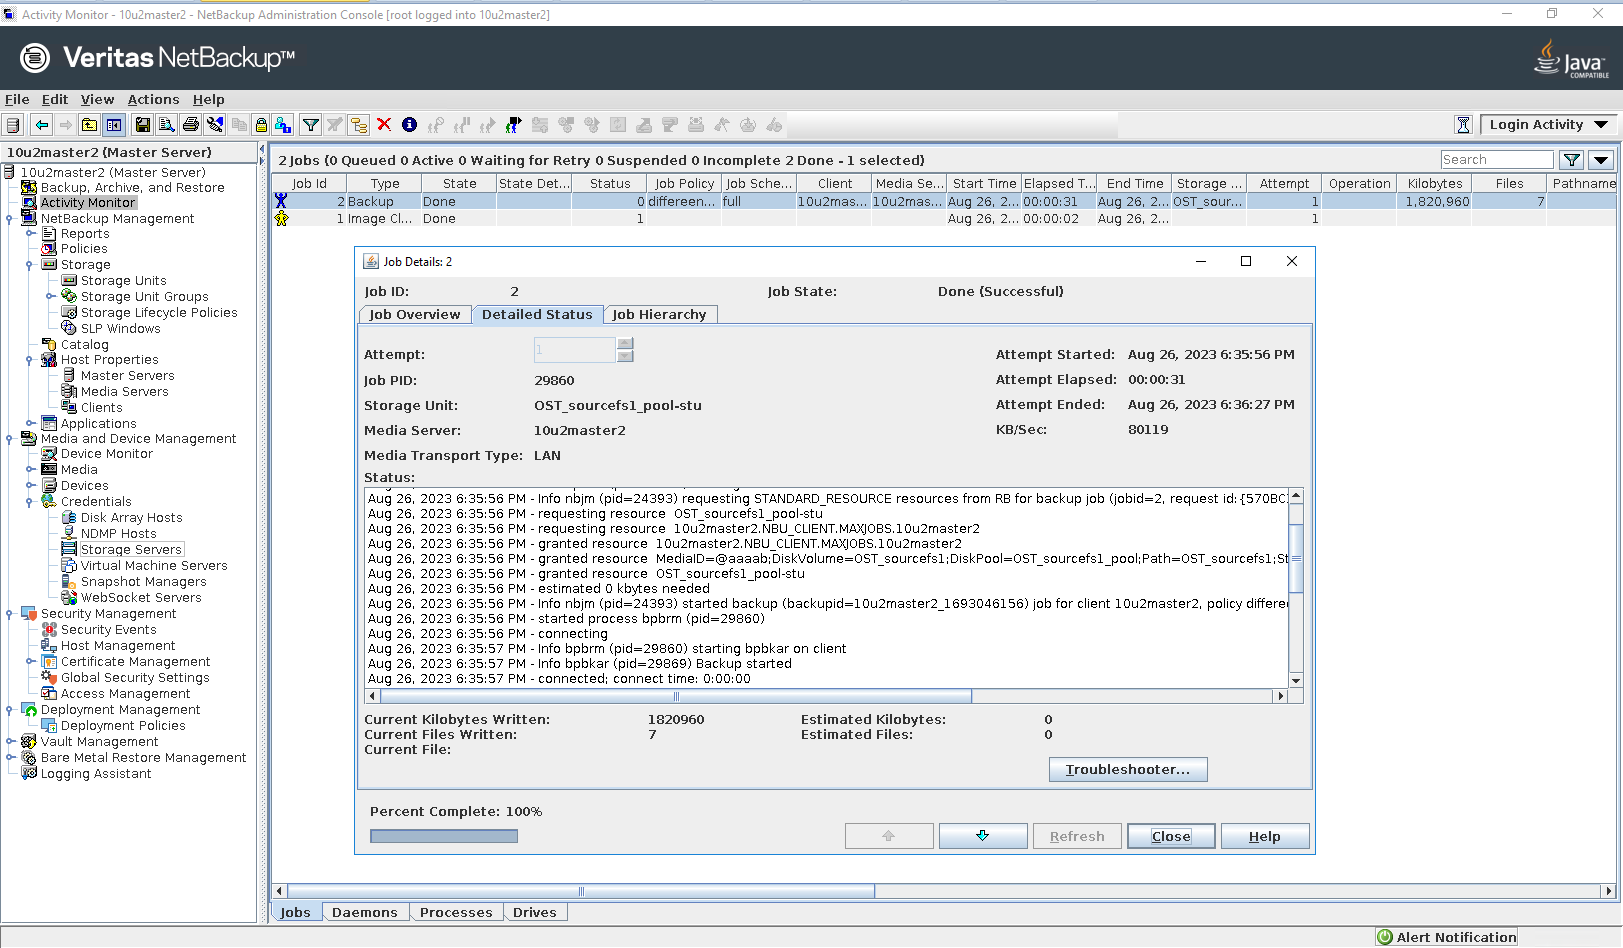

Step 3 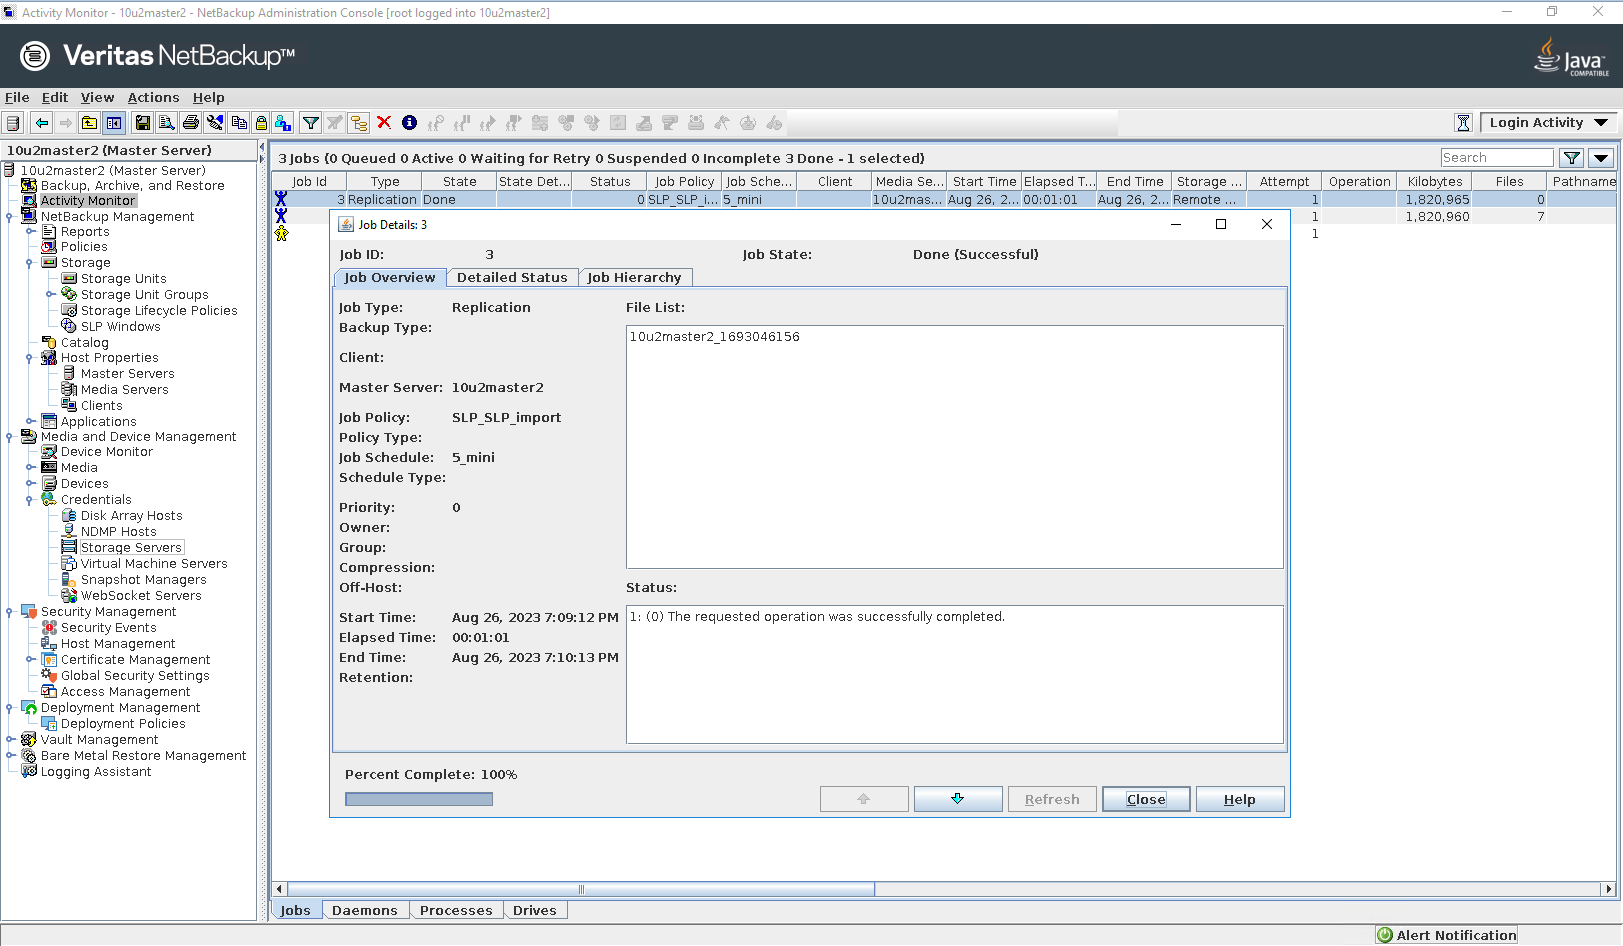

Step 4 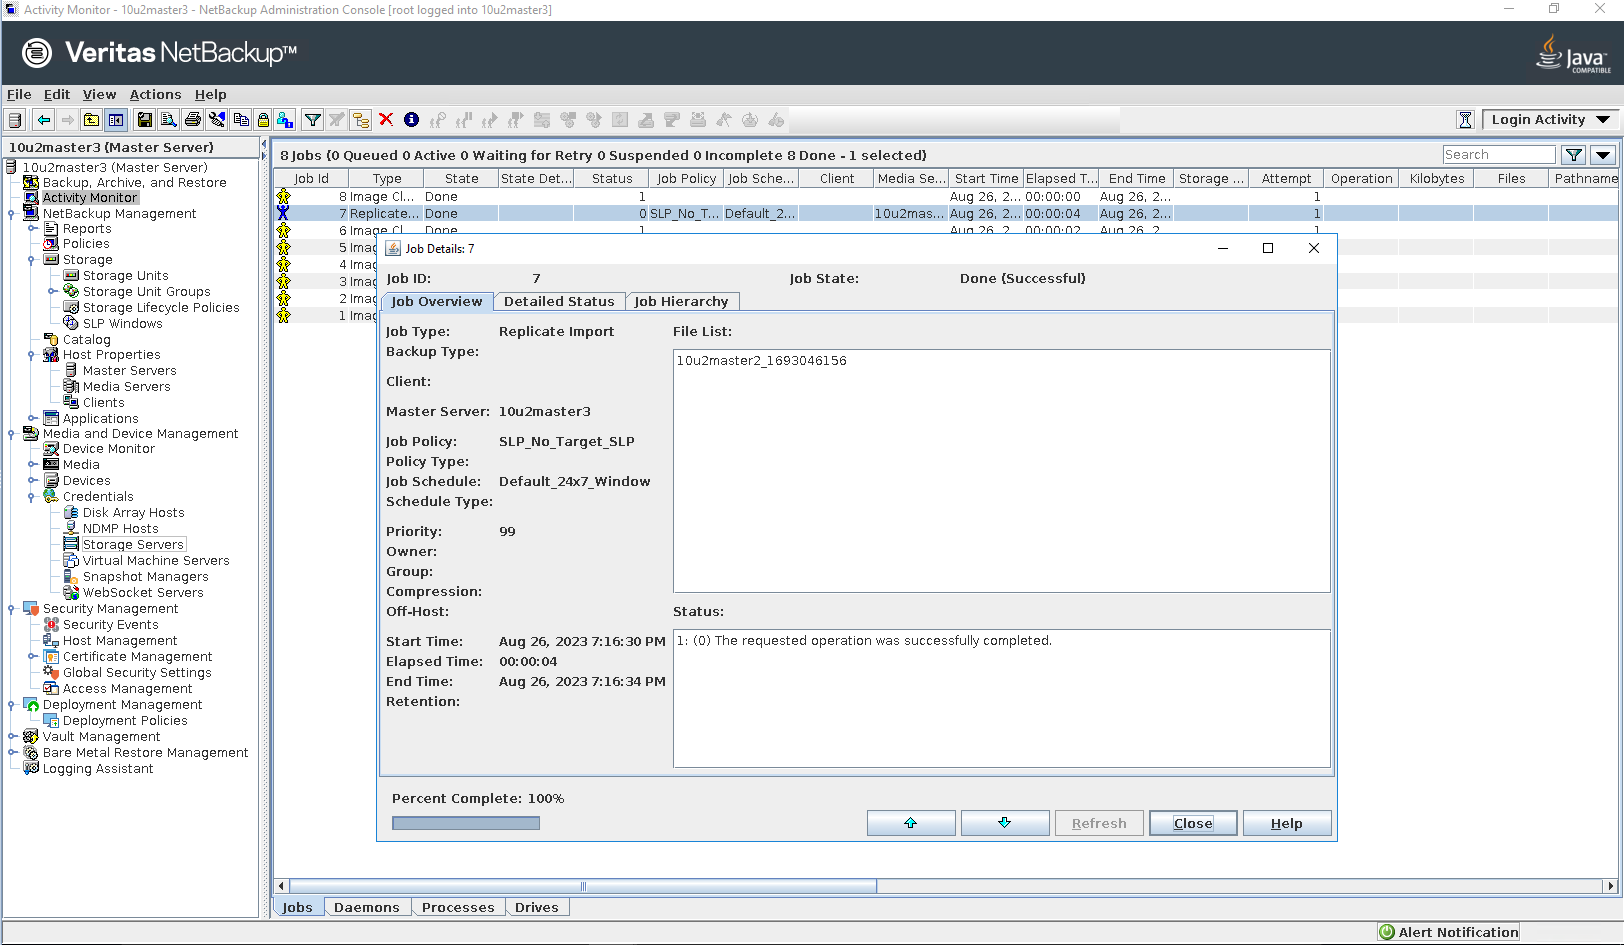
Step 5 Click Backup, Archive and Restore button 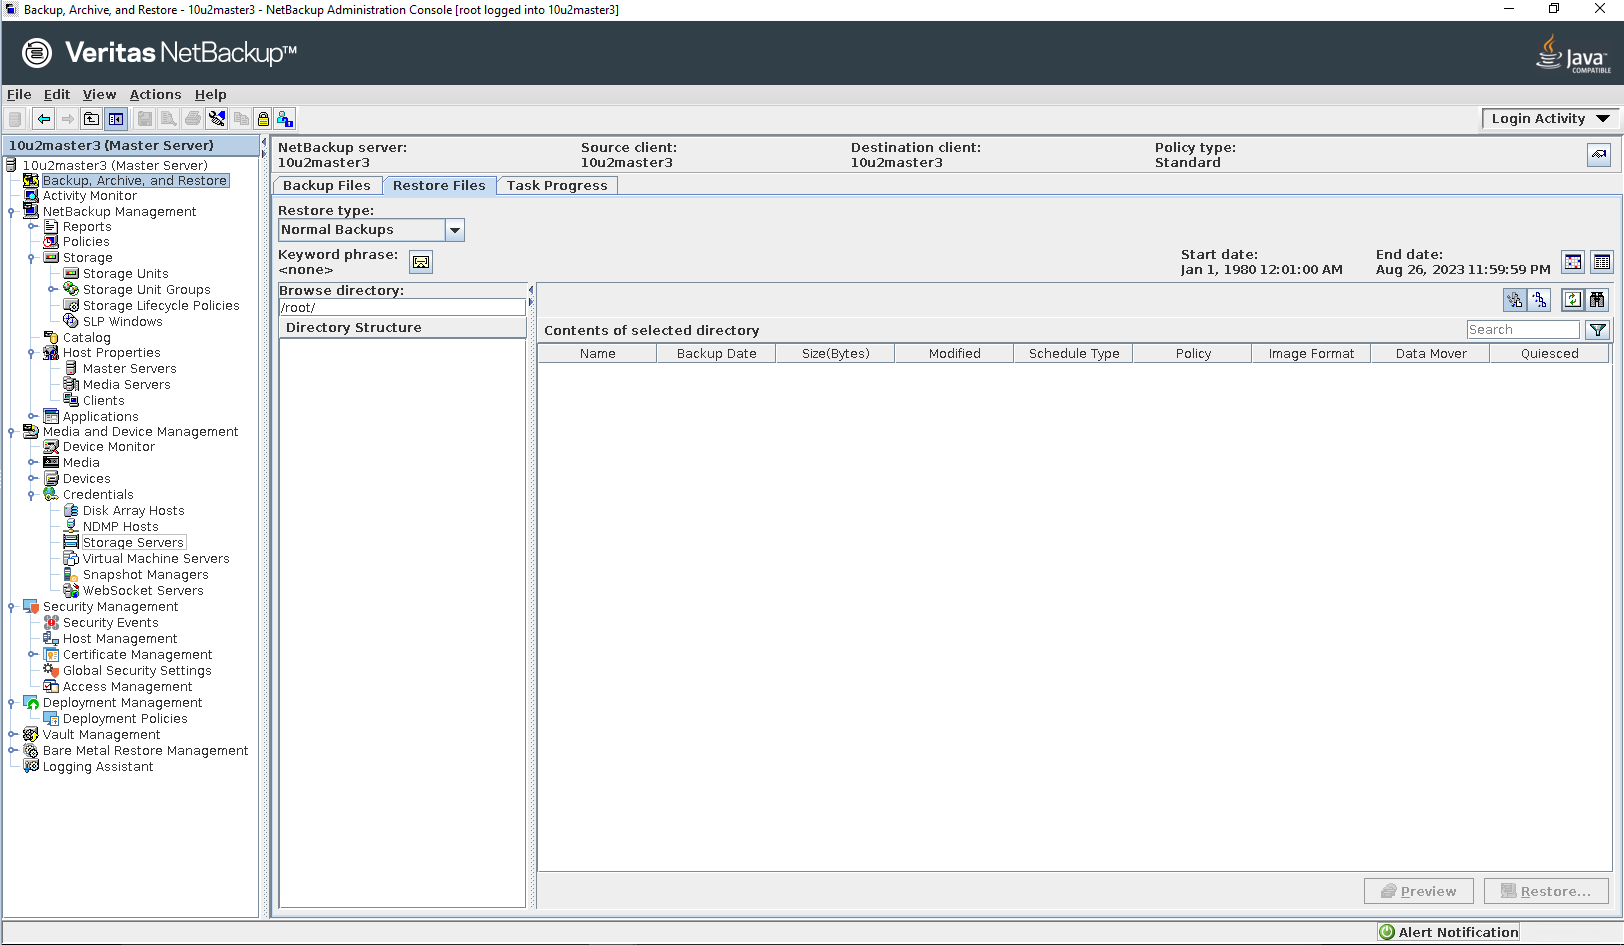
Select the source client and destination client 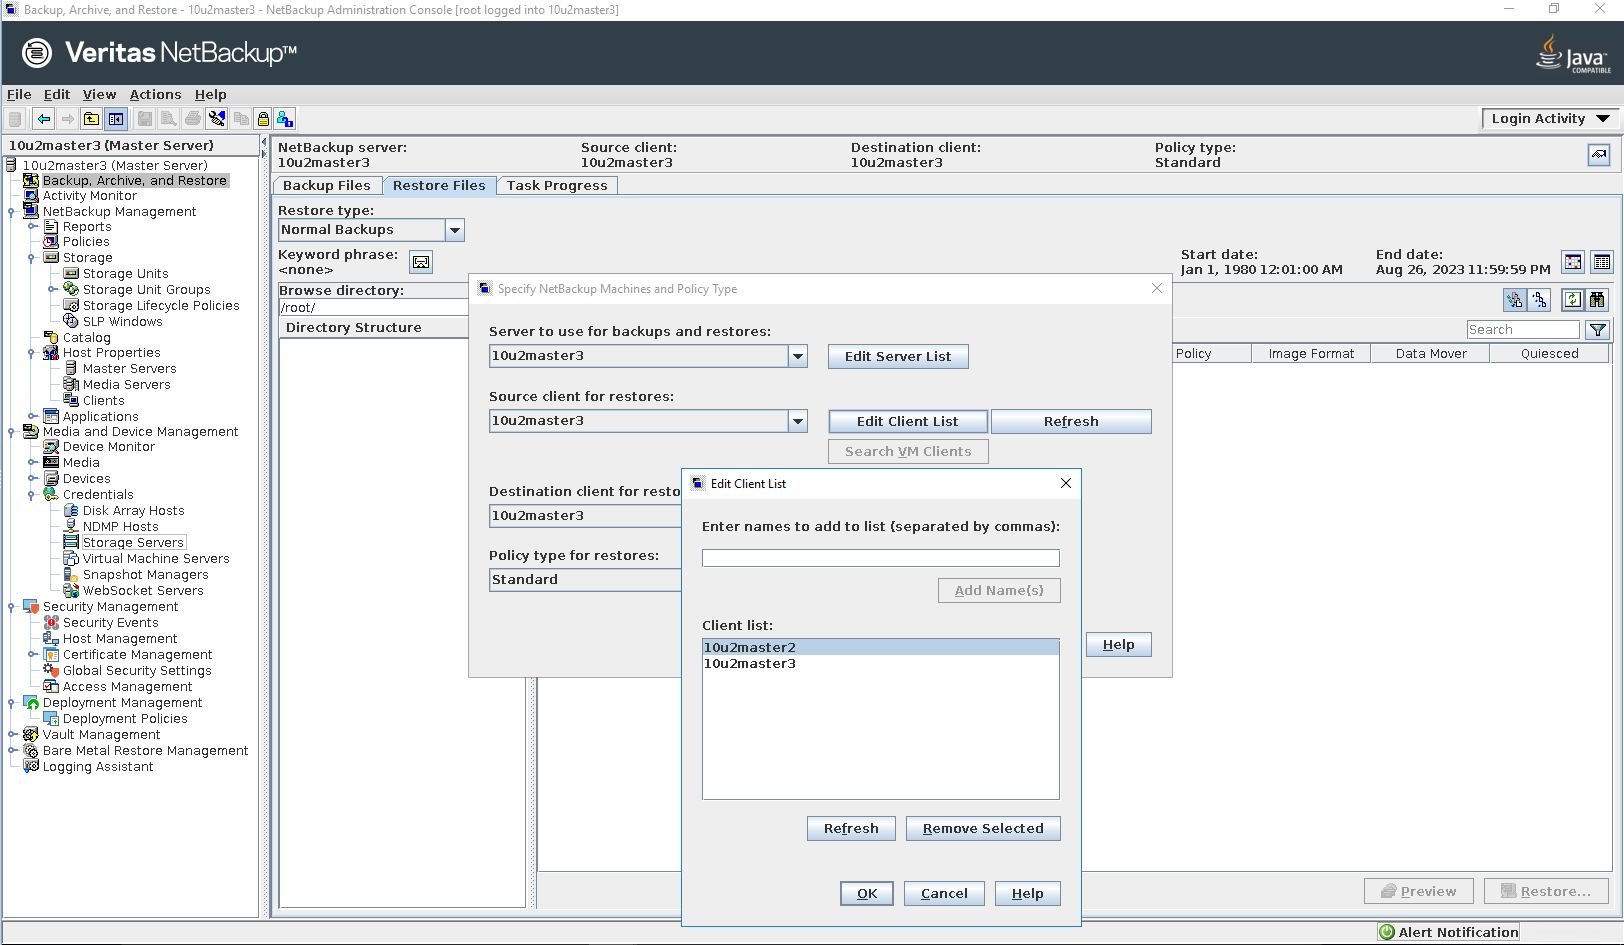
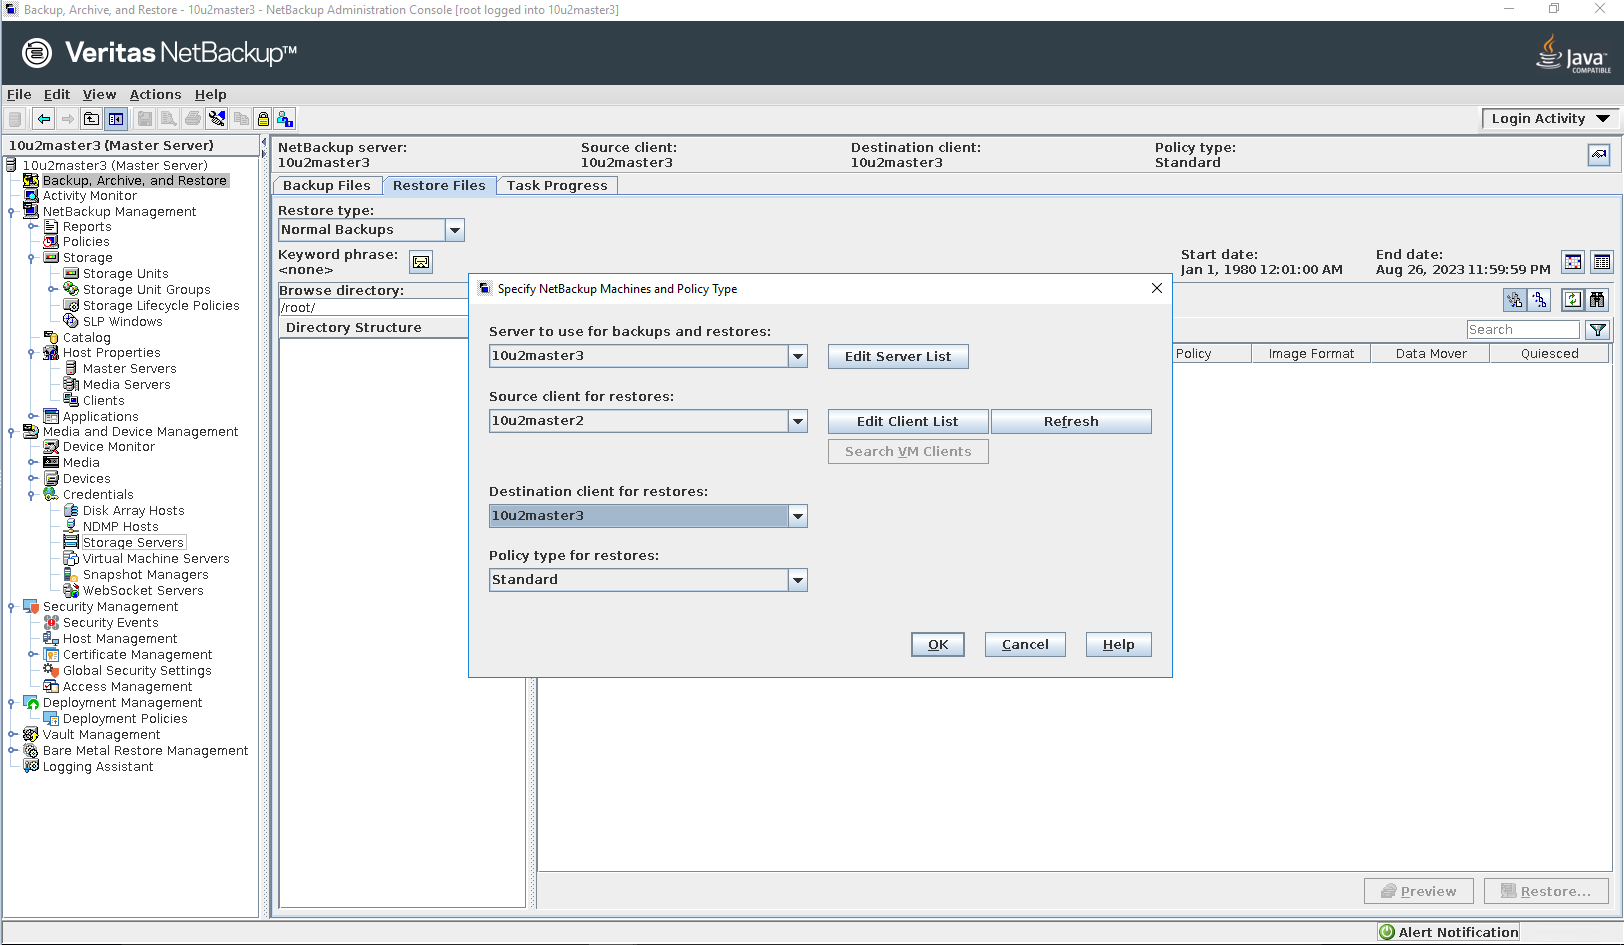
Select the files or folders to be restored 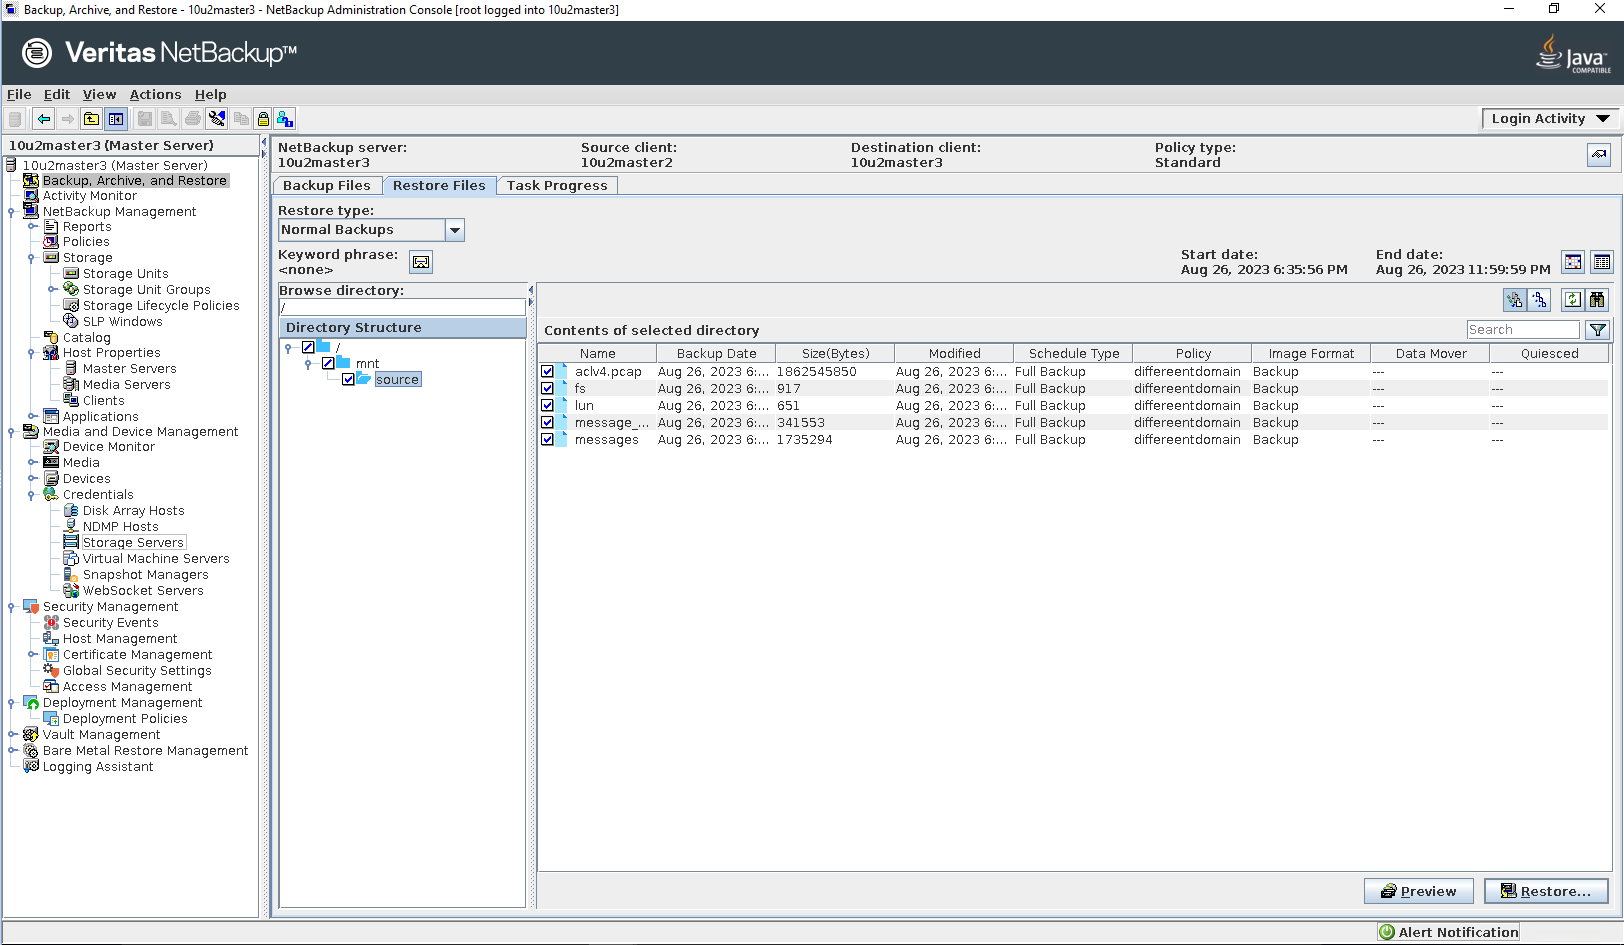
Select the destination 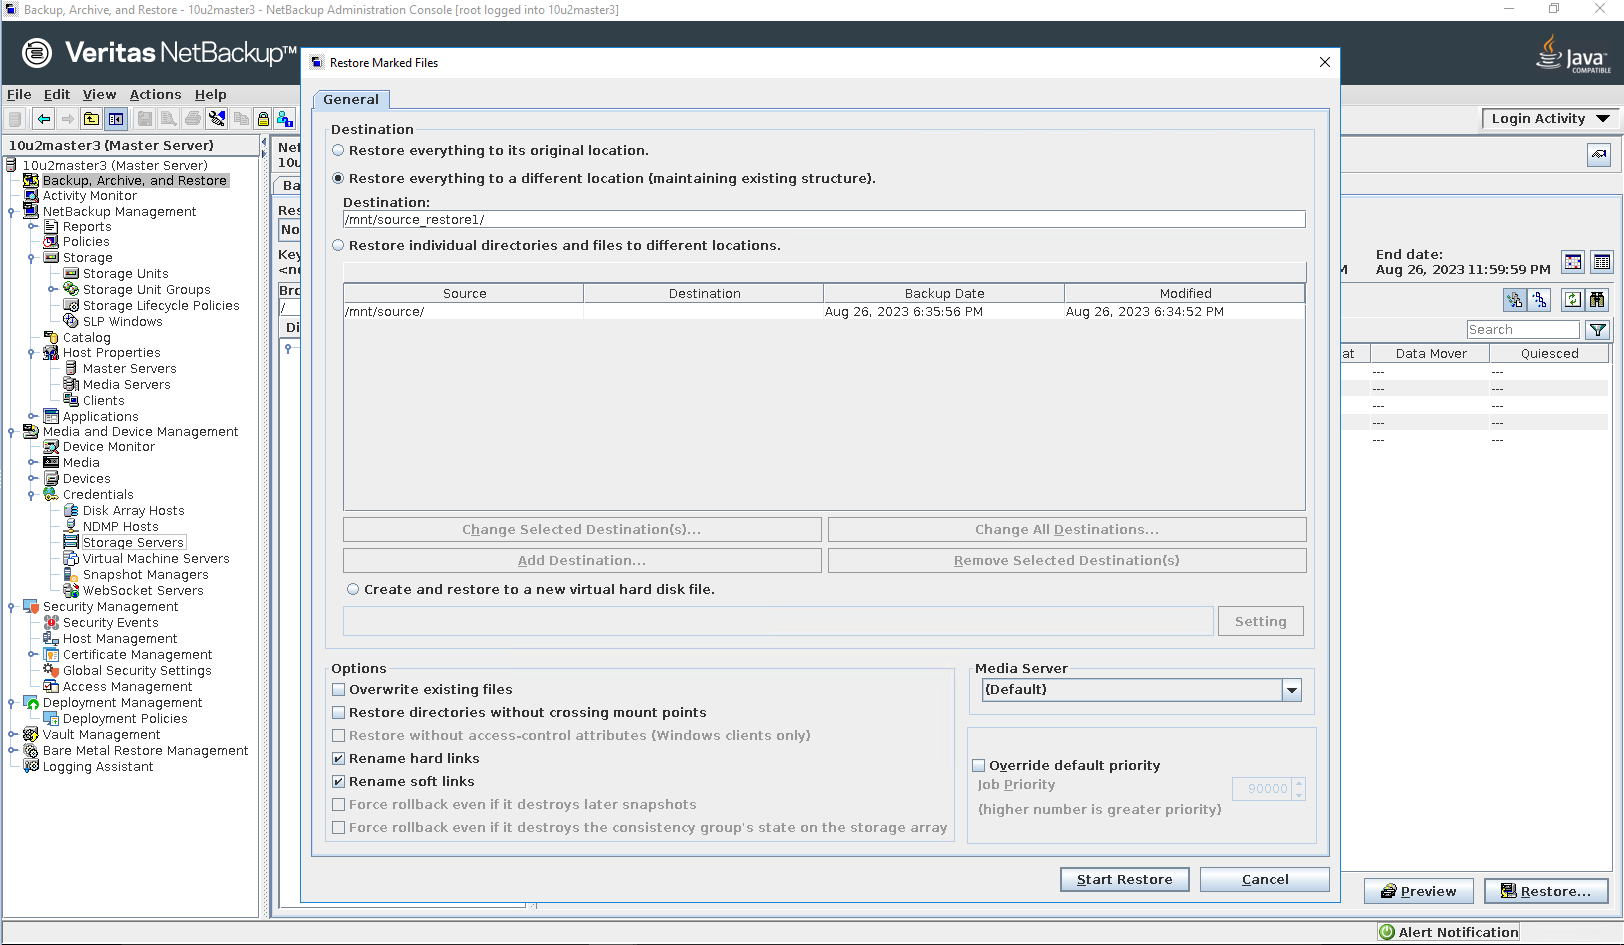
Start restore 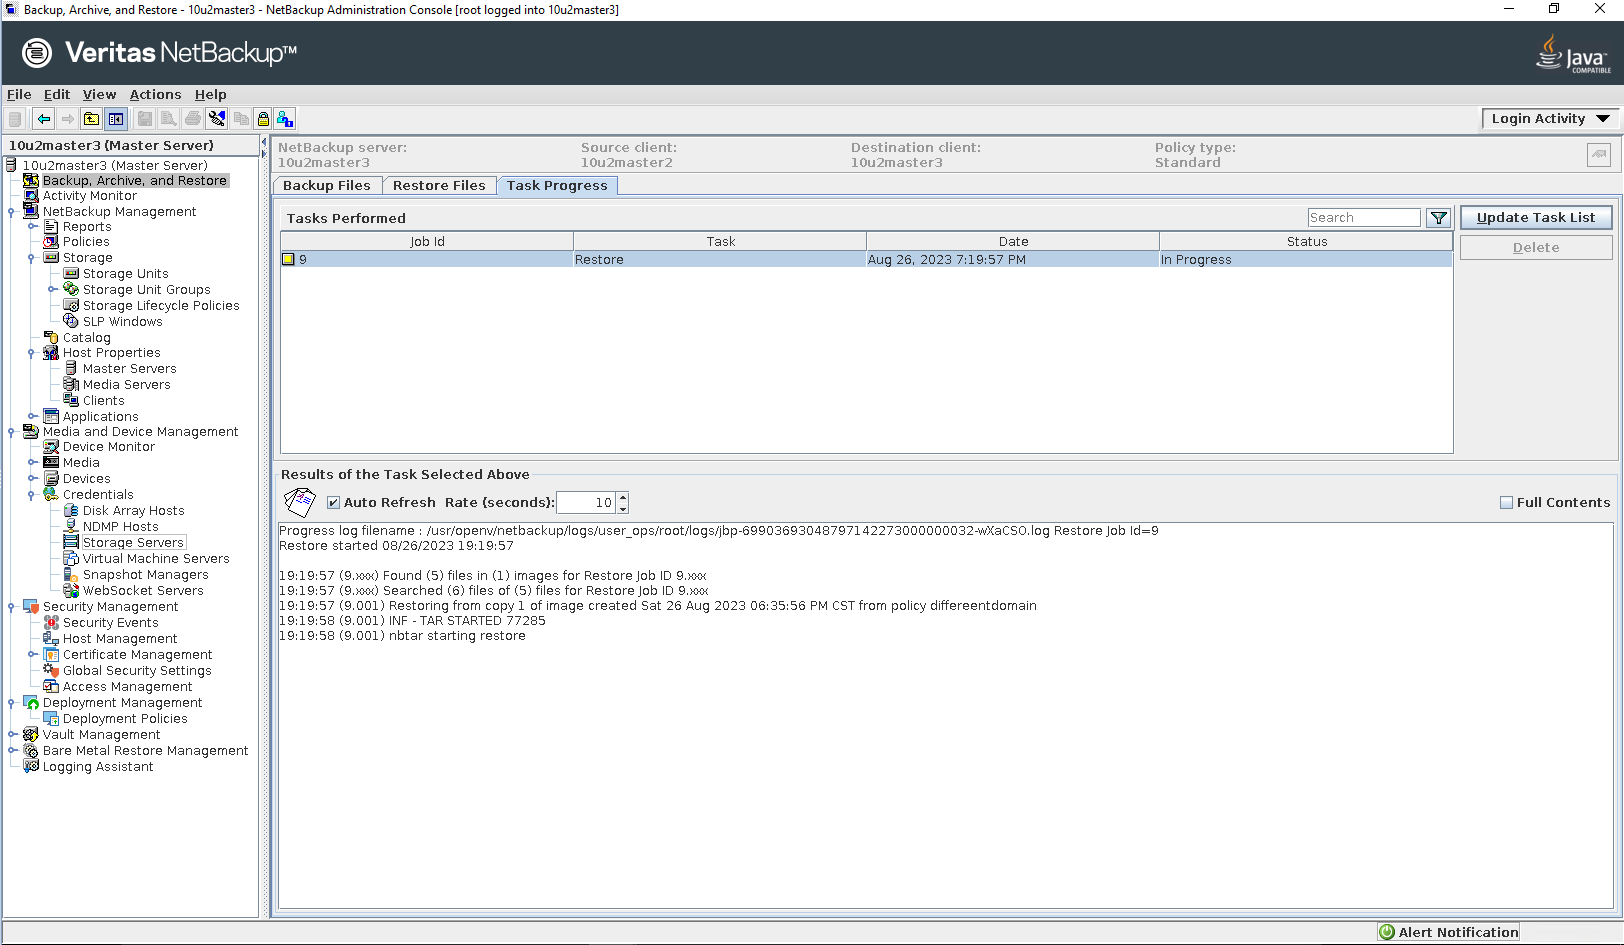
Step 6 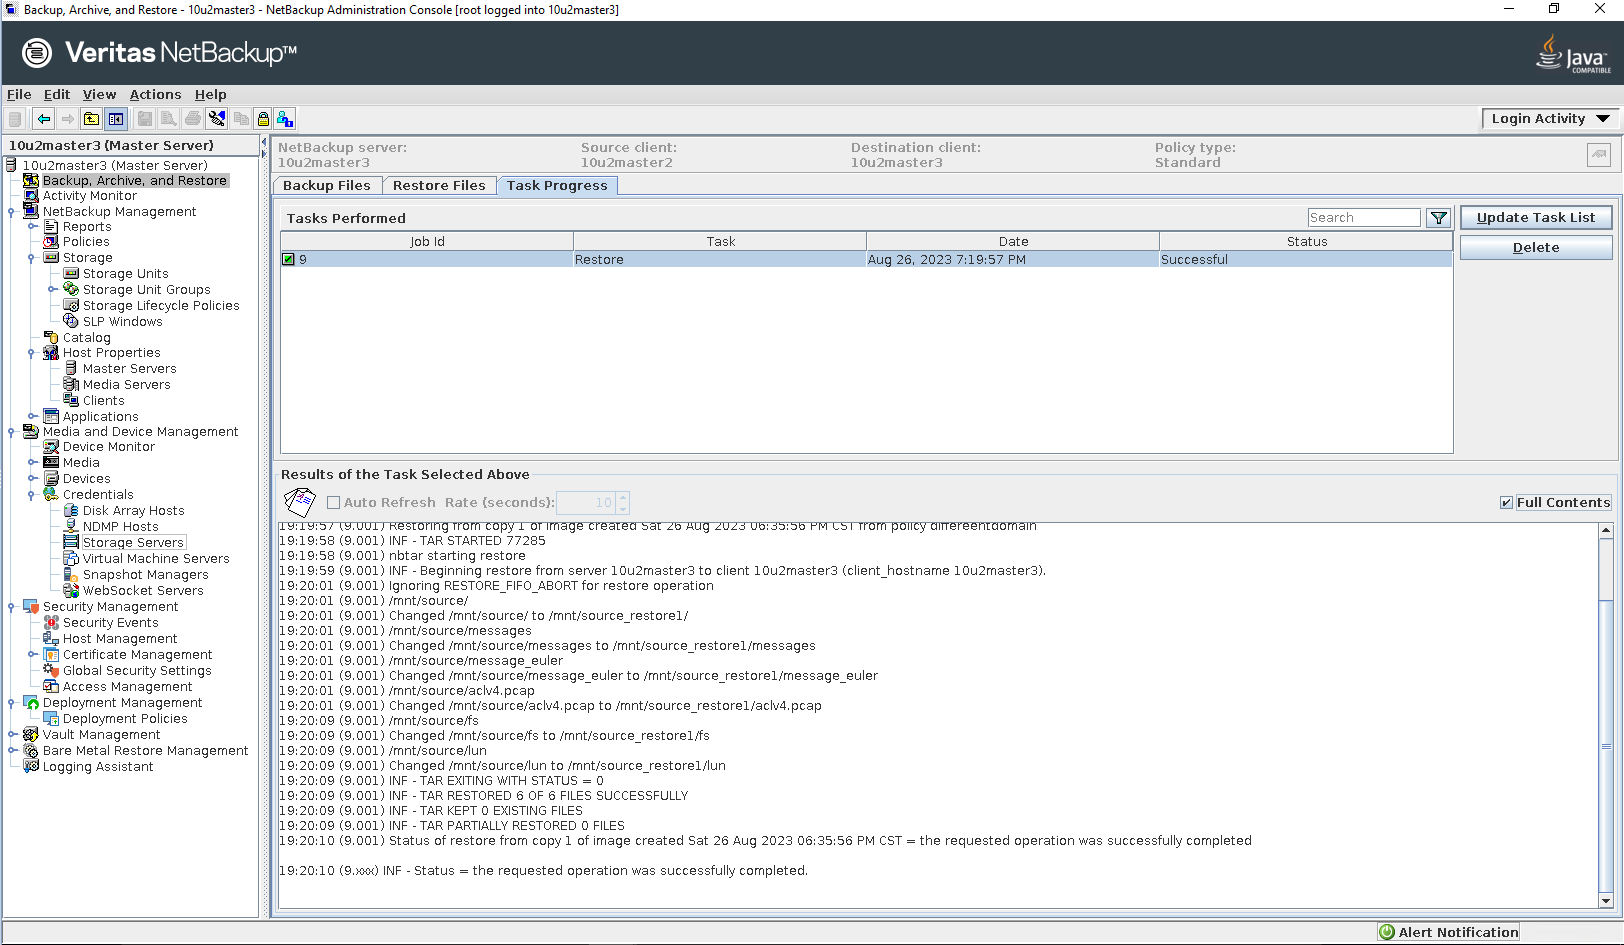
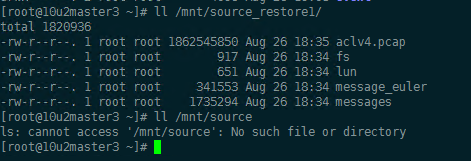

|
3.6 Replication failed in the Different Master Domains
Test Purpose | Replication failed in the different Master Domains, temporary data has been cleared automatically then perform secondary replication. |
Test Networking | Huawei OceanProtect Backup Storage Function Compatibility Test Networking 2 |
Prerequisites |
|
Test Procedure |
Once the restore job finished, check the status of the job and data consistence. |
Expected Result | Step 2 Backup finish successfully. Step 4 Replication job failed. Step 5 Replication job finish successfully. Step 6 Replication import job finish successfully. Step 7 Restore job finish successfully and restored files are the same as original files. |
Test Result | Passed Step 1 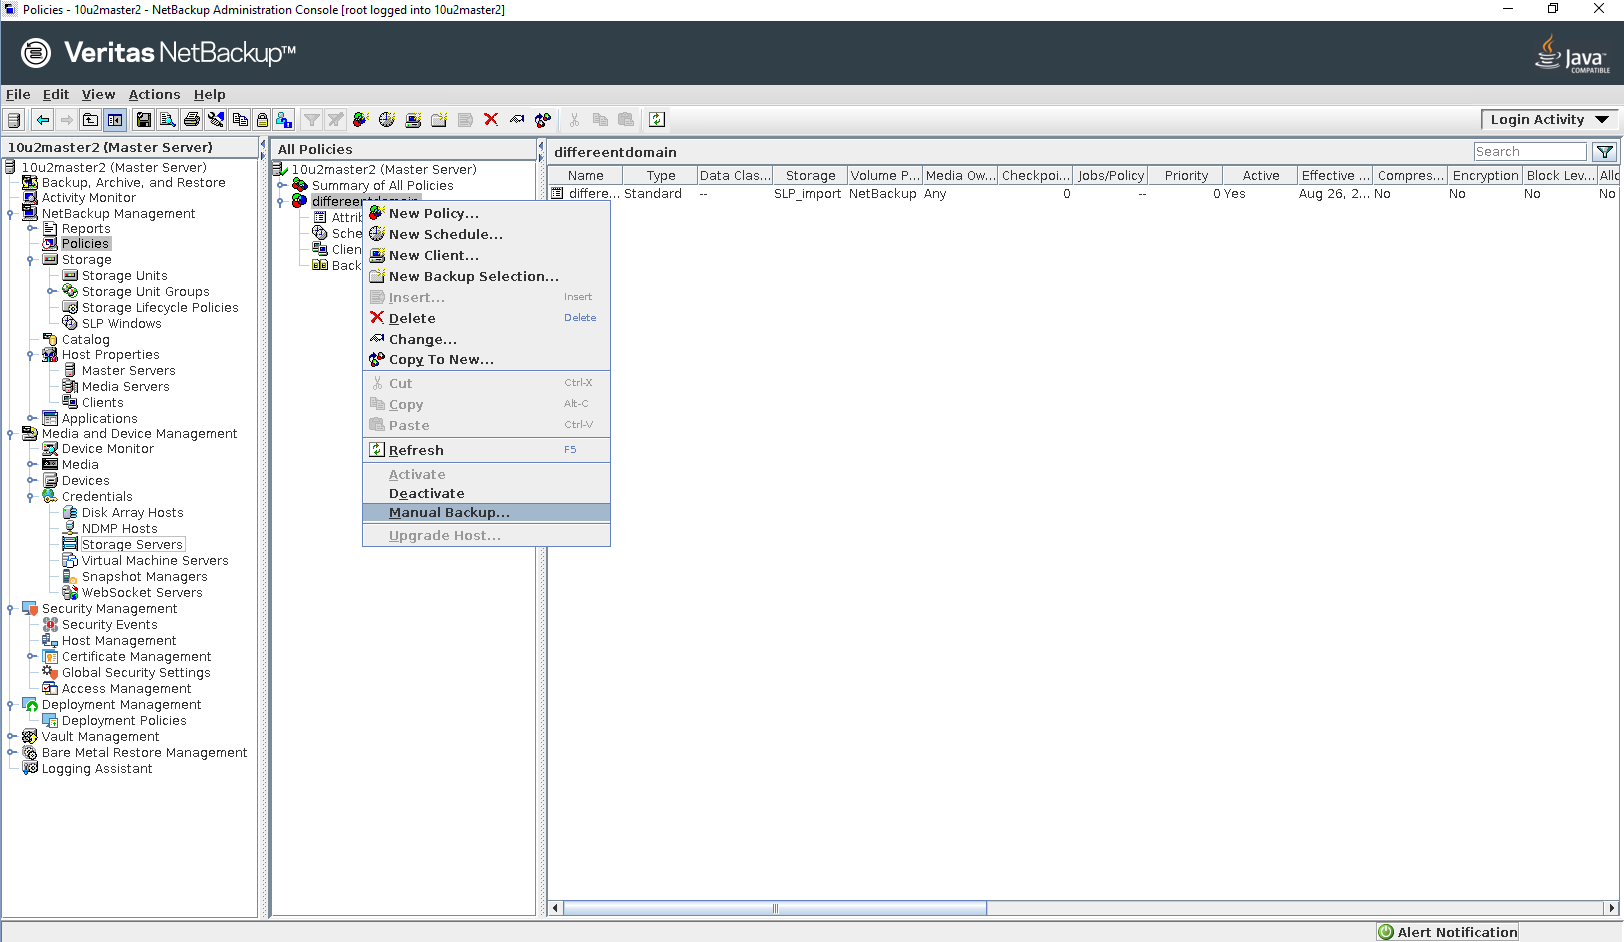
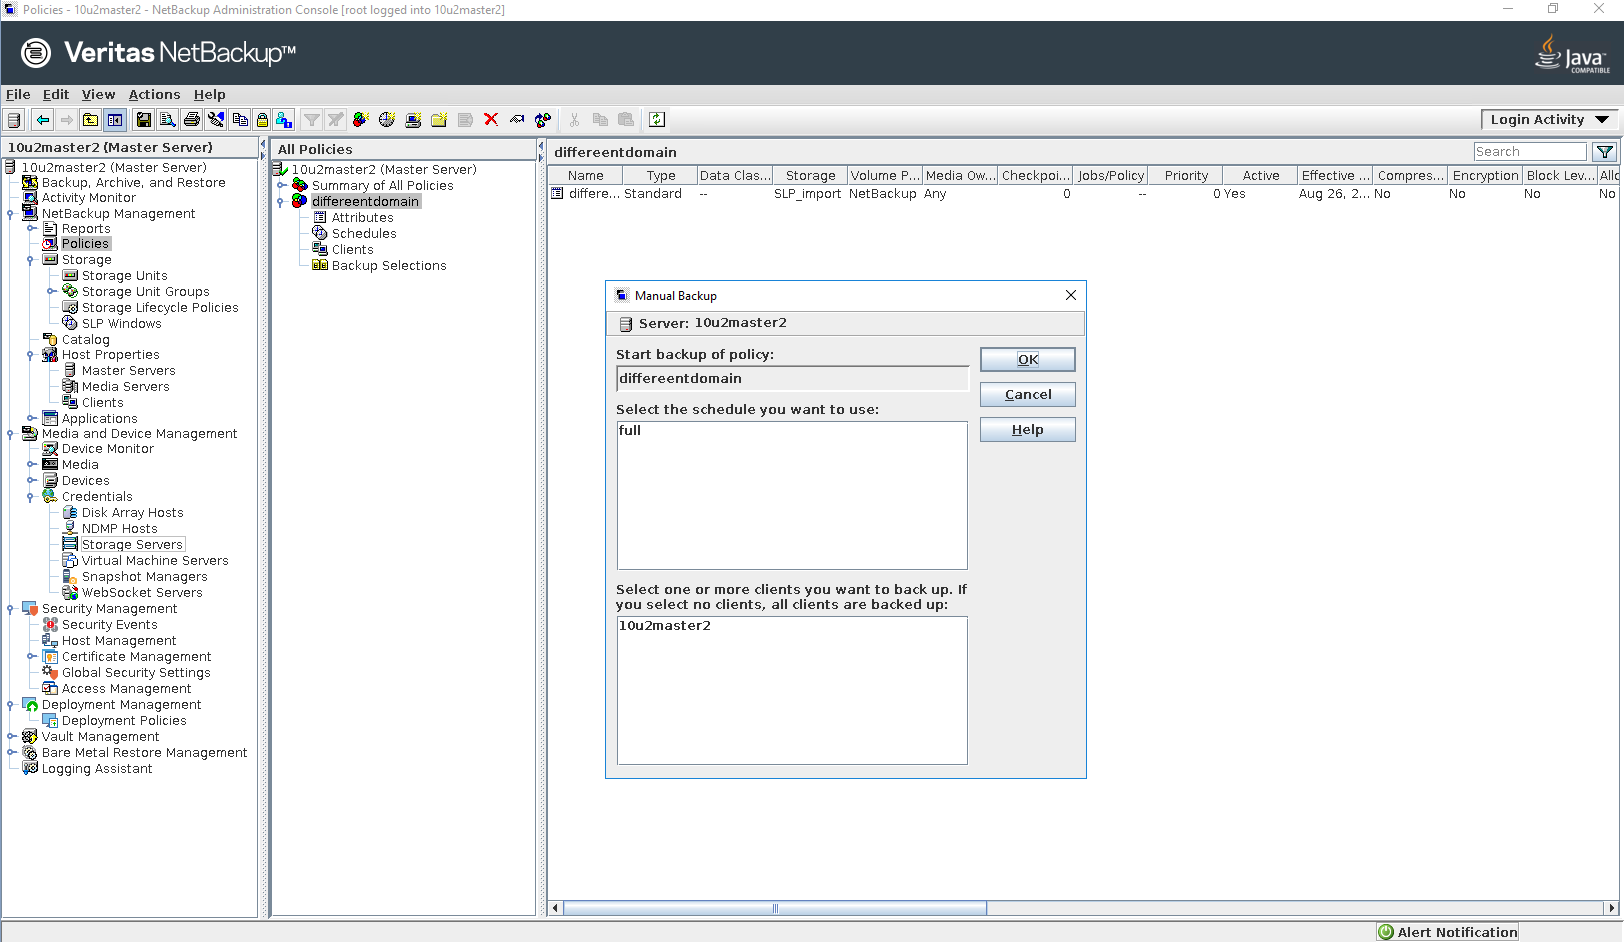
Step 2 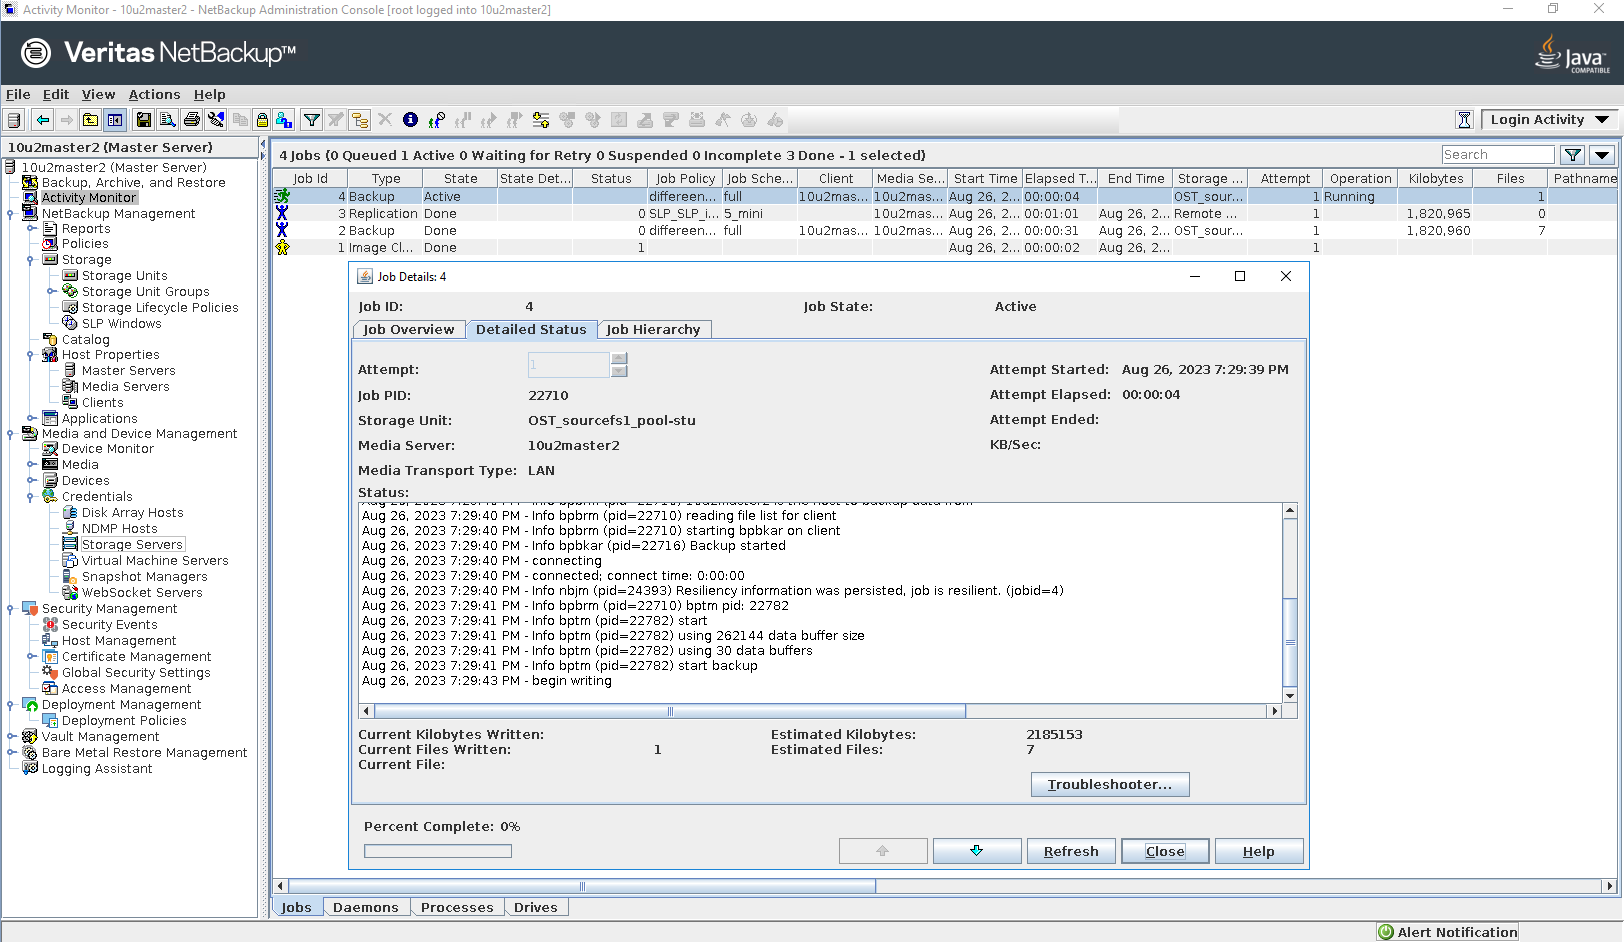
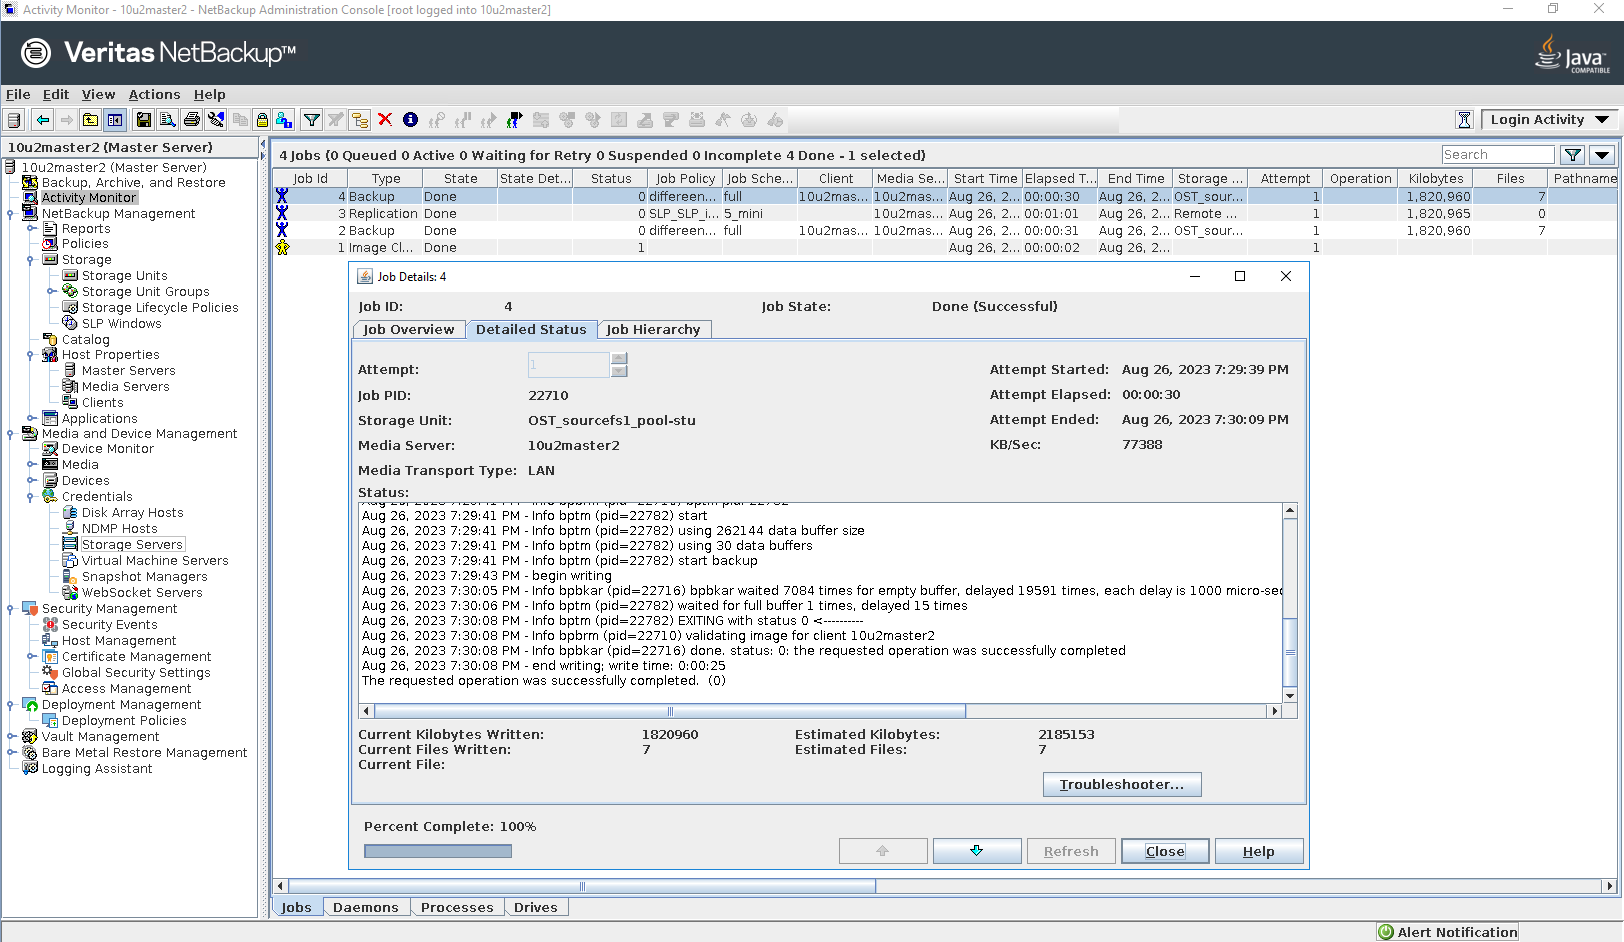

Step 3 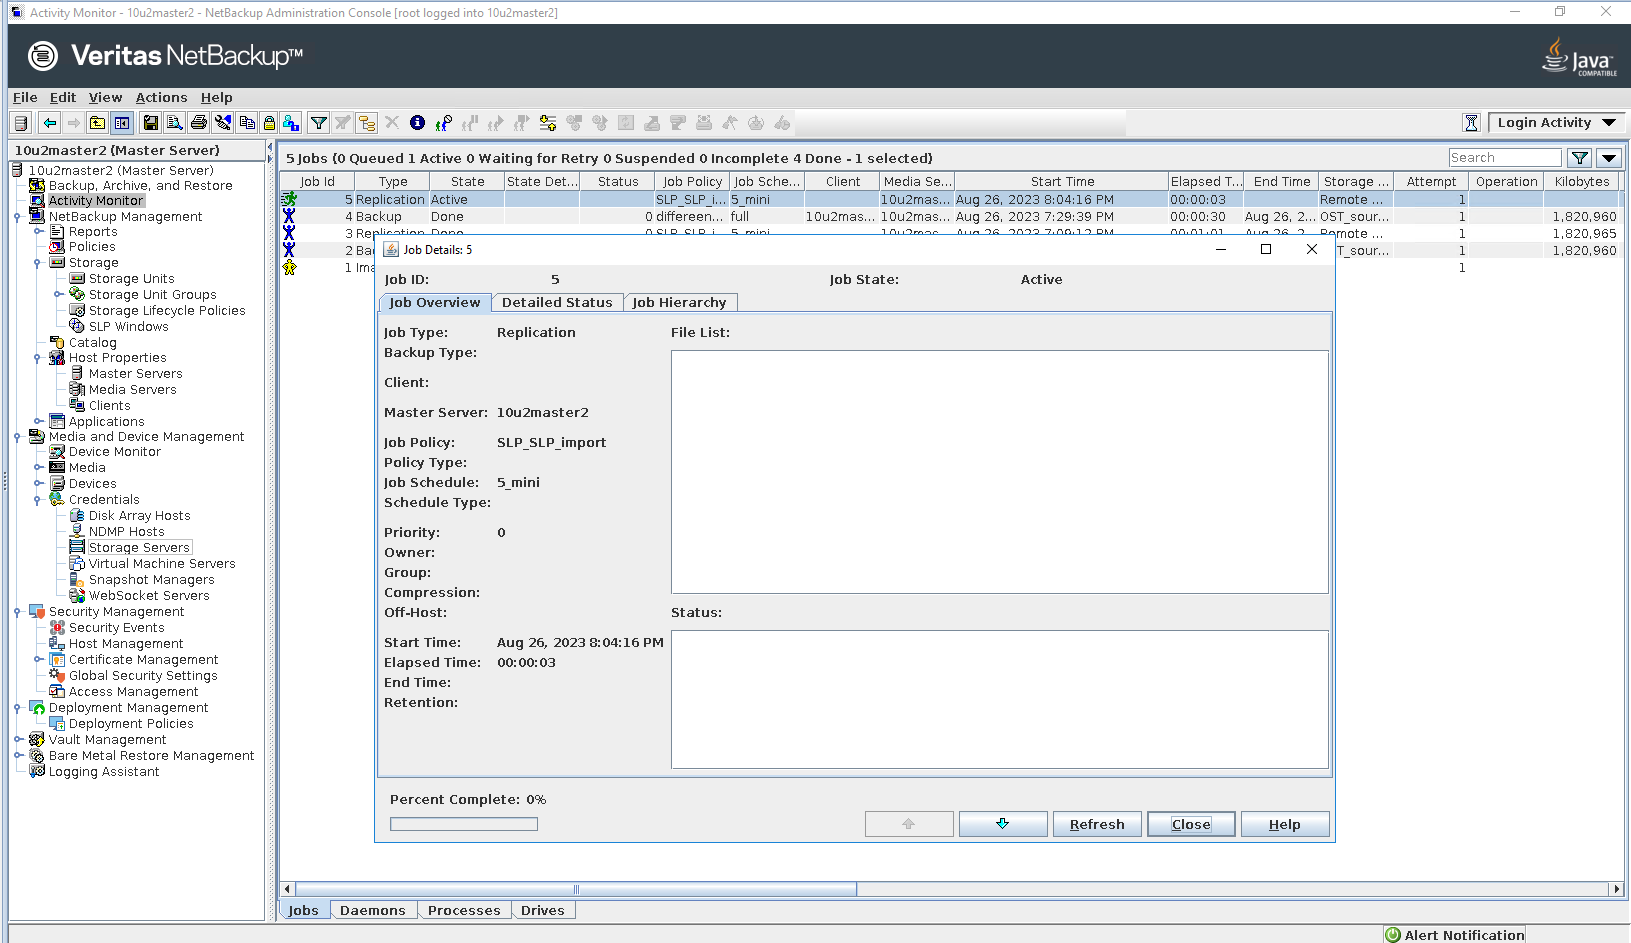
Step 4 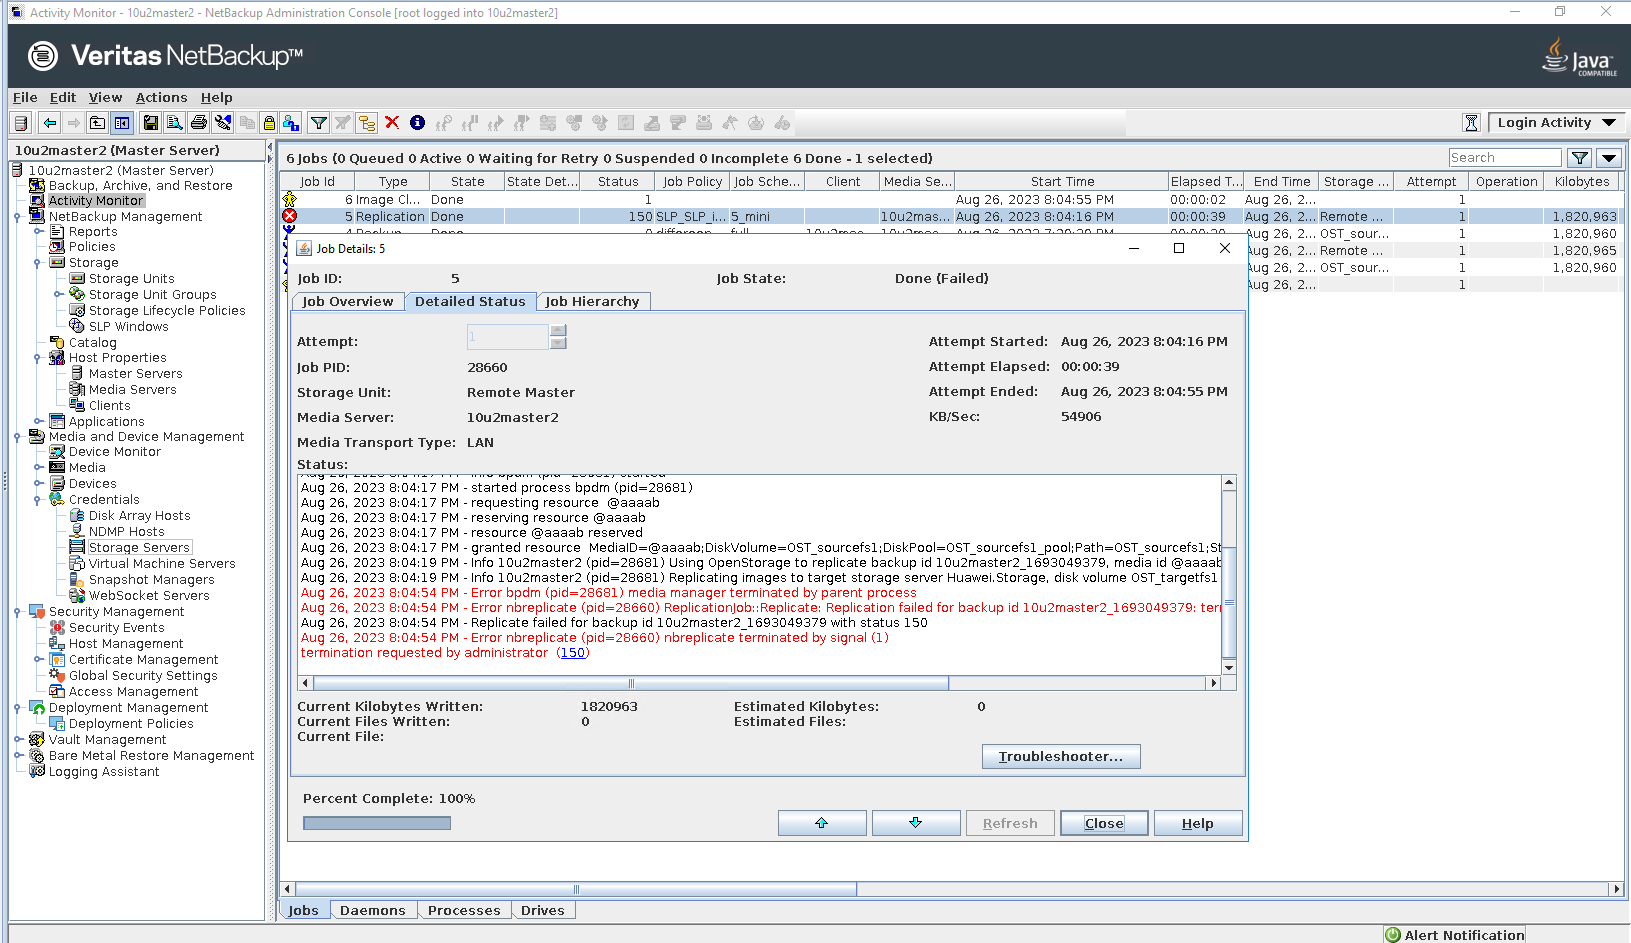

Step 5 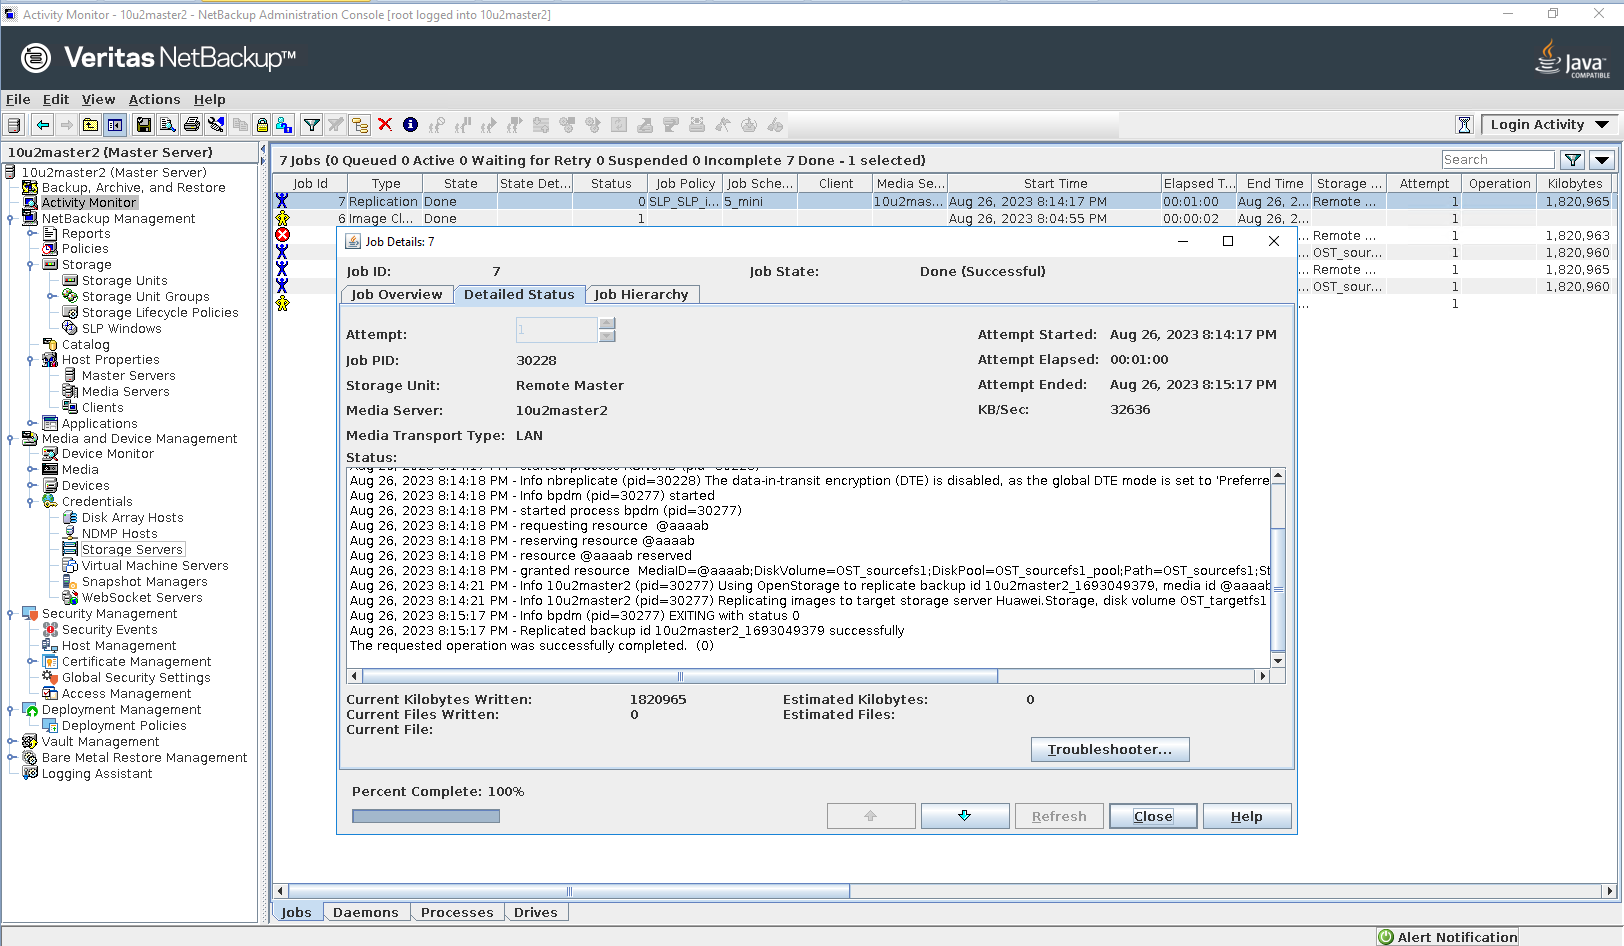
Step 6 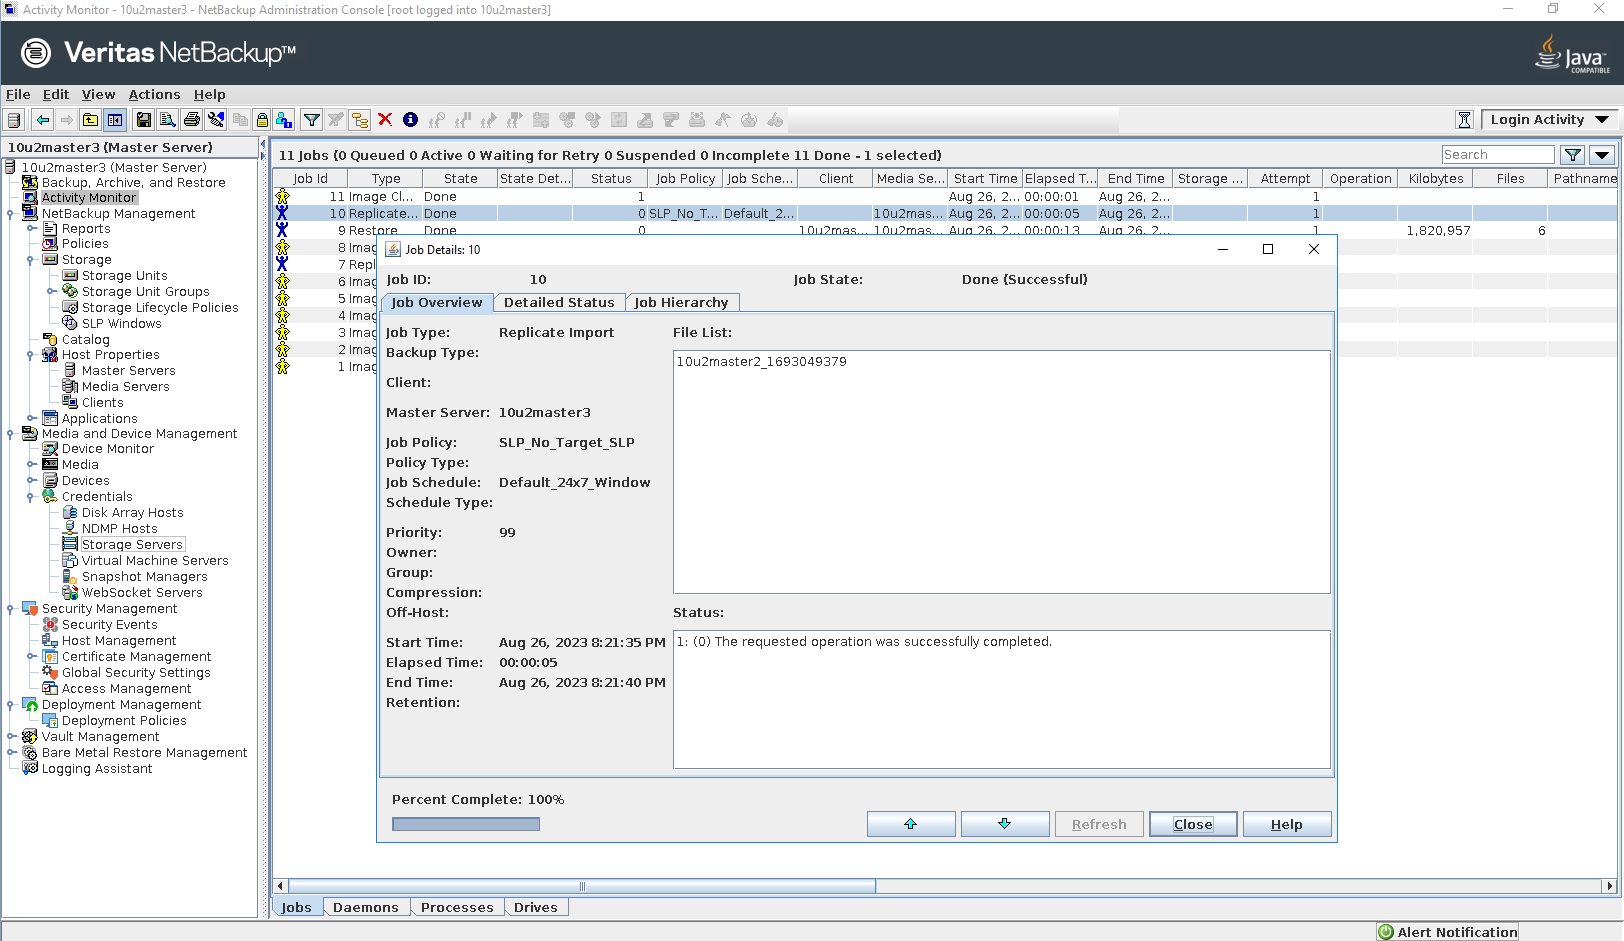

Step 7 Click Backup, Archive and Restore button 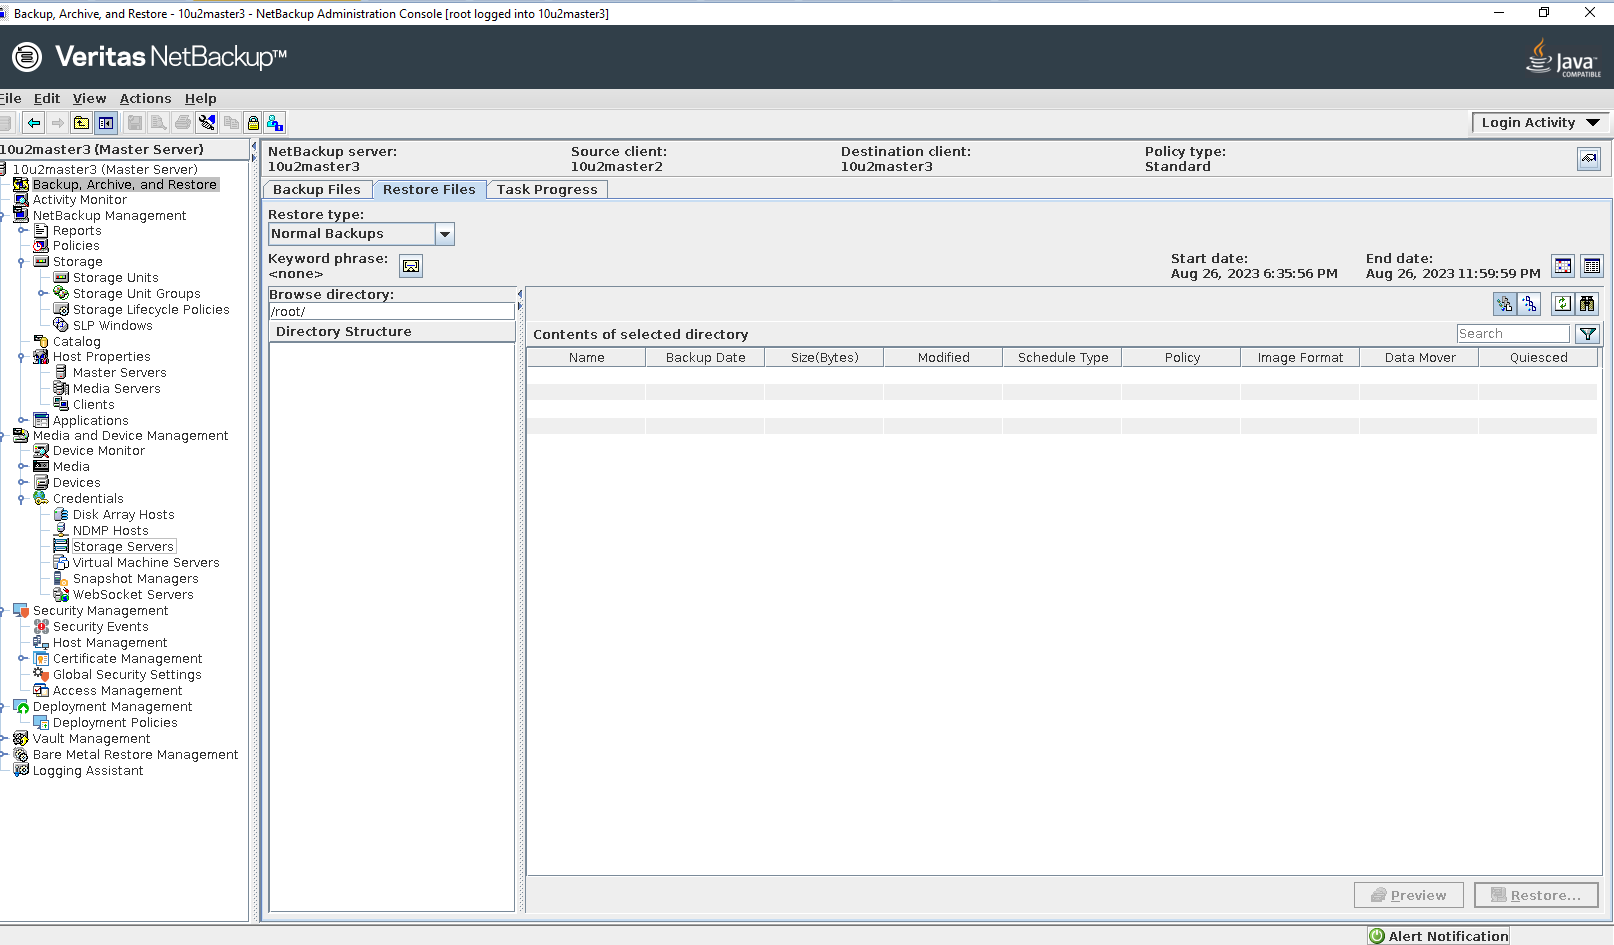
Select the source client and destination client 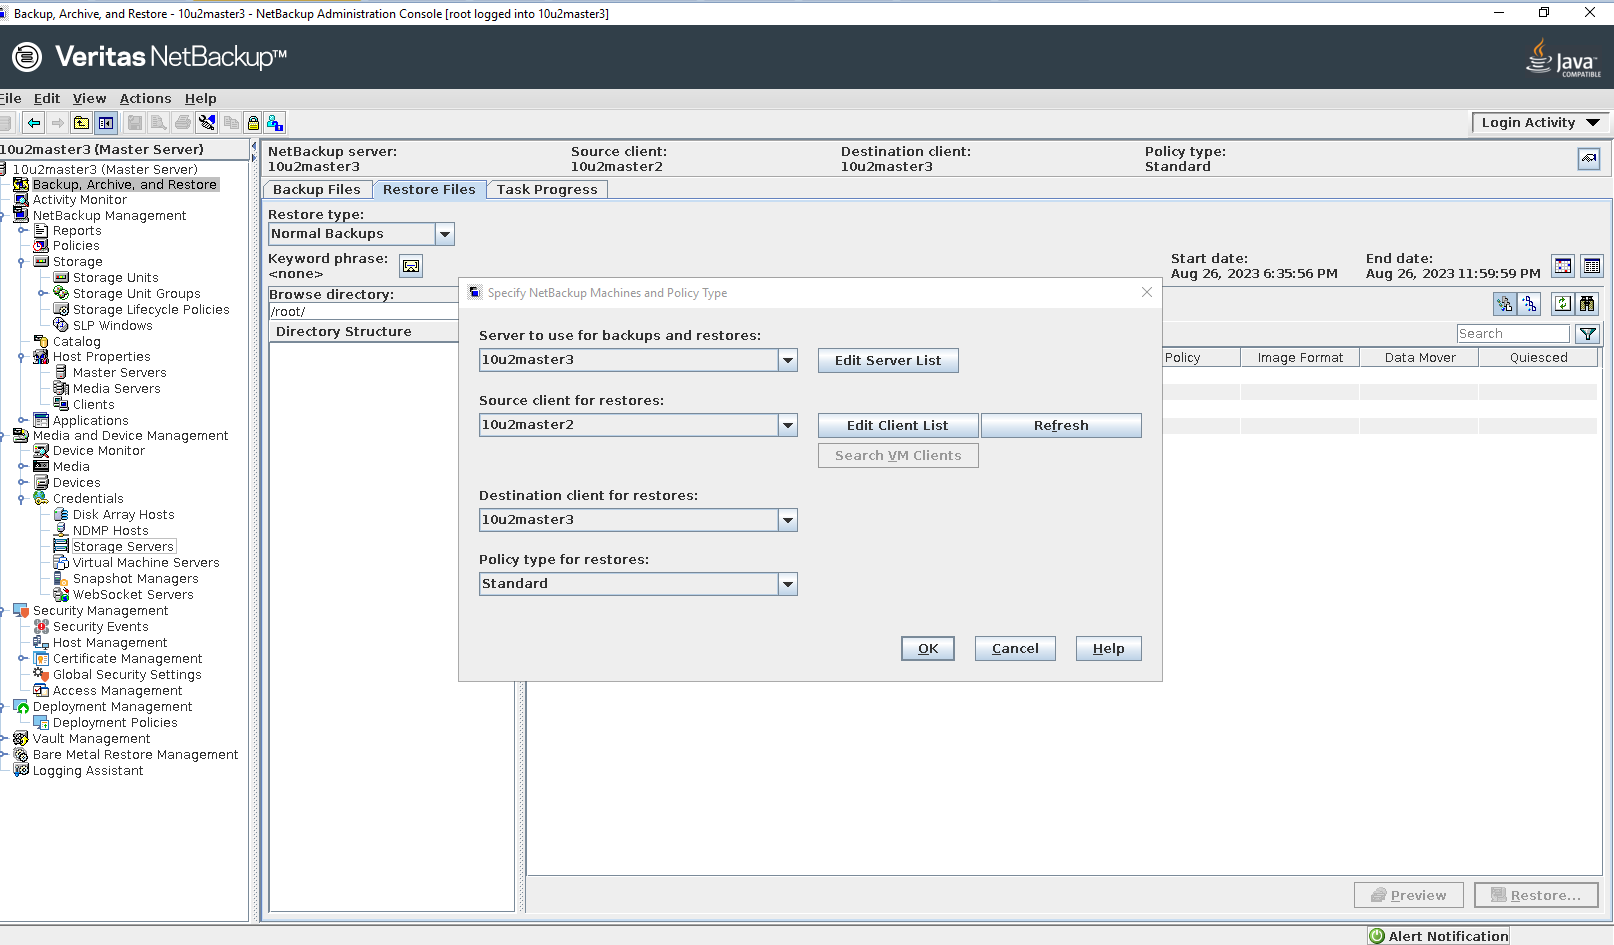
Select the files or folders to be restored 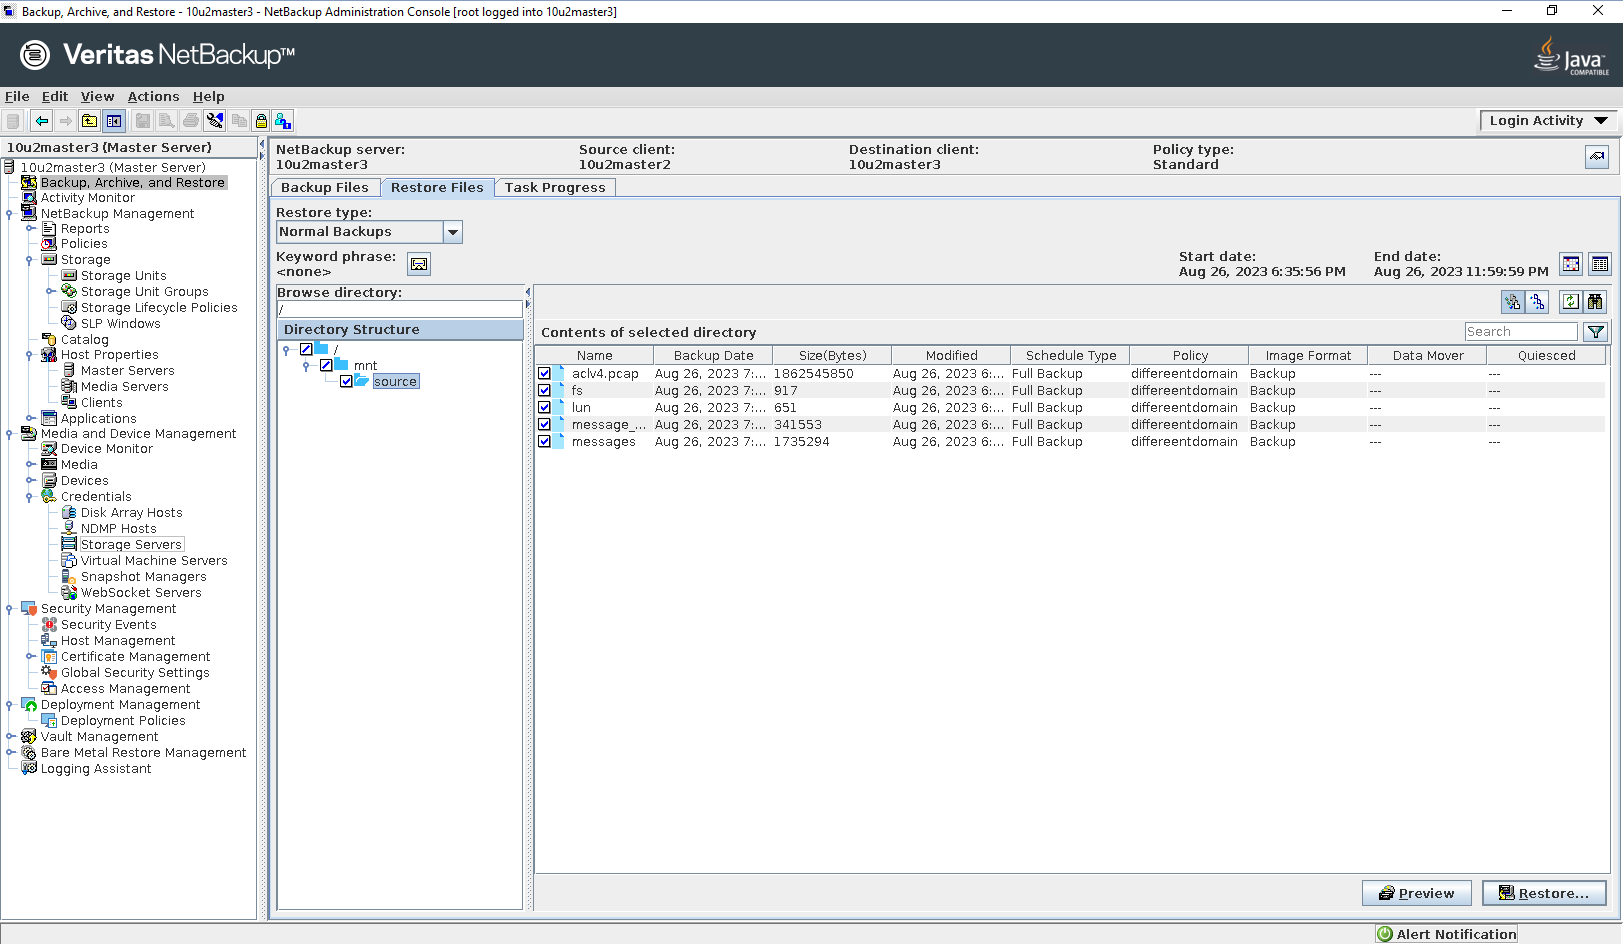
Select the destination 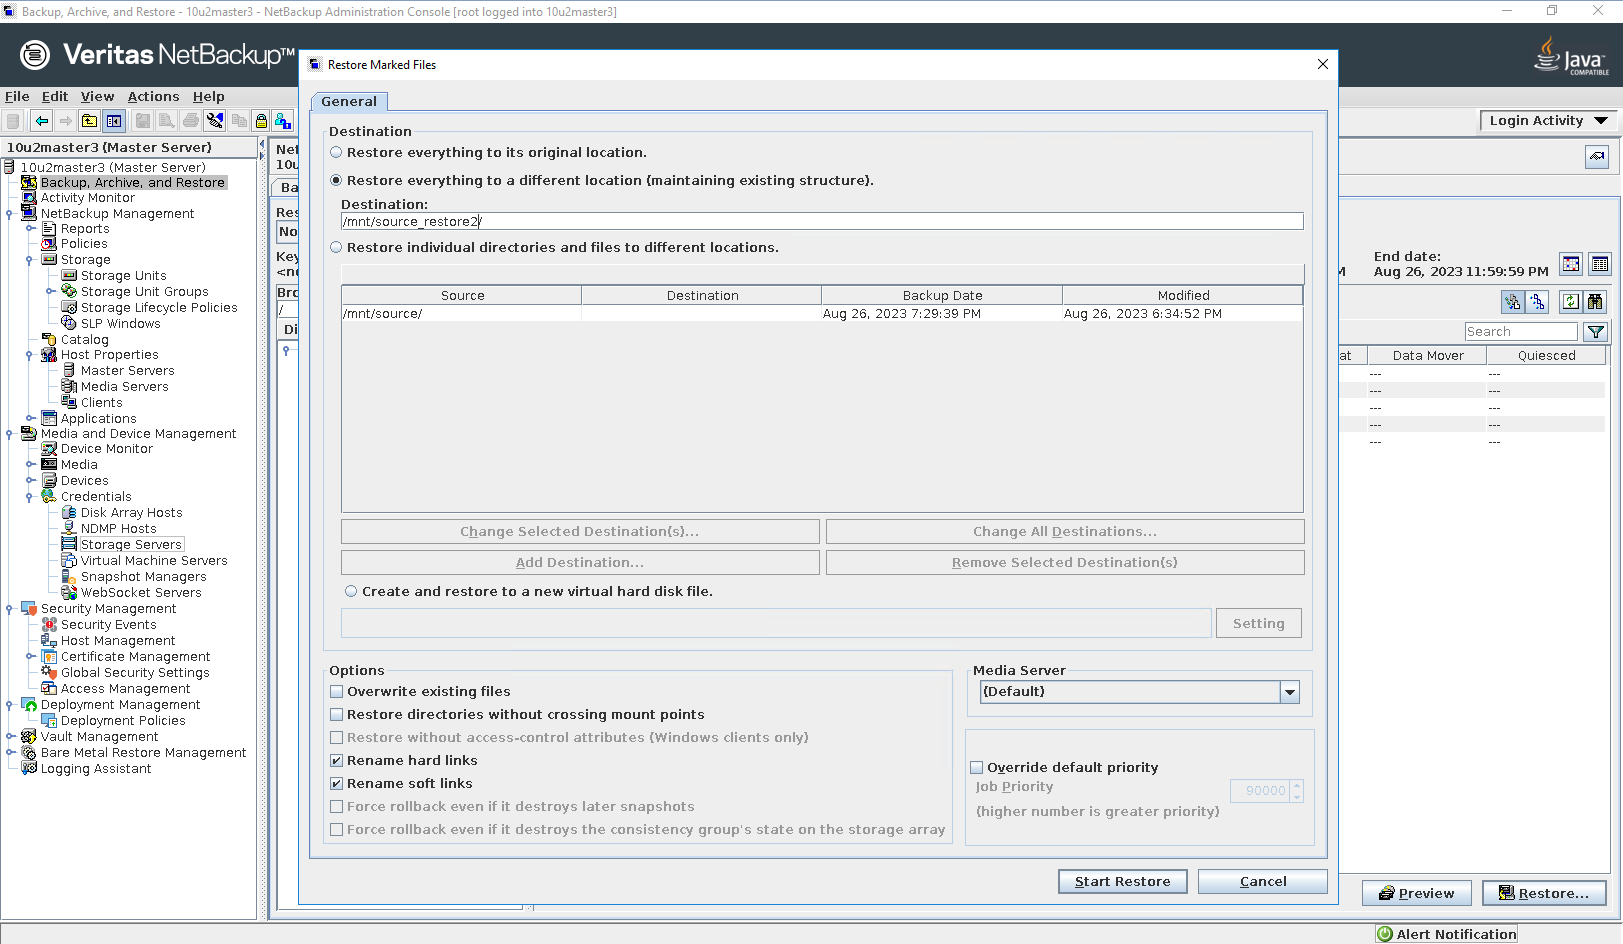
Start restore 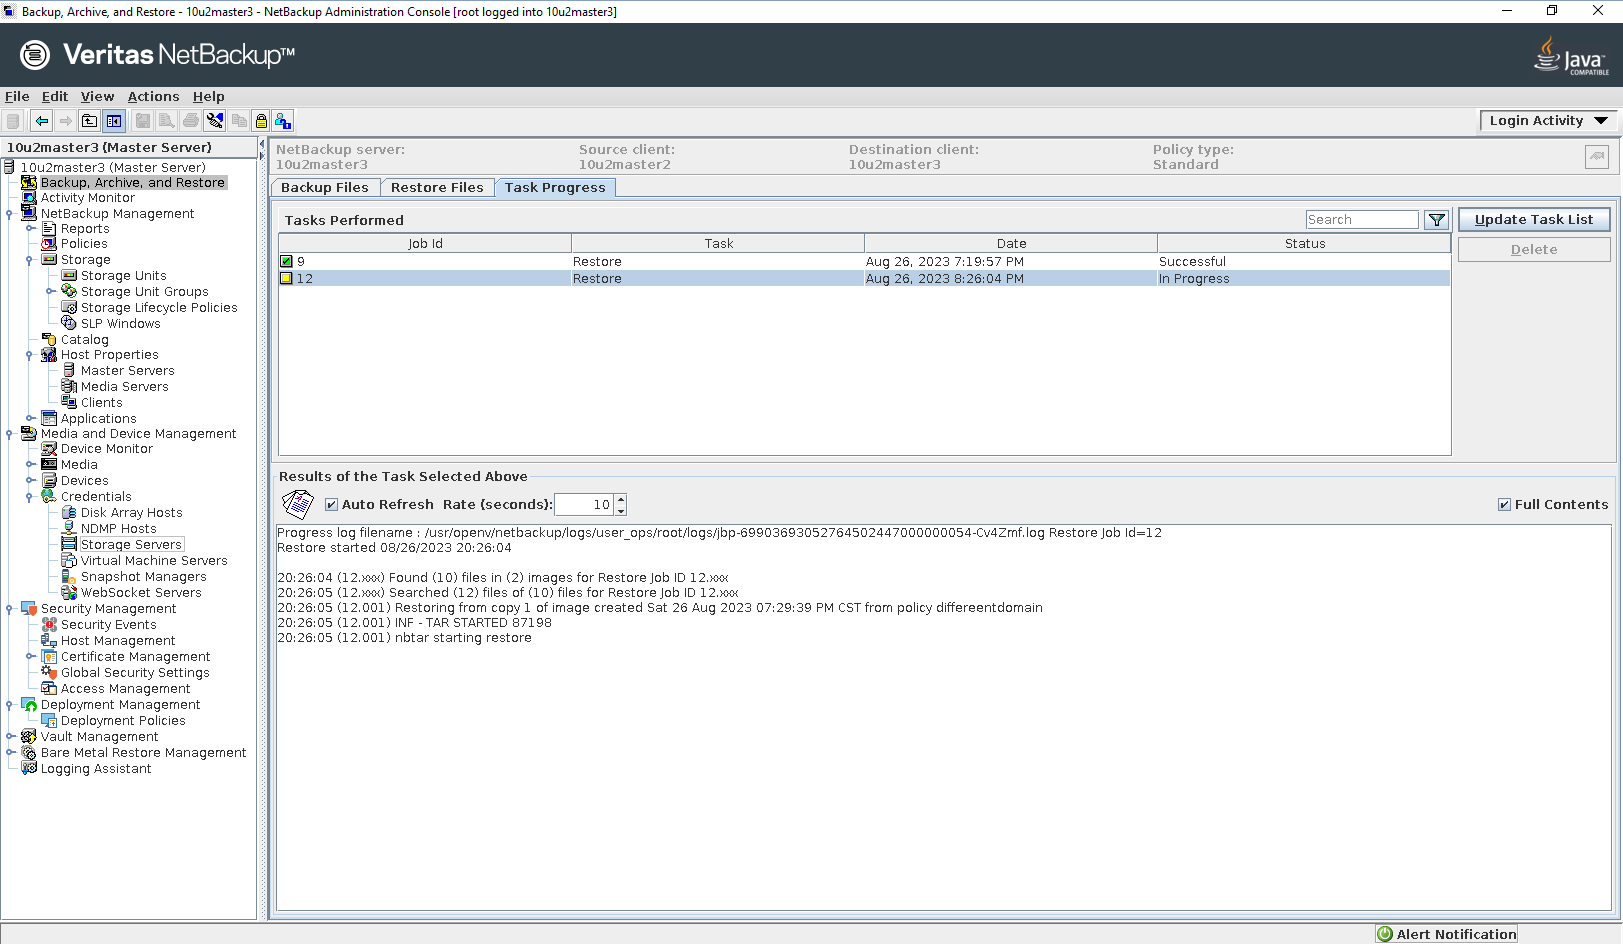
Step 8 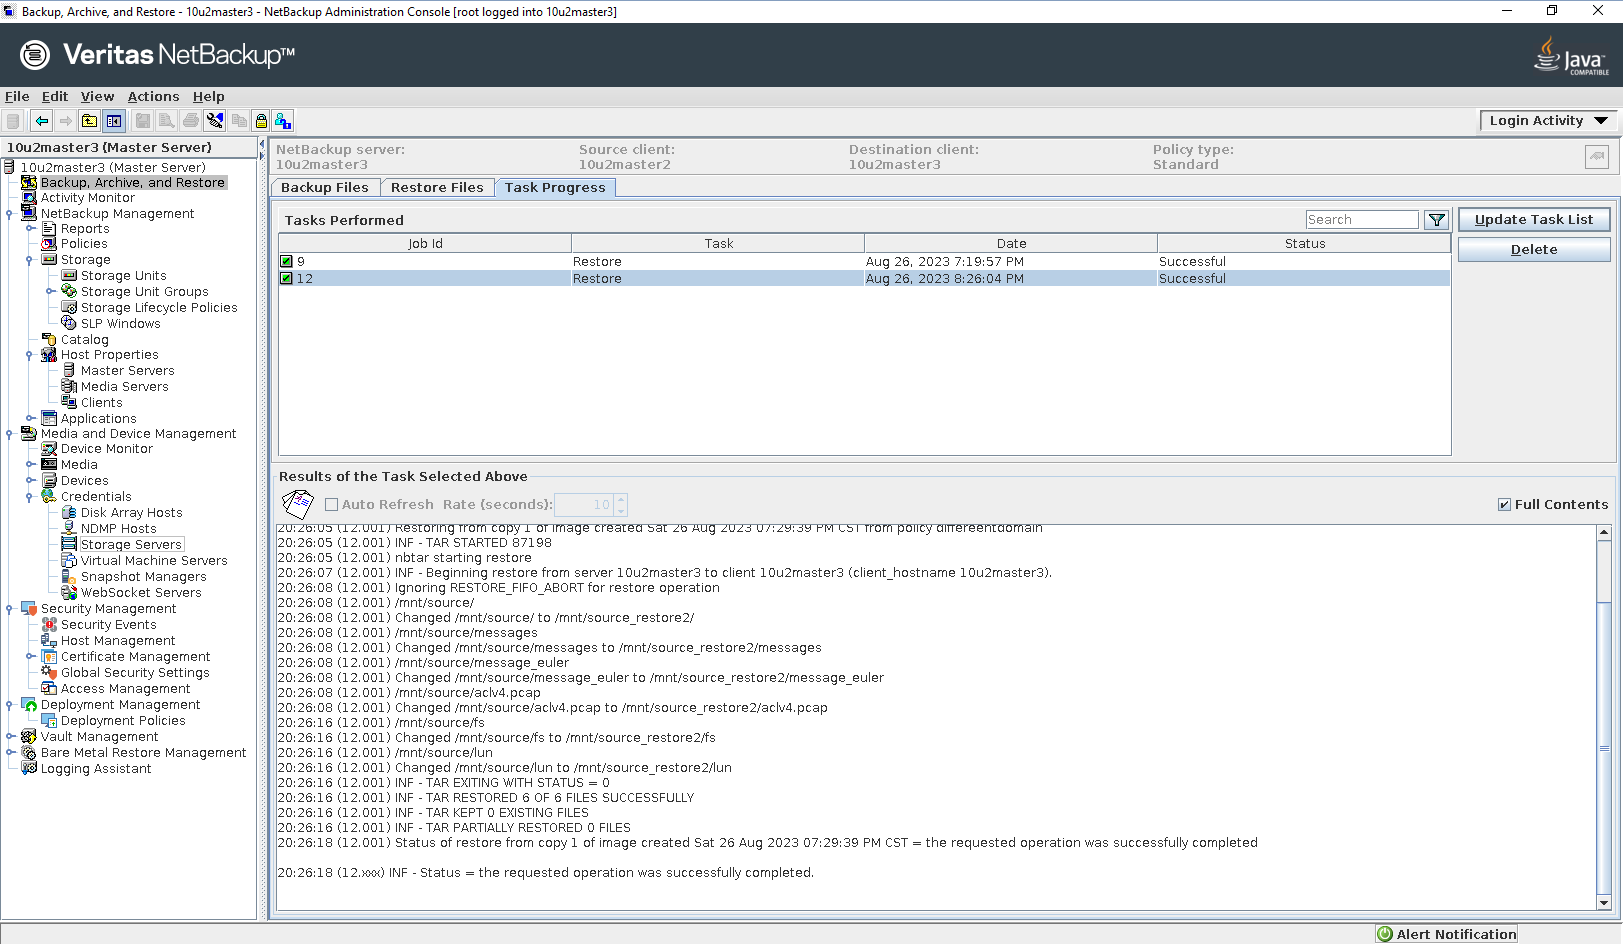


|
4. Reference
4.1 Veritas NetBackup™ Administrator’s Guide, Volume I
https://www.veritas.com/content/support/en_US/doc/18716246-158973241-0/v27655789-158973241